Category: News

  • The Best Peptide Skincare Products for Plumper Healthier Skin According to Beauty Experts

    The Best Peptide Skincare Products for Plumper Healthier Skin According to Beauty Experts

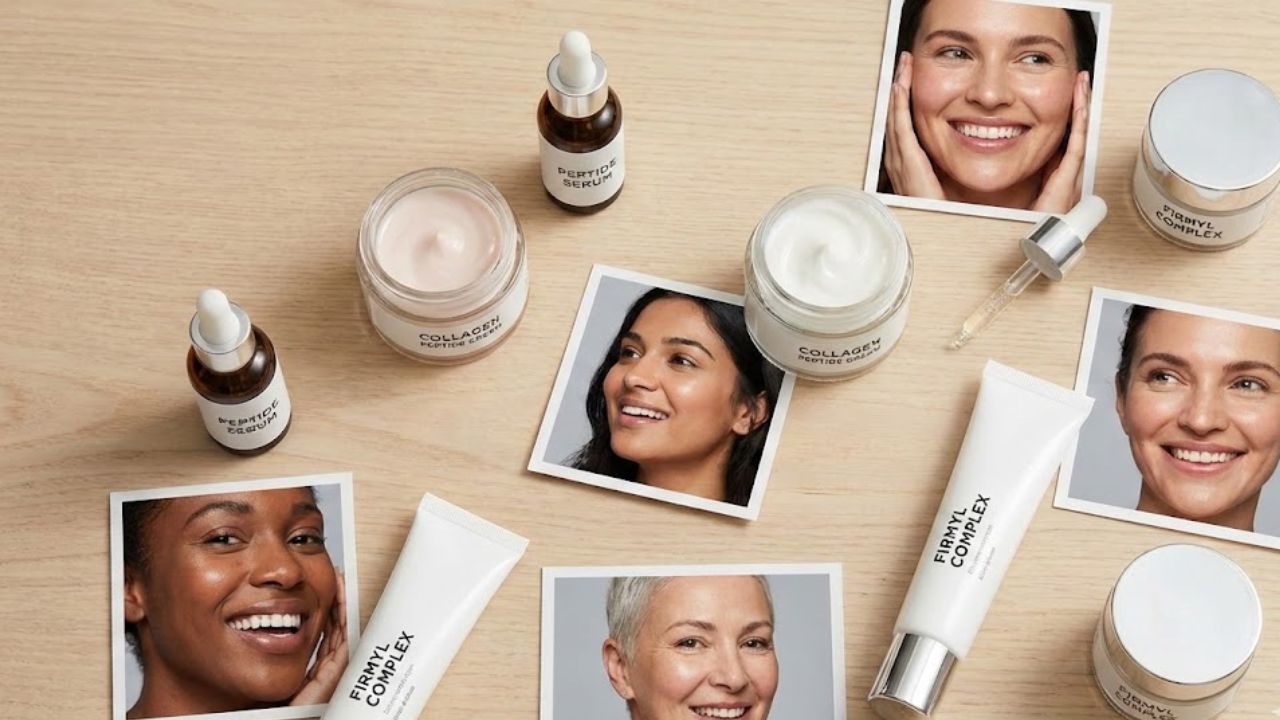
    Peptide-powered skincare has quickly become a favourite among dermatologists and beauty experts for its ability to support firmer, smootherlooking skin. In India, where climate stress, pollution, and daily sun exposure can accelerate visible ageing, peptides offer a gentle yet effective way to maintain a healthy glow. These skin-loving ingredients work behind the scenes to encourage resilience and hydration without harsh actives. From serums to moisturisers, peptide formulas are now widely recommended for anyone seeking plumper, healthier skin with long-term benefits.

    Why peptide skincare products are essential for plumper skin

    Peptides are often described as skin messengers, and for good reason. When applied topically, they signal the skin to look smoother and more resilient over time. What makes them especially appealing is their suitability for most skin types, including sensitive skin. Regular use can support collagen support signals, improve skin elasticity feel, and enhance surface smoothness without irritation. Unlike aggressive actives, peptides work gradually, making them ideal for daily routines. Beauty experts in India often suggest pairing peptide products with sunscreen to protect results and maintain a naturally fuller-looking complexion.

    Top peptide skincare formulas beauty experts recommend

    Not all peptide products are created equal, which is why experts focus on formulas that combine peptides with hydrating and barrier-friendly ingredients. Serums with lightweight textures allow for better absorption, while creams help seal in moisture. Many recommendations highlight multi peptide blends, barrier repair focus, and lightweight daily textures that layer well under makeup. For Indian weather conditions, non-greasy formulas are particularly popular. Consistent use, rather than product hopping, is key to seeing visible improvement in skin bounce and overall comfort.

    How peptide skincare fits into a healthy skin routine

    Incorporating peptides into your routine doesn’t require a complete overhaul. Most experts advise applying them after cleansing and before heavier creams. Morning or night use depends on the formula, but many enjoy the flexibility of both. Peptides complement actives like niacinamide and ceramides, offering gentle daily repair, hydration boosting layers, and long term skin comfort. For beginners, starting with one peptide product helps the skin adjust. Over time, this consistent approach can support a visibly plumper and healthier skin appearance.

    Are peptides worth the hype for healthier skin?

    While peptides won’t deliver overnight miracles, their strength lies in steady, skin-friendly performance. Beauty experts often describe them as a smart investment for anyone focused on skin longevity rather than quick fixes. With continued use, many notice gradual firmness improvement, improved skin resilience, and balanced moisture levels. In the Indian skincare market, peptides stand out for working well across age groups and skin concerns. When combined with sun protection and a simple routine, peptide skincare can play a meaningful role in maintaining a naturally healthy glow.

    Product Type Main Benefit Best For
    Peptide Serum Targeted skin repair All skin types
    Peptide Moisturiser Daily hydration support Dry to normal skin
    Peptide Eye Cream Smoother under-eyes Fine lines concern
    Peptide Mask Instant plumping feel Occasional use

    Frequently Asked Questions (FAQs)

    1. What are peptides in skincare?

    Peptides are amino acid chains that help signal the skin to look firmer and healthier.

    2. Can peptide products be used daily?

    Yes, most peptide skincare products are gentle enough for everyday use.

    3. Are peptides suitable for sensitive skin?

    Peptides are generally well tolerated and often recommended for sensitive skin.

    4. How long before results are visible?

    Most users notice gradual improvements after a few weeks of consistent use.

  • 6 Best Lip Tints for Achieving a Soft Natural Makeup Look Loved by Beauty Editors

    6 Best Lip Tints for Achieving a Soft Natural Makeup Look Loved by Beauty Editors

    Achieving a soft, natural makeup look has become a major beauty goal for many makeup lovers across India, and lip tints are playing a starring role. Unlike heavy lipsticks, lip tints offer sheer colour, a lightweight feel, and a “your lips but better” finish that beauty editors genuinely swear by. From barely-there pinks to muted berry hues, the right formula can instantly brighten your face without looking overdone. Whether you prefer dewy, matte, or balmy textures, these editor-loved lip tints help create an effortless, fresh-faced look perfect for everyday wear.

    Best lip tints for soft natural makeup looks

    Beauty editors often reach for lip tints because they deliver colour without effort, making them ideal for relaxed, everyday makeup. The best formulas melt into the lips, offering sheer buildable colour that enhances rather than hides your natural tone. Many modern tints also focus on comfort, featuring lightweight water texture that feels almost invisible after application. What truly sets editor favourites apart is their ability to leave a skin-like lip finish, meaning no harsh edges or obvious lines. These qualities make them perfect for minimal makeup days when you want to look polished but not overly made up.

    Natural-looking lip tints beauty editors love

    What makes a lip tint editor-approved is how seamlessly it fits into real life. Shades inspired by natural lip colours are especially popular, creating effortless everyday makeup that works for office hours, quick errands, or casual outings. Many editors also look for formulas that provide comfortable long wear without drying out the lips as the day goes on. A major plus is a hydrating stain effect, which keeps lips soft while leaving behind a subtle flush even after the glossiness fades. These thoughtful details help lip tints stand out in crowded beauty routines.

    Soft makeup lip tints for a fresh finish

    For a truly soft makeup look, application matters just as much as the product itself. Editors recommend patting lip tints with fingertips to achieve a blurred lip look that mimics naturally flushed lips. Many also love formulas that double as cheek colour, creating a multi-use makeup product that saves time and space. The best options offer a natural tint payoff, allowing you to control intensity with ease. This flexibility makes lip tints ideal for beginners and makeup minimalists alike.

    Why lip tints remain a beauty-editor favourite

    Lip tints continue to dominate beauty editor recommendations because they align perfectly with modern makeup trends. Their ability to enhance rather than mask lips supports no-makeup makeup trend, which remains popular across India. Editors also appreciate formulas that suit different skin tones, offering universally flattering shades that work with minimal base makeup. Above all, lip tints deliver low effort beauty, making them a reliable choice for busy mornings and quick touch-ups. This balance of ease, comfort, and natural finish keeps them firmly in editor-approved lists.

    Lip Tint Type Finish Best For Wear Time
    Water-based tint Natural stain Daily minimal makeup 4–6 hours
    Gel lip tint Soft glossy Fresh dewy looks 5–7 hours
    Balm tint Hydrating sheen Dry lips 3–5 hours
    Matte lip tint Velvet matte Oilier lips 6–8 hours

    Frequently Asked Questions (FAQs)

    1. Are lip tints suitable for everyday wear?

    Yes, lip tints are lightweight and subtle, making them ideal for daily use.

    2. Can lip tints dry out the lips?

    Hydrating formulas are comfortable, but very matte tints may feel drying without balm.

    3. Do lip tints work for all skin tones?

    Most modern lip tints come in universally flattering shades suitable for diverse skin tones.

    4. How do I make lip tint last longer?

    Applying on exfoliated lips and blotting lightly helps extend wear time.

  • 4 Daily Yoga Exercises to Improve Flexibility and Reduce Body Stiffness

    4 Daily Yoga Exercises to Improve Flexibility and Reduce Body Stiffness

    Four Simple Yoga Exercises to Improve Your Flexibility Flexibility is important for staying fit and healthy but most people avoid stretching because they think it takes too much time or effort. Yoga offers an easy way to increase flexibility naturally. Just a few minutes each day helps you loosen tight muscles and improve joint movement while reducing daily stiffness. These four yoga exercises are perfect for home practice and help you build flexibility gradually without straining your body.

    Cat and Cow Pose for a Flexible Spine

    Cat and Cow Pose for Daily Spinal Health Cat and Cow Pose ranks among the most effective daily exercises for maintaining spinal flexibility. Begin by positioning yourself on your hands and knees while keeping your spine in a neutral alignment. As you breathe in gently create an arch in your back while lifting both your head and chest upward. When you breathe out, curve your spine in the opposite direction and bring your chin down toward your chest. This flowing exercise enhances the mobility of your spine & promotes better blood circulation throughout your back. It also helps decrease stiffness that commonly develops in both the neck and lower back regions.

    Making this pose part of your daily routine supports long-term spinal health and maintains flexibility as you age. The beauty of this movement lies in its simplicity and accessibility. You don’t need any special equipment or extensive training to perform it correctly. The gentle rocking motion between the two positions creates a massage-like effect on the vertebrae & surrounding muscles. Regular practice can lead to improved posture and reduced back pain over time.

    Downward Facing Dog for Full Body Stretch

    Downward Facing Dog stretches multiple major muscle groups at the same time. Start from a hands and knees position & lift your hips upward to create an inverted V shape with your body. Press your palms firmly against the floor and let your heels sink toward the ground naturally without pushing too hard. This position stretches your hamstrings & calves along with your shoulders & arms and spine. Practicing this pose regularly improves your overall flexibility and strengthens your body at the same time. This combination supports better movement patterns in your daily activities.

    Seated Forward Bend for Hamstring and Back Flexibility

    Seated Forward Bend The seated forward bend offers a straightforward way to increase flexibility in your hamstrings & lower back. Start by sitting on the floor with your legs stretched out in front of you. Take a breath in to make your spine longer. Then breathe out as you slowly bend forward from your hips. Try to reach toward your shins or ankles but only go as far as feels comfortable. This position helps release the tightness that builds up from sitting too much during the day. It also works to calm your nervous system and bring a sense of relaxation to your body.

    Cobra Pose for Chest and Spine Opening

    Cobra Pose works on making your spine chest and abdomen more flexible. Start by lying face down with your hands positioned under your shoulders. Lift your chest up slowly while your hips stay flat on the ground & keep a slight bend in your elbows. This position stretches the entire front side of your body & helps your spine extend better. When you do this pose every day it fights against poor posture from slouching and maintains a flexible and strong spine.

    Why Daily Flexibility Practice Matters

    Flexibility and Daily Movement Flexibility helps improve your posture while reducing muscle tension & supporting healthy joints. Modern wellness approaches focus on gentle daily movement rather than intense stretching sessions. Yoga works well with this method because it combines slow stretches with controlled breathing. When you practice these poses every day your body adapts slowly and this lowers your chance of getting injured. Regular flexibility work creates lasting benefits for your physical health.

    Simple Tips for Better Results

    Practice these exercises when your stomach is light or empty & move at a slow pace without pushing yourself too hard. Breathe deeply and maintain a steady rhythm throughout. Begin by holding each position for fifteen to thirty seconds and extend the duration as you progress. Regular practice matters more than how deep you can stretch. You don’t need complex workout plans to become more flexible. These four yoga exercises you can do every day provide a straightforward and practical approach to maintaining flexibility and mobility at home. When you practice regularly your body will feel less tense and more prepared to handle everyday tasks.

  • People Are Mixing Kiwi Peels With Vinegar for a Reason Few Expect

    People Are Mixing Kiwi Peels With Vinegar for a Reason Few Expect

    The kitchen carried a sharp note of vinegar, quiet and still. On the counter sat a small glass bowl holding something most of us discard without pause: twisted strips of kiwi peel, bright green against a cloudy liquid. A nutritionist friend hovered over it like a miniature experiment. She stirred, waited, then smiled. “This is the part nobody mentions,” she said. “The real value often hides in what we throw away.

    I had always peeled kiwis straight into the bin, moving on without thinking. The fuzzy skin, the sticky fingers, the next task waiting. Watching those scraps soak that day felt strangely defiant. Using what’s usually wasted. Turning leftovers into something quietly useful.

    “Mix kiwi peels with vinegar,” she said, “and you don’t just make a jar. You send a signal.

    Why Kiwi Peels and Vinegar Are Suddenly Gaining Attention

    The first surprise comes fast. Once kiwi peels meet vinegar, the clear liquid shifts colour within minutes, becoming a soft green-gold, almost like a pale herbal infusion. It looks alive. On the surface, it’s just scraps in a jar. Underneath, a dense mix of polyphenols, vitamin C, enzymes and minerals slowly migrates from peel to liquid.

    Some dietitians describe it as a micro-dose of concentrated plant defence. Others stay cautious but curious. To them, the ritual sits between science and symbolism: a way to transform everyday waste into a small, caring habit. It doesn’t shout “superfood.” It works quietly, almost invisibly.

    One food scientist joked that kiwi peel is “the neighbour nobody invites, even though they’re the most useful.” Lab tests often show the peel carrying higher antioxidant levels than the flesh itself. Vinegar becomes the carrier. It doesn’t just preserve; it extracts and delivers those compounds in a form the gut can actually use.

    In a small pilot project at a university lab in New Zealand, researchers compared vinegar infusions made from different fruit scraps. Kiwi peel ranked unexpectedly high, especially after steeping for more than a week. The samples showed a stronger ability to neutralise free radicals than plain vinegar. No miracle. Just a modest lift in defensive capacity.

    There’s also a human angle. A chef in Lyon told me that during periods of rising prices, clients suddenly paid closer attention to ideas that stretched food value. She began adding fruit-peel infusions to drinks and dressings. The kiwi-vinegar version became a favourite, used in salads, sparkling water and grilled vegetables. Not for show, she said, but because it finally felt like using the whole fruit with respect.

    The logic is disarmingly simple. Plants concentrate many protective compounds in their skins: pigments, fibres and bitter molecules. We strip that layer away in seconds. Vinegar, one of the oldest preservatives, acts as a gentle solvent with a long culinary history. Put them together and a low-tech extraction happens on your counter.

    From a nutritional perspective, experts usually point to three threads. First, the potential increase in antioxidants and plant compounds that support daily repair. Second, traces of fibre and prebiotic material clinging to the peel, which may gently support gut microbes. Third, the behavioural shift: people who adopt rituals like this often waste less, cook more and pay closer attention to what they consume. That side effect may be the real headline.

    • Using scraps creatively can change how you value everyday food.
    • Simple kitchen habits often ripple into broader lifestyle choices.
    • Small actions can quietly reshape long-term routines.

    How to Make a Kiwi Peel and Vinegar Infusion at Home

    The method itself is almost absurdly simple. Peel two or three ripe kiwis, but instead of tossing the skins, rinse them briefly under cool water. Pat them dry and slice them thinner if you want more surface area. Place the peels in a clean glass jar and cover them with a mild vinegar such as apple cider, rice, or white wine vinegar.

    Leave a small gap at the top, seal the jar and give it a gentle shake. Then you wait. Most specialists suggest five to fourteen days in a cool, dark place. A daily swirl helps the process. When the scent turns fruit-sharp and the colour deepens, strain out the peels and store the flavoured vinegar in a clean bottle. A splash on salad or a spoonful diluted in water is enough.

    This is where intention meets reality. It’s easy to imagine saving every peel, labelling jars and tracking dates. Soyons honnêtes : almost nobody does this perfectly. Routines slip back in. That’s why many nutrition coaches advise starting small, perhaps with one jar a week after a relaxed weekend breakfast.

    Most mistakes come from rushing. Overfilling the jar, using an aggressively harsh vinegar, or leaving it in direct sunlight can ruin the balance. The gentler the approach, the more pleasant and usable the result.

    The other common error is expecting magic. A kiwi peel infusion will not cancel out poor sleep, heavy smoking or an ultra-proces

  • Skip sit-ups and use this 8-move workout to build stronger abs more effectively

    Skip sit-ups and use this 8-move workout to build stronger abs more effectively

    Many people in India still rely on endless sit-ups to train their core, but modern fitness research shows there are smarter ways to build strong abs. This 8-move workout focuses on controlled movements, full-core engagement, and better muscle activation without stressing the neck or lower back. By skipping traditional sit-ups, you can improve stability, posture, and overall strength more efficiently. Whether you work out at home or in a gym, this approach suits busy lifestyles and supports long-term fitness goals with less strain and more balanced results.

    Why skipping sit-ups builds stronger abs more efficiently

    Sit-ups often rely on momentum and hip flexors, which can limit true core engagement. An 8-move workout shifts the focus to movements that train the abs as stabilisers rather than simple flexors. Exercises like planks, dead bugs, and controlled leg movements activate deeper muscles, improving spinal support and balance. This approach encourages core muscle control, promotes joint-friendly training, and reduces the risk of overuse injuries. By emphasising quality over quantity, you develop functional strength gains that translate into better posture and daily movement. Over time, these exercises also support lower back safety while helping you feel stronger and more confident.

    How the 8-move abs workout targets the full core

    This workout is designed to challenge the front, sides, and deep layers of the core in one session. Instead of isolating one area, each move encourages coordinated effort across multiple muscle groups. Rotational and anti-rotation exercises improve stability, while slow tempos increase time under tension. The result is deep core activation that traditional sit-ups rarely achieve. You also benefit from balanced muscle engagement, which supports athletic performance and everyday tasks. Because the routine uses bodyweight and simple positions, it fits easily into home workouts and promotes consistent training habits without the need for equipment.

    Making this sit-up-free abs routine part of your week

    Consistency matters more than intensity when building lasting core strength. This 8-move workout can be done three to four times a week, taking less than 20 minutes per session. Start with manageable hold times or repetitions and gradually progress as control improves. The variety keeps workouts engaging and supports progressive core overload without burnout. Many people notice improved posture awareness within weeks, along with better movement confidence. By avoiding repetitive sit-ups, you protect your spine and create sustainable fitness progress that fits long-term health goals.

    Summary and practical takeaways

    Skipping sit-ups does not mean skipping core training; it means training smarter. This 8-move workout encourages controlled movement, stability, and full-core involvement rather than high-rep strain. Over time, these exercises support everyday movement strength, reduce discomfort, and improve overall body control. For people aiming for visible abs or better functional fitness, the key lies in patience and proper technique. When paired with regular activity and balanced nutrition, this approach delivers long-term core resilience while keeping workouts safe, effective, and enjoyable.

    Workout Element Primary Benefit
    Plank Variations Improves core stability
    Dead Bug Enhances coordination
    Leg Raises Targets lower abs
    Bird Dog Supports spinal control
    Side Plank Strengthens obliques

    Frequently Asked Questions (FAQs)

    1. Is this workout suitable for beginners?

    Yes, movements can be scaled with shorter holds and fewer repetitions.

    2. How often should I do this 8-move abs workout?

    Three to four sessions per week work well for most people.

    3. Do I need equipment to skip sit-ups?

    No, the routine uses bodyweight and simple floor exercises.

    4. Will this help reduce back strain?

    Yes, controlled core exercises generally place less stress on the spine.

  • Homemade Eyebrow Gel Using Aloe and Cocoa Creates Soft Natural Hold

    Homemade Eyebrow Gel Using Aloe and Cocoa Creates Soft Natural Hold

    The radiator clicked to life with its familiar metallic rhythm, a sound that usually promised comfort. Outside, wind slid through bare branches, tapping the windows as if warning that colder days were settling in. Indoors, the room was warm, yet the air felt thin and dry. Your throat felt scratchy, your hands felt tight, and your nose hovered on the edge of a sneeze.

    That was when a memory surfaced—something once mentioned by an older relative or read somewhere online—about placing a glass of water near a radiator to make a room feel warmer. It sounded unlikely, almost like an old superstition. Still, as the evening stretched on and the dryness became more noticeable, you filled a glass and set it beside the heat source. Slowly, quietly, something began to shift, the way winter often reveals its effects without announcement.

    The Subtle Science Behind a Glass of Water

    The idea that a simple glass of water could improve comfort without raising heating costs seems almost too gentle to be true. Water doesn’t create heat, and it certainly isn’t acting as a hidden heater. The change happens elsewhere. It’s not about generating warmth, but about helping your body feel the warmth already present.

    When a radiator runs, it warms the room while also pulling moisture from the air. At first, this dryness is easy to overlook. It shows up as dry skin, a scratchy throat, static in clothing, or small shocks from metal surfaces. What’s less obvious is how this lack of moisture quietly alters the way your body experiences temperature.

    Why Dry Air Makes Warm Rooms Feel Cooler

    Your body constantly exchanges heat with its surroundings. In very dry air, moisture evaporates more quickly from your skin and from every breath you release. This evaporation draws heat away from your body, creating a subtle cooling effect—even when the room itself is warm. The radiator may be working exactly as intended, but your body doesn’t fully agree.

    Placing a glass of water near the heat allows it to warm gradually and release moisture through gentle evaporation. Even a small increase in humidity can reduce moisture loss from your skin and lungs. The temperature remains the same, yet the air feels softer, warmer, and more comfortable.

    Aloe Vera as a Gentle Brow Base

    Aloe vera has soothed skin for centuries, long before it became a packaged cosmetic. In its pure form, the gel feels cool, light, and non-sticky. On eyebrows, it works quietly, offering control without stiffness.

    In a homemade brow gel, aloe serves as the base. Its natural texture provides light-to-medium hold, keeping brow hairs in place while allowing them to move naturally. When using a high-quality gel with minimal additives, it also adds a touch of hydration, turning styling into care.

    Cocoa Powder for Natural Definition

    Cocoa powder adds depth and warmth through its natural pigment. Its soft brown tone blends well with light to medium-dark brows, creating definition without harsh edges. When mixed with aloe, it produces a subtle, stain-like effect rather than a bold, painted finish.

    The amount controls the result. A small pinch offers gentle enhancement, while a little more deepens the shade. The color merges smoothly with natural brows, avoiding sharp lines. Using a familiar kitchen ingredient to frame the face brings a quiet sense of balance between beauty and simplicity.

    Preparing Your Simple Brow Gel Setup

    Making brow gel at home feels more like a calm routine than a cosmetic task. A clean jar, a small spoon, and a spoolie brush are all that’s needed. The process is unhurried and hands-on, inviting focus rather than rush.

    At its simplest, the formula uses only aloe vera gel and cocoa powder. Optional additions, such as a drop of jojoba oil for smoothness or a pinch of coffee or charcoal for deeper color, can be included later. The appeal lies in its simplicity—just two ingredients combined with care.

    • Pure aloe vera gel (2 teaspoons): Acts as the base, offering natural hold, smooth application, and moisture.
    • Unsweetened cocoa powder (¼–½ teaspoon): Provides soft, natural color to enhance brows.
    • Small clean glass jar: Used for mixing and storing the finished gel safely.
    • Spoolie or angled brow brush: Helps apply and shape the gel evenly.
    • Mini spoon or mixing stick: Used to blend ingredients smoothly.

    Mixing the Gel Slowly and Evenly

    Spoon the aloe vera gel into a clean jar. Sprinkle in the cocoa powder and stir gently, pressing out any clumps as you go. The clear gel gradually turns into a smooth, earthy brown.

    Test the shade on the back of your hand and allow it to dry briefly. Adjust by adding more cocoa for depth or more aloe for softness. The finished texture should be creamy and light, thick enough to cling to a brush without feeling heavy. Once mixed, close the jar and let it rest for about an hour so the blend settles evenly.

    Applying the Gel with a Light Touch

    Begin with clean, dry brows. Dip a spoolie lightly into the gel and remove any excess. Brush through the brows using short, gentle strokes that follow the natural direction of hair growth.

    Start at the inner brow and move outward, shaping rather than drawing. For added definition, allow the first layer to dry before applying another, focusing on sparse areas. An angled brush can help mimic individual hairs if needed. The finish stays soft and flexible, never stiff.

    Choosing Simplicity in Daily Care

    Creating a product at home carries quiet intention. It reduces waste, limits unnecessary ingredients, and brings awareness back to the act of making. Each refill of a small jar replaces a disposable tube, and each application reinforces that beauty doesn’t need to be complicated.

    Natural solutions are personal, and paying attention to your skin is essential. Patch testing and small adjustments are part of the process. Still, there is value in slowing down, mixing something by hand, and shaping your brows with care rather than haste.

    In that brief moment—brush in hand, cocoa-scented gel nearby—it becomes clear that beauty can be gentle, practical, and deeply personal. Sometimes, it begins with the simplest things.

  • Hanging This Near the Shower Stops Damp Smells Before They Start

    Hanging This Near the Shower Stops Damp Smells Before They Start

    Not filthy, just unmistakably bathroom air. You open the window, wave your hand through the room, maybe spray something labeled “fresh cotton” that quickly turns into a sharp chemical cloud. Ten minutes later, the air still feels thick and stale.

    It’s oddly familiar: you spend a short time under hot water, yet the room stays damp for hours. Corners grow darker, paint near the ceiling begins to peel, and silicone seams slowly turn black. Over time, it starts to feel normal, like a door that squeaks or traffic noise you stop noticing.

    Then one day, in someone else’s bathroom, you spot a small, unremarkable object hanging quietly near the shower. No device, no filter, just a simple bag. Their bathroom feels dry, almost crisp. A quiet, low-effort trick is doing all the work.

    Why your bathroom remains damp long after every shower

    Step into a compact bathroom after a hot shower and the air seems to cling to your skin. Steam lingers near the ceiling, droplets settle on tiles, and the mirror looks permanently frosted. This isn’t just uncomfortable. Trapped moisture slowly alters the room.

    Paint begins to curl, grout lines darken, and doors subtly warp. Eventually, small black marks appear in corners and along silicone joints. You clean them away, only for them to return. The bathroom becomes a space you constantly maintain yet never fully trust. The air rarely feels truly fresh.

    In many homes, especially apartments, the issue isn’t poor hygiene. The room simply cannot breathe. Ventilation fans are weak or too loud to run for long. Windows open onto cold courtyards or noisy streets. As a result, moisture lingers, hiding in towels, bath mats, and the tiny pores of walls.

    During winter in a northern city, researchers measured humidity levels in a typical family bathroom. With a hot shower and the door closed, relative humidity rose from 50% to over 90% in just six minutes. An hour later, it still hovered above 70%, even after partial ventilation.

    One homeowner in a 1970s building described it as “living with a permanent cloud in the bathroom.” Monthly mold scrubbing, constant airing, and changing cleaning products made little difference. The stains always returned, darker than before. The fan rattled loudly, so no one wanted to leave it running.

    When she finally hung a moisture-absorbing bag near the shower head, the change felt almost suspicious. No noise, no installation. Just a steady reduction in that heavy, sticky air. Towels dried faster, mirrors cleared sooner, and the bag slowly collected water that would otherwise have stayed in the room.

    Moisture behaves like a stubborn guest. Once in the air, it slips into soft surfaces such as curtains, bath mats, and even toilet paper. Fans and open windows mostly shift humid air around. Unless the water leaves the room or is captured, it settles again. Hanging an absorber near the shower turns invisible steam into visible liquid you can remove.

    • Centenarian shares daily habits behind mental resilience and long life
    • Add two drops to your mop bucket for a long-lasting fresh scent
    • The taxi method that keeps car interiors fresh without air fresheners
    • The overlooked truth about an inexpensive fish staple
    • Experts warn seven modern parenting trends linked to rising unhappiness
    • The longest solar eclipse of the century already has a scheduled date
    • How incorrect rug placement increases household dust
    • School district adopts a four-day week, sparking parent backlash

    Hanging it by the shower: how this simple solution works

    The idea is almost disappointingly straightforward. You hang a moisture absorber where steam is most concentrated, near or slightly above the shower. No drilling or tools are needed, just a hook or adhesive hanger and a bag filled with hygroscopic crystals such as calcium chloride.

    As you shower, steam rises and spreads. The crystals attract water molecules from the air and bind them, slowly forming liquid brine that collects at the bottom of the bag. Instead of settling on ceilings and corners, a portion of that humidity is trapped and removed.

    The changes show up in small, practical ways. Mirrors clear faster, bath mats lose their constant chill, and the faint stale smell after a hot shower fades. The bathroom starts to feel like a normal room again. Over weeks, the bag fills, faster in small or windowless spaces. Once full, it is emptied or replaced.

    Setting it up takes less than a minute. The ideal spot might be a corner of the shower rail, a waterproof adhesive hook, or the back of a shower door that swings inward. The key is placing it in the path of rising steam, not directly under running water.

    Many people pair this with small habits such as spreading the shower curtain open or hanging towels fully unfolded. These actions improve air circulation and make the absorber more effective. Doing this most days, even without perfect consistency, noticeably changes how the room feels.

    The emotional benefit is subtle. Later in the day, the bathroom air feels neutral rather than sour. Concerns about ceiling mold fade into the background. It removes one quiet irritation from daily life.

    “I thought it was a gimmick at first,” says Emma, who lives in a small flat with a barely functioning fan. “After two weeks, the bag was half full of water. That was the same moisture that used to sit in my walls.”

    Simple checks to improve results

    • Hang the absorber at least a hand-width below the ceiling to allow airflow.
    • Keep it away from direct splashes so the crystals do not dilute too quickly.
    • Use short bursts of ventilation after longer showers.
    • Replace the bag once the crystals have fully liquefied.

    Some people feel disappointed when the bag is placed too low or hidden behind a curtain where steam rarely passes. Small adjustments matter. Moving it slightly higher or closer to where steam gathers can make the bathroom feel drier within days. It follows the natural movement of moisture.

    Living with a drier bathroom, one small hook at a time

    After a few weeks, most people stop noticing the bag. That’s when the real change has occurred. The bathroom no longer demands attention each time you enter. There’s no instinctive glance at ceiling corners or mental note about scrubbing grout.

    Some households experiment by adding a second bag behind the door or under the sink where pipes sweat in summer. Others settle on one well-placed absorber and a minor routine change, such as leaving the door ajar after showers. Families often notice towels staying fresher longer, as less moisture lingers in fabrics.

    At its core, it’s about reclaiming a small space meant for comfort. A hot shower after a long day feels better when the room greets you with light, clean air. Paint lasts longer, silicone stays clearer, and maintenance effort drops. A single hanging bag won’t renovate a bathroom, but it changes how the space is experienced.

    Readers often share quiet before-and-after moments. Fewer arguments about leaving the fan on. Less mold between tenant visits. Reduced musty smells in crowded apartments. Each story points to the same outcome: a simple habit easing a persistent problem.

    You don’t need to make a point of it. You hang the bag once. One morning, the mirror clears a little faster. Then you notice the water collected inside and realize how much moisture used to linger in the air. One hook, one bag, and a little less dampness shaping daily life.

    • Place an absorber near the shower: Hang it where steam concentrates, without direct water contact.
    • Monitor the filling level: Replace or empty the bag once crystals liquefy.
    • Combine with small habits: Brief ventilation, open curtains, and unfolded towels improve results.
  • Everyday Household Oils That Help Grow Thicker Brows and Longer Lashes Over Time Naturally

    Everyday Household Oils That Help Grow Thicker Brows and Longer Lashes Over Time Naturally

    Eyebrow thinning rarely happens all at once. It emerges slowly, often under the bathroom light as you lean closer with a cotton pad in hand. A few hairs near the tail seem shorter, and the once-defined arch appears uneven. Factors like age, years of overplucking, stress, or dry indoor air can all contribute. Regardless of the cause, this change can make your face feel unfamiliar, as if something essential around your eyes has diminished. Soon, every fallen lash during nightly makeup removal draws your attention.

    The Subtle Power of Everyday Oils

    Before investing in expensive serums or complex formulations, consider what you already have at home. In many UK households, simple oils like olive oil, coconut oil, or castor oil sit quietly on shelves. These oils may lack luxury branding, but with patience and consistency, they provide gentle nourishment for delicate brow and lash hairs, supporting healthier growth over time.

    Why Eyebrows and Lashes Matter Emotionally

    Eyebrows and eyelashes often carry emotional significance. Many women recall periods of heavy makeup, overplucking trends, or hormonal shifts that impacted hair growth. When brows thin or lashes weaken, the face can appear tired or unfamiliar, subtly affecting self-image. Opting for a natural approach feels gentler and aligns with a slower, mindful lifestyle. While oils don’t promise immediate results, regular use helps the body’s natural processes work more effectively.

    Household Oils That Support Hair Health

    Several common oils offer supportive properties for brows and lashes:

    • Castor Oil: Thick and slightly sticky, rich in ricinoleic acid, locks in moisture, strengthens hair fibres, and reduces breakage.
    • Coconut Oil: Light to medium texture, melts on contact, penetrates the hair shaft, reduces protein loss, and softens hairs.
    • Olive Oil: Medium weight, antioxidant-rich, supports the skin barrier around roots, and improves flexibility.
    • Sweet Almond Oil: Smooth and silky, absorbs easily, gentle for sensitive eye areas while nourishing fine hairs.
    • Argan Oil: Lightweight, non-greasy, high in vitamin E and essential fatty acids, improves strength and resilience.

    Building a Calm Evening Routine

    Consistency is key. The most effective routines integrate naturally into your evening. Begin with clean, makeup-free eyes and freshly washed hands. Choose one oil or a simple blend, apply a small amount to the brows using a clean spoolie, and lightly coat the upper lashes. Gently blot any excess oil to avoid irritation. Following this nightly for several weeks transforms the process into a soothing ritual rather than a task.

    Respecting Sensitive Eye Skin

    The skin around the eyes is delicate, so awareness is essential. Always perform a patch test with new oils and start with minimal amounts. If irritation occurs, switch to a lighter oil. Avoid getting oil in the eyes, and rinse gently if it happens. Those with existing eye conditions or ongoing treatments should consult a pharmacist or GP. Progress is gradual; focus on reduced shedding and subtle fullness instead of rapid results.

    Daily Habits That Encourage Healthier Hair Growth

    Oils work best when combined with supportive habits. Reducing waterproof mascara use, gentle makeup removal, and a balanced diet rich in protein, healthy fats, and minerals all contribute to healthier hairs. Managing stress and paying attention to hormonal balance also affect growth. Oils provide external care, while nutrition, rest, and lifestyle form the foundation underneath.

    Creating a Simple Personalized Oil Blend

    Once comfortable, blending oils at home is straightforward. A combination of castor oil for thickness, almond oil for softness, and argan oil for light nourishment works well. Store in a clean container, label with the date, and use within a few months. This personalized approach keeps your routine clear, reliable, and made from ingredients you know and trust.

  • A personal trainer for seniors recommends these 4 seated exercises for core strength

    A personal trainer for seniors recommends these 4 seated exercises for core strength

    I work with many clients aged 65 and older, and some of them find it difficult or uncomfortable to get down onto a yoga mat for traditional floor-based core exercises. That doesn’t mean we avoid core work altogether. Ab training is still essential, even when movements need to be adapted.

    Building a strong core matters at every stage of life, but it becomes especially important for seniors. Core muscles such as the transverse abdominis and internal obliques support breathing, posture, and balance—areas that are often a priority for older adults who want to stay active and independent.

    When I’m working with someone who has mobility limitations, I rely on these four seated exercises as part of their core-strengthening routine. Even if you’re comfortable exercising on the floor, adding these movements can introduce variety and a new challenge to your abdominal workouts.

    How to Perform These Seated Core Exercises

    This workout requires no equipment other than a sturdy chair.

    Before beginning any new exercise routine, it’s important to check with your medical team. I also recommend working with a certified personal trainer, especially if you’re new to exercise. They can help refine your form and suggest modifications or alternatives when needed.

    Complete each exercise for 1–3 sets of 10–15 repetitions. If you’re just getting started, begin with fewer reps and sets, then gradually increase as your strength and confidence improve.

    1. Seated Torso Twist

    • Sit on the edge of a chair with your feet flat on the floor.
    • Maintain a neutral spine and engage your core.
    • Cross your arms, placing your hands on your shoulders.
    • Rotate your torso to the right while staying tall.
    • Return to the center, then twist to the left.
    • Alternate sides for 10–15 reps per side.

    2. Seated Knee Lifts

    • Sit upright on the edge of a chair with your feet grounded.
    • Engage your core muscles and keep your spine tall.
    • Slowly lift your right foot, keeping the knee bent.
    • Lower it back to the floor with control.
    • Repeat on the left side.
    • Continue alternating for 10–15 reps per side.

    3. Seated Side Bends

    • Sit on the edge of a chair with your feet flat.
    • Engage your core and maintain a neutral spine.
    • Place both hands behind your head.
    • Lower your left elbow toward the floor, contracting the left side of your torso.
    • Return to the center, then repeat on the right side.
    • Alternate sides for 10–15 reps per side.

    4. Seated Bicycles

    • Sit tall on the edge of a chair with your core engaged.
    • Place both hands behind your head.
    • Lift your right foot and rotate your torso so your left elbow moves toward your right knee.
    • Return to the starting position.
    • Repeat on the opposite side.
    • Alternate for 10–15 reps per side.

    If reaching your elbow to your knee feels challenging, work within a smaller, comfortable range of motion.

    Benefits of Seated Core Exercises

    This seated workout targets key core muscles, including the rectus abdominis, internal and external obliques, and the transverse abdominis. Together, these muscles help stabilize the body, support internal organs, assist with vital bodily functions, and maintain proper posture.

    Many traditional core exercises require lying on the floor, which may not be suitable for individuals with mobility concerns or certain injuries. Because these movements are performed while seated, they are accessible to a wide range of fitness levels and can be safely adjusted or progressed with guidance from a qualified personal trainer or physical therapist.

  • Natural Henna Hair Dye Recipes for Safe, Vibrant and Long-Lasting Results

    Natural Henna Hair Dye Recipes for Safe, Vibrant and Long-Lasting Results

    The first time I used henna to dye my hair the kitchen smelled like an old pharmacy. The air was filled with the smell of wet dirt and dried leaves that felt warm & strangely nice like someone had soaked soil in hot water. A ceramic bowl sat on the counter filled with deep green paste that looked thick and shiny like melted chocolate mixed with plant matter. I stopped for a second with the spoon hanging over the bowl & thought about whether this muddy mix could really work as well as the shiny boxes of hair dye at the drugstore. Then I put the brush in the paste and separated my hair and spread it through my strands. The henna felt cool and thick like a face mask on my scalp and this natural hair color started to stain my hands and my hair and later changed how I thought about beauty.

    Why Henna Still Feels Like Magic in a Chemical World

    Walking through a modern hair dye aisle often feels overwhelming—sharp chemical smells, bold promises, and warning labels tucked into tiny print. To achieve a perfect shade, many people accept ammonia, peroxide, and synthetic formulas as a normal trade-off. Henna offers a completely different experience. Derived from the Lawsonia inermis plant, henna has been used for thousands of years to stain hair, skin, and fabric naturally. When mixed with warm liquid, its lawsone pigment releases slowly, binding gently to keratin. Instead of stripping hair, henna wraps each strand in a translucent layer of color, leaving hair stronger, glossier, and visibly healthier. The scent is earthy and real—more like leaves and tea than perfume—turning hair coloring into a grounding ritual rather than a rushed cosmetic chore.

    Choosing Pure and Honestly Labeled Henna

    The quality of henna matters more than anything else. True henna should be pure, body-art-quality powder without metallic salts or synthetic dyes. Many negative experiences come from so-called compound hennas that contain hidden chemicals. Good henna feels soft and finely sifted, smells grassy and fresh, and never sparkles or smells artificial. Freshness is crucial, as henna loses staining power over time. Reading labels carefully and sourcing responsibly becomes part of the process. You’re not just buying color—you’re choosing a plant grown under sun and soil, harvested and ground with care. When henna is respected as a living material, the results on your hair are noticeably richer and more reliable.

    Building a Simple Henna Toolkit

    Henna doesn’t require expensive tools. A glass, ceramic, or stainless-steel bowl, a spoon, gloves, an applicator brush, plastic wrap, and an old towel are enough. Avoid reactive metals, and always protect your hands and clothes. More important than tools is patience. Henna works slowly, releasing dye over hours instead of minutes. Compared to instant chemical dyes, henna feels more like cooking a slow meal than using fast food—intentional, unhurried, and far more rewarding in the end.

    Classic Henna Recipe for Copper Tones

    The simplest recipe creates warm copper shades. Mix pure henna powder with strong warm tea until it reaches a yogurt-like consistency. Optional lemon juice or apple cider vinegar can help dye release if your scalp tolerates mild acidity. Let the mixture rest for 4–8 hours until the color deepens. Apply evenly to clean hair, wrap, and leave for 2–4 hours. After rinsing, the color may appear bright orange at first, but it will oxidize over several days into a more natural copper or auburn, depending on your base hair color.

    Creating Auburn and Brown Shades Naturally

    Henna can be softened or deepened by combining it with other plant powders. Mixing henna with amla reduces brightness and adds cooler auburn tones while supporting hair texture. For brown or chocolate shades, a two-step process works best: first apply henna for a red base, then follow with indigo to deepen the shade. This method offers better control and more predictable results, especially on light to medium hair, producing colors ranging from chestnut to near black.

    Ingredient Used Primary Benefit Ideal For
    Amla Powder Softens strong red tones into cooler auburn and boosts hair body Anyone aiming to reduce orange hues and achieve a balanced brown-red shade
    Indigo Powder Transforms henna color into deep brown or near-black tones Gray coverage seekers or those wanting dark brunette results
    Cassia (Neutral Henna) Enhances shine with a light golden glow and little color deposit Blonde or light hair types looking for warmth and gloss
    Black Tea / Coffee Adds subtle depth and richness to overall hair tone Medium to dark hair needing a deeper, fuller color finish
    Chamomile Tea Naturally brightens with soft golden warmth Light hair shades wanting a gentle sun-lit effect
    Aloe Vera Gel Improves moisture retention and smooth paste consistency Dry, curly, or fragile hair needing added hydration
    Essential Oils (Lavender, Rosemary) Enhances fragrance and may calm or stimulate the scalp Those sensitive to henna scent or focused on scalp comfort

    Henna Gloss for Subtle Color and Shine

    If you prefer a gentle effect, a henna gloss is ideal. Mix a small amount of henna paste with a silicone-free conditioner and apply it like a hair mask. Leave it on for 45–90 minutes before rinsing. This method adds soft highlights, warmth, and noticeable shine without a dramatic color shift. It’s a perfect way to experiment with henna before committing fully.

    Finding Your Ideal Shade Through Layering

    Henna builds color gradually. Each application adds depth, gloss, and richness. Lighter hair turns golden-copper, medium hair becomes chestnut or auburn, and dark hair reveals subtle red tones in sunlight. Gray strands transform into warm highlights rather than disappearing completely. Because henna fades slowly, starting gently is wise. You can always deepen the shade with future applications while maintaining hair health.

    Safety, Patch Tests, and Hair History

    Even natural dyes require care. Always perform a patch test to check for sensitivity. Apply a small amount to skin, rinse, and observe for 24–48 hours. Be cautious if your hair has a history of chemical dyes, especially those with metallic salts. Pure henna is generally safe, but poor-quality products can cause unexpected reactions. Protect your hairline with oil, ventilate the room, and allow adequate processing time without rushing.

    Aftercare and Long-Term Results

    Rinsing henna is a slow process, but warm water and patience help remove the paste completely. Many people avoid shampoo for the first 24 hours to let the color settle. Over several days, the shade deepens and stabilizes. With gentle cleansing and minimal sulfates, henna color lasts well. Regular root touch-ups or occasional gloss treatments keep the color consistent while maintaining hair strength and shine.

    The Quiet Power of Plant-Based Hair Color

    Henna doesn’t fight your natural hair—it works with it. Grays become highlights, natural variations become part of the beauty. Choosing henna is a quiet rebellion against harsh chemicals and rushed beauty standards. It invites patience, earthiness, and connection. The result isn’t a salon-perfect uniform shade but a living color shaped by time, light, and nature—one that feels deeply personal and grounded.