Category: News

  • Fix Scratches on Glass Cooktops Quickly at Home Without Replacement

    Fix Scratches on Glass Cooktops Quickly at Home Without Replacement

    The first time you notice it your heart sinks. That shiny black glass cooktop you used to love now has a pale jagged scratch running across it. Perhaps it appeared when you moved a heavy pot too quickly or when a tiny grain of salt got stuck under a pan. The scratch is small but every time you enter the kitchen you spot it immediately. When you touch the surface you can feel the rough edge. You begin to worry that the damage is permanent and wonder if you need to replace the entire cooktop or simply accept the flaw.

    Why Scratches Appear on Glass Cooktops (Even With Careful Use)

    Glass cooktops look smooth, modern, and almost unbreakable—like a dark, glossy surface that can handle daily cooking without trouble. In reality, the glass is more sensitive than it appears. Tiny abrasions can form even when you’re careful. Sliding a heavy pot, a grain of salt trapped under cookware, or a cast-iron pan with a rough base can all quietly mark the surface. Often, the scratch isn’t noticed right away. It shows up later while cleaning, bringing that familiar mix of irritation and regret. The important thing to know is that many of these scratches are not permanent and can often be reduced with gentle care.

    Understanding the Scratch: How Serious Is It?

    Before trying to fix anything, it helps to understand what kind of scratch you’re dealing with. Look at the cooktop under bright light and from different angles. If the scratch appears only at certain angles and your fingernail doesn’t catch on it, it’s likely a light surface mark. These are usually the easiest to improve. If your nail catches slightly, the scratch may still be manageable. Deep grooves that clearly catch your nail are more serious and can’t be fully removed at home. Thinking of scratches in levels—light haze, visible lines, and deep grooves—helps you choose the right approach and set realistic expectations.

    Preparing the Right Tools: Gentle, Not Aggressive

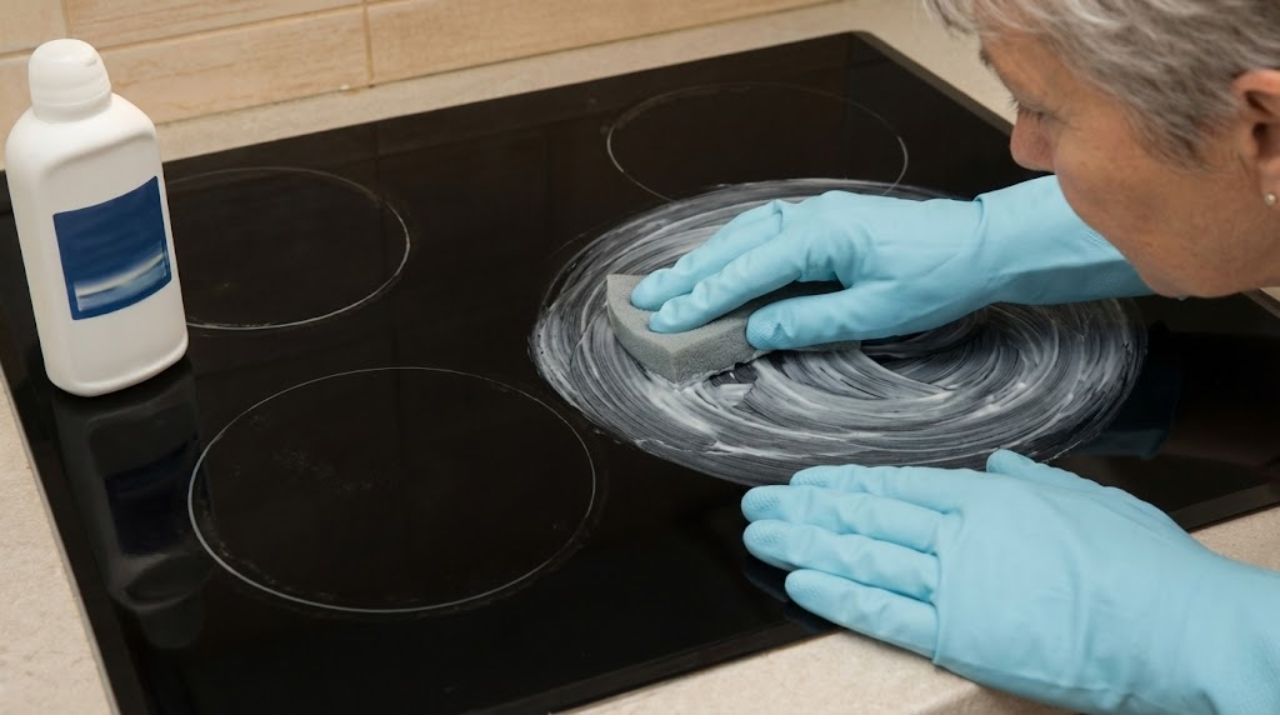
    Start by cleaning the cooktop thoroughly so no grease or debris interferes with the repair. Use a soft cloth and a cooktop-safe cleaner, then dry the surface completely. For polishing, choose mild options only. Baking soda paste, non-gel toothpaste, ceramic cooktop cream, or a glass polishing compound are all suitable for light to medium scratches. These products work by gently smoothing the surface rather than grinding it down. Always use a soft microfiber cloth and avoid harsh sponges, steel wool, or anything gritty that could add new scratches.

    At-Home Methods That Can Reduce Scratches

    Begin by testing your chosen method on a small, hidden area. If the finish remains clear, move on to the scratch. For light scratches, apply baking soda paste or toothpaste and rub gently in small circles. Wipe clean, check progress, and repeat if needed. For more visible scratches, ceramic cooktop cream or glass polishing compound often works better. Apply with light pressure and patience, letting the product do the work. Deep scratches won’t disappear, but careful polishing can soften their appearance and make them far less noticeable.

    Finishing the Surface After Polishing

    Once the scratch looks improved, clean the area again to remove residue. Many people like to finish with a cooktop cleaner that leaves a light protective shine. Buff gently with a dry microfiber cloth until the surface reflects evenly. The scratch may still exist faintly, but it usually fades into the background rather than standing out.

    Method Used Most Effective For Main Advantages Possible Drawbacks
    Baking Soda Paste Minor surface marks and dull patches Low cost, easily available at home, gentle on glass Not effective for deep or clearly visible scratches
    Non-Gel Toothpaste Light but noticeable scratches Simple application, mild abrasive helps polish glass Needs repeated attempts for visible results
    Cooktop Polishing Cream Light to moderate scratch damage Specifically made for glass cooktops, restores shine safely More expensive than basic household options
    Glass Polishing Compound Multiple or stubborn scratch marks Stronger polishing power, better visible improvement Requires careful use to prevent surface damage

    How to Prevent Future Scratches on Your Cooktop

    Prevention is mostly about changing small habits. Lift cookware instead of sliding it. Wipe the bottoms of pots and pans before placing them on the glass. Clean spills—especially sugar or salt—before cooking again. Avoid storing heavy or rough cookware directly on the cooktop. If you use protective mats or covers, make sure they are designed specifically for glass cooktops and safe for heat.

    When Repair Isn’t Enough and Replacement Is Safer

    If a scratch looks more like a crack, spreads over time, or feels deeply gouged, it’s best to stop and seek professional advice. Structural damage can affect how the glass handles heat and may become a safety issue. However, most everyday scratches are cosmetic and don’t require replacement. With gentle methods and patience, you can restore much of the cooktop’s smooth appearance and continue using it with confidence.

    Final Thoughts on Caring for a Glass Cooktop

    A glass cooktop is both practical and reflective, showing signs of daily cooking life over time. Scratches don’t always mean failure or neglect—they’re often just part of regular use. Learning how to soften or reduce them helps keep your kitchen looking calm and cared for. More importantly, it builds confidence in maintaining your appliance without panic, allowing you to focus on cooking rather than worrying about every small mark.

  • Blush Placement Technique: A Simple Method That Changes Face Shape After 30

    Blush Placement Technique: A Simple Method That Changes Face Shape After 30

    The woman looking at her bathroom mirror appears nearly identical to how she looked at 25 but not quite. Her cheeks have dropped slightly lower. The rounded areas that used to lift when she smiled now blend gently into her jawline. She picks up her trusted blush brush & follows her usual routine of smiling and applying color to the apples of her cheeks. Then she stops. The color makes her face look droopy instead of lifted. The shadows under her eyes appear darker and the middle of her face looks somewhat swollen. She removes the blush and tries again but this time places it slightly higher. Her cheekbones suddenly look more defined. Her entire face appears lifted and her eyes look more awake. She used the same blush. She is the same person. But her face looks completely different. The product did not change. What changed was where she applied it.

    Why Traditional Blush Placement Suddenly Feels Wrong After 30

    There’s an odd age when your makeup routine stops working as well. There’s no clear moment when it happens. You just start wondering why things don’t look right anymore when you use the same techniques that worked for years. Blush is usually the first problem. When you apply it low & round it can make a 32-year-old look tired by late afternoon. The color that used to look fresh on the apples of your cheeks now sits closer to soft lines around your nose & mouth. Instead of adding shape it just settles into those areas. That’s when changing where you put blush becomes more important than which blush you use. A makeup artist in London told me she can guess someone’s age by watching how they apply blush. Younger people put it right on the center of their cheeks like a simple drawing. People over 30 often keep doing this even though their face has changed slightly over time. She mentioned two sisters who were 28 and 38 who came to see her together. They used the same products and had similar skin tones. On the younger sister the color on the apples of her cheeks made her whole face look better. On the older sister that same spot suddenly made the slight hollows under her eyes more obvious. When the artist moved the blush higher toward the temples on the 38-year-old it looked like she had gotten a full night of sleep. The color worked like a soft filter that drew attention to her eyes & cheekbones instead of the middle of her face. The reason for this is straightforward even though people don’t talk about it much. After 30 your bone structure stays the same but the fat under your skin starts to shift. The round part of your cheek moves lower. Your muscle memory still makes you smile and follow where that round part used to be. So you end up putting color in the area that’s starting to drop. When you place blush there it makes your face look like it’s sagging. Move it slightly up and out & it makes your face look lifted. You’re not actually changing your features. You’re just changing where people look first when they see you. That’s what makes a small amount of pink blush so effective.

    The Modern Blush Placement Map That Creates a Natural Lift

    The Simple Blush Trick That Actually Works After 30 The makeup technique that keeps showing up everywhere right now is surprisingly straightforward. Instead of smiling & applying blush to the apples of your cheeks you should keep your face relaxed & look straight ahead. Picture a diagonal line running from the top of your ear down to the side of your nostril. Apply your blush along the upper half of that imaginary line closer to your ear than your nose. The shape should be a soft slanted C that curves toward the outer corner of your eye. Blend the color upward into your temples rather than down toward the center of your cheek. Let the color fade gradually as it moves toward your hairline like watercolor on paper. For most people over 30 this placement immediately brings out cheekbones you may have forgotten existed. There is another small adjustment that makes a noticeable difference. Leave a clean gap between your under-eye area and where the blush starts. About a finger-width of bare skin prevents color from settling into fine lines or highlighting dark circles. If you want that fresh flushed appearance you can add just a tiny bit of blush on the bridge of your nose but keep the main color high and toward the outer face. Many people over 30 share the same concern. They want a healthy glow but worry about looking overdone. The concern makes sense because one heavy application too low on the cheek can make you look flushed in an unflattering way. This is why where you put the blush matters more than how much you use. Start with less product than you think you need. Tap it on instead of sweeping it across your skin. Build up the color gradually in thin layers rather than applying one thick stripe. Cream blushes often work better on mature skin because they blend into the skin instead of sitting on top of it. Let’s be honest about real life. Nobody actually does this every day with professional brushes and twenty minutes to spare. You might be applying makeup with one hand while checking your phone with the other. So pick one simple rule you can remember on a busy morning like “higher and further back” and forget about the rest. The emotional impact is genuine too. On a tired day that slightly higher placement can make your whole face look more awake. You suddenly look like the version of yourself you still feel like on the inside. Key Points to Remember Think of an angled line instead of a circular shape when applying blush along an upward diagonal rather than as a round spot. Keep the strongest color away from your nose & mouth area. Blend upward into your temples to create a lifting effect on the outer part of your face. Choose cream or liquid formulas if powder settles into skin texture. Reassess your blush placement every few years because faces change & your routine should change with them.

    How Blush Becomes a Subtle Confidence Reset With Age

    There’s something quietly radical about changing how you apply a product you’ve used for 15 years. It’s like admitting that your face has changed and deciding to work with it instead of against it. One subtle diagonal stripe becomes a small act of negotiation with time. Friends talk in bathrooms about looking tired or not quite like themselves. Often it’s not their face that’s changed so dramatically but the way light & shadow now move across it. Change the splash of color and you change where the light seems to land. It’s almost philosophical because the map you draw on your skin shifts the story your face tells before you even speak. We’ve all had that moment where we catch our reflection in a shop window & think who is that. Remapping blush doesn’t erase that shock but it can soften it. The right placement whispers that you’re still in there. It doesn’t pretend you’re 22 but highlights the structure & expression you’ve earned without dragging everything downward. This simple tweak is also strangely shareable. Once you’ve tried the higher lifted placement & seen the difference it’s hard not to show a friend or your mum. You end up doing that half & half trick with one cheek the old way & one the new. The contrast usually says more than any tutorial. Blush becomes less about copying trends and more about understanding your own architecture. Where does your face want color and where does it look instantly more awake? There’s no universal diagram that fits everyone but just a guiding idea that color traveling upward tends to read as youth and energy. Color that pools in the center tends to read as fatigue. Maybe that’s why this technique keeps resurfacing on social feeds no matter how much contouring or highlighting comes and goes. It’s simple & doesn’t require new products. You’re just moving what you already own a few millimeters north.

    Astuce principale Méthode recommandée Bénéfice esthétique
    Remonter la zone d’application Déposer le blush au-dessus de l’axe oreille-nez, en direction des tempes Donne un effet lift naturel au visage, sans chirurgie ni retouche
    Préserver l’espace sous l’œil Laisser environ un doigt de peau libre entre le correcteur et le blush Atténue visuellement les cernes et limite l’accentuation des ridules
    Favoriser les lignes obliques Estomper le blush en diagonale plutôt qu’en cercle sur la joue Affine les contours du visage et évite l’effet de traits alourdis après 30 ans
  • Easy At-Home Eyebrow Tinting Method Creates Soft Defined Brows Using a Simple Step-by-Step Process

    Easy At-Home Eyebrow Tinting Method Creates Soft Defined Brows Using a Simple Step-by-Step Process

    At-home eyebrow tinting has become a common beauty practice for people who want neat brows without regular salon appointments. This trend is growing in India as more people try DIY grooming methods. When done correctly you can improve your natural brows safely and cheaply at home. This technique aims for soft and defined results instead of harsh or too dark brows. By using a straightforward process and products designed for beginners even people trying it for the first time can feel confident & in control while creating a tidy and well-groomed eyebrow appearance.

    Getting started with at-home eyebrow tinting

    Learning the fundamentals is essential for safe and successful at-home eyebrow tinting. Selecting a shade that closely matches your natural brow color helps prevent harsh results and keeps your brows looking soft and natural. A patch test is always necessary to minimize the risk of irritation and prioritize skin safety. Brows should be thoroughly cleansed and free from oil or makeup so the tint adheres evenly, ensuring smooth, consistent color. Using a small amount of product and strictly following timing instructions reduces the chance of over-darkening, which is especially important for everyday brows.

    A simple step-by-step eyebrow tinting process

    Following a structured method can make brow tinting feel much more approachable. Begin by applying petroleum jelly around the brows to shield the surrounding skin and create clean, defined edges. Prepare the tint according to the instructions, then apply it with a small angled brush for precise control. Start at the tail of the brow and move toward the front, keeping the inner brow lighter for balanced definition. Set a timer and watch the color develop carefully to avoid staining. Once the time is complete, gently remove the tint with a damp cotton pad to reveal even, natural-looking brows.

    How to care for brows after tinting

    Good aftercare helps your brow tint last longer and fade evenly. Avoid washing your face for at least 12 hours so the pigment can fully set, supporting longer-lasting results. Use mild, sulfate-free cleansers near the brow area to protect color retention. Applying a lightweight brow oil or serum helps nourish brow hair and encourages healthy growth. Space out touch-ups to prevent dryness or damage, allowing you to maintain soft, defined brows with minimal upkeep.

    Key takeaways for successful at-home brow tinting

    At-home eyebrow tinting offers a convenient way to achieve defined brows without relying on salon visits. When done correctly, it provides cost-effective beauty benefits and full control over shade and intensity. Success depends on careful preparation, patience, and following instructions precisely. Focusing on subtle enhancement rather than dramatic change helps create polished brows that suit your features. With proper care and mindful touch-ups, this routine can become a reliable part of your grooming routine.

    Aspect Recommended Approach Key Benefit
    Shade Selection Choose a shade close to your natural brow color Creates a softer, more natural-looking finish
    Patch Testing Perform a patch test at least 24 hours before application Helps minimise the risk of skin irritation
    Application Time Leave the tint on for 5–10 minutes Allows better control over colour intensity
    Aftercare Avoid contact with water for 12 hours post-application Ensures longer-lasting tint results
    Maintenance Retint brows every 3–4 weeks Keeps brows looking fresh and well-defined
  • Short Haircuts for Fine Hair That Create Volume and Make Strands Look Thicker

    Short Haircuts for Fine Hair That Create Volume and Make Strands Look Thicker

    At the salon right after the lunch crowd leaves you can see her right away. She twists the ends of her bob with her fingers while looking at her reflection that seems flatter with each second under the bright mirror lights. Her hair is clean and shiny but it lies completely flat against her cheeks. The stylist picks up a section and drops it and the whole style falls apart like a cake that didn’t rise properly. They both laugh but her eyes show a hint of sadness. She takes out her phone and shows a photo of short bouncy full hair that clearly belongs to someone who has more hair than she does. She says she just wants it to look thicker like she has said the same thing at every appointment for the past five years. The stylist smiles and picks up the scissors and suggests a different cut. After three quick cuts the hair suddenly looks alive. Something changed even though it’s hard to explain what happened. The secret is not about having more hair. It’s about getting the right short haircut for fine hair.

    Short fine hair explained: why some cuts flatten volume while others enhance it

    Fine hair behaves a bit like silk thread: soft to the touch, lightweight, and quick to slip out of shape. When the cut is wrong, strands cling to the scalp, especially around the crown and jawline. That’s how the unwanted “helmet” look appears — flat roots, no movement, and hair that feels thinner than it really is.

    With short styles, placement is everything. When length lands in the wrong spot, fine strands can look even more limp. A blunt jaw-length bob with no layering, for example, tends to stick to the face. The real secret lies in strategic length, smart layering, and careful weight removal. That’s where volume starts to show up naturally.

    One Tuesday afternoon in London, stylist Maya R. demonstrated this perfectly. A client arrived with an overgrown long bob that hadn’t been trimmed in nine months. The ends looked uneven, and the roots appeared oily just hours after washing. The hair wasn’t damaged — it was simply extremely fine.

    Maya recommended a softly layered bixie cut, blending elements of a bob and a pixie. She cropped the back, kept length at the front, and exposed the neck. Fifteen minutes later, the same hair appeared nearly 30% fuller. The client’s reaction wasn’t excitement at first, but surprise: “Wait… that’s all my hair?” That’s the power of a well-designed cut.

    From a technical perspective, fine hair struggles with two things: misplaced weight and heavy blunt lines. When too much bulk sits at the bottom, everything gets dragged downward. The roots never have a chance to lift.

    Volume-enhancing short cuts work by redistributing that weight. Excess bulk is removed where it flattens the shape, while soft structure is added to encourage lift at the crown and face. Airy layers, undercut napes, and slightly uneven edges prevent strands from clumping together. The result: hair that looks thicker without actually growing.

    The four best short haircuts that make fine hair appear fuller

    The first standout option is the bixie haircut. This pixie-bob hybrid is ideal for fine hair because it keeps gentle length around the face while shaping the back and sides closer to the head.

    This contrast instantly creates visual dimension. Subtle crown layers prevent the hair from lying flat in one sheet. With a touch of texturizing cream, individual strands separate and reflect light, creating the illusion of density. It also grows out gracefully, making it practical for anyone who doesn’t visit the salon often.

    The second favorite is the modern French bob. Not the heavy, perfectly blunt version, but a softened, slightly broken cut that falls between the lip and jaw. The ends are diffused, while internal layers stay invisible.

    On low-effort days, it tucks neatly behind the ears. On better days, a quick upside-down rough-dry delivers that effortless Parisian feel. For many with fine hair, this is the first style where flat roots finally stop being a daily frustration.

    Third comes the soft layered pixie. This isn’t an ultra-short, sharp style, but a feathered shape with movement. The sides and back are tapered for a clean outline, while the top remains longer for flexibility.

    Fine hair benefits here because there’s less weight pulling downward. A small amount of mousse at the roots and a quick blast from the dryer often does all the styling work. It’s especially freeing for anyone who’s spent years hiding behind longer, lifeless lengths.

    The fourth reliable option is the stacked nape bob. Shorter and graduated at the back, with longer front sections that angle toward the chin. From the side, it forms a soft diagonal. From the back, the stacked layers create a gentle curve.

    This structure builds volume directly into the shape. The stacking lifts hair at the occipital bone, keeping the silhouette full. Worn straight, it looks sleek. Styled with waves and a touch of sea salt spray, it can look like twice the hair.

    Key point Details Why it matters to readers
    Best cut for ultra-fine, flat hair A soft layered pixie or bixie with extra length on top and lighter sides. Avoid razor-thin ends; ask for scissors and subtle texturizing instead. Gives instant volume at the roots and makes morning styling faster, especially if your hair collapses within hours.
    Ideal styling products Lightweight mousse at the roots, sea salt or texturizing spray on mid-lengths, and a dry shampoo for day two. Skip heavy serums and oils near the scalp. Helps keep hair lifted and full without that greasy, weighed-down effect that fine hair gets too easily.
    How often to trim Every 6–8 weeks for a bob or stacked bob, 4–6 weeks for a pixie or bixie. Ask for micro-adjustments instead of dramatic reshapes each time. Keeps the shape sharp so your hair doesn’t collapse into a flat, triangular mass that

    How to style short fine hair so volume actually lasts

    The right haircut solves only half the problem; drying technique finishes the job. Fine hair needs to be lifted while it’s still damp. Once it dries flat against the scalp, regaining volume becomes difficult.

    Start by rough-drying with your head upside down until hair is about 80% dry. Use your fingers instead of a brush to lift at the crown. Once upright, a round brush can be used lightly to smooth ends or add a bend. A golf-ball-sized amount of lightweight mousse at the roots can significantly boost lift.

    In real life, styling is often rushed. In a busy coworking bathroom one Monday morning, a woman with a fresh French bob had only five minutes and a travel straightener. What worked wasn’t perfection.

    She dampened the front pieces slightly, lifted the roots with her fingers, and used warm air to set them. The back stayed imperfect, but the style looked intentional. Practical styling beats flawless routines.

    The biggest mistake with fine hair is overusing products. More product usually means heavier roots, not more volume. Thick creams, rich serums, and layered sprays quickly weigh strands down.

    Realistically, nobody styles perfectly every day. That’s why day-two habits matter. Applying a light layer of dry shampoo at night helps absorb oil before it builds up. Sleeping with your part flipped to the opposite side keeps roots lifted by morning.

    • Blot hair gently using a microfiber towel or cotton T-shirt — never rub
    • Apply styling products only to mid-lengths and ends
    • Use mousse or root spray sparingly at the scalp

    Living with short fine hair: confidence, experimentation, and ease

    Choosing short hair with fine strands is often more than a style decision. It can feel like a quiet rebellion against years of ponytails that never looked full enough. Cutting it short often means letting go of comparisons.

    On one evening train ride, a woman in her forties ran her fingers through her stacked bob and said, “I finally stopped waiting for my hair to be something it isn’t.” That moment said more than any product recommendation ever could.

    There’s a unique feeling when a cut reveals your neck, jawline, and cheekbones. Short hair on fine texture often brings that sense of freedom — familiar, yet new.

    The experience isn’t always smooth. Some weeks the fringe won’t cooperate, or humidity takes over. Some mornings you air-dry and accept the softness; other days you refine every bend. Both approaches are valid.

    Between the bixie, the French bob, the soft pixie, and the stacked bob, most people eventually discover a shape family that suits them. From there, it’s just small adjustments — a shorter fringe, a lifted crown, a different part.

    The real shift happens when the question changes from “How do I hide fine hair?” to “How do I let this texture shine?” On the page, it sounds subtle. In the mirror, it changes everything.

  • Why Frequent Haircuts Do Not Speed Growth and Only Change How Healthy Hair Appears Over Time

    Why Frequent Haircuts Do Not Speed Growth and Only Change How Healthy Hair Appears Over Time

    “If I keep coming every three weeks,” she said, “it’ll grow faster, right?” The stylist paused, meeting my eyes in the mirror with that familiar look reserved for a myth she’d already heard too many times that day. Outside the salon window, people rushed by — some with sleek blowouts, others with messy buns — all chasing the same goal: longer, healthier hair, as quickly as possible. The belief that frequent trims boost growth has quietly survived for years, passed along in bathrooms, group chats, and well-meaning advice, even though the science has long moved on.

    The strange thing is that the more often we cut, the less we tend to understand what’s actually happening at the root. Hair growth doesn’t respond to scissors. It follows its own rules, far beneath the surface.

    Why the Idea of “Trim to Grow” Still Feels So Convincing

    Step into almost any local salon on a weekend and you’ll hear it: “Just a small trim, I’m growing it out.” The words come with hope, as if those tiny clippings on the floor might somehow signal the scalp to speed things up. The logic feels intuitive. Trim plants and they grow back fuller. Shave and hair seems thicker. The mind connects dots that, biologically, don’t belong together.

    In reality, hair growth begins inside the follicle, completely unaffected by what happens at the ends. Scissors never reach the living part of the strand. Still, the myth persists because a fresh cut looks like progress. Ends appear smoother, shapes look cleaner, and hair moves better. Visually, it feels like growth.

    This belief is reinforced everywhere. Many people swear that once they started trimming every few weeks, their hair suddenly flew past shoulder length. A 2023 UK haircare survey found that nearly 60% of women believe regular cuts speed up growth. Add comparison pressure, social media advice, and oversimplified success stories, and the haircut becomes the hero — while genetics, hormones, stress, and nutrition quietly disappear from the narrative.

    The biology tells a calmer story. Hair grows from the root, where cells divide and push the strand outward. Once it leaves the scalp, the hair is essentially dead material. Cutting the tip sends no message upstream. What trims actually do is remove split ends, reducing breakage higher up the shaft. Hair doesn’t grow faster — it simply breaks less. You’re not accelerating growth; you’re preventing loss.

    What Actually Makes Hair Appear Longer and Healthier

    The most effective strategy for visible length is simple: trim based on the condition of your ends, not a fixed calendar rule. For some people, that means every eight weeks. For others, every four months. The goal is to remove damage while preserving as much healthy length as possible. It’s about pruning splits, not policing growth.

    When frayed ends are regularly removed, hair falls in a cleaner line. Light reflects better, and the length you already have becomes more noticeable instead of thinning out at the tips. A micro-trim of half a centimeter can prevent a much bigger cut later. Over a year, this gentle approach protects the inches you’re trying to keep.

    The classic “every six weeks” rule often works against people growing their hair. If hair grows around 1–1.25 cm per month and you cut off 2 cm each visit, the math is unforgiving. Progress stalls, sometimes for years, while the real issue isn’t age or hair type — it’s how much gets trimmed each time.

    There’s also an emotional side. Regular appointments feel like control. Sitting in the chair, cape on, can feel like an investment in future hair. On a hard week, a fresh cut acts like a reset. That feeling is real. The problem starts when the ritual turns into a superstition that quietly works against your goal.

    How to Encourage Length Without Chasing the Wrong Habit

    A smarter approach is focusing on your hair survival rate rather than trim frequency. Notice when your ends begin to feel rough, tangle more, or show white dots. For some, this happens around week ten; for others, much later. That’s your real trim schedule.

    Between cuts, treat your ends like delicate fabric. Detangle gently, avoid harsh towel-drying, and apply a small amount of leave-in conditioner to the last few centimeters. Low-friction pillowcases, looser hairstyles, and avoiding tight elastics all help preserve length. None of this makes hair grow faster — it simply protects what you’ve already grown.

    Most people aren’t failing at growth. They’re losing length through quiet, daily damage: rushed brushing, quick heat styling without protection, sleeping with wet hair twisted tight. These habits target the oldest, weakest part of the strand — the ends. When progress stalls, scissors get blamed or praised, depending on the mood.

    As London trichologist Dr. Hannah Reed puts it, “Cutting the ends doesn’t send a memo to the roots.” Regular trims protect your investment. Growth is what you earn; preventing split ends is how you stop losing it without noticing.

    A Simple Reminder Before Your Next Salon Visit

    • Ask exactly how much needs cutting — in centimeters, not vague phrases.
    • Cut less than your average growth if length is your goal.
    • Watch your ends, not the date: rough or dotted tips mean it’s time.
    • Prioritize scalp health, nutrition, and gentle handling over frequent appointments.
    • Remember: trims maintain health; they don’t speed up root growth.

    Redefining What Hair “Progress” Really Looks Like

    There’s something freeing about accepting that hair follows its own steady rhythm. It won’t suddenly double its speed just because you book more salon time. When you let go of the myth, attention shifts from acceleration to preservation. The cycle of trimming, waiting, and complaining finally loosens its grip.

    Instead, more meaningful questions appear. How does stress affect your hair over a year? What changes with better sleep, hydration, or gentler care? These aren’t dramatic fixes — they’re quiet habits that your follicles actually respond to.

    The next time you say, “I’m growing it out,” it can mean something more intentional. A micro-trim instead of a cleanup. Saying no to that extra centimeter because you understand your own growth rate. Less hair on the floor, and more control over what happens at the root.

    • Haircuts don’t increase growth speed: Growth happens in the follicle, not at the ends.
    • Regular trims reduce breakage: Removing splits helps retain length.
    • Daily habits matter most: Gentle care and health outweigh rigid trim schedules.
  • Goodbye Hair Dye for Grey Hair: The Conditioner Mix Helping Natural Colour Return Without Salon Treatments

    Goodbye Hair Dye for Grey Hair: The Conditioner Mix Helping Natural Colour Return Without Salon Treatments

    For years, covering grey hair meant choosing between strong chemical dyes or unreliable natural fixes. Recently, a simple change to everyday conditioner using an ingredient often found near the coffee jar has gained attention. This method focuses on soft blending rather than dramatic colour shifts, appealing to people who want healthier-looking hair without exposing ageing strands or sensitive scalps to aggressive chemical treatments.

    Why Many People Are Moving Away From Chemical Dyes for Grey Hair

    Grey hair develops when pigment-producing cells in the hair follicles slow down and eventually stop creating melanin. While age is a key factor, stress, genetics, smoking, nutritional gaps, and certain medical conditions also play a role. What begins as a few silver strands gradually spreads across the scalp. Permanent and semi-permanent dyes remain popular because they offer quick coverage. However, repeated colouring relies on powerful chemical reactions that can irritate sensitive or ageing scalps.

    Hair lacking pigment is often drier, weaker, and less flexible. Frequent dyeing can leave it rough, prone to breakage, and lacking shine. Even formulas marketed as gentle or ammonia-free still alter the hair’s structure. While these products may suit thicker hair in earlier years, they can feel too harsh on finer, fragile strands over time. Natural options like henna or indigo attract interest, but their results vary widely and are difficult to reverse.

    The Cocoa Conditioner Method Gaining Attention

    This is where unsweetened cocoa powder enters the routine. The method uses plain cocoa intended for baking, not sweetened drink mixes. Cocoa contains natural pigments and plant compounds that lightly stain the hair’s surface without damaging its protective outer layer. Unlike permanent dye, cocoa acts as a gentle colour filter, giving grey strands a soft brown tint while conditioning the hair.

    Cocoa includes flavonoids and tannin-like compounds that attach to the outer layer of hair. On grey or light hair, repeated use creates a gradual darkening effect. On darker hair, it adds warmth and depth rather than changing the colour. It also offers antioxidant benefits, smoothing properties, and a mild balancing effect on the scalp when mixed with conditioner.

    How to Mix Cocoa Powder Into Conditioner Correctly

    The technique shared across beauty communities is simple and low-cost. Use it on freshly washed, towel-dried hair once or twice a week. Place a generous amount of your regular conditioner into a clean bowl. Silicone-light or silicone-free conditioners help the pigment adhere more evenly. Add two to four tablespoons of unsweetened cocoa powder, adjusting for hair length and thickness.

    Stir slowly until a smooth, lump-free paste forms. Section the hair and apply evenly, focusing on visible grey areas such as the temples, part line, and crown. Comb through with a wide-tooth comb and leave the mixture on for about 20 minutes, or up to 30 minutes for more resistant white hair. Rinse thoroughly with lukewarm water, gently massaging the scalp to remove residue. Results appear gradually, softening contrast rather than fully replacing salon colour.

    Who This Grey-Blending Method Suits Best

    Cocoa-infused conditioner works best for people with scattered grey strands rather than completely white hair. It suits blondes and light brunettes where greys stand out sharply. Those with sensitive scalps who struggle with chemical dyes often find this option milder. The method appeals to anyone seeking a natural-looking transition instead of a bold change.

    For very dark hair, cocoa will not fully hide grey roots, but it can soften the contrast between new growth and coloured lengths. The finish resembles a tinted gloss rather than solid dye, making it suitable for people exploring grey blending without long-term commitment.

    Expected Results Based on Hair Type

    • Mostly white or grey, fine hair: Soft beige-brown tone with improved shine and smoothness
    • Salt-and-pepper brown hair: Greys blend more evenly, creating a balanced overall colour
    • Dark brown or black hair with few greys: Subtle warmth with minimal visible colour change

    How Cocoa Works With Grey Hair Structure

    Grey hair often feels coarse because its protective outer layer lifts more easily than pigmented hair. This makes it prone to frizz and tangling. Conditioner helps smooth this layer, improving slip and manageability. When cocoa is added, its fine particles remain on the surface instead of penetrating deep into the shaft.

    This surface-level action explains why colour builds slowly and fades gradually, avoiding harsh regrowth lines. Cocoa forms a lightly tinted coating that adds colour while leaving the inner structure largely unchanged. Over time, this gentle approach can noticeably improve softness, movement, and manageability in ageing or dry hair.

    Comparing Cocoa With Other Grey Hair Solutions

    Cocoa is part of a wider range of grey-blending options. Herbal rinses like coffee or black tea offer temporary staining but may dry the hair with frequent use. Tinted conditioners and professional salon treatments provide more predictable results at a higher cost. Cocoa stands out for being affordable, accessible, and conditioning.

    Its main limitation is variability. Results depend on hair texture and porosity, and excessive use without thorough rinsing can dull the hair. Even so, many people find cocoa easy to incorporate into their routine without drastic changes or long-term commitment.

    Daily Care Habits That Support Healthy Greying Hair

    Maintaining grey hair involves more than colour blending. Dermatologists note that stress, smoking, sun exposure, and diets low in antioxidants influence pigment loss. People who use cocoa treatments often adopt gentler habits, such as reducing heat styling, spacing out washes, and using nourishing masks.

    Some colourists suggest cocoa-based treatments between salon visits to refresh tone without extra chemical processing. Others view it as a helpful transition for clients gradually embracing natural grey growth. Overall, the cocoa trend reflects a shift toward soft, reversible care methods that work with hair’s changing biology rather than fighting it.

  • Simple Morning Hydration Habits That Support Clearer Skin and Higher Energy Throughout the Day

    Simple Morning Hydration Habits That Support Clearer Skin and Higher Energy Throughout the Day

    The first glass of water you drink after waking up can quietly shape how your entire day unfolds. In India, where warm mornings, long commutes, and busy schedules are common, many people begin their day already running on low hydration. A simple morning hydration routine helps your body recover from overnight fluid loss and prepares your mind and skin for the hours ahead. This four-minute habit doesn’t require supplements or complicated steps—just intention, timing, and awareness—making it easy to follow even on the most hectic mornings.

    Why a Simple Morning Hydration Routine Matters

    Most people wake up experiencing morning dehydration without realizing it. While you sleep, your body continues breathing, repairing tissues, and regulating temperature, all of which use water. Starting your day with a slow, deliberate glass supports cellular rehydration and helps your system shift gently from rest to activity. Unlike rushing straight to coffee, this approach creates a gentle wake-up that feels calmer and more grounded. Over time, this habit supports internal balance, helping digestion, circulation, and mental clarity work together more smoothly as your day begins.

    How the Four-Minute Morning Water Routine Works

    This routine is effective because it focuses on quality, not quantity. The first glass reintroduces fluid, while the second can include light electrolyte support from lemon or a pinch of salt. This helps your body hold onto water instead of flushing it out too quickly. Consistent hydration improves skin hydration, making your complexion look fresher over time. Many people also notice steady energy levels, with fewer mid-morning crashes. Think of it as a mineral water boost that prepares your body before caffeine or food enters the picture.

    Building a Simple Morning Hydration Routine Daily

    The key to success is awareness, not perfection. Slow, mindful sipping allows your body to absorb water efficiently while keeping your stomach comfortable. This practice supports circulation benefits, helping oxygen and nutrients move more freely through your system. Over time, this routine becomes a reliable hydration habit that feels natural rather than forced. When repeated with daily consistency, the body adapts, making mornings feel more stable, focused, and physically comfortable without drastic lifestyle changes.

    Why This Small Habit Creates Lasting Results

    What makes this routine powerful is how gently it supports long-term wellness. Instead of relying on quick fixes, you’re practicing simple self-care that fits into real life. As hydration improves, you naturally develop better body awareness, noticing how your skin, energy, and focus respond. These changes don’t appear overnight, but they accumulate quietly. Over weeks, this small ritual can reshape how your mornings feel, helping you start each day more centered, hydrated, and ready to respond rather than rush.

    Routine Step Time Spent Purpose
    First glass of water 1 minute Rehydrate after sleep
    Mineral-enhanced water 1 minute Support hydration retention
    Slow sipping 1 minute Improve absorption
    Breathing and posture 1 minute Calm nervous system

    Frequently Asked Questions (FAQs)

    1. How much water should I drink in the morning?

    About 400–500 ml is enough to start rehydration gently.

    2. Can I add lemon or salt every day?

    Yes, small amounts are safe for most people and support hydration.

    3. Should I drink water before coffee?

    Yes, water first helps prevent dehydration and caffeine jitters.

    4. How long before results are noticeable?

    Most people notice better energy and skin within a few weeks.

  • 11 Nail Polish Shades Trending Everywhere This Winter for a Fresh Modern Look

    11 Nail Polish Shades Trending Everywhere This Winter for a Fresh Modern Look

    Royal purple and ruby red are just a glimpse of the striking nail polish shades embraced by True Winter color enthusiasts. Even those drawn to neutral palettes will find an impressive range of options. Lovers of cool tones, in particular, may be surprised by the variety of whites available—each reflecting light differently, much like snow shimmering before it melts. The same depth applies to gray hues, as well as rich burgundy variations such as cranberry, deep berry, and merlot. World champion nail artist and beauty educator Valeriia Telemaniuk told Byrdie that winter typically signals a return to timeless nail styles. Expect classic French manicures, elegant grays, blue-based tones, and deep reds—both bold and understated—to dominate the season. Below, discover the winter nail colors professional artists predict will trend and where to shop them.

    Chocolate Ganache Nails Take Center Stage

    As brownie pudding shades fade, a more indulgent winter favorite is emerging: ganache nails. Nail artist and educator Sofiia Mazur describes this color as a rich, velvety brown reminiscent of melted dark chocolate. Think shades similar to Red Iguana’s Ganache gel or Dazzle Dry’s Fringe. The tone feels warm, luxurious, and perfectly suited to colder months or anyone drawn to understated sophistication. On nails, ganache conveys quiet confidence—polished without being flashy. It pairs seamlessly with gold jewelry, neutral outfits, and minimalist black ensembles, making it both timeless and versatile.

    Muted Berry Tones Gain Momentum

    Grounded, deeper hues are increasingly popular this season. Juanita Huber-Millet, founder and creative director of Townhouse Salons, notes a growing interest in espresso browns, soft mauves, and muted berry shades. These colors offer a refined balance of warmth and elegance while remaining subtle enough for daily wear. Muted berries, in particular, provide a sophisticated alternative to brighter reds, delivering richness and depth without overwhelming the overall look.

    Light Ocean Blue Adds a Soft Glow

    Light ocean blue with a pearlescent finish is another shade expected to shine this winter. Nail expert Amy Ling Lin describes these blues as calm, luminous, and uplifting. Shades such as Sundays Studio’s L09 offer a refreshing contrast to winter’s darker color palette. The soft pearl finish reflects light beautifully, adding dimension and a gentle glow. This color evokes a soothing, airy mood—quietly joyful while remaining modern and refined.

    Cool Gray Emerges as a Winter Neutral

    Cool gray is quickly becoming a go-to winter neutral. According to OPI Global Ambassador Coca Michelle, it’s a chic and sophisticated shade that blends effortlessly with winter wardrobes. Cool gray also highlights jewelry beautifully, especially for those who enjoy mixing metals. Notable options include OPI’s Peace of Mined, Case of Glamnesia, and Suzi Talks with Her Hands, all known for their versatile and polished finishes.

    Deep Navy for a Clean Seasonal Reset

    Deep navy is being hailed as the ideal post-holiday reset color. Calming and timeless, it transitions smoothly from winter into the New Year. Easy to wear, this shade works just as well for special occasions as it does for everyday office looks. Recommended polishes include OPI Nail Lacquer shades such as Less is Norse, Havin’ a Candy Ol’ Time, and Suzi & the Arctic Fox, each offering a rich and wearable navy tone.

    Soft “Barely-There” Shades Offer a Fresh Start

    Winter often inspires a desire for simplicity and calm, reflected in the rise of barely-there nail colors. According to Huber-Millet, soft milky hues, cool neutrals, and subtle pastels are trending. Shades like Coconut Milk, Glazed Marshmallow, and Milkshake from Townhouse’s Flawless Collection feel clean, restorative, and refreshing after autumn’s deeper tones. For pink-toned neutrals, experts suggest adding French tips—either crisp white or softer modern variations—for a timeless finish.

    Warm Deep Red Remains a Winter Classic

    A warm, deep red continues to be a cold-weather essential. Amy Ling Lin describes this shade as chic, cozy, and quietly powerful. It brings instant warmth during colder months while maintaining a polished, festive feel. This versatile red transitions effortlessly from everyday elegance to seasonal celebrations, offering sophistication without feeling heavy.

    Earthy Metallics Bring Subtle Shine

    Earthy metallic shades are also set to trend throughout winter. Sofiia Mazur highlights tones like bronze, clay gold, and olive chrome, often paired with matte or stone-inspired textures. These finishes reflect light softly, creating a refined glow that feels elevated rather than flashy. Inspired by fashion runways such as Balmain’s fall collection, earthy metallics work beautifully as full nail looks or understated accent shades.

    Black Cherry Nails Deliver Understated Drama

    Black cherry nails strike a balance between deep darkness and subtle red warmth. Mazur notes that this combination keeps the shade elegant and highly wearable. Long favored by fashion icons and celebrities, black cherry complements both evening attire and casual looks like oversized blazers or vintage denim. It has become a reliable cold-season staple that returns year after year.

    Crisp White Makes a Winter Statement

    Crisp white nail polish is enjoying a strong resurgence this winter. Following Pantone’s selection of Cloud Dancer, pure white shades such as Mineral Fusion Ice Breaker are seeing increased demand. This clean, modern color reflects snowy landscapes, cozy knits, and frosty mornings. Once considered strictly a summer shade, white has firmly secured its place in winter minimalism.

    Gray-Lavender Blends Cool and Soft Tones

    Gray-lavender merges cool gray with a subtle hint of purple, making it especially fitting for winter. According to Telemaniuk, shorter days and cooler atmospheres naturally draw clients toward muted hues like this. Gray-lavender feels modern, elegant, and versatile—minimal yet refined—making it an ideal nail color choice for the colder months.

  • Skipping the Gym for Walking Works Only When You Maintain Continuous Movement at a Steady Pace

    Skipping the Gym for Walking Works Only When You Maintain Continuous Movement at a Steady Pace

    Every January, gyms crowd with people chasing a fresh start, yet a growing number quietly step away. Some feel uncomfortable in gym spaces, others struggle to stay motivated, and many simply dislike indoor workouts altogether. For these individuals, walking has become the preferred alternative. It requires no contracts, no mirrors, and no entry barriers. Just a pair of shoes and an open path. Increasingly, people are discovering that walking can deliver meaningful health benefits without the pressure or complexity often associated with gym-based exercise.

    Scientific research supports this shift. Regular walking helps strengthen the heart and lungs, supports weight management by encouraging fat use, improves circulation, protects bones and muscles, and reduces the risk of chronic conditions such as type 2 diabetes and cardiovascular disease.

    Walking can function as a quiet yet effective workout for those who avoid gyms, but only when it reaches the right intensity and duration.

    The challenge is that a slow, interrupted stroll between errands does not produce the same results as a focused, continuous walk. Public health advice can feel vague, leading many people to overestimate what casual steps achieve.

    The 30-minute guideline and why steady walking matters

    Sports nutritionists and trainers often highlight a simple rule: when walking replaces structured exercise, it should last at least 30 minutes, completed in one continuous session, without frequent stops, at a steady pace of around 5 km/h (3.1 mph).

    This pace places most healthy adults in the moderate-intensity zone. The heart works harder, breathing becomes faster, and the body shifts toward using fat as a primary fuel source. Shorter or broken walks still offer benefits, but they rarely challenge the cardiovascular system in the same way.

    The practical target is clear: 30 minutes without stopping, at roughly 5 km/h, where speaking in short sentences is possible but singing feels uncomfortable.

    How a 5 km/h pace feels in real life

    Many people are unsure how fast they actually walk. While fitness trackers provide numbers, the body gives reliable signals that indicate the right pace:

    • You can hold a conversation in short sentences, but long explanations feel tiring.
    • Your breathing becomes deeper and slightly quicker, without gasping.
    • You feel warm or lightly sweaty after 10–15 minutes, even in cool weather.
    • Your stride naturally lengthens, and your arms swing more freely.

    This is not race walking. It is brisk, intentional movement that keeps you progressing forward, without long pauses at shop windows or constant phone use at crossings.

    Why continuous effort outperforms scattered steps

    Many people accumulate 8,000 or even 10,000 steps across an entire day, yet notice limited changes in fitness or body weight. Continuous walking affects the body differently than low-intensity movement spread over many hours.

    How walking patterns influence results

    • Short, scattered walks: Support joint mobility and circulation, but provide only mild cardiovascular stimulation.
    • One 30-minute brisk walk: Creates a stronger challenge for the heart and lungs, increases calorie use, and has a clearer effect on mood and sleep.

    During a sustained 30-minute walk, the cardiovascular system remains engaged long enough to adapt. Blood flow increases, the heart pumps more efficiently, and muscles use oxygen more effectively. Hormones involved in mood and stress regulation, including endorphins, respond more strongly to continuous effort.

    Health benefits that extend beyond weight management

    Weight control often dominates conversations about walking, but the benefits reach much further. Regular brisk walking is linked to better digestion and fewer episodes of constipation, as body movement stimulates gut activity. Improved circulation and sleep quality also support immune function.

    The brain benefits as well. Moderate, consistent activity is associated with stronger memory, improved focus, and a lower risk of age-related cognitive decline. Researchers highlight the hippocampus, a region critical for memory formation, which appears to shrink more slowly in physically active adults.

    Brisk walking supports mental health and cognitive function, not just physical fitness.

    Outdoor walking adds further advantages. Exposure to daylight supports vitamin D production, which contributes to bone strength and immune health. Time outside also helps regulate the body’s internal clock, improving sleep patterns and overall rest quality.

    Reduced swelling, improved posture, and a calmer mind

    Regular walking can reduce leg swelling by improving venous return. The calf muscles act as a pump, helping blood flow back toward the heart, which is especially important for people who sit or stand for long periods.

    Posture often improves over time. Brisk walking encourages an upright position, relaxed shoulders, and gentle core engagement. This reduces strain on the lower back and neck, particularly when combined with simple habits such as looking ahead instead of down at a phone.

    Mentally, daily walking is associated with lower perceived stress, fewer low-mood episodes, and better sleep. Many people use their walk as a transition between work and home, creating a simple routine that helps the mind reset.

    Who the 30-minute brisk walk is suitable for

    One reason health authorities consistently recommend walking is its wide accessibility. Young adults, working professionals, and many older individuals can all adjust it to their ability. Beyond comfortable footwear and weather-appropriate clothing, no special equipment is required.

    This accessibility matters in regions where gym access is limited or costly. Walking transforms streets, parks, and even long corridors into usable training spaces. For people with mild joint discomfort, it often feels gentler than running while still offering meaningful physical challenge.

    From students to retirees, a daily 30-minute brisk walk can anchor a healthier routine.

    When 30 minutes at 5 km/h feels too demanding

    Not everyone should begin at this pace and duration. Individuals with heart conditions, severe joint pain, respiratory issues, or long periods of inactivity may need medical guidance before increasing intensity.

    A gradual progression can help:

    • Weeks 1–2: 10–15 minutes at a comfortable pace, once daily.
    • Weeks 3–4: 20 minutes, including 5–10 minutes at a brisk pace.
    • Weeks 5–6: 30 minutes total, aiming to maintain a steady, faster rhythm.

    Those unable to walk continuously can divide the time into two 15-minute brisk sessions. The focus remains on maintaining rhythm and limiting idle pauses.

    Making walking a consistent daily habit

    Turning guidelines into habits often depends on small adjustments rather than major promises. Many people succeed by scheduling their walk like an appointment, whether before breakfast, during lunch, or after work, with backup indoor routes for poor weather.

    • Use a timer to ensure the full 30 minutes is completed.
    • Choose a familiar loop that takes roughly the same amount of time.
    • Walk with a friend occasionally for accountability.
    • Keep simple gear ready, such as a cap, gloves, or a light waterproof layer.

    Combining walking with other low-impact activities, such as light strength exercises or mobility work at home, enhances results. Stronger leg and core muscles make brisk walking easier and help protect joints.

    Additional benefits and potential risks to note

    Even those who train regularly can benefit from a 30-minute brisk walk. It works well on recovery days, improving circulation and reducing muscle stiffness without adding heavy strain. Office workers gain valuable movement after long hours of sitting.

    There are some risks. Sudden increases in speed or distance can lead to overuse injuries such as shin splints or knee discomfort. Poor lighting and uneven surfaces increase fall risk. Choosing stable footwear, well-lit routes, and progressing gradually helps reduce these issues.

    For individuals with pre-diabetes or borderline blood pressure, daily brisk walking often acts as a supportive health measure. It assists with blood sugar control, weight management, and vascular flexibility. When combined with adequate sleep and modest dietary adjustments, this routine can meaningfully influence long-term health without any gym attendance.

  • 11 Winter Nail Polish Shades Trending Everywhere This Season for a Fresh Polished Modern Look

    11 Winter Nail Polish Shades Trending Everywhere This Season for a Fresh Polished Modern Look

    Royal purple and ruby red remain favorites among True Winter color lovers, while those who prefer neutral looks still have plenty of refined choices. Cool-toned enthusiasts can explore a wider range of white shades than expected—much like freshly fallen snow shimmering in sunlight. The same variety applies to gray tones, along with rich burgundy hues such as cranberry, deep berry, and merlot. World champion nail artist and beauty educator Valeriia Telemaniuk shared with Byrdie that winter often revives classic nail styles, bringing renewed attention to French manicures, cool grays, soft blues, and both bold and muted deep red shades.

    Rich Chocolate Ganache Brown

    Previously popular brownie pudding nails are giving way to a more refined winter favorite: ganache brown. Nail artist and educator Sofiia Mazur describes this shade as a deep, indulgent brown reminiscent of melted dark chocolate. Similar to tones like Red Iguana’s Ganache gel or Dazzle Dry’s Fringe, this color feels warm, luxurious, and polished. Ganache brown offers understated confidence and pairs beautifully with gold jewelry, neutral outfits, and minimalist black ensembles.

    Soft and Muted Berry Shades

    This winter highlights a shift toward deeper, grounding nail colors. Juanita Huber-Millet, founder and creative director of Townhouse Salons, observes growing interest in espresso browns, gentle mauves, and muted berry tones. These shades balance warmth with sophistication, making them suitable for everyday wear. Muted berries provide a subtle alternative to brighter reds, delivering richness without overpowering the overall look.

    Light Ocean Blue with a Pearly Glow

    A light ocean blue finished with a soft pearlescent sheen stands out this season. Nail professional Amy Ling Lin describes these tones as calm, luminous, and uplifting. Shades like Sundays Studio’s L09 offer a refreshing contrast to darker winter palettes, while the pearl finish reflects light gently, adding dimension and a refined glow.

    Modern Cool Gray Neutrals

    Cool gray nails are becoming a staple winter neutral. According to OPI Global Ambassador Coca Michelle, this shade feels chic, effortless, and sophisticated, pairing easily with seasonal wardrobes. Cool gray also complements mixed-metal jewelry. Notable options include OPI Peace of Mined, Case of Glamnesia, and Suzi Talks with Her Hands, each offering a polished, versatile finish.

    Timeless Deep Navy Blue

    Deep navy nails are considered an ideal post-holiday reset shade. This calming color transitions smoothly through winter and into the New Year while remaining easy to wear. A true classic, navy suits both special occasions and everyday office looks. Popular choices include OPI Less is Norse, Havin’ a Candy Ol’ Time, and Suzi & the Arctic Fox.

    The Popularity of Barely-There Nails

    As winter arrives, many are drawn to nail shades that reflect calm and clarity. Huber-Millet notes rising demand for soft milky tones, cool neutrals, and subtle pastels. Shades such as Coconut Milk, Glazed Marshmallow, and Milkshake from Townhouse’s Flawless Collection feel clean, restorative, and fresh—offering a gentle reset after autumn’s deeper hues.

    Warm and Deep Red Classics

    A warm, deep red continues to be a winter essential. Amy Ling Lin describes this shade as warm, chic, and quietly powerful. It adds instant coziness during colder months while maintaining a polished, festive feel. This versatile color transitions seamlessly from everyday elegance to holiday-ready looks.

    Earth-Inspired Metallic Finishes

    Earth-toned metallic nails are also gaining attention this winter. Sofiia Mazur highlights shades such as bronze, clay gold, and olive chrome, often styled with matte or stone-like textures. These finishes reflect light softly, creating a refined glow that feels luxurious without appearing flashy, whether worn alone or as subtle accents.

    Elegant Black Cherry Tones

    Black cherry nails deliver understated drama by combining deep darkness with a hint of red warmth. Mazur explains that this balance keeps the shade elegant and wearable. Long favored by fashion icons, black cherry pairs effortlessly with evening wear as well as casual looks like oversized blazers or vintage denim.

    Clean and Crisp Winter White

    Crisp white nails are making a strong return this winter. Following Pantone’s introduction of Cloud Dancer, pure white shades such as Mineral Fusion Ice Breaker are seeing renewed interest. This clean, modern color reflects snowy landscapes and frosty mornings, establishing white as a key tone in winter minimalism.

    Soft Gray-Lavender Blends

    Gray-lavender nails merge cool gray bases with a subtle hint of purple, making them especially suitable for winter. Telemaniuk notes that shorter days and cooler atmospheres are drawing attention to muted, calming shades like this. Gray-lavender feels modern, minimal, and refined, offering a versatile option for the colder season.