Category: News

  • Plank Hold Timing Explained: How Long to Hold a Plank for Maximum Core Benefits by Age

    Plank Hold Timing Explained: How Long to Hold a Plank for Maximum Core Benefits by Age

    The floor feels cool against your forearms. Your toes push into the mat and your legs work hard. Your breathing settles into a steady pattern. Between the tension in your stomach and the focus in your mind a question appears: “How long should I hold this position?” Is it ten seconds? Thirty seconds? Two minutes that seem endless? People treat planks like they are a basic exercise that works the same for everyone but they are really an interaction between your body and gravity that shifts throughout your life. What feels strong & easy at 18 becomes a different kind of challenge at 48 or requires more care at 68. At any age your core remains your foundation. It is the hidden structure that supports your spine and protects your back and allows you to move comfortably. So how long should you hold a plank to get the best core results without pushing into strain or pain or letting your pride take over? The answer depends on understanding your body exactly as it is right now.

    The Quiet Storm in Your Core

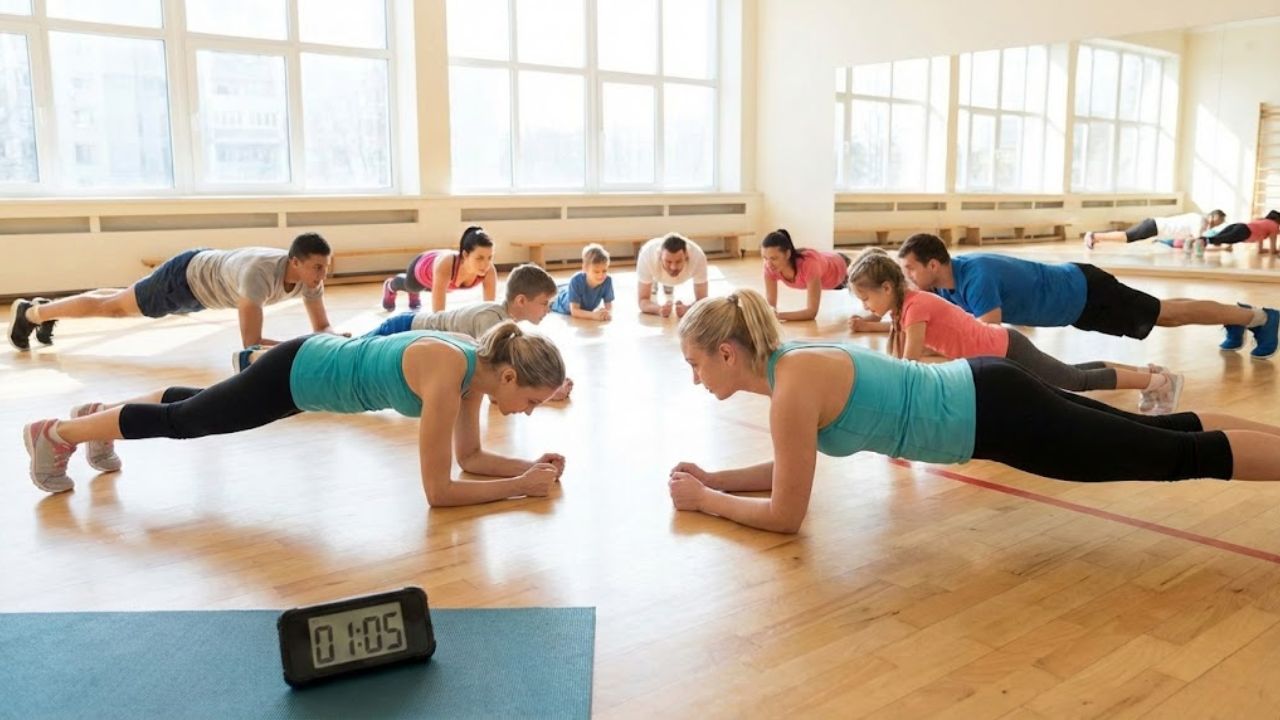
    Most workouts announce themselves with noise—feet pounding on treadmills, iron plates clashing, sharp exhales filling the room. Planks are different. They arrive quietly. You line your body up in one long shape: shoulders stacked over elbows or wrists, heels reaching back, head floating easily between them. Nothing appears to move. From the outside, it looks almost effortless.

    Inside, however, a quiet storm unfolds. Deep stabilizers wake up and coordinate: the transverse abdominis cinches your midsection like a supportive belt, the multifidus offers subtle protection to the spine, the diaphragm links breath to effort, and the pelvic floor provides steady support from below. These muscles don’t crave intensity or drama—they respond best to calm, precise effort repeated consistently.

    This is why “how long” matters far less than “how well” and “how often.” A tense, collapsing one-minute plank does less good—and carries more risk—than a clean twenty-second hold where your body feels strong, aligned, and calm. Time still plays a role, but it should match the moment your form begins to fade, not push beyond it.

    The Myth of the 2-Minute Plank

    Fitness culture has long celebrated extremes. Two-minute planks. Five-minute challenges. Viral clips of shaking bodies holding on by sheer willpower. Somewhere along the way, longer became synonymous with better.

    The quieter truth is less flashy: past a certain point, extending a plank builds tolerance for discomfort more than it builds useful strength. Research and experienced coaching tend to agree—short, high-quality holds performed multiple times offer greater benefits for core strength and spinal health than occasional marathon efforts.

    This doesn’t mean long planks are inherently harmful. It means the return on investment diminishes while the risk of fatigue-related misalignment quietly rises. As the years go by, the question naturally shifts from “How long can I survive?” to “How well can I support my body right now?”

    Age, Gravity, and the Plank Equation

    As decades pass, the body’s calculations change. Recovery slows slightly. Tissues become less forgiving. Balance and coordination demand more attention. A plank that once felt effortless may now feel more intentional—and that’s not a weakness, but an honest reflection of biology.

    Rather than one universal rule, it helps to think in flexible ranges. The goal is to match your hold time to the moment just before your form starts to unravel. Below are general, realistic guidelines for healthy adults, assuming no major injuries or medical concerns.

    Age Range Suggested Hold Time (per set) Sets Weekly Frequency
    Teens (13–19) 20–40 seconds 2–4 2–4 days/week
    20s–30s 30–60 seconds 2–4 3–5 days/week
    40s 20–45 seconds 2–4 3–4 days/week
    50s 15–40 seconds 2–3 2–4 days/week
    60s–70s+ 10–30 seconds 2–3 2–4 days/week

    These are guideposts, not judgments. You may fall above or below them, and that’s completely fine. What matters most is the quality of each second you choose to hold.

    Your 20s and 30s: Capability Without Restraint

    In your 20s and 30s, your body often feels generous. Recovery is quick, tissues are resilient, and strength comes easily. This is when many people chase longer plank times—and with good form, thirty to sixty seconds can be an excellent working range.

    The hidden risk isn’t lack of strength; it’s ignoring subtle breakdowns. Hips dip slightly. Shoulders creep upward. The lower back whispers warnings that go unheard. If this is your age range, consider dividing your effort: several shorter, high-quality holds can deliver more benefit than one long, punishing attempt.

    Your 40s: Strength With Awareness

    By your 40s, the body starts offering clearer feedback. Old injuries speak up. Stiffness appears more quickly. Strength is still very much present, but it demands respect.

    For many people, the most productive plank range now sits between twenty and forty-five seconds, repeated a few times. Some days you’ll feel solid for longer; other days, stopping earlier will feel wiser. The goal becomes sustainability—supporting your spine, posture, and daily movement for years to come.

    Your 50s, 60s, and Beyond: Resilient, Not Reckless

    Later decades invite a redefinition of strength. Muscle mass may decline gradually, balance may shift, and recovery may take longer—but adaptation is still possible. Planks remain valuable, even if they look different.

    Shorter holds—ten to thirty seconds—performed with excellent alignment can be deeply effective. Modified versions, such as knee planks or incline planks, are not compromises; they are intelligent adjustments. Each well-supported second helps preserve posture, stability, and confidence in movement.

    Knowing When to Stop

    Your body always signals when a plank has crossed from productive to risky. Common signs include sagging or aching in the lower back, shoulders tightening toward the ears, breath holding, or facial tension taking over. The moment you notice these, that’s your cue to stop.

    Stopping at the first sign of form loss isn’t quitting—it’s skillful training. Over time, this approach teaches your nervous system efficiency rather than collapse.

    Turning Planks Into a Practice

    Planks don’t need to be dramatic. They can be woven into daily life: a brief hold before coffee, another after work, one more before bed. Over time, these small efforts accumulate into meaningful strength.

    The real benefit isn’t a personal record—it’s the quiet ease of standing taller, moving more confidently, and supporting your body through everyday tasks. Hold as long as your form feels honest. Rest. Repeat. That’s where lasting core strength lives.

  • Short Haircuts for Fine Hair That Create Volume and Make Strands Look Thicker

    Short Haircuts for Fine Hair That Create Volume and Make Strands Look Thicker

    At the salon right after the lunch crowd leaves you can see her right away. She twists the ends of her bob with her fingers while looking at her reflection that seems flatter with each second under the bright mirror lights. Her hair is clean and shiny but it lies completely flat against her cheeks. The stylist picks up a section and drops it and the whole style falls apart like a cake that didn’t rise properly. They both laugh but her eyes show a hint of sadness. She takes out her phone and shows a photo of short bouncy full hair that clearly belongs to someone who has more hair than she does. She says she just wants it to look thicker like she has said the same thing at every appointment for the past five years. The stylist smiles and picks up the scissors and suggests a different cut. After three quick cuts the hair suddenly looks alive. Something changed even though it’s hard to explain what happened. The secret is not about having more hair. It’s about getting the right short haircut for fine hair.

    Short fine hair explained: why some cuts flatten volume while others enhance it

    Fine hair behaves a bit like silk thread: soft to the touch, lightweight, and quick to slip out of shape. When the cut is wrong, strands cling to the scalp, especially around the crown and jawline. That’s how the unwanted “helmet” look appears — flat roots, no movement, and hair that feels thinner than it really is.

    With short styles, placement is everything. When length lands in the wrong spot, fine strands can look even more limp. A blunt jaw-length bob with no layering, for example, tends to stick to the face. The real secret lies in strategic length, smart layering, and careful weight removal. That’s where volume starts to show up naturally.

    One Tuesday afternoon in London, stylist Maya R. demonstrated this perfectly. A client arrived with an overgrown long bob that hadn’t been trimmed in nine months. The ends looked uneven, and the roots appeared oily just hours after washing. The hair wasn’t damaged — it was simply extremely fine.

    Maya recommended a softly layered bixie cut, blending elements of a bob and a pixie. She cropped the back, kept length at the front, and exposed the neck. Fifteen minutes later, the same hair appeared nearly 30% fuller. The client’s reaction wasn’t excitement at first, but surprise: “Wait… that’s all my hair?” That’s the power of a well-designed cut.

    From a technical perspective, fine hair struggles with two things: misplaced weight and heavy blunt lines. When too much bulk sits at the bottom, everything gets dragged downward. The roots never have a chance to lift.

    Volume-enhancing short cuts work by redistributing that weight. Excess bulk is removed where it flattens the shape, while soft structure is added to encourage lift at the crown and face. Airy layers, undercut napes, and slightly uneven edges prevent strands from clumping together. The result: hair that looks thicker without actually growing.

    The four best short haircuts that make fine hair appear fuller

    The first standout option is the bixie haircut. This pixie-bob hybrid is ideal for fine hair because it keeps gentle length around the face while shaping the back and sides closer to the head.

    This contrast instantly creates visual dimension. Subtle crown layers prevent the hair from lying flat in one sheet. With a touch of texturizing cream, individual strands separate and reflect light, creating the illusion of density. It also grows out gracefully, making it practical for anyone who doesn’t visit the salon often.

    The second favorite is the modern French bob. Not the heavy, perfectly blunt version, but a softened, slightly broken cut that falls between the lip and jaw. The ends are diffused, while internal layers stay invisible.

    On low-effort days, it tucks neatly behind the ears. On better days, a quick upside-down rough-dry delivers that effortless Parisian feel. For many with fine hair, this is the first style where flat roots finally stop being a daily frustration.

    Third comes the soft layered pixie. This isn’t an ultra-short, sharp style, but a feathered shape with movement. The sides and back are tapered for a clean outline, while the top remains longer for flexibility.

    Fine hair benefits here because there’s less weight pulling downward. A small amount of mousse at the roots and a quick blast from the dryer often does all the styling work. It’s especially freeing for anyone who’s spent years hiding behind longer, lifeless lengths.

    The fourth reliable option is the stacked nape bob. Shorter and graduated at the back, with longer front sections that angle toward the chin. From the side, it forms a soft diagonal. From the back, the stacked layers create a gentle curve.

    This structure builds volume directly into the shape. The stacking lifts hair at the occipital bone, keeping the silhouette full. Worn straight, it looks sleek. Styled with waves and a touch of sea salt spray, it can look like twice the hair.

    Key point Details Why it matters to readers
    Best cut for ultra-fine, flat hair A soft layered pixie or bixie with extra length on top and lighter sides. Avoid razor-thin ends; ask for scissors and subtle texturizing instead. Gives instant volume at the roots and makes morning styling faster, especially if your hair collapses within hours.
    Ideal styling products Lightweight mousse at the roots, sea salt or texturizing spray on mid-lengths, and a dry shampoo for day two. Skip heavy serums and oils near the scalp. Helps keep hair lifted and full without that greasy, weighed-down effect that fine hair gets too easily.
    How often to trim Every 6–8 weeks for a bob or stacked bob, 4–6 weeks for a pixie or bixie. Ask for micro-adjustments instead of dramatic reshapes each time. Keeps the shape sharp so your hair doesn’t collapse into a flat, triangular mass that

    How to style short fine hair so volume actually lasts

    The right haircut solves only half the problem; drying technique finishes the job. Fine hair needs to be lifted while it’s still damp. Once it dries flat against the scalp, regaining volume becomes difficult.

    Start by rough-drying with your head upside down until hair is about 80% dry. Use your fingers instead of a brush to lift at the crown. Once upright, a round brush can be used lightly to smooth ends or add a bend. A golf-ball-sized amount of lightweight mousse at the roots can significantly boost lift.

    In real life, styling is often rushed. In a busy coworking bathroom one Monday morning, a woman with a fresh French bob had only five minutes and a travel straightener. What worked wasn’t perfection.

    She dampened the front pieces slightly, lifted the roots with her fingers, and used warm air to set them. The back stayed imperfect, but the style looked intentional. Practical styling beats flawless routines.

    The biggest mistake with fine hair is overusing products. More product usually means heavier roots, not more volume. Thick creams, rich serums, and layered sprays quickly weigh strands down.

    Realistically, nobody styles perfectly every day. That’s why day-two habits matter. Applying a light layer of dry shampoo at night helps absorb oil before it builds up. Sleeping with your part flipped to the opposite side keeps roots lifted by morning.

    • Blot hair gently using a microfiber towel or cotton T-shirt — never rub
    • Apply styling products only to mid-lengths and ends
    • Use mousse or root spray sparingly at the scalp

    Living with short fine hair: confidence, experimentation, and ease

    Choosing short hair with fine strands is often more than a style decision. It can feel like a quiet rebellion against years of ponytails that never looked full enough. Cutting it short often means letting go of comparisons.

    On one evening train ride, a woman in her forties ran her fingers through her stacked bob and said, “I finally stopped waiting for my hair to be something it isn’t.” That moment said more than any product recommendation ever could.

    There’s a unique feeling when a cut reveals your neck, jawline, and cheekbones. Short hair on fine texture often brings that sense of freedom — familiar, yet new.

    The experience isn’t always smooth. Some weeks the fringe won’t cooperate, or humidity takes over. Some mornings you air-dry and accept the softness; other days you refine every bend. Both approaches are valid.

    Between the bixie, the French bob, the soft pixie, and the stacked bob, most people eventually discover a shape family that suits them. From there, it’s just small adjustments — a shorter fringe, a lifted crown, a different part.

    The real shift happens when the question changes from “How do I hide fine hair?” to “How do I let this texture shine?” On the page, it sounds subtle. In the mirror, it changes everything.

  • Stop Washing Your Hair This Often, Dermatologists Warn – You’re Training Your Scalp to Misbehave

    Stop Washing Your Hair This Often, Dermatologists Warn – You’re Training Your Scalp to Misbehave

    We’ve all grown up thinking squeaky-clean hair is the ultimate goal, reaching for foam and fragrant shampoos as a daily ritual. Yet, dermatologists are raising alarms: washing hair too frequently can damage the scalp and hair shafts, leaving lengths dull, greasy, or fragile. What once felt like a reassuring hygiene habit may actually be contributing to long-term hair issues. The real concern isn’t just frequency, but how your scalp responds when over-stripped, triggering a cycle of oil overproduction and irritation that affects both scalp health and hair appearance.

    Why Daily Washing Can Backfire: Insights from Experts

    Weekday showers often involve steam, hot water, and vigorous scrubbing with familiar shampoos. While it feels productive, this routine can lead to over-washing and scalp imbalance. By late afternoon, roots may already appear greasy, prompting another wash, training sebaceous glands to produce more oil. Dr Emma Wedgeworth, consultant dermatologist in London, cites a 2021 UK survey where women washed hair an average of 4.3 times weekly, with daily washing common in major cities. Constant exposure to surfactants and hot water strips the natural lipid barrier, resulting in rebound oil, frizz, dull color, and weakened hair texture, creating a loop of cleaning and irritation rather than genuine scalp health.

    Recommended Hair Washing Frequency by Dermatologists

    There isn’t a one-size-fits-all rule, but dermatologists suggest that daily washing is rarely necessary unless you have a scalp condition, very fine hair, or exercise heavily. For most people, washing two to three times per week strikes a balance between cleanliness and maintaining the scalp’s natural barrier. Oily, acne-prone scalps may tolerate three washes weekly, while dry or curly hair may benefit from one weekly wash combined with midweek co-washes or water rinses. Transitioning gradually helps the scalp adapt over three to six weeks, reducing oil production and irritation while supporting healthier hair growth.

    Key Point Details Why it Matters
    Recommended wash frequency by scalp type Oily or acne-prone: 3–4 times/week with gentle shampoo. Normal: 2–3 times/week. Dry, curly, coily: 1–2 times/week with hydration in between. Provides realistic targets tailored to scalp type instead of copying influencer routines.
    Signs of over-washing Tight, itchy, or burning scalp; flakes with redness; rough ends; greasy roots within 12–24 hours. Helps recognize over-stripped scalp rather than “dirty hair,” guiding smarter routine changes.
    Stretching washes effectively Gradually reduce frequency (daily → every other day → every third day), use simple hairstyles, swap heavy dry shampoo for light mist, shampoo only scalp. Ensures manageable transition without reverting to daily over-washing.
    Scalp-focused washing technique Use lukewarm water, apply shampoo only to roots, massage gently with fingertips, allow foam to cleanse lengths briefly, condition mid-lengths to ends. Protects hair shafts, maintains softness, and preserves scalp barrier while ensuring cleanliness.
    Between-wash care Occasional dry shampoo, light fragrance-free scalp serum 1–2 times/week, loose braids or pineapple at night to reduce friction. Supports barrier recovery, reduces tangles, and minimizes the temptation for unnecessary washing.

    Practical Tips for a Calmer, Healthier Scalp

    Focus on scalp health first, lengths second. Avoid the squeaky-clean trap: it signals over-stripping. Observe your scalp—tightness, itchiness, or burning indicates the need for gentler care. Gradual adjustment of wash frequency, gentle cleansing, and mindful styling allow the scalp to recover, hair shafts to strengthen, and natural oils to normalize. Over time, this approach reduces flakes, itch, and dryness while promoting healthier, more manageable hair.

    Embracing Realistic Hair Care

    Letting go of daily washes fosters a quieter, less stressful hair routine. Hair becomes part of your lifestyle, not a project to constantly fix. While this won’t reverse hormonal shedding or genetic thinning, it establishes a baseline of scalp comfort and healthier hair ends. With a calmer scalp, decisions around haircuts, color, or treatments are made from a place of control rather than panic. Ultimately, healthy hair begins with a resilient scalp, not endless scrubbing.

  • Why Warmer Hair Color Tones After 50 Can Instantly Brighten Skin Compared With Cool Ashy Shades

    Why Warmer Hair Color Tones After 50 Can Instantly Brighten Skin Compared With Cool Ashy Shades

    Her hair was a polished, high-end ash blonde, the kind usually saved to inspiration boards. On the stylist’s phone screen, though, her skin appeared dull. Slightly tired. A faint grey tone lingered around her mouth. The stylist paused, tilted her head, and quietly mixed a new formula—this time with a subtle touch of copper and gold. Twenty minutes later, the transformation was undeniable. The same face, the same lines, but her skin looked brighter, as if she’d just returned from a sunny weekend away. Nothing about her features had changed. Only the warmth in her hair. And yet, the shift felt far more significant.

    Why Hair Warmth Becomes More Important After 50

    Step into a busy salon on a Saturday morning and pay close attention. Clients under 40 still gravitate toward icy blondes and cool-toned browns, while chairs filled by women over 50 increasingly reflect shades of honey, caramel, and soft copper. This isn’t coincidence. As we age, natural pigment fades, facial contrast softens, and cool, ashy tones can begin to work against the complexion rather than enhance it.

    A smoky balayage that looks elegant at 30 can, by 58, make skin appear sallow or slightly bluish under certain lighting. Warm hair tones act like a gentle filter. They reflect light back onto the face, soften shadows, and subtly lift the look of cheeks and lips. Nothing is erased. The skin simply appears more alive.

    A London colorist recalls a 62-year-old client who insisted on being “as blonde and as ashy as possible.” Technically flawless, the color photographed beautifully—but in daily life, her daughter kept asking if she was exhausted. When they shifted the shade just two levels warmer, into a soft golden beige, the change was immediate. She didn’t look artificially younger. She simply looked well-rested.

    There’s no mystery ingredient in warm hair dye. It’s basic optics. Cool pigments absorb light and can cast grey or green tones on skin that already carries less natural color after menopause. Warm pigments—gold, caramel, copper, strawberry—bounce light back, creating a subtle glow. Hair frames the face, and after 50, a warmer frame often flatters the picture far better than a sharp, icy one.

    Adding Warmth Without Going “Too Orange”

    The safest way to introduce warmth isn’t a dramatic color overhaul. It’s a small adjustment. Ask for a half-shade warmer gloss or toner over your usual color. Think neutral-gold or soft caramel, not vivid copper. On grey or salt-and-pepper hair, a translucent beige or champagne glaze can brighten without hiding natural silver.

    For at-home coloring, look for box descriptions like “golden beige,” “warm neutral,” or “honey”. Avoid labels such as ash, cool, or pearlescent platinum if your skin already looks washed out in daylight or photos. You’re not aiming for a dramatic reinvention. You’re simply restoring a hint of warmth that time has quietly taken away.

    Soyons honnêtes : personne ne fait vraiment ça tous les jours. Most people don’t want complex routines or constant touch-ups. That’s why small, strategic changes matter more than bold hair moments. Swapping icy highlights for soft, diffused gold. Choosing a warmer brown that reads sun-kissed rather than red. These subtle shifts can dramatically change how skin appears—healthy or tired, fresh or faded.

    “After 50, I’m not chasing ‘younger’,” says a French stylist who works mainly with women over 45. “I’m aiming for rested, alive, softly lit. Warmth is often the quickest way to achieve that without looking like you’re trying too hard.”

    Common Hair Color Mistakes and Smarter Adjustments

    Colorists often see the same missteps repeat. Choosing overly cool shades because they sound sophisticated, then wondering why makeup suddenly looks wrong. Fighting natural warmth instead of working with it. Or swinging too far toward flat, overpowering reds. A more balanced approach usually works best.

    • Shift gradually: move from ash to neutral, then toward soft warmth.
    • Match depth: stay close to your natural level, just slightly warmer.
    • Use warmth selectively: around the face, in fine highlights, or through a gloss.

    What Your Skin Really Needs From Your Hair Color

    After 50, skin naturally loses some of its pink, gold, and brown undertones. That’s biology. Cool, ashy hair can exaggerate this change, deepening under-eye shadows and sharpening fine lines. Warm tones counteract it by casting a soft reflection onto the skin—a touch of gold near the temples, warmth along the jawline, light around the mouth.

    A makeup artist working with older TV presenters relies on a simple trick. When icy hair makes skin look flat on camera, she doesn’t just add bronzer. She calls the hair team. A warmer toner often makes a bigger difference on screen than extra foundation. Cameras respond to harmony, not youth. Viewers see someone who looks present and healthy.

    Warm hair color also pairs more easily with everyday makeup. Peach blush, rose lipstick, soft brown eyeliner all sit more naturally alongside honey or caramel highlights than with blue-toned ash. The entire look becomes easier to balance, with fewer moments of wondering why a familiar shade suddenly looks wrong. It’s not about rules. It’s about creating a color environment where your skin can breathe and glow.

    Finding Your Next Step

    The next time harsh lighting catches you off guard, pause before blaming the mirror. Look at how your hair and skin interact. Does your hair echo warmth from your complexion, or does it compete with it? Does your face appear illuminated, or slightly dimmed?

    You don’t need to abandon cool tones entirely. Some women keep ash at the back and add warmth only around the face. Others embrace silver and refresh it with a beige or champagne gloss once or twice a year. On a tous vécu ce moment où l’on se demande si “c’est moi ou la lumière”. Often, it’s simply that your hair color hasn’t evolved alongside your skin.

    Warm hair after 50 isn’t a rule—it’s a tool. A way to support your skin instead of working against it. A way to honor lines, texture, and life experience without letting them dominate the first impression. Best of all, it’s easy to test slowly. Strand by strand, gloss by gloss. Until one day, you see a candid photo and think: I look like myself again—just better lit.

    Key Takeaways at a Glance

    • Warm tones brighten skin: Gold, honey, and copper reflect light, helping the complexion appear fresher in real life and photos.
    • Ash shades can dull features: Cool pigments highlight shadows and color loss, explaining why “perfect” blondes can look tiring after 50.
    • Small changes go far: Glosses, neutral-warm shades, and face-framing highlights allow safe testing without dramatic change.
  • I didn’t know my core needed strengthening until I tried Pilates ‘flutter kicks,’ and now I’m humbled

    I didn’t know my core needed strengthening until I tried Pilates ‘flutter kicks,’ and now I’m humbled

    I never used to enjoy Pilates, but over time I’ve grown to genuinely appreciate the way it helps me build strength, increase mobility, and refine overall body control. With weekly Pilates sessions alongside CrossFit, yoga, and my work as a personal trainer, I’ve developed what I consider to be a solid core.

    Even without visible six-pack abs, a strong midsection delivers far more than aesthetics. It supports good posture, spinal stability, and injury prevention, helping the body move efficiently and safely at any age. This is well supported by existing research.

    Recently, I decided to focus on an exercise that appears frequently in Pilates sessions: flutter kicks. While commonly associated with Pilates, this move is widely used across many ab workouts. I’ve also relied on it for years when training my own clients.

    To test my core strength and see the effects firsthand, I committed to doing flutter kicks every day for one week. Here’s what I noticed — and what didn’t change.

    Understanding the Flutter Kicks Exercise

    Flutter kicks involve lying on your back, lifting your upper body slightly off the mat, and moving your legs in a controlled, alternating up-and-down motion while they hover just above the floor. This exercise appears in both mat and reformer Pilates, although it’s considered more modern than the original movements created by Joseph Pilates.

    Despite the fast leg motion, flutter kicks should be driven by your core muscles. Momentum should never take over. You may hear them referred to as scissor kicks, but regardless of the name, proper execution relies on controlled, intentional movement powered from the midsection.

    How to Perform Flutter Kicks Correctly

    • Lie flat on your back with your legs fully extended.
    • Place your hands by your sides, or slide them under your upper glutes if you struggle to keep your lower back connected to the mat.
    • Engage your core by drawing your belly toward your spine and gently tucking your pelvis.
    • Lift both legs to hover above the mat, point your toes, and raise your shoulders slightly while keeping your gaze forward.
    • Begin fluttering your legs up and down, alternating steadily.
    • If needed, softly bend your knees to reduce strain or prevent discomfort in the hips or lower back.

    Prioritize control and rhythm over speed. If lifting your upper body feels too challenging, keep your head supported on the mat. Avoid arching your lower back, as this shifts the workload away from your core and places unnecessary stress on your lumbar spine.

    Doing Flutter Kicks Daily for One Week: What Changed

    Flutter kicks maintain constant tension in the core, promote deep muscle activation, and help build long-term endurance in the hips and torso. After practicing them daily for a week, several things became clear.

    1. Flutter Kicks Work More Than Just Your Abs

    It’s important to distinguish between ab muscles and the entire core. The rectus abdominis is only one part of a larger system that includes the internal and external obliques, transverse abdominis, erector spinae, multifidus, pelvic floor, diaphragm, hip flexors, and glute muscles.

    All of these muscles work together around the pelvis, spine, and ribcage. Training the core as a whole improves functional strength, supports posture, and may help reduce discomfort and pain.

    Flutter kicks effectively engage the deep core muscles, particularly the transverse abdominis, while also challenging the lower abs, hips, and legs. If the exercise is felt mainly in the hips or lower back, it usually indicates insufficient core engagement.

    Despite considering my core strong, flutter kicks proved extremely demanding. Keeping both the legs and upper back elevated requires continuous bracing, increasing muscular endurance and reinforcing the principle of time under tension.

    CrossFit enhanced my maximal strength and power, while Pilates refined my control, balance, stability, and ability to slow movements down. Strength alone doesn’t guarantee endurance, and this exercise highlighted that difference clearly.

    While lifting heavy weights feels achievable, maintaining flutter kicks for repeated intervals — such as 10 rounds of 45 seconds on and 15 seconds off — was a serious challenge.

    Performing the movement required full-body awareness: keeping the shoulder blades lifted, compressing the abdomen, pressing the lower back into the mat without arching, stabilizing the hips, and controlling leg motion. Even breathing became something I had to consciously correct.

    Proper breathing is essential for core engagement, especially since the diaphragm plays a central role in core stability. Shallow breathing and poor posture are closely linked — a reminder I learned quickly.

    Unlike sit-ups, crunches, or Russian twists, flutter kicks keep the back supported on the floor, limiting repeated spinal flexion and extension. While this doesn’t automatically make the exercise suitable for everyone with back pain, my own spine certainly felt less strained.

    Anti-flexion, anti-extension, and anti-rotation exercises like flutter kicks help the body learn how to resist movement while maintaining tension and stability. Incorporating them regularly can make traditional ab exercises feel far less necessary.

  • CeraVe’s New Budget-Friendly Anti-Aging Line Is Being Compared to Much More Expensive Skincare Brands

    CeraVe’s New Budget-Friendly Anti-Aging Line Is Being Compared to Much More Expensive Skincare Brands

    CeraVe’s latest launch has sparked major interest across the United States, especially among skincare users looking for effective results without luxury pricing. Known for dermatologist-backed formulas, the brand’s new budget-friendly anti-aging line is being compared to high-end skincare labels that cost significantly more. From social media reviews to expert commentary, many are questioning whether affordable products can truly deliver visible results. With growing awareness around ingredients, skin barriers, and long-term care, this new line has quickly become a talking point for consumers seeking smart, science-led skincare choices.

    CeraVe budget-friendly anti-aging skincare explained

    CeraVe’s approach focuses on combining proven dermatological science with everyday affordability. The new anti-aging range is designed to support skin health while targeting concerns like fine lines and uneven texture. Products emphasize ceramide-rich formulas, gentle active ingredients, and barrier repair support that help skin retain moisture over time. Unlike luxury brands that rely heavily on prestige marketing, CeraVe prioritizes clinical formulation focus and accessibility. This strategy resonates with consumers who want consistent results without unnecessary fragrance or irritation. As awareness grows, many users are discovering that effective anti-aging care doesn’t always require premium price tags.

    Why CeraVe anti-aging products rival luxury brands

    Comparisons to expensive skincare brands stem from ingredient lists that look surprisingly similar. Many formulas include dermatologist-developed blends, hydration-lock technology, and skin barrier science that rival high-cost alternatives. Experts note that visible results often come from consistent use rather than brand prestige. CeraVe’s ability to deliver daily-use compatibility while minimizing irritation gives it an edge for sensitive skin types. This balance of performance and tolerance explains why skincare professionals increasingly recommend affordable options that prioritize skin health over luxury packaging.

    CeraVe anti-aging line and real user results

    User feedback highlights improvements in texture, hydration, and overall skin comfort within weeks. Many report that the products layer well with existing routines and feel lightweight, supporting long-term skin comfort. Consistent use encourages visible smoothness gains without overwhelming the skin. Consumers also appreciate the fragrance-free benefit, especially those prone to irritation. With routine-friendly pricing, users are more likely to stay consistent, which plays a key role in achieving noticeable anti-aging results over time.

    Summary and skincare analysis

    CeraVe’s new anti-aging range demonstrates that effective skincare does not have to be expensive. By focusing on ingredient transparency, science-backed care, and accessible formulations, the brand challenges the long-held belief that luxury equals better results. While premium brands still hold appeal, this comparison highlights a shift toward informed consumer choices. For many, reliability, comfort, and affordability now matter more than exclusivity, making CeraVe a strong contender in the modern anti-aging skincare market.

    Feature CeraVe Anti-Aging Line Luxury Skincare Brands
    Price Range Affordable High-end
    Key Ingredients Ceramides, actives Similar actives
    Fragrance Fragrance-free Often fragranced
    Dermatologist Input Yes Varies

    Frequently Asked Questions (FAQs)

    1. Is CeraVe’s anti-aging line suitable for sensitive skin?

    Yes, it is formulated to be gentle and fragrance-free.

    2. Can budget skincare really replace luxury brands?

    In many cases, similar ingredients can deliver comparable results.

    3. How long before visible results appear?

    Most users notice changes within a few weeks of consistent use.

    4. Are these products dermatologist recommended?

    Yes, CeraVe products are widely recommended by dermatologists.

  • 6-12-25 Workout Method: Trainer’s Functional Plan to Build Lean Muscle Mass and Strength

    6-12-25 Workout Method: Trainer’s Functional Plan to Build Lean Muscle Mass and Strength

    Whether we notice it or not, most training routines are built around numbers — reps, sets, and rest. One structured approach that’s gained serious traction is the 6-12-25 workout rule. Popularized by bodybuilders, this method focuses on driving muscle growth and strength gains through a high-volume training style.

    This isn’t light-weight, endurance-style training. Instead, it’s all about heavy lifts, intense pumps, and hypertrophy-focused overload. As with any effective program, proper technique matters. Following the method correctly is key if you want to see results. Below is a complete breakdown of how the 6-12-25 system works.

    Understanding the 6-12-25 Training Method

    The 6-12-25 protocol was developed by renowned strength coach Charles Poliquin. It uses giant sets to push muscles into growth through hypertrophy training. A giant set involves performing three or more exercises back-to-back with little or no rest, moving seamlessly from one movement to the next.

    This structure significantly boosts training volume while cutting down rest time, making workouts both challenging and efficient. Typically, each giant set targets one muscle group using three exercises performed consecutively.

    How Reps, Sets, and Rest Are Structured

    The name comes from the repetition scheme: six reps, 12 reps, and 25 reps, performed for three to five sets. Rest is taken only after completing all three exercises, usually around three minutes between sets.

    Lower reps focus on maximal strength using heavier loads and compound lifts. Moderate reps slightly reduce weight and emphasize supporting movements. High-rep sets rely on lighter loads and isolation exercises to create metabolic stress and deep muscle fatigue.

    Example Splits for Major Muscle Groups

    Here’s how the method can be applied across different muscle groups:

    • Chest (3–5 sets)
      • Bench press – 6 reps
      • Shoulder press – 12 reps
      • Reverse flyes – 25 reps
    • Back (3–5 sets)
      • Pull-ups – 6 reps
      • Single-arm rows – 12 reps
      • Weighted superman – 25 reps
    • Legs (3–5 sets)
      • Front squats – 6 reps
      • Good mornings – 12 reps
      • Hamstring curls – 25 reps

    Programming, Recovery, and Key Benefits

    You can spread these sessions across the week — for example, chest one day, back the next, and legs later — or combine muscle groups depending on your schedule. Full-body sessions are possible, but adequate recovery of at least 24 to 48 hours is essential.

    This method blends strength development, muscle hypertrophy, and endurance training into one system. By adjusting loads and progressively increasing resistance, you can continue to adapt and grow stronger. The mix of compound movements and isolation exercises enhances muscle balance, blood flow, and delivers an intense post-workout pump driven by sheer volume and effort.

  • Best Cleansing Balms for All Skin Types How They Work Key Ingredients and Proper Usage Tips

    Best Cleansing Balms for All Skin Types How They Work Key Ingredients and Proper Usage Tips

    In modern skincare, few steps feel as luxurious yet essential as the first cleanse. The era of harsh soaps and eye-watering makeup removers is long gone. Today, the cleansing balm stands out as a rich, buttery solution that has reshaped how we cleanse our skin.

    Whether you are chasing a flawless “glass skin” glow or aiming to simplify an overwhelming routine, learning how to use a cleansing balm can be a true turning point for your complexion.

    Understanding What a Cleansing Balm Is

    A cleansing balm is a solid-to-oil facial cleanser created to melt away makeup, sunscreen, and daily environmental buildup.

    Unlike liquid oils, these balms stay solid at room temperature, making them travel-friendly and spill-proof. Once warmed between the hands, the balm transforms into a smooth oil that glides effortlessly across the skin, cleansing deeply while protecting the skin’s moisture barrier.

    How a Cleansing Balm Cleanses the Skin

    The principle behind cleansing balms is straightforward: like dissolves like. Makeup, sunscreen, and excess sebum are typically oil-based. A well-formulated cleansing balm uses botanical oils and emollients to bind with these impurities.

    Because the balm closely resembles the skin’s natural oils, it can reach into pores to lift out buildup that many water-based cleansers leave behind.

    Key Benefits of Using a Cleansing Balm

    Switching from micellar water to a cleansing balm offers benefits that extend far beyond convenience:

    • Effortless Makeup Removal: Breaks down waterproof mascara and long-wear foundation without harsh rubbing.
    • Supports the Skin Barrier: Nourishing lipids help prevent the tight, stripped feeling caused by foaming cleansers.
    • Deep Pore Cleansing: Dissolves excess oil to reduce blackheads and congestion.
    • Encourages Mindful Skincare: The smooth texture allows for gentle facial massage, supporting circulation and lymphatic flow.
    • Intense Hydration: A cleansing balm for dry skin delivers essential fatty acids, leaving skin soft and comfortable.
    • Foundation of Double Cleansing: Removes oil-based debris first, allowing the second cleanser to work more effectively.
    • Gentle for Sensitive Skin: Free from abrasive pads and harsh surfactants, making it ideal for reactive skin types.

    Essential Ingredients to Look for in a Cleansing Balm

    Choosing the right cleansing balm means balancing performance and skin nourishment. Look for formulas that include:

    • Natural Seed Oils: Rosehip, Jojoba, or Almond oil for vitamins and fatty acids.
    • Vitamin E: An antioxidant that calms skin and stabilizes the formula.
    • Emulsifiers: Ingredients such as PEG-20 Glyceryl Triisostearate that help the balm rinse clean.
    • Soothing Additives: Oat kernel oil or Bisabolol to minimize redness during cleansing.

    Selecting the Right Cleansing Balm for Your Skin Type

    Despite common misconceptions, cleansing balms can suit every skin type when chosen correctly:

    • Cleansing balm for dry skin: Rich formulas with Shea butter or Avocado oil help seal in moisture.
    • Cleansing balm for oily skin: Lightweight, non-comedogenic options with Grapeseed oil help regulate sebum.
    • Cleansing balm for acne-prone skin: Clean-rinsing formulas with Salicylic acid or Tea Tree oil are ideal; mineral oil-free options are best.

    How to Use a Cleansing Balm Correctly

    Proper technique ensures you get the full benefit of your cleansing balm:

    • Start Dry: Apply to a completely dry face using dry hands.
    • Warm It Up: Melt a small amount between your fingers until it turns oily.
    • Massage Gently: Use circular motions for about 60 seconds, focusing on makeup-heavy areas.
    • Emulsify: Add lukewarm water to turn the oil into a milky texture.
    • Rinse or Wipe: Rinse thoroughly or remove with a warm, damp cloth.
    • Follow with a Second Cleanse: Use a water-based cleanser to complete the routine.

    Common Cleansing Balm Mistakes to Avoid

    • Applying to Wet Skin: Water reduces the balm’s ability to grip makeup.
    • Using Too Much: Excess product can be difficult to rinse and may clog pores.
    • Skipping the Hairline: Makeup residue often gathers around the edges of the face.
    • Ignoring the Second Cleanse: Double cleansing helps skincare products absorb properly.

    Final Thoughts on Cleansing Balms

    A cleansing balm is not just about removing makeup—it is a skin-respecting ritual. By selecting a formula suited to your needs, whether a lightweight cleansing balm for oily skin or a deeply nourishing option for dry skin, you create the perfect foundation for a balanced, radiant complexion.

  • 6 Eye Shadow Primers That Keep Makeup Smooth Vibrant and Crease-Free From Morning to Night

    6 Eye Shadow Primers That Keep Makeup Smooth Vibrant and Crease-Free From Morning to Night

    This article may include compensation from retailers or from purchases made through selected product links. The best eye shadow primers often decide whether your makeup looks fresh all day or fades before lunchtime. With just one application, a quality primer helps eye shadow appear more vibrant, blend more smoothly, and stay put without creasing or fading. Think of it as properly prepping your eyelids before makeup. Today’s formulas go beyond hold alone. They help smooth texture, even out skin tone, and deliver added benefits like hydration or oil control. If you notice fine lines around your eyes or want shimmer shades to look brighter and last longer, the right primer can completely change the result. Below, you’ll find editor and artist-approved options showing that great eye makeup starts before the shadow goes on.

    Editor Favorites: Eye Shadow Primers That Truly Deliver

    Why Editors Love It

    The Urban Decay Eye Primer Potion has remained a trusted staple among editors and makeup artists for years. Miami-based makeup artist Natalie Dresher, who previously spoke with Allure, notes that it helps eye shadow last longer without settling into fine lines or feeling heavy. The lightweight formula has a nearly serum-like texture that glides on evenly without buildup or patchiness. It feels slightly tacky, which helps shadow stay in place throughout the day without becoming sticky. The Original shade appears as a sheer translucent beige, Eden offers a matte beige, and Sin delivers a soft champagne shimmer. There is also an anti-aging version made for mature skin that includes plumping peptides and brown algae. Overall, this primer suits nearly anyone looking to improve eye makeup wear.

    Best All-Day Hold: Urban Decay Primer That Keeps Color Locked

    Why It Stands Out

    Milk Hydro Grip Eye Primer goes on completely invisible and works almost like double-sided tape for eye shadow, without sinking into fine lines. Pittsburgh makeup artist Patty Bell explains that its thinner consistency makes it easy to blend over the delicate eyelid area. Once applied, it keeps eye makeup in place for up to eight hours. The formula contains hyaluronic acid to add moisture and create a softly blurred finish. It’s also made with blue agave for grip, plus niacinamide and aloe for extra hydration. Bell even suggests using it under the eyes to help reduce concealer creasing, making it a truly multi-use product.

    Great for Aging Eyes: Milk Hydro Grip for Smooth Wear

    Why It’s a Smart Pick

    The NYX Professional Makeup Ultimate Shadow & Liner Primer is one of Bell’s favorite affordable options and delivers performance well beyond its price point. The formula feels light on the skin and spreads quickly, making it easy for anyone to apply. It comes in four natural-looking shades that can double as a subtle cream eyeshadow on their own. These shades help cover visible veins and uneven tone while creating a smooth base. Infused with vitamin E, the primer keeps eyelids moisturized throughout the day and helps prevent dryness or flaking.

    Best Affordable Option: NYX Primer with Pro-Level Results

    Why Artists Trust It

    NARS Pro-Prime Smudge Proof Eyeshadow Base is a behind-the-scenes essential that quietly improves every eye look. The sheer formula disappears on contact, leaving behind a barely-there layer. New York City makeup artist Nick Barose has shared with Allure that he appreciates how it grips shadow without feeling heavy or altering the color applied on top. He notes it has been his go-to for decades because it allows the pigment to truly stand out. The formula includes rice extract and sea whip extract to help hydrate and protect the delicate eye area. It wears more like skincare than traditional makeup and avoids dryness while improving wear time and blending.

    Best for Dry Lids: NARS Base That Stops Flaking

    Why It Works So Well

    If you use a Too Faced palette, the brand’s Shadow Insurance Eye Primer helps those shades perform at their best. The formula features oil-absorbing silica to control shine and keep lids smooth all day. Its silky, colorless texture works across all skin tones and creates a reliable base that helps shadow adhere properly. This leads to brighter color payoff, easier blending, and longer wear. The waterproof formula resists fading and smudging, even in humid or rainy conditions. While the brand claims 24-hour wear, it comfortably holds up through 12-hour days, which is still impressive.

    Best for Oily Lids: Too Faced Primer with Long-Lasting Control

    Why It’s Worth Using

    The Laura Mercier Eye Basics Primer is available in two shades and works especially well for evening out eyelid tone. The light blue shade helps neutralize purple and pink undertones, including redness and visible veins. The peach shade brightens dull-looking skin and creates a more awake appearance. Once applied, eyelids look smooth and balanced, and eye shadow stays in place throughout the day with both powder and cream formulas. The formula also provides skin benefits, featuring aloe to soothe and hydrate, lanolin acid to lock in moisture, and safflower seed oil to nourish the skin

  • Daily Exercise Over 60: Personal Trainer Shares the 1 Move Worth Practicing Every Single Morning

    Daily Exercise Over 60: Personal Trainer Shares the 1 Move Worth Practicing Every Single Morning

    It might come as a surprise how many people struggle to perform calf raises with proper control and stability. True control means lifting into the movement over three to four seconds, holding briefly at the top, then lowering just as slowly. This approach demands far more balance and coordination than most expect. Too often, people focus on rushing through repetitions and miss the opportunity to slow down, stay present, and fully engage the muscles.

    I encourage you to improve your mind-muscle connection by deliberately slowing your calf raises the next time you train—or by adding them to your routine if you don’t already. It’s one exercise I recommend practicing daily, particularly for those over the age of 60, as it supports long-term strength and movement quality.

    Why Calf Raises Matter More as You Age

    Age has nothing to do with capability—I’ve trained incredibly strong and fit individuals well into their seventies. Still, natural changes do occur over time. Muscle mass and bone density gradually decline, joints can stiffen, and overall mobility may decrease. These shifts can raise the risk of losing balance and falling, especially if lower-body strength isn’t maintained.

    From a trainer’s perspective, calf raises remain one of the most effective exercises for preserving ankle mobility and lower-body strength. They play a key role in helping the body stay stable, coordinated, and resilient during everyday movement.

    What Are Calf Raises?

    Calf raises are performed by standing with your feet hip-width apart, either flat on the ground or on the edge of a step. From there, you lift your heels, rising onto the balls of your feet, before slowly lowering your heels back down. For those who find standing balance challenging, seated calf raises are a suitable alternative.

    Performing calf raises on a step creates a greater range of motion, allowing your heels to dip below ground level. This variation gently stretches the ankles and Achilles tendons, helping to improve flexibility and overall movement capacity.

    How to Perform Calf Raises Correctly

    • Stand with your feet hip-width apart
    • Keep a tall posture and engage your core
    • Place your hands by your sides, on your hips, or hold weights if desired
    • Lift onto the balls of your feet slowly, counting three to four seconds
    • Pause at the top and squeeze your calves
    • Lower your heels back down with control
    • If using a step, allow your heels to drop as far as balance allows before rising again
    • Complete 3–4 sets of 6–12 reps

    The Benefits of Calf Raises

    The calf is made up primarily of the gastrocnemius muscles, which activate when you lift off the ground. These muscles mimic the action of pushing forward during walking, running, and jumping, helping you stay upright and balanced while maintaining posture.

    The gastrocnemius also supports the knees, ankles, and feet, playing an important role in fall prevention and lower-body stability. Beneath it lies the soleus muscle, which assists with plantar flexion—pressing down through the toes—and helps prevent the body from tipping forward.

    Calf raises strengthen both muscle groups, supporting joint health and efficient gait. When these muscles are weak, the risk of strains, tears, and compensatory injuries increases. If balance is an issue, holding onto a stable surface allows you to move slowly and with purpose, improving muscle activation and neural coordination. Using a step to stretch the calves also increases time under tension, further enhancing strength and mobility.