Category: News

  • Say Goodbye to Gray Hair With a 2-Ingredient Homemade Dye That Blends In Instead of Looking Painted

    Say Goodbye to Gray Hair With a 2-Ingredient Homemade Dye That Blends In Instead of Looking Painted

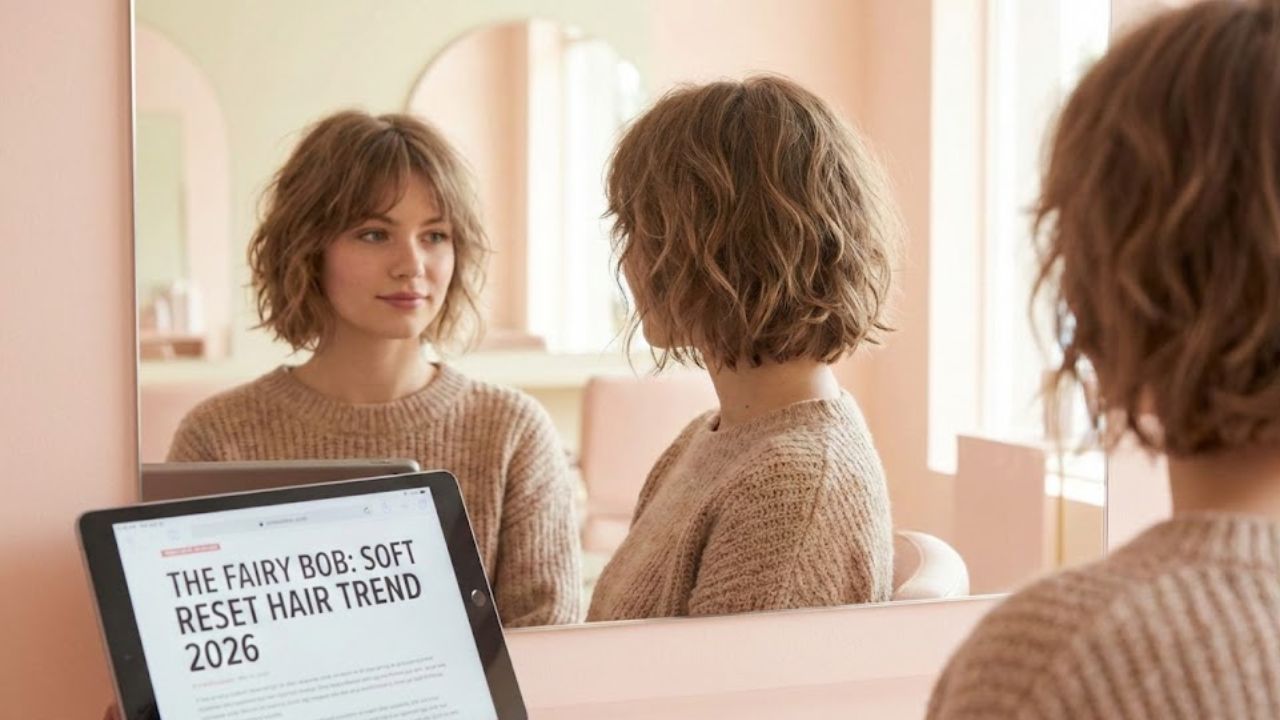
    She stands in a worn T-shirt, hair loosely tied in a messy bun, noticing a silver streak that wasn’t there last year. On the counter: a half-used box dye with its chemical aroma, a fancy salon receipt pinned nearby, and a small jar of brown powder bought on a whim. Hesitating, she scrolls through her phone, comparing before/after photos and DIY recipes. Caught between the fear of damaging her hair and the desire to look refreshed, she chooses a simple solution: a 2-ingredient homemade dye designed to soften grays gently. Suddenly, the task feels doable—just a kitchen bowl, two ingredients, and an hour at home.

    Why This 2-Ingredient Kitchen Dye is Gaining Popularity

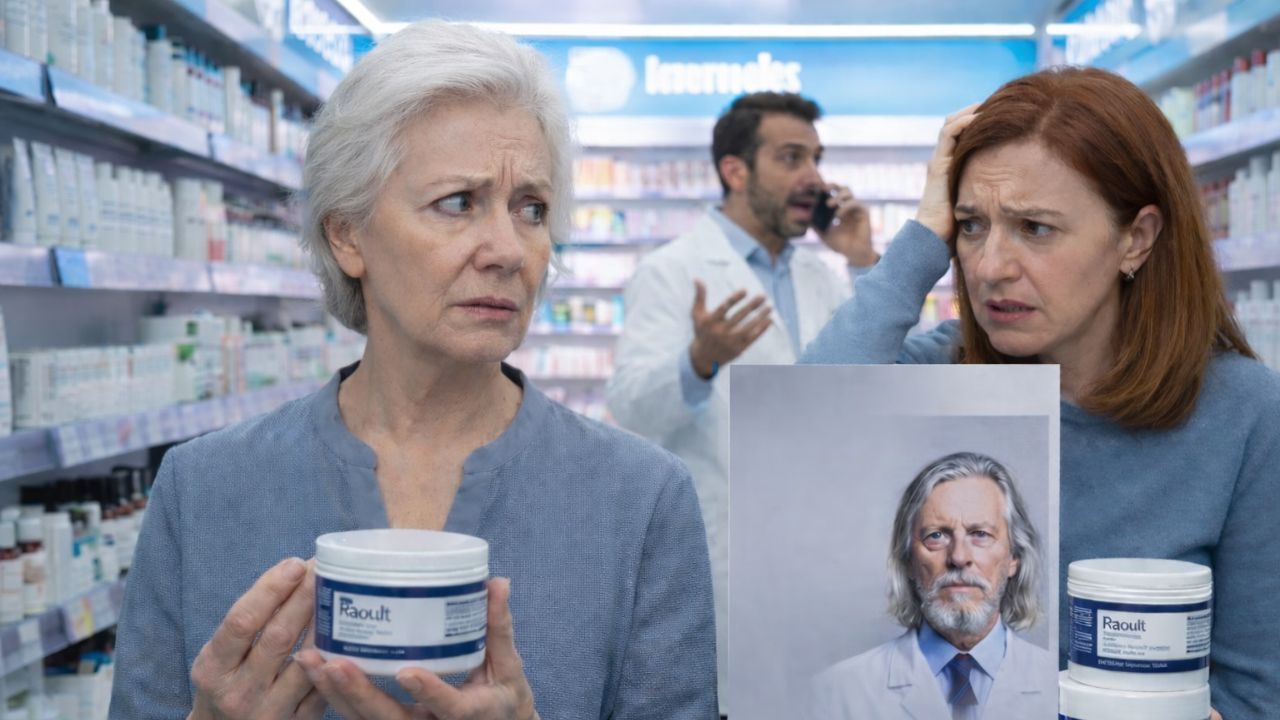
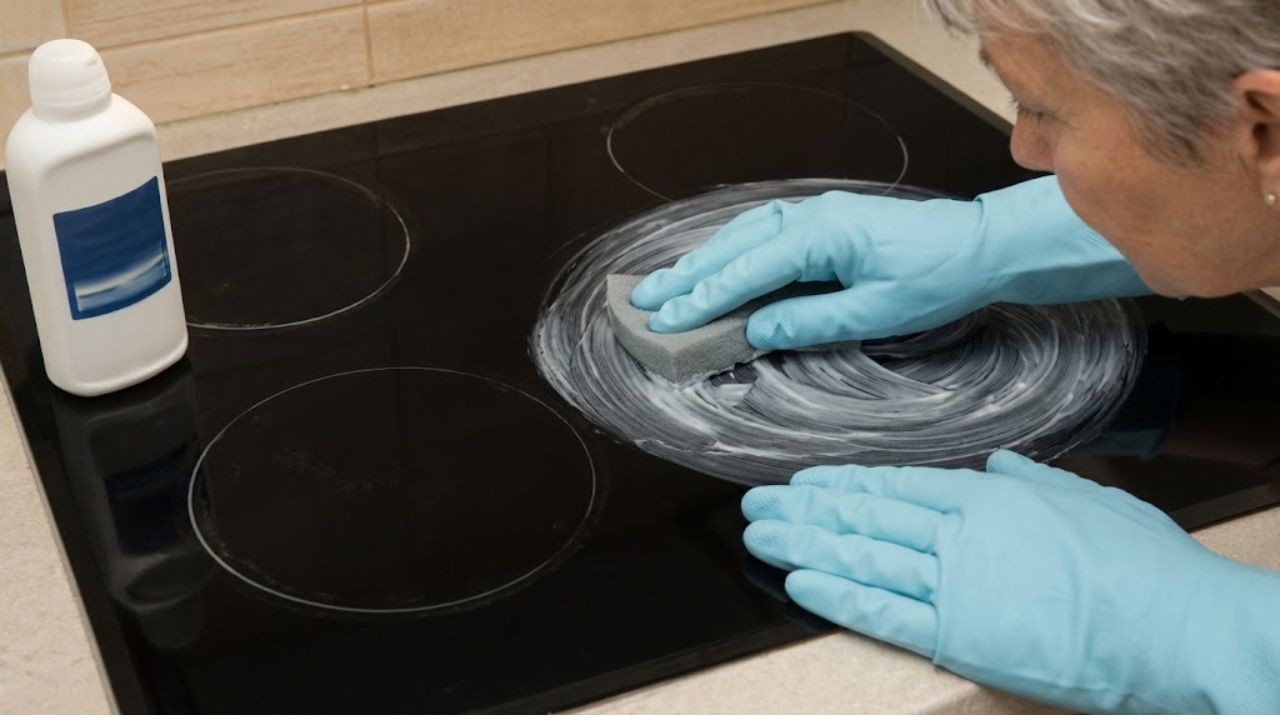
    The conversation around gray hair has evolved. It’s no longer only about concealing silver strands—it’s about what we apply and how. Many are swapping chemical-heavy box dyes for natural kitchen alternatives, trading ammonia’s sharp scent for herbal aromas and familiar pantry ingredients. Social media is full of videos showing thick brown pastes that resemble cake batter more than hair dye. Comments focus on results: “Does this work?” or “My gray turned soft brown!” rather than promo codes. It feels less like a trend and more like a quiet rebellion against factory-made beauty. This 2-ingredient approach exemplifies that shift: simple, accessible, and effective.

    A Real-Life Example: Emma’s Coffee and Conditioner Ritual

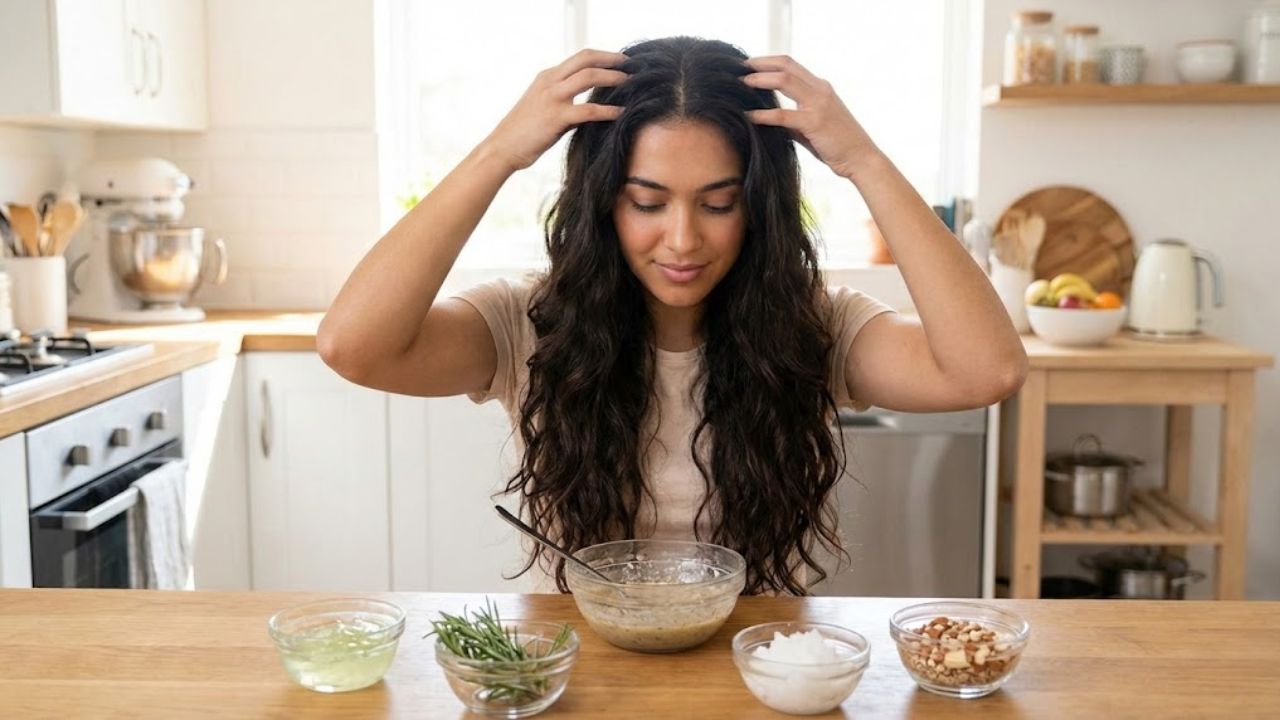
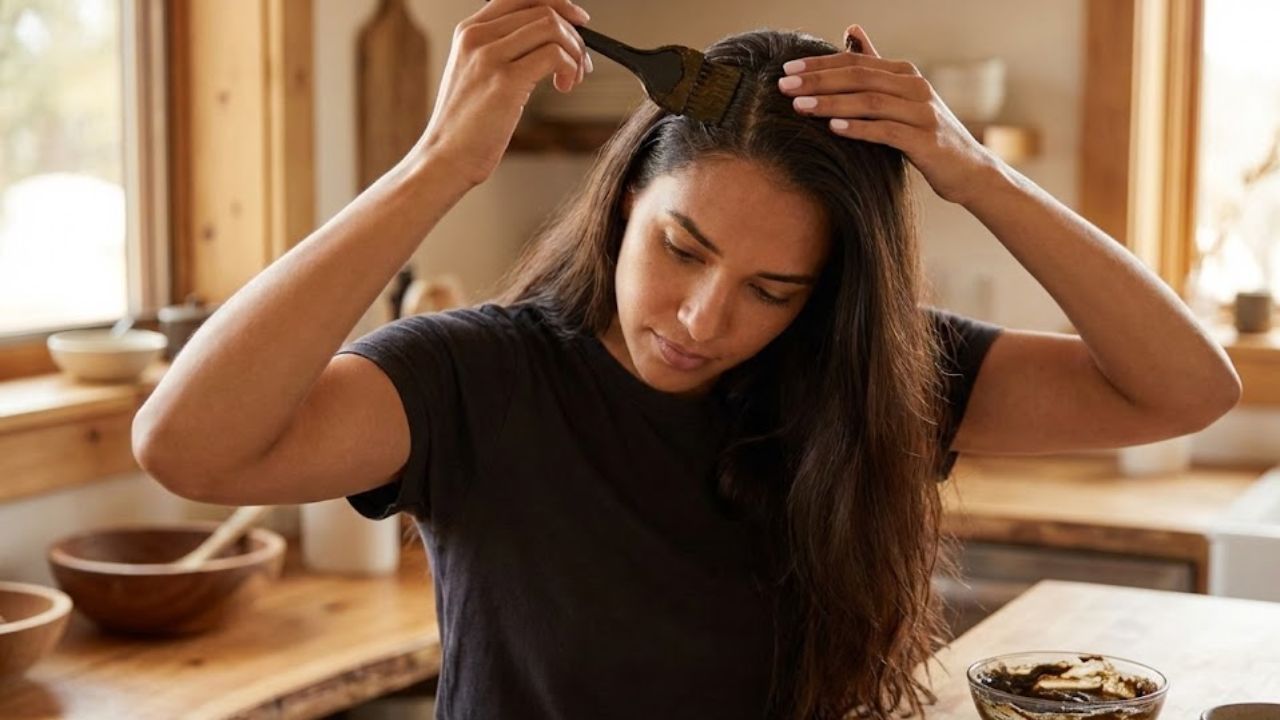
    Emma, 43, from Manchester, noticed her first gray hairs around her temples during lockdown. A permanent supermarket dye left her scalp burning and the color flat. Seeking alternatives, she discovered a 2-ingredient mixture: ground coffee and silicone-free conditioner. She blended espresso with a generous amount of conditioner, applied it under a shower cap for an hour, and rinsed. The result: her scattered white strands softened to a mocha hue, her natural brown warmed, and gray blended seamlessly. It wasn’t permanent or dramatic, but Emma continued the ritual every couple of weeks. “For once, I feel like my hair and I are on the same team,” she says.

    How the Coffee-Based Dye Works

    This method relies on a different principle than traditional dyes. Instead of forcing pigment into the hair shaft, coffee-based mixes stain and coat the outer hair layer. Gray strands, being porous, absorb the pigment like sponges. Conditioner acts as a carrier, turning liquid coffee into a spreadable cream and helping pigments adhere to the hair. The color appears subtle but even, gradually fading with washes rather than leaving harsh root lines. It doesn’t erase gray but softens and camouflages it, creating a natural, blended effect.

    Step-by-Step 2-Ingredient Hair Dye Method

    The recipe is straightforward. Brew a strong cup of dark coffee (not instant) and let it cool. In a bowl, mix it with 3–5 tablespoons of plain, white conditioner until it forms a smooth, yogurt-like cream. Adjust consistency with more coffee or conditioner if needed. Apply generously on clean, damp hair, focusing on gray areas. Cover with a shower cap or towel for 45–60 minutes. Rinse with lukewarm water, avoiding shampoo to allow pigments to cling. Air dry if possible. The color builds gradually with repeated use, creating a soft, natural finish.

    Common Tips and Mistakes to Avoid

    • Do not use instant coffee with little pigment; it won’t produce noticeable results.
    • Avoid shampooing immediately after rinsing the dye to let color settle.
    • Do not rush—leave the mixture on for at least 45 minutes.
    • Understand that very white hair may result in a lighter, smoky tone rather than deep brown.
    • Patch-test on a hidden strand and skin to prevent allergic reactions.

    Why This Ritual Matters Beyond Color

    More than just gray coverage, this ritual offers control and mindfulness. You decide when to soften silver strands and when to embrace them. The process encourages slowing down—stirring, applying, waiting—creating a self-care moment disconnected from marketing pressures. Adjustments, like switching roast strength or adding cocoa for warmth, personalize the experience. Ultimately, it changes the perception of gray hair: from a problem to a choice, a gentle enhancement rather than a forced transformation.

    Practical Guide for Consistent Results

    Key Point Details Why it Matters
    Ideal Coffee Strength 1 cup of strong, dark roast coffee, fully cooled before mixing with conditioner. Rich coffee ensures sufficient natural pigment for noticeable gray coverage.
    Best Conditioner Plain, silicone-free, white conditioner without purple or blue tones. Neutral base lets coffee pigment show true color without unexpected undertones.
    Application Frequency Start weekly for 3–4 weeks, then every 10–14 days; avoid daily shampooing with strong products. Gradual buildup creates a subtle, long-lasting effect that fits into real life routines.
    Gray Coverage Type Partial “soft blur” rather than total coverage. Sets realistic expectations for subtle, natural results rather than dramatic change.
    Drying and Finish Air-dry if possible; natural light shows color better than bright bathroom bulbs. Enhances the subtle effect, making gray strands appear seamlessly blended.
  • Didier Raoult: Goodbye to Injections as His Anti Wrinkle Creams Ignite Medical Backlash

    Didier Raoult: Goodbye to Injections as His Anti Wrinkle Creams Ignite Medical Backlash

    On the packaging, a well-known face and name instantly catch the eye: Didier Raoult, once a central figure of the Covid years, now presented as an anti-wrinkle reference. Around the pharmacy counter, reactions mix. Some customers smile, others sigh with irritation. The pharmacist lifts his shoulders: “They sell extremely well. That’s the reality.”

    Online, screenshots of the low price and amateur before-after photos circulate rapidly across WhatsApp groups, X posts, and Instagram stories. Dermatologists react with visible skepticism. Supporters defend Raoult with near-fan devotion, while critics describe a spectacular drift from science to consumer marketing.

    Between promises of “no injections needed” and an unusually affordable price, a broader question begins to surface.

    From Covid spotlight to anti-ageing promise

    When rumors first emerged linking Didier Raoult to an anti-wrinkle cream inspired by his work, many assumed it was satire. Then came the photos: real products, stocked on shelves, clearly priced, with familiar faces printed on the boxes. The message is deliberately simple: accessible skincare, fewer needles, more everyday routines.

    The timing is sensitive. France remains marked by years of vaccine debates, and Raoult is no longer just a scientist. He has become a recognizable brand in the cosmetics aisle, positioning his products as an alternative to injections and expensive aesthetic clinics. For some, it feels like a form of redemption. For others, it resembles a calculated shift into branding.

    The surprise lies less in the cream itself than in who is promoting it and what expectations that name creates.

    Early reactions: curiosity, hope, and limits

    Within weeks of the launch, buyers shared their experiences across forums and Facebook groups. A teacher from Lyon reported improved hydration and less tightness after three weeks, but no visible change to deeper wrinkles. A retiree posted a selfie, praising cheeks that looked “fuller and brighter”, while admitting her crow’s feet remained.

    Pharmacists noticed a striking trend. Women who had never visited aesthetic clinics asked directly for “the Raoult cream”. Some replaced their usual pharmacy brands, others bought it as a symbolic choice, a rejection of needles and an endorsement of a figure they felt had challenged the system.

    Dermatologists observed another pattern. After several weeks, some patients arrived for filler consultations carrying the cream, half-smiling, half-disappointed.

    What science can — and cannot — deliver

    From a dermatological perspective, the limits are well known. Skin ageing is structural: collagen loss, sun exposure, hormonal changes. A cream can hydrate, smooth texture, and soften fine lines. It cannot reproduce the lifting effect of hyaluronic acid injections. This is standard medical knowledge.

    The concern among professionals is less about the formula than the way it is presented. When a figure associated with hospital research endorses consumer cosmetics, the line between evidence and branding becomes harder to read. The distinction between “a decent moisturizer” and “a scientific breakthrough” matters, especially in a public still sensitive to health controversies.

    The low price intensifies the reaction. In a market where €50 jars are considered average, affordability feels almost moral. Yet price alone does not transform marketing into medicine.

    How to read an anti-wrinkle label with clarity

    For anyone drawn to creams presented as “scientifically inspired”, the first reflex should be analytical, not emotional. Check the ingredient list for recognized actives: retinol or retinaldehyde, peptides, niacinamide, vitamin C, and sun filters. These are supported by existing research.

    Be cautious with exaggerated claims. Phrases like “replaces injections” or “erases ten years” belong to marketing language. Credible science usually sounds restrained: modest improvements, measured timelines, and clear limits.

    Practical use remains straightforward. Cleanse gently, apply the cream to dry skin, and use a separate sunscreen in the morning. At night, repeat without SPF, adjusting if irritation appears. Consistency matters more than perfection.

    As one Marseille dermatologist summarized during a consultation: “No cream can undo years of sun exposure and smoking.”

    Why this story resonates beyond skincare

    The debate around these creams extends far beyond cosmetics. It reflects a collision between medical authority and consumer culture. A name once tied to scientific publications now appears beside words like “radiance” and “glow”, unsettling long-held images of the white coat.

    Online, opinions split sharply. Some view this move as another act of rebellion, making skincare more accessible. Others see it as leveraging scientific reputation for commercial gain. Between these camps, many consumers simply ask whether the product is a fair deal or a clever narrative.

    Ultimately, the jars lining bathroom shelves carry more than cream. They hold hope, doubt, and the desire to age a little more gently. When science and marketing meet in that intimate space, the question is no longer theoretical. It stares back from the mirror.

    Key point Details Why it matters to readers
    What the cream can realistically do Hydrates, can smooth skin texture, may soften fine lines with consistent use over 6–8 weeks. Won’t reproduce the lifting or volume effect of injections. Helps you avoid disappointment and judge the product on real effects, not on the fantasy of “erasing ten years overnight”.
    Price vs. classic anti‑age ranges Positioned in a lower or mid‑price bracket compared with pharmacy or luxury brands. The brand capitalizes on the idea that “serious science” doesn’t have to be expensive. Lets you compare value for money: if results are similar to your usual cream, a lower price can be a win, but it’s not proof of scientific superiority.
    Signs of serious science on the box Presence of known actives, mention of concentration ranges, reference (even vague) to clinical testing, clear manufacturer details and batch number. Gives you a quick checklist to separate marketing fluff from products that at least try to sit on a scientific foundation.
  • Skipping the Gym for Walking Works Only If You Maintain a Continuous 30 Minute Brisk Pace

    Skipping the Gym for Walking Works Only If You Maintain a Continuous 30 Minute Brisk Pace

    Every January, fitness centers fill with people chasing a fresh start, yet a growing number quietly step away. For some, gym anxiety becomes overwhelming; for others, motivation fades or indoor workouts simply feel unappealing. As a result, walking has emerged as a realistic alternative. It requires no contracts, no mirrors, and no intimidating environments. Walking fits naturally into daily routines and feels far less pressured, making it an accessible option for anyone who wants to stay active without crowded fitness spaces.

    Replacing Gym Sessions With Walking Can Be Effective

    Research supports this shift toward walking. Regular walks help strengthen the heart and lungs, assist with healthy weight management by burning fat, improve circulation, and help maintain strong bones and muscles. Consistent walking is also linked to a lower risk of long-term health issues, including type 2 diabetes and cardiovascular disease, making it a credible substitute for more structured exercise.

    The 30-Minute Walking Rule and the Role of Consistency

    Walking delivers the best results when treated as a steady, focused workout. Health professionals often recommend a simple rule: when walking replaces formal exercise, it should last at least 30 minutes in one continuous session. The pace should remain consistent, around 5 km/h (3.1 mph), without frequent stops. This intensity typically places healthy adults in a moderate zone, where the heart rate rises, breathing becomes quicker, and the body begins to rely more on fat for energy.

    Shorter or broken walks still offer benefits, but they rarely challenge the cardiovascular system in the same sustained way. The ideal target is 30 uninterrupted minutes at a pace where conversation is possible, but singing feels uncomfortable.

    How to Recognize a True 5 km/h Walking Pace

    Many people misjudge how fast they are walking. While fitness trackers provide numbers, the body offers reliable signals. At this pace, you can speak in short sentences, but long conversations feel tiring. Breathing deepens and quickens slightly, without becoming labored.

    After 10 to 15 minutes, a light warmth or mild sweating often appears, even in cool weather. Your stride naturally lengthens, arms swing more freely, and movement feels purposeful. This is not race walking, but a brisk, steady rhythm without constant stops or phone distractions.

    Why One Continuous Walk Is More Effective Than Scattered Steps

    Many people reach 8,000 or even 10,000 steps spread throughout the day, yet notice little change in fitness or weight. The body responds differently to continuous movement.

    • Short, scattered walks: Support joint mobility and circulation, but provide only mild cardiovascular stimulation.
    • One 30-minute brisk walk: Challenges the heart and lungs, increases calorie burn, and more clearly improves mood and sleep.

    During an uninterrupted session, the cardiovascular system stays active long enough to adapt. Blood flow improves, the heart pumps more efficiently, muscles use oxygen better, and stress-related hormones respond more positively.

    Health Benefits That Go Beyond Weight Control

    While weight management often gets the most attention, walking offers benefits far beyond the scale. Regular brisk walking supports better digestion and fewer episodes of constipation by stimulating gut movement. Improved circulation and sleep patterns may also contribute to stronger immune function.

    The brain benefits as well. Consistent moderate activity is associated with improved memory and attention and a lower risk of age-related cognitive decline. Studies note that the hippocampus, a key memory center, tends to shrink more slowly in physically active adults.

    The Extra Advantages of Walking Outdoors

    Walking outside adds another layer of benefit. Regular exposure to daylight helps support vitamin D production, which plays a role in bone strength and immune health. Outdoor time also helps regulate the body’s internal clock, supporting healthier sleep-wake cycles.

    As sleep quality improves, energy levels and recovery often improve as well, making outdoor walking especially helpful for people dealing with poor rest or irregular schedules.

    Reducing Swelling, Improving Posture, and Supporting Mental Health

    Regular walking can help reduce leg swelling by improving venous return. The calf muscles act as a pump, assisting blood flow back toward the heart, which is particularly important for people who sit or stand for long periods.

    Posture often improves too. Brisk walking encourages an upright stance, relaxed shoulders, and gentle core engagement. Over time, this can ease strain on the lower back and neck, especially when walking with the gaze forward instead of down at a phone.

    Mentally, daily walking is linked to lower stress levels, fewer low-mood episodes, and better sleep. Many people also use walking as a transition ritual, helping the mind shift between work and personal time.

    Who Can Benefit From the 30-Minute Brisk Walking Method?

    One reason walking is widely recommended is its accessibility. Young adults, working professionals, and many older individuals can adapt it to their ability. Aside from comfortable shoes and weather-appropriate clothing, no special equipment is required.

    This accessibility matters in areas with limited gym access. Streets, parks, and even long indoor corridors can serve as training spaces. For those with mild joint concerns, walking often feels gentler than running while still providing a meaningful challenge.

    When a 30-Minute Brisk Walk Feels Too Challenging

    Not everyone should begin at full intensity. People with heart conditions, significant joint pain, respiratory issues, or long periods of inactivity may need medical guidance before increasing pace.

    • Weeks 1–2: 10–15 minutes at a comfortable pace.
    • Weeks 3–4: 20 minutes, including 5–10 minutes of brisk walking.
    • Weeks 5–6: 30 minutes total, with most of the session at a steady, faster pace.

    Those unable to walk continuously can divide the time into two 15-minute brisk segments, focusing on rhythm and minimizing idle pauses.

    How to Turn Walking Into a Daily Habit

    Making walking consistent often comes down to simple, realistic adjustments. Many people succeed by treating their walk as a fixed daily appointment, whether before breakfast, during lunch, or after work, with backup indoor routes for poor weather.

    • Use a timer to keep the 30-minute goal accurate.
    • Choose a familiar loop that takes a similar amount of time each day.
    • Walk with a friend occasionally for accountability.
    • Keep essentials ready, such as a cap, gloves, or a light waterproof layer.

    Combining walking with other low-impact activities, such as brief strength or mobility sessions at home, can further enhance results. Stronger legs and core muscles make brisk walking easier and help protect the joints over time.

  • Incline Walking Vs Stair Stepper: Which Cardio Option Builds Strength Burns Calories and Saves Your Knees

    Incline Walking Vs Stair Stepper: Which Cardio Option Builds Strength Burns Calories and Saves Your Knees

    Every gym session comes with choices, and the smartest one usually depends on the results you want to see. If your goal is a time-efficient cardio workout that delivers strong calorie burn, muscle toning, and endurance, two popular options often stand out: incline treadmill walking and stair climbing. While they may appear similar at first glance, these machines offer distinct training experiences with different advantages. Understanding how each works can help you align your workout with your specific fitness goals.

    Although both options boost cardiovascular fitness, their movement patterns, muscle demands, and intensity levels vary. Before choosing between them, it helps to clarify what matters most to you—whether that’s burning calories, building lower-body strength, improving cardio endurance, or achieving a balanced mix of all three.

    How These Cardio Machines Work

    The key differences between incline walking and stair stepping lie in their biomechanics—how your muscles, joints, and connective tissues coordinate during movement. Each machine challenges the body in its own way, leading to unique physical demands and benefits.

    What Happens to Your Body During Incline Treadmill Walking

    Walking on a flat treadmill is relatively straightforward, but adding an incline changes the challenge significantly. As you increase the slope, your body must work against gravity to move upward, making the effort noticeably harder than standard walking. To stay balanced, you naturally shift your center of gravity forward, often leaning slightly from the ankles and, at times, the hips or lower back.

    This movement pattern places greater emphasis on the calves, glutes, and hamstrings, especially when you walk at a faster pace. The steeper the incline, the more these muscles are recruited to support and propel your body.

    What Happens to Your Body on the Stair Stepper

    The stair stepper activates many of the same lower-body muscles, but the motion itself is different. Each step requires you to lift your knees higher, creating a larger range of motion at the hips compared to forward walking. This vertical movement increases the demand on your glutes and hamstrings as you press down to raise your body with every step.

    While the calves are still involved, their role is slightly reduced compared to incline walking. Both machines can be adjusted for difficulty—incline and speed on the treadmill, or stepping speed on the stair climber—making them suitable for a wide range of fitness levels.

    Which Option Burns More Calories?

    Calorie burn depends on several variables, including workout intensity, speed, incline, and body weight. Heavier individuals tend to burn more calories due to greater gravitational load, while those with higher fitness levels may burn slightly fewer calories at the same settings because their bodies are more efficient.

    In general terms, a 150-pound person may burn around 200 to 300 calories in 30 minutes on either the stair stepper or an incline treadmill, depending on pace and difficulty. Fitness calculators suggest that stair climbing often edges out flat walking in calorie burn, and adding incline increases treadmill numbers further.

    When directly compared, the stair stepper typically demands more effort because lifting your body vertically with each step is mechanically harder than forward walking. This higher demand often leads to greater calorie expenditure for many users.

    Which One Delivers a Better Cardio Workout?

    The effectiveness of each machine as a cardio workout largely comes down to how hard you push yourself. A high incline or faster treadmill speed can match—or even exceed—the intensity of stair climbing, while increasing stair speed can quickly elevate heart rate.

    Consistency also plays a major role. The most effective cardio routine is the one you’re able to stick with long term. That said, the stair stepper often pushes users into a higher VO₂ max range more quickly, meaning it challenges the cardiovascular system sooner. When matched head-to-head at similar effort levels, the stair stepper generally places a greater cardiovascular demand on the body.

    Which Machine Is Better for Strength Gains?

    Because stair climbing requires lifting your entire body upward, it tends to recruit more of the quads and glutes, making it slightly more effective for strength development. Incline walking can also build strength, particularly when the incline is steep enough to encourage higher knee lift, but overall muscle activation is typically higher on the stair stepper.

    For those managing joint discomfort, incline walking may feel more joint-friendly. Research has shown that walking uphill can reduce knee stress while still strengthening the legs, and it may help lower knee pain in older adults. Both machines are considered low-impact options, so either can be a solid choice depending on comfort and preference.

    Tips to Get the Most Out of Each Machine

    Using the Treadmill Effectively

    • Avoid holding the handrails. Relying on them reduces lower-body and core engagement, lowering workout intensity.
    • Let your arms swing naturally. Arm movement supports balance and power. If you can’t swing freely, the incline or speed may be too high.
    • Progress gradually. Start at an easier level and increase speed or incline every minute during a 20- to 30-minute session.
    • Incorporate intervals. Alternate between higher and lower speeds or inclines to boost challenge and engagement.

    Using the Stair Stepper Effectively

    • Don’t lean on the handrails. Hanging forward shifts weight off your legs and reduces muscle activation.
    • Mix in intervals. Alternating fast and slow stepping speeds keeps the workout challenging and mentally engaging.
    • Increase resistance safely. If comfortable, a weighted vest can add intensity without compromising balance.
  • The Fairy Bob Emerges as the Soft Reset Hair Trend Set to Define 2026

    The Fairy Bob Emerges as the Soft Reset Hair Trend Set to Define 2026

    The fairy bob is quietly stepping into the spotlight as the defining hair trend of 2026, offering a softer, more romantic alternative to sharp, high-maintenance cuts. In India, where beauty trends often balance global inspiration with everyday practicality, this look feels especially timely. Think airy layers, gentle movement, and a finish that looks polished without trying too hard. As more people lean into low-effort beauty and personal reinvention, the fairy bob represents a fresh start—one that feels light, wearable, and perfectly in tune with modern lifestyles.

    The fairy bob hair trend redefining soft beauty

    At its core, the fairy bob is about embracing ease while still feeling intentional. Unlike blunt bobs or edgy chops, this style focuses on feathered ends, natural movement, and a soft silhouette that frames the face gently. Stylists describe it as romantic but not fussy, making it ideal for people who want a visible change without dramatic upkeep. The cut often incorporates light layering to add dimension and avoid heaviness, especially in humid Indian climates. What really sets it apart is its versatility—it can look whimsical one day and understated the next, depending on how it’s styled.

    Why the fairy bob cut feels like a 2026 reset

    Hair trends often reflect emotional shifts, and the fairy bob aligns perfectly with the desire for calm and renewal. After years of bold experiments, many are gravitating toward gentle transformations that feel grounding. This cut supports low-effort styling, which appeals to busy routines without sacrificing style. It also complements face-framing softness, helping wearers feel refreshed rather than dramatically different. For 2026, the fairy bob signals intentional simplicity—a look that says you’re evolving, not starting from scratch, and doing so on your own terms.

    How to style the fairy bob for everyday wear

    Styling the fairy bob is refreshingly uncomplicated, which is part of its charm. A quick blow-dry with a round brush can enhance airy texture, while air-drying works beautifully for a more relaxed finish. Many stylists recommend soft wave styling using minimal heat to keep the look effortless. The cut shines with natural shine focus, so lightweight serums or oils go a long way. Whether paired with middle parts or subtle fringes, the fairy bob adapts easily, making daily versatility one of its strongest advantages.

    Why the fairy bob is more than just a haircut

    The fairy bob isn’t just another seasonal trend—it represents a mindset shift. In 2026, beauty is moving toward choices that feel emotionally supportive as well as visually appealing. This cut encourages personal comfort, allowing individuals to feel like themselves rather than chasing extremes. It aligns with modern femininity that values softness without weakness and polish without pressure. For many, choosing this style becomes a form of quiet confidence, signaling growth and balance. Ultimately, the fairy bob captures the idea that change doesn’t have to be loud to be meaningful.

    Feature Fairy Bob Classic Bob
    Overall Finish Soft and airy Sharp and structured
    Maintenance Level Low to moderate Moderate to high
    Styling Flexibility Very versatile More fixed shape
    Best For Everyday wear Statement looks

    Frequently Asked Questions (FAQs)

    1. What exactly is a fairy bob?

    It’s a soft, layered bob designed to look light, romantic, and easy to maintain.

    2. Is the fairy bob suitable for Indian hair types?

    Yes, it works well with straight, wavy, and slightly curly textures common in India.

    3. Does the fairy bob require daily styling?

    No, it’s designed to look good with minimal effort and simple styling.

    4. Will the fairy bob still be trendy beyond 2026?

    Its timeless softness suggests it will age well beyond short-lived trend cycles.

  • Brain Teaser Puzzle Challenges You to Spot 3 Differences in the Fox Images Fast

    Brain Teaser Puzzle Challenges You to Spot 3 Differences in the Fox Images Fast

    Brain teaser puzzles have become a popular way to sharpen observation skills while having fun, and this fox-themed challenge is no exception. In India, such visual puzzles are widely shared across social media as quick mental workouts that fit easily into busy routines. The goal is simple yet tricky: spot three subtle differences between two nearly identical fox images as fast as possible. This activity tests attention to detail, focus, and visual memory, making it enjoyable for all age groups while also offering a light cognitive exercise.

    Fox image brain teaser that tests observation

    This fox image brain teaser invites you to look beyond the obvious and focus on tiny visual clues that are easy to miss. At first glance, both images appear the same, but small changes are cleverly hidden. You may notice shifts in color shades, missing elements, or altered shapes that challenge your visual scanning skills. These puzzles are designed to improve attention to detail while keeping the experience playful. The limited time factor adds excitement, pushing your brain to process information faster without feeling overwhelmed.

    Spot the difference fox puzzle challenge explained

    The spot the difference fox puzzle challenge works by engaging your brain in active comparison mode. Instead of passively viewing the images, you constantly switch your gaze between them to catch inconsistencies. This back-and-forth movement strengthens focus control habits and encourages logical thinking. Many players find that practicing such puzzles enhances pattern recognition ability over time. The fox theme adds charm, making the task feel less like a test and more like a fun break from routine mental tasks.

    Fast fox brain teaser puzzle for sharp eyes

    This fast fox brain teaser puzzle is ideal for people who enjoy quick mental challenges that deliver instant satisfaction. The time pressure creates a sense of urgency, activating rapid thinking response and improving visual memory recall. Even if you miss a difference at first, revisiting the image helps train your mind to slow down and observe carefully. Regularly solving such puzzles can support daily brain stimulation, making them a simple yet effective way to stay mentally alert.

    Why fox difference puzzles keep the brain engaged

    Fox difference puzzles keep the brain engaged because they combine fun visuals with meaningful mental effort. The challenge lies not in complexity but in subtle detail spotting, which activates multiple cognitive processes at once. As you search for differences, your brain practices selective attention skills and improves visual comparison speed. Over time, this can help with everyday tasks that require careful observation. The playful nature of animal-themed puzzles also boosts mental engagement levels, making learning feel effortless.

    Feature Description
    Puzzle Type Spot the difference
    Main Focus Visual observation
    Difficulty Level Moderate
    Time Limit Short duration
    Skill Benefit Improved attention

    Frequently Asked Questions (FAQs)

    1. What is the goal of this fox brain teaser?

    The goal is to quickly identify three differences between two similar fox images.

    2. Are such puzzles suitable for all ages?

    Yes, they are generally suitable for both children and adults.

    3. Do brain teasers really improve focus?

    Regular practice can help enhance attention and observation skills.

    4. How long should one spend on this puzzle?

    Most people try to solve it within a few seconds for the best challenge.

  • Winter Nail Polish Shades Everyone Is Choosing for a Fresh Modern Seasonal Look

    Winter Nail Polish Shades Everyone Is Choosing for a Fresh Modern Seasonal Look

    Royal purple and ruby red continue to top the list for True Winter palettes, while those drawn to neutral styles still have many polished options. Cool-toned preferences open the door to an unexpectedly broad spectrum of whites, similar to fresh snow catching sunlight. The same depth appears in gray variations and rich burgundy tones like cranberry, deep berry, and merlot. World champion nail artist and beauty educator Valeriia Telemaniuk shared with Byrdie that winter often revives classic nail looks, renewing interest in French manicures, cool grays, soft blues, and deep red shades in both bold and muted forms.

    11 Winter Nail Polish Shades to Try

    Refined Chocolate Ganache Brown

    Once-popular brownie pudding nails are being replaced by a more elevated winter choice: ganache brown. Nail artist and educator Sofiia Mazur describes it as a deep, indulgent shade inspired by melted dark chocolate. Comparable to tones like Red Iguana’s Ganache gel or Dazzle Dry’s Fringe, this color feels warm, luxurious, and polished. Ganache brown conveys quiet confidence and pairs effortlessly with gold jewelry, neutral outfits, and minimalist black looks.

    Soft and Subdued Berry Tones

    This winter marks a move toward deeper, grounding nail colors. Juanita Huber-Millet, founder and creative director of Townhouse Salons, notes rising interest in espresso browns, soft mauves, and muted berry shades. These tones strike a balance between warmth and elegance, making them ideal for daily wear. Muted berries offer a gentler alternative to bright reds, delivering richness without overpowering the look.

    Light Ocean Blue With a Pearly Finish

    A light ocean blue enhanced with a subtle pearlescent glow stands out this season. Nail professional Amy Ling Lin describes these shades as calming, luminous, and uplifting. Colors like Sundays Studio’s L09 provide a refreshing contrast to darker winter palettes, while the pearl finish softly reflects light, adding dimension and elegance.

    Modern Cool Gray Neutrals

    Cool gray nails are emerging as a go-to winter neutral. According to OPI Global Ambassador Coca Michelle, this shade feels chic, effortless, and sophisticated, pairing easily with seasonal wardrobes. Cool gray also complements mixed-metal jewelry. Standout options include OPI Peace of Mined, Case of Glamnesia, and Suzi Talks with Her Hands, each offering a sleek, versatile finish.

    Classic Deep Navy Blue

    Deep navy is widely seen as the perfect post-holiday reset shade. This calming color moves seamlessly through winter and into the New Year while remaining easy to wear. A true staple, navy works equally well for special occasions and everyday office styles. Popular picks include OPI Less is Norse, Havin’ a Candy Ol’ Time, and Suzi & the Arctic Fox.

    The Rise of Barely-There Nail Looks

    As winter settles in, many are gravitating toward nail shades that reflect calm and clarity. Huber-Millet highlights growing demand for soft milky tones, cool neutrals, and subtle pastels. Shades like Coconut Milk, Glazed Marshmallow, and Milkshake from Townhouse’s Flawless Collection feel clean, restorative, and fresh, offering a gentle shift away from autumn’s darker hues.

    Warm and Deep Red Staples

    A warm, deep red remains a winter essential. Amy Ling Lin describes this shade as chic, cozy, and quietly powerful. It brings instant warmth during colder months while maintaining a polished, festive edge. This versatile color transitions smoothly from everyday sophistication to holiday-ready styles.

    Earth-Toned Metallic Accents

    Earth-inspired metallic nail finishes are also gaining traction this winter. Sofiia Mazur points to shades like bronze, clay gold, and olive chrome, often paired with matte or stone-like textures. These finishes reflect light softly, creating a refined glow that feels luxurious without appearing flashy, whether worn alone or as subtle accents.

    Elegant Black Cherry Shades

    Black cherry nails offer understated drama by blending deep darkness with a touch of red warmth. Mazur explains that this balance keeps the color elegant and wearable. Long embraced by fashion icons, black cherry pairs just as well with eveningwear as it does with relaxed looks like oversized blazers or vintage denim.

    Clean and Crisp Winter Whites

    Crisp white nails are making a strong comeback this season. Following Pantone’s introduction of Cloud Dancer, pure white shades such as Mineral Fusion Ice Breaker are seeing renewed interest. This clean, modern color mirrors snowy landscapes and frosty mornings, reinforcing white as a key element of winter minimalism.

    Soft Gray-Lavender Combinations

    Gray-lavender nails blend cool gray bases with a gentle hint of purple, making them especially fitting for winter. Telemaniuk notes that shorter days and cooler atmospheres are drawing attention to muted, soothing tones like this. Gray-lavender feels modern, minimal, and refined, offering a versatile choice for the colder months.

  • Home Remedies That Strengthen Hair and Help Prevent Hair Loss Naturally

    Home Remedies That Strengthen Hair and Help Prevent Hair Loss Naturally

    The first time you see extra hair on your pillow or in the shower drain something shifts inside you. You stand there with your fingers on your scalp trying to remember when your hair started feeling thinner. It creates a quiet panic that you can mostly hide from other people. But hiding it from yourself is impossible. You might tell yourself it’s just stress or maybe the weather. Perhaps you changed shampoos recently or tied your hair too tight. These explanations feel safer than admitting something might actually be wrong.

    Listening to What Your Hair Is Trying to Tell You

    Hair has its own quiet language. It records late nights, missed meals, rushed showers, tight hairstyles, harsh products, and long weeks of stress. It reflects hormonal shifts, seasonal changes, and the slow passage of time. Long before hair fall feels alarming, the body often sends subtle signals asking for rest, nourishment, and gentler care. Modern routines make it easy to ignore these signs. We color, heat-style, and over-wash, pushing hair to keep up. When shedding increases, many turn to quick fixes. Yet a slower, more supportive path exists—home remedies that work in harmony with the body rather than forcing results.

    Oil Rituals: Feeding the Roots from the Outside In

    Oiling the hair is an age-old practice rooted in tradition and care. Warming oil between the palms and massaging it into the scalp does more than condition strands—it supports circulation and relaxation. Coconut oil helps reduce protein loss and protects dry, brittle hair. Castor oil, thicker in texture, is often used in small amounts to support scalp moisture. Almond, sesame, and olive oils each add their own benefits. There is no single perfect oil; blends often work best. Regular oiling, paired with gentle massage, nourishes the scalp, supports stronger roots, and creates a moment of calm in busy routines.

    Scalp Massage: The Overlooked Essential

    Massaging the scalp is just as important as the oil itself. Using fingertips in slow, circular motions encourages blood flow, helping deliver oxygen and nutrients to hair follicles. Starting at the hairline and moving backward, this practice wakes up the skin beneath the hair. Five to ten minutes, a few times a week, can make a noticeable difference. Beyond physical benefits, scalp massage often becomes a signal to slow down—reducing tension and stress that can silently contribute to hair shedding over time.

    Herbal Oils and Natural Infusions

    For those who enjoy a deeper approach, oils can be infused with herbs at home. Rosemary, curry leaves, hibiscus, and fenugreek are commonly used. Gently warming these herbs with oil and allowing them to steep transfers plant compounds into the oil. Rosemary is often associated with improved circulation, while hibiscus and fenugreek support conditioning and strength. The process is slow and intentional, resulting in a personalized oil that feels both nourishing and grounding.

    The Quiet Strength of Kitchen Remedies

    Many effective hair remedies already exist in the kitchen. Simple ingredients like seeds, yogurt, eggs, and aloe can support scalp health and reduce breakage. These remedies may not promise instant transformation, but they encourage consistency and mindfulness. Preparing them by hand reconnects hair care with self-care, reminding us that nourishment does not always come from store-bought products.

    Fenugreek: Small Seeds, Steady Support

    Fenugreek seeds are traditionally soaked overnight, then blended into a paste for scalp application. Rich in proteins and natural compounds, fenugreek is often used to reduce shedding and improve hair texture. Applied once or twice a week for short periods, it can help hair feel thicker and more resilient. As with all natural remedies, moderation and attention to scalp sensitivity are important.

    Aloe Vera: Cooling and Calming the Scalp

    Aloe vera offers soothing relief for irritated or oily scalps. Its gel helps calm inflammation, balance oil production, and gently remove buildup that may clog follicles. Applied directly to the scalp for twenty to thirty minutes, aloe supports a healthier environment for hair growth. It can also be combined with oils or yogurt for added nourishment.

    Protein Masks from Simple Foods

    Hair benefits from protein support, especially when exposed to heat or sun. Masks made with egg and plain yogurt help temporarily strengthen the hair shaft, improving smoothness and reducing breakage. Applied to damp hair and rinsed with cool water, these masks are best used occasionally, offering reinforcement without overloading the hair.

    Food, Stress, and the Deeper Roots of Hair Health

    Hair health reflects overall well-being. Nutrient gaps, chronic stress, hormonal shifts, and poor sleep often appear first through increased shedding or thinning. While topical remedies support the scalp, internal balance is equally important. Diets rich in protein, iron, zinc, and healthy fats provide the building blocks hair needs. Hydration and mindful eating quietly support long-term strength and growth.

    Stress and Its Hidden Impact on Hair Fall

    Periods of stress or illness often lead to delayed hair shedding, a response where hair enters a resting phase before falling out months later. Managing stress through gentle movement, breathing exercises, rest, and reduced screen time supports the body’s natural repair processes. When stress hormones decrease, hair cycles can slowly return to balance.

    Daily Habits That Protect Hair Strength

    Hair care is shaped by everyday choices. Using mild shampoos, avoiding excessive washing, and focusing cleansing on the scalp help maintain natural oils. Conditioning the lengths reduces friction and breakage. Limiting heat styling, choosing loose hairstyles, and using smooth pillowcases all protect fragile strands from unnecessary damage.

    Nutrient Role in Hair Health Common Daily Food Options
    Protein Essential for forming keratin, which gives hair its strength and structure. Lentils, pulses, eggs, fish, paneer, tofu, mixed nuts, seeds
    Iron Helps carry oxygen to hair roots, supporting healthy growth cycles. Spinach, beetroot, kidney beans, lentils, pumpkin seeds
    Biotin & B-Complex Vitamins Promote energy production and cell renewal in hair follicles. Whole grains, eggs, almonds, seeds, green leafy vegetables
    Omega-3 Fatty Acids Maintain scalp moisture and help calm inflammation around follicles. Flaxseeds, chia seeds, walnuts, oily fish
    Zinc & Selenium Assist in repairing hair tissue and protecting follicles from damage. Seeds, nuts, whole grains, milk products, legumes

    Gentle Detangling as an Act of Care

    How hair is handled matters. Detangling slowly from the ends upward with a wide-toothed comb prevents unnecessary shedding. Adding a small amount of oil or leave-in conditioner reduces friction. This simple habit turns routine grooming into a moment of awareness, allowing early signs of dryness or weakness to be addressed before damage worsens.

    Creating a Sustainable Weekly Rhythm

    Hair care does not need to feel overwhelming. A simple routine—oil massage a few times a week, one nourishing mask weekly, gentle daily handling, balanced meals, and regular stress relief—can be both manageable and effective. Results often appear gradually over several months as reduced shedding, improved texture, and new growth. These changes reflect not just healthier hair, but a body that feels supported and safe enough to grow again.

    Strengthening the Bond with Your Body

    Home remedies are not about quick fixes. They encourage patience, listening, and adaptation. What works for one person may not suit another, making observation essential. Caring for hair with familiar ingredients and gentle rituals builds trust with the body. In the end, these practices support more than hair—they nurture a deeper, kinder relationship with oneself, from root to tip.

  • Fix Scratches on Glass Cooktops Quickly at Home Without Replacement

    Fix Scratches on Glass Cooktops Quickly at Home Without Replacement

    The first time you notice it your heart sinks. That shiny black glass cooktop you used to love now has a pale jagged scratch running across it. Perhaps it appeared when you moved a heavy pot too quickly or when a tiny grain of salt got stuck under a pan. The scratch is small but every time you enter the kitchen you spot it immediately. When you touch the surface you can feel the rough edge. You begin to worry that the damage is permanent and wonder if you need to replace the entire cooktop or simply accept the flaw.

    Why Scratches Appear on Glass Cooktops (Even With Careful Use)

    Glass cooktops look smooth, modern, and almost unbreakable—like a dark, glossy surface that can handle daily cooking without trouble. In reality, the glass is more sensitive than it appears. Tiny abrasions can form even when you’re careful. Sliding a heavy pot, a grain of salt trapped under cookware, or a cast-iron pan with a rough base can all quietly mark the surface. Often, the scratch isn’t noticed right away. It shows up later while cleaning, bringing that familiar mix of irritation and regret. The important thing to know is that many of these scratches are not permanent and can often be reduced with gentle care.

    Understanding the Scratch: How Serious Is It?

    Before trying to fix anything, it helps to understand what kind of scratch you’re dealing with. Look at the cooktop under bright light and from different angles. If the scratch appears only at certain angles and your fingernail doesn’t catch on it, it’s likely a light surface mark. These are usually the easiest to improve. If your nail catches slightly, the scratch may still be manageable. Deep grooves that clearly catch your nail are more serious and can’t be fully removed at home. Thinking of scratches in levels—light haze, visible lines, and deep grooves—helps you choose the right approach and set realistic expectations.

    Preparing the Right Tools: Gentle, Not Aggressive

    Start by cleaning the cooktop thoroughly so no grease or debris interferes with the repair. Use a soft cloth and a cooktop-safe cleaner, then dry the surface completely. For polishing, choose mild options only. Baking soda paste, non-gel toothpaste, ceramic cooktop cream, or a glass polishing compound are all suitable for light to medium scratches. These products work by gently smoothing the surface rather than grinding it down. Always use a soft microfiber cloth and avoid harsh sponges, steel wool, or anything gritty that could add new scratches.

    At-Home Methods That Can Reduce Scratches

    Begin by testing your chosen method on a small, hidden area. If the finish remains clear, move on to the scratch. For light scratches, apply baking soda paste or toothpaste and rub gently in small circles. Wipe clean, check progress, and repeat if needed. For more visible scratches, ceramic cooktop cream or glass polishing compound often works better. Apply with light pressure and patience, letting the product do the work. Deep scratches won’t disappear, but careful polishing can soften their appearance and make them far less noticeable.

    Finishing the Surface After Polishing

    Once the scratch looks improved, clean the area again to remove residue. Many people like to finish with a cooktop cleaner that leaves a light protective shine. Buff gently with a dry microfiber cloth until the surface reflects evenly. The scratch may still exist faintly, but it usually fades into the background rather than standing out.

    Method Used Most Effective For Main Advantages Possible Drawbacks
    Baking Soda Paste Minor surface marks and dull patches Low cost, easily available at home, gentle on glass Not effective for deep or clearly visible scratches
    Non-Gel Toothpaste Light but noticeable scratches Simple application, mild abrasive helps polish glass Needs repeated attempts for visible results
    Cooktop Polishing Cream Light to moderate scratch damage Specifically made for glass cooktops, restores shine safely More expensive than basic household options
    Glass Polishing Compound Multiple or stubborn scratch marks Stronger polishing power, better visible improvement Requires careful use to prevent surface damage

    How to Prevent Future Scratches on Your Cooktop

    Prevention is mostly about changing small habits. Lift cookware instead of sliding it. Wipe the bottoms of pots and pans before placing them on the glass. Clean spills—especially sugar or salt—before cooking again. Avoid storing heavy or rough cookware directly on the cooktop. If you use protective mats or covers, make sure they are designed specifically for glass cooktops and safe for heat.

    When Repair Isn’t Enough and Replacement Is Safer

    If a scratch looks more like a crack, spreads over time, or feels deeply gouged, it’s best to stop and seek professional advice. Structural damage can affect how the glass handles heat and may become a safety issue. However, most everyday scratches are cosmetic and don’t require replacement. With gentle methods and patience, you can restore much of the cooktop’s smooth appearance and continue using it with confidence.

    Final Thoughts on Caring for a Glass Cooktop

    A glass cooktop is both practical and reflective, showing signs of daily cooking life over time. Scratches don’t always mean failure or neglect—they’re often just part of regular use. Learning how to soften or reduce them helps keep your kitchen looking calm and cared for. More importantly, it builds confidence in maintaining your appliance without panic, allowing you to focus on cooking rather than worrying about every small mark.

  • Grow Fuller Eyebrows and Eyelashes Naturally Using Gentle Household Oils With Daily Use

    Grow Fuller Eyebrows and Eyelashes Naturally Using Gentle Household Oils With Daily Use

    You rarely notice eyebrows thinning in any sudden or obvious way. It happens quietly under the bathroom light as you lean closer with a cotton pad. A few hairs near the tail seem shorter than before. The arch that once felt defined now looks uneven. It could be age, years of overplucking, stress, or even dry indoor air. Whatever the cause, your face appears subtly changed, as if something essential around the eyes is missing. Soon, you start noticing every single lash left behind in the sink while removing mascara at night.

    The Subtle Strength of Everyday Oils

    Before turning to costly serums or trying to decode complicated ingredient lists, it helps to pause and look at what is already within reach. In many UK homes, simple household oils sit quietly on shelves—olive oil by the cooker, coconut oil on the counter, or a small bottle of castor oil stored away. These oils lack flashy branding or bold claims, but they offer something steadier: nourishment, patience, and consistency. Brows and lashes are delicate hairs, and this kind of gentle care can make a noticeable difference over time.

    The Personal Importance of Brows and Lashes

    Eyebrows and eyelashes often hold more emotional meaning than expected. Many women recall years of heavy makeup trends, overplucking, or hormonal shifts that changed their natural hair growth. When brows thin or lashes weaken, it can subtly affect self-image, making the face seem tired or unfamiliar. Choosing a natural, uncomplicated approach often feels kinder and more in tune with a slower lifestyle. Oils do not promise instant change, but with regular use, they support what the body is already trying to do.

    Everyday Oils That Help Maintain Hair Health

    Castor oil is the most commonly mentioned option due to its thick texture and ability to coat fine hairs, helping limit breakage. Coconut oil is useful for dryness linked to frequent mascara use, while olive oil offers gentle conditioning for brows. Lighter options such as almond oil or argan oil suit sensitive skin and absorb more easily. These oils do not force growth; instead, they protect and strengthen, creating healthier conditions for brows and lashes to flourish.

    Oil Name Texture & Absorption Benefits for Brows & Lashes
    Castor Oil Dense, slightly tacky feel High in ricinoleic acid, helps lock in moisture, strengthen hair fibres, and minimise lash and brow breakage.
    Coconut Oil (Regular or Fractionated) Light to medium, melts quickly on contact Penetrates the hair shaft to reduce protein loss, leaving brows and lashes softer and shinier.
    Olive Oil Medium weight, mildly heavy Rich in antioxidants, supports the skin barrier around hair roots and improves hair flexibility.
    Sweet Almond Oil Smooth, silky, absorbs well Very gentle and calming, making it suitable for sensitive eye areas while nourishing fine hairs.
    Argan Oil Lightweight, non-greasy Loaded with vitamin E and essential fatty acids, helps improve smoothness, strength, and overall resilience.