Author: admin

  • Restore Grey Hair Naturally With This Effective Colour-Reviving Alternative

    Restore Grey Hair Naturally With This Effective Colour-Reviving Alternative

    Grey hair is a natural part of ageing, but many people in India are now looking for gentler ways to restore their original colour without relying on harsh chemical dyes. Natural colour-reviving alternatives focus on nourishing the scalp, supporting melanin production, and improving overall hair health rather than masking grey strands overnight. These methods appeal to those who want gradual, believable results while keeping their hair strong and manageable. With consistent care and the right ingredients, it’s possible to enhance natural tones and feel more confident about your hair’s appearance.

    Restore grey hair naturally using colour-reviving methods

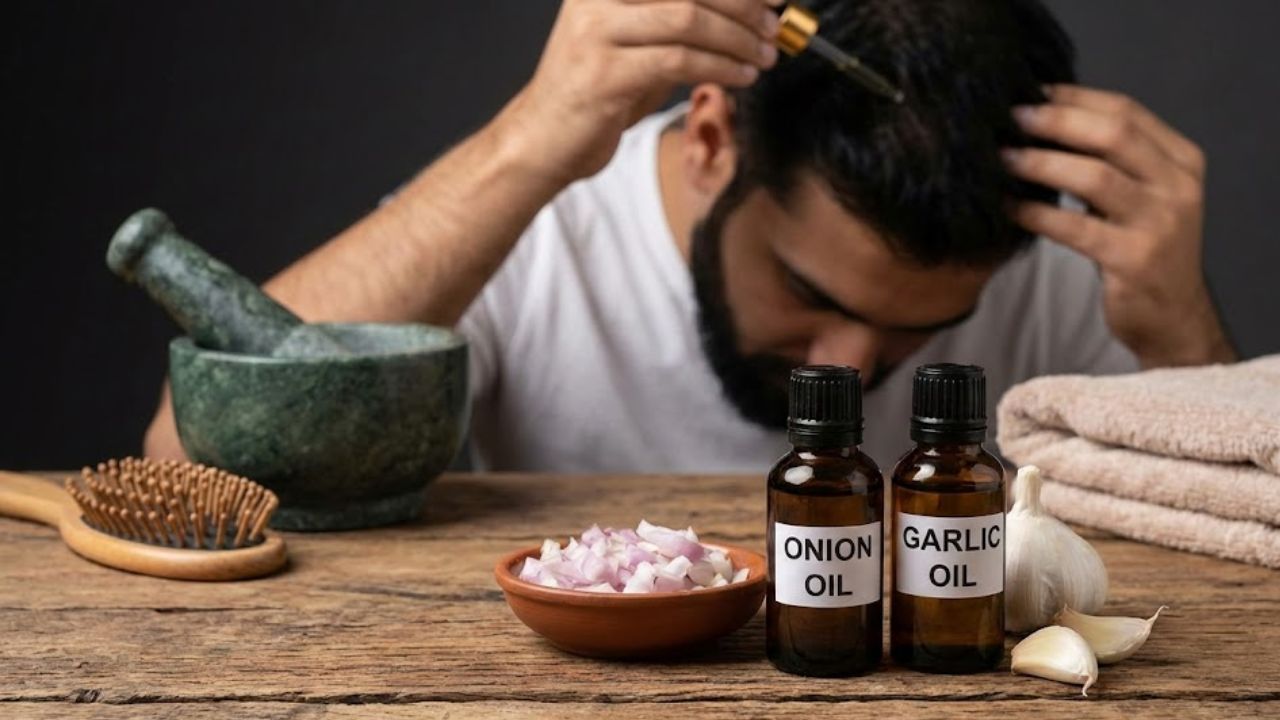
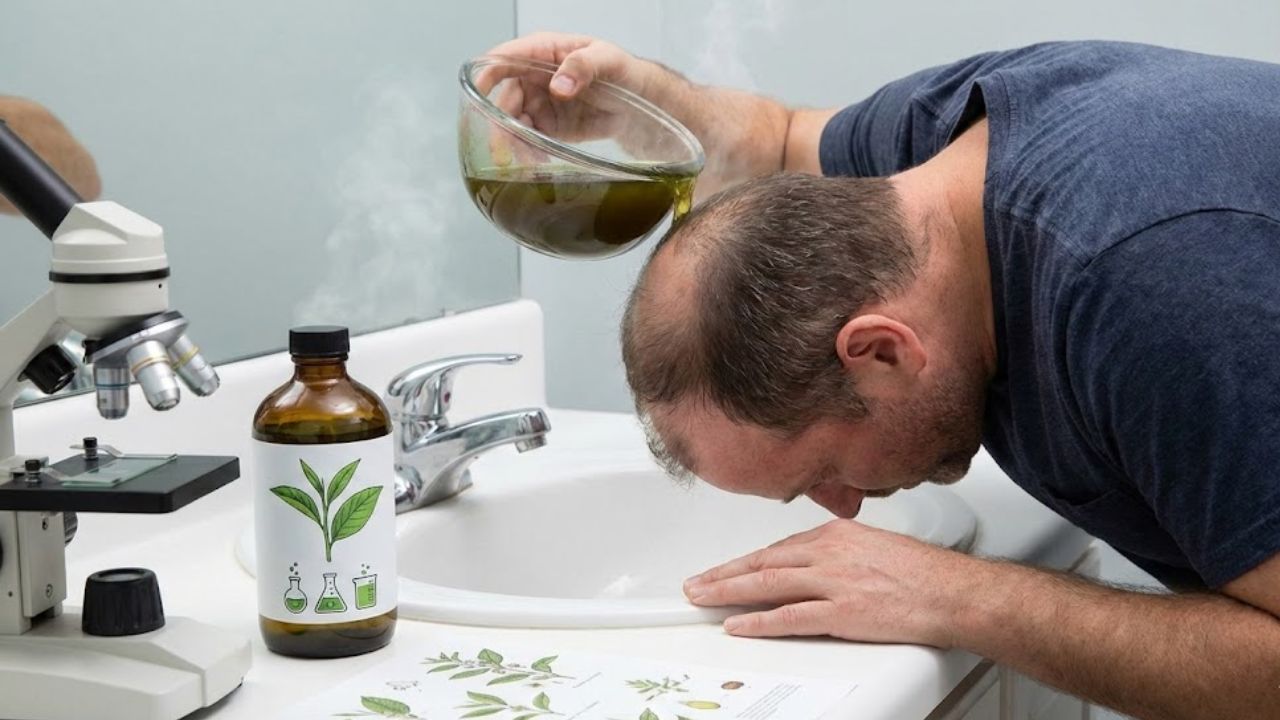
    Natural colour-reviving methods work by supporting the hair’s internal pigment process instead of coating strands with artificial colour. Ingredients like plant extracts, oils, and minerals help improve scalp circulation and follicle health, which may encourage better pigment retention over time. Many people prefer this route because it avoids irritation and dryness linked to dyes. When used regularly, these approaches promote natural pigment support, improve scalp nourishment, and encourage healthy hair growth. While results are gradual, users often notice improved texture, shine, and depth of colour, making grey strands blend more naturally with existing hair.

    Colour-reviving alternatives that reduce grey hair appearance

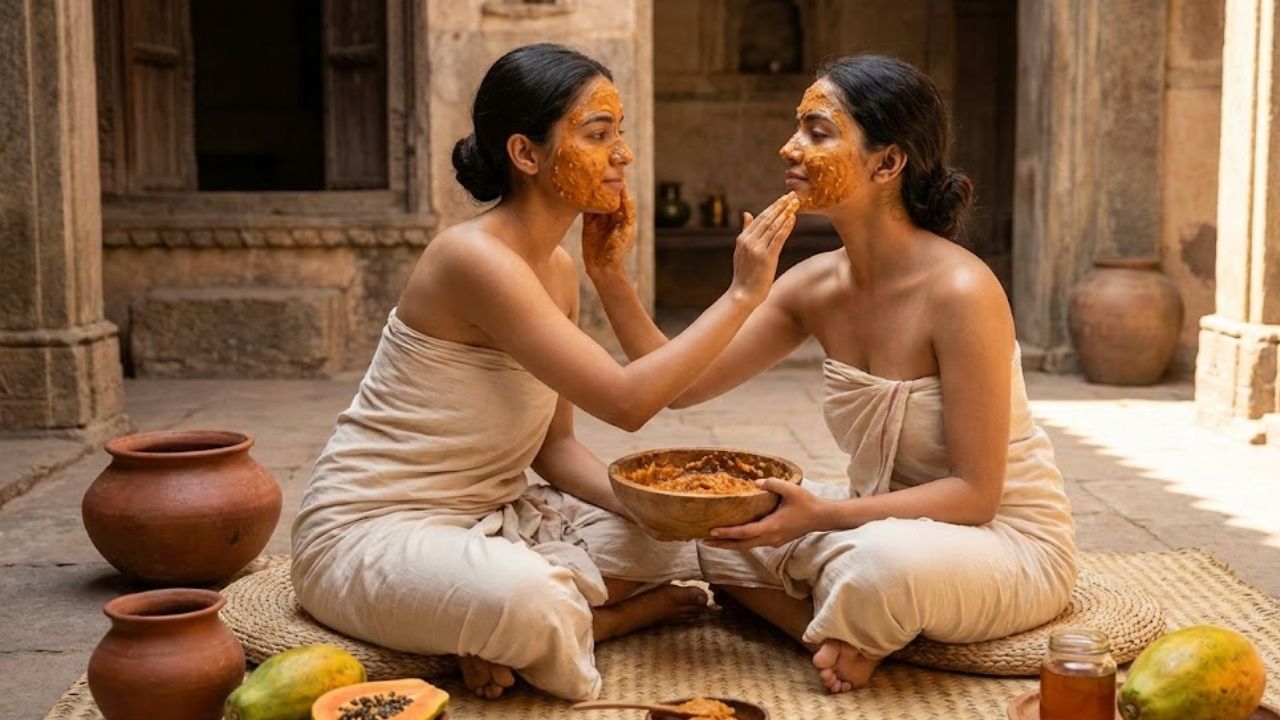
    Unlike instant dyes, colour-reviving alternatives focus on consistency and patience. Herbal rinses, oil infusions, and nutrient-rich treatments slowly deepen hair tone while strengthening strands from within. These methods are popular among people who want subtle change without obvious regrowth lines. Over time, hair may appear darker and fuller, creating a softer transition between grey and natural shades. Benefits often include gradual tone revival, chemical-free care, and improved hair strength. This approach suits those who value long-term hair health as much as appearance.

    Why natural grey hair restoration suits long-term hair care

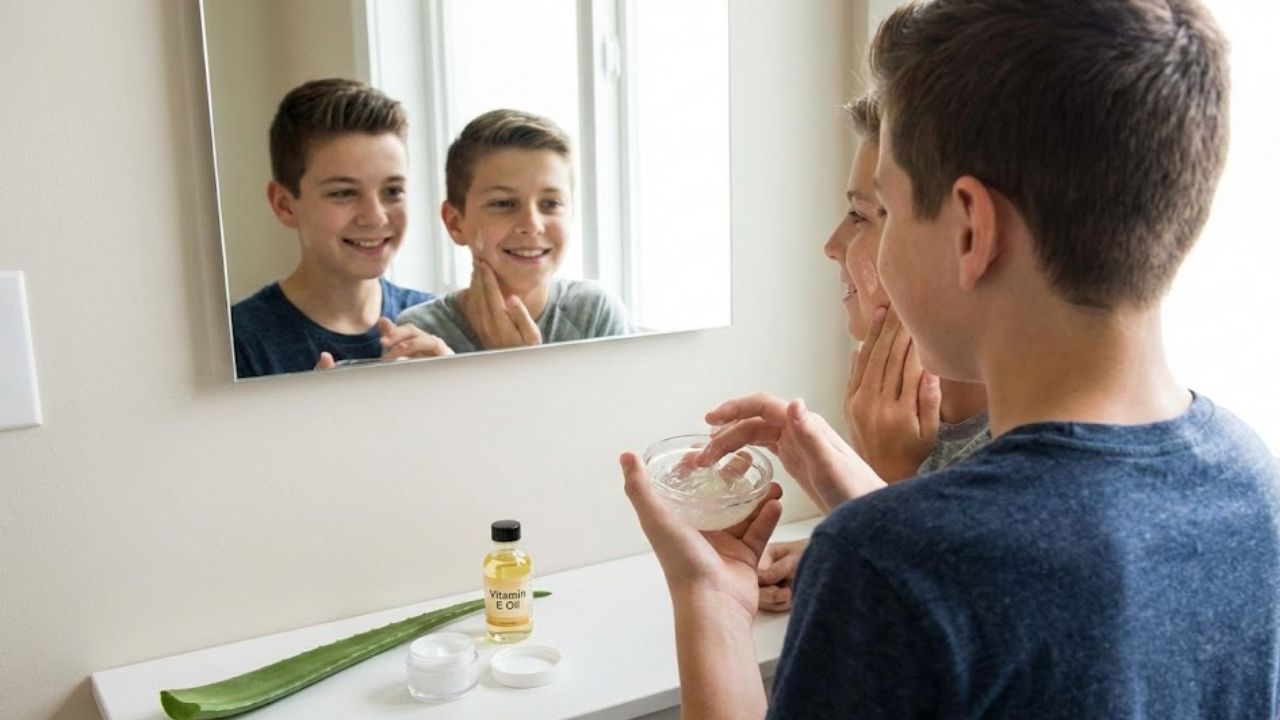
    Choosing natural restoration methods is about building a sustainable hair routine rather than chasing quick fixes. Many colour-reviving alternatives double as treatments that reduce breakage and dryness. They also help maintain moisture balance, which is essential as hair ages. People following these routines often report less scalp irritation, better moisture retention, and stronger hair strands. While no method can reverse ageing completely, natural care supports healthier-looking hair that ages gracefully and confidently.

    Summary and practical outlook

    Restoring grey hair naturally is less about reversing time and more about enhancing what your hair can do with proper care. Colour-reviving alternatives offer a balanced path for those who want subtle improvement without harsh chemicals. When paired with good nutrition and gentle hair habits, these methods support long-term hair wellness, encourage consistent natural results, and promote confidence in ageing. For many, this approach feels more authentic and easier to maintain over the years.

    Method Type Main Benefit Result Speed
    Herbal oils Improves scalp health Slow
    Plant-based rinses Enhances natural tone Gradual
    Nutrient treatments Supports pigment retention Moderate
    Chemical dyes Instant colour change Fast

    Frequently Asked Questions (FAQs)

    1. Can natural methods completely reverse grey hair?

    No, they mainly improve appearance and support healthier pigmentation.

    2. How long do colour-reviving alternatives take to show results?

    Most people notice subtle changes after several weeks of consistent use.

    3. Are these methods safe for sensitive scalps?

    Generally yes, as they avoid harsh chemicals, but patch testing is advised.

    4. Can I combine natural methods with hair dye?

    Yes, many people use them alongside dyes to improve overall hair health.

  • My father is 72 and we use this exercise daily to improve strength and mobility

    My father is 72 and we use this exercise daily to improve strength and mobility

    Plenty of people say this about their dads, but mine truly doesn’t move like someone his age. He’s one of the most active people I know — and I can say that with confidence because I train him twice a week. Alongside our sessions, he lifts weights, runs, and spends time gardening, which keeps his daily activity levels consistently high.

    One area of fitness that took us years to improve is mobility. Mobility naturally declines with age and drops even faster when activity levels fall. When it’s combined with resistance training — whether that’s lifting weights or using bodyweight movements like squats and push-ups — it becomes one of the most effective tools for longevity and long-term health.

    I rely on a small group of foundational exercises in his strength routine because our top priority is consistency. With that in mind, I want to share one movement I truly stand by. It’s a standout exercise that only requires a single dumbbell, though weight choice is entirely optional.

    What is this dumbbell exercise?

    This movement combines a weighted prisoner squat with a good morning exercise, creating a powerful test of thoracic, hip, knee, and ankle mobility. Holding the prisoner position — with hands placed behind the head — encourages a more upright torso, activates the upper and mid-back, and helps open the chest and shoulders.

    Because squatting in this position is more demanding, it places greater emphasis on mobility and upper-body engagement. The squat portion works the core, hips, glutes, quads, and hamstrings, while the good morning targets the posterior chain, including the back, glutes, and hamstrings. The dumbbell adds resistance while also providing counterbalance and control.

    Together, this compound movement builds strength and mobility across the entire body. It also offers several ways to assess how efficiently your body moves throughout the range.

    How to perform the weighted prisoner squat to good morning

    • Stand with your feet about shoulder-width apart.
    • Hold a dumbbell with both hands across your upper back, avoiding pressure on the neck.
    • Pull your elbows back and squeeze your shoulder blades to open the chest.
    • Engage your core before initiating the movement.
    • Push your hips back and descend into a deep squat, keeping your heels grounded.
    • Maintain an upright chest and straight torso.
    • Pause briefly at the bottom, then hinge forward until your torso is parallel to the floor, lifting your hips back with a slight bend in the knees.
    • Reverse the motion by lifting the chest and lowering the hips back into the squat.
    • Drive through your legs to stand, fully extending the hips and knees.

    Common mistakes to watch for

    This exercise requires focus, which helps you stay aware of your movement quality rather than going through the motions. One frequent issue is the knees collapsing inward, often linked to limited mobility or muscle imbalances. Think about pushing the floor away and keeping your knees aligned with your toes.

    Another sign of restricted mobility is heels lifting off the ground during the squat. This can stem from the hips, knees, ankles, or even the spine. Practicing standard squats and incorporating regular hip mobility work can help improve your range of motion.

    Upper-body fatigue often shows up as elbows drifting forward or the chest dropping as you squat. While the chest should hinge forward during the good morning portion, it should remain upright and forward-facing during the squat itself.

    Why thoracic mobility matters

    The thoracic spine plays a key role in supporting muscles of the chest, back, and shoulders, while enabling rotation, flexion, and extension. It’s essential for movements like twisting and stabilizing weight overhead, yet it tends to be less mobile than other areas, making exercises like the prisoner squat more challenging.

    Including full-body mobility sessions in your routine can help improve posture, open the shoulders and chest, and strengthen the supporting back muscles.

    Recommended sets and reps

    Aim for 2 sets of 8–12 repetitions. We typically use an 8kg dumbbell, but the weight can be adjusted or removed entirely to focus on mastering the movement with bodyweight first.

  • Cucumber and Aloe Vera Eye Patches That Reduce Puffiness and Dark Circles

    Cucumber and Aloe Vera Eye Patches That Reduce Puffiness and Dark Circles

    The first time I used cucumber & aloe eye patches under my eyes the world felt quieter and calmer. The day had been exhausting with too much screen time and coffee and not enough sleep. My reflection showed how tired I was. But when I placed those green patches under my eyes I felt myself relax. The scent reminded me of fresh cucumbers and wet leaves. The coolness felt good on my skin. For a brief time I stopped thinking about emails and work deadlines & scrolling through my phone late at night. It was just me breathing & feeling the soothing effect of the natural ingredients doing their work.

    How Our Eyes Reveal Our Lives

    You rarely notice the moment it begins. One late night quietly becomes several. The glass of water you planned to drink turns into another cup of coffee. Your room glows blue well past midnight. Then, one morning, the mirror tells on you. Puffiness that narrows your eyes, shadows that seem deeper than before, skin that feels thinner and more delicate than you remember.

    The skin around the eyes is the most fragile terrain on the face. It is thinner, softer, and far more sensitive, with blood vessels resting close to the surface. When sleep is short, salt is high, screens are constant, or emotions run heavy, lymphatic fluid can linger here. That trapped fluid becomes swelling, and when circulation slows or pigment gathers, dark circles appear like soft bruises made of light.

    It’s easy to blame age, stress, or genetics. But the under-eye area is less a flaw to fix and more a quiet signal. It reflects how we live. That’s why small rituals—like placing cucumber and aloe eye patches beneath tired eyes—can feel like a gentle act of resistance against exhaustion.

    The Green Duo: Why Cucumber and Aloe Work Together

    Cold cucumber slices over the eyes are a familiar comfort, but when those benefits are refined into eye patches, the effects become more consistent and evenly delivered. These curved patches hug the under-eye area, allowing soothing ingredients to sink in more effectively than a simple slice ever could.

    Cucumber is deeply hydrating and naturally calming. Its high water content and mild antioxidants help soothe irritation and temporarily tighten the appearance of puffiness by gently constricting surface blood vessels. The cooling sensation alone brings fast relief, easing swelling and refreshing tired skin.

    Aloe vera complements cucumber perfectly. Where cucumber refreshes, aloe restores. Its gel is rich in water-binding sugars, vitamins, and minerals that support skin repair. Aloe forms a breathable layer over the skin, creating a moist environment that allows stressed under-eyes to recover and rehydrate.

    Slowing Down with Eye Patches

    Applying eye patches can feel surprisingly ceremonial. You lift them from their tray, glossy and cool, and press them gently into place. There’s an instant chill, followed by a slow, calming spread of coolness that settles into the skin.

    As the patches rest, circulation responds. Puffiness begins to soften as blood vessels contract slightly and lymphatic flow improves. Aloe smooths over fine lines, delivering moisture where the skin needs it most.

    Those ten or fifteen minutes can become something more than skincare. You might lie back, close your eyes, and notice the quiet of your space. When the patches come off, the change is subtle but real—less swelling, brighter skin, and an overall look that feels more rested.

    The Science Behind the Comfort

    Under-eye puffiness is often caused by fluid retention and mild inflammation. Cool temperatures help narrow blood vessels and encourage fluid movement, reducing swelling. Cucumber naturally supports this process with mild astringent properties.

    Aloe works on hydration and repair. The under-eye area loses moisture quickly, which can exaggerate shadows and fine lines. Aloe helps bind water to the skin’s surface, plumping it slightly and reducing the appearance of tiredness. Consistent hydration also supports the skin barrier, minimizing irritation that can deepen dark circles.

    Turning Eye Patches into a Gentle Ritual

    The real power of cucumber and aloe eye patches lies in the pause they create. In a world that rewards constant movement, taking a few minutes to do nothing can feel revolutionary. These patches invite stillness.

    Rather than saving them only for emergencies, try making them part of a regular rhythm. A couple of times a week, place them under your eyes and allow yourself to rest. Light a candle, sip warm tea, or simply breathe. These moments help reshape how you view your face—not as something to correct, but as something to care for.

    Managing Expectations and Seeing Results

    Cucumber and aloe eye patches are excellent for calming swelling, easing irritation, and improving hydration. They help dark circles appear lighter by reducing puffiness and improving skin texture.

    However, not all dark circles are the same. Those caused by genetics or naturally thin skin may only improve slightly. In these cases, eye patches work best as part of a broader routine that includes good sleep, hydration, reduced salt intake, and regular breaks from screens.

    Choosing and Using Eye Patches Wisely

    When selecting cucumber and aloe eye patches, check the ingredient list carefully. These ingredients should appear near the top, not buried beneath fragrance or fillers. The under-eye area is sensitive, so gentle formulas matter.

    For best results, apply patches to clean skin, positioning the wider end toward the outer corner of the eye. Chilling them in the refrigerator can enhance their soothing effect. After removal, gently tap in any remaining essence and follow with a light eye cream to seal in moisture.

    A Small Ritual with a Lasting Effect

    Cucumber and aloe eye patches don’t promise miracles. What they offer instead is relief—cooling tired skin, softening swelling, and easing the visible weight of long days.

    More than that, they remind you that your face is not just something others see; it’s where you experience the world. Caring for your eyes with simple, plant-based comfort is a way of acknowledging everything they carry for you. And often, as the skin calms, so does the mind.

    A Quick Look at Benefits and Tips

    Cucumber and aloe eye patches help reduce puffiness, soothe irritation, hydrate delicate skin, and create a moment of rest in busy days. Use them consistently, gently, and with realistic expectations to get the most from their quiet, restorative power.

    Key Benefit Visible Effect Helpful Care Tip
    Reduced eye swelling Under-eye area appears smoother, firmer, and less puffy Refrigerate patches before use; avoid salty foods late in the day
    Brighter under-eyes Dark circles look softer and more evenly toned Use regularly; support with quality sleep and mild sun protection
    Improved moisture balance Skin looks hydrated, with fine lines appearing less prominent Apply to freshly cleansed skin; finish with a gentle eye cream
    Cooling relief Eyes feel refreshed and relaxed after strain or travel Use after long screen sessions or flights; take short eye breaks
    Relaxing self-care moment A sense of calm and mental pause during the day Enjoy 10–20 minutes without devices while patches are on
  • 18 Hip Opening Yoga Stretches to Improve Mobility and Flexibility

    18 Hip Opening Yoga Stretches to Improve Mobility and Flexibility

    18 Hip-Opening Yoga Stretches to Improve Mobility and Flexibility Tight hips have become a widespread problem in our modern world. Spending long hours sitting at desks and moving less throughout the day creates stiffness in the hip flexors and surrounding muscles. When you add stress and poor posture to the mix, your hips pay the price. This tightness doesn’t stay isolated either. It can lead to lower back pain & reduced mobility and even affect how well you perform in sports or daily activities. Yoga provides a practical solution for restoring hip mobility and flexibility. The practice combines intentional stretching with mindful breathing to release tension that builds up in your hips over time. Regular practice strengthens the muscles around your hip joints while improving their overall health. This guide presents 18 hip-opening yoga stretches that instructors recommend most often. These poses work for everyone from complete beginners to experienced practitioners. Whether you spend your days at a desk or you’re an active athlete looking to improve your range of motion these stretches can help you move better & feel more comfortable in your body. The following poses target different areas around your hips to give you a complete approach to releasing tightness and building strength. You can practice them individually or combine several into a flowing sequence that addresses your specific needs.

    Why Hip Mobility Matters

    Healthy hips play a vital role in everyday movement and long-term physical well-being. They support essential actions such as walking, running, bending, and sitting. Strong, mobile hips also help protect the lower back and knees from excess strain. When hip joints move properly, posture and body alignment naturally improve. Athletic performance benefits as well, thanks to better power transfer and balance. Tight hips force other areas of the body to compensate, which often leads to discomfort, pain, and muscular imbalances over time.

    Types of Hip Muscles Yoga Targets

    Hip-opening yoga stretches focus on a wide range of muscles that influence mobility and stability. These include hip flexors that tighten from prolonged sitting, underactive glutes that affect posture, and inner thigh muscles known as adductors. Yoga also targets the outer hips and deep hip rotator muscles. Creating a balance between flexibility and strength in these areas improves movement efficiency, coordination, and joint health.

    How Often Should You Practice Hip-Opening Yoga?

    For noticeable improvements, practicing hip-opening yoga three to five times per week is ideal. Poses should be held anywhere from thirty seconds to two minutes, depending on comfort and experience level. Movements should be slow and controlled, with steady breathing throughout. Forcing a stretch can cause strain, so patience is essential. Consistent, mindful practice delivers better results than pushing intensity.

    Hip-Opening Yoga Stretches to Improve Mobility and Flexibility

    Low Lunge (Anjaneyasana)

    Targets: Hip flexors, quadriceps
    Benefits: Reduces stiffness from sitting and improves stride length
    Step one foot forward into a lunge, lower the back knee, and gently shift the hips forward while maintaining an upright torso.

    Pigeon Pose (Eka Pada Rajakapotasana)

    Targets: Glutes, outer hips
    Benefits: Deep tension release and relaxation
    Fold forward over the front leg and allow the breath to soften tight areas.

    Butterfly Pose (Baddha Konasana)

    Targets: Inner thighs, hips
    Benefits: Improves hip rotation and flexibility
    Sit tall, bring the soles of the feet together, and gently guide the knees toward the floor.

    Garland Pose (Malasana)

    Targets: Hips, ankles, inner thighs
    Benefits: Enhances mobility and supports digestion
    Lower into a deep squat while keeping the heels grounded when possible.

    Lizard Pose (Utthan Pristhasana)

    Targets: Hip flexors, groin
    Benefits: Builds deep hip strength and mobility
    Lower onto forearms for a deeper stretch if comfortable.

    Frog Pose (Mandukasana)

    Targets: Inner thighs, groin
    Benefits: Releases deep hip tension
    Use props for support and ease into the pose gradually.

    Happy Baby Pose (Ananda Balasana)

    Targets: Hips, lower back
    Benefits: Gentle release and relaxation
    Hold the feet or ankles and softly rock side to side.

    Figure Four Stretch (Supine or Seated)

    Targets: Glutes, outer hips
    Benefits: Relieves lower back tightness
    Cross one ankle over the opposite knee and press gently away.

    Warrior II (Virabhadrasana II)

    Targets: Hips, inner thighs
    Benefits: Builds strength and mobility
    Maintain a strong stance with active external hip rotation.

    Extended Side Angle Pose

    Targets: Hip flexors, inner thighs
    Benefits: Improves lateral hip mobility
    Lengthen the side body while grounding firmly through the legs.

    Cow Face Pose (Gomukhasana – Legs)

    Targets: Outer hips
    Benefits: Enhances hip alignment
    Stack the knees if comfortable and sit upright.

    Fire Log Pose (Agnistambhasana)

    Targets: Deep hip rotators
    Benefits: Advanced hip flexibility
    Support the knees with blocks if needed.

    Wide-Legged Forward Fold

    Targets: Inner thighs, hips
    Benefits: Increases adductor flexibility
    Fold forward while maintaining a neutral spine.

    Crescent Lunge Twist

    Targets: Hip flexors, spine
    Benefits: Improves balance and mobility
    Add a gentle twist to enhance circulation.

    Reclined Bound Angle Pose

    Targets: Hips, inner thighs
    Benefits: Passive release and relaxation
    Use bolsters or pillows to support the knees.

    Half Split Pose (Ardha Hanumanasana)

    Targets: Hamstrings, hips
    Benefits: Improves posterior chain flexibility
    Shift the hips back while extending the front leg.

    Yogi Squat with Twist

    Targets: Hips, spine
    Benefits: Functional mobility
    Add a gentle rotation to deepen the stretch.

    Supine Windshield Wipers

    Targets: Outer hips, lower back
    Benefits: Gentle mobility and relaxation
    Slowly drop bent knees from side to side.

    Tips for Safe Hip Opening

    Always warm up before deep stretching. Use blocks, bolsters, or blankets for support. Stretching should feel strong but never painful. Deep breathing helps release muscular tension, and progress develops gradually with regular practice.

    Who Benefits Most from Hip-Opening Yoga?

    Hip-opening yoga is especially beneficial for desk workers, runners, cyclists, older adults, individuals with lower back discomfort, and anyone experiencing limited mobility.

    Why Hip Openers Can Feel Emotional

    The hips are often associated with stored emotional tension. During practice, emotional release, deep relaxation, or increased mental clarity may occur. Practicing with patience and awareness allows these sensations to pass naturally.

    How to Build a Hip-Opening Routine

    An effective routine includes a gentle warm-up, five to eight hip-opening poses, longer holds with steady breathing, and a calming final posture. Even fifteen to twenty minutes of focused practice can create meaningful improvements.

    Conclusion

    Hip-opening yoga stretches go beyond improving flexibility—they support better posture, reduced pain, and smoother movement in daily life. With consistent practice, mindful breathing, and patience, these eighteen stretches can transform how the body moves and how it feels. Healthy hips form the foundation of a healthy body.

  • Boys Using Baking Soda for Teeth Whitening — Does This Household Trick Really Work?

    Boys Using Baking Soda for Teeth Whitening — Does This Household Trick Really Work?

    Boys across India are increasingly curious about using baking soda as a quick, low-cost solution for brighter teeth. Social media clips, family tips, and old household advice often claim that this common kitchen ingredient can remove stains and improve smiles overnight. But does it actually work, or could it harm your teeth in the long run? Understanding how baking soda interacts with tooth enamel is important before trying any DIY whitening trick. This article breaks down the science, real benefits, possible risks, and safer ways to approach teeth whitening at home.

    Boys Using Baking Soda for Teeth Whitening at Home

    Many boys try baking soda because it feels simple and affordable, especially compared to professional whitening treatments. Baking soda is mildly abrasive, which means it can scrub away surface stains caused by tea, coffee, or sugary foods. This is why people notice surface stain removal after a few uses. It also creates an alkaline environment in the mouth, supporting acid neutralizing action that may reduce plaque buildup. However, baking soda does not change the natural color of teeth, so deep enamel whitening is not realistic. Overuse can also lead to enamel wear risk, making teeth sensitive and dull over time.

    Is Baking Soda Teeth Whitening Safe for Boys?

    Safety is where opinions differ, and boys need to be especially careful. Occasional use may be harmless, but frequent brushing with baking soda can gradually erode enamel. Dentists often warn about abrasive brushing damage, especially when combined with hard brushing habits. Once enamel is worn down, it does not grow back, leading to tooth sensitivity issues and higher cavity risk. Baking soda also lacks fluoride, so relying on it alone means losing fluoride protection loss against decay. For teenagers and young adults, whose teeth are still developing, moderation and awareness are key.

    Better Alternatives to Baking Soda Whitening Tricks

    If the goal is a brighter smile, there are safer options than daily baking soda use. Dentists recommend fluoride toothpaste designed for whitening, which balances cleaning and enamel care. Professional cleanings remove tartar and stains without causing long term enamel harm. Whitening strips or gels approved by dental associations offer controlled whitening results when used as directed. Simple habits like rinsing after tea or cola help with stain prevention habits. Most importantly, consistent oral hygiene supports overall dental health, which naturally makes teeth look cleaner and brighter.

    Summary and Practical Analysis

    Baking soda can make teeth look slightly cleaner by removing surface stains, but it is not a miracle whitening solution. Boys in India should understand that brighter teeth do not always mean healthier teeth. Short-term results may feel rewarding, yet repeated use increases enamel erosion concern and sensitivity problems. A balanced approach that combines fluoride toothpaste, proper brushing technique, and occasional professional care offers safer whitening choices. Instead of chasing instant results, focusing on daily habits delivers lasting smile confidence without risking long-term damage.

    Method Effect on Teeth Safety Level
    Baking Soda Removes surface stains Moderate with limited use
    Whitening Toothpaste Gradual brightness improvement High when used daily
    Professional Cleaning Deep stain removal Very high
    Whitening Strips Visible color change High if used correctly

    Frequently Asked Questions (FAQs)

    1. Can boys use baking soda daily for teeth whitening?

    No, daily use can damage enamel and increase tooth sensitivity.

    2. Does baking soda permanently whiten teeth?

    No, it only removes surface stains and does not change natural tooth color.

    3. Is baking soda safe for teenagers?

    Occasional use is safer, but frequent use is not recommended for developing teeth.

    4. What is a safer way to whiten teeth at home?

    Using fluoride whitening toothpaste and maintaining good oral hygiene is safer.

  • Men’s Secret Hair Hack: Onion and Garlic Oil Combo That Boosts Hair Regrowth

    Men’s Secret Hair Hack: Onion and Garlic Oil Combo That Boosts Hair Regrowth

    Hair thinning and slow regrowth are concerns many men in India quietly struggle with, especially due to stress, pollution, and changing lifestyles. Recently, a traditional remedy has resurfaced as a powerful home solution—the onion and garlic oil combination. Known for their strong nutrients and scalp-stimulating properties, these kitchen staples are now being used as a natural hair regrowth hack. When applied correctly, this oil blend supports healthier roots, stronger strands, and improved scalp circulation, making it an appealing option for men seeking visible results without expensive treatments.

    How Onion and Garlic Oil Supports Hair Regrowth

    The onion and garlic oil combo works because both ingredients are rich in sulfur, which is essential for keratin production. Onion helps improve blood flow to hair follicles, while garlic strengthens roots with its antibacterial properties. Together, they create a scalp environment that encourages regrowth and reduces breakage. Men using this oil often notice reduced hair fall within weeks. Key benefits include follicle stimulation, sulfur nourishment, root strengthening, and scalp detox support. Consistent massage allows nutrients to penetrate deeply, helping dormant follicles become active again.

    Why Men Prefer Onion Garlic Oil for Hair Care

    Many men prefer this remedy because it is affordable, natural, and easy to prepare at home. Unlike chemical products, this oil blend does not rely on artificial additives. Garlic’s antioxidants help fight scalp infections, while onion juice improves hair texture over time. Regular use promotes thicker hair growth, reduced hair fall, natural shine boost, and improved scalp health. For men dealing with early bald patches or receding hairlines, this combo offers a practical solution rooted in traditional Indian hair care wisdom.

    How to Use Onion and Garlic Oil Effectively

    To get the best results, warm the oil slightly and massage it gently into the scalp for 10 minutes. Leave it on for at least one hour or overnight before washing with a mild shampoo. Using it two to three times a week is usually enough. Proper application ensures deep oil absorption, better blood circulation, follicle revival process, and long-term regrowth support. Patience is key, as natural remedies work gradually but deliver lasting benefits when used consistently.

    Summary and Practical Insight

    The onion and garlic oil combo stands out as a simple yet effective hair regrowth method for men seeking natural solutions. While results vary depending on genetics and lifestyle, most users experience improved scalp condition and stronger hair over time. This remedy works best when combined with a balanced diet and proper hair hygiene. Its chemical-free approach, budget-friendly solution, traditional remedy value, and consistent usage benefits make it a reliable option for men aiming to restore hair health without aggressive treatments.

    Aspect Details
    Main Ingredients Onion extract and garlic-infused oil
    Recommended Use 2–3 times per week
    Suitable For Men with hair thinning or hair fall
    Visible Results Typically within 4–6 weeks
    Application Time Minimum 1 hour before washing

    Frequently Asked Questions (FAQs)

    1. Is onion and garlic oil safe for all men?

    Yes, but a patch test is recommended for sensitive skin.

    2. How long does it take to see hair regrowth?

    Most men notice changes in hair fall and texture within 4–6 weeks.

    3. Can this oil be used on a dry scalp?

    Yes, it helps moisturize and nourish dry scalp conditions.

    4. Should the oil be applied daily?

    No, applying it two or three times a week is sufficient.

  • Girls Use Papaya and Honey Face Pack for Spotless Skin — Ancient Beauty Formula

    Girls Use Papaya and Honey Face Pack for Spotless Skin — Ancient Beauty Formula

    In India, traditional beauty rituals are making a strong comeback as more girls look for safe, kitchen-based skincare solutions. One such timeless remedy is the papaya and honey face pack, often praised for delivering clear, radiant skin without harsh chemicals. Rooted in ancient beauty practices, this natural combination is easy to prepare and gentle on the skin. With rising awareness around clean beauty and natural ingredients, many women are rediscovering how this simple face pack can support a healthy glow while fitting effortlessly into modern skincare routines.

    Papaya and Honey Face Pack for Natural Skin Glow

    The papaya and honey face pack works beautifully because both ingredients complement each other. Papaya contains natural enzymes that help remove dead skin cells, revealing fresher-looking skin underneath. Honey adds moisture and locks it in, creating a gentle exfoliation effect without irritation. When used consistently, this pack supports raw honey glow and leaves the face feeling soft and refreshed. Many girls prefer it as part of their daily skin care routine because it feels nourishing rather than harsh, making it suitable for regular use at home.

    Ancient Papaya Honey Formula for Spotless Skin

    This age-old beauty formula is often recommended for improving overall complexion. Papaya helps promote even skin tone by gently clearing surface impurities, while honey supports dark spot fade over time. Together, they provide a noticeable hydration boost that keeps skin from looking dull or tired. Since both ingredients are antioxidant rich, they also help protect the skin from everyday environmental stress. Girls across India value this face pack for delivering visible results without relying on expensive cosmetic products.

    Why Girls Trust Papaya and Honey Face Pack at Home

    One reason this face pack remains popular is how easy it is to prepare and apply. It feels like a simple home ritual that doesn’t require special tools or salon visits. Many users find it sensitive skin friendly, especially when used once or twice a week. It’s perfect for weekend pampering after a long week and fits well as a budget beauty hack for students and working women alike. The comfort and familiarity of natural ingredients build long-term trust.

    Summary or Analysis

    The papaya and honey face pack continues to stand out because it blends tradition with practicality. Backed by ancient remedy wisdom, it proves that skincare doesn’t need to be complicated. Girls who use it regularly often notice consistent results when they stick to a routine. With minimal ingredients and easy preparation, it supports a more holistic skincare approach that aligns well with today’s preference for natural beauty solutions.

    Skin Benefit Main Ingredient How It Helps Recommended Use
    Brightening Papaya Removes dead skin buildup Once a week
    Moisturising Honey Locks in natural moisture Twice a week
    Spot reduction Papaya + Honey Improves overall complexion Weekly
    Skin soothing Honey Calms dryness and irritation As needed

    Frequently Asked Questions (FAQs)

    1. How often should this face pack be used?

    Using it once or twice a week is generally sufficient for most skin types.

    2. Is papaya and honey face pack suitable for oily skin?

    Yes, it can be used on oily skin when applied in moderate quantity.

    3. Can sensitive skin users try this face pack?

    A patch test is recommended before full application for sensitive skin.

    4. How long should the pack stay on the face?

    Leaving it on for 10–15 minutes is usually enough before rinsing.

  • Men Using Green Tea Rinse for Hair Loss — Science Behind This Viral Remedy

    Men Using Green Tea Rinse for Hair Loss — Science Behind This Viral Remedy

    Hair loss is a growing concern among men in India, and social media has recently spotlighted a simple, affordable solution: the green tea hair rinse. Known for its health benefits when consumed, green tea is now being used externally as a scalp treatment. Many men claim reduced hair fall and improved scalp health after regular use. This viral remedy stands out because it blends traditional habits with modern curiosity, prompting questions about whether green tea can truly support hair strength, slow thinning, and improve overall hair appearance without harsh chemicals.

    How Green Tea Rinse Helps Men Tackle Hair Loss

    The popularity of green tea rinse for men largely comes from its natural compounds that support scalp health. Green tea contains antioxidants that may help reduce scalp stress, a factor linked to excessive hair fall. When used as a rinse, it can cleanse the scalp gently without stripping natural oils. Men who use it regularly report reduced hair shedding, a calmer scalp, and less itchiness. Its mild nature makes it suitable for frequent use, supporting scalp circulation support while keeping follicles clean. Over time, this routine may encourage healthier hair roots and create conditions that favor thicker-looking hair without relying on strong chemical products.

    Science Behind Green Tea Rinse for Hair Growth

    The science angle behind green tea rinses focuses on compounds like catechins, which are studied for their role in scalp balance. Research suggests these compounds may help manage hormones linked to hair thinning. While it is not a medical cure, green tea can act as a supportive care step by offering antioxidant scalp care. It may help reduce buildup that weakens follicles and supports natural follicle strength. Men dealing with early-stage thinning often see it as a low-risk addition to their routine, especially because it promotes gentle scalp detox without causing dryness or irritation common with harsher treatments.

    How Men Are Using Green Tea Rinse Correctly

    Using a green tea rinse is simple, but consistency matters. Most men brew fresh green tea, let it cool, and pour it over the scalp after shampooing. This allows nutrients to stay in contact with the scalp for a few minutes before rinsing lightly or leaving it in. Regular users say this habit fits easily into weekly routines and supports oil balance control. Over weeks, some notice improved hair texture and less breakage. While results vary, correct usage combined with patience can make this rinse a helpful addition for men seeking chemical-free hair care.

    Is Green Tea Rinse Worth Trying for Men?

    Green tea rinse works best when viewed as a supportive habit rather than a miracle fix. For men in India facing stress, pollution, and hard water issues, it offers a simple way to improve scalp conditions naturally. It supports daily scalp hygiene and may slow visible thinning when paired with a balanced lifestyle. However, genetics and medical conditions still play a major role in hair loss. Men with advanced hair fall should see it as a complementary step alongside expert advice. As a low-cost, accessible option, it remains a sensible experiment for those prioritizing long-term hair wellness.

    Aspect Green Tea Rinse Insight
    Main Benefit Supports scalp health naturally
    Best For Early hair thinning in men
    Usage Frequency 2–3 times per week
    Cost Factor Low and affordable
    Expected Results Gradual improvement over weeks

    Frequently Asked Questions (FAQs)

    1. Can green tea rinse stop hair loss completely?

    No, it helps support scalp health but cannot fully stop genetic hair loss.

    2. How often should men use green tea rinse?

    Most men use it two to three times a week for best results.

    3. Is green tea rinse safe for all hair types?

    Yes, it is generally safe for most hair and scalp types.

    4. When can results be noticed?

    Visible changes usually appear after several weeks of consistent use.

  • Boys Massage Aloe Vera and Vitamin E Oil for Acne-Free Skin — Results in 10 Days

    Boys Massage Aloe Vera and Vitamin E Oil for Acne-Free Skin — Results in 10 Days

    In India, more boys are turning to simple, natural skincare routines to manage acne without harsh chemicals. One method gaining attention is massaging aloe vera gel mixed with vitamin E oil, a combination known for calming irritated skin and supporting healing. This routine fits well into daily life, especially for teenagers and young men dealing with breakouts caused by sweat, pollution, and hormonal changes. When used consistently and correctly, this natural blend is believed to show visible improvement within about 10 days, making it a practical option for clearer, healthier-looking skin.

    Boys Using Aloe Vera and Vitamin E Oil for Acne Control

    Aloe vera is widely valued for its soothing and antibacterial nature, while vitamin E oil supports skin repair and moisture balance. When boys massage this blend gently into clean skin, it helps reduce redness and calm active pimples without clogging pores. Regular use supports calmer skin texture, improves oil balance support, and encourages natural healing process. Unlike harsh acne products, this routine feels light and comfortable, especially in humid Indian weather. Over time, the massage action itself boosts circulation, helping nutrients absorb better and promoting a more even skin tone.

    Aloe Vera Massage Routine with Vitamin E Oil for Clear Skin

    The routine is simple but consistency matters. Most boys apply the mixture at night on a freshly washed face, allowing it to work overnight. Aloe vera hydrates without heaviness, while vitamin E seals in moisture and repairs damaged skin barriers. This balance helps reduce overnight skin recovery, supports gentle pore care, and minimizes new breakout chances. Many prefer using this routine daily for the first 10 days, then reducing frequency once acne calms, making it easy to maintain alongside school or work schedules.

    Results Boys See After 10 Days of Aloe Vera and Vitamin E Use

    Within about 10 days, boys often notice fewer active pimples and a smoother skin feel. While results vary by skin type, common changes include reduced inflammation and quicker fading of acne marks. The blend encourages visible acne reduction, promotes skin barrier strength, and enhances healthy glow signs. It is not an instant cure, but a steady improvement that feels natural and sustainable. Pairing this routine with good hygiene and a balanced diet can further improve outcomes.

    Summary and Skin Care Analysis

    This aloe vera and vitamin E oil massage works best as a supportive, long-term habit rather than a quick fix. Its strength lies in being gentle, affordable, and easy to follow. For Indian boys exposed to dust, heat, and daily stress, this routine offers simple skincare habit, supports long term clarity, and encourages confidence building results. While severe acne may need medical advice, this natural method is a smart first step toward healthier skin.

    Aspect Details
    Main Ingredients Aloe vera gel and vitamin E oil
    Application Time Night, before sleep
    Expected Results Reduction in acne and redness
    Suitable Skin Types Normal, oily, and combination skin
    Recommended Duration Daily use for 10 days

    Frequently Asked Questions (FAQs)

    1. Is this routine safe for teenage boys?

    Yes, it is generally safe when used on clean skin and patch-tested first.

    2. Can oily skin boys use aloe vera and vitamin E oil?

    Yes, using a small amount helps balance oil without clogging pores.

    3. Will this remove acne scars completely?

    It may lighten marks over time but deep scars need professional treatment.

    4. Can this routine be used daily?

    Yes, daily use for up to 10 days is commonly recommended.

  • A Calming 6 Minute Morning Green Tea Ritual That Boosts Metabolism and Focus

    A Calming 6 Minute Morning Green Tea Ritual That Boosts Metabolism and Focus

    The kettle turns on before the sun has fully risen. The house is quiet in that space between night and day. You stand barefoot in the kitchen with one hand on the cool counter and the other holding your favorite mug. Outside the world is slowly waking with a pale blue glow at the window & leaves rustling as a bird sings its first note. In this brief in-between moment you have exactly six minutes to create something simple & beautiful: your morning green tea ritual.

    The Gentle Power of Six Unhurried Minutes

    In busy mornings filled with phone alerts, six minutes might seem like nothing at all. It barely gives you enough time to check your messages. However, six minutes used with purpose becomes something more meaningful. When you spend that time with hot water & tea while paying full attention it can change how your whole day unfolds. This practice does not require extreme willpower or complicated schedules. You will not need cold showers or harsh wake-up calls. The ritual involves only you, water and tea working together to gently wake up your body and mind in a way that feels natural but powerful. The benefits do not make themselves obvious right away. They show up quietly as small improvements like a steadier pulse sharper thinking and energy that builds gradually instead of hitting you all at once. As time passes, these small changes start to influence how your days feel and flow.

    Steam, Scent, and the Science Within the Leaves

    The kettle hums and then grows louder before it settles down. You wait for the water to calm because green tea works better with warmth rather than boiling heat. Steam rises up and the sound gets softer as the temperature reaches the right level. You pour the water over the leaves. These might be flat sencha blades or curled dragonwell or fine matcha powder. The aroma comes up first. It smells green & gentle with a faint sweetness and hints of wet stone and spring leaves. You breathe it in naturally. Inside the cup the catechins like EGCG begin their work & gently support your metabolism. A small amount of caffeine starts to increase your alertness but soon gets balanced by L-theanine which eases your nervous system into calm focus. Together they create an unusual combination where you feel awake yet relaxed and focused without tension. This explains why the ritual matters. It gives space for chemistry and mindfulness to develop together.

    The Subtle Ritual of Preparing Your Cup

    Before you drink there is a moment of getting ready. You pick a cup that seems right for the moment. It might be made of thick clay or thin porcelain. Perhaps it has a small chip but you know it well. You feel how heavy it is and notice the warmth spreading into your palms. You add the tea by measuring out a teaspoon of loose leaves or picking a bag or scooping some matcha powder. The quiet sound of leaves landing in the cup feels calming and helps you focus. You pour hot water at a steady pace. The leaves move in circles and drop down before floating back up. They open slowly as if they are waking up from a long rest. You take a moment to just look at what is happening. You let it sit without feeling impatient. This small break becomes the first calm breath you take all day. You rest against the kitchen counter and pay attention to the solid floor under your feet. You sense that something about the air around you has shifted. Time keeps going but it does not feel like something working against you anymore.

    A Six-Minute Morning Flow That Fits Real Life

    This ritual doesn’t demand extra time—it transforms time that already exists.

    Time Window Your Action The Benefit You Feel
    0–1 Minute Heat the water, pick your favorite mug, prepare the tea leaves or bag. Creates intention and gently signals your body that the day has begun with care.
    1–3 Minutes Pour the hot water and allow the tea to steep. Pause, breathe, and observe the morning light. A brief mindful pause that helps your nervous system move into calm awareness.
    3–4 Minutes Remove the tea leaves or bag and cradle the warm cup in your hands. Soothing physical sensations that ground you firmly in the present moment.
    4–6 Minutes Drink slowly without distractions. Focus on flavor, breath, and stillness. Balanced energy and mental clarity, setting a steady tone for the day ahead.

    Calm Energy That Feels Different from Coffee

    Green tea delivers energy in a gentler way than coffee. Instead of hitting you all at once it builds gradually and settles in smoothly. This happens because green tea contains both caffeine and L-theanine working together. The caffeine wakes you up while the L-theanine keeps you calm. You get steady energy that lasts without the jittery feeling or the afternoon slump. Starting your morning with green tea helps you think more clearly. Your tasks seem less overwhelming. You handle situations with more control & less stress.

    Gently Waking Your Metabolism

    Green tea gives you energy in a softer way compared to coffee. The energy rises slowly and feels smooth instead of sudden. This works because green tea has caffeine and L-theanine that team up together. The caffeine makes you alert while the L-theanine keeps you relaxed. You experience consistent energy that continues without shaking or crashing later in the day. Drinking green tea in the morning helps your mind work better. Your work feels easier to manage. You deal with problems more calmly and with less tension.

    Creating a Small Personal Sanctuary

    Some mornings feel overwhelming & rushed. That is exactly when this simple routine becomes most valuable. You should wake up before checking your phone. The sound of the kettle should be the first thing you hear each day. Stand near the window and wait while your tea brews. Take that first sip slowly and actually taste it instead of gulping it down. After doing this regularly it transforms into something you look forward to each morning. It becomes your personal refuge built from hot tea & quiet moments. You will not find perfect peace but you will find yourself fully present in that moment.

    How Six Minutes Echo Through the Day

    The real effects of the ritual become clear as time passes. Your energy levels remain stable throughout the day. The urge to snack or eat impulsively becomes less intense. You find yourself able to stay calm in situations that would normally frustrate you. If you have a difficult day the ritual will be there for you the next morning. You can boil water in the kettle again. The tea leaves will release their flavor as they sit in hot water. Sunlight will come through your window once more. What the ritual offers never changes: six minutes to start fresh each day.