Blog

  • 11 Balance Exercises for Seniors to Strengthen Stability and Reduce Fall Risk

    11 Balance Exercises for Seniors to Strengthen Stability and Reduce Fall Risk

    Balance Exercises for Older Adults Try these 11 balance exercises designed specifically for older adults to help prevent falls. Falls are one of the main causes of injuries in people over 65 years old. These movements improve your balance and build muscle strength. Both are essential for staying independent and safe as you age.

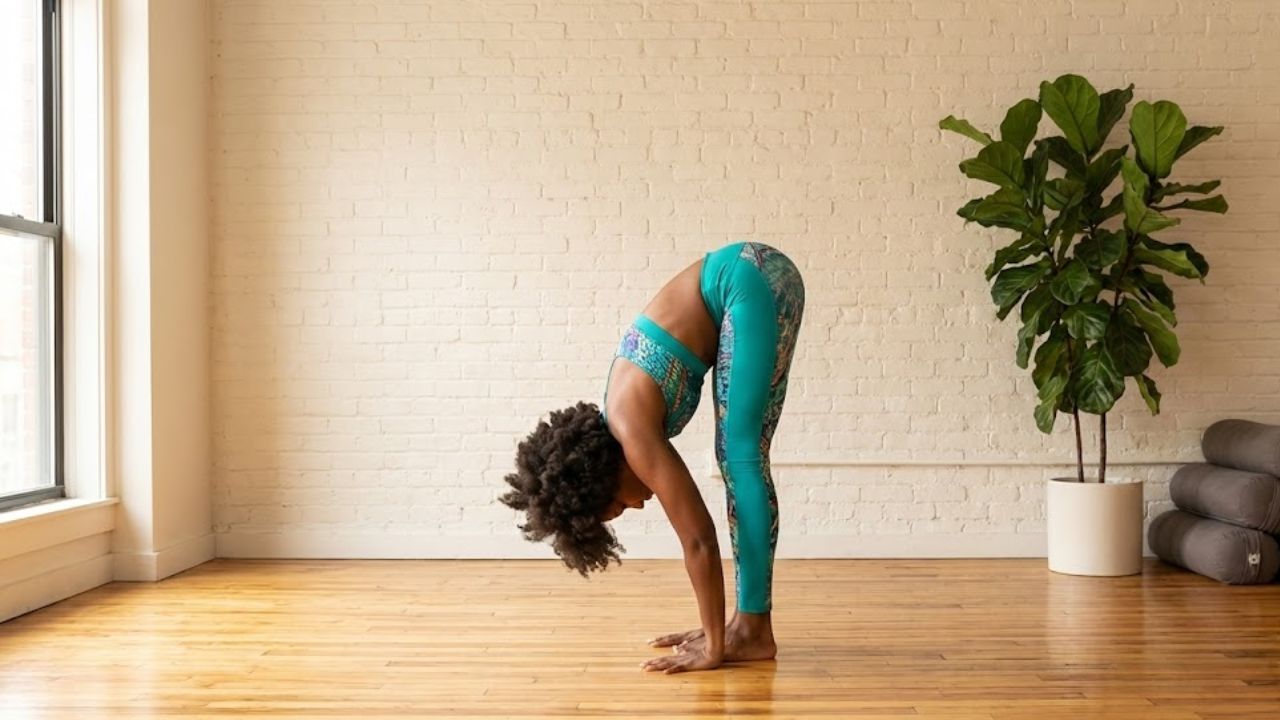
    1. Controlled Weight Transfers for Better Body Awareness

    Balance Exercises for Older Adults Try these 11 balance exercises designed for older adults to help prevent falls. Falls are one of the main causes of injuries in people over 65 years old. These movements improve your balance and build muscle strength. Both are essential for staying independent and safe as you age. Why Balance Matters Good balance helps you move confidently through daily activities. It reduces your risk of falling and lets you maintain your active lifestyle. Strong muscles support your joints & make it easier to recover if you start to lose your balance.

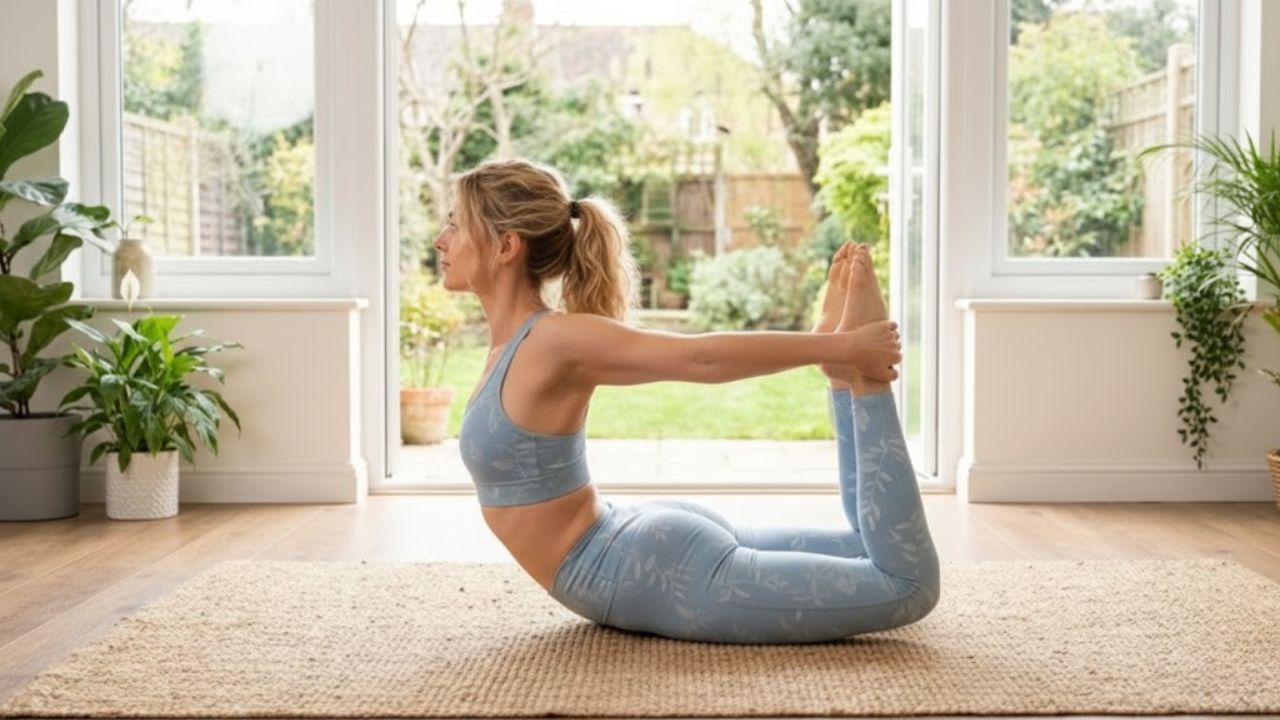
    2. Standing Heel Lifts to Build Ankle Strength and Balance

    Heel Raises Heel raises help improve your balance and make your calf muscles stronger. These muscles are important for walking and going up stairs.

    How to do heel raises: Stand with your feet about hip-width apart. You can hold onto something steady like a chair or counter for support. You can also put your hands on your hips if you feel balanced enough. Lift your heels off the ground so you are standing on the balls of your feet. Stay in this position for one or two seconds. Then slowly lower your heels back down to the floor.

    Making it more challenging: If you want to make this exercise harder you can try doing it on one foot at a time. This will require more balance & strength from each leg individually.

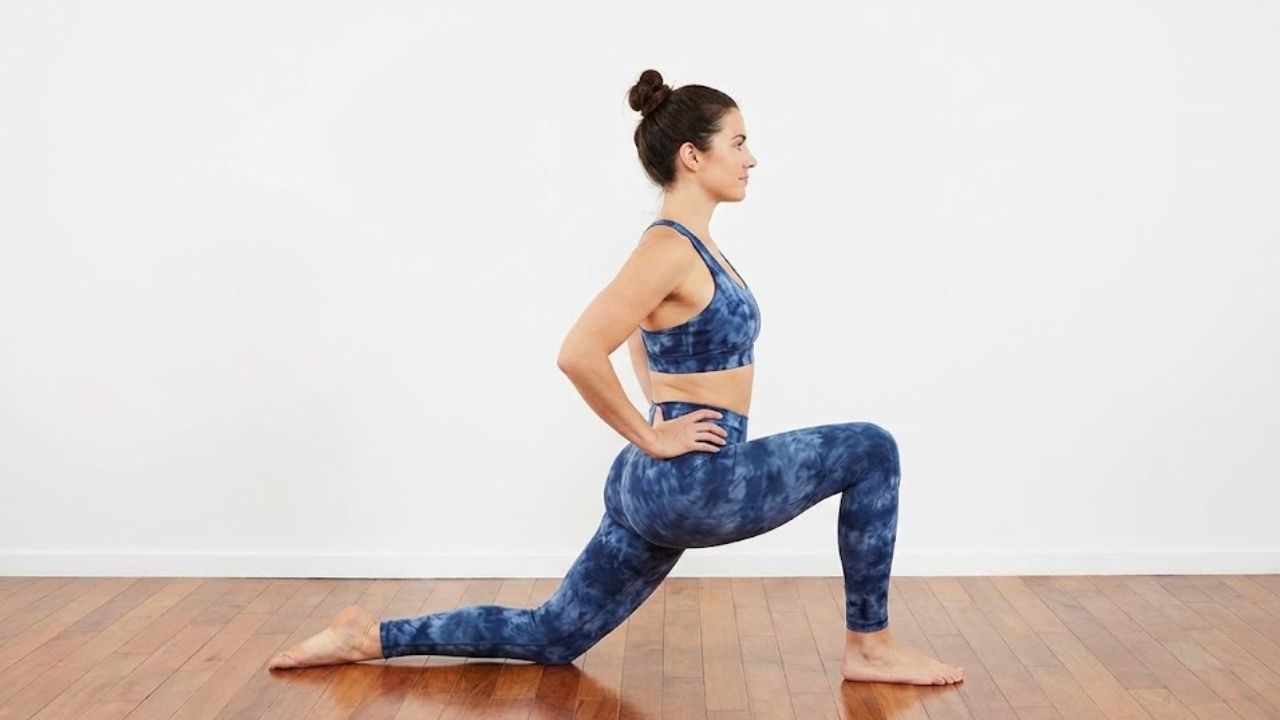
    3. Gentle Forward and Backward Steps for Stability Control

    Forward and Backward Stepping Exercise After you have mastered weight-shifting exercises, you can move on to forward and backward stepping. You have two options for completing this exercise. You can finish all repetitions on one leg before moving to the other leg or you can switch between legs after each repetition to increase the difficulty level. Here is how to perform the exercise: Begin by standing with your feet positioned at hip-width distance. Let your arms hang naturally at your sides. Move your right foot forward & then return it to the starting position. Move your right foot backward and then return it to the starting position. Perform the same movements with your left foot.

    4. Feet-Together Standing to Improve Core Balance

    Standing Balance Exercise When you stand with your feet together you create a smaller base that makes balancing harder. This exercise gets more challenging as you improve. Start by standing with your arms stretched out to both sides. Move your feet together until they touch. Stay in this position as long as possible without moving your feet. After you can hold this for one minute try it again with your arms hanging at your sides. Make it harder by crossing your arms over your chest. When that becomes easy go back to holding your arms out to the sides but this time close your eyes.

    5. Walking with Head Turns to Enhance Coordination

    Your balance depends on multiple body parts working together and your vision plays an important role. You can improve your balance by changing where you look while you move. This exercise helps train your body to stay stable even when your head turns in different directions. Start by walking forward at a slow and controlled pace. While you continue moving ahead turn your head to the right & look back over your right shoulder. Bring your head back to face forward again. Next turn your head to the left and look over your left shoulder. Keep switching between looking right and looking left as you walk. Repeat this pattern for as long as you want to practice. This simple activity strengthens the connection between your eyes and your balance system. Regular practice can help you feel more steady on your feet during everyday activities.

    6. Side-to-Side Stepping for Lateral Balance Support

    Side-stepping can be done by sliding your hands along a counter for extra support until you feel comfortable doing it without holding on. Here is how to do it: Stand with your feet positioned at hip width. Keep your toes pointing forward and take a small step to the right using your right foot. Move your left foot next to your right foot. Continue this pattern for the distance you want to cover and then side-step in the other direction to return to where you started.

    7. Forward Step-Ups to Strengthen Legs and Confidence

    Forward Step-Ups for Better Balance Forward step-ups help you maintain better balance when doing everyday activities like walking up stairs. This exercise is practical because it mimics movements you already do throughout your day. You can do this exercise at the bottom of any staircase in your home. Hold onto the handrail whenever you need extra support. If regular stairs feel too high (most are about 7 inches tall) you can use a lower platform or sturdy box instead.

    How to Do Step-Ups Start by standing in front of the step. Put your right foot on the step first. Bring your left foot up to meet it on the step. Step back down with your left foot to the floor. Then bring your right foot down to the floor. Switch which foot leads each time you repeat the exercise. This simple movement pattern strengthens your legs and trains your body to handle stairs more confidently. Practice regularly to see the best results in your daily activities.

    8. Side Step-Ups for Hip Stability and Fall Prevention

    You should only try side step-ups after you can safely perform them moving forward. Find a step or stable raised platform that is wide enough to hold both feet. Follow these steps to do side step-ups: Position yourself so the right side of your body faces the step. Place your right foot on the step. Lift your left foot up to join it on the step. Lower your left foot back down to the floor. Bring your right foot down to the floor. Complete 10 repetitions on this side. Then turn around so your left side faces the step and do 10 more repetitions using the opposite leg to lead.

    9. Heel-to-Toe Standing to Sharpen Balance Focus

    Tandem standing is a more challenging exercise you can try after you feel comfortable standing with your feet placed together. Here is how to do tandem standing:5 Stand up & extend your arms straight out to each side at shoulder level. Place your right foot directly in front of your left foot so the heel of your right foot touches the toes of your left foot. Stay in this position for as long as possible without moving your feet. Switch sides and repeat with your left foot positioned in front of your right foot. You can make this exercise harder by letting your arms hang down at your sides or by crossing your arms over your chest. To add an even greater challenge you can attempt tandem standing while keeping your eyes closed.

    10. One-Leg Standing to Improve Overall Stability

    When you begin balance exercises try standing on one leg next to a solid surface that you can grab if needed. Here is how to do a single-leg stance:5 Stand near a solid surface. Lift your right foot by bending your knee and bringing your heel toward your backside while keeping your body upright. Put your weight on your left foot and stay balanced for as long as you can without moving. Switch legs & repeat. You can make this exercise more challenging by closing your eyes or standing on an unstable surface like a cushion or pillow.

    11. Cross-Step Walking to Boost Coordination and Control

    Braiding Exercise Instructions The braiding exercise is also known as the grapevine or karaoke exercise. This is an advanced balance activity. Here is how to do it: Start by standing with your feet positioned at hip-width apart. Let your arms hang naturally at your sides. If you need extra balance support you can extend your arms straight out to each side so they are parallel to the floor. Take your right leg and cross it over in front of your left leg. Then bring your left foot out from behind your right foot and step it to the left side. Next cross your right leg behind your left leg. After that step your left leg out to the side again. Keep repeating this movement pattern as you travel sideways for whatever distance you want to cover. When you reach your endpoint reverse all the movements and work your way back to your starting position.

  • Optical Illusion Test: Find the Hidden 08 and 66 Numbers Among 88s in 10 Seconds

    Optical Illusion Test: Find the Hidden 08 and 66 Numbers Among 88s in 10 Seconds

    Optical illusion challenges have become a popular way for people in India to test focus, observation skills, and mental sharpness in a fun way. This particular visual puzzle asks readers to spot the hidden numbers 08 and 66 cleverly disguised among rows of similar-looking 88s, all within just 10 seconds. At first glance, everything appears identical, but subtle differences make this test both tricky and exciting. Such challenges are often shared on social media because they engage the brain, encourage quick thinking, and offer a refreshing break from daily routines.

    Optical Illusion Test That Challenges Your Focus

    This optical illusion test is designed to push your visual attention to the limit by hiding two unique numbers among repetitive patterns. When your eyes scan rows of 88s, the brain tends to assume uniformity, which makes spotting 08 and 66 harder. The challenge works because of visual pattern bias, where the mind fills in expected shapes automatically. As seconds tick away, time pressure effect adds urgency and excitement. Many participants report a mental strain moment before clarity sets in, making the experience memorable. Completing the task successfully often leads to a confidence boost and motivates people to try similar puzzles.

    Why Finding 08 and 66 Among 88s Is Tricky

    The difficulty of this illusion lies in how similar the digits appear when placed closely together. The number 88 dominates the visual field, creating repetitive number illusion that confuses the brain’s recognition system. Your eyes may skim too quickly, missing the slight curve changes that define 08 and 66. This puzzle highlights selective attention limits, showing how easily details can be overlooked. Many solvers benefit from slow scanning method, focusing on one row at a time. Overcoming this challenge sharpens detail recognition skill, which is useful beyond puzzles.

    How Optical Illusion Number Puzzles Train the Brain

    Number-based optical illusions are more than entertainment; they actively train cognitive abilities. When searching for hidden digits, the brain practices visual discrimination training and strengthens neural connections. These puzzles encourage focus under pressure, especially with a strict time limit. Regular exposure can improve processing speed awareness and enhance patience. For many people in India, such challenges are a quick way to enjoy mental refresh break during busy schedules. Over time, consistent practice may lead to better concentration and sharper observational habits.

    Summary and Visual Analysis of the Challenge

    In summary, this optical illusion test cleverly combines simplicity with mental challenge. By hiding 08 and 66 among identical 88s, it forces the brain to slow down and truly observe. The experience reveals human perception limits and explains why we often miss small details. It also demonstrates pattern recognition habits that influence everyday decision-making. Whether you solve it quickly or struggle at first, the puzzle offers insightful brain exercise and reminds us that careful observation can make all the difference.

    Aspect Details
    Hidden Numbers 08 and 66
    Distractor Number 88
    Time Limit 10 Seconds
    Skill Tested Visual Attention
    Difficulty Level Moderate

    Frequently Asked Questions (FAQs)

    1. What is the goal of this optical illusion test?

    The goal is to find the hidden numbers 08 and 66 among multiple 88s within 10 seconds.

    2. Why do most people find this puzzle difficult?

    The repeating 88 pattern tricks the brain into overlooking small visual differences.

    3. Does solving such puzzles improve brain skills?

    Yes, regular practice can enhance focus, observation, and visual processing.

    4. Can anyone attempt this optical illusion challenge?

    Yes, it is suitable for all ages and requires no special skills.

  • Quick Yoga for Busy Schedules: 6 Poses You Can Do Anytime

    Quick Yoga for Busy Schedules: 6 Poses You Can Do Anytime

    Quick Yoga Poses for Busy Days: Simple Ways to Relax and Reset

    In today’s fast-moving lifestyle, making time for self-care can feel challenging. Between work responsibilities, family demands, and personal tasks, finding even a few moments to unwind often seems out of reach. Yoga provides a practical and time-efficient solution for busy individuals who want to relax and recharge. With just a handful of easy poses, you can release built-up tension, improve flexibility, and restore energy in minutes. Below are six quick yoga poses designed to help you refresh your body and mind without disrupting your schedule.

    1. Mountain Pose (Tadasana): Building Stability and Inner Calm

    Mountain Pose may look simple, but it is a powerful posture for grounding and awareness. It supports better posture, balance, and mindfulness, making it ideal for starting the day or resetting between tasks. Standing tall and engaging your core activates multiple muscle groups and creates a sense of steadiness.

    To practice Mountain Pose:

    • Stand with your feet hip-width apart and arms resting naturally by your sides.
    • Distribute your weight evenly, gently lift your chest, and lengthen your spine.
    • Engage your thighs and lightly draw in your abdominal muscles.
    • Soften your shoulders, gaze forward, and focus on steady breathing.
    • Hold for 30 seconds, breathing deeply and feeling grounded.

    This pose can be practiced anywhere and offers a quick posture reset with minimal effort.

    2. Cat-Cow Pose (Marjaryasana-Bitilasana): Ease Back and Neck Tension

    Long hours at a desk or on your phone can leave your spine feeling tight. Cat-Cow Pose is a gentle, flowing movement that helps release tension in the back, neck, and shoulders. It also improves spinal mobility and encourages mindful breathing.

    To practice Cat-Cow Pose:

    • Begin on your hands and knees in a tabletop position.
    • Inhale as you arch your back, drop your belly, and lift your head and tailbone.
    • Exhale as you round your spine, tuck your chin, and draw your navel inward.
    • Continue flowing between the poses for 1–2 minutes, matching movement with breath.

    This gentle sequence is especially helpful for those with a sedentary routine.

    3. Seated Forward Fold (Paschimottanasana): Stretch the Lower Body Quickly

    Seated Forward Fold provides a deep stretch for the hamstrings, calves, and lower back. It is particularly beneficial after long periods of sitting and helps calm the mind while easing physical tension.

    To practice Seated Forward Fold:

    • Sit with your legs extended straight in front of you, feet flexed.
    • Inhale to lengthen your spine.
    • Exhale as you hinge forward, reaching toward your feet or shins.
    • Maintain a long spine without rounding your back.
    • Hold for 30 seconds to 1 minute, breathing slowly.

    This pose is simple yet effective, making it easy to include during short breaks.

    4. Child’s Pose (Balasana): Gentle Rest for Deep Relaxation

    Child’s Pose is a soothing posture that stretches the hips, thighs, and back while encouraging relaxation. It offers a quiet moment to pause and reconnect, helping calm the nervous system and reduce stress.

    To practice Child’s Pose:

    • Kneel with your big toes together and knees slightly apart.
    • Sit back onto your heels and extend your arms forward.
    • Lower your forehead to the floor.
    • Breathe deeply and allow your body to soften.
    • Remain in the pose for 1–2 minutes.

    This posture is ideal for recharging both body and mind during a busy day.

    5. Standing Forward Fold (Uttanasana): Refresh and Re-energize

    Standing Forward Fold helps stretch the hamstrings and back while calming the mind. It is especially useful for relieving stiffness and restoring alertness after sitting for extended periods.

    To practice Standing Forward Fold:

    • Stand with feet hip-width apart and knees slightly bent.
    • Inhale to lengthen your spine.
    • Exhale as you hinge forward from the hips, letting your head drop.
    • Hold your ankles or place your hands on the floor if comfortable.
    • Stay for 30 seconds to 1 minute, relaxing your neck and shoulders.

    This pose offers an instant energy lift and helps release built-up tension.

    6. Legs Up the Wall (Viparita Karani): Restore and Relax in Minutes

    Legs Up the Wall is a deeply restorative pose that supports circulation, relaxation, and lower-body relief. It is an excellent way to unwind and reset when time is limited.

    To practice Legs Up the Wall:

    • Sit sideways next to a wall and gently swing your legs upward.
    • Lower your back to the floor with legs resting vertically against the wall.
    • Place your arms comfortably by your sides, palms facing up.
    • Close your eyes and focus on slow, steady breathing.
    • Hold for 1–2 minutes.

    This pose is ideal for calming the mind and restoring energy quickly.

    Quick Yoga Relief for Tight Schedules

    These six time-efficient yoga poses are well-suited for busy individuals seeking fast relief from stress and stiffness. Whether your goal is to improve posture, ease tension, or feel refreshed during a demanding day, these poses deliver meaningful benefits in just a few minutes. By incorporating them into your daily routine, you can enjoy the physical and mental advantages of yoga without dedicating large blocks of time. Even brief moments of mindful movement can help you stay balanced, energized, and relaxed throughout the day.

  • 12 Yoga Poses That Release Body Stiffness and Improve Flexibility Without Intense Effort

    12 Yoga Poses That Release Body Stiffness and Improve Flexibility Without Intense Effort

    Body stiffness is a common issue for people in India, especially with long work hours, frequent screen use, and limited daily movement. Tight muscles, aching joints, and reduced flexibility often develop from prolonged sitting, stress, or aging. Over time, even simple movements can feel uncomfortable. Yoga offers a gentle and effective way to counter this stiffness without placing strain on the body. By combining slow stretches with controlled breathing, yoga helps muscles relax naturally. Practicing the right poses regularly can restore mobility, improve posture, and make everyday movement feel smoother and easier.

    Yoga poses to reduce body stiffness through gentle movement

    When stiffness builds up across the body, starting with simple standing and spinal poses can make a noticeable difference. Movements like Mountain Pose and Cat–Cow encourage gentle spinal mobility while helping the body reconnect with proper alignment. These poses improve posture awareness and activate muscles that often go unused during the day. Coordinating motion with mindful breathing allows tight areas to soften without forcing a stretch. Over time, these basic poses support healthier joints and smoother transitions in daily movement, making them ideal for beginners or anyone easing back into physical activity.

    Yoga poses for body stiffness in hips, back, and legs

    Many people feel stiffness most intensely in the hips, lower back, and legs, especially after long periods of sitting. Poses such as Low Lunge, Standing Forward Bend, and Butterfly Pose focus on hip joint release while lengthening tight muscles. Seated postures and twists improve seated flexibility and help relieve compression around the spine. As tension eases, practitioners often notice lower back ease and better comfort during daily tasks. These poses also promote circulation support, helping muscles feel warmer, looser, and more responsive with regular practice.

    Yoga poses to release body stiffness and promote relaxation

    Restorative poses play a key role in reducing stiffness that comes from stress and overexertion. Positions like Child’s Pose, Supine Figure Four, and Legs Up the Wall encourage restorative relaxation while gently stretching tired areas. These poses calm the mind and create a sense of nervous system calm, which allows muscles to let go of hidden tension. They also support muscle recovery after long days or intense workouts. Because they rely on passive stretching, these poses are accessible to all fitness levels and ideal for winding down.

    How regular yoga practice improves flexibility over time

    Practicing yoga consistently helps the body adapt gradually, leading to long term flexibility without strain or discomfort. As muscles lengthen and joints move more freely, the risk of aches and strains decreases, supporting injury prevention. The key is consistent practice rather than intensity, allowing the body to respond at its own pace. Over weeks and months, posture improves, movement feels lighter, and stiffness becomes less frequent. Beyond physical benefits, yoga also enhances overall wellbeing, making it a sustainable and calming solution for everyday stiffness.

    Yoga Pose Main Benefit Target Area Recommended Duration
    Cat–Cow Pose Spinal flexibility Spine and shoulders 1–2 minutes
    Low Lunge Hip opening Hips and thighs 30–60 seconds each side
    Butterfly Pose Inner thigh stretch Hips and groin 1–3 minutes
    Child’s Pose Deep relaxation Back and shoulders 2–5 minutes
    Legs Up the Wall Improved circulation Legs and lower back 5–10 minutes

    Frequently Asked Questions (FAQs)

    1. How often should I practice yoga to reduce stiffness?

    Practicing gentle yoga at least three to five times a week can noticeably reduce stiffness.

    2. Can beginners do these yoga poses safely?

    Yes, these poses are beginner-friendly and can be modified for comfort.

    3. Is yoga better than stretching for body stiffness?

    Yoga combines stretching with breathing, making it more effective for overall stiffness relief.

    4. When is the best time to do yoga for stiffness?

    Morning or evening sessions work well, depending on when your body feels tight.

  • Visual Challenge in 8 Seconds Spot 3 Differences in the Duck Wearing Jacket Image

    Visual Challenge in 8 Seconds Spot 3 Differences in the Duck Wearing Jacket Image

    If you love optical illusions and the thrill of a brain teaser, you’re in for a treat. Today’s Spot the Difference puzzle will challenge your observation skills and quick thinking. The puzzle features a charming duck in sunglasses and a stylish jacket strolling beside a peaceful pond. But there’s a twist: two nearly identical images hide three subtle differences. Can you spot them in just 8 seconds? Only the sharpest eyes will succeed!

    8-Second Visual Challenge

    Why Spot-the-Difference Puzzles Captivate So Instantly

    Spot the Difference games have been popular for decades because they are easy to understand, highly engaging, and effective at sharpening cognitive skills. By focusing on tiny details, these puzzles enhance visual perception and boost mental speed. While they seem simple at first, the difficulty increases when differences are cleverly hidden, forcing your brain to work harder.

    These puzzles appeal to a wide audience. Children enjoy them as a playful activity, while adults use them as a quick brain exercise. Spot the Difference challenges also improve memory, focus, and attention to detail, making them a favorite among puzzle enthusiasts.

    The 8-Second Duck Puzzle That Tests Your Sharpness

    Today’s puzzle shows two images of a cute yellow duck wearing sunglasses and a jacket by a serene pond. At first glance, the images appear identical, but small differences are hidden throughout.

    Your task is to find three differences in just 8 seconds. Time flies, so you need to examine every detail carefully to catch all the changes. These differences are subtle, so close attention is key.

    Smart Techniques to Spot Differences Quickly

    Here are some ways to sharpen your observation and spot changes more effectively:

    • Start With a Fast Overview: Quickly glance at both images to grasp the overall layout before focusing on details.
    • Focus on Individual Elements: Examine specific areas like the duck’s jacket, the pond, or nearby objects to spot small variations.
    • Watch for Color, Size, and Shape Changes: Differences often involve tiny shifts in color, shape, or proportion.
    • Use Balance and Symmetry: Designers often place differences in mirrored or balanced positions; comparing sides helps spot inconsistencies.
    • Train With Short Time Limits: Practicing with tight timers, such as 7 seconds, improves your ability to detect subtle differences under pressure.

    Revealing the Three Hidden Differences in the Jacketed Duck

    Here’s a detailed breakdown of the three hidden differences to look for:

    1. The Disappearing Rock Near the Grass

    In the lower part of the image near the grass, a small rock is visible in the left image but missing in the right image. This change blends naturally into the background, so look carefully near the duck’s feet to spot it.

    2. The Missing Hoodie Drawstring

    The duck’s hoodie in the left image has a visible drawstring, but in the right image, the drawstring is gone. Since the hoodie looks almost identical otherwise, focus closely on the neckline to catch this subtle change.

    3. The Vanishing Frog by the Pond

    Near the pond, a small frog sits at the water’s edge in the left image but is absent in the right image. This detail is easy to miss but is crucial for spotting all three differences. Examine the pond area carefully to notice it.

    How Spot-the-Difference Puzzles Enhance Your Observation

    These puzzles do more than entertain—they train your brain. Searching for small differences teaches you to notice details often overlooked in daily life, improving your concentration. Regular practice strengthens focus, which can help in work, study, and everyday tasks.

    Playing these games also speeds up your brain’s visual processing and enhances short-term memory, since you need to remember details from one image while comparing them to another. This skill of analyzing and recalling information quickly is useful in many situations.

    Pro Tips to Master Spot-the-Difference Challenges

    • Practice Regularly: Frequent practice trains your eyes and brain to detect even the smallest differences.
    • Use a Timer: Recreate the 8-second challenge to improve speed while maintaining focus.
    • Pay Attention to Fine Details: Look closely at patterns, textures, outlines, and tiny objects that might be overlooked initially.
    • Move on to Advanced Puzzles: Once comfortable with simpler images, tackle more complex scenes to further enhance visual sharpness and observation skills.
  • Naturally Boost Lash and Brow Growth With a Daily Castor Oil Habit That Shows Results

    Naturally Boost Lash and Brow Growth With a Daily Castor Oil Habit That Shows Results

    The first time you become aware of the sound of your own eyelashes, it feels almost like a small illusion. Lean toward a window on a breezy evening or rub tired eyes after a long day, and there it is—a faint brushing sound, soft bristles whispering against skin. Lashes and brows are tiny, subtle details we rarely think about. Until one day, something feels different.

    They don’t look the same anymore. They seem less full, less dark, less bold than before. Under sharp bathroom lighting, you pause. When did my lashes get this sparse? Or, my brows used to be thicker. Suddenly, you’re searching—serums, pencils, gels—anything that promises visible growth by next week.

    A Slower, More Intentional Kind of Beauty

    There is another approach—calmer, slower, and quietly rewarding. It comes in a small amber bottle, thick and golden, carrying a mild earthy scent: castor oil. Not a shiny, silver-labeled “miracle serum,” but something that feels like it belongs in a grandmother’s cabinet. A simple plant-based oil, pressed from castor bean seeds, its relationship with lashes and brows isn’t dramatic. It’s built on consistency, patience, and gentle daily rituals.

    Building a Simple Nighttime Routine

    Picture the rhythm. Evening settles in, the house grows quiet, screens finally dim. You stand at the sink, moving through familiar steps—warm water, cleanser, towel. Makeup melts away like watercolor on paper. Then comes the extra minute you’ve promised yourself.

    You reach for the bottle, rolling the glass between your fingers, watching the oil catch the light. It doesn’t promise overnight results, and that’s the point. Instead, it offers a gentler relationship with your face and your sense of time. Night after night, your hands remember the motion—dip, dab, smooth. You’re not forcing growth with harsh formulas. You’re supporting what wants to grow, slowly and naturally.

    The Gentle Science Behind Castor Oil

    Castor oil often surprises people with its texture. It’s thick and syrup-like, but once warmed between your fingers, it softens and spreads easily. This richness comes from ricinoleic acid, the fatty acid responsible for its weight and staying power.

    While research on direct lash or brow growth is limited, what is known is practical. Castor oil helps by locking in moisture and shielding fragile hairs from dryness, friction, and makeup stress. It doesn’t create new hair—it helps protect what’s already there from breaking and shedding too soon.

    The Role of Gentle Touch

    There’s another quiet benefit: intentional touch. Applying oil encourages careful handling of lashes and brows. That light massage can support local circulation and help follicles stay comfortable and nourished, especially when paired with an overall gentle routine.

    How to Start a Lash and Brow Care Ritual

    Imagine the bathroom mirror, the soft hum of a fan, water draining from the sink. This is where the ritual begins.

    Step 1: Cleanse With Care

    Remove all traces of mascara, brow gel, and eyeliner. Use a mild cleanser and warm water. Gently press a towel against your face—don’t rub—until lashes and brows are clean and dry.

    Step 2: Use Simple, Clean Tools

    A clean mascara wand or cotton swab works perfectly. If reusing a wand, wash it with mild soap every few days and allow it to dry fully. Clean tools help prevent irritation.

    Step 3: Pour, Don’t Dip

    Instead of dipping directly into the bottle, place a small drop of castor oil on the back of your hand or a tiny dish. This keeps the oil clean and reduces contamination.

    Step 4: Apply Lightly to Lashes

    Dip the wand gently and wipe off excess. With one eye closed, brush oil from the mid-lengths to the tips of your lashes. Avoid the waterline and roots. Repeat on the other eye. If lashes feel heavy, you’ve applied too much.

    Step 5: Condition the Brows

    Using what remains, softly comb oil through your brows, following the natural growth pattern. You’re not shaping—just delivering nourishment to each hair.

    Recognizing Progress Over Time

    The most challenging part is patience. Natural routines don’t announce results loudly. In the first few weeks, you may notice softness before any visible change. Lashes feel less brittle, brows smoother, and makeup applies more easily.

    After one to two months of gentle care, subtle changes may appear—slight fullness, fewer gaps, softer edges, and baby hairs that stay longer in their growth cycle. It’s not dramatic, but it feels real.

    Daily Habits That Support the Process

    Castor oil works best as part of a bigger picture. Small, mindful habits make a difference:

    • Use lash curlers sparingly and only on clean lashes
    • Take mascara-free days when possible
    • Avoid over-tweezing and allow brows to rest
    • Remove makeup gently using balm or oil cleansers
    • Nourish from within with hydration, protein, and healthy fats

    Turning Care Into a Moment You Enjoy

    Rituals last when they feel like a treat, not a task. Let this be a pause in your day. Lower the lights, enjoy the quiet, feel the oil warm between your fingers. This isn’t about perfection—it’s about care and connection.

    Paying Attention to Your Skin

    Even natural oils deserve respect. If you notice redness, itching, or small bumps, stop and rinse gently. Reduce how often you apply it. Some people prefer using castor oil every other night. Always choose a pure, fragrance-free oil, and if your eyes are sensitive, consult a professional.

    Allowing Your Natural Features to Reemerge

    As lashes and brows grow stronger, your face begins to feel more like you. You may reach for less makeup, use lighter touches, or skip products entirely some days. The change feels earned—like quietly tending a small, personal garden over time.

  • Find 99 and 93 Hidden Among 98 in 7 Seconds Using Sharp Eyes

    Find 99 and 93 Hidden Among 98 in 7 Seconds Using Sharp Eyes

    Optical illusion challenges offer an enjoyable method to evaluate your vision and mental alertness. This specific test pushes your ability to focus and concentrate. When you first look at the puzzle it appears straightforward because it contains many identical numbers. But somewhere among all those 98s are two different numbers hiding: 99 & 93. Your challenge is to find these hidden numbers in only 7 seconds. Do you think your vision is sharp enough? Let’s see if you can do it!

    The Visual Challenge: Spot 99 and 93 Hidden Among 98s

    In this optical illusion vision test, your task is to identify the numbers 99 and 93 concealed within a grid filled almost entirely with 98s. The repeated appearance of the same number makes this puzzle deceptively difficult. At first glance, the grid looks identical throughout, which leads your brain to assume there are no differences.

    This uniform pattern is exactly what makes the challenge effective. With only 7 seconds to scan the grid, you must concentrate carefully to detect the two numbers that break the pattern. It’s not simply about seeing what’s in front of you—it’s about overcoming automatic visual habits and sharpening your focus under pressure.

    Why Optical Illusions Effectively Test Visual Skills

    Optical illusions are powerful tools for training both the eyes and the brain. They encourage critical thinking by forcing you to question what you think you’re seeing. In this challenge, your brain naturally wants to skim through the grid, assuming every number is the same.

    The subtle differences between 99, 93, and 98 are intentionally designed to slip past quick scans. This illusion demonstrates how easily small details can be missed when time is limited, making it an excellent exercise for improving focus and visual accuracy.

    Smart Strategies to Solve the Puzzle

    With a strict time limit, staying composed is essential. These practical tips can help you locate the hidden numbers more efficiently:

    – Stay Calm and Concentrated: Pressure can lead to mistakes. Keeping a steady focus improves accuracy.

    – Focus on the Second Digit: Since most numbers end in 8, any different second digit is your biggest clue.

    – Scan Methodically: Move through the grid one row at a time instead of scanning randomly.

    Notice Small Visual Differences: The shape of a 3 or the doubled curves in 99 can reveal what doesn’t belong.

    Practice Regularly: If you miss it at first, don’t worry. Repetition improves visual sharpness.

    The Answer Revealed: Locations of 99 and 93

    If you’ve finished scanning, here’s where the two hidden numbers are located:

    – 99: Found in the third row from the top and the third column from the left. Its placement makes it especially easy to miss.

    – 93: Located in the fourth row from the bottom and the fourth column from the right.

    Both numbers are carefully disguised among the surrounding 98s. While they break the pattern, recognizing them requires close attention to even the smallest differences.

    How Optical Illusions Benefit Brain Function

    Solving optical illusions offers more than entertainment—it also supports mental development in several ways:

    – Sharper Attention to Detail: These puzzles train you to notice minor variations that are often overlooked.

    – Improved Mental Flexibility: They enhance quick thinking and problem-solving skills under time pressure.

    – Stronger Focus: Regular practice helps improve concentration on tasks without distraction.

    – Overall Cognitive Boost: Mental challenges like these support memory, processing speed, and brain health.

    Why Optical Illusions Are Both Fun and Valuable

    Optical illusions combine enjoyment with mental exercise, making them easy to incorporate into everyday routines. Whether during a break, at home, or before sleep, they provide a simple way to keep your mind engaged.

    By regularly practicing visual puzzles, you strengthen your ability to recognize patterns, maintain focus, and spot fine details. Over time, these skills translate into better observation and sharper thinking in daily life.

  • Short on time? This 15-minute dumbbell routine crushes your core without one sit-up

    Short on time? This 15-minute dumbbell routine crushes your core without one sit-up

    If sit-ups aren’t your thing, there’s good news — they’re not the only, or even the most effective, way to train your core. Rather than endless crunches, one of the smartest ways to develop your midsection is to train it like any other muscle group. That means adding dumbbells and using progressive overload to build strength and shape definition.

    Introducing a dumbbell adds extra resistance, instantly increasing the challenge placed on your core. When combined with a balanced, healthy diet, this approach can help make abdominal muscles more visible. Because the intensity is higher, you’ll often see results faster, making a 15-minute workout more than enough.

    Not sure where to begin? Below is a 15-minute dumbbell ab workout that uses just one heavy weight. If you’re completely new to exercise or returning after a long break, pregnancy, or injury, it’s always best to seek personalized guidance from a qualified professional.

    What Does the Workout Involve?

    This routine is designed by fitness trainer Shaina Fata. It includes five different exercises, each performed for 40 seconds, followed by a 20-second rest. You’ll complete two or three full rounds of the circuit, with the option to take short breaks between rounds if needed.

    You’ll need one dumbbell for the entire workout. Choose a weight that feels challenging but manageable — the final few reps should be tough, but still achievable with good form.

    Exercises Included in the Workout

    Sumo Oblique Bends

    Begin in a sumo squat stance with your feet wider than hip-width and toes turned outward. Engage your core and hold the dumbbell behind your head with both hands. Using your oblique muscles, bend to one side, lowering your elbow toward your knee, then return to center before switching sides. Stay low in the squat for the entire 40 seconds.

    Single Dumbbell Swings

    Stand with your feet slightly wider than hip-width and your core braced. Holding the dumbbell in one hand, hinge at the hips and swing it between your legs, then drive it forward until it reaches chest height. Switch hands after 20 seconds, or for a longer challenge, complete 40 seconds per side.

    Dumbbell Core Twists

    With your feet slightly wider than hip-width, hold the dumbbell in both hands in front of your torso. Keeping your abs fully engaged, rotate your upper body from one side to the other with controlled movement. Focus on maintaining tension through your core throughout the exercise.

    Dumbbell Flutter Kicks

    Lie on your back with your lower back pressed firmly into the floor. Lift your head, neck, and shoulders slightly, holding the dumbbell in both hands with arms extended overhead. Raise your legs a few inches off the ground and alternate kicking each leg upward. The movement should stay small and controlled. If you feel strain in your neck, gently rest your head back on the floor.

    Hovering Table Dumbbell Sliders

    Start on all fours with your wrists under shoulders and knees under hips. Hover your knees a few inches above the floor and place the dumbbell beside your body. Keeping your knees lifted, reach the opposite hand under your torso to pull the dumbbell across, then switch hands to reverse the motion. Maintain a steady hover throughout.

  • How to Make a Curly Bob Work for Your Texture According to Professional Stylists

    How to Make a Curly Bob Work for Your Texture According to Professional Stylists

    There’s no denying it: the bob haircut has ruled the hair scene for years. From relaxed, Parisian-inspired cuts to sleek, commanding styles, this shape has proven endlessly adaptable. A quick scroll online reveals bobs in every possible length, texture, and finish, making it one of the most versatile haircuts around.

    For those with curls, though, the idea of going shorter can raise questions. When you’re used to longer lengths helping weigh hair down and define curls, a bob can feel like a risk. Cut it too short and you might worry about unwanted volume; leave it too long and curls can lose their natural bounce and definition.

    The reality is far more reassuring. With the right shape, tailored length, and thoughtful finish, a curly bob can be incredibly flattering and surprisingly freeing. When designed around your natural texture and face shape, it can completely change how your curls look and feel.

    Why a Curly Bob Is So Effective

    Curly bobs work particularly well because of their flexibility in shape. According to stylist Conor McLaughlin of Hershesons Belgravia, shorter lengths allow curls to show their true texture without excess weight pulling them down. By adjusting where bulk is removed, the cut can be made more rounded or closer to the head, depending on the desired effect.

    In simple terms, this means curls are free to spring naturally, hold their bounce, and move with ease. Without heavy length dragging the hair down, the overall shape looks deliberate, light, and well-balanced rather than bulky.

    Modern Takes on Curly Bob Haircuts

    Much like straight and wavy bobs, curly versions come in a range of styles. While sharp blunt cuts and asymmetrical lines remain popular, current trends are leaning softer. McLaughlin favors curly bobs that feel lighter and less chunky, focusing on looser shapes that create effortless volume.

    Think fluid movement, soft structure, and natural-looking fullness rather than tight, retro curls. The goal is a relaxed finish that feels modern, wearable, and easy to maintain.

    How to Style a Curly Bob with Ease

    One of the biggest advantages of a bob is its low-maintenance nature, though a little preparation makes a noticeable difference. McLaughlin recommends starting with a curl cream to nourish and define the hair, followed by the Hershesons Airdry Spray to enhance texture without making curls look overly polished.

    This approach helps achieve healthy definition, soft hold, and effortless texture, resulting in curls that feel natural rather than styled to perfection.

    Inspiration for Your Curly Bob Look

    For visual inspiration, Julia Garner shows how short, loose curls can look polished yet relaxed. Nathalie Emmanuel offers another take, proving that fuller, rounder shapes can bring striking impact. For a more timeless reference, McLaughlin highlights Natalie Portman’s textured, laidback bob as a perfect example of understated style.

    Whether you prefer something sculpted and face-framing or soft and undone, the curly bob is a cut that embraces texture instead of controlling it. It’s easy to manage, visually impactful, and could easily become the most effortless hair choice you make.

  • 10-Minute Yoga Flow: Improve Flexibility With a Quick Routine

    10-Minute Yoga Flow: Improve Flexibility With a Quick Routine

    Building flexibility doesn’t require long workouts or extended studio sessions. A short, focused yoga flow can effectively improve flexibility and expand your range of motion. This 10-minute yoga routine is suitable for both beginners and experienced practitioners. It focuses on opening the body, supporting better posture, and easing stiffness caused by long periods of sitting or standing. Whether you are short on time or looking to add gentle movement to your morning or evening routine, this quick flow helps you feel more open, relaxed, and refreshed.

    1. Cat-Cow Pose (Marjaryasana-Bitilasana): Gentle Spine Warm-Up

    Begin your practice with Cat-Cow Pose, a smooth sequence that warms the spine and encourages spinal mobility. This movement helps awaken the body and prepares you for deeper stretches.

    How to do it:

    • Come into a tabletop position with your wrists under your shoulders and knees under your hips.
    • Inhale, dropping your belly while lifting your chest and tailbone upward.
    • Exhale, rounding your back, tucking your chin, and drawing your navel inward.
    • Continue flowing between these movements for one minute, matching each motion with your breath.

    Benefits: This pose gently mobilizes the spine while easing tension in the neck, shoulders, and back, helping improve overall torso flexibility.

    2. Downward-Facing Dog (Adho Mukha Svanasana): Full-Body Lengthener

    Move into Downward-Facing Dog to stretch the back of the body, including the legs and spine. This foundational pose is known for releasing built-up tension and supporting full-body flexibility.

    How to do it:

    • From tabletop, lift your hips up and back to form an inverted V shape.
    • Press your palms firmly into the floor with fingers spread wide.
    • Engage your legs and gently press your heels toward the ground.
    • Let your head relax between your arms and hold for one minute with slow, steady breaths.

    Benefits: This pose stretches the hamstrings, calves, and spine while helping lengthen muscles and improve flexibility in the lower body.b

    3. Low Lunge (Anjaneyasana): Hip and Thigh Opener

    Low Lunge focuses on the hip flexors and quadriceps, areas that often become tight from extended sitting or standing. It supports improved mobility in the hips and legs.

    How to do it:

    • From Downward-Facing Dog, step your right foot forward between your hands.
    • Lower your left knee to the floor and extend the left leg back.
    • Lift your chest and reach your arms overhead while keeping your core engaged.
    • Hold for 30 seconds, then repeat on the other side.

    Benefits: This stretch releases tension in the hip flexors and quadriceps, helping improve flexibility throughout the lower body.

    4. Seated Forward Fold (Paschimottanasana): Hamstring Stretch

    Seated Forward Fold is an effective pose for deepening hamstring flexibility while gently lengthening the spine.

    How to do it:

    • Sit with your legs extended straight in front of you and feet flexed.
    • Inhale to lengthen your spine.
    • Exhale and hinge forward from the hips, reaching toward your feet or shins.
    • Keep your spine long and hold for one minute while breathing deeply.

    Benefits: This pose improves hamstring flexibility, stretches the spine, and helps relieve lower back tension.

    5. Butterfly Pose (Baddha Konasana): Inner Thigh and Hip Stretch

    Butterfly Pose gently opens the hips and inner thighs, making it ideal for releasing tightness in the lower body.

    How to do it:

    • Sit upright and bring the soles of your feet together.
    • Hold your feet and allow your knees to relax toward the floor.
    • Optionally, lean forward slightly to deepen the stretch.
    • Hold for 30 seconds to one minute while breathing comfortably.

    Benefits: This pose improves hip mobility, increases inner thigh flexibility, and reduces tension in the groin area.

    6. Pigeon Pose (Eka Pada Rajakapotasana): Deep Hip Release

    Pigeon Pose offers an intense stretch for the hips and glutes, making it especially useful for improving hip flexibility.

    How to do it:

    • Start in tabletop and slide your right knee forward behind your right wrist.
    • Extend your left leg straight back.
    • Lower your hips toward the floor, keeping them squared.
    • Stay upright or fold forward and hold for one minute on each side.

    Benefits: This pose deeply stretches the hips, glutes, and lower back, helping release stored tension and improve hip mobility.

    7. Supine Spinal Twist (Supta Matsyendrasana): Spine Relaxation

    End your flow with a gentle spinal twist to release remaining tension and support spinal flexibility.

    How to do it:

    • Lie on your back with knees bent and feet on the floor.
    • Extend your arms out to the sides with palms facing down.
    • Drop both knees to the right while keeping your shoulders grounded.
    • Hold for 30 seconds, then switch sides.

    Benefits: This twist enhances spinal flexibility, stretches the lower back, and helps improve overall torso mobility.

    Conclusion

    This 10-minute yoga flow offers a simple and effective way to enhance flexibility at any experience level. Through gentle movements and mindful breathing, it helps release tension, stretch key muscle groups, and improve range of motion. Adding this routine to your daily schedule supports long-term flexibility and keeps your body mobile. Whether practiced in the morning or before sleep, these poses encourage easier movement and a more relaxed body throughout the day.