Blog

  • This 15-Minute Kettlebell Routine Builds Power Strength and Endurance Using Just 4 Effective Moves

    This 15-Minute Kettlebell Routine Builds Power Strength and Endurance Using Just 4 Effective Moves

    Rewritten Text This kettlebell workout suits busy people in India who want to get fit without spending hours at the gym. The routine uses four carefully selected exercises and takes just 15 minutes. It combines strength training with cardio to help you build power and stamina together. Kettlebells work well because each movement engages several muscle groups at once while improving your coordination. You can do this workout at home or in a small studio. The session fits easily into your daily schedule and gives you practical results that boost your energy and last over time.

    Kettlebell Training for Explosive Full-Body Power

    This kettlebell workout is built around explosive, high-output movements that teach your muscles to produce force rapidly. Exercises such as swings and cleans activate the hips, glutes, and core, developing powerful hip drive that supports overall athletic performance. Because the kettlebell moves dynamically, your body must maintain full-body tension from start to finish. Over time, this training style develops functional power that carries over into everyday activities. Short rest periods also keep the heart rate elevated, improving cardiovascular capacity without relying on running or cycling. The result is a workout that feels intense yet efficient, even within a 15-minute session.

    How Kettlebells Help Build Strength Efficiently

    Strength development relies on consistent tension and controlled movement, both of which kettlebell training delivers effectively. Movements like goblet squats and presses require you to stabilise the load, driving deep core engagement with every repetition. Since many exercises use a single kettlebell, the body must correct imbalances, supporting joint stability throughout the workout. This method encourages balanced muscle loading, which may reduce injury risk over time. When performed with proper technique, these exercises engage multiple muscle groups at once, allowing for faster strength gains without the need for heavy machines or extended training sessions.

    Boosting Endurance with a Short Kettlebell Session

    Endurance is not limited to long-duration workouts; it also involves maintaining effort under fatigue. This kettlebell routine challenges your ability to sustain movement with proper form, strengthening overall muscular endurance. Timed sets promote steady breathing control, helping you manage fatigue more efficiently. As conditioning improves, you may notice greater heart rate resilience during daily activities. The continuous flow of exercises also builds mental focus, training you to stay composed and consistent even as muscles begin to tire.

    Why This Four-Exercise Kettlebell Workout Is Effective

    The effectiveness of this workout comes from its simple, focused structure. Repeating four carefully selected movements reinforces technique while gradually challenging the body. This approach supports time-efficient training without compromising workout quality. By combining power, strength, and endurance in one routine, it delivers well-rounded fitness benefits rather than isolated results. The short duration also encourages consistent daily movement instead of occasional long sessions. For many people in India balancing work and family life, this routine offers sustainable progress that feels both achievable and rewarding.

    Workout Element Purpose Time Allocation
    Kettlebell Swings Power and conditioning 4 minutes
    Goblet Squats Lower-body strength 4 minutes
    Overhead Press Upper-body control 3 minutes
    Farmer Carry Grip and core endurance 4 minutes
  • These 5 Daily Exercises Are Helping a 72-Year-Old Build Strength Balance and Long-Term Mobility

    These 5 Daily Exercises Are Helping a 72-Year-Old Build Strength Balance and Long-Term Mobility

    I’ll admit it—I can be a little persistent when it comes to encouraging my parents to exercise. Over time, I’ve identified five key strength exercises that I regularly recommend to my loved ones to help them maintain strength, balance, and mobility as they age.

    You don’t need a lot of equipment to perform these movements, but I do recommend investing in a quality set of kettlebells or adjustable dumbbells. Being able to increase resistance gradually is essential for building strength over time. Adjustable weights also allow you to tailor the load, repetitions, and sets to suit your current fitness level while continuing to progress.

    If you’re ready to begin, here’s a breakdown of the exercises and the benefits they offer.

    Tip-Toe Farmer’s Walk for Calf Strength and Balance

    Your calf muscles play a crucial role in stabilizing your lower-body joints and helping you move efficiently while walking or running. The tip-toe farmer’s walk differs from traditional calf raises because you stay elevated on the balls of your feet while moving. This keeps the calf muscles engaged for the entire duration of the exercise.

    I suggest using lighter weights for this movement, as balance becomes more challenging and stability is essential. This variation activates smaller stabilizing muscles throughout the body, including the core muscles. Hold a weight in each hand at your sides and walk at a steady pace. Lift onto the balls of your feet and continue walking in that position. Beginners can alternate between normal walking and tip-toe walking before progressing to the full movement.

    Prisoner Squats to Improve Mobility and Posture

    Prisoner squats engage the upper body more than standard squats while testing mobility in the thoracic spine. They also challenge flexibility in the hips, knees, and ankles, helping you stay upright as you squat. A forward lean during squats often signals limited mobility in these key areas.

    To perform the movement, place your hands lightly behind your head and squat down while pressing through your heels. Keep your chest lifted as you lower your hips toward the floor. For variety, you can push your hips backward at the bottom of the squat and hinge forward until your chest is parallel to the ground, briefly resembling the bottom of a good morning. Return to the squat position before standing. As strength improves, you can add a resistance band around the thighs or hold a weight behind the head.

    Split Squats for Stable Lower-Body Strength

    Split squats are ideal for beginners who find lunges difficult, as your feet remain in a fixed position, making balance easier to maintain. Start in a split stance and lower your back knee toward the floor before pushing back up to standing.

    Once you feel confident, you can elevate the back foot to increase the difficulty and place greater emphasis on the glutes. Holding weights in each hand can actually improve balance while adding resistance for the legs. Slowing the lowering phase to three or four seconds increases time under tension, helping build strength more effectively. To further target the glutes, lean your torso slightly forward while keeping your back straight.

    Pike Push-Ups for Shoulder and Arm Strength

    Pike push-ups strengthen the shoulders and triceps using bodyweight in a vertical pressing position. Think of this movement as an overhead press performed upside down. No equipment is required, but the exercise also challenges hamstring and shoulder flexibility.

    Begin in a downward dog position and gradually walk your hands and feet closer together. Shift your weight forward while keeping your hips high. Maintain a more vertical angle than a standard push-up. Lower the top of your head gently toward the floor just in front of your hands, then press back up to return to the starting position.

    Overhead Squats to Build Upper-Body Strength and Mobility

    Overhead squats place greater demands on the upper body than prisoner squats and require strong thoracic mobility and squat depth. Keep your arms locked overhead near your ears, with your chest lifted and spine neutral.

    Begin with bodyweight or very light resistance. I often have clients hold a barbell plate with both hands. To increase the challenge, try holding weight in just one hand to work each side independently. As you squat, maintain an upright torso and distribute weight evenly through the feet using the tripod position—pressing through the heels, big toes, and little toes. Avoid letting the knees cave inward or the chest fall forward. Gradually work toward deeper squats while imagining you’re balancing a tray overhead.

    About the Trainer

    Sam Hopes is a level 3 qualified personal trainer and a level 2 Reiki practitioner. She currently works as the fitness editor at Tom’s Guide and is completing her Yoga for Athletes training. Sam has contributed to multiple fitness publications and worked with several Future brands, including Live Science, Fit&Well, Coach, and T3.

    Her coaching background includes roles at fitness studios such as F45 and Virgin Active. Today, she primarily teaches outdoor bootcamps and specializes in bodyweight training, calisthenics, kettlebell workouts, mobility, and flexibility. Sam has competed in two mixed doubles Hyrox events in London and the Netherlands and completed her first doubles race in 1:11. She believes that true strength comes from a well-rounded and consistent approach to physical training.

  • As a Busy Working Mum These 3 Habits Sparked My Successful Body Recomposition Journey

    As a Busy Working Mum These 3 Habits Sparked My Successful Body Recomposition Journey

    As a physician, I have always understood the value of health and wellness, yet for many years, my own needs were placed last.

    My hospital schedule was overwhelming, and as a mother of two young children, every spare moment revolved around them. My meals were mostly processed foods and quick snacks, and while I occasionally joined cardio sessions or bootcamp-style classes, nothing felt consistent or sustainable. I was constantly exhausted, lacked muscle tone, and struggled to shed postpartum weight.

    The real wake-up call came in 2024 when my one-year-old daughter broke her leg. Carrying her with a cast made me realise how little strength I had. I had no energy left to play with my three-year-old son or manage the demands of my job.

    At 37, I felt completely depleted and knew I was not living the life I wanted.

    I recognised that I needed structure and accountability, which led me to work with a coach. A friend introduced me to KMAK Fitness, an online training programme focused on body recomposition through muscle growth and fat loss, using strength training and macro-based nutrition. Inspired by her transformation, I booked a consultation and began working with my coach, George Pearce.

    Committed to change, I began virtual training three days a week. Initially, I trained entirely at home using dumbbells and free weights. With minimal experience in weightlifting, I started light to learn proper movement patterns. Each 30- to 45-minute session focused on full-body compound exercises, while daily movement included a goal of 10,000 steps.

    The first few weeks were incredibly challenging. I felt tired, sore, and short on time. However, George kept me accountable and reminded me that discipline outweighs motivation. Consistency became my greatest tool. After three months, I noticed visible muscle definition, steady weight loss, improved focus at work, and energy levels I had never experienced before.

    Alongside training, I completely reworked my nutrition habits. I learned how to track macros, prioritise protein, and replace processed foods with more nutrient-dense options. No foods were eliminated, but I began viewing food as fuel rather than restriction.

    Balancing macros took time, but after three months of consistency, the results were clear. My workouts felt stronger, and both my physical and mental well-being improved significantly.

    Now at 39, I continue training three days a week, focusing on two lower-body sessions and one upper-body session, while averaging 12,000 steps daily. My workouts are still programmed by George, but I now train at Life Time, where I progressed to heavier weights and machines.

    A major breakthrough occurred when I began working with Cory McCue, a functional movement specialist skilled in Pilates and TRX. His emphasis on form, mobility, and functional strength improved my balance, reduced injury risk, and enhanced my overall movement quality.

    Each workout typically includes six exercises performed for three sets of 8 to 12 reps. Progressive overload remains my priority, with movements such as squats, hip thrusts, Romanian deadlifts, dumbbell rows, and pull-ups. I also include accessory exercises like biceps curls, triceps extensions, and kettlebell core work.

    At the start of my journey, an 8-pound goblet squat felt impossible. Two years later, I can squat 105 pounds. Push-ups and pull-ups once seemed unreachable, but I can now complete eight push-ups and am close to achieving an unassisted pull-up. Each milestone reflects growth earned through persistence.

    In addition to strength training, I maintain 12,000 daily steps and regularly add short cardio sessions on the treadmill or stair climber. Stretching and foam rolling before and after workouts help preserve flexibility and range of motion.

    My nutrition approach remains macro-focused, though experience has taught me portion control without tracking every bite. Weekly meal preparation with my husband ensures consistency during busy workdays.

    Three Habits That Made My Transformation Successful

    Following a structured training plan

    As a busy working mother, it’s easy to make excuses. To stay consistent, I schedule workouts like appointments and block them into my calendar. Not every session is perfect, but progress over perfection keeps me moving forward.

    Prioritising consistency over motivation

    There are days when exhaustion wins, but discipline keeps me grounded. Whether it’s lifting weights, walking 10,000 steps, or preparing meals, every effort counts. Motivation fades, but self-discipline creates lasting confidence.

    Valuing my own well-being

    Years of caring for others left me disconnected from my body. Strength training taught me the importance of showing up for myself. Building physical strength allowed me to reclaim energy, resilience, and a stronger sense of self.

    Over the past two years, I’ve achieved more than I ever imagined. I balance a career I’m proud of with a fulfilling family life. As Medical Director at Moffitt Cancer Center, a leader in immunotherapy research, and founder of a nonprofit supporting women physicians, strength training has become the foundation that allows me to stay present, grounded, and strong.

    My thirties have been a decade of transformation, and as I step into my forties, I look forward to continuing this journey—stronger than ever.

  • Strength Training in Your 40s Can Reverse Muscle Loss These 4 Exercises Matter Most

    Strength Training in Your 40s Can Reverse Muscle Loss These 4 Exercises Matter Most

    Strengthen your inner foundation and elevate your external results with these carefully selected self-help books for women focused on growth, confidence, and long-term success. As 2026 begins, many women are looking beyond short bursts of motivation toward lasting personal transformation. The right book can do more than inspire—it can reshape how you think, act, and intentionally design the life you want.

    Whether your focus is building unshakable confidence, gaining control of your finances, or advancing your career with clarity, these eight titles stand out for their insight, practicality, and real-world relevance.

    This curated collection of self-help books is designed for women ready to turn reflection into action. Each book provides tools to refine your mindset, strengthen daily habits, and create outcomes aligned with your goals.

    At Chic Style Collective, we see personal development as a vital part of a refined lifestyle—one that goes beyond appearance or home aesthetics and extends into how you think, plan, and invest in yourself.

    A truly elevated life is built with intention through consistent habits, clear boundaries, financial self-assurance, and a mindset focused on sustainable fulfilment rather than quick fixes. These books align seamlessly with our Refined Lifestyle philosophy: thoughtful living, quiet ambition, and steady self-growth that compounds over time.

    1. Atomic Habits by James Clear

    James Clear’s modern classic breaks down behaviour change into simple, actionable principles. Rooted in psychology and habit science, Atomic Habits explains how small, consistent adjustments can lead to remarkable improvements over time. For women balancing multiple responsibilities, it offers a practical system for replacing limiting patterns and building habits that support goals related to health, productivity, and personal growth.

    2. The Mountain Is You by Brianna Wiest

    The Mountain Is You turns attention inward, examining emotional self-sabotage and the internal work required to overcome it. Brianna Wiest focuses on emotional intelligence and resilience, guiding readers to identify self-defeating patterns, heal internally, and step into greater personal power—making it a powerful resource for mindset transformation and self-belief.

    3. Think Again by Adam Grant

    Organisational psychologist Adam Grant challenges readers to question their assumptions in Think Again. He highlights the importance of intellectual humility and the ability to rethink deeply held beliefs. For women building careers or launching businesses, learning how to unlearn and adapt quickly can become a critical advantage.

    4. Get Good with Money by Tiffany Aliche

    Tiffany “The Budgetnista” Aliche delivers an empowering guide to financial clarity and confidence. Get Good with Money simplifies budgeting, saving, debt management, and investing without judgment. Designed for women ready to take ownership of their financial future, it combines practical guidance with motivational focus to help build habits that endure.

    5. Limitless by Jim Kwik

    In Limitless, brain coach Jim Kwik shares techniques to expand memory, focus, and learning ability. Women managing busy schedules and continuous learning demands will find his strategies for faster reading, stronger recall, and cognitive optimisation especially useful. This book transforms brain science into a practical performance framework.

    6. The Confidence Code by Katty Kay and Claire Shipman

    The Confidence Code blends research from genetics, psychology, and neuroscience with stories of accomplished women to explore how confidence develops. Katty Kay and Claire Shipman show how confidence can be built as a repeatable habit, influencing leadership, advocacy, and decision-making. It’s an essential read for women ready to fully step into their capabilities.

    7. Designing Your Life by Bill Burnett and Dave Evans

    Inspired by Stanford’s well-known course, Designing Your Life applies design thinking to life and career choices. The book reframes planning as an iterative and creative process, encouraging experimentation and curiosity instead of fear. It resonates deeply with women navigating transitions or seeking work that feels purposeful.

    8. The Gap and the Gain by Dan Sullivan and Dr. Benjamin Hardy

    Dan Sullivan and Dr. Benjamin Hardy introduce a powerful mindset shift in The Gap and the Gain. Rather than measuring success against idealised outcomes, the book encourages tracking progress from your starting point. This approach builds motivation, confidence, and momentum, supporting ambitious women in pursuing growth without burnout.

    These eight books offer more than recommendations—they provide a clear roadmap for meaningful growth in 2026. Whether you’re refining habits, strengthening your mindset, improving your relationship with money, or navigating career goals, these titles deliver both insight and practical frameworks. Read with purpose, apply what aligns, and let the year ahead be shaped by intentional progress.

  • 12 Simple Yoga Poses to Improve Flexibility and Daily Mobility

    12 Simple Yoga Poses to Improve Flexibility and Daily Mobility

    Yoga offers significant benefits for improving flexibility. These advantages apply to both experienced practitioners and those just starting out. Regular practice of yoga poses helps increase your body’s flexibility while also improving how far you can move your joints and reducing stiff muscles. Many people mistakenly believe they need to already be flexible before beginning yoga. This is not true. The 12 basic yoga poses described here work to stretch your muscles & build strength throughout your body. They also help develop better overall flexibility. When you add these poses to your regular exercise routine you will notice improvements in how flexible you are. You will also find that moving through daily activities becomes easier and more comfortable.

    Downward-Facing Dog (Adho Mukha Svanasana)

    Downward-Facing Dog is a foundational yoga posture known for stretching the hamstrings, calves, and spine while strengthening the arms and shoulders. It supports full-body flexibility and helps energize the body.

    How to Practice:
    Begin on your hands and knees. Lift your hips upward toward the ceiling, forming an inverted V shape. Keep your hands shoulder-width apart and your feet hip-width apart. Press your heels gently toward the floor while lengthening your spine. Hold for 30 seconds to 1 minute with steady breathing.

    Benefits:
    Stretches the back, hamstrings, and calves while building strength in the arms and shoulders.

    Child’s Pose (Balasana)

    Child’s Pose is a calming, restorative posture that gently stretches the hips, thighs, and back. It is ideal for releasing tension and encouraging mental relaxation.

    How to Practice:
    Kneel on the floor and sit back onto your heels. Lower your forehead to the mat and extend your arms forward or rest them beside your body. Breathe deeply and allow your body to relax.

    Benefits:
    Provides a deep stretch for the hips and back while calming the nervous system.

    Seated Forward Fold (Paschimottanasana)

    The Seated Forward Fold targets the hamstrings, spine, and lower back, making it an effective pose for increasing flexibility and encouraging relaxation.

    How to Practice:
    Sit with your legs extended straight. Inhale to lengthen the spine, then exhale as you hinge forward from the hips, reaching toward your feet or shins. Hold for 30 seconds to 1 minute.

    Benefits:
    Stretches the hamstrings and lower back while soothing the mind.

    Cat-Cow Pose (Marjaryasana–Bitilasana)

    Cat-Cow Pose is a gentle flow between two movements that warms up the spine and improves spinal mobility.

    How to Practice:
    Begin in a tabletop position. Inhale and arch your back, lifting the chest and tailbone. Exhale and round the spine, tucking the chin and tailbone. Continue flowing for several rounds.

    Benefits:
    Enhances spinal flexibility and releases tension in the neck and shoulders.

    Reclining Bound Angle Pose (Supta Baddha Konasana)

    This restorative pose gently opens the hips and inner thighs while promoting deep relaxation.

    How to Practice:
    Lie on your back, bend your knees, and bring the soles of your feet together. Allow your knees to fall outward. Use cushions for support if needed and relax your arms by your sides.

    Benefits:
    Improves hip and groin flexibility while calming the body.

    Standing Forward Fold (Uttanasana)

    Standing Forward Fold deeply stretches the hamstrings, calves, and lower back while helping to calm the mind.

    How to Practice:
    Stand with feet hip-width apart. Inhale to lengthen the spine, then exhale and fold forward from the hips. Let your head relax and breathe deeply.

    Benefits:
    Releases tension in the back and enhances leg and spinal flexibility.

    Pigeon Pose (Eka Pada Rajakapotasana)

    Pigeon Pose is a deep hip-opening posture that targets the hip flexors, thighs, and lower back.

    How to Practice:
    From a tabletop position, bring one knee forward behind the wrist and extend the opposite leg back. Lower your torso toward the mat and rest your forehead down. Hold, then switch sides.

    Benefits:
    Releases stored tension in the hips and improves lower-body flexibility.

    Cobra Pose (Bhujangasana)

    Cobra Pose is a gentle backbend that opens the chest and improves spinal flexibility.

    How to Practice:
    Lie on your stomach with palms under your shoulders. Inhale and lift your chest, keeping elbows slightly bent and hips grounded. Hold briefly, then release.

    Benefits:
    Strengthens the spine and opens the chest and shoulders.

    Butterfly Pose (Baddha Konasana)

    Butterfly Pose is a seated hip opener that stretches the inner thighs and groin.

    How to Practice:
    Sit upright, bring the soles of your feet together, and allow your knees to drop outward. Hold your feet and gently deepen the stretch.

    Benefits:
    Improves flexibility in the hips and inner thighs.

    Lunge Pose (Anjaneyasana)

    Lunge Pose stretches the hip flexors and thighs while strengthening the legs and improving balance.

    How to Practice:
    Step one foot forward into a lunge position, lowering the back knee to the floor. Press the hips forward and hold before switching sides.

    Benefits:
    Opens the hips and increases flexibility in the legs.

    Sphinx Pose (Salamba Bhujangasana)

    Sphinx Pose is a mild backbend that supports spinal flexibility without excessive strain.

    How to Practice:
    Lie on your stomach with elbows under shoulders. Lift the chest while keeping the lower body relaxed. Hold comfortably.

    Benefits:
    Strengthens the lower back and opens the chest.

    Twisted Root Pose (Supta Matsyendrasana)

    Twisted Root Pose is a gentle spinal twist that helps release tension and encourages relaxation.

    How to Practice:
    Lie on your back, bend your knees, and let them fall to one side while extending your arms outward. Turn your head in the opposite direction, then switch sides.

    Benefits:
    Improves spinal mobility, hip flexibility, and promotes deep relaxation.

  • At Home Eyebrow Tinting Methods Create Soft Defined Brows With Minimal Effort

    At Home Eyebrow Tinting Methods Create Soft Defined Brows With Minimal Effort

    At-home eyebrow tinting has become a go-to beauty solution for people who want neatly shaped brows without frequent salon appointments. This trend is especially growing in India, where DIY grooming routines are gaining popularity. With the right technique, it is possible to enhance your natural brows in a safe, affordable, and convenient way at home. The goal is to achieve soft definition rather than brows that look too dark or harsh. By following a straightforward process and using beginner-friendly products, even first-time users can create clean, well-groomed eyebrows with confidence.

    Easy At-Home Eyebrow Tinting for Beginners

    Learning the basic principles of eyebrow tinting is essential before starting. Selecting a shade that closely matches your natural brow color helps maintain a realistic and balanced appearance. A patch test should always be done in advance to minimize the risk of irritation and keep skin safety a priority. Brows should be thoroughly cleaned to remove oil or makeup, as this allows the tint to apply evenly and deliver smoother results. Using a small amount of product and closely following the recommended timing helps prevent over-darkening, making it easier to achieve soft, everyday brows.

    Step-by-Step Method for Tinting Eyebrows at Home

    Having a clear process makes at-home eyebrow tinting feel much more manageable. Begin by applying petroleum jelly around the brows to shield the surrounding skin and create neat edges. Prepare the tint according to the instructions and apply it with a small angled brush for better precision. Start from the tail of the brow and move toward the front, keeping the inner area lighter for a more natural gradient. Set a timer and watch the color closely to avoid staining. Once the time is complete, gently remove the tint with a damp cotton pad to reveal evenly tinted, natural-looking brows.

    Caring for Brows After Tinting

    Proper aftercare plays a key role in how long the tint lasts and how evenly it fades. Avoid washing your face for at least 12 hours so the pigment can settle properly. Using gentle, sulfate-free cleansers around the brow area helps preserve the color. Applying a light brow oil or serum keeps the hair nourished and supports healthy growth. Touch-ups should be spaced appropriately to prevent dryness or damage, helping maintain consistent, low-maintenance brows that suit busy daily routines.

    Summary and Key Takeaways

    At-home eyebrow tinting is a practical choice for anyone looking to define their brows without relying on salon visits. When done correctly, it offers a cost-effective way to control shade and intensity. Success depends on proper preparation, patience, and careful attention to instructions. By aiming for subtle enhancement instead of dramatic change, you can create polished brows that complement your features. With regular care and mindful maintenance, this routine can easily become a reliable part of your personal grooming habits.

    Recommended Practices for Best Results

    • Shade selection: Match your natural brow color for a soft, realistic finish
    • Patch testing: Test 24 hours before use to reduce irritation risk
    • Application time: Keep within 5–10 minutes for controlled color depth
    • Aftercare: Avoid water for 12 hours to support longer-lasting results
    • Maintenance: Retint every 3–4 weeks for a consistent brow look
  • Psychology Explains When Grey Hair Enhances Beauty—and When Coloring Makes Sense

    Psychology Explains When Grey Hair Enhances Beauty—and When Coloring Makes Sense

    That first silver strand has a way of making you pause. For some people, it appears in their twenties; for others, not until after 50. While we can’t control when gray hair shows up, we can choose how to handle it—whether to cover it fully, soften it with blending, or wear it confidently. Understanding your options early helps avoid surprises at the salon or in front of the mirror.

    Why Hair Loses Its Color (And Why the Texture Changes)

    Hair turns gray when melanin-producing cells called melanocytes stop supplying pigment to the hair shaft. Research suggests their stem cells can become inactive over time, which explains why graying often accelerates with age. A global survey found that about 74% of people aged 45 to 65 had some gray hair, though far fewer matched the old idea of being mostly gray by 50. Once pigment disappears, hair commonly feels coarser, drier, and harder to manage.

    When Covering Gray Feels Like the Right Choice

    For many, the immediate response is to color their hair—and that’s common. Permanent hair dye remains the most widely used option, but gray hair reacts differently to color. Products designed specifically for gray coverage or guidance from a professional colorist can help prevent shades from turning too warm or overly bright. Without the right approach, a goal like “natural light brown” can easily shift into an unwanted copper tone.

    • Scattered gray: Choose shades one to two levels lighter than your natural color.
    • Mostly gray hair: Opt for overall lighter tones instead of very dark shades.
    • Avoid deep black colors: They highlight white roots quickly and can make hair appear thinner.

    Another important factor is allergic reactions. The ingredient p-phenylenediamine (PPD), common in permanent dyes, is a leading cause of contact allergies in hair products. Over 24 years of testing, around 5.6% of patients showed reactions. Some temporary “black henna” tattoos also contain PPD, increasing sensitivity risks. A simple patch test and an open discussion with your stylist can help prevent discomfort later.

    Exploring Natural and Plant-Based Hair Color

    Plant-based dyes, such as henna often mixed with indigo, are an alternative for people who can’t tolerate conventional dyes. Allergic reactions can still occur, but they are generally less common. However, there are trade-offs. On gray hair, henna may appear very vivid, and uneven gray distribution can result in a patchy look. Because gray hair is often more porous, color can cling longer, and switching directly from henna to chemical dye may cause unexpected shades, including green.

    Low-Effort Blending With Highlights and Soft Techniques

    If frequent salon visits aren’t ideal, highlights and gray-blending methods offer a practical compromise. When gray hair makes up less than about 30% and the base color is light brown, a colorist can add subtle lighter strands that soften the appearance of silver. With lower contrast, touch-ups can often be spaced out to roughly every four months.

    Effective gray blending doesn’t hide every silver strand. Instead, it makes gray look intentional and integrated, rather than something that needs fixing.

    Hair Color Options and Maintenance Schedule

    • Full permanent color: Refresh every 4–6 weeks to manage visible roots.
    • Highlights or gray blending: Typically refreshed every 3–4 months.
    • Natural gray with toning gloss: Maintain every 6–8 weeks or as needed.

    Experience shows that satisfaction often comes from choosing a routine that fits daily life, not from achieving a perfect shade on paper. Matching your approach—whether full coverage, blended color, or natural gray—to your time and budget helps the process feel like a style choice rather than a problem.

    Caring for and Embracing Natural Silver Hair

    Letting gray hair grow naturally doesn’t mean ignoring care. Gray and white strands lose some natural UV protection and often feel drier and more wiry. The focus should be on moisture, shine, and tone. Products designed for silver hair work well, but formulas for very dry or damaged hair can be just as effective.

    • Use deep conditioners or masks weekly for softness and shine.
    • Apply lightweight oils, such as argan or burdock oil, to smooth the ends.
    • Reduce heat styling or always use a heat protectant to prevent extra roughness.

    Striking gray hair isn’t about age—it’s about texture, hydration, and confidence. Well-cared-for silver hair reflects light differently than over-processed color. Whether softened with gentle dye or left completely natural, the real success comes from seeing a reflection that feels like you—just with a bit more experience showing through.

  • Flexibility and Mobility Yoga: 6 Poses That Improve Joint Range and Movement

    Flexibility and Mobility Yoga: 6 Poses That Improve Joint Range and Movement

    Yoga is a time-tested practice valued for strengthening both the body and the mind. One of its most powerful benefits is the way it enhances flexibility and joint mobility, which play a vital role in everyday comfort and movement. Whether you are new to yoga, physically active, or simply aiming to move with greater ease, adding targeted poses to your routine can create meaningful change. Below are six carefully selected yoga poses that focus on improving flexibility and mobility in a safe and effective manner.

    1. Downward-Facing Dog (Adho Mukha Svanasana)

    Downward-Facing Dog is a foundational posture that gently stretches and strengthens multiple muscle groups at once. It primarily works the hamstrings, calves, spine, and shoulders while helping open the hips and back. This pose supports overall mobility and helps reduce stiffness caused by prolonged sitting or inactivity.

    How to Do It:

    • Begin on all fours with wrists under shoulders and knees under hips.
    • Tuck your toes and lift your hips upward, forming an inverted V shape.
    • Keep feet hip-width apart and hands shoulder-width apart.
    • Press firmly through your palms and lengthen your legs without forcing the heels down.
    • Hold for 5–10 breaths while focusing on a long spine.

    Benefits:

    • Improves hamstring flexibility
    • Enhances shoulder mobility
    • Eases neck and spine tension

    2. Cat–Cow Flow (Marjaryasana–Bitilasana)

    Cat–Cow is a gentle flowing sequence that increases spinal flexibility while warming up the neck and shoulders. This rhythmic movement encourages smoother spinal motion, supports posture, and helps release built-up tension. It works especially well as a warm-up at the start of a yoga session.

    How to Do It:

    • Start on all fours with a neutral spine.
    • Inhale, drop the belly, and lift the chest and tailbone (Cow Pose).
    • Exhale, round the spine, tuck the chin, and draw the tailbone down (Cat Pose).
    • Move slowly between the two for 5–10 breaths.

    Benefits:

    • Boosts spinal mobility
    • Improves neck flexibility
    • Relieves back stiffness

    3. Pigeon Pose (Eka Pada Rajakapotasana)

    Pigeon Pose is a deep hip opener that targets the hip flexors, glutes, and thighs. It helps release stored tightness in the hips, an area often affected by long hours of sitting. Improved hip mobility supports smoother movement and reduces lower-back discomfort.

    How to Do It:

    • Begin in a tabletop position.
    • Bring your right knee toward your right wrist, sliding the ankle forward.
    • Extend the left leg straight back with the top of the foot resting on the floor.
    • Lower your hips evenly and stay upright or fold forward if comfortable.
    • Hold for 30–60 seconds, then switch sides.

    Benefits:

    • Opens tight hips
    • Improves lower-back flexibility
    • Releases sitting-related tension

    4. Low Lunge Pose (Anjaneyasana)

    Low Lunge is an effective pose for improving flexibility in the legs while enhancing balance and stability. It deeply stretches the hip flexors and quadriceps, muscles that often shorten due to limited movement. This posture also supports better lower-body mobility.

    How to Do It:

    • Step your right foot forward from standing or kneeling.
    • Align the right knee over the ankle and lower the left knee to the floor.
    • Keep hips facing forward and lift your arms overhead.
    • Sink gently into the lunge and breathe steadily.
    • Hold for 5–10 breaths before switching sides.

    Benefits:

    • Lengthens hip flexors
    • Stretches quads and hamstrings
    • Builds balance and core support

    5. Seated Forward Fold (Paschimottanasana)

    Seated Forward Fold offers a calming stretch along the entire back of the body. It targets the hamstrings, spine, and lower back, encouraging greater spinal mobility while helping release tension. This pose is ideal for improving forward bending ability over time.

    How to Do It:

    • Sit with legs extended straight in front of you.
    • Inhale to lengthen the spine.
    • Exhale and hinge forward from the hips.
    • Reach for your feet or ankles without rounding the back.
    • Hold for 30–60 seconds while breathing deeply.

    Benefits:

    • Improves hamstring length
    • Enhances spinal flexibility
    • Promotes mental relaxation

    6. Butterfly Pose (Baddha Konasana)

    Butterfly Pose is a seated stretch that focuses on the hips, inner thighs, and groin. It gently encourages greater range of motion in the lower body and helps ease tightness that can limit movement. This pose is especially useful for improving hip flexibility.

    How to Do It:

    • Sit upright with legs extended.
    • Bring the soles of your feet together.
    • Allow the knees to fall outward naturally.
    • Hold your feet and gently guide the knees downward.
    • Optionally fold forward while keeping the spine long.

    Benefits:

    • Opens hips and thighs
    • Improves groin flexibility
    • Reduces lower-back tension

    Building Flexibility and Mobility Through Consistent Practice

    Adding these six yoga poses to your routine can gradually enhance overall flexibility and mobility. With regular practice, the body begins to move more freely, stiffness decreases, and the risk of injury is reduced. These poses are adaptable for all levels, making them suitable for beginners and experienced practitioners alike. The key lies in consistent, mindful practice, allowing the body to open and strengthen over time. As flexibility improves, daily movements become smoother, more comfortable, and easier to perform.

  • Why Your House Still Feels Chilly Even When the Thermostat Says It’s Warm

    Why Your House Still Feels Chilly Even When the Thermostat Says It’s Warm

    Your breath almost seems visible in the hallway. You rub your hands, tug your sleeves lower, and tap the small screen on the wall as if it might suddenly reveal a different number. The heating bill keeps rising, yet your comfort does not. What should feel like winter warmth starts to feel like a quiet joke your house is playing on you.

    In the living room, the thermostat display glows with calm certainty. You sit on the sofa, wrapped in a blanket, feet tucked beneath you, wondering how 21°C can feel so close to standing inside a fridge. Somewhere between the number on the wall and the chill in your socks, something stops adding up.

    The answer is slightly frustrating, a little unsettling, and oddly reassuring at the same time.

    Why 21°C Can Feel Nothing Like 21°C

    The first thing to understand is that the thermostat only tells part of the story. It works like a single instrument playing alone while the rest of the orchestra stays silent. That number reflects the air temperature at one fixed spot, not the warmth your body actually feels where you sit, stand, or move.

    Your body reads the room differently. It senses cold walls, drafts around your ankles, and subtle changes in humidity. A space can average 21°C overall while cold surfaces and uneven airflow make it feel closer to 18°C. That gap is where discomfort begins.

    Heating systems often get the blame first. In reality, the problem usually lies with the building itself. Air leaks, poor insulation, temperature layering, and even furniture placement can quietly undermine that reassuring number on the wall.

    Imagine a semi-detached home in a windy suburb, built in the late 1990s. Each evening, the thermostat is set to 20°C. The living room, open to the hallway and stairs, never feels quite right. Children complain about the cold floor. The thermostat creeps up a degree, then another, and the energy bill follows.

    When a technician checks the room, nothing appears broken. The thermostat wall reads 21°C. The centre of the room at sitting height shows 19.3°C. Near the floor, it drops to 17.5°C. The large window measures just 13°C. Warm air rises upstairs, while cold surfaces pull heat away from where people actually spend time.

    This is a common trap. The numbers look fine. The experience does not.

    Research on thermal comfort shows that people often feel cold when wall or window surfaces fall below 17–18°C, even if the air temperature seems normal. Our bodies respond to surfaces, not screens. So a home heated to 20°C can still feel uncomfortably cold when you sit near a large, icy window.

    Related Everyday Habits People Often Miss

    • This daily screen habit affects sleep more than blue light
    • This bathroom habit speeds up limescale buildup
    • This cleaning tool works better when not used daily
    • Hang it by the shower to reduce lingering moisture
    • Why reheating rice this way increases health risks
    • People who feel thirsty all day often miss this signal
    • This gardening shortcut weakens plants over time
    • $2,000 direct deposit for U.S. citizens in January: eligibility and payment timing

    There is also a psychological layer. Seeing a “good” number creates expectations. When 21°C does not feel cosy, frustration amplifies the discomfort. It becomes emotional as well as physical, as if your home is quietly letting you down.

    The Hidden Reasons Your Home Loses Heat

    One of the most effective steps has nothing to do with adjusting the thermostat. Start by finding hidden air movement. Light a candle or incense stick and move it slowly along skirting boards, window frames, and door gaps. Watch how the flame or smoke shifts.

    Those movements reveal where warm air escapes and cold air sneaks in. Seal these spots first. Draught excluders, foam window strips, and brush seals for letterboxes can make a noticeable difference. Even a small gap under a front door can make an entire hallway feel icy.

    Next, focus on where you actually sit. If your sofa rests against an uninsulated external wall, your body constantly loses heat to that cold surface. A thick throw or a slim insulated panel behind the sofa can change how that area feels without touching the thermostat.

    Small habits often matter more than dramatic changes. Close doors to unused rooms in the evening so warmth stays where you need it. Use thick curtains at night, but keep them clear of radiators. Think less about heating the whole house and more about warming the specific spaces you live in.

    Some common mistakes make things worse. Turning the thermostat far higher “to heat faster” does not work. The thermostat sets a target, not a speed. In a poorly insulated home, this only strains the system, overheats certain areas, and leaves cold corners unchanged.

    The floor is often ignored. Hard flooring above unheated spaces acts like a cooling plate. Even with 20°C air at chest height, cold feet can dominate your comfort. A well-placed rug can feel like a heating upgrade at a fraction of the cost.

    Many people also feel they should not use extra layers or blankets because “the heating is on.” Comfort does not follow rules. Your body simply wants a stable envelope of warmth, including clothing and textiles.

    Your thermostat is like a speedometer. It shows one accurate number while hiding the conditions that decide whether the ride actually feels comfortable.

    Simple Comfort Improvements That Really Help

    • Move the thermostat away from sunlight, radiators, and draughts for more accurate readings
    • Bleed and balance radiators so heat spreads evenly
    • Add rugs, throws, and cushions where you sit or walk most
    • Use thermal curtains at night and open them during the day
    • Block unused chimneys and vents with proper draught stoppers

    Rethinking What “Warm” Means at Home

    Once you realise that 21°C is only a guideline, not a comfort guarantee, your perspective shifts. You stop blaming yourself and start noticing patterns. The cold draft at your back. The corner where guests reach for extra layers. The bedroom that feels fine at night but harsh in the morning.

    Thermal comfort sits at the intersection of physics and daily life. Air temperature, surface warmth, airflow, humidity, clothing, and activity all combine into one question: do you feel okay right now? Raising the thermostat is just one option, and often not the most effective.

    On a deeper level, comfort affects how we relate to our homes. A space that looks warm on paper but feels cold in reality slowly erodes trust. You avoid certain spots, gather in one room, or live under blankets by default. Understanding the real causes restores a sense of control.

    The next time you glance at that glowing number, you may see it as one clue among many. The real story lives in cold toes, warm mugs, chosen seats, and the candle flame bending near the floor. It is a story many people recognise when they say, “The heating’s on, but I’m still freezing.”

    Key Takeaways for Better Comfort

    • Thermostat versus reality: The thermostat measures air in one spot, not overall comfort
    • Surfaces and draughts: Cold walls, windows, and air leaks steal body heat
    • Practical actions: Seal gaps, adjust placement, use textiles, and balance heating for better comfort
  • Say Farewell to Dull Grey Hair With This Easy Shampoo Trick That Restores Natural Tone

    Say Farewell to Dull Grey Hair With This Easy Shampoo Trick That Restores Natural Tone

    She runs her fingers through her roots beneath the harsh mirror lights, leans in, then steps back, as if refusing what she has just noticed. Fine silver strands shimmer under the glow. She exhales, picks up a box labeled “dark chestnut”, scans the instructions, then gently places it back. Too time-consuming. Too harsh. Too much effort for a simple Tuesday evening.

    A couple of shelves below, another shopper scrolls on her phone and murmurs, “There has to be an easier way.” A short video appears: “Mix this into your shampoo and your grey hair looks darker in weeks.” She stops scrolling. Ingredients already in her kitchen. No gloves. No harsh lines along the scalp. Just a bottle in the shower and a small habit that doesn’t shout “I’m fighting age.”

    The dye box remains untouched. Suddenly, her shampoo feels like a quiet ally.

    But could such a small trick really soften the rules of time?

    Why gentle grey darkening has suddenly captured attention

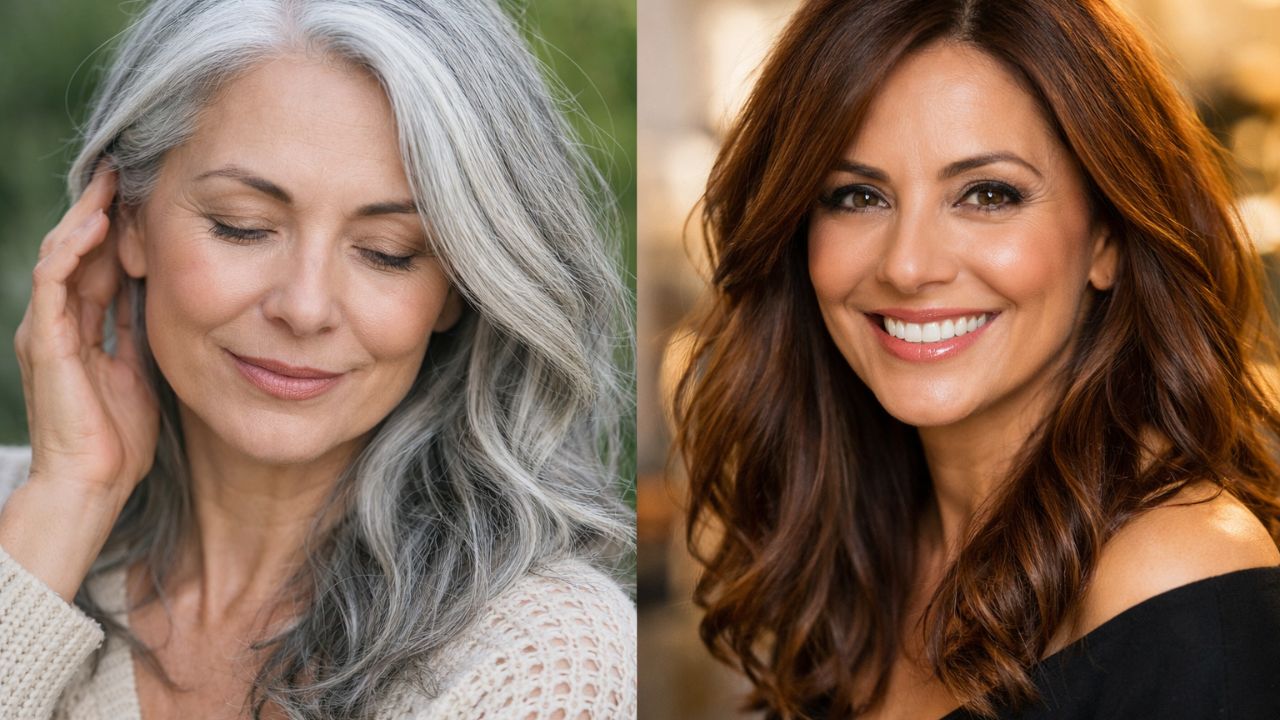
    Grey hair once felt like a final verdict. Today, it feels more like a conversation. Many people are not trying to erase it completely; they simply want it softer, deeper, less attention-grabbing. On the subway, you see it everywhere: natural hair with a muted veil of grey, not the stark stripe that signals an overdue dye job.

    The shift goes beyond hair itself. There is growing fatigue with heavy colouring routines and long salon visits. In their place comes curiosity for smaller, quieter habits. A spoon added to shampoo. A familiar kitchen ingredient repurposed. A subtle adjustment rather than a total change.

    On a rainy Monday in London, 49-year-old Emily shares her experience over coffee. When she first noticed white at her temples during a video call, her thought wasn’t “I’m getting old,” but “I look exhausted.” She tried permanent dye once. The colour felt flat, the scent lingered for days, and she no longer recognised her own hair.

    Later, she read about adding coffee and black tea to shampoo to slowly deepen grey strands. No overnight transformation. No filtered illusion. Just a gradual change, wash by wash. After a month, friends asked if she was sleeping better or had changed her skincare. No one mentioned her hair, which was exactly what she wanted.

    She is far from alone. Beauty retailers report rising searches for “natural grey hair darkening” and “no dye grey coverage.” These searches are about more than appearance. They reflect a desire for choice and control: keeping some silver, softening others, experimenting without committing to harsh chemicals.

    Grey hair appears as pigment fades. Hair follicles rely on melanocytes to produce melanin. Over time, these cells slow or stop, leaving strands transparent, which we see as grey or white. Traditional dyes force colour back in using strong chemicals that penetrate the hair shaft quickly.

    • This tiny change in how you phrase requests makes people far more willing to help you
    • People who stay calm under pressure almost always use this simple mental rule without realising it
    • Goodbye kitchen cabinets: this cheaper new alternative doesn’t warp, won’t grow mould, and is quickly winning over homeowners
    • This mindset shift helps break procrastination faster than productivity hacks
    • A new set of eight spacecraft images reveals with unsettling precision the interstellar comet 3I ATLAS
    • “You shouldn’t rub or spray on your wrists or neck”: the simple trick to make perfume last all day
    • Nivea: “I’m a dermatologist and I studied the blue cream’s formula, here’s my honest take”
    • Why some people remember conversations clearly while others forget them within hours

    The newer approach works differently. Plant pigments and natural tannins cling to the outer layer of hair, much like tea staining fabric. They fade gradually and tend to be gentler on the scalp. Instead of forcing biology, the method relies on repetition and patience, carried out quietly beneath running water.

    So when someone says, “Just add this to your shampoo,” they are really offering a slower, softer agreement with time.

    The simple method: one spoon in your shampoo

    The idea is almost disarmingly easy. You turn your everyday shampoo into a mild, gradual darkening wash by blending in a natural colour source. The most discussed pairing is strong black tea or coffee mixed into a gentle shampoo.

    You prepare an intense brew, allow it to cool completely, then mix a small amount into your shampoo bottle and shake well. With each wash, the natural pigments lightly coat the hair’s surface. No gloves, no timers, no lingering chemical scent. Just an extra moment under the shower, massaging what looks like ordinary foam.

    Some people enhance the mix with small amounts of sage, rosemary, or amla powder. At that point, the process becomes a ritual. A jar, a spoon, steam rising from a mug. The outcome is not full coverage. It is a soft shift, where greys resemble highlights rather than harsh lines.

    Disappointment often comes from unrealistic expectations. Trying the method twice and expecting jet-black hair leads many to dismiss it too quickly. These ingredients work by layering translucent colour over time. The effect builds slowly, especially on very light or coarse hair.

    Hair texture plays a role. Thick hair may need stronger infusions or occasional leave-on treatments before shampooing. Fine hair can darken faster but may show buildup sooner. Let’s be honest: no one follows this perfectly every day. Showers get rushed, routines change, and that’s fine. The trick is meant to fit real life.

    The biggest mistake is using too much. Excess coffee can dry hair, and overly strong tea can leave residue. The balance between softly stained and dull and heavy is delicate. It works best when treated like seasoning, adjusted gradually.

    “At first I felt let down,” says Marco, 57. “My temples were still grey. Then someone told me I looked more rested. That’s when I understood it had worked. It didn’t erase my age, it just softened it.”

    A simple routine many people follow

    • Brew 250 ml of very strong black tea or coffee and let it cool fully
    • Pour about half into an almost empty bottle of gentle shampoo and shake well
    • Use this mixture two to three times a week, leaving the lather on for a few minutes
    • Observe results for two weeks before increasing strength
    • Dilute or pause if hair feels dry, and use conditioner if needed

    On paper, it sounds basic. In practice, it becomes a brief pause where you decide how you want your reflection to change alongside you, not against you.

    Living with softer greys and what really changes

    What often stays with people is not just the darker tone. It is a subtle mental shift. When silver feels muted rather than glaring, some grow their hair longer, change their part, or rely less on heavy makeup. The mirror becomes less of an adversary.

    Many describe relief. No more rushed salon visits before big events. No last-minute box dye panic. This shampoo trick doesn’t erase grey hair; it turns down its volume. That leaves space for style, texture, and confidence to stand out.

    There are still days when every white strand is visible in the light. That remains part of the agreement. The difference is control. You are doing something small and steady, not waiting for a dramatic fix. Over time, this leads to experimentation and a kind of peace with change.

    The ritual also invites conversation. When someone asks if you changed your colour, the answer feels personal: “Not really, I just add tea to my shampoo.” It sounds simple, yet it carries a message that aging can be shaped through quiet attention.

    Friends exchange tips like recipes. Some prefer rosemary and clove for deeper tones, others notice changes in texture. Not every claim is scientifically proven, but the shared experience builds confidence in what feels right and sustainable.

    This method never promises to reverse time. It exists in a different space, where you gently adjust contrast instead of erasing it. For many, that is its real appeal: small, repeatable changes that feel deeply personal, even as the foam rinses away.

    Key points to remember

    • Gentle darkening: Tea or coffee pigments gradually soften the contrast of grey
    • Simple routine: One small step added to an existing habit
    • Custom results: Strength and frequency can be adjusted to suit your hair