Blog

  • Four Completely Free Ways to Build Real Fitness Without Paying for a Gym Membership

    Four Completely Free Ways to Build Real Fitness Without Paying for a Gym Membership

    Pull on your trainers and start improving your fitness with gentle walks or light jogs that fit easily into daily life.

    Start Running With Confidence

    The NHS Couch to 5K is a free nine-week programme designed to help beginners ease into running. Simply download the app and follow the guided sessions at your own pace.

    Once you feel ready, you can join free weekly 5K Parkruns held every Saturday morning at more than 1,250 locations nationwide. Full details are available at parkrun.org.uk.

    Play Together Outdoors

    ParkPlay is a nationwide initiative offering free games and activities every week throughout the year in parks and other public spaces.

    The sessions welcome all ages and fitness levels, making them ideal for individuals or families. Participation is free, but registration is required before attending. Find your nearest session and sign up at park-play.com.

    Those aged 55 and over can also take part in free or low-cost walking football sessions organised by Age UK. The charity currently runs 86 groups across the country. Visit ageuk.org.uk/services to find one near you.

    Try Free Tennis Sessions

    Barclays Free Park Tennis offers weekly sessions across the UK, open to everyone from complete beginners to those wanting to sharpen their skills.

    Rackets and equipment are provided, making it easy to get started. Learn more and book a place at lta.org.uk/play/free-park-tennis.

    Build Strength Without Equipment

    If your goal is to increase strength, bodyweight exercises are a simple and cost-free option that can be done anywhere, at any time.

    Several apps provide free workout routines. The Nike Training Club app includes a wide range of guided sessions, while the free version of the Freeletics app offers 20 bodyweight workouts and 25 individual exercises.

    Top Deals and Smart Savings

    Stay warm for less with the Slumberdown Calm & Cosy 13.5 tog duvet, now half price at Sainsbury’s. The single size has dropped from £22 to just £11, saving £11.

    Short on time? Primark’s PS… dry shampoo powder helps refresh hair between washes and costs just £3.

    New in store, Aldi’s latest Special Buys include baby and child essentials, such as a lightweight foldable wipe-clean stroller priced at £39.99.

    Brighten Your Home for Less

    Add light to a dark corner with the Ferris table lamp for £12 at Dunelm. Alternatively, a similar version is available at Lidl for £7.99 with a Lidl Plus card (£9.99 without), saving up to £4.01.

    Extra Savings and Offers

    Shop online with Co-op this month and avoid delivery fees by using code FD2026. A minimum spend of £25 applies.

    Accessorize has reduced its green faux leather tote bag from £35 to £17.50, offering a saving of £17.50.

    At Morrisons, stock up on your five a day with three packs of selected fruit for £5, including grapes, pears, oranges and blueberries.

    Chance to Win Cash

    Join The Sun Raffle and take part alongside thousands of readers. Each month, 250 winners receive £100, offering a helpful boost whether you’re saving or covering everyday costs.

  • This 5-Minute Bedtime Yoga Flow Instantly Relieved My Heavy Legs After Intense Training Days

    This 5-Minute Bedtime Yoga Flow Instantly Relieved My Heavy Legs After Intense Training Days

    I can trace it all back to the walking lunges. Last week, I took on my first solo HYROX race in London. At the start, it felt enjoyable—until my lack of proper preparation caught up with me at the second-to-last workout station.

    Every few steps of walking lunges, with a 45lb sandbag balanced across my shoulders, sent my quads into sharp, uncomfortable spasms.

    I somehow pushed through the rest of the course, shaking off the cramp as best I could. But in the days that followed, delayed onset muscle soreness (DOMS) hit hard.

    Everything I Tried to Recover

    I experimented with gentle active recovery, used a massage gun, and spent time in compression boots. I stretched regularly, stayed hydrated, and refuelled generously with carbohydrates and protein—including a fair amount of pepperoni pizza.

    In the end, it was a five-minute yoga flow I found on Instagram that truly helped me recover—ironically by getting me off my feet.

    My Experience With the Bedtime Yoga Flow

    This short, four-move routine from yoga teacher Leanne Lent via Yoga-Go is designed as a pre-bed flow to support better sleep.

    The legs up the wall pose stood out as especially effective. It helped calm my central nervous system, improve circulation, and made my legs feel noticeably lighter and less tender.

    A 2024 research review explains this effect through lymphatic drainage and improved venous return, where deoxygenated blood flows back toward the heart. This process helps reduce swelling and clear lactic acid.

    While Lent holds the pose for 60 seconds, I extended it to two to three minutes. After a brief pins-and-needles sensation in my feet and calves, a deep sense of relaxation followed.

    The child’s pose that came next released tension in my chest, hips, and lower back. I found the reclined butterfly pose more challenging on my hips, so adding extra cushions under each knee made it more comfortable.

    The routine finished with a reclined twist, which gently mobilised my thoracic spine and encouraged better blood flow throughout my body.

    How to Do the Five-Minute Bedtime Yoga Flow

    Legs Up the Wall (60 seconds)

    • Remove the pillows from your bed and move your hips close to the wall or headboard.
    • Extend your legs straight up against the wall.
    • Lie back, relax, and breathe deeply.

    Child’s Pose (60 seconds)

    • Kneel with your knees wider than hip-width apart, placing a pillow in front of you.
    • Sit back onto your heels and fold forward, resting your chest on the pillow.
    • Extend your arms forward, rest them on the pillow, or place them by your sides.
    • Breathe slowly and deeply into the stretch.
  • Only Quick Thinkers Can Find 5601 Hidden Among 5610s

    Only Quick Thinkers Can Find 5601 Hidden Among 5610s

    Optical illusions offer a great way to challenge your mind and test your thinking skills. These visual puzzles are entertaining & help improve focus & problem-solving abilities. One popular challenge is the Optical Illusion Puzzle IQ Test where people must find differences or hidden items in images filled with similar objects. In this test your task is to find the number 5601 hidden among many 5610s in just 6 seconds. Can you handle the challenge?

    Understanding Optical Illusion Puzzle IQ Tests

    An Optical Illusion Puzzle IQ Test is created to measure how effectively your brain can interpret visual details under pressure. These puzzles usually present shapes, numbers, or patterns that look identical at first glance but hide tiny visual differences. The goal is to challenge your mind by testing your ability to observe accurately, process information quickly, and think critically when distractions are present.

    Optical illusions work by confusing the brain’s perception, making it see something other than what actually exists. As a result, these puzzles become a fun yet powerful way to assess visual-spatial intelligence, attention span, and pattern recognition speed. Some people enjoy them as mental games, while others use them as regular brain-training exercises to sharpen cognitive performance.

    The Visual Challenge: Finding 5601 Hidden Among 5610s

    In this particular illusion puzzle, the task seems simple—but it’s far from easy. At first glance, the image appears to display the number 5610 repeated endlessly. However, hidden within this visual field is a single instance of 5601. The difficulty lies in identifying this one altered number among the nearly identical sequence.

    The difference is subtle but important. In the number 5601, the placement of the digits changes, replacing the familiar pattern your brain expects. You are given only 6 seconds to spot it, pushing your ability to stay focused and process visual data rapidly. This makes the puzzle an effective test of speed, concentration, and accuracy.

    Why This Optical Illusion Is Harder Than It Looks

    At face value, the puzzle doesn’t seem complex. The numbers are clear, and the variation is small. However, the challenge arises because the brain naturally locks onto repeating patterns. Once your mind recognizes the dominant number sequence, it tends to ignore anything that doesn’t immediately stand out.

    This effect is known as visual fixation, where the brain becomes accustomed to what it expects to see. Because of this, the altered number can easily go unnoticed. The most effective approach is to examine each number individually instead of scanning the image as a whole. Doing so requires deliberate focus and rapid visual processing.

    Mental Abilities Tested by Optical Illusion Puzzles

    Optical illusion puzzles are more than just entertainment. They actively challenge and strengthen multiple cognitive skills. Below are the key abilities this puzzle is designed to test:

    Precision and Attention to Detail

    The puzzle depends entirely on noticing a minor visual change between two similar numbers. Successfully spotting it demonstrates strong detail-oriented thinking, a skill valuable in everyday tasks that require accuracy.

    Visual-Spatial Awareness

    Visual-spatial intelligence involves understanding how objects and patterns relate within a visual field. This puzzle requires your brain to analyze number placement and structure, strengthening your ability to interpret visual layouts.

    Logical Problem-Solving

    Although visual in nature, the puzzle also demands logical analysis. You must recognize repetition, identify anomalies, and apply a structured approach to find the correct answer.

    Speed of Thinking

    The limited time frame forces your brain to work faster. This sharpens reaction speed and helps improve how quickly you can process and respond to visual information.

    Focus and Mental Discipline

    Maintaining concentration is essential. Ignoring distractions and resisting the urge to rush improves sustained focus, a skill that benefits both mental challenges and real-life tasks.

    Solution Explained: Where to Find 5601

    The solution becomes clear once you know what to look for. The repeated number throughout the image is 5610, but one number breaks this pattern. In that instance, the digit order changes, forming 5601.

    If you carefully scan the image while focusing on each digit instead of the full number, the difference stands out. The hidden 5601 can be found in the upper-right area of the image. Once visual fixation is broken, the anomaly becomes much easier to detect.

    Ways to Strengthen Visual Processing Skills

    If this puzzle felt difficult, that’s completely normal. These skills improve with practice. Here are some proven ways to enhance your visual awareness and cognitive sharpness:

    – Practice frequently by solving different types of optical illusion puzzles.

    – Study individual elements instead of scanning the image as a whole.

    – Slow your pace to improve accuracy, even during timed challenges.

    – Increase difficulty gradually to keep your brain adapting.

    Final Takeaway

    Optical illusion puzzles offer an engaging way to challenge your brain while strengthening essential cognitive skills. From improving attention to detail to enhancing visual processing speed, these puzzles provide real mental benefits. The challenge of finding 5601 among 5610s is a perfect example of how small details can test mental agility. With regular practice, spotting such differences becomes faster, easier, and more intuitive.

  • Mental Clarity Yoga: 5 Poses That Sharpen Focus and Clear the Mind

    Mental Clarity Yoga: 5 Poses That Sharpen Focus and Clear the Mind

    Mental clarity plays a vital role in focus, productivity, emotional balance, and overall well-being. In modern life, constant notifications, packed schedules, and ongoing stress often make clear thinking difficult. One natural way to sharpen the mind is through yoga. The combination of gentle movement and conscious breathing increases blood flow to the brain, lowers stress hormones, and encourages calm alertness. These poses can be done almost anywhere, require very little space, and need no equipment. Below are five yoga poses, rooted in traditional practice and aligned with current wellness trends, that help improve mental clarity quickly.

    Yoga unites body and breath in a way that soothes the nervous system and lifts mental fog. Holding a pose with mindful awareness sends calming signals to the brain, guiding it into a more relaxed state. That relaxation supports clearer thinking. These five poses are especially effective because they activate the parasympathetic nervous system, balance oxygen flow, and release physical tension that interferes with clear thought.

    Balasana (Child’s Pose) for Stress Relief and Mental Ease

    Child’s Pose is well known for easing stress and built-up tension. It gently lengthens the spine while connecting breath to deeper body awareness. As you settle into this posture, the heart rate slows and the brain receives more oxygen-rich blood, allowing stress and anxiety to fade gradually.

    Begin on your knees and lower your hips toward your heels, keeping the knees hip-distance apart. Extend your arms forward along the floor and rest your forehead gently on the mat. Inhale deeply through the nose and exhale slowly through the mouth, staying focused on the rhythm of your breath. Remain here for one to three minutes, visualizing stress dissolving with each exhale.

    This pose also releases neck and shoulder tension. When these areas are tight, the mind often feels cloudy and distracted. By easing that physical strain, Child’s Pose creates a calm inner state that supports clearer mental focus.

    Uttanasana (Standing Forward Bend) to Boost Brain Circulation

    Standing Forward Bend is highly effective for increasing blood circulation to the brain. With the head positioned below the heart, fresh blood flow is encouraged, delivering oxygen and nutrients that help sharpen focus quickly.

    Stand with your feet hip-distance apart. Inhale and lift your arms overhead. As you exhale, hinge at the hips and fold forward. Allow your arms to hang freely or hold opposite elbows. Keep a gentle bend in the knees if needed. Relax the neck and let gravity support the stretch. Hold for 30 seconds to one minute while following each breath, imagining your thoughts settling like sand in water.

    Forward bending also stretches the hamstrings and calves. Tight hamstrings can pull on the lower back, creating discomfort that distracts the mind. Releasing these muscles helps the entire body relax, making focused attention easier.

    Viparita Karani (Legs Up the Wall) for Nervous System Calm

    Viparita Karani is valued for its restorative and calming effects. This pose quiets mental chatter, reduces fatigue, and soothes the nervous system. Elevating the legs above the heart improves circulation and provides the brain with a gentle oxygen boost.

    Sit close to a wall and swing your legs up so they rest vertically against it. Keep the lower back relaxed and place your arms by your sides with palms facing upward. Close your eyes and breathe slowly. Inhale for a count of four and exhale for a count of six. Stay in this position for five to fifteen minutes, focusing on the breath rather than wandering thoughts.

    This posture is especially helpful after a long day or intense mental work. The inverted position signals the body to enter a parasympathetic state, calming the nervous system and clearing mental clutter.

    Dandayamana Bharmanasana (Balancing Table Pose) to Sharpen Concentration

    Balancing Table Pose strengthens concentration while building core stability and grounding the mind. Holding this posture requires engagement from multiple muscle groups and steady awareness, helping clear distractions and train the mind to stay present.

    Start on all fours with wrists under shoulders and knees under hips. Inhale as you extend your right arm forward and left leg back, keeping hips level and gaze low. Hold for thirty seconds while breathing evenly. Lower down and repeat on the opposite side.

    This pose improves posture and core strength, which supports better breathing patterns. Steady, deep breathing increases oxygen supply to the brain, enhancing clarity. The blend of physical balance and mental focus helps dissolve mental fog efficiently.

    Sirsasana (Headstand) or Supported Inversion for Mental Alertness

    Headstand is often referred to as the king of yoga poses. It increases blood flow to the brain more than many other postures and, when practiced safely, stimulates the pituitary and pineal glands linked to mood regulation and focus.

    If you are new to Headstand, practice near a wall or use a folded blanket for support. Place your forearms on the mat, interlace your fingers, and rest the crown of your head gently on the blanket. Walk your feet closer and lift one leg at a time until both legs are vertical. Keep the core engaged and breathe slowly. Hold for ten to thirty seconds, then lower carefully and rest in Child’s Pose.

    Those with neck injuries, high blood pressure, or eye conditions should avoid Headstand and choose Dolphin Pose or Bridge Pose instead, which still provide inversion benefits with less strain.

    The inversion improves focus by supplying the brain with fresh, oxygen-rich blood. This circulation boost supports alertness, reduces mental fatigue, and helps sustain clarity, memory, and energy throughout the day.

    Simple Ways to Add These Poses to Your Daily Routine

    Consistency is key when using yoga to support mental clarity. Practicing these five poses in the morning or during a midday break can reset focus and emotional balance. Even a brief ten-minute routine can make a noticeable difference, especially when paired with slow, mindful breathing.

    Begin with Standing Forward Bend to stimulate circulation. Move into Balancing Table Pose to build concentration, then shift into Child’s Pose to release stress. Follow with Legs Up the Wall to calm the nervous system, and finish with Headstand or a supported inversion if it feels appropriate. Take a moment at the end to observe your mind, noticing increased clarity and steadiness.

    These poses retrain the nervous system to respond to stress with calm rather than tension. Over time, this practice clears mental clutter, strengthens resilience, sharpens focus, and supports better decision-making.

    Clear thinking does not mean having no thoughts. It means creating space between you and your thoughts so you can respond with intention. Yoga cultivates that space through body awareness and breath control. These five simple postures help the mind stay present, focused, and calm in a demanding world.

  • Optical Illusion Challenge: Can You Find 119 in 8 Seconds?

    Optical Illusion Challenge: Can You Find 119 in 8 Seconds?

    In the world of optical illusions some challenges truly test your observation skills and focus. Today we present a challenge designed to measure your attention span. This optical illusion requires you to find a number hidden among many similar looking numbers. It might sound easy but think again. You have only 8 seconds to find the hidden number 119 among dozens of 116s. It is not as simple as it sounds!

    Why Optical Illusions Capture Our Attention

    Optical illusions have intrigued people for generations, offering far more than simple amusement. They provide valuable insight into how the brain interprets visual information and processes what the eyes perceive. At their core, optical illusions take advantage of the way our visual system recognizes shapes, patterns, and colors. In many cases, the brain fills in gaps or makes assumptions, leading us to see something that isn’t actually there or misunderstand what is right in front of us. These illusions can range from straightforward designs to complex, time-based visual challenges that test both perception and cognition.

    A Unique Take on the Classic Spot-the-Difference Puzzle

    This optical illusion belongs to the familiar “spot the difference” category, but it introduces an unexpected twist. Instead of comparing two images, the challenge is to locate a single number that blends almost perfectly into its surroundings. The puzzle requires sharp observation skills, sustained focus, and the ability to detect even the smallest visual inconsistencies.

    The 8-Second Test: Can You Find Number 119?

    Picture a grid filled entirely with the number 116, each one looking exactly the same at first glance. Hidden within this uniform pattern is the number 119, carefully designed to merge seamlessly with the surrounding digits. Your task is simple in theory: find it before the 8-second timer runs out. What sounds easy quickly turns into a real challenge.

    As you scan the grid, the difficulty becomes clear. The numbers are arranged neatly, using the same font, spacing, and size throughout. Under time pressure, the subtle difference between 116 and 119 becomes harder to notice, making the puzzle far more demanding than expected.

    Why Time Limits Make Optical Illusions Harder

    What truly elevates the difficulty of this illusion is the strict time constraint. Unlike untimed puzzles where careful analysis is possible, an 8-second limit forces the brain to work at maximum speed. In that short window, your mind must quickly scan the pattern and isolate the one detail that doesn’t belong, requiring intense visual focus and rapid processing.

    Studies suggest that time-restricted visual challenges can enhance mental clarity, improve concentration, and boost cognitive speed. Regular exposure to these puzzles trains the brain to identify small details faster, a skill that carries over into everyday activities that demand quick thinking and attention.

    How Optical Illusions Strengthen Brain Skills

    Beyond entertainment, optical illusions offer meaningful cognitive benefits. Engaging with visual puzzles helps develop several key mental abilities that support daily functioning and problem-solving.

    – Attention to detail: These illusions encourage careful examination of patterns and visuals, improving awareness of subtle differences.

    – Focus and concentration: Time-based challenges strengthen the ability to stay locked in on a task, even under pressure.

    – Pattern recognition: Repeated exposure trains the brain to recognize familiar structures and quickly detect anomalies.

    – Quick decision-making: Working against the clock enhances mental agility and the ability to act decisively.

    Breaking Down the Illusion: Where Is 119 Hidden?

    So where exactly is the hidden number? Finding 119 requires more than a quick glance—it demands a deliberate and organized scanning approach.

    Check the top-right area of the grid carefully. The number 119 is positioned among identical 116s, making it easy to overlook. Its location within a dense cluster is intentional, designed to distract the eye.

    The key lies in spotting the minor numerical variation. While most entries end in a 6, the correct number includes a 9 in the final position. Training your eyes to catch this small change makes all the difference.

    Why Many People Miss It on the First Try

    If you couldn’t find the number right away, that’s completely normal. This illusion is intentionally crafted to challenge even highly observant individuals. The visual similarity between 116 and 119 makes the difference easy to miss, especially when time is limited.

    The puzzle relies on visual camouflage, a technique where an element blends into its environment by closely matching surrounding patterns. This method is widely used in art, design, and nature to conceal details in plain sight, making the eventual discovery both rewarding and memorable.

    The Mental Advantages of Timed Visual Challenges

    Time-limited optical illusions offer more than a moment of fun. Research indicates that regularly engaging in these challenges can improve working memory, increase cognitive flexibility, and sharpen processing speed. The faster your brain learns to identify hidden details, the more efficient it becomes overall.

    In addition, these puzzles help combat mental fatigue by keeping the brain active and engaged. Just like physical exercise strengthens the body, visual challenges provide a valuable workout for the mind, supporting long-term cognitive health.

  • Skip Sit-Ups for Better Results With This 8-Move Core Workout

    Skip Sit-Ups for Better Results With This 8-Move Core Workout

    Many people in India still rely on endless sit-ups to train their core, but modern fitness research shows there are smarter ways to build strong abs. This 8-move workout focuses on controlled movements, full-core engagement, and better muscle activation without stressing the neck or lower back. By skipping traditional sit-ups, you can improve stability, posture, and overall strength more efficiently. Whether you work out at home or in a gym, this approach suits busy lifestyles and supports long-term fitness goals with less strain and more balanced results.

    Why skipping sit-ups builds stronger abs more efficiently

    Sit-ups often rely on momentum and hip flexors, which can limit true core engagement. An 8-move workout shifts the focus to movements that train the abs as stabilisers rather than simple flexors. Exercises like planks, dead bugs, and controlled leg movements activate deeper muscles, improving spinal support and balance. This approach encourages core muscle control, promotes joint-friendly training, and reduces the risk of overuse injuries. By emphasising quality over quantity, you develop functional strength gains that translate into better posture and daily movement. Over time, these exercises also support lower back safety while helping you feel stronger and more confident.

    How the 8-move abs workout targets the full core

    This workout is designed to challenge the front, sides, and deep layers of the core in one session. Instead of isolating one area, each move encourages coordinated effort across multiple muscle groups. Rotational and anti-rotation exercises improve stability, while slow tempos increase time under tension. The result is deep core activation that traditional sit-ups rarely achieve. You also benefit from balanced muscle engagement, which supports athletic performance and everyday tasks. Because the routine uses bodyweight and simple positions, it fits easily into home workouts and promotes consistent training habits without the need for equipment.

    Making this sit-up-free abs routine part of your week

    Consistency matters more than intensity when building lasting core strength. This 8-move workout can be done three to four times a week, taking less than 20 minutes per session. Start with manageable hold times or repetitions and gradually progress as control improves. The variety keeps workouts engaging and supports progressive core overload without burnout. Many people notice improved posture awareness within weeks, along with better movement confidence. By avoiding repetitive sit-ups, you protect your spine and create sustainable fitness progress that fits long-term health goals.

    Summary and practical takeaways

    Skipping sit-ups does not mean skipping core training; it means training smarter. This 8-move workout encourages controlled movement, stability, and full-core involvement rather than high-rep strain. Over time, these exercises support everyday movement strength, reduce discomfort, and improve overall body control. For people aiming for visible abs or better functional fitness, the key lies in patience and proper technique. When paired with regular activity and balanced nutrition, this approach delivers long-term core resilience while keeping workouts safe, effective, and enjoyable.

    Workout Element Primary Benefit
    Plank Variations Improves core stability
    Dead Bug Enhances coordination
    Leg Raises Targets lower abs
    Bird Dog Supports spinal control
    Side Plank Strengthens obliques

    Frequently Asked Questions (FAQs)

    1. Is this workout suitable for beginners?

    Yes, movements can be scaled with shorter holds and fewer repetitions.

    2. How often should I do this 8-move abs workout?

    Three to four sessions per week work well for most people.

    3. Do I need equipment to skip sit-ups?

    No, the routine uses bodyweight and simple floor exercises.

    4. Will this help reduce back strain?

    Yes, controlled core exercises generally place less stress on the spine.

  • Hanging This Near the Shower Helps Control Moisture and Prevent Musty Bathroom Smells

    Hanging This Near the Shower Helps Control Moisture and Prevent Musty Bathroom Smells

    Not filthy, just unmistakably bathroom air. You open the window, wave your hand through the room, maybe spray something labeled “fresh cotton” that quickly turns into a sharp chemical cloud. Ten minutes later, the air still feels thick and stale.

    It’s oddly familiar: you spend a short time under hot water, yet the room stays damp for hours. Corners grow darker, paint near the ceiling begins to peel, and silicone seams slowly turn black. Over time, it starts to feel normal, like a door that squeaks or traffic noise you stop noticing.

    Then one day, in someone else’s bathroom, you spot a small, unremarkable object hanging quietly near the shower. No device, no filter, just a simple bag. Their bathroom feels dry, almost crisp. A quiet, low-effort trick is doing all the work.

    Why your bathroom remains damp long after every shower

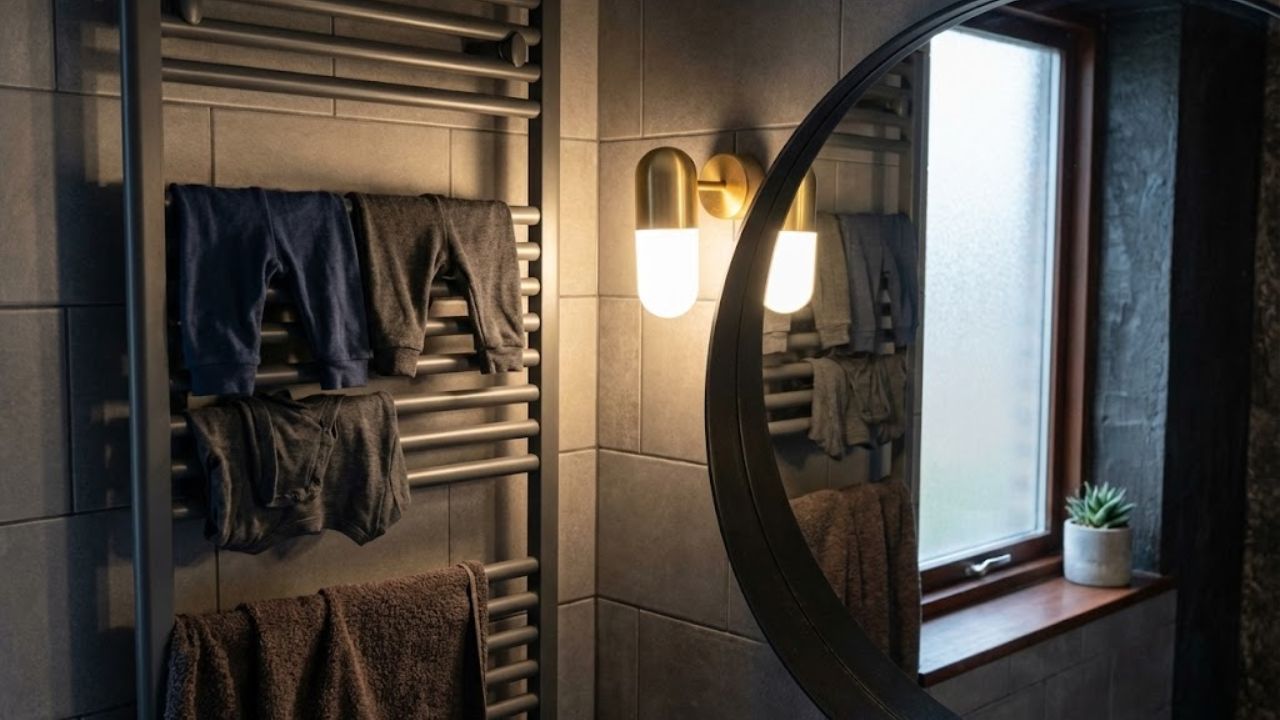
    Step into a compact bathroom after a hot shower and the air seems to cling to your skin. Steam lingers near the ceiling, droplets settle on tiles, and the mirror looks permanently frosted. This isn’t just uncomfortable. Trapped moisture slowly alters the room.

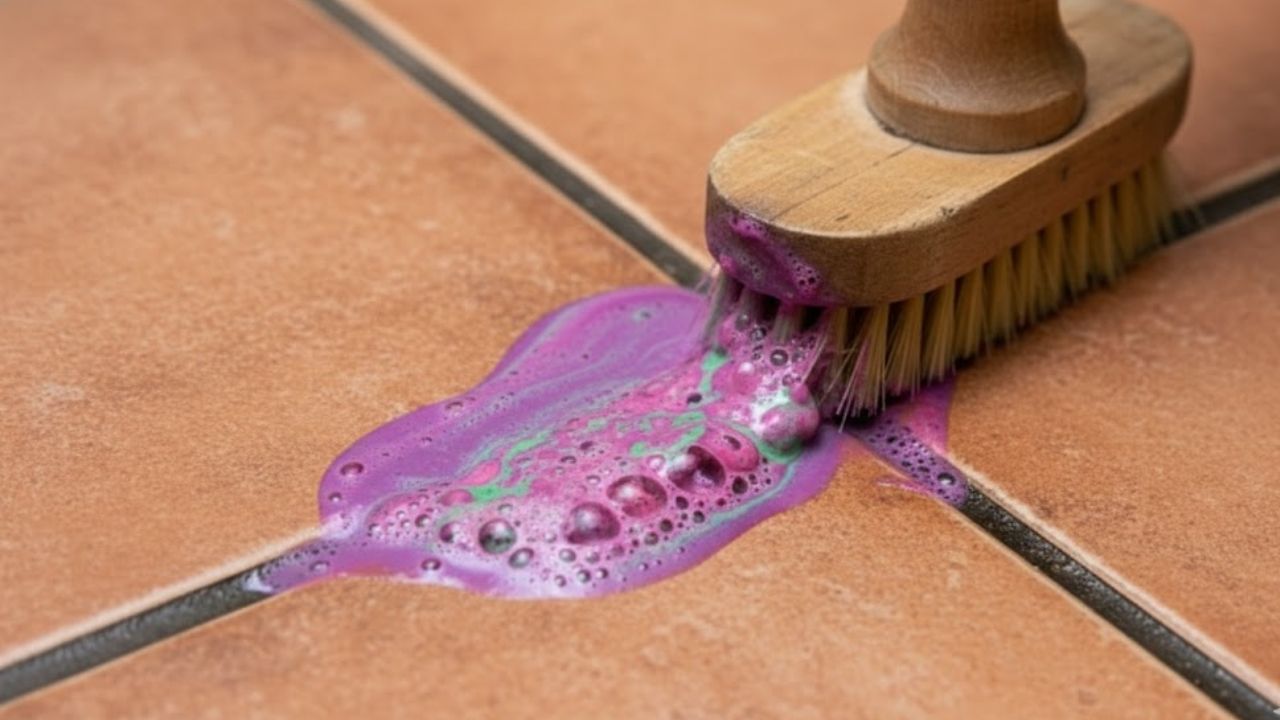
    Paint begins to curl, grout lines darken, and doors subtly warp. Eventually, small black marks appear in corners and along silicone joints. You clean them away, only for them to return. The bathroom becomes a space you constantly maintain yet never fully trust. The air rarely feels truly fresh.

    In many homes, especially apartments, the issue isn’t poor hygiene. The room simply cannot breathe. Ventilation fans are weak or too loud to run for long. Windows open onto cold courtyards or noisy streets. As a result, moisture lingers, hiding in towels, bath mats, and the tiny pores of walls.

    During winter in a northern city, researchers measured humidity levels in a typical family bathroom. With a hot shower and the door closed, relative humidity rose from 50% to over 90% in just six minutes. An hour later, it still hovered above 70%, even after partial ventilation.

    One homeowner in a 1970s building described it as “living with a permanent cloud in the bathroom.” Monthly mold scrubbing, constant airing, and changing cleaning products made little difference. The stains always returned, darker than before. The fan rattled loudly, so no one wanted to leave it running.

    When she finally hung a moisture-absorbing bag near the shower head, the change felt almost suspicious. No noise, no installation. Just a steady reduction in that heavy, sticky air. Towels dried faster, mirrors cleared sooner, and the bag slowly collected water that would otherwise have stayed in the room.

    Moisture behaves like a stubborn guest. Once in the air, it slips into soft surfaces such as curtains, bath mats, and even toilet paper. Fans and open windows mostly shift humid air around. Unless the water leaves the room or is captured, it settles again. Hanging an absorber near the shower turns invisible steam into visible liquid you can remove.

    • Centenarian shares daily habits behind mental resilience and long life
    • Add two drops to your mop bucket for a long-lasting fresh scent
    • The taxi method that keeps car interiors fresh without air fresheners
    • The overlooked truth about an inexpensive fish staple
    • Experts warn seven modern parenting trends linked to rising unhappiness
    • The longest solar eclipse of the century already has a scheduled date
    • How incorrect rug placement increases household dust
    • School district adopts a four-day week, sparking parent backlash

    Hanging it by the shower: how this simple solution works

    The idea is almost disappointingly straightforward. You hang a moisture absorber where steam is most concentrated, near or slightly above the shower. No drilling or tools are needed, just a hook or adhesive hanger and a bag filled with hygroscopic crystals such as calcium chloride.

    As you shower, steam rises and spreads. The crystals attract water molecules from the air and bind them, slowly forming liquid brine that collects at the bottom of the bag. Instead of settling on ceilings and corners, a portion of that humidity is trapped and removed.

    The changes show up in small, practical ways. Mirrors clear faster, bath mats lose their constant chill, and the faint stale smell after a hot shower fades. The bathroom starts to feel like a normal room again. Over weeks, the bag fills, faster in small or windowless spaces. Once full, it is emptied or replaced.

    Setting it up takes less than a minute. The ideal spot might be a corner of the shower rail, a waterproof adhesive hook, or the back of a shower door that swings inward. The key is placing it in the path of rising steam, not directly under running water.

    Many people pair this with small habits such as spreading the shower curtain open or hanging towels fully unfolded. These actions improve air circulation and make the absorber more effective. Doing this most days, even without perfect consistency, noticeably changes how the room feels.

    The emotional benefit is subtle. Later in the day, the bathroom air feels neutral rather than sour. Concerns about ceiling mold fade into the background. It removes one quiet irritation from daily life.

    “I thought it was a gimmick at first,” says Emma, who lives in a small flat with a barely functioning fan. “After two weeks, the bag was half full of water. That was the same moisture that used to sit in my walls.”

    Simple checks to improve results

    • Hang the absorber at least a hand-width below the ceiling to allow airflow.
    • Keep it away from direct splashes so the crystals do not dilute too quickly.
    • Use short bursts of ventilation after longer showers.
    • Replace the bag once the crystals have fully liquefied.

    Some people feel disappointed when the bag is placed too low or hidden behind a curtain where steam rarely passes. Small adjustments matter. Moving it slightly higher or closer to where steam gathers can make the bathroom feel drier within days. It follows the natural movement of moisture.

    Living with a drier bathroom, one small hook at a time

    After a few weeks, most people stop noticing the bag. That’s when the real change has occurred. The bathroom no longer demands attention each time you enter. There’s no instinctive glance at ceiling corners or mental note about scrubbing grout.

    Some households experiment by adding a second bag behind the door or under the sink where pipes sweat in summer. Others settle on one well-placed absorber and a minor routine change, such as leaving the door ajar after showers. Families often notice towels staying fresher longer, as less moisture lingers in fabrics.

    At its core, it’s about reclaiming a small space meant for comfort. A hot shower after a long day feels better when the room greets you with light, clean air. Paint lasts longer, silicone stays clearer, and maintenance effort drops. A single hanging bag won’t renovate a bathroom, but it changes how the space is experienced.

    Readers often share quiet before-and-after moments. Fewer arguments about leaving the fan on. Less mold between tenant visits. Reduced musty smells in crowded apartments. Each story points to the same outcome: a simple habit easing a persistent problem.

    You don’t need to make a point of it. You hang the bag once. One morning, the mirror clears a little faster. Then you notice the water collected inside and realize how much moisture used to linger in the air. One hook, one bag, and a little less dampness shaping daily life.

    • Place an absorber near the shower: Hang it where steam concentrates, without direct water contact.
    • Monitor the filling level: Replace or empty the bag once crystals liquefy.
    • Combine with small habits: Brief ventilation, open curtains, and unfolded towels improve results.
  • 71-Year-Old Fitness Trainer Demonstrates 5 Essential Moves to Stay Strong After 50

    71-Year-Old Fitness Trainer Demonstrates 5 Essential Moves to Stay Strong After 50

    Compound exercises target several muscle groups simultaneously and provide an effective approach to developing overall body strength. Liz Hilliard is a 71-year-old fitness instructor who created the Hilliard Studio Method. She claims to have more strength today than she possessed at age 40. Because of her substantial background working with people over 50 years old I requested that Liz recommend her preferred compound exercises for developing total body strength. She provided five exercises listed below. The only equipment required is a long resistance band and some open space to perform them.

    Squat and biceps curl

    Get the Fit&Well Newsletter Start your week with practical workout ideas & health tips delivered to your inbox. Contact me with news and offers from other Future brands. Receive email from us on behalf of our trusted partners or sponsors. By submitting your information you agree to the Terms & Conditions & Privacy Policy and are aged 16 or over. Stand with your feet hip-width apart on the middle of a resistance band while holding the ends in your hands at your sides. Push your hips back & bend your knees to squat down while simultaneously bending your elbows and pulling the band up to your shoulders for a biceps curl. Stand back up and return your arms to your sides.

    Lunge and deltoid raise

    Stand up and position the resistance band beneath your left foot while gripping both ends with your hands. Move your right foot backward and bend your right knee downward as you lift both arms outward to each side with your palms turned toward the ground. Try to raise your hands until they align with your shoulder height to create a T shape with your body. Press down through your front foot to return to a standing position as you bring your arms back down. Complete this movement 5-10 times before changing to the opposite side.

    Triceps squat

    Start by standing with your feet placed at hip width on the center of a resistance band while gripping both ends at your sides. Lower yourself into a squat by pushing your hips backward and bending your knees as your chest moves toward the ground with your elbows tucked close to your body. While staying in the squat extend your arms straight behind you and keep your palms turned inward. Bend your elbows once more as you return to standing position and perform the movement again.

    Reach to plank

    Start by standing up straight and lifting both arms above your head. Move your hips backward while bending at the knees until you are in a squatting position. Put both hands flat on the ground directly below your shoulders. Move one leg behind you and then move the other leg back so you are holding a plank with your body forming a straight line from your shoulders down to your heels. Bring both feet forward again to return to the squatting position and then stand up while reaching your arms overhead once more.

    Glute bridge

    Lie down & bend your knees while keeping your feet flat on the floor. Tuck your tailbone in and tighten your core muscles. Push your feet down into the floor and lift your hips up slowly while your mid-back stays on the mat. Bring your hips back down to the mat by lowering one vertebra at a time.

  • Make Dull Tiles and Grout Shine Again Using Fast Natural Cleaning Methods at Home

    Make Dull Tiles and Grout Shine Again Using Fast Natural Cleaning Methods at Home

    Dirty, dull tiles can quietly change how a home feels, especially in busy Indian households where dust, spills, and humidity are part of daily life. Over time, even well-maintained floors lose their sparkle as grime settles into grout lines and a cloudy layer forms on the surface. The good news is that restoring tile shine does not require expensive products or harsh chemicals. With the right approach and a few simple habits, you can revive the natural glow of your floors and make rooms feel brighter, fresher, and far more welcoming again.

    Restore shine to dirty tiles with gentle daily care

    One of the easiest ways to bring life back to floors is by adjusting how you clean them day to day. Dust and grit act like sandpaper, slowly dulling the surface, so frequent dry sweeping is essential. Using a soft broom or microfiber mop helps remove particles without scratching. When mopping, stick to warm water and a mild cleaner to avoid buildup. This simple routine supports surface protection habits, reduces grime layering issues, encourages consistent floor upkeep, and maintains natural tile glow. Over time, these small steps prevent heavy staining and make deep cleaning far less demanding.

    Restore shine to dirty tiles using safe natural solutions

    Natural cleaners can be surprisingly effective when used correctly. A mix of warm water and a small amount of vinegar works well on ceramic and porcelain tiles, cutting through residue that causes dullness. For grout, a paste of baking soda and water gently lifts embedded dirt without damage. These methods support chemical-free cleaning, deliver gentle stain lifting, promote family-safe methods, and leave behind fresh indoor air. Always rinse thoroughly and dry the surface to prevent streaks, allowing the tiles to regain a clean, even finish.

    Restore shine to dirty tiles by matching care to material

    Not all tiles respond the same way to cleaning, so understanding your floor material is crucial. Ceramic and porcelain are durable and tolerate mild acidic cleaners, while natural stone like marble or granite needs pH-neutral products only. Using the wrong solution can cause etching or dull patches that are hard to reverse. Choosing the right method ensures material-specific care, avoids long-term surface damage, supports tile lifespan extension, and preserves original floor texture. When unsure, testing a small hidden area first can save you from costly mistakes.

    Why regular attention makes tile shine last longer

    Restoring shine is not just about one deep clean; it is about maintaining results over time. Regular light cleaning prevents dirt from settling deep into grout and stops films from forming on the tile surface. Simple habits like wiping spills quickly and placing mats at entrances reduce wear dramatically. This approach builds low-effort maintenance, creates visibly brighter rooms, supports stress-free cleaning, and delivers long-lasting results. When care becomes routine, your floors stay reflective and your home feels consistently fresh.

    Tile Type Recommended Cleaner Cleaning Frequency Extra Tip
    Ceramic Warm water + mild soap Weekly Dry after mopping
    Porcelain Water + diluted vinegar Weekly Avoid abrasive pads
    Marble pH-neutral cleaner Bi-weekly Never use acids
    Granite Stone-safe solution Bi-weekly Seal periodically

    Frequently Asked Questions (FAQs)

    1. Can dirty tiles regain their original shine?

    Yes, with proper cleaning methods and regular maintenance, most tiles can look bright again.

    2. Is vinegar safe for all types of tiles?

    No, vinegar is suitable for ceramic and porcelain but not for natural stone.

    3. How often should tiles be deep cleaned?

    Deep cleaning every one to two months is usually enough for most homes.

    4. Does buffing really improve tile shine?

    Yes, drying and buffing removes streaks and enhances light reflection.

  • Blush Placement Technique: The Subtle Change That Visually Lifts and Balances Faces After 30

    Blush Placement Technique: The Subtle Change That Visually Lifts and Balances Faces After 30

    The woman staring at her bathroom mirror looks almost the same as she did at 25 but something has shifted. Her cheeks have settled a bit lower. The fullness that once lifted when she smiled now flows smoothly into her jawline. She grabs her favorite blush brush and does what she always does: she smiles and sweeps color onto the apples of her cheeks. Then she pauses. The color makes her face look saggy rather than fresh. The darkness under her eyes seems more pronounced and the center of her face looks puffy. She wipes off the blush and tries again but this time she positions it a little higher. Her cheekbones instantly look sharper. Her whole face appears more elevated and her eyes look brighter. She used the exact same blush. She is the exact same person. But her face looks entirely different. The product stayed the same. What changed was the placement.

    There comes a subtle stage when your makeup routine quietly stops giving the same results. There’s no milestone birthday or sudden shift—you just notice that familiar techniques no longer flatter your face the way they once did. For many people, blush placement is the first thing that feels off. The methods that once added freshness can begin to create a tired or heavy look. This change isn’t about the product itself, but about how your face naturally evolves over time. Adjusting where you place color often matters far more than switching shades or formulas.

    Why Classic Blush Placement Starts to Work Against You After 30

    Applying blush low and round on the cheeks can unintentionally emphasize fatigue once you pass your early thirties. The color that used to brighten the apples of the cheeks can settle closer to soft lines near the nose and mouth. Instead of sculpting the face, it can draw attention to areas that now hold more shadow. A London-based makeup artist once explained that she can often estimate someone’s age simply by watching how they apply blush. Younger faces benefit from centered placement, while faces over 30 often need a more thoughtful approach.

    How Subtle Facial Changes Affect Where Blush Looks Best

    After 30, your bone structure remains stable, but the fat beneath the skin begins to shift slightly downward. The rounded area of the cheek moves lower, even though muscle memory still guides your hand to the same old spot. When blush is applied there, it can accentuate that downward movement. Placing color slightly higher and outward changes the visual balance. You’re not altering your features—you’re redirecting attention. The eye is drawn upward, making the face appear more lifted and rested.

    A Modern Blush Placement That Creates a Soft Lift

    The technique gaining attention now is refreshingly simple. Instead of smiling while applying blush, keep your face relaxed and look straight ahead. Imagine a diagonal line from the top of your ear toward the side of your nose. Apply blush along the upper half of that line, closer to the ear. The shape should resemble a gentle, slanted curve that moves toward the outer corner of the eye. Blend upward into the temples, allowing the color to fade naturally like watercolor.

    Small Adjustments That Make a Big Difference

    Leaving a small gap—about a finger’s width—between your under-eye area and the blush prevents color from settling into fine lines or highlighting darkness. For a subtle flush, a touch of color on the bridge of the nose can work, but the main focus should stay high and outward. This approach enhances cheekbones and brings light back to the eyes without overwhelming the face.

    Why Application Technique Matters More Than Product

    Many people worry about looking overdone, especially with blush. That concern is valid, as heavy application in the wrong spot can look harsh. Placement matters more than quantity. Start with less product than you think you need and build color gradually. Tapping rather than sweeping helps maintain control. Cream and liquid blushes often blend more seamlessly into mature skin, avoiding the textured look powders can create.

    Keeping It Real for Everyday Life

    Not everyone has time for a full, meticulous routine each morning. That’s why remembering one simple rule—higher and further back—can make all the difference. Even on tired days, this small shift can make your face look more awake and aligned with how you feel inside.

    Key Takeaways for Flattering Blush After 30

    • Think in angled lines rather than circular shapes.
    • Keep the strongest color away from the nose and mouth.
    • Blend upward into the temples for a lifting effect.
    • Choose cream or liquid formulas if powder emphasizes texture.
    • Revisit your blush placement every few years as your face changes.

    How Blush Becomes a Quiet Confidence Reset With Age

    Changing how you apply a product you’ve used for years can feel surprisingly meaningful. It’s an acknowledgment that your face has evolved—and a choice to work with that change rather than resist it. A single diagonal sweep of color can alter how light moves across your face. It doesn’t aim to erase age, but to highlight the structure and expression you’ve gained. This subtle adjustment often becomes something you share, showing friends the difference one small shift can make. Blush becomes less about trends and more about understanding your own facial architecture.

    Astuce principale Méthode recommandée Bénéfice esthétique
    Remonter la zone d’application Déposer le blush au-dessus de l’axe oreille-nez, en direction des tempes Donne un effet lift naturel au visage, sans chirurgie ni retouche
    Préserver l’espace sous l’œil Laisser environ un doigt de peau libre entre le correcteur et le blush Atténue visuellement les cernes et limite l’accentuation des ridules
    Favoriser les lignes obliques Estomper le blush en diagonale plutôt qu’en cercle sur la joue Affine les contours du visage et évite l’effet de traits alourdis après 30 ans