Category: Timesco

  • 15 Yoga Moves You Can Do at Home to Build Strength Balance and Control

    15 Yoga Moves You Can Do at Home to Build Strength Balance and Control

    Yoga offers a powerful way to build strength, enhance flexibility, and support mental calm without leaving your home. Whether you are just starting out or already experienced, adding these 15 foundational yoga poses to your routine can help create a balanced and effective practice. Each movement focuses on improving body awareness, increasing mobility, and encouraging mindfulness, making it easier to stay consistent even with a busy schedule.

    1. Mountain Pose (Tadasana)

    Why it matters: This grounding posture supports alignment, balance, and posture awareness.

    • Stand upright with feet hip-width apart.
    • Activate your thighs and gently lift your chest.
    • Rest your arms by your sides, palms facing forward.
    • Ground through your feet while lengthening the spine.

    Benefits: Improves posture, strengthens legs and core, and enhances stability.

    2. Downward-Facing Dog (Adho Mukha Svanasana)

    Why it matters: A full-body stretch that energizes muscles and improves mobility.

    • Begin on hands and knees with proper alignment.
    • Tuck toes and lift hips to form an inverted V shape.
    • Press palms firmly and work heels toward the floor.

    Benefits: Stretches the back and legs, strengthens the arms and core, and supports circulation.

    3. Warrior I (Virabhadrasana I)

    Why it matters: A strong standing pose that develops power and focus.

    • Step feet wide apart from a standing position.
    • Turn one foot outward and bend the front knee.
    • Lift arms overhead and open the chest.

    Benefits: Builds leg and core strength, improves balance, and opens the chest and shoulders.

    4. Warrior II (Virabhadrasana II)

    Why it matters: Encourages endurance while strengthening the lower body.

    • Open hips and shoulders to the side from Warrior I.
    • Extend arms parallel to the floor, palms down.
    • Maintain a strong bend in the front knee.

    Benefits: Strengthens legs and shoulders, increases stamina, and stretches hips.

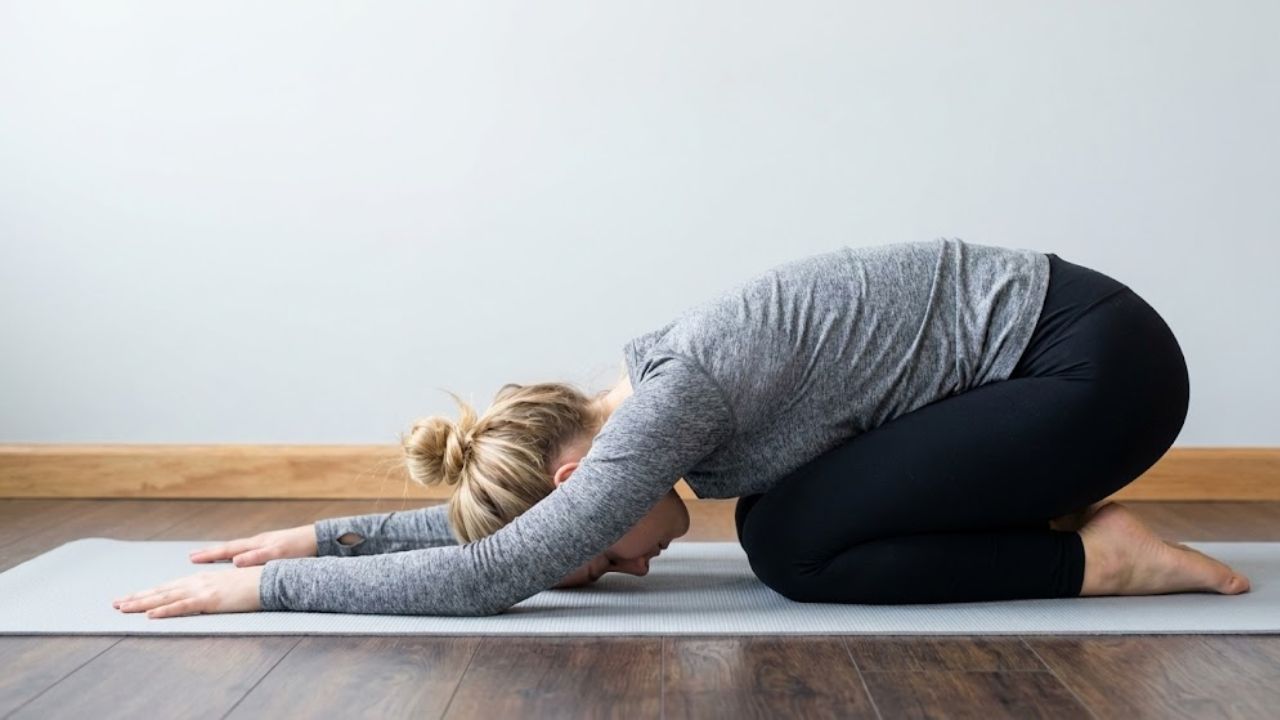
    5. Child’s Pose (Balasana)

    Why it matters: A calming posture that promotes rest and release.

    • Kneel and sit back on your heels.
    • Fold forward with arms extended, forehead on the mat.
    • Breathe slowly and deeply.

    Benefits: Eases tension, calms the nervous system, and stretches the spine and hips.

    6. Cobra Pose (Bhujangasana)

    Why it matters: A gentle backbend that supports spinal mobility.

    • Lie face down with hands under shoulders.
    • Press lightly into palms and lift the chest.
    • Keep shoulders relaxed and elbows soft.

    Benefits: Strengthens the lower back, opens the chest, and improves flexibility.

    7. Seated Forward Fold (Paschimottanasana)

    Why it matters: A deep stretch that encourages relaxation and release.

    • Sit with legs extended straight.
    • Lengthen the spine on an inhale.
    • Fold forward gently on the exhale.

    Benefits: Stretches hamstrings and back, reduces stress, and improves flexibility.

    8. Bridge Pose (Setu Bandhasana)

    Why it matters: Strengthens the back body while opening the chest.

    • Lie on your back with knees bent.
    • Press feet into the floor and lift hips.
    • Engage glutes and core gently.

    Benefits: Strengthens glutes and legs, opens shoulders, and supports spinal health.

    9. Triangle Pose (Trikonasana)

    Why it matters: Combines strength and stretch in a single posture.

    • Stand wide and turn one foot outward.
    • Extend arms and hinge forward.
    • Reach one hand down while the other lifts.

    Benefits: Improves balance, stretches hips and spine, and strengthens legs.

    10. Downward-Facing Dog Split (Eka Pada Adho Mukha Svanasana)

    Why it matters: Builds balance while deepening flexibility.

    • Start in Downward-Facing Dog.
    • Lift one leg upward with hips steady.
    • Engage the core for control.

    Benefits: Stretches legs, strengthens arms and core, and enhances coordination.

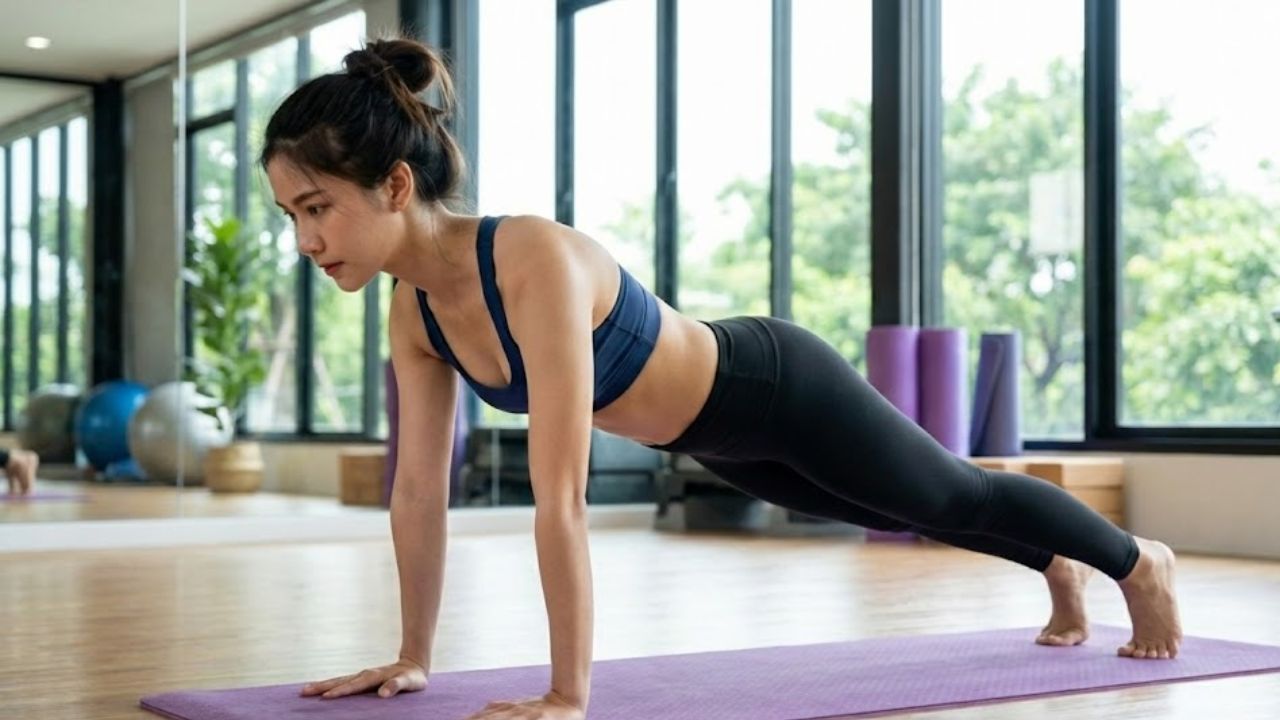
    11. Plank Pose (Phalakasana)

    Why it matters: A foundational pose for total-body strength.

    • Begin in a push-up position.
    • Align body in one straight line.
    • Hold while engaging the core.

    Benefits: Strengthens core and limbs, improves posture, and tones muscles.

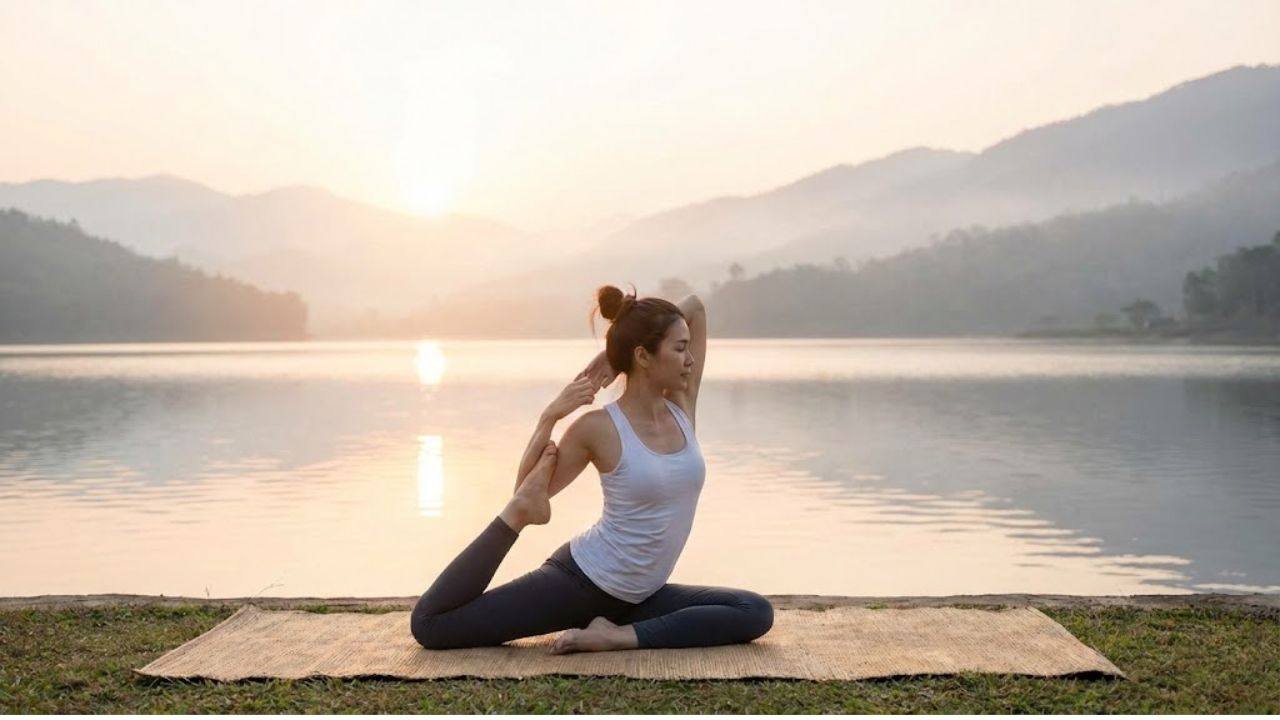
    12. Pigeon Pose (Eka Pada Rajakapotasana)

    Why it matters: A deep stretch for tight hips and glutes.

    • Bring one knee forward from tabletop.
    • Extend the opposite leg behind you.
    • Lower the chest to deepen the stretch.

    Benefits: Releases hip tension, stretches glutes, and supports pelvic flexibility.

    13. Crow Pose (Bakasana)

    Why it matters: Builds strength and confidence through balance.

    • Begin in a low squat.
    • Place hands on the floor and bend elbows.
    • Lift feet and balance on hands.

    Benefits: Strengthens arms and core, improves coordination, and sharpens focus.

    14. Happy Baby Pose (Ananda Balasana)

    Why it matters: Encourages relaxation and gentle release.

    • Lie on your back and draw knees in.
    • Hold the outer edges of your feet.
    • Gently lower knees toward the floor.

    Benefits: Eases lower back tension, stretches inner thighs, and promotes calm.

    15. Shavasana (Corpse Pose)

    Why it matters: Allows the body and mind to fully rest.

    • Lie flat with arms relaxed by your sides.
    • Close your eyes and focus on breathing.
    • Release all remaining tension.

    Benefits: Reduces stress, supports recovery, and enhances mental clarity.

  • 8 Simple Yoga Routines You Can Practice Comfortably at Home

    8 Simple Yoga Routines You Can Practice Comfortably at Home

    Yoga at home provides an excellent way to maintain physical and mental health without needing a gym membership or special equipment. Modern life often leaves little room for dedicated exercise time but practicing yoga requires only a mat and a small area in your living space. Regular practice helps increase flexibility, correct posture problems, and lower stress levels. The following eight yoga routines work for beginners and experienced practitioners alike. Each routine focuses on different benefits while remaining simple enough to fit into any daily schedule. You can modify these exercises based on your current fitness level and available time. Starting a home yoga practice eliminates common barriers like commuting to classes or coordinating schedules with instructors. You control the pace & intensity of each session. Morning routines can energize you for the day ahead while evening practices help you unwind before sleep. These routines target various aspects of wellness. Some focus on building strength and balance while others emphasize relaxation and breathing techniques. The beauty of home practice lies in its flexibility. You can spend five minutes on a quick stretch or dedicate an hour to a comprehensive session. Consistency matters more than duration when developing a yoga habit. Even short daily practices produce better results than occasional lengthy sessions. As you become familiar with these eight routines, you will notice improvements in how your body feels and moves throughout regular activities.

    Morning Energizer Yoga Routine

    Starting your day with a short yoga practice can help wake up your body and sharpen your focus. This energizing routine uses gentle movements and stretches to boost circulation and set a positive tone for the day ahead.

    Key Poses:

    Cat-Cow Stretch: Begin on all fours. Inhale as you arch your back (Cow), then exhale as you round your spine (Cat). This movement enhances spinal flexibility and warms up the body.

    Downward Dog: From hands and feet, lift your hips upward to form an inverted V shape. This pose stretches the legs while strengthening the arms and shoulders.

    Sun Salutations: A flowing sequence of poses that boosts blood flow and activates the entire body, making it ideal for morning energy.

    Yoga for Flexibility Routine

    This routine is designed to improve flexibility and muscle tone, especially in areas that often feel tight, such as the hips, hamstrings, and lower back.

    Key Poses:

    Forward Fold: Stand tall and gently bend forward, reaching toward your toes. This stretch releases tension in the hamstrings and lower back.

    Seated Forward Bend: Sit with legs extended and slowly fold forward. This pose deeply stretches the spine and backs of the legs.

    Pigeon Pose: From a kneeling position, bring one leg forward and extend the other back. This pose opens the hips and eases tightness in the glutes.

    Yoga for Stress Relief Routine

    When stress builds up, calming yoga poses can help relax the body and quiet the mind, supporting both mental and physical well-being.

    Key Poses:

    Child’s Pose: Kneel down, stretch your arms forward, and rest your forehead on the mat. This pose soothes the nervous system and gently stretches the back.

    Legs Up the Wall: Lie on your back with legs extended up a wall. This restorative pose promotes relaxation and improves circulation.

    Savasana: Lie flat on your back and focus on deep, steady breathing. This pose helps release stress and restores energy.

    Core Strengthening Yoga Routine

    A strong core supports balance, stability, and posture. This routine focuses on strengthening the abdominal muscles, back, and sides of the body.

    Key Poses:

    Plank Pose: Hold your body in a straight line, supported by hands and toes. This pose builds strength in the core, arms, and shoulders.

    Boat Pose: Sit with your legs bent and lift your feet off the floor while keeping your spine upright. This pose strengthens the abdominal muscles.

    Side Plank: Rotate from plank onto one arm, stacking your feet. This pose targets the obliques and improves balance.

    Yoga for Posture Improvement Routine

    Long hours of sitting can lead to poor posture. These poses help align the spine, open the chest, and reduce tension in the neck and shoulders.

    Key Poses:

    Mountain Pose: Stand tall with feet grounded and arms relaxed by your sides. This pose reinforces proper body alignment.

    Chest Opener Stretch: Clasp your hands behind your back and lift your chest to stretch the shoulders and counteract slouching.

    Bridge Pose: Lie on your back, bend your knees, and lift your hips upward. This pose strengthens the back and supports better posture.

    Yoga for Better Sleep Routine

    If falling asleep is difficult, this gentle routine helps calm the nervous system and prepares the body for restful sleep.

    Key Poses:

    Reclining Bound Angle Pose: Lie on your back with feet together and knees open. This pose relaxes the hips and encourages deep relaxation.

    Forward Fold: This calming stretch releases tension in the neck and shoulders, helping the mind unwind.

    Savasana: End your practice lying still, allowing the body to fully relax before sleep.

    Detox Yoga Routine

    This routine supports the body’s natural detox process by stimulating digestion and improving circulation.

    Key Poses:

    Twisted Chair Pose: From a chair position, twist your torso to one side. This pose massages the digestive organs and supports detoxification.

    Downward Dog to Plank Flow: Move fluidly between these poses to strengthen the body and boost blood flow.

    Reverse Warrior: A standing pose that stretches the legs and opens the chest while stimulating the abdominal area.

    Yoga for Relaxation and Mindfulness Routine

    This routine focuses on breath awareness and gentle movement to cultivate mindfulness and inner calm.

    Key Poses:

    Seated Meditation: Sit comfortably, close your eyes, and focus on your breathing to enhance mental clarity.

    Cat-Cow Stretch: Coordinate breath with movement to relax the spine and calm the mind.

    Savasana: Conclude your practice with deep breathing to ground your energy and promote peace.

    Conclusion

    Adding yoga to your daily life can improve flexibility, strength, and mental clarity. These eight simple routines can be practiced anywhere, without special equipment. Whether you’re a beginner or experienced, you can adapt these routines to suit your needs and enjoy the benefits of a calmer, healthier, and more balanced body and mind.

  • Strength Without Strain: 6 Yoga Moves That Build Stability and Body Control

    Strength Without Strain: 6 Yoga Moves That Build Stability and Body Control

    Yoga gets recognized mostly for improving flexibility and balance but it works really well for building strength too. The secret lies in doing movements that work your muscles in a controlled and thoughtful manner while keeping strain low and benefits high. These six yoga moves will help you get stronger without putting unnecessary stress on your body regardless of whether you just started or have been practicing for years. The first move is the plank pose which strengthens your core along with your arms and shoulders. You hold your body in a straight line from head to heels while supporting yourself on your forearms and toes. This position engages multiple muscle groups at once & builds endurance throughout your entire body.

    Downward-Facing Dog (Adho Mukha Svanasana)

    Downward-Facing Dog is one of the most well-known yoga poses and is highly effective for developing full-body strength. This pose activates the core, shoulders, arms, and legs while providing a deep stretch to the spine and hamstrings. To begin, come onto all fours with your hands firmly grounded and knees positioned under your hips. Curl your toes under and slowly lift your hips upward, creating an inverted “V” shape. Keep your arms long, heels moving toward the floor, and spine aligned. Hold the pose for 30 seconds to one minute, maintaining steady, controlled breathing to stay relaxed and supported.

    Plank Pose (Phalakasana)

    Plank Pose is a powerful foundational posture that builds core strength and overall stability. It activates the arms, shoulders, back, abdominals, and glutes all at once. Start in a push-up position with your hands placed directly under your shoulders and feet set hip-width apart. Align your body in a straight line from head to heels, ensuring your lower back does not dip. Engage your core muscles and press firmly through your palms. Hold the pose for about 30 seconds, increasing the duration gradually as your strength and endurance improve.

    Warrior II (Virabhadrasana II)

    Warrior II is a strong standing pose that enhances leg strength, hip stability, and core engagement while improving balance and stamina. Begin by standing with your feet wide apart and arms stretched out parallel to the ground. Turn your right foot outward and bend your right knee so it aligns above the ankle. Keep your left leg straight and grounded, with the foot slightly angled inward. Maintain an upright torso and steady gaze over your right hand. This pose builds lower-body strength while opening the hips and chest.

    Boat Pose (Navasana)

    Boat Pose is an effective posture for strengthening the core and hip flexor muscles. Sit on the mat with your knees bent and feet resting on the floor. Lean back slightly while keeping your spine tall, then lift your feet so your shins are parallel to the ground. Stretch your arms forward for balance. For a deeper challenge, straighten your legs to form a “V” shape. Focus on lengthening the spine and engaging your abdominal muscles. Hold the pose for around 30 seconds while breathing steadily.

    Bridge Pose (Setu Bandhasana)

    Bridge Pose is excellent for building strength in the glutes, lower back, and legs, while gently opening the chest and spine. Lie on your back with your knees bent and feet flat on the mat, positioned hip-width apart. Rest your arms alongside your body with palms pressing into the floor. Push through your feet and lift your hips upward until your body forms a straight line from shoulders to knees. Engage your glutes at the top and breathe comfortably. Lower down slowly after a few steady breaths.

    Extended Side Angle Pose (Utthita Parsvakonasana)

    Extended Side Angle Pose is a strengthening and stretching posture that targets the legs, hips, core, and side body. Start with your feet set wide apart, turning your right foot forward and left foot slightly inward. Bend your right knee so it stacks over the ankle and stretch your arms out wide. Place your right forearm on your thigh and extend your left arm overhead, creating a long line from heel to fingertips. Engage your core and breathe deeply as you hold the pose for 30 seconds, then repeat on the opposite side.

  • 5 Yoga Poses That Help You Relax Quickly During Stressful Moments

    5 Yoga Poses That Help You Relax Quickly During Stressful Moments

    Some days you do not need a full workout. You just need your nervous system to settle down. That is where quick relaxation yoga helps. A short sequence can soften tight shoulders and slow racing thoughts while bringing your breathing back to normal. The best part is you can do this at home or at work or even before bed with no fancy setup. These five yoga poses are picked for real life. They are simple and beginner-friendly and focused on calming your body fast. If you have only 7 to 10 minutes you can still feel a noticeable shift. Before you start do a quick check in. If you feel dizzy or sharp pain or you have a medical concern then keep things gentle and skip anything that does not feel right.

    Why quick relaxation yoga is so effective

    Your body responds to stress through the natural “fight or flight” reaction. Your heart rate speeds up, breathing becomes shallow, and muscles tighten often without awareness. Relaxation yoga gently reverses this process. Slow movements, calm holds, and mindful breathing send a message of safety to the brain. This shifts your system into “rest and digest,” where true relaxation and recovery take place. Instead of forcing calm, these poses create the right environment for your body to relax on its own, which is why even a few minutes can feel deeply soothing.

    How to use this 5-pose relaxation routine

    You can practice these poses as a short flow or choose just one when time is limited. Try to breathe through your nose and keep the breath smooth. Emotional responses during relaxing poses are completely normal. Stress is often stored in the body, and stillness can allow it to surface and release.

    A simple plan to follow:
    Hold each pose for 45 to 75 seconds and repeat the ones that feel most comforting. If you have around 10 minutes, stay in each pose for about 90 seconds.

    Pose 1: Child’s Pose

    Child’s Pose is one of the quickest ways to signal your body to soften. It gently releases the lower back and naturally slows the breath.

    How to do it:
    Kneel down, bring your big toes together, and allow your knees to open slightly. Fold forward, stretching your arms ahead or resting them alongside your body. Let your forehead rest on the floor or a cushion.

    Relaxation tip:
    Breathe into the back of your ribs and imagine your lower back expanding with each inhale. Stay for 8 to 12 slow breaths.

    Make it easier:
    Place a pillow under your chest or a folded blanket under your hips for extra support.

    Pose 2: Cat-Cow (slow and mindful)

    When done slowly, Cat-Cow becomes a gentle moving meditation. It releases tension in the neck and spine while helping your breath find a steady rhythm.

    How to do it:
    Come onto your hands and knees. Inhale as you gently drop your belly, lift your chest, and look forward softly. Exhale as you round your back, tuck your chin, and draw your belly inward. Move only with your breath, not speed.

    Relaxation tip:
    Count your breathing. Inhale for 4 counts and exhale for 6. Longer exhales help calm the nervous system.

    Common mistake:
    Moving too fast. Slowness is what creates the relaxing effect.

    Pose 3: Standing Forward Fold

    This pose is especially helpful when your mind feels overloaded. The gentle inversion feels grounding and releases tension along the back of the body where stress often accumulates.

    How to do it:
    Stand with feet hip-width apart and bend your knees generously. Fold forward and let your head hang freely. Hold opposite elbows or rest your hands on blocks, a chair, or your shins.

    Relaxation tip:
    Gently shake your head yes and no to relax the neck. Keep your jaw soft and unclenched.

    Make it safer:
    If you feel light-headed, rise slowly or switch to a seated forward fold.

    Pose 4: Legs Up the Wall

    For fast, noticeable relaxation, this pose works like a reset button. It reduces feelings of heaviness and supports calm, steady breathing.

    How to do it:
    Sit next to a wall, lie down, and swing your legs up the wall. Adjust your hips to a comfortable distance. Rest your arms by your sides with palms facing up.

    Relaxation tip:
    Place one hand on your chest and the other on your belly. Aim to feel the belly rise more than the chest as you breathe.

    If your hamstrings feel tight:
    Move your hips slightly away from the wall or bend your knees gently.

    Pose 5: Reclined Bound Angle

    This supported hip opener encourages a deep sense of safety and ease. It is particularly helpful for releasing tension held in the hips, belly, and lower back.

    How to do it:
    Lie on your back, bring the soles of your feet together, and let your knees fall open. Support each knee with cushions or rolled blankets.

    Relaxation tip:
    Close your eyes and consciously relax your tongue. A relaxed tongue often signals a calmer nervous system. Stay for 1 to 3 minutes.

    Optional breath add-on:
    Inhale for 4 counts, exhale for 6, and pause briefly before the next inhale.

    How to make the calm last longer

    The benefits of relaxation yoga deepen when you protect the calm feeling afterward. Avoid jumping straight back to screens if possible.

    Simple ways to extend the effect:
    Drink water slowly after your practice.
    Sit quietly for one minute.
    Do gentle shoulder rolls paired with long exhales.
    Dim the lights if practicing in the evening.

    Best times to practice for results

    This routine works anytime, but certain moments are especially powerful.

    Morning:
    Helps you begin the day without carrying stress forward.

    Midday:
    Acts as a reset after work, errands, or long periods of screen time.

    Evening:
    Relaxes tight shoulders and calms the mind before sleep.

    Even at work, a short Child’s Pose or standing forward fold paired with slow breathing can quickly reduce tension.

    Quick relaxation yoga routine (easy to save)

    Child’s Pose: 60 seconds
    Cat-Cow: 60 seconds
    Standing Forward Fold: 60 seconds
    Legs Up the Wall: 2 minutes
    Reclined Bound Angle: 2 minutes

    This adds up to about 7 minutes. If you have extra time, stay longer in Legs Up the Wall or Reclined Bound Angle for deeper relaxation.

  • 7 Simple Yoga Practices That Encourage Inner Calm and Balance

    7 Simple Yoga Practices That Encourage Inner Calm and Balance

    In our busy modern lives finding inner peace often seems impossible to reach. The encouraging part is that basic yoga exercises can lead you toward feeling calm & help lower your stress while bringing more peace into your daily experience. Yoga works as a complete system that helps your body along with your mind and spirit. When you add these straightforward practices to what you do each day you can develop a peaceful and clear mindset with better balance. These are the top 7 basic yoga practices that will guide you toward inner peace.

    Pranayama (Breathing Exercises)

    Pranayama is the practice of mindful, controlled breathing and is one of the most effective ways to calm both the mind and body. By consciously focusing on the breath, pranayama helps ease anxiety, sharpen concentration, and encourage deep relaxation. Simple breathing techniques such as Nadi Shodhana (Alternate Nostril Breathing) and Ujjayi (Victorious Breath) are beginner-friendly and can be practiced almost anywhere.

    How to Practice:
    Sit comfortably with your spine upright. Gently close one nostril using your thumb and inhale slowly through the other nostril. Switch nostrils by closing the open one and exhale through the opposite side. Continue alternating nostrils in a slow, steady rhythm. Practicing this technique for 5–10 minutes daily can help quiet mental chatter and promote a deep sense of calm.

    Child’s Pose (Balasana)

    Child’s Pose, also known as Balasana, is a soothing and restorative posture that supports relaxation and inner stillness. This gentle pose is especially helpful for releasing tension from the lower back, shoulders, and neck while signaling the nervous system to slow down and relax.

    How to Practice:
    Begin in a kneeling position, sitting back on your heels. Slowly fold your torso forward, allowing your forehead to rest on the mat. You may stretch your arms out in front of you or place them alongside your body. Breathe deeply and evenly, allowing your body to soften into the pose. Hold the position for as long as feels comfortable, returning to it whenever you need grounding.

    Meditation (Dhyana)

    Meditation is one of the most powerful practices for developing inner peace and emotional balance. It helps calm the mind, reduce stress, and create mental clarity. Meditation does not need to be lengthy or complex—just a few minutes of mindful awareness can bring noticeable calm and stability.

    How to Practice:
    Choose a quiet space and sit comfortably with a straight spine. Close your eyes and bring your attention to your breath or a soothing mantra. When thoughts arise, gently redirect your focus back to the breath without judgment. Begin with 5–10 minutes and gradually extend the duration as your comfort and focus improve.

    Cat-Cow Pose (Marjaryasana–Bitilasana)

    The Cat-Cow sequence is a gentle, flowing movement that stretches the spine and enhances flexibility. This rhythmic motion helps release tension in the back while calming the nervous system, promoting a sense of ease and balance in both body and mind.

    How to Practice:
    Start on all fours in a tabletop position, with hands beneath shoulders and knees under hips. Inhale as you arch your back, lifting your head and tailbone (Cow Pose). Exhale as you round your spine, tucking your chin and drawing your navel inward (Cat Pose). Move smoothly between these poses for 5–10 rounds, syncing each movement with your breath.

    Savasana (Corpse Pose)

    Savasana, or Corpse Pose, is often regarded as the most essential yoga posture because it allows the body to fully absorb the benefits of practice. Though it appears simple, Savasana is deeply effective for calming the nervous system and encouraging profound relaxation.

    How to Practice:
    Lie flat on your back with your legs comfortably apart and arms resting by your sides, palms facing upward. Close your eyes and bring awareness to your breath. Allow your entire body to sink into the floor, releasing tension with each exhale. Remain in this pose for 5–10 minutes, letting your mind settle into stillness.

    Legs Up the Wall (Viparita Karani)

    Viparita Karani, or Legs Up the Wall, is a restorative pose that gently relaxes the body and soothes the nervous system. This posture helps reduce stress, supports circulation, and encourages a deep state of relaxation.

    How to Practice:
    Sit sideways next to a wall and gently lie back as you extend your legs upward against the wall. Keep your arms relaxed by your sides and ensure your body feels supported and comfortable. Focus on slow, steady breathing and stay in this position for 5–10 minutes. This pose is particularly effective for relieving tension in the legs and lower back.

    Gratitude Practice

    Adding gratitude to your yoga routine can transform your mindset by shifting attention away from stress and toward appreciation. Cultivating gratitude supports emotional well-being, reduces mental clutter, and enhances feelings of peace and contentment.

    How to Practice:
    At the end of your yoga session, sit quietly and reflect on things you feel grateful for. This may include your health, your ability to move, supportive relationships, or simple daily comforts. Allow these thoughts to settle in your heart, taking a few moments to fully experience gratitude and calm.

    How to Make These Practices Part of Your Routine

    To gain the full benefits of these calming practices, aim to incorporate them into your daily schedule. You don’t need long sessions—even a few minutes of mindful breathing or a gentle pose can have a meaningful impact. Try beginning your day with pranayama or meditation to set a peaceful tone. In the evening, unwind with Cat-Cow or Savasana to prepare your body and mind for rest.

    Final Thoughts

    Yoga is a powerful and accessible way to cultivate inner peace without requiring advanced poses or extended practice time. Simple techniques such as breathing exercises, meditation, and gentle postures can restore balance and calm in daily life. Whether you are just starting your yoga journey or have years of experience, these seven practices can support your overall well-being. With consistency and just a few mindful minutes each day, the calming effects of yoga can naturally become part of your life.

  • The Plain Yogurt Trick That Revives Dry Skin and Locks in Deep Hydration Overnight

    The Plain Yogurt Trick That Revives Dry Skin and Locks in Deep Hydration Overnight

    Dry, tight skin is a common concern for many people in India, especially with changing weather, pollution, and frequent cleansing. While store-bought creams can help, more people are now turning to simple kitchen remedies that feel gentle and familiar. One such method is the plain yogurt trick, which has gained attention for its ability to deeply moisturize skin overnight. Rich in natural fats and soothing compounds, plain yogurt can help revive dull skin without harsh chemicals, making it a comforting option for those seeking natural hydration solutions.

    How the plain yogurt trick restores dry skin naturally

    The plain yogurt trick works by using yogurt’s natural moisture-binding properties to support the skin barrier while you sleep. When applied as a thin layer, yogurt delivers natural lactic moisture that gently softens rough patches without scrubbing. Its creamy texture creates a gentle hydration seal that helps reduce overnight water loss. Many people notice softer morning skin because yogurt supports calm, balanced skin rather than forcing quick results. For dry or flaky areas, this method encourages skin barrier comfort, making it especially useful during cooler months or after sun exposure.

    Why plain yogurt helps lock in deep hydration overnight

    What makes plain yogurt effective is its ability to work slowly while your body rests. During sleep, skin naturally repairs itself, and yogurt supports this process by providing overnight moisture support without clogging pores. The probiotics and fats help maintain balanced skin texture, which is key for lasting hydration. Users often describe a cooling calming effect that reduces tightness before bed. Over time, consistent use can lead to improved skin smoothness, especially for those who struggle with dryness caused by air conditioning or frequent face washing.

    Using the yogurt hydration method safely at home

    To get the best results, it’s important to keep the routine simple and clean. Always choose plain, unsweetened yogurt to avoid irritation, and apply it to freshly washed skin. A thin layer is enough to create even moisture coverage without feeling heavy. Leaving it on for 15–20 minutes or overnight can promote deep skin nourishment. Rinse gently with lukewarm water in the morning to maintain skin comfort balance. For sensitive skin types, this method offers low irritation care when used once or twice a week.

    Summary or Analysis

    The plain yogurt trick stands out because it combines simplicity with real skin benefits. Rather than overwhelming the skin, it supports hydration in a calm, gradual way that feels sustainable. This approach encourages consistent moisture habits instead of quick fixes, which can be more effective long term. For many users, the appeal lies in minimal ingredient care and the comfort of using something familiar. When paired with a healthy routine, yogurt can contribute to long lasting softness and a more resilient complexion over time.

    Aspect What to Know
    Main ingredient Plain, unsweetened yogurt
    Best time to use Night before sleep
    Skin types Dry to normal skin
    Application frequency 1–2 times per week
    Key benefit Deep overnight hydration

    Frequently Asked Questions (FAQs)

    1. Can plain yogurt really hydrate dry skin?

    Yes, its natural fats and moisture-binding properties help reduce dryness.

    2. Is this method suitable for sensitive skin?

    Generally yes, if plain unsweetened yogurt is used and patch-tested.

    3. How long should yogurt stay on the skin?

    It can be left on for 15–20 minutes or overnight if comfortable.

    4. How often can this trick be used?

    Most people use it safely once or twice a week.

  • Experts Review Nivea Cream and Their Findings May Surprise Everyday Users

    Experts Review Nivea Cream and Their Findings May Surprise Everyday Users

    Nivea Cream has long been a familiar skincare staple, but recent expert reviews in India have sparked fresh conversations among everyday users. Dermatologists and skincare analysts have revisited this classic product to assess how it performs against modern skin concerns like dryness, sensitivity, and barrier repair. Their findings go beyond nostalgia, highlighting both strengths and limitations that many people may not expect. For Indian consumers dealing with varied climates and skin types, these insights help clarify whether Nivea Cream still deserves a place in today’s skincare routines.

    Experts Review Nivea Cream for Everyday Skincare Needs

    When experts review Nivea Cream closely, they often focus on its simple yet rich formulation. Dermatologists point out that its heavy occlusive nature helps lock in moisture effectively, making it useful for deep moisture seal during harsh winters. Many reviewers appreciate its ability to support skin barrier repair, especially for people with dry or compromised skin. However, specialists also caution that its thick texture may not suit those prone to clogged pores risk. In Indian weather conditions, experts suggest using smaller amounts to avoid a greasy feel. Overall, the cream is praised for reliability rather than innovation.

    Nivea Cream Findings That Surprise Regular Users

    One surprising finding from expert evaluations is how versatile Nivea Cream can be beyond facial use. Review panels highlight its effectiveness for targeted dry patches such as elbows, heels, and hands. Some skincare professionals even note its role in makeup prep base when applied sparingly. On the flip side, experts warn that it may feel too heavy for oily skin types, particularly in humid regions of India. These balanced insights challenge the assumption that the cream is either outdated or universally suitable.

    Dermatologist Insights on Nivea Cream Ingredients

    Ingredient analysis plays a key role in expert opinions. Dermatologists often highlight the presence of emollients that promote long lasting hydration and help reduce moisture loss. The formula’s simplicity is seen as a benefit for those avoiding complex actives, contributing to minimal irritation chances. However, experts also mention that it lacks modern active ingredients aimed at anti aging benefits. For Indian users seeking straightforward nourishment rather than treatment-based skincare, these ingredient insights explain why the cream remains popular decades after launch.

    Expert Summary and Practical Takeaways

    In summary, expert reviews suggest that Nivea Cream continues to hold value, but with realistic expectations. It excels as a dependable moisturizer offering classic skincare comfort, especially for dry skin and body care. Specialists advise mindful application to avoid heaviness and recommend pairing it with lighter products in warmer climates. For Indian households, the key takeaway is that this cream works best as a supportive staple rather than a multifunctional solution. Understanding these expert-backed nuances helps everyday users make more informed skincare choices.

    Review Aspect Expert Observation
    Moisturizing Power Highly effective for dry skin
    Texture Rich and heavy consistency
    Skin Type Suitability Best for dry to normal skin
    Climate Performance More suitable in cooler weather
    Ingredient Complexity Simple, non-active focused formula

    Frequently Asked Questions (FAQs)

    1. Is Nivea Cream suitable for daily use?

    Yes, experts say it can be used daily in small amounts, especially on dry skin.

    2. Can oily skin users apply Nivea Cream?

    Oily skin users should apply it sparingly or limit use to dry areas.

    3. Does Nivea Cream work in hot Indian weather?

    It works better in cooler conditions and may feel heavy in high humidity.

    4. Is Nivea Cream recommended by dermatologists?

    Many dermatologists recommend it as a basic moisturizer, not a treatment product.

  • Skip weights and try this 10-move bodyweight workout to strengthen your core in 10 minutes

    Skip weights and try this 10-move bodyweight workout to strengthen your core in 10 minutes

    One of the biggest challenges with ab workouts is how quickly the muscles fatigue. It often takes just a few minutes before each move starts to feel intensely demanding.

    That same challenge is also a major advantage. Because your core tires quickly, you can complete a highly effective abs workout in a short amount of time, without needing any equipment.

    This 10-minute abs routine from fitness trainer Maddie Lymburner, better known as MadFit on YouTube, is designed to target your abs and obliques. It can be done anywhere you have enough room to lie down.

    What You’ll Need Before You Start

    The workout requires no equipment at all. Since every exercise is performed on the floor, using one of the best yoga mats can make the session more comfortable, especially on hard surfaces.

    Inside MadFit’s 10-Minute Abs Workout

    The routine includes 10 different exercises. Each move is performed for 45 seconds, followed by a 15-second rest before moving on.

    All exercises are done in a lying position, so there’s no need to flip over for planks. It’s also a no-repeat workout, meaning each exercise is completed only once during the session.

    Lymburner completes the workout alongside you and offers clear form cues and guidance. Keeping her visible and audible during the workout is helpful, especially during the rest periods when she previews the next movement.

    How to Adjust the Pace

    If possible, aim to match Lymburner’s tempo. She maintains a steady rhythm that helps you control each movement while still completing plenty of reps during every work interval.

    If the pace feels too challenging or you need extra recovery, you can extend the rest periods. Options include adjusting the structure to 40 seconds of work and 20 seconds of rest, or 30 seconds on and 30 seconds off for beginners.

    This is a demanding workout, but it’s also easy to scale based on your fitness level, making it suitable for a wide range of abilities.

    Muscles Worked During the Session

    The workout combines crunches for the upper abs, leg raises for the lower abs, and rotational movements that place extra emphasis on the obliques.

    While it doesn’t focus as heavily on deep core stabilizers as routines built around static holds like planks, it still engages the entire core and supports strength gains that carry over into other workouts.

    What to Try Next

    Once you feel confident with this session and want to progress further, a 15-minute Pilates abs workout can be a great next step, especially for deep core engagement.

    If you’re looking for a different approach or find that sit-ups strain your back, the Pilates ball crunch can be a useful alternative to include in future workouts.

  • 6 Easy Yoga Poses You Can Do Anytime to Feel Calm and Relaxed

    6 Easy Yoga Poses You Can Do Anytime to Feel Calm and Relaxed

    Rewritten Text Life moves quickly & your body often shows that rush through tight muscles, quick breathing and too much mental activity. Yoga for calm and peace does not mean forcing your body into difficult positions. It means slowing things down so your nervous system can settle. Even a short session of gentle movement can reduce anxiety, calm busy thoughts and restore a sense of balance. These six simple yoga poses work well because they have a soothing effect on both mind and body. They are straightforward easy to access & good for people just starting out. You do not need to be flexible or strong to experience their benefits. All you need is slow breathing & a willingness to take a break.

    Why Calming Yoga Works So Fast

    Stress triggers the body’s natural alert system. Your heart rate rises, muscles tighten, and breathing becomes shallow. Gentle yoga works in the opposite way. Slow movements, longer holds, and controlled breathing send signals of safety to the brain. This allows the nervous system to shift into a relaxed mode where rest and recovery can occur. With regular practice, calming yoga can support better sleep, improved mood, smoother digestion, and stronger emotional balance.

    Child’s Pose

    Child’s Pose is one of the most comforting yoga positions. It softly releases tension from the lower back, shoulders, and neck while helping the mind settle.

    How to do it:
    Kneel on the floor and lower your hips toward your heels. Fold your upper body forward and rest your forehead on the mat or a cushion. Your arms may extend forward or relax alongside your body.

    Calming benefit:
    Encourages slow breathing into the back of the body and helps ease mental stress.

    Hold for:
    1 to 2 minutes with gentle, steady breaths.

    Seated Forward Bend

    This pose has a grounding and reflective quality. Folding forward helps draw attention inward, naturally calming the nervous system.

    How to do it:
    Sit with your legs stretched out in front of you. Inhale to lift and lengthen your spine. Exhale as you hinge forward from the hips. Slightly bend the knees if your hamstrings feel tight.

    Calming benefit:
    Releases tension in the lower back and legs while quieting racing thoughts.

    Hold for:
    60 to 90 seconds.

    Cat Cow Pose

    Cat Cow is a smooth, flowing movement that connects breath with motion. It is ideal for reducing stiffness and easing the mind.

    How to do it:
    Begin on your hands and knees. Inhale as you lift the chest and let the belly soften. Exhale as you round the spine and gently drop the chin. Move slowly with your breath.

    Calming benefit:
    The steady rhythm relaxes the spine and improves breath awareness, helping lower stress.

    Practice for:
    About 1 minute at an easy pace.

    Legs Up the Wall

    This restorative pose is deeply soothing and especially helpful for tired bodies.

    How to do it:
    Sit close to a wall, then gently lie back and lift your legs upward so they rest against the wall. Place your arms comfortably by your sides with palms facing up.

    Calming benefit:
    Slows the heart rate, supports circulation, and helps reduce feelings of anxiety.

    Hold for:
    2 to 3 minutes, or longer if it feels comfortable.

    Supine Spinal Twist

    This gentle twist relaxes the spine and supports internal balance, creating a sense of ease.

    How to do it:
    Lie on your back and draw one knee toward your chest. Guide it across your body while extending the opposite arm outward. Keep both shoulders relaxed.

    Calming benefit:
    Releases lower back tension and helps clear mental clutter.

    Hold for:
    45 seconds to 1 minute on each side.

    Corpse Pose

    Corpse Pose may appear simple, but it is one of the most effective poses for deep relaxation.

    How to do it:
    Lie flat on your back. Allow your feet to fall open and your arms to rest naturally by your sides. Close your eyes and let the body fully relax.

    Calming benefit:
    Supports complete physical and mental rest, allowing the nervous system to reset.

    Stay for:
    3 to 5 minutes with natural breathing.

    How to Practice These Poses for Deeper Calm

    You can move through all six poses in one relaxing session or choose a few when time is short. Keep your breathing slow and even, inhaling through the nose and exhaling fully. Soft lighting or gentle music can enhance the experience. It is best to avoid practicing right after a heavy meal.

    Simple 10-Minute Calm Routine

    Child’s Pose
    Cat Cow
    Seated Forward Bend
    Supine Spinal Twist (both sides)
    Legs Up the Wall
    Corpse Pose

    Tips to Stay Calm Beyond the Mat

    Yoga becomes more powerful when combined with mindful daily habits. Take a few deep breaths during stressful moments. Reduce screen use before bedtime. Drink enough water and aim for consistent sleep. Even practicing one calming pose during a busy day can help restore balance.

    Who Should Be Careful

    If you have recent injuries, knee discomfort, or spinal issues, use props for support and move gently. Never force a position. Pregnant individuals should seek professional guidance and modify twists or forward bends as needed.

    Final Thought

    Calm and peace are not distant goals. They already live within you. These gentle yoga poses simply help you reconnect with that inner stillness. If you’d like, a short morning or bedtime routine can be created using these poses to fit your daily schedule.

  • 15-Minute Yoga Routine: Simple Movements That Sustain Energy Throughout the Day

    15-Minute Yoga Routine: Simple Movements That Sustain Energy Throughout the Day

    Yoga offers an excellent method to increase your energy and sharpen your focus while improving your general health. A brief yoga session works perfectly when you need a fast & practical way to feel alert and energized at the start of your day. You can activate your body & boost circulation in only 15 minutes while getting ready for a productive day. This straightforward & active yoga routine aims to get your body moving & stretch important muscle groups while building a feeling of energy. This sequence will make you feel energized & prepared for your day regardless of whether you are just starting yoga or have been practicing for years.

    Child’s Pose (Balasana)

    Start your yoga routine with Child’s Pose to relax the mind and gently stretch the lower back, hips, and thighs. Kneel on the floor with your knees comfortably apart and your big toes touching. Slowly fold your torso forward, allowing your chest to rest between your thighs. Extend your arms forward or place them alongside your body. Let your forehead settle on the mat and take slow, deep breaths. This grounding posture helps release built-up tension and creates a calm mental space, preparing your body and focus for the poses that follow.

    Downward-Facing Dog (Adho Mukha Svanasana)

    From Child’s Pose, shift into Downward-Facing Dog to awaken and energize the entire body. Begin on all fours with your hands under your shoulders and knees beneath your hips. Curl your toes under and lift your hips upward, forming an inverted V shape. Press your palms firmly into the mat, lengthen your spine, and gently work your heels toward the floor. Hold this pose for 30 seconds to one minute while breathing steadily. This posture stretches the hamstrings, calves, shoulders, and spine, boosting circulation and overall energy.

    Cat-Cow Stretch (Marjaryasana–Bitilasana)

    Transition into the Cat-Cow Stretch to mobilize the spine and ease tension in the neck and shoulders. Return to a tabletop position with neutral alignment. As you inhale, drop your belly, lift your chest, and look slightly upward for Cow Pose. As you exhale, round your back, draw your chin toward your chest, and press the floor away for Cat Pose. Continue moving fluidly between these two positions for about 30 seconds. This gentle flow improves spinal flexibility, relieves stiffness, and encourages healthy energy movement.

    Low Lunge (Anjaneyasana)

    Low Lunge provides a deep stretch for the hips, thighs, and legs while opening the chest. From tabletop, step your right foot forward between your hands, aligning your knee over your ankle. Lower your left knee to the mat and sink your hips slightly forward. Raise your arms overhead and lengthen through your fingertips. Hold the pose for 30 seconds to one minute, then switch sides. This posture is especially helpful for releasing tight hips and reactivating the lower body after extended sitting.

    Warrior II (Virabhadrasana II)

    Move into Warrior II to build strength, stability, and stamina. Stand with your feet wide apart and turn your right foot outward while keeping the left foot slightly angled inward. Bend your right knee so it aligns above your ankle, keeping your left leg straight and strong. Extend your arms parallel to the floor and gaze over your right fingertips. Hold for 30 seconds before changing sides. Warrior II strengthens the legs, opens the hips, and sharpens focus, helping to boost confidence and vitality.

    Tree Pose (Vrksasana)

    Tree Pose challenges balance while cultivating concentration and inner calm. Stand upright with your weight evenly distributed. Shift your weight onto your left foot and place your right foot on the inner calf or thigh, avoiding the knee. Bring your palms together at your chest or raise your arms overhead. Hold for 30 seconds, breathing steadily and focusing your gaze on a fixed point. Switch sides afterward. This posture strengthens the legs and core while improving balance, mental clarity, and body awareness.

     Seated Forward Fold (Paschimottanasana)

    Slow the pace with Seated Forward Fold, a soothing stretch for the back and legs. Sit on the mat with your legs extended straight in front of you. Inhale to lengthen your spine, then exhale as you hinge forward from the hips, reaching toward your feet or shins. Keep your spine long rather than rounded. Hold the pose for 30 seconds to one minute while breathing calmly. This posture stretches the hamstrings and lower back, encouraging relaxation and releasing residual tension.

    Shoulder Bridge Pose (Setu Bandhasana)

    Conclude your routine with Shoulder Bridge Pose to strengthen the lower body and open the chest. Lie on your back with your knees bent and feet planted hip-width apart. Press your feet into the mat and lift your hips upward, forming a gentle arch through the spine. Keep your arms relaxed at your sides with palms pressing down. Hold for 30 seconds to one minute, then slowly lower your hips. This pose activates the glutes, supports the spine, and promotes healthy circulation to re-energize the body.