Category: News

  • Sorry, the Matrix doesn’t exist: new mathematical proofs suggest the universe cannot be a simulation

    Sorry, the Matrix doesn’t exist: new mathematical proofs suggest the universe cannot be a simulation

    You’re scrolling late at night, half-awake, when an old question slips back in: what if none of this is real? The low hum of the fridge, the blue glow on your face, the slight delay as your thumb swipes. Somewhere between a meme about “escaping the simulation” and a quote from Elon Musk, the thought lands: what if we’re just NPCs in someone else’s video game?

    This idea hasn’t only lived in sci-fi or stoner conversations. Scientists have played with it too. But in recent years, mathematicians and physicists have begun pushing back—quietly, with equations and proofs. And what they’re uncovering may be even more unsettling than the simulation itself.

    Why the Matrix Idea Is Starting to Unravel

    The modern simulation obsession took off when tech billionaires started saying aloud what philosophy students had debated for decades: maybe reality is a computer program. It was an appealing story. Instead of an indifferent universe, we’d be characters inside a higher-level project, like a cosmic sandbox run by post-human programmers.

    The idea fit neatly into the digital age. We went from dial-up internet to hyper-realistic, ray-traced game worlds in a blink. So why not scale that logic up and imagine the entire universe as better graphics, bigger servers, and smarter code?

    Lately, though, a different group has been speaking up—the people who live inside raw equations. They’re not just dismissing the idea as unlikely. Several teams now argue that a fully detailed simulated universe like ours may not be mathematically possible at all, no matter how powerful the computer.

    When Physics Looks for the Pixels

    One major line of attack focuses on lattice simulations. Physicists use these grid-based models to study tiny slices of reality, such as how quarks behave inside atoms. A few years ago, researchers asked a bold question: if our universe were built on a similar grid, would we notice the pixelation?

    They examined ultra-high-energy cosmic rays—particles that strike Earth with staggering force. In a digital lattice universe, those rays should reveal the grid’s orientation, like visible pixels when you zoom too far into an image. No such signal appeared. While this doesn’t completely kill the simulation idea, it traps one popular version of it and exposes a serious mathematical flaw.

    The Crushing Weight of Computation

    Other researchers targeted a deeper issue: computational limits. Simulating a universe as detailed as ours—down to every particle interaction—causes the information load to explode. Using bounds from quantum information theory, analyses suggest that any computer capable of perfectly simulating our universe would need to be at least as large and complex as the universe itself.

    That’s not a clever shortcut. That’s just another universe.

    The cracks widen quickly. A simulation would need to store every state, track every interaction, and update everything constantly. Our world isn’t a simple board game. It’s 10⁸⁰ particles, quantum fields, black holes, and everyday devices all interacting at once.

    Even with perfect compression, physics pushes back. The Bekenstein bound limits how much information can exist in a given space. Any “computer behind the universe” would still have to obey those laws, meaning it couldn’t store more data than the universe it’s meant to simulate.

    • Mega engineering project
  • 12 Beginner-Friendly Yoga Poses That Improve Flexibility Safely

    12 Beginner-Friendly Yoga Poses That Improve Flexibility Safely

    Improving flexibility does not require extreme stretches, painful positions, or years of experience. Flexibility develops best when the body feels safe, relaxed, and supported through consistent movement. Yoga offers an ideal starting point for beginners because it blends gentle stretching with controlled breathing and mindful awareness. These twelve beginner-friendly yoga poses help ease tight muscles, improve joint mobility, and encourage smoother movement—without force or strain.

    Why Yoga Works Well for Beginners Seeking Flexibility

    Many beginners assume they must already be flexible to start yoga, but flexibility is a result of practice, not a prerequisite. Yoga enhances flexibility by calming the nervous system first. As stress levels decrease, muscles stop resisting and begin to lengthen naturally. Gentle, repeated movements also improve circulation and lubricate the joints, which supports long-term mobility and comfort.

    Beginner Yoga Poses to Improve Flexibility

    Mountain Pose for Better Postural Flexibility

    Mountain pose builds alignment and body awareness. Standing tall with relaxed shoulders helps lengthen the spine and reduce postural tension. Though subtle, this pose forms the foundation for flexibility by improving how the body supports itself throughout daily activities.

    Standing Forward Fold for Hamstrings and Spine

    This gentle forward fold stretches the hamstrings, calves, and back. Beginners can slightly bend the knees to stay comfortable. Allowing the head to hang freely helps release neck and upper-back tension, supporting overall flexibility.

    Low Lunge for Hip Flexor Mobility

    Low lunge is especially helpful for beginners with tight hips caused by prolonged sitting. It gently opens the front of the hips while building leg strength. Increased hip flexibility often improves posture and reduces lower-back discomfort.

    Cat–Cow Stretch for Spinal Movement

    This slow, flowing sequence increases spinal flexibility from neck to lower back. Coordinating breath with movement helps release stiffness in the shoulders and spine while warming up the body in a safe, controlled way.

    Downward Facing Dog (Modified for Beginners)

    This full-body stretch targets the back, shoulders, hips, calves, and hamstrings. Beginners can keep the knees bent and focus on lengthening the spine instead of straightening the legs.

    Seated Forward Fold for Gentle Lengthening

    This seated pose stretches the hips, hamstrings, and lower back without placing pressure on the joints. Its relaxed nature encourages the muscles to soften and lengthen gradually over time.

    Butterfly Pose for Inner Hip Flexibility

    Butterfly pose gently opens the inner thighs and groin, areas that are often tight in beginners. Holding the pose with calm breathing improves flexibility without discomfort.

    Seated Twist for Side Body Mobility

    Gentle seated twists enhance flexibility around the spine, waist, and hips. These movements restore natural rotation and help undo stiffness caused by daily posture habits.

    Child’s Pose for Full-Body Release

    Child’s pose stretches the hips, back, and shoulders while allowing complete relaxation. It is especially beginner-friendly because it combines gentle flexibility with restorative rest.

    Supine Knee-to-Chest Pose for Lower Back Relief

    This reclining pose gently stretches the lower back and hips while decompressing the spine. It is ideal for beginners who feel stiff after long periods of sitting.

    Supine Figure Four for Outer Hip Opening

    This accessible hip opener releases tension in the glutes and outer hips without stressing the joints. Improved hip mobility often makes everyday movement feel easier.

    Reclined Bound Angle Pose for Deep Relaxation

    This restorative pose allows gravity to gently open the hips and inner thighs while the body remains fully supported. Longer, relaxed holds encourage flexibility gains without effort.

    How Often Beginners Should Practice

    Consistency matters more than intensity. Practicing these poses for 10–20 minutes, 4–6 days a week, can lead to noticeable flexibility improvements within a few weeks. Gentle daily practice produces the best results.

    Common Flexibility Mistakes Beginners Should Avoid

    Forcing stretches, holding the breath, or comparing progress to others can slow improvement. Flexibility develops fastest when movements stay slow, comfortable, and paired with steady breathing.

    How Natural Flexibility Supports Daily Life

    As flexibility improves, everyday actions such as walking, bending, reaching, and sleeping become easier. Reduced stiffness supports better posture, fewer aches, and increased energy throughout the day.

    Conclusion

    You do not need to push your body to become flexible—you need patience, breath, and consistency. These twelve beginner-friendly yoga poses provide a safe and natural approach to improving flexibility while calming the mind and supporting joint health. With regular practice, the body gradually opens, lengthens, and moves with greater ease and comfort.

  • 19 Winter Bob Haircuts That Update This Classic Style With a Sharp Modern Edge

    19 Winter Bob Haircuts That Update This Classic Style With a Sharp Modern Edge

    The bob haircut is officially back in the spotlight, returning with a wide range of fresh styling possibilities. While long, back-skimming lengths still have their appeal, shorter cuts continue to dominate modern It-Girl style. This winter, bobs are updated with sharper silhouettes, high-shine finishes, and texture-driven details that feel deliberate, contemporary, and easy to maintain.

    From Parisian-inspired French bobs to sculpted curls, ultra-short power cuts, and retro shapes pulled straight from Old Hollywood glamour, this season’s bobs balance refinement with individuality. Whether you prefer blunt edges, soft layering, or subtle movement, there’s a bob suited to every hair type and face shape. Ahead, expert hairstylists share the top winter bob haircuts you’ll be seeing everywhere—and why each one deserves attention.

    Meet the Experts

    • Ashanti Lation, celebrity hairstylist who has worked with Tems and Latto
    • Hiro Araki, professional hairstylist at Abby Haliti Color Studio
    • Juan Flores, professional hairstylist based in Dallas, Texas
    • Suzette Boozer, celebrity hairstylist who has worked with Teyana Taylor and Quinta Brunson

    01. Parisian French Bob

    This effortlessly chic, chin-length bob with blunt ends continues to reign supreme. Ashanti Lation explains that its glossy finish and soft, straight fringe frame the face beautifully, instantly elevating any winter look.

    02. Power Mini Bob

    Suzette Boozer describes this ultra-short bixie-length cut, stopping at the earlobe, as bold, clean, and unapologetically stylish. Wear it sleek and blunt for impact or soften it with gentle side bangs.

    03. Curve Bob

    Juan Flores highlights this retro-inspired shape, defined by its rounded, slightly A-line structure. The curved finish under the chin delivers a look that feels polished yet modern.

    04. Box Bob

    Hiro Araki recommends this pin-straight, precision-cut bob for those craving structure. Its graphic silhouette and weighty finish add edge while grounding layered winter outfits.

    05. Curtain Bang Bob

    This soft chin- to shoulder-length bob pairs seamlessly with curtain bangs. Boozer suggests a middle part and roller-set fringe to create natural volume and face-framing movement.

    06. Sculpted Curly Bob

    According to Lation, curly bobs are having a standout winter season. This rounded cut enhances natural texture, giving curls more definition, shape, and controlled volume.

    07. Micro Bob

    Perfect for a dramatic refresh, this jawline-grazing bob emphasizes facial features like the cheekbones and jaw. Flores calls it a statement cut that’s easy to personalize.

    08. Italian Bob

    Both Araki and Lation agree this European-inspired style is gaining momentum. Defined by its fluid shape, controlled volume, and natural shine, the Italian bob feels luxurious, confident, and city-ready.

    09. Fringe Bob

    For added dimension, Flores recommends this textured bob with feathered fringe. Fringe can be adapted to suit curtain, side-swept, or micro bang styles, instantly enhancing face shape and movement.

    10. Old Hollywood Bob

    This vintage-inspired cut brings classic glamour into winter styling. Lation suggests a deep side part paired with smooth, sculpted waves and high shine for a true red-carpet finish.

    11. Wavy Bob

    Natural waves create a relaxed yet refined effect. Araki notes that undone texture adds softness, perfectly balancing the sharp tailoring of winter wardrobes.

    12. Barrel-Bump Bangs Bob

    Inspired by Anna Wintour’s iconic look, Boozer says gently barrel-curled bangs add subtle volume and editorial polish, elevating a classic bob without overstyling.

    13. Soft Blunt Bob

    This shoulder-length style features minimal layers and a smooth finish. Lation explains that it provides structure without heaviness, making hair look full, healthy, and winter-ready.

    14. Jawline Ribbon Bob

    Boozer recommends adding a single mid-shaft spiral curl to a blunt jaw-length bob. This simple detail creates movement, romance, and red-carpet appeal with minimal effort.

    15. Glossy Brunette Bob

    Color plays a crucial role in elevating any cut. Flores suggests pairing your bob with a rich, high-shine brunette tone and maintaining it with a leave-in conditioner to keep strands smooth and radiant.

    16. Soft Layered Bob

    Araki explains that strategic layering introduces movement without compromising shape. The result is a polished yet effortless style that transitions easily from daytime to evening wear.

    17. Textured A-Line Bob

    Boozer notes that this blunt, layer-free cut sits at or just above the shoulder. With a slim crown and fullness at the ends, it mirrors the elegance of an A-line dress while enhancing volume and shape.

  • 25 Birthday Nail Designs That Bring Bold Colour Fun Details and Instant Celebration Vibes

    25 Birthday Nail Designs That Bring Bold Colour Fun Details and Instant Celebration Vibes

    Every birthday deserves a little self-gifting, and a fresh manicure is one of the most satisfying ways to celebrate. Whether you save salon visits for major moments or keep your nails perfectly polished year-round, your birthday nails should feel genuinely special. It’s also the ideal moment to experiment—especially since experts are calling 2026 the year of maximalist nails. There’s no better time to embrace that main-character energy.

    Even if your style leans minimal, there are subtle ways to elevate a classic look. A hint of glitter, confetti, or shimmer can instantly transform a milky nude. And once you see the creative designs top nail artists are serving up, you may feel inspired to go all in.

    Below, you’ll find standout inspiration for birthday manicures, from zodiac-driven designs to bold colors and playful party-ready styles. Pick your favorite early, then get back to planning the celebration.

    Party Stars

    This manicure strikes the perfect balance between celebratory and wearable. A nude base with a dimensional cat-eye finish paired with star decals adds just enough sparkle to last well beyond your birthday week.

    Birth-Year Manicure

    Celebrate your roots by honoring the year you were born. A retro-inspired design turns your nails into a bold, personal statement.

    Aura Nails

    If birthdays put you in a reflective mood, an aura manicure in a color that resonates with you is a meaningful choice. This look is also surprisingly achievable at home using a simple sponge technique.

    Funfetti Nails

    For a joyful, throwback vibe, lean into a color-packed glitter mix. The brighter and more chaotic the combo, the better it complements every birthday outfit.

    Holographic Pink

    Nothing says party-ready quite like hot pink nails. Add a holographic or glitter topcoat, and the look instantly feels playful, bold, and celebration-approved.

    Cat-Eye Star Sign

    Your birthday may last a day, but your zodiac season lives on. A celestial, horoscope-inspired manicure is a stylish way to celebrate your sign.

    Bejeweled Birthday Nails

    Bedazzled manicures are trending in 2026, making them a natural choice for birthdays. Mix and match gems, or spotlight your birthstone for a meaningful centerpiece.

    Champagne Pop Tips

    Champagne-toned cat-eye tips deliver a refined blend of minimalism and celebration. They pair effortlessly with any outfit—and a celebratory toast.

    Rainbow Disco Nails

    Disco-inspired nails aren’t reserved for New Year’s Eve. Multicolor tile sequins bring a fresh, fun energy that’s perfect for welcoming a new year of life.

    Rockstar Manicure

    This design proves short nails can still make an impact. Stars, subtle studs, and hints of cowhide print create an effortlessly cool, edgy look.

    Multicolor Dot Nails

    For minimalists craving a festive touch, polka-dot nails never fail. Using multiple colors keeps the design playful while staying clean and simple.

    Classic Spicy Red

    A solid red manicure is timeless for a reason. Bold, chic, and eye-catching, it’s a confident choice for any birthday celebration.

    Confetti Ombré

    Sometimes the theme can be literal. Blending glitter with mini tinsel flecks creates a confetti-inspired ombré that feels unmistakably festive.

    Butterfly Nails

    Birthdays often mark transformation, making butterfly nail art a fitting symbol as you step into a new age.

    Golden Birthday Flames

    These sculpted flames capture the spirit of a golden birthday week. It’s a stylish way to tap into the 3D gilded nail trend defining 2026.

    Dainty Heart Details

    A sweetheart manicure pairs perfectly with a day meant to be filled with love, warmth, and celebration.

    Silver Velvet Nails

    Gold often steals the spotlight, but silver manicures can feel just as festive. A magnetic cat-eye effect adds depth and dimension.

    Birthday Blues

    If the birthday blues strike, flip the mood with soft blue French tips accented by delicate sparkle for a cheerful finish.

    Signature Cocktail Nails

    Turn your favorite drink into nail art. A cocktail-inspired manicure looks especially charming when raising a glass for a birthday toast.

    Main Character Orange

    Orange is having a major moment in 2026. As a statement shade, it delivers confidence, energy, and undeniable main-character vibes.

    Bauble Manicure

    This is your year to shine. Let your nails reflect it with pearl and bauble-inspired accents.

    Let’s Get Wild

    Animal prints are a standout nail trend for 2026. Leopard or cheetah designs bring bold energy that’s perfect for a birthday statement.

    Funky Star Designs

    Unexpected color pairings and maximalist star patterns define this playful look—ideal for stepping out of a neutral nail routine.

    Bow Manicure

    While plans may not always tie together perfectly, your nails can. This delicate bow design feels festive, polished, and right on theme without feeling overdone.

  • Forget crunches and sit-ups as this beginner-friendly core workout builds strength without strain

    Forget crunches and sit-ups as this beginner-friendly core workout builds strength without strain

    For many beginners in India, traditional crunches and sit-ups can feel uncomfortable, intimidating, or even risky for the lower back and neck. That’s why more people are turning to gentler core routines that still deliver real strength gains without unnecessary strain. This beginner-friendly core workout focuses on controlled movements, breathing, and stability rather than force. It helps activate deep abdominal muscles, improve posture, and support everyday movements. Best of all, it’s accessible for all fitness levels and fits easily into a regular home workout routine.

    Beginner-friendly core workout without crunches

    This beginner-friendly core workout replaces high-pressure movements with slow, intentional exercises that prioritize form. Instead of flexing the spine repeatedly, you focus on maintaining alignment and tension through moves like dead bugs and standing core holds. These exercises promote spine-friendly training, encourage deep muscle activation, and support better body control. Because the movements are low impact, they’re easier to learn and safer for those returning to exercise. Over time, this approach builds a strong foundation that supports balance, posture, and daily tasks without overwhelming the body.

    How this no sit-up core routine builds strength

    A no sit-up core routine works by engaging stabilizing muscles that are often ignored in traditional ab workouts. When you resist movement rather than create it, your core learns to brace and protect the spine. This leads to functional core strength, improved joint stability focus, and balanced muscle engagement. Beginners often notice better posture and reduced discomfort during daily activities. Because the exercises emphasize control, they also help develop coordination and confidence, making it easier to progress to more advanced workouts later.

    Why beginners benefit from low-strain core exercises

    Low-strain core exercises are especially valuable for beginners because they reduce the risk of overuse injuries and soreness. By avoiding aggressive spinal flexion, these movements encourage safe movement patterns, promote steady strength progress, and support long-term consistency. Many people find they’re more likely to stick with a routine that feels manageable and rewarding. Over time, this consistency leads to stronger muscles, improved mobility, and a greater sense of confidence in one’s physical abilities.

    Summary and practical takeaway

    Skipping crunches doesn’t mean skipping results. A beginner-friendly core workout that focuses on stability, breathing, and alignment can be just as effective, if not more. This approach supports everyday movement ease, encourages mindful exercise habits, and builds lasting core resilience. For beginners in India looking to start safely, these low-strain routines offer a practical, sustainable way to develop strength without discomfort or fear of injury.

    Exercise Type Main Benefit Strain Level
    Dead Bug Core stability Low
    Standing Knee Lift Balance support Low
    Bird Dog Spine control Low
    Plank Hold Total core engagement Moderate

    Frequently Asked Questions (FAQs)

    1. Is this core workout suitable for complete beginners?

    Yes, it’s designed to be safe, simple, and easy to follow.

    2. How often should beginners do this routine?

    Two to three times per week is ideal for steady progress.

    3. Do I need any equipment for this workout?

    No equipment is required; bodyweight is enough.

    4. Can this replace traditional ab workouts?

    Yes, it can effectively build core strength without crunches or sit-ups.

  • Goodbye to Hair Dyes: New Methods Gaining Attention for Covering Grey Hair Naturally

    Goodbye to Hair Dyes: New Methods Gaining Attention for Covering Grey Hair Naturally

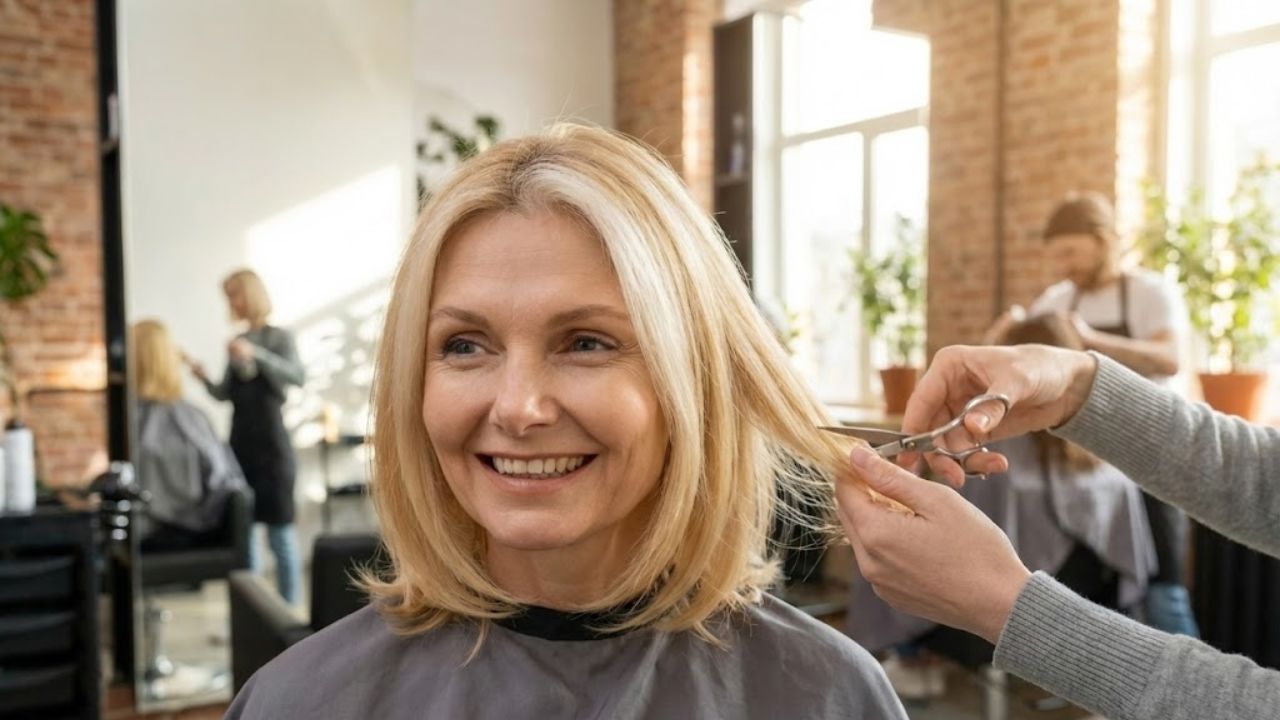
    The Gentle Shift in Hair Coloring Gray hairs bring a decision point. You can either show them off or cover them up in a way that feels natural. People everywhere are looking for something different now. They want to reduce the appearance of gray hair & look more vibrant without using strong chemical dyes. A gentler method of coloring hair is becoming popular in homes around the world. This shift reflects a broader change in how we think about aging and beauty.

    The science behind grey hair – and why it changes your whole look

    Hair does not suddenly “turn” grey. Each strand grows from a follicle in the scalp, where specialised pigment-producing cells called melanocytes inject colour into the hair shaft during growth. This pigment, mainly melanin, determines your natural hair shade. Over time, factors such as ageing, genetic makeup, long-term stress, and lifestyle habits cause these melanocytes to slow down or stop working completely. When this happens, new hair grows with reduced pigment or none at all, appearing grey or white. Grey hair is therefore not old hair losing colour, but entirely new hair forming without melanin.

    Keratin, the protein structure of hair, naturally carries a pale yellow tone. When melanin disappears, this underlying shade becomes visible, especially under bright lighting. At the same time, ageing scalps often produce less sebum, the oil that keeps hair smooth and shiny. Reduced oil levels make grey hair feel rougher, look duller, and frizz more easily. Changes in texture can also alter how hair bends and sits, which explains why greys often feel wiry or unruly.

    Visually, even a small number of bright white strands against darker hair can create sharp contrast around the face. This contrast may emphasise shadows, under-eye circles, and fine lines, making features appear more tired. For many people, this shift in texture and reflection has more impact on appearance than the colour change itself.

    Why classic hair dye is losing ground

    For years, permanent hair dye was the default solution for greys. These formulas work by opening the hair cuticle with ammonia or similar agents, allowing pigment to penetrate deep into the shaft through an oxidising process. While results can look polished initially, repeated treatments often weaken hair structure, especially already-fragile grey strands. Roughened cuticles lead to tangling, dryness, and brittleness, while sensitive scalps may react with itching or irritation.

    Another drawback is maintenance. Permanent dye creates a stark line of regrowth every few weeks, forcing regular salon visits. As beauty preferences evolve, many people now seek softer, lower-commitment options that reduce chemical exposure while preserving natural dimension. The shift is not about abandoning colour entirely, but about choosing gentler methods that allow for subtle change rather than perfection.

    The rise of natural darkening: from the kitchen to the bathroom shelf

    Plant-based and food-based colour boosters have gained popularity as part of this softer approach. These methods do not bleach or permanently alter the hair’s internal structure. Instead, they sit on the surface, gradually building a translucent layer of colour while adding shine. Among these ingredients, cocoa powder has drawn particular attention.

    Cocoa contains natural pigments and polyphenols that can gently deepen light to medium brown hair tones over time. On grey strands, it helps soften stark whiteness, allowing them to blend more seamlessly with surrounding hair. Rather than acting like a permanent dye, cocoa behaves as a tinted conditioning treatment that enhances colour gradually while improving texture.

    How cocoa helps darken grey hair

    Cocoa-based treatments coat the hair shaft, creating a soft brown veil that washes out slowly. When mixed with conditioners or oils, cocoa also supports moisture retention, helping to smooth the cuticle. Many users notice that their grey hair appears shinier, less coarse, and easier to manage after consistent use. The result is not dramatic coverage, but a more harmonious overall tone.

    A simple at-home cocoa mix

    A minimal recipe suits sensitive scalps and low-maintenance routines. For short to medium hair, combine one tablespoon of pure, unsweetened cocoa powder with a generous amount of a lightweight, oil-free conditioner. Mix thoroughly until the paste is smooth and evenly coloured.

    Apply to freshly washed, towel-dried hair, concentrating on areas with the most visible greys such as the temples, parting, and hairline. Use a wide-tooth comb to distribute evenly. Leave the mixture on for 15 to 20 minutes, then rinse with lukewarm water. Avoid shampooing immediately afterward, as this would remove most of the surface pigment.

    Natural Hair Colour Result After Cocoa Application Recommended Usage Frequency
    Light Brown Visible warm tone boost, grey strands blend faster Apply 1–2 times weekly
    Medium Brown Enhances richness, greys appear naturally mixed Once per week
    Dark Brown / Black Adds shine with mild warmth, minimal colour shift Every 7–10 days for gloss effect
    Blonde May turn patchy or dull in tone Patch test advised or avoid use

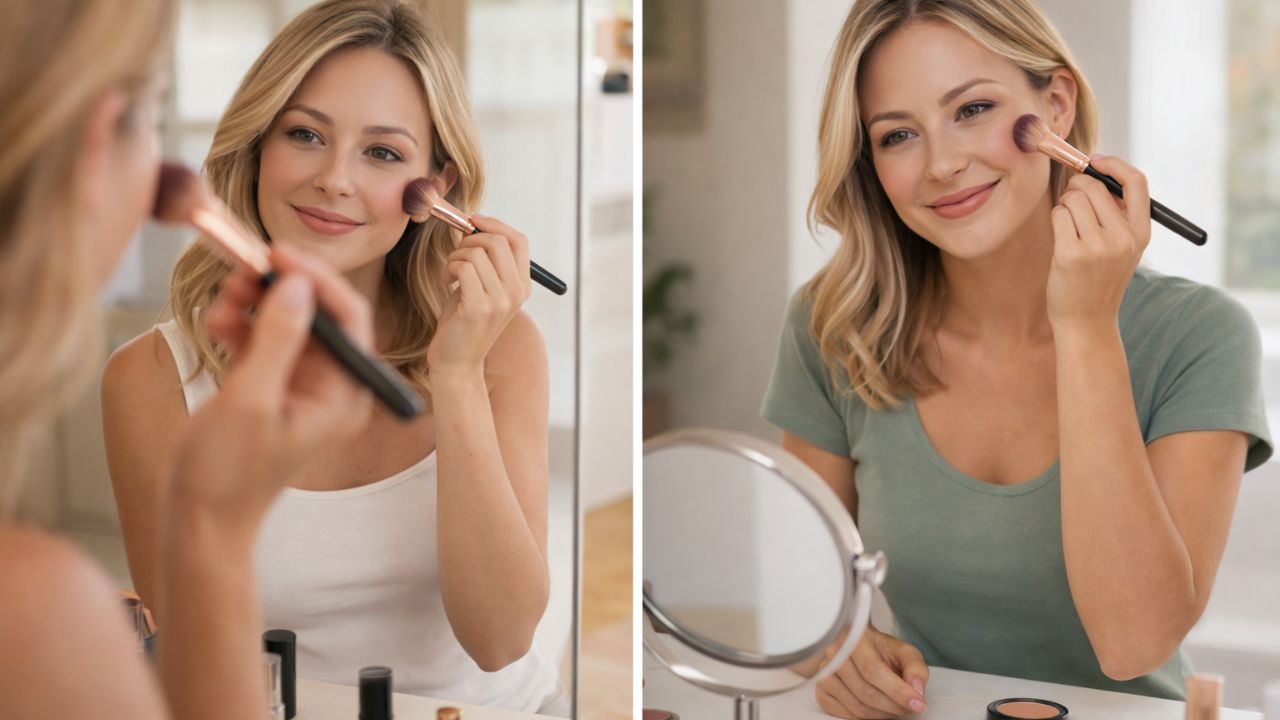
    Can this really make you look younger?

    Grey hair alone does not determine age. Haircut, skin quality, posture, and clothing all influence appearance. However, strong contrast between dark hair and bright white strands can accentuate facial shadows and fine lines. By softening this contrast, cocoa-based treatments can help create a more rested, balanced look.

    Younger-looking hair is often less about eliminating greys and more about maintaining shine, hydration, and shape. Smooth, reflective hair frames the face more gently, brightening the eye area and subtly lifting overall features. Even reduced frizz around the face can noticeably change how skin appears both in real life and on camera.

    Where natural methods work – and where they do not

    Natural colour adjusters such as cocoa, coffee, black tea, or sage are best suited for people with up to 40–50% grey who want blending rather than full coverage. They appeal to those who prefer gradual change, warmer tones, and minimal maintenance. Individuals expecting dramatic colour shifts in one session may feel disappointed, as these methods rely on repeated use and patience.

    Despite being natural, these treatments are not entirely risk-free. Cocoa can cause reactions in people with sensitivities or allergies, making a patch test essential before full application. Build-up may also occur over time, so using a mild clarifying shampoo every few weeks helps maintain shine and lightness.

    How this trend is changing the beauty conversation

    The popularity of cocoa and similar methods reflects a broader shift in beauty standards. Fully uniform hair colour is no longer the sole marker of youth. Blended greys, transparent coverage, and soft tints now appear in fashion and social media, encouraging individuality rather than strict correction.

    Many people choose to soften greys without erasing them completely, pairing natural tints with strategic cuts, scalp care, and nutrition. While supplements cannot reverse greying, nutrients such as omega-3s, iron, zinc, and B vitamins support the strength and quality of new hair growth.

    Going further: other gentle options to pair with cocoa

    Some users combine cocoa treatments with other mild options such as black tea or coffee rinses to deepen tone, or sage and rosemary infusions to add subtle shading and scalp freshness. Rotating these treatments prevents colour from becoming too warm or flat.

    Professional guidance can also play a role. Many colourists now specialise in grey blending, using low-impact dyes alongside plant-based glosses. Maintaining results at home with cocoa or tea masks allows longer gaps between salon visits and reduces chemical stress on the hair. Testing on a small hidden section first remains the best way to understand how your hair responds.

  • The Chicest Celebrity Pixie Cuts That Might Finally Convince You to Go Short

    The Chicest Celebrity Pixie Cuts That Might Finally Convince You to Go Short

    When it comes to haircuts that deliver instant impact, few styles feel as polished and confident as the short pixie haircut. While bob hairstyles have held the spotlight for seasons—ranging from relaxed lobs to sharp, power-driven cuts—the focus has now shifted. Shorter lengths are making waves, offering a look that feels sharper, fresher, and undeniably modern.

    Enter the short pixie. Alongside undercut pixies and asymmetrical variations, this ultra-cropped style is enjoying a clear resurgence, appearing everywhere from celebrity red carpets to everyday social feeds. It carries an unmistakable confidence: effortless to maintain, yet striking in its effect. Simply put, it’s the ultimate cool-girl haircut.

    “A short pixie is the ultimate expression of confidence,” says celebrity hairstylist Jason Collier, whose client list includes Victoria Beckham and Sienna Miller. “It frames the face to highlight the eyes, cheekbones, and jawline. It’s strong, but still feminine.”

    Whether you’re considering a dramatic transformation or you’re already devoted to short hair and ready for a refresh, this guide covers everything you need to know about short pixie hairstyles—from salon conversations to styling tips at home, plus the celebrities proving just how powerful this cut can be.

    What Defines a Short Pixie Haircut?

    A short pixie haircut is a cropped style featuring closely cut sides and back, balanced with slightly longer layers on top for texture, movement, and shape. It’s bold and contemporary, blending elegance with edge in a way few hairstyles can. Even better, it suits all hair types, making it a versatile option for many.

    “The secret to a great short pixie is balance,” explains Collier. “It should complement your bone structure and enhance your natural features. When it’s cut properly, it looks modern, soft, and completely wearable—never harsh.”

    What to Discuss With Your Stylist Before the Chop

    Before committing to a pixie, it’s important to be clear about the style you’re drawn to. Are you leaning toward something ultra-cropped and directional, softly boyish, tousled and textured, or sleek and sculpted?

    “Always bring reference images to your appointment,” says Collier. “They help us understand the overall vibe and adapt it to your hair type, face shape, and daily routine.”

    Length is another crucial detail. You may be curious about micro bangs, prefer gentle softness around the ears, or want added volume through the top with a side-swept finish. A skilled stylist will assess your hair density, growth patterns, and facial structure to create the most flattering version of the pixie for you.

    How to Style a Short Pixie Haircut at Home

    One of the biggest advantages of a short pixie haircut is how easy it is to style—but simple doesn’t mean limited. “For a relaxed, textured look, work a small amount of matte wax or dry paste through the top,” Collier advises. “Warm it between your fingers and gently rake it through the roots and ends for movement.”

    If you prefer a more refined finish, a lightweight pomade or shine cream will create a sleek, sculpted effect that works especially well for evenings or polished occasions. Pixie cuts also look striking when styled with a deep side part, slicked back, or enhanced with statement clips or headbands.

    One key rule to remember: avoid overusing product. “With a pixie, less really is more,” Collier adds.

    Is a Short Pixie Haircut Right for You?

    “Pixies have longevity because they’re never one-dimensional,” says Collier. “They return every few years, each time with a fresh attitude.” Bold yet timeless, adaptable yet distinctive, the short pixie haircut proves that some of the bravest hair choices are also the most chic.

  • Blush Placement Technique: The Subtle Shift That Instantly Improves Facial Balance and Softens Features After 30

    Blush Placement Technique: The Subtle Shift That Instantly Improves Facial Balance and Softens Features After 30

    The woman looking into her bathroom mirror appears almost unchanged from her mid-twenties, yet something feels different. Her cheeks rest a little lower, and the fullness that once lifted with a smile now blends softly into the jawline. She reaches for her favorite blush brush and follows the same routine she always has, smiling and sweeping color onto the apples of her cheeks. Then she stops. Instead of looking fresh, her face appears heavier. Under-eye shadows seem deeper, and the center of her face looks swollen. She removes the blush and tries again, placing it slightly higher. Instantly, her cheekbones stand out, her face appears lifted, and her eyes look brighter. The blush is identical. She hasn’t changed. The placement has.

    Why Traditional Blush Placement Often Fails After Your Early Thirties

    There is a quiet moment in life when a makeup routine stops giving the same results. It doesn’t happen suddenly or come with a warning. One day, familiar techniques simply look off. Blush is often the first sign. When applied low and rounded, it can make someone in their early thirties appear tired by midday. Shades that once looked youthful on the apples of the cheeks begin to drift toward fine lines near the nose and mouth, settling rather than lifting. At this stage, placement matters more than the product itself.

    A makeup artist in London once shared that she can often estimate someone’s age by observing how they apply blush. Younger people usually place it directly in the center of the cheeks. Many people over 30 keep this habit, even as their facial structure subtly shifts. She described working with two sisters, aged 28 and 38, with similar skin tones using the same makeup. On the younger sister, blush on the apples instantly brightened her face. On the older sister, that same placement emphasized hollows beneath the eyes.

    When the artist moved the blush higher, closer to the temples on the 38-year-old, the change was immediate. She looked rested and refreshed, as if she had slept well. The color drew attention upward, highlighting the eyes and cheekbones instead of the center of the face. The reason is simple. After 30, bone structure stays the same, but facial fat gradually shifts downward. Muscle memory guides the hand to where fullness once sat, placing color too low. Adjusting placement upward changes where the eye focuses, creating a subtle lifting effect.

    A Modern Blush Technique That Creates a Natural Lift

    The technique gaining attention now is straightforward and practical. Instead of smiling and targeting the apples of the cheeks, keep your face relaxed and look straight ahead. Picture a diagonal line running from the top of the ear toward the side of the nostril. Apply blush along the upper section of that line, closer to the ear than the nose. The shape should form a soft, angled C that curves toward the outer corner of the eye.

    Blend the color upward into the temples rather than pulling it inward. Let it fade gently into the hairline, similar to watercolor spreading on paper. For many people over 30, this placement instantly reveals cheekbones they forgot were still there. One small adjustment makes a visible difference: leave a clean space between the under-eye area and where the blush starts. A finger-width gap helps prevent color from settling into fine lines or emphasizing dark circles.

    For a lightly flushed look, a small tap of blush across the bridge of the nose can work, but keep the main color high and toward the outer face. Many people over 30 want a healthy glow without looking overdone. That concern is valid, as blush placed too low or applied too heavily can appear like unflattering redness. This is why where blush sits matters more than how much is used. Start with a small amount and build in light layers.

    Cream blush formulas often suit mature skin because they blend in rather than sitting on top. Real life isn’t a professional makeup setting, and mornings can be rushed. Remembering one simple rule helps: apply higher and further back. Even this small shift can make the face look more awake and balanced.

    Key Blush Placement Reminders

    • Think diagonally instead of applying blush in a round shape.
    • Keep the strongest color away from the nose and mouth.
    • Blend upward into the temples for a lifting effect.
    • Choose cream or liquid formulas if powder highlights texture.
    • Revisit placement every few years as facial structure naturally changes.

    How Adjusting Blush Placement Quietly Builds Confidence Over Time

    There is something subtle yet powerful about changing how a product you’ve used for years is applied. It’s an acknowledgment that your face has evolved and a choice to work with that change. A diagonal sweep of color becomes a gentle adjustment rather than a correction. Many people talk about looking tired or unfamiliar to themselves, but it’s often not dramatic change. It’s how light and shadow now move across the face.

    Shifting where color sits alters how light appears to fall on the skin. The effect feels almost reflective. The pattern created with blush influences how a face is read before a word is spoken. Catching a reflection and feeling momentarily disconnected is common. Adjusting placement doesn’t erase that feeling, but it can soften it. The right positioning highlights structure without dragging features downward.

    This technique is easy to pass along. Once the difference is visible, it’s natural to show someone else. Many people try a side-by-side comparison, applying blush the old way on one cheek and the updated method on the other. The contrast usually explains everything. Blush becomes less about trends and more about understanding individual facial architecture. There is no universal diagram, only a guiding idea: color that moves upward reads as energy, while color concentrated in the center often reads as fatigue. That’s why this simple adjustment continues to resurface, regardless of changing makeup trends.

  • From January 28, pensions will increase but only for retirees who submit a missing certificate, leaving many saying : “They know we don’t have internet access” administrative injustice outrage

    From January 28, pensions will increase but only for retirees who submit a missing certificate, leaving many saying : “They know we don’t have internet access” administrative injustice outrage

    The news arrived on a quiet Tuesday morning, mixed in with supermarket leaflets and the gas bill. A thin, pale-blue government letter announced that pensions would increase from January 28. For a brief moment, many retirees felt relief. Some imagined a better-stocked fridge, a little help for grandchildren, or enough spare change for a bus trip to see family.

    Then came the second paragraph.

    A missing certificate had to be submitted. Online. Through a portal many had never used, on a screen they often didn’t even own. In an instant, the promise of a raise left a bitter aftertaste.

    The unspoken message was harsh.

    No click, no increase.

    “From January 28” Sounds Like Hope — Until You Read the Fine Print

    On the radio and television, the message sounds comforting: pensions will rise from January 28. It feels like a long-overdue response to rising food prices and growing energy bills. But a single condition changes everything: only retirees who submit the missing certificate will receive the increase.

    Behind those few words, many older people hear something very different.

    If you’re not comfortable online, you’re on your own.

    Take Georges, 78, a widower living alone in a small apartment on the edge of town. His letter arrived late because the shared mailbox downstairs often jams. It told him to log into his “personal account” and upload a document confirming his situation. Georges doesn’t own a computer. His phone is an old model with large buttons and no apps.

    His daughter lives 200 kilometers away, works full time, and has two children. Georges carefully folds the letter and places it in the drawer with his rent receipts. “I’ll deal with it later,” he tells himself.

    Later, at 78 and alone, often means too late.

    The Digital Divide Hidden Behind an Administrative Detail

    What looks like a small administrative requirement hides a deeper digital divide. On one side are retirees with smartphones, fast internet, and family members who complete online forms in minutes. On the other are those who have never sent an email and confuse a login with a PIN code.

    Public services have moved online, slowly but steadily. Lives, however, don’t transition at the same speed. What seems simple on paper becomes an obstacle when you don’t even know where to type a web address.

    The rule applies to everyone. Access to the rule does not.

    Getting Through an Online Requirement When You’re Offline

    For those who opened the letter and felt lost, a few practical steps can still make a difference. The first is simple but crucial: don’t hide the envelope in a drawer. Leave it visible — on the table, near the phone, beside the kettle. That paper represents access to the January 28 pension increase.

    Next, take it step by step. Call the pension office number listed at the bottom of the letter. Speak slowly. Ask whether the certificate can be sent by post or delivered in person. Write down dates, addresses, and instructions directly on the letter.

    Another often-overlooked option is local support. Town halls, social centers, and assistance groups frequently offer help with administrative procedures. Many cities now run digital help desks where someone sits with you and completes the online process together. It’s not perfect — appointments are limited, and waiting times can be long.

    But one visit, with the letter and your ID, can prevent months of missed pension payments.

    Let’s be realistic: no one processes every official letter the day it arrives, without exception.

    There’s also help closer to home. Neighbors, building caretakers, or a tech-savvy resident can make all the difference. Some retirees hesitate to ask, worried about bothering others or appearing dependent. Yet asking for help is often the only way to avoid being left behind.

    “They know perfectly well we don’t have internet,” says Maria, 83, standing by her mailbox. “If they really wanted us to receive the increase, they’d send a form to sign, not a code to type into a machine I don’t own.”

    Simple Habits That Can Prevent Lost Benefits

    • Store all official letters in one visible place instead of scattering them across drawers.
    • Write deadlines, phone numbers, and addresses directly on the letter.
    • Ask at the town hall or social center for help accessing or creating an online account.
    • Bring someone you trust — a child, neighbor, or volunteer — so you’re not alone.
    • Keep copies or photos of every document before submitting or sending it.

    A Pension Increase That Raises a Bigger Question

    This situation — pensions rising from January 28 only for those who manage to submit a missing certificate online — says a lot about how aging is handled today. On paper, the policy is reasonable: updating records, preventing fraud, confirming eligibility. In reality, the line between fair control and silent exclusion becomes very thin when everything depends on a screen.

    Most people know the frustration of a simple task turning into a maze of passwords, verification codes, and vanished forms. Now imagine facing that maze at 82, with shaky hands and the nearest help two bus rides away.

    The frustration many retirees express isn’t only about money. It’s about feeling acknowledged rather than ignored.

    Some will receive the increase. Others may miss out entirely. The deeper question is whether a society should accept that a single missed click can cost someone a week’s worth of groceries. That question doesn’t fit into an online form, and there’s no password to unlock it.

    Key Takeaways for Protecting Your Pension Rights

    • Review the letter carefully: deadlines, required documents, and contact details are often listed at the end.
    • Seek offline assistance: town halls, social services, family members, and associations can help complete online steps.
    • Keep proof of every action: copies, photos, and reference numbers help if documents are said to be missing.
  • Back-Friendly Core Killer: Abs Exercise That Hits Hard Without Sit-Ups and Without Back Pain

    Back-Friendly Core Killer: Abs Exercise That Hits Hard Without Sit-Ups and Without Back Pain

    If you’d rather skip traditional sit-ups, this option offers a far gentler experience for your lower back. It doesn’t require heavy weights or standing movements, making it accessible and controlled.

    At first glance, the exercise looks straightforward, but its real focus is on stability, control, and sustained muscle tension. Inspired by Pilates, it uses a Pilates ball and a mat, with minimal additional equipment.

    Instead of the repetitive up-and-down motion of sit-ups, which can aggravate some backs, your spine is supported on the ball around the shoulder blade area. Using a supportive mat under your hips and feet helps with comfort and grip. This setup challenges deep stabilizing muscles and activates the abs effectively.

    Understanding The Exercise

    Knowing how to engage your core doesn’t always guarantee an exercise will feel right for you. While sit-ups aren’t automatically off-limits, it’s worth considering whether there’s a more suitable and effective alternative.

    Pilates is a low-impact training method well known for improving core strength and posture. When practiced consistently, even a single session can make a noticeable difference.

    This Pilates ball crunch stands out because it allows you to mobilize and stretch the spine. If desired, you can lower your head and upper back fully toward the floor on each repetition, opening the chest and increasing intensity.

    How To Perform The Pilates Ball Crunch

    As shown in demonstrations, focus on a strong exhale as you lift your chest forward and upward. Keep your hands lightly supporting your head, elbows drawn back, and chest open throughout the movement.

    Pay attention to form: the back stays straight as the core initiates the lift, then gently presses back into the ball. Knees remain bent, with feet firmly planted on the floor. Moving slowly can increase control and deepen abdominal engagement.

    Think about curling the spine off the ball at shoulder-blade level, then gradually rolling back down. An optional fuller range of motion involves lowering the upper back and head fully to the floor behind you, creating a deeper stretch. If you choose this variation, imagine uncurling the spine carefully into the ball as the chest opens.

    Step-By-Step Setup

    • Begin seated with a Pilates ball placed behind you, knees bent and feet flat on the mat.
    • Lower your back onto the ball so it supports your shoulder blades.
    • Place your hands behind your head and keep your gaze forward.
    • Engage your core, then exhale as you lift your chest and upper back, drawing the ribcage downward.
    • Pause briefly, then lower back onto the ball with control, avoiding any arch in the lower back.
    • Complete 10–15 repetitions for several rounds, with the option to lower fully to the floor each time to release the spine.

    When performed correctly, the movement appears subtle, with minimal visible motion and far less strain on the back than standard sit-ups. The emphasis is on stability, control, and abdominal contraction, particularly in the deep core muscles.

    A slight shake or tremble is normal, but if you feel pain or discomfort, stop immediately and avoid pushing beyond what your body can handle.