Category: News

  • 14 Yoga Poses That Help Open Tight Hips and Improve Mobility

    14 Yoga Poses That Help Open Tight Hips and Improve Mobility

    Tight hips affect many people who spend hours sitting or doing the same movements repeatedly. When your hips become stiff they can cause discomfort and bad posture & sometimes even pain in your lower back. Yoga offers an excellent solution for releasing this tension while building flexibility & better movement in your hip area. The 14 yoga poses described here focus on opening your hips and stretching the muscles around them to boost your overall flexibility.

    Child’s Pose (Balasana)

    Why it works for hip flexibility: Child’s Pose stretches your lower back and hip area while loosening tight thigh muscles. This makes it a good beginner pose for improving hip mobility.

    How to perform it: Start in a kneeling position with your hands flat on the floor. Sit back slowly until your bottom moves toward your heels and stretch your arms forward. Rest your forehead on the mat & breathe slowly and deeply.

    What you gain: This pose stretches your hips & thighs while releasing lower back tension. It also helps calm your mind and body.

    Pigeon Pose (Eka Pada Rajakapotasana)

    Why it works for hip opening: Pigeon Pose ranks among the most effective stretches for loosening hip flexors & releasing tension in the glutes and lower back. How to perform it: Start on your hands & knees in a tabletop position. Move one knee forward and position it behind the corresponding wrist. Straighten the other leg behind you & gently lower your hips down toward the ground. Stay in this position for multiple breaths before switching to the other side. Benefits: This pose provides a deep hip opening while stretching the glutes and hip flexors along with the lower back muscles.

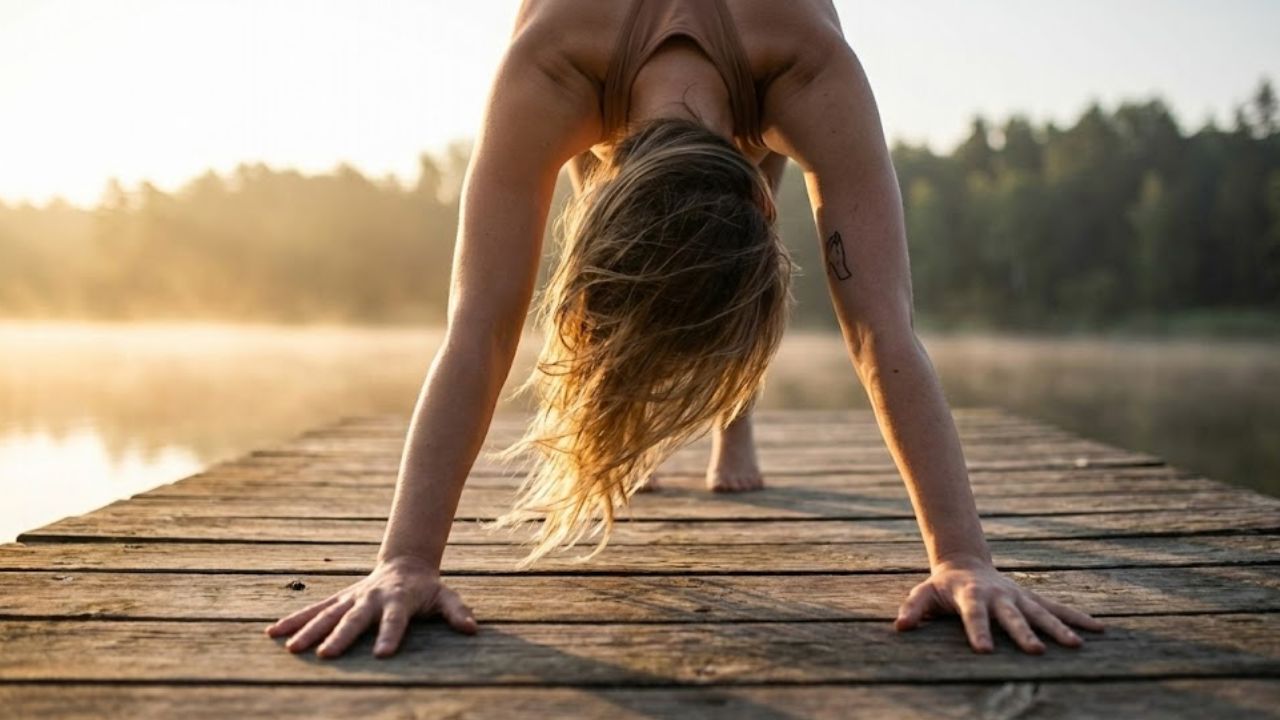
    Lizard Pose (Utthan Pristhasana)

    Why it works for hip opening: Lizard Pose focuses on the hip flexors and groin area to provide an intense stretch that loosens tight hips. How to perform it: Begin in a high plank position & bring one foot forward to land outside your hands. Drop your hips down while keeping your back leg straight. For a more intense stretch you can lower your forearms to the floor. Benefits: This pose stretches the hip flexors & groin and hamstrings while building better flexibility.

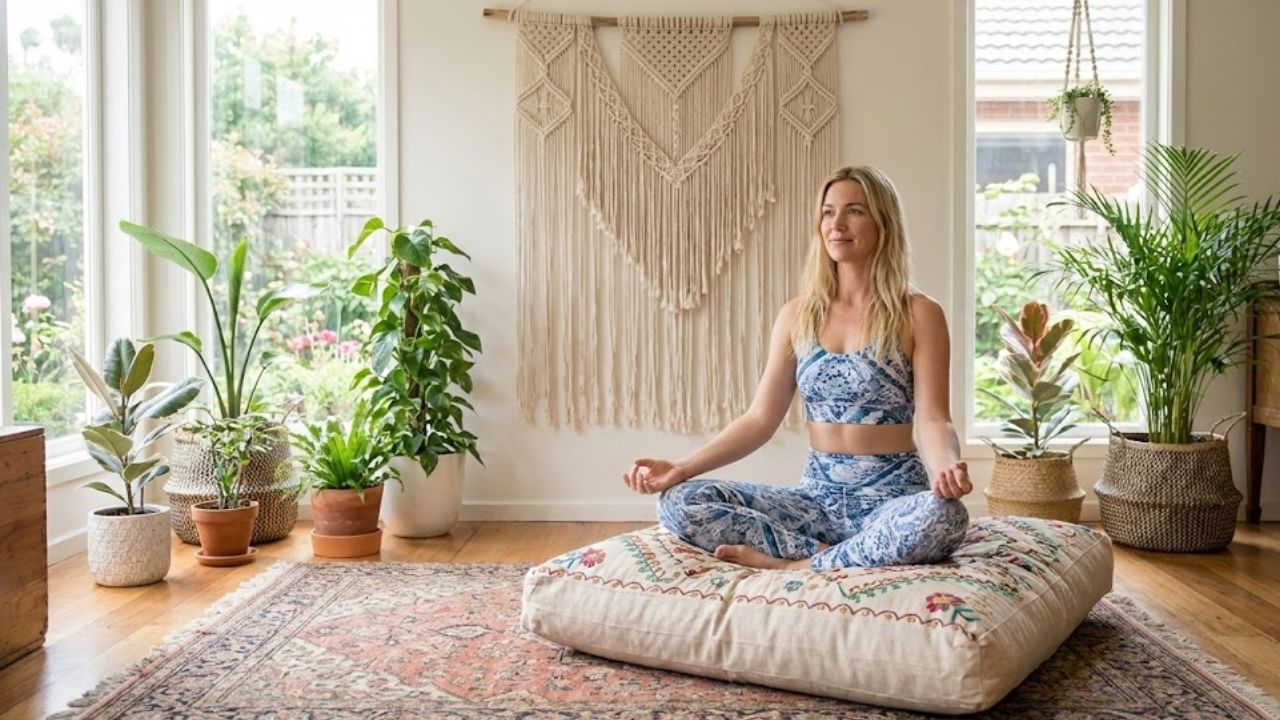
    Butterfly Pose (Baddha Konasana)

    Why it works for hip flexibility: Butterfly Pose loosens tightness in your inner thighs and groin area while creating more space in your hip joints. How to perform it: Start by sitting down with the soles of your feet pressed together. Let your knees fall open to each side. Grab your feet with both hands and apply light pressure to push your knees closer to the ground. For a deeper stretch you can hinge forward from your hips. Benefits: Increases hip mobility and flexibility while targeting the inner thigh muscles and groin region.

    Reclining Bound Angle Pose (Supta Baddha Konasana)

    Why it works for hip opening: This version of Butterfly Pose gently stretches your hips while helping your body relax and unwind. How to perform it: Start by lying flat on your back. Press the bottoms of your feet together & allow your knees to drop naturally toward the floor on each side. Place your arms comfortably beside your body with your palms turned upward and take slow deep breaths. Benefits: Stretches the hip and groin areas while releasing tension throughout your lower body.

    Happy Baby Pose (Ananda Balasana)

    Why it works for hip flexibility: Happy Baby Pose opens up the hip joints while stretching your groin area & inner thighs. It also helps loosen your lower back muscles. How to perform it: Start by lying flat on your back. Draw both knees up toward your chest. Reach up & hold the outside edges of your feet with your hands while keeping your knees bent. Your hips should stay wide apart. Apply gentle pressure to push your knees down toward the ground. What you gain: This pose stretches your hip flexors and inner thigh muscles while releasing tightness in your lower back region.

    Low Lunge (Anjaneyasana)

    Why it works for hip flexibility: Low Lunge effectively stretches the hip flexors while building leg strength. This combination makes it excellent for releasing tension in tight hips. How to perform it: Begin by standing upright. Step one foot forward and bend that knee to form a right angle. Bring your back knee down to rest on the floor. Keep your hips facing forward and gently push them toward the front of your mat. For a deeper stretch you can lift both arms above your head. What it does: This pose lengthens the hip flexors and stretches both the quadriceps & hamstrings. It also builds strength throughout the legs.

    Crescent Lunge (Anjaneyasana)

    Why it works well for hip flexibility: Crescent Lunge builds on the basic Low Lunge position by creating additional stretch through the hip flexor muscles. This pose also helps develop better balance and core stability during practice. How to perform it: Begin by standing upright with feet together. Take a large step forward with one foot and lower into a lunge by bending the front knee. Your back leg should remain extended with the heel off the ground. Lift both arms straight up toward the ceiling & slowly push your hips forward to deepen the stretch. Benefits: This pose increases hip mobility & flexibility. It lengthens tight hip flexor muscles and builds strength throughout the leg muscles.

    Squat Pose (Malasana)

    Why it works well for hip flexibility Crescent Lunge takes the basic Low Lunge position and adds more stretch to your hip flexor muscles. It also improves your balance and strengthens your core while you hold the pose. # How to perform it Stand up straight & take a big step forward with one foot. Bend your front knee and keep your back leg straight with the heel lifted off the floor. Raise both arms overhead and gently push your hips forward. # What you gain This pose makes your hips more mobile and stretches your hip flexors while making your leg muscles stronger.

    Seated Forward Bend (Paschimottanasana)

    Why it works for hip flexibility: This pose mainly targets the hamstrings but also loosens tight areas in your hips and lower back. How to perform it: Start by sitting on the floor with both legs stretched out in front of you. Take a breath in while sitting up tall and lengthening through your spine. As you breathe out fold forward from your hips and reach your hands toward your feet. Try to maintain a straight back as you go deeper into the position. Benefits: This stretch works your hamstrings & hip muscles while also releasing tension in your lower back. It helps improve overall flexibility in these areas.

    Lunge with a Twist (Parivrtta Anjaneyasana)

    Why it works for hip flexibility: This position targets your hips and groin area while also stretching your lower back. The twisting motion helps your spine move more freely. How to perform it: Start in a Low Lunge position. Put the hand opposite to your front leg down on the ground. Turn your upper body toward your bent leg and reach your other arm straight up toward the ceiling. Try to keep your hips facing forward while you twist deeper. What you gain: Your hips become more open and flexible. Your groin muscles get a good stretch. Your spine gains better range of motion.

    Warrior II (Virabhadrasana II)

    Why it works well for hip flexibility: Warrior II builds leg strength & increases hip and chest mobility at the same time. This pose effectively enhances your flexibility and helps you maintain better balance. How to perform it: Stand with your feet positioned far apart and rotate one foot so it points outward. Lower your body by bending the front knee until it forms a right angle while your back leg stays extended. Stretch both arms out to the sides so they are level with the floor & look straight ahead. What you gain: Better hip mobility and stronger leg muscles along with improved balance.

    Frog Pose (Mandukasana)

    Why it works well for hip flexibility: Warrior II strengthens your legs & opens up your hips & chest at the same time. This pose improves your flexibility and helps you balance better. How to perform it: Stand with your feet wide apart and turn one foot outward. Bend your front knee to create a right angle while keeping your back leg straight. Extend both arms out to your sides at shoulder height and gaze forward. What you gain: Greater hip mobility & stronger legs with better balance.

    Bound Angle Pose (Baddha Konasana)

    Butterfly Pose for Hip Flexibility This seated position effectively stretches your hips and groin area while making your inner thighs more flexible. Start by sitting on the floor with your legs straight out in front of you. Bring the bottoms of your feet together so they touch. Let your knees fall naturally to the sides. Grab your feet with both hands and apply gentle pressure to push your knees closer to the ground. This pose helps open up tight hips and stretches the groin muscles. It also works on increasing flexibility in your inner thigh area.

  • 7 Home Yoga Exercises That Help You Stay Fit Naturally

    7 Home Yoga Exercises That Help You Stay Fit Naturally

    Seven Simple Yoga Exercises to Stay Fit at Home Staying fit does not always require heavy workouts or gym equipment. Yoga offers a natural and balanced way to keep the body strong and flexible while boosting energy levels. Practicing yoga at home fits perfectly into modern routines where time and space are often limited. With consistent practice yoga supports muscle tone & improves posture while aiding digestion and stress control. These seven home yoga exercises are simple and effective for anyone who wants to stay fit naturally.

    Mountain Pose for Natural Posture and Strength

    Mountain Pose: The Foundation of Your Yoga Practice Mountain Pose serves as the starting point for countless yoga movements. To perform it correctly you should stand upright with your feet positioned close together. Let your arms hang naturally at your sides while keeping your spine in a straight alignment. Direct your attention to maintaining steady breathing patterns and feel the connection between your feet & the ground beneath you. This fundamental pose delivers several physical benefits. It works to strengthen the muscles throughout your legs while simultaneously working on your overall posture. Regular practice also sharpens your awareness of how your body moves and holds itself in space. Making Mountain Pose part of your daily routine can lead to lasting improvements in how you carry yourself.

    Downward Facing Dog for Total Body Fitness

    Downward Facing Dog engages nearly all the major muscle groups in your body. Start from a hands & knees position & lift your hips upward while pressing your chest gently toward your thighs. This pose provides a stretch for the back & shoulders along with the calves & hamstrings. At the same time it builds strength in both the arms and legs. The position enhances blood circulation throughout the body & increases your energy levels. Regular practice of this pose at home supports ongoing flexibility & builds stamina without putting excessive strain on your body.

    Cobra Pose for a Healthy Spine

    Downward Facing Dog works almost every major muscle group in your body. Begin on your hands and knees and then lift your hips up while gently pressing your chest toward your thighs. This pose stretches your back and shoulders as well as your calves and hamstrings. It also strengthens your arms and legs at the same time. The position improves blood flow through your body and boosts your energy. Practicing this pose regularly at home helps maintain flexibility & builds endurance without placing too much stress on your body.

    Bridge Pose for Core and Lower Body Strength

    Bridge Pose strengthens the glutes and lower back along with the core muscles. You start by lying on your back and bending your knees so your feet rest flat on the floor. Then you lift your hips upward and press your feet firmly into the mat. This pose supports spinal health and improves circulation while toning the lower body. Regular practice helps maintain natural body strength and stability over time.

    Tree Pose for Balance and Body Control

    Tree Pose helps you develop better balance and makes your legs stronger. To do this pose you need to stand on one leg while placing your other foot against your calf or inner thigh. Put your hands together in front of your chest & look at something that isn’t moving. This type of exercise works on your physical stability and mental concentration at the same time. When you practice balancing poses regularly you gain better control over your muscles and learn to focus your mind more effectively. These skills are important for maintaining your fitness through natural movement & body awareness.

    Plank Pose for Full Body Toning

    Plank Pose works as an effective exercise for building total body strength. You position yourself on your hands and feet while keeping your entire body straight & tight through the middle. This position works your stomach muscles along with your arms & shoulders while also strengthening your back and legs. When you practice plank consistently you develop better stamina and create firmer muscles using only your body weight. This makes it one of the most practical strength exercises you can do at home without needing any special gear.

    Child Pose for Recovery and Relaxation

    Fitness requires proper recovery to be effective. Child Pose provides deep relaxation and helps release muscle tension. Start by kneeling on the floor and sitting back on your heels before folding forward gently. This position relaxes your spine along with your shoulders and hips while it calms your nervous system. The pose helps your body recover and gets you ready for your next workout or daily activities.

    Why Home Yoga Supports Natural Fitness

    Yoga works on balancing your entire body instead of targeting individual muscles. The practice brings together physical strength with flexibility while also incorporating breathing techniques & mental awareness. Modern approaches to health & wellness place importance on moving in ways that feel natural to your body while reducing daily stress & maintaining regular exercise patterns. Yoga addresses each of these wellness goals effectively. When you practice yoga in your own home you gain a sense of comfort and the freedom to move at your own pace. This home environment helps you establish a consistent routine that supports lasting fitness habits without creating unnecessary pressure or stress about performance.

    Simple Tips to Stay Consistent

    Practice yoga at the same time each day before eating and keep your sessions manageable. Pay attention to how well you move instead of pushing yourself too hard. Just twenty minutes of daily practice can help maintain your natural fitness level. Yoga offers a gentle but effective approach to staying fit without artificial methods. These seven home exercises build strength throughout your body while increasing flexibility & sharpening your mind. When you practice consistently yoga transforms from a simple workout into something deeper. It becomes a natural part of your routine that promotes lasting health and wellbeing.

  • Goodbye hair dyes: the new trend that covers grey hair and helps you look younger

    Goodbye hair dyes: the new trend that covers grey hair and helps you look younger

    Not quite. She’s fixated on a delicate silver line near her temple, while the colourist scrolls through flawless-looking “before and after” photos on her phone.

    Just behind her, a man in his thirties leans toward his reflection, lifting his fringe to check a small cluster of pale strands. He laughs it off, but his shoulders tense. The stylist smiles and says, “We can blend it. No one has to know.”

    Outside on the street, the same scene repeats itself: roots catching the summer light, people tugging at ponytails, tilting their heads for selfies, zooming in on the greys. Across all these mirrors, something subtle is changing.

    And it’s not only about concealment.

    From solid dye to softer grey blending

    Step into a modern salon and it’s clear: fewer heavy, opaque colours, more gentle transitions and near-natural shades. Stylists no longer focus on “covering grey” but on blending it in. The aim isn’t to deny time—it’s to age with intention.

    Grey blending, translucent toners, glosses, and low-commitment colours are replacing the rigid monthly dye routine. These techniques don’t erase silver strands; they soften the contrast between grey roots and the base colour. The effect feels less like a disguise and more like good lighting.

    This shift matters for anyone tired of strict salon calendars or boxed dye stashed under the sink. It signals a new relationship with ageing—and with time itself.

    Emily, 46, once booked root touch-ups every four weeks without fail. By week three, she relied on headbands and hats, hoping no one would notice the harsh white line along her part. “It felt like my roots were shouting before I said a word,” she shared.

    Her colourist proposed a gentler approach: soft highlights around the face, a translucent toner close to her natural shade, and a gloss to bring it together. No attempt to look 25—just a smoother story growing from the scalp.

    Three months later, she still colours her hair, but less often and with less anxiety. When grey appears now, it blends into lighter strands. Friends comment that she looks “rested” or “fresh,” not dramatically changed. The praise shifted from “nice colour” to simply “you look good.”

    The change is subtle yet powerful. Full-coverage permanent dye creates a hard border between colour and regrowth, announcing every passing week. Grey blending and gentle toning soften that edge, like painting with a feathered brush instead of a marker.

    Our brains interpret strong contrast as harsh or ageing. By reducing contrast between grey and base colour—either lifting the base or adding lighter strands—the overall look appears more youthful, even if the number of grey hairs stays unchanged.

    This trend isn’t illusion. It’s optics, psychology, and honesty in front of the mirror.

    Subtle techniques that soften silver

    The most discussed approach today is grey blending, which uses fine highlights and lowlights to merge natural grey into a multi-dimensional finish. Instead of targeting every silver hair, colourists work with them, weaving shades just one or two tones lighter than the base.

    The result feels more like sunlit hair than a fresh colour appointment. Regrowth lines blur, often extending the time between visits by weeks or even months. It’s a deliberate move from sharp definition to soft focus.

    For those avoiding bleach or highlights, translucent glosses and demi-permanent toners have become essential. They gently tint grey, reduce brightness, and add shine that reflects light away from fine lines near the face.

    Practically, the routine becomes kinder. Many follow a cycle of grey blending every three to four months, with quick gloss sessions in between. At home, colour-depositing conditioners used weekly help maintain an intentional mix of tones.

    As one colourist put it, this is maintenance that doesn’t take over your life. The panic of visible roots fades, replaced by a looser, more forgiving rhythm.

    Of course, it’s not flawless. Some mornings, hair still has a mind of its own. Soyons honnêtes : personne ne fait vraiment ça tous les jours.

    “My clients no longer ask how to eliminate grey,” says London colourist Hannah Reid. “They ask how to make it look intentional, not like they’ve stopped caring.”

    The emotional layer runs deep: being the only one in a meeting with visible silver, a family joke at lunch, or the moment a selfie reveals streaks you can’t ignore.

    • Grey blending – Softens contrast, reduces regrowth stress, keeps dimension.
    • Glosses and toners – Add shine, calm wiry greys, low commitment.
    • Face-framing highlights – Draw attention to features rather than roots.
    • Partial coverage – Conceals dense areas while letting silver show.
    • Cut and texture – Movement and layers always read younger.

    Redefining “young hair” through softer ageing

    There’s a quiet rebellion here. Instead of chasing the promise of zero grey forever, more people are choosing hair that tells a gentler truth: time passed, but the story is styled. The youthful impression comes from cohesion, not denial.

    When hair, skin, and energy align, the result feels vibrant rather than artificially young. Grey blending, subtle toning, and thoughtful cuts protect that balance, allowing your reflection to match who you are now—not who you were at 22 or fear becoming at 70.

    At its core, this trend invites conversation: with friends, partners, and yourself at 7 a.m. under unforgiving bathroom light. On good days, those faint silver threads can even feel like evidence of a life well lived.

    Key takeaways for readers

    • Grey blending techniques – A mix of highlights, lowlights, and natural grey for smoother transitions and fewer visible roots.
    • Glosses and toners – Demi-permanent options that add shine and refresh tone without harsh regrowth.
    • Strategic placement – Lighter sections around the face and crown to highlight features, not roots.
  • Goodbye Kitchen Islands: their 2026 Replacement Is A More Practical And Elegant Trend

    Goodbye Kitchen Islands: their 2026 Replacement Is A More Practical And Elegant Trend

    It happens on an ordinary evening, around 7:23 p.m., when you are rushing to get dinner ready and hit your hip for the third time on that once-coveted kitchen island. The stools are buried under unopened mail, the sides are scuffed by school backpacks, and cooking somehow means turning your back on everyone else. What once felt like a symbol of a gourmet lifestyle now feels more like a four-legged traffic jam planted in the middle of the room.

    Across design studios, Instagram feeds, and new-build showrooms, a quiet shift is underway. Architects are drawing fewer islands and replacing them with something lighter, more fluid, and closer to a piece of furniture than a fixed monument. Once you notice it, the traditional island suddenly looks strangely outdated.

    Why kitchen islands are slowly losing their status

    Step into a high-end kitchen showroom in late 2025 and the change is subtle but unmistakable. The space feels more open, with clear sightlines from window to dining area. Instead of being guided toward a massive central block, you are shown a slender element that resembles a modern table, often freestanding, sometimes on legs, with open space underneath.

    The era of the oversized, built-in island is fading quietly. Designers now talk about flow, flexible living, and mixed-use spaces where cooking, working, helping with homework, and serving drinks happen without being boxed in by cabinetry. What was once a sign of success can start to feel like a visual wall dividing the room.

    Homeowners notice it too. Many admit they rarely sit at their island, as stools get in the way and counters collect crumbs and clutter. A 2025 US survey found that while islands are still requested, nearly 40% of respondents now prefer table-style workstations or peninsula and table combinations over a full central block.

    What is replacing the island is the kitchen worktable and the refined kitchen peninsula. These options are slimmer, more furniture-like, and often lighter on storage but richer in comfort. They allow people to face each other again, instead of lining up along a sink.

    The 2026 alternative: worktables and peninsulas that actually work

    The rising solution is not one fixed product but a family of ideas. Think of long, narrow worktables aligned with the main kitchen run, or peninsulas extending from a wall with just enough depth for casual meals and quick laptop use. These designs leave generous walkways and keep the room feeling balanced and breathable.

    The key shift is thinking like a furniture maker rather than a cabinet installer. Instead of a heavy box down to the floor, you get legs, visible light underneath, and chairs that pull in comfortably. Appliances stay on the main run, freeing the center of the room for everyday life, not plumbing.

    Simply shrinking the old island idea rarely works. A narrow block in the middle can still clutter the space. Smarter layouts push the new element toward a wall or window, acting as a bridge rather than a barrier. A peninsula preserves counter space without slicing the room in two, while a movable worktable offers occasional flexibility that changes how the room feels.

    Designers working on 2026 projects are direct about this evolution. Many now draw a traditional island in only a small fraction of plans, favoring solutions that feel kinder and more adaptable in real homes.

    How to rethink your kitchen before it feels dated

    A practical first step is simple: tape the island shape on your floor at full scale. Live with it for a few days. Then tape an alternative—a slimmer worktable or a peninsula off the main cabinets. Walk around it, open imaginary doors, and notice which option feels easier in your body. That experience reveals more than any moodboard.

    Sketch multiple layouts and keep storage honest. Losing deep island cabinets might mean adding a taller pantry or smarter drawers elsewhere. Avoid designing for rare occasions instead of daily routines. Most kitchens serve a handful of people on an ordinary weekday, not a ten-person brunch.

    There is also a quiet emotional layer. Many feel they should want an island because it has long been the aspirational image. Letting go of that expectation can feel like relief. A lighter peninsula or table often supports real life better than a kitchen designed to perform for photos.

    • Keep plumbing off the center: Placing sinks and hobs on the main wall frees the central surface to function as a true table or peninsula.
    • Vary surface heights: Mixing counter-height prep space with a slightly lower area improves comfort for seated work or children.
    • Add softness: Lighting, simple objects, or textiles can turn a work surface into a warm, lived-in focal point.

    A kitchen that feels current in 2026 and timeless later

    The deeper trend is not about removing islands but about recognizing kitchens as living spaces first. Islands rose with open-plan living, acting as control towers between cooking and social life. As that idea matures, many are choosing centers that feel less dominant and more inviting.

    The island is not disappearing overnight; it is simply losing its automatic place. Some will refine it into something smaller and lighter. Others will adopt worktables and peninsulas that feel calmer on a weekday and more generous on a weekend. The kitchens that stand out now are those that allow movement, clarity, and comfort.

    If you are planning a renovation or just imagining one, the real question is not whether to have an island. It is where you want to stand, sit, and talk at the end of the day. Once that moment is pictured honestly, the shape at the center of the kitchen often redesigns itself.

    Key ideas to take away

    • Islands losing ground: Designers and homeowners are moving away from bulky central blocks that can quickly feel dated.
    • Worktables and peninsulas: Slimmer, furniture-like surfaces offer practical and elegant alternatives for real life.
    • Designing for daily rhythm: Planning around everyday use creates kitchens that remain comfortable and relevant over time.
  • A study shows these 2 exercises help lower blood sugar better than others

    A study shows these 2 exercises help lower blood sugar better than others

    When you purchase through links on our site we may earn an affiliate commission. Here’s how it works. Around 35 million Americans have type 2 diabetes and doctors have long recommended exercise as a useful tool for managing blood sugar. Recent research has examined which types of exercise work best for controlling blood sugar levels. The findings point to yoga and walking as particularly effective options. The study appeared in the Cureus Journal of Medical Science & involved 20 adults with type 2 diabetes. Researchers divided participants into four groups: one practiced yoga, another walked regularly a third did both yoga & walking, and a control group maintained their usual routine without changes. All participants were taking oral medication to control their blood sugar. Anyone using insulin was not included in the study. The participants followed their assigned exercise routines for three months. Researchers measured their fasting blood sugar, post-meal blood sugar levels, quality of life and HbA1c which indicates average blood sugar over time.

    The group that combined both activities showed the biggest improvements in controlling blood sugar levels according to the researchers. Participants also reported feeling better overall in their daily lives.

    This study only included a small number of people so researchers would need to conduct a larger study to confirm these findings. However earlier studies have already shown that both yoga and walking can help reduce blood sugar levels.

     Regular physical activity remains an effective tool for managing blood sugar whether someone has type 2 diabetes or not. People who require medication should continue taking it as prescribed since exercise cannot replace necessary medical treatment. Anyone with diabetes should talk to their doctor before starting any new fitness routine.

    Managing blood sugar levels becomes easier when you focus on keeping your weight at a healthy level and choosing nutritious foods that provide balanced nutrition. Reducing the amount of stress in your daily life also plays an important role in helping your body regulate blood sugar more effectively.

  • Build muscle with just 3 moves and 15 minutes using this trainer-approved routine

    Build muscle with just 3 moves and 15 minutes using this trainer-approved routine

    I’m a huge supporter of dumbbell-based training. It’s easy to finish in under 60 minutes, requires very little equipment, and removes the need to rush to a gym or sacrifice a full lunch break. That makes it a smart way to train efficiently without compromising workout quality.

    With that in mind, here’s a three-move dumbbell workout that takes just 15 minutes to complete. It’s simple to adjust, making it an ideal option for anyone looking for a beginner-friendly routine that still delivers results.

    Watch the Three-Move Dumbbell Workout

    Take a moment to review the movements using the demo videos below, then follow the full workout plan to get started.

    The Three Essential Dumbbell Moves

    1. Dumbbell Suitcase Deadlift

    Before suitcases had wheels, you had to bend down, lift them, and carry them — that’s exactly where this movement gets its name.

    The suitcase deadlift targets your core, grip strength, and legs. It should be performed with intent and speed, but never at the expense of proper form. Aim to lightly touch the dumbbells to the floor on every rep, then drive up powerfully to stand.

    Keep your chest lifted, your back neutral, and hinge at the hips. A firm squeeze of the glutes helps maintain stability and protects the lower back throughout the movement.

    2. Dumbbell Devil Press

    The name says it all — this one is challenging. The devil press blends multiple movements into a single exercise, including a burpee, swing, and snatch. It builds full-body power and strength while testing endurance and control under load.

    With the right weight selection, you can settle into a steady rhythm, but it demands focus and minimal pauses. Because of the high rep volume, choosing manageable weights is key.

    You shouldn’t need to stop every few reps. Ideally, aim for one short reset per round. For example, breaking 20 reps into two sets of 10 keeps momentum without excessive fatigue.

    3. Dumbbell Squat Clean

    Squat cleans build leg and core power, increase muscle strength, and train your body to move weights smoothly from the floor to the shoulders. This exercise demands balance and coordination, requiring both sides of the body to work together.

    Focus on an explosive pull from the floor to the shoulders. Quickly rotate the elbows forward to rack the dumbbells, then move straight into the squat. Each rep should be clean, controlled, and fast.

    Make sure to reach full depth — no partial reps. Sit low, drive upward with strength, and reset efficiently before the next repetition.

    The 15-Minute Dumbbell Workout Structure

    Descending Ladder Format

    • 20 / 18 / 16 / 14 … reps
    • Suitcase Deadlift
    • Devil Press
    • Squat Clean

    Start with 20 reps of each exercise, moving from one movement to the next with very little rest. You can alternate arms using a single dumbbell, splitting reps evenly, or extend the time cap if needed.

    Each new round drops the reps by two. Continue descending the ladder until you hit your time limit. Aim for a 15-minute cap, tracking progress as your fitness improves while keeping the same weights.

    Because this workout requires pace, avoid choosing overly heavy dumbbells. Ideally, complete each set with no more than one brief pause. Once you reach 10 to 12 reps per movement, challenge yourself to complete them without stopping.

    Good luck — and may the devil press be in your favor.

  • Restore Grey Hair Naturally With This Effective Colour-Reviving Alternative

    Restore Grey Hair Naturally With This Effective Colour-Reviving Alternative

    Grey hair is a natural part of ageing, but many people in India are now looking for gentler ways to restore their original colour without relying on harsh chemical dyes. Natural colour-reviving alternatives focus on nourishing the scalp, supporting melanin production, and improving overall hair health rather than masking grey strands overnight. These methods appeal to those who want gradual, believable results while keeping their hair strong and manageable. With consistent care and the right ingredients, it’s possible to enhance natural tones and feel more confident about your hair’s appearance.

    Restore grey hair naturally using colour-reviving methods

    Natural colour-reviving methods work by supporting the hair’s internal pigment process instead of coating strands with artificial colour. Ingredients like plant extracts, oils, and minerals help improve scalp circulation and follicle health, which may encourage better pigment retention over time. Many people prefer this route because it avoids irritation and dryness linked to dyes. When used regularly, these approaches promote natural pigment support, improve scalp nourishment, and encourage healthy hair growth. While results are gradual, users often notice improved texture, shine, and depth of colour, making grey strands blend more naturally with existing hair.

    Colour-reviving alternatives that reduce grey hair appearance

    Unlike instant dyes, colour-reviving alternatives focus on consistency and patience. Herbal rinses, oil infusions, and nutrient-rich treatments slowly deepen hair tone while strengthening strands from within. These methods are popular among people who want subtle change without obvious regrowth lines. Over time, hair may appear darker and fuller, creating a softer transition between grey and natural shades. Benefits often include gradual tone revival, chemical-free care, and improved hair strength. This approach suits those who value long-term hair health as much as appearance.

    Why natural grey hair restoration suits long-term hair care

    Choosing natural restoration methods is about building a sustainable hair routine rather than chasing quick fixes. Many colour-reviving alternatives double as treatments that reduce breakage and dryness. They also help maintain moisture balance, which is essential as hair ages. People following these routines often report less scalp irritation, better moisture retention, and stronger hair strands. While no method can reverse ageing completely, natural care supports healthier-looking hair that ages gracefully and confidently.

    Summary and practical outlook

    Restoring grey hair naturally is less about reversing time and more about enhancing what your hair can do with proper care. Colour-reviving alternatives offer a balanced path for those who want subtle improvement without harsh chemicals. When paired with good nutrition and gentle hair habits, these methods support long-term hair wellness, encourage consistent natural results, and promote confidence in ageing. For many, this approach feels more authentic and easier to maintain over the years.

    Method Type Main Benefit Result Speed
    Herbal oils Improves scalp health Slow
    Plant-based rinses Enhances natural tone Gradual
    Nutrient treatments Supports pigment retention Moderate
    Chemical dyes Instant colour change Fast

    Frequently Asked Questions (FAQs)

    1. Can natural methods completely reverse grey hair?

    No, they mainly improve appearance and support healthier pigmentation.

    2. How long do colour-reviving alternatives take to show results?

    Most people notice subtle changes after several weeks of consistent use.

    3. Are these methods safe for sensitive scalps?

    Generally yes, as they avoid harsh chemicals, but patch testing is advised.

    4. Can I combine natural methods with hair dye?

    Yes, many people use them alongside dyes to improve overall hair health.

  • Brain Teaser Test: Find 3 Differences in the Shark Pictures

    Brain Teaser Test: Find 3 Differences in the Shark Pictures

    Are you ready for a fun brain teaser that will test how well you notice things? This puzzle shows you two shark pictures that look almost the same when you first see them. But there are three hidden differences between the images. Your goal is to find all the differences in just 10 seconds. It might sound easy but these puzzles are made to challenge your focus & help you get better at spotting small details. This type of game is perfect for anyone who wants to sharpen their mind while having a good time. You need to look carefully at both pictures and compare them side by side. The differences could be anything from a missing fin to a changed color or a small object that appears in one image but not the other. Sometimes the changes are obvious but other times they blend into the background and require extra concentration to find. The 10-second time limit adds excitement to the challenge. It forces you to scan the images quickly without missing important details. This helps train your brain to process visual information faster. Many people find that practicing these puzzles regularly improves their observation skills in everyday life too. Whether you solve it in time or need a few extra seconds the important thing is to enjoy the process. These brain teasers are meant to be entertaining while giving your mind a good workout. So take a close look at those shark pictures and see if you can spot all three differences before time runs out.

    The Puzzle Challenge: Find the Three Differences

    At first look, the two shark images seem almost identical. But with careful observation, small details begin to stand out. These differences may appear in the shark’s appearance, nearby objects, or elements in the background. Our brains naturally assume that similar images are the same, which is exactly what makes this challenge so tricky.

    Get ready to dive in and put your observation skills to the test. You have just 10 seconds to identify all three differences between the shark pictures. Are you ready? Let the challenge begin.

    How to Take on the Challenge

    – Study both shark images closely.

    – Examine every detail, including fins, objects, and surroundings.

    – Scan quickly for small visual changes between the images.

    – Try to find all three differences before time runs out.

    Getting Started: Tips to Spot the Differences

    As you work through this visual puzzle, don’t let the similarities distract you. Begin by focusing on the shark itself. While the overall shape and pose may look the same, the real differences are hidden in finer details. Look closely at what the shark is holding, nearby plants, and background elements.

    Our brains often fill in missing details based on what feels familiar, so staying focused is essential. The differences are subtle by design and meant to test how well you notice small changes under time pressure.

    The Answer Revealed: The Three Key Differences

    After taking time to search for the changes, here is what sets the two shark images apart:

    The Object in the Shark’s Fin: In the first image, the shark is holding a red box. In the second image, that object changes to a small sound icon. This detail is easy to overlook at first glance.

    The Palm Tree Detail: One palm tree appears different between the two images. In the second image, coconuts are visible on the tree, while the first image shows only leaves.

    The Crab’s Color: On the small island in the lower-right corner, the crab changes color. It is red in the first image and yellow in the second, making it one of the smallest but most telling differences.

    Why Observation Puzzles Benefit Your Brain

    Challenges like this are not just entertaining—they also support mental fitness in several ways:

    Enhances Visual Awareness: Searching for small details trains your eyes and brain to notice subtle differences, improving everyday attention to detail.

    Strengthens Mental Processing: Time-based challenges encourage faster analysis and decision-making, helping sharpen cognitive speed.

    Builds Focus and Concentration: Staying attentive during these puzzles helps improve concentration skills in daily tasks.

    Supports Memory Development: Regularly observing and recalling visual details helps improve memory retention across different situations.

    Promotes Relaxation: Engaging with enjoyable brain teasers offers a mental break, helping reduce stress and refresh the mind.

    More Brain Teasers to Explore

    If you enjoyed this shark-themed challenge, there are many other puzzles that can keep your mind active and engaged:

    – Spot-the-difference puzzles featuring natural landscapes

    – Hidden shape challenges within complex images

    – Number search games that test speed and accuracy

    Just like this shark puzzle, these activities are designed to entertain while helping maintain strong observation and thinking skills.

  • Sleep Support Yoga: 3 Poses That Help You Rest Better Tonight

    Sleep Support Yoga: 3 Poses That Help You Rest Better Tonight

    Getting quality sleep feels impossible in our busy modern lives. Work stress and endless distractions make it hard to relax at bedtime. Adding yoga to your evening routine offers a natural solution for better rest. These three easy poses can help you fall asleep faster and sleep more soundly tonight. The first pose to try is Child’s Pose. This gentle stretch calms your nervous system and releases tension from your back and shoulders. Kneel on your bed or a soft surface and sit back on your heels. Lower your chest toward the floor and extend your arms forward. Rest your forehead on the ground & breathe slowly for two to three minutes. This position signals your body that it’s time to wind down. Next is Legs-Up-The-Wall pose

    Child’s Pose (Balasana): A Gentle Reset for Body and Mind

    Child’s Pose is a deeply restorative yoga posture designed to relax the body and quiet the mind. It helps ease stress, soften tight muscles in the back, neck, and shoulders, and gently signal that it’s time to slow down. By lengthening the spine and encouraging slow, mindful breathing, this pose activates the parasympathetic nervous system, supporting the body’s natural relaxation response.

    How to Practice

    – Begin kneeling on the floor with your big toes touching and knees comfortably apart, creating space for your torso.

    – Gradually fold forward, lowering your torso between your thighs and resting your forehead on the mat.

    – Stretch your arms forward with palms down, or place them alongside your body with palms facing up—choose what feels best.

    – Breathe slowly and evenly, remaining in the pose for 1 to 3 minutes.

    Benefits

    – Soothes the nervous system

    – Releases tension in the back, neck, and shoulders

    – Encourages deep, calming breaths

    Child’s Pose is an ideal way to begin an evening wind-down routine, helping you let go of physical and mental stress before rest.

    Legs Up the Wall (Viparita Karani): A Simple Way to Unwind

    Legs Up the Wall is a mild inversion that supports relaxation and prepares the body for sleep. By resting the legs vertically against a wall, this pose promotes healthy circulation and helps transition the body from alertness to calm. It is especially helpful for easing restlessness and quieting a busy mind at night.

    How to Practice

    – Sit sideways next to a wall with your legs extended and your body relaxed.

    – Carefully lie back and swing your legs up so they rest comfortably against the wall, keeping your back flat on the floor.

    – Optionally place a cushion or bolster under your hips for extra support.

    – Rest your arms by your sides with palms facing upward and breathe deeply.

    – Remain in the pose for 5 to 10 minutes, allowing your body to fully relax.

    Benefits

    – Helps reduce stress and anxiety

    – Improves circulation and eases leg and foot discomfort

    – Calms the nervous system before sleep

    This pose gently balances blood flow and releases tension in the lower body, creating a peaceful state that supports restful sleep.

    Reclining Bound Angle Pose (Supta Baddha Konasana): Deep Relaxation Before Bed

    Reclining Bound Angle Pose is a restorative posture that helps soften tightness in the hips, groin, and lower back after a long day. It supports mindful breathing and relaxation, making it easier to quiet the mind and release lingering tension that can disrupt sleep.

    How to Practice

    – Lie on your back with knees bent and feet flat on the floor, about hip-width apart.

    – Bring the soles of your feet together and allow your knees to gently fall open to the sides.

    – Rest your arms by your sides with palms up, or place them on your abdomen for added grounding.

    – Close your eyes and focus on slow, steady breaths, noticing the movement of your belly.

    – Hold the pose for 5 to 10 minutes, allowing your body to relax completely.

    Benefits

    – Gently opens the hips and releases lower-body tension

    – Encourages deep relaxation and stress relief

    – Supports the parasympathetic nervous system for better sleep

    This pose helps the body fully unwind, making it easier to transition into a calm, restful night’s sleep.

  • Optical Illusion Test: Spot the Numbers 37 and 81 Among 31 in 5 Seconds

    Optical Illusion Test: Spot the Numbers 37 and 81 Among 31 in 5 Seconds

    Optical illusion challenges have become a popular way to test attention, focus, and quick-thinking skills, especially among puzzle lovers in India. This optical illusion test asks readers to spot the numbers 37 and 81 hidden among repeated 31s within just five seconds. At first glance, the grid may look simple, but the visual similarity between the numbers makes it surprisingly tricky. Such brain games are not just entertaining; they also help sharpen observation skills, improve concentration, and offer a refreshing mental break from daily routines.

    Optical Illusion Test to Spot Hidden Numbers Quickly

    This optical illusion test is designed to challenge how fast your eyes and brain can work together under pressure. When dozens of similar numbers are placed close together, your brain tends to follow patterns instead of details. That is where the challenge begins. To succeed, you need sharp visual focus, pattern-breaking attention, and rapid mental scanning. Many people find that slowing down slightly actually helps them identify the odd numbers faster. The trick is not to read each number but to look for shape differences, spacing changes, or unusual curves that don’t match the surrounding 31s.

    Why Finding 37 and 81 Among 31 Is So Challenging

    The difficulty of this illusion lies in how the human brain processes repetitive information. When the same number appears repeatedly, the brain switches to autopilot, making it easier to miss subtle changes. Spotting 37 and 81 requires detail-oriented vision, cognitive alertness, visual discrimination skill, and mental flexibility. The shapes of the digits are intentionally similar, especially when viewed quickly. This is why time pressure increases the challenge and makes the test more exciting for participants of all ages.

    How Optical Illusion Challenges Improve Brain Performance

    Regularly attempting optical illusion tests can offer surprising cognitive benefits. These puzzles encourage focused eye movement, faster decision making, and attention control training. Over time, such challenges can improve your ability to notice small details in everyday tasks. Many people use these puzzles as a fun mental warm-up before work or study. Since they are short and engaging, they help reduce stress while still providing a productive mental exercise that keeps the brain active and responsive.

    Summary and Final Analysis

    This optical illusion test is more than just a quick visual game; it is a reflection of how perception and focus work together. Successfully spotting 37 and 81 among 31s depends on visual awareness growth, pattern interruption ability, mental speed balance, and concentration under pressure. Whether you solve it in seconds or take a bit longer, the experience itself strengthens observation skills. Such puzzles remain popular because they are simple, engaging, and surprisingly effective at keeping the mind sharp.

    Feature Description
    Challenge Type Optical illusion number puzzle
    Target Numbers 37 and 81
    Distractor Number 31
    Time Limit 5 seconds
    Primary Skill Tested Visual focus and attention

    Frequently Asked Questions (FAQs)

    1. What is the goal of this optical illusion test?

    The goal is to quickly identify the numbers 37 and 81 hidden among multiple 31s.

    2. How much time is given to solve the puzzle?

    You are given only five seconds to spot both hidden numbers.

    3. Are optical illusion tests good for the brain?

    Yes, they help improve focus, attention, and visual processing skills.

    4. Can anyone try this optical illusion challenge?

    Yes, it is suitable for all ages and does not require special skills.