Category: News

  • Morning Ease Yoga: 6 Gentle Poses That Support Natural Movement and Flexibility

    Morning Ease Yoga: 6 Gentle Poses That Support Natural Movement and Flexibility

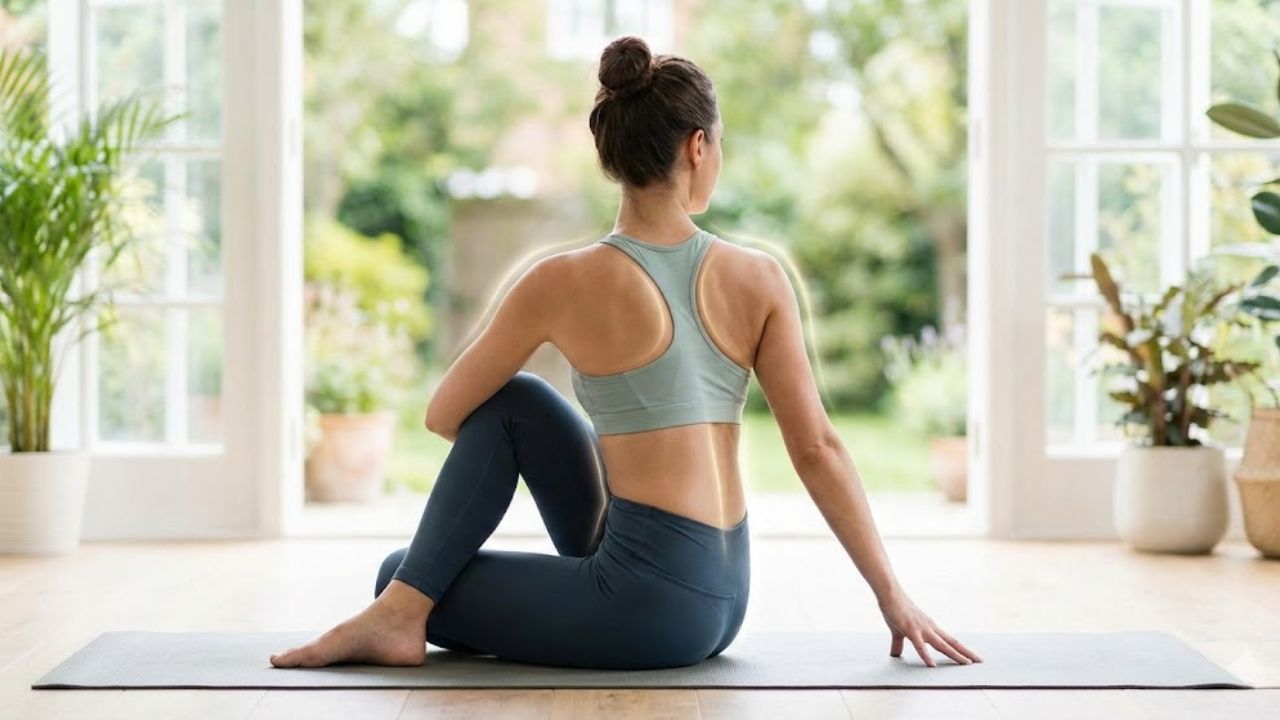
    Starting your day with basic yoga can help you move more naturally and boost your energy levels. Yoga builds flexibility and strength while supporting how your body naturally functions throughout the day. Adding these six morning yoga poses to your routine will wake up your muscles & get your blood flowing while making your joints more mobile. These gentle stretches work well for beginners and experienced practitioners alike and will help you feel refreshed & ready to tackle the day ahead.

    Cat–Cow Stretch (Marjaryasana–Bitilasana)

    The Cat–Cow Stretch is an effective way to gently awaken the spine and ease stiffness that builds up during rest. Begin on all fours in a tabletop position, aligning your wrists under your shoulders and knees under your hips. Inhale as you drop your belly, lift your chest, and look forward into Cow Pose. Exhale as you round your spine, draw your chin toward your chest, and press the floor away into Cat Pose. Move slowly between these two shapes, syncing each transition with your breath. This flowing motion helps release tension in the spine, neck, and shoulders while improving overall spinal mobility.

    Downward-Facing Dog (Adho Mukha Svanasana)

    Downward-Facing Dog is a foundational yoga posture that deeply stretches the back of the body, including the hamstrings, calves, and spine. From a tabletop position, lift your hips upward and back to form an inverted V shape. Press your palms firmly into the mat, spread your fingers, and allow your heels to gently reach toward the floor. If your heels remain lifted, focus instead on lengthening your spine and relaxing your neck. Hold the pose for 30 seconds to one minute, breathing steadily and allowing built-up tension to gradually release.

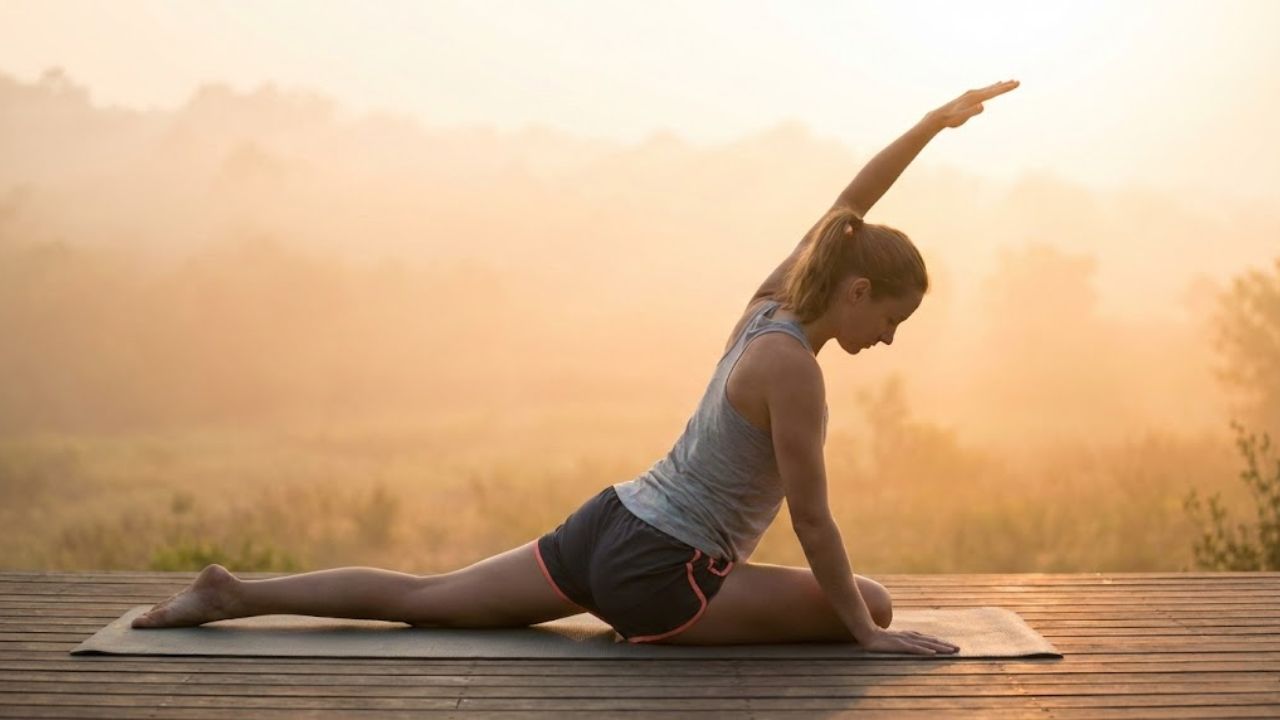
    Low Lunge (Anjaneyasana)

    The Low Lunge is ideal for opening the hips and stretching tight hip flexors, especially after long periods of sitting. Start in a tabletop position and step your right foot forward between your hands, keeping the knee stacked over the ankle. Lower your left knee to the mat and keep your hips facing forward. Raise your arms overhead to deepen the stretch through the hips, thighs, and torso. Hold the pose for 30 seconds to one minute, then switch sides. This stretch supports smoother movement and greater comfort throughout the day.

    Seated Forward Fold (Paschimottanasana)

    Seated Forward Fold provides a soothing stretch for the hamstrings, lower back, and spine. Sit upright with your legs extended straight in front of you and your feet flexed. Inhale to lengthen your spine, then exhale as you hinge forward from the hips, reaching toward your shins, ankles, or feet. Keep your chest open and avoid collapsing the spine. Hold the pose for 30 seconds to one minute, breathing calmly. This stretch enhances flexibility and helps relieve lower-body stiffness.

    Standing Forward Fold (Uttanasana)

    Standing Forward Fold is a simple yet powerful pose for releasing tension in the lower back, hamstrings, and calves. Stand with your feet hip-width apart and fold forward from the hips as you exhale, allowing your torso to drape over your legs. Let your head hang freely and keep a gentle bend in your knees if needed. Stay in the pose for 30 seconds to one minute, breathing deeply and letting gravity assist the stretch. This posture encourages relaxation and improves overall flexibility.

    Child’s Pose (Balasana)

    Child’s Pose is a deeply restorative posture that gently stretches the back and hips while calming the mind. Begin by kneeling on the floor with your big toes touching and knees slightly apart. Sit your hips back toward your heels and extend your arms forward as you lower your chest toward the mat. Rest your forehead on the floor or a cushion for support. Breathe slowly and remain in the pose for one to two minutes, allowing your body to fully relax. This pose helps restore energy and promotes a sense of peace.

  • These 5 exercises build strong mobile shoulders according to a physical therapist

    These 5 exercises build strong mobile shoulders according to a physical therapist

    Sometimes, simply building muscle in the gym doesn’t resolve shoulder issues. If you’re dealing with tightness, ongoing pain, or minor injuries, it may be time to rely on the guidance of a physiotherapist to help restore proper movement and comfort.

    Rebecca Bossick, lead physiotherapist at One Body LDN, shares five targeted movements designed to release tight trapezius muscles, correct rounded shoulders, and reduce everyday aches. These exercises can be done at your desk or around workouts, offering a simple yet effective way to ease tension and improve shoulder mobility.

    If you can dedicate just 10 minutes a few times a week, these are the movements worth prioritising.

    Five Shoulder Moves That Truly Deliver Results

    “The shoulder joint is among the most mobile joints in the body, but that same mobility also makes it one of the least stable,” explains Bossick. “Spending long hours seated or repeating the same movements without balance can train the shoulders into poor patterns. Over time, this often leads to pain, weakness, or injury.”

    Tight trapezius muscles, rounded posture, and habitual slouching may start as mild discomfort but can gradually develop into more serious postural problems or muscle strains.

    For people who sit for extended periods, introducing gentle movement, stretching, and mobility work throughout the day can make a meaningful difference. That said, these exercises are beneficial for anyone looking to improve overall shoulder function.

    Bossick notes that conditions such as rotator cuff strains, shoulder impingement, and frozen shoulder often stem from prolonged shoulder rounding, also known as internal rotation, combined with tight chest muscles. As a result, the smaller stabilising muscles around the shoulder blades weaken and become underactive. Skipping warm-ups, poor lifting technique, and repetitive strain can further worsen the issue.

    “These problems tend to persist because people either avoid movement completely or push through pain,” she says. “What the shoulder actually needs is controlled, consistent movement that builds strength and stability within the joint.”

    Below are the exercises Bossick recommends for building stronger, pain-free shoulders.

    1. Scapula Retractions

    “Stand upright and gently draw your shoulder blades together, holding the position for a few seconds,” says Bossick. “This helps activate the correct postural muscles and reduces overuse of the upper trapezius, which is a common source of tension for desk-based workers.”

    2. Wall Angels

    “With your back and arms against a wall, slowly lift and lower your arms in a controlled snow angel motion,” Bossick explains. “It looks simple, but it improves coordination and mobility between the shoulder blades and upper back, which is essential for overhead movements and daily comfort.”

    3. Resistance Band External Rotations

    “Secure a light resistance band at elbow height, keep your elbow close to your side, and rotate your hand outward,” she says. “This movement strengthens the rotator cuff, a group of small yet essential muscles that stabilise the shoulder joint and help prevent injury.”

    4. Face Pulls

    “Using a cable machine or resistance band, pull towards your face with your elbows lifted,” Bossick advises. “This targets the rear deltoids and mid-back muscles, supporting better posture and helping to counteract a tight chest.”

    5. Y-T-W Exercises

    “While lying face down or hinging forward from the hips, move your arms to form the shapes of a Y, T, and W,” she explains. “This is an endurance-based exercise for the deep shoulder stabilisers, improving balance, control, and strength across the upper back.”

    Final Thoughts on Shoulder Care

    The most important factor is consistency. There’s little benefit in doing these exercises intensively for a short period and then stopping altogether.

    “Even ten minutes, performed three times a week, can lead to noticeable improvements,” says Bossick. “Prioritise slow, controlled movements rather than heavy resistance. Once the exercises feel comfortable, you can introduce light bands or small dumbbells.”

    Simple habits, such as doing scapula retractions or gentle shoulder rolls during the day, can help relieve built-up tension while reinforcing better posture.

    “It’s about retraining your body,” Bossick adds. “You’re reminding your muscles how to move efficiently, even in environments where you’re largely inactive.”

    “Just as you wouldn’t wait for tooth pain before brushing, your joints deserve the same care. A few minutes of focused movement each week can be the difference between ongoing discomfort and a body that feels strong, capable, and resilient.”

  • Optical Illusion Challenge: Find the Inverted 687 Hidden Among Identical 687s in 7 Seconds

    Optical Illusion Challenge: Find the Inverted 687 Hidden Among Identical 687s in 7 Seconds

    Optical illusion challenges remain hugely popular online because they stretch the limits of human perception. At first glance, this visual test appears straightforward, but it quickly becomes far more challenging than expected. Your goal is to spot one inverted 687 hidden among rows of identical-looking 687 numbers, all within just seven seconds. The layout feels uniform and predictable, yet a subtle irregularity disrupts the pattern. That small detail is what makes this puzzle both intriguing and difficult.

    This challenge goes beyond simple vision. It tests how the brain recognizes patterns, processes orientation, and reacts under time pressure. Picture the grid in front of you, start the timer, and see how quickly your mind adapts.

    Why Does the Inverted 687 Illusion Feel So Hard?

    The main challenge comes from repetition. When the brain encounters the same number repeatedly, it quickly assumes everything is identical. This shortcut is useful in everyday life, but it becomes a disadvantage in visual illusion tasks.

    Because nearly every number appears as 687, the brain groups them together and stops checking each one carefully. With only a single inverted number in the entire grid, your eyes may skim over it several times without noticing anything unusual.

    How Number Orientation Confuses the Brain

    Certain digits are especially misleading in optical illusions. The number 8 is symmetrical and looks the same when rotated. The number 6 can resemble a 9 when flipped upside down. When the sequence 687 is rotated 180 degrees, it can visually resemble 987, depending on the font.

    Our brains are trained to recognize numbers regardless of orientation. While this helps us read quickly in daily life, it works against us here. The inverted sequence blends in because the brain assumes familiarity means correctness.

    Why a Seven-Second Time Limit Makes It Tougher

    Seven seconds may sound generous, but it feels much shorter once the clock starts. Under time pressure, the brain shifts from careful inspection to rapid scanning. Instead of analyzing each number, the eyes sweep across the grid hoping the difference will stand out.

    This illusion is designed so nothing visually jumps out. There are no changes in color, spacing, or size. Orientation is the only clue, and noticing it requires focused attention rather than quick pattern recognition.

    What the Brain Is Doing During This Visual Search

    From a neurological perspective, this task involves more than basic eyesight. While early visual regions detect shapes and lines, identifying numbers and their orientation requires higher-level processing.

    When many identical elements appear together, the brain relies on step-by-step scanning instead of instant recognition. This slower process is controlled by attention networks, which explains why spotting the inverted 687 within seven seconds feels so demanding.

    Best Techniques to Solve the Puzzle Faster

    Scanning randomly rarely works. A structured method improves success. Mentally divide the grid into sections and check each row carefully, similar to reading a page of text. This keeps your eyes from wandering aimlessly.

    Another helpful strategy is to focus on the digit 6. In the inverted sequence, its curve direction changes and can resemble a 9. Training your eyes to notice reversed curves instead of reading the entire number can break automatic assumptions.

    Some people also benefit from slightly relaxing their gaze or tilting their head, which can make orientation differences easier to detect.

    Where the Inverted 687 Appears in the Grid

    In the solution, the inverted 687 is located in the lower middle section of the grid, slightly toward the right. This position is intentional. Most people begin scanning from the top left and gradually move downward.

    As time passes, attention weakens, and lower areas often receive less focus. Placing the anomaly away from common scanning paths increases the likelihood it will be missed on the first attempt.

    What Spotting the Inverted Number Says About You

    Finding the inverted 687 quickly suggests strong visual processing speed and sustained attention. These abilities are useful in tasks that demand accuracy under pressure, such as design, analysis, and spatial reasoning.

    It also reflects cognitive flexibility, the ability to question automatic perceptions and reassess what you see. Missing the answer does not reflect poor intelligence. It simply shows that your brain prioritized efficiency over precision, which is entirely normal.

    Can Optical Illusions Improve Observation Skills?

    With regular practice, visual puzzles can sharpen attention and reduce reliance on mental shortcuts. Over time, the brain becomes more comfortable slowing down and examining familiar patterns more carefully.

    Research on cognitive training suggests that visual challenges can support mental agility and attentional control. While these puzzles are not formal IQ tests, they do help keep the mind active and adaptable.

    How to Get Better at Similar Eye Tests

    Consistency is key. Try a variety of visual challenges, such as number grids and hidden-object scenes. Gradually reducing time limits can help build both speed and accuracy.

    Mindfulness can also improve focus, making it easier to notice subtle differences. Proper rest and reduced screen fatigue matter as well, since tired eyes and minds are more likely to overlook details.

    The inverted 687 illusion may appear simple, but it clearly shows how easily perception can be influenced by familiarity and time pressure. Whether you solved it quickly or needed the answer, the challenge offers insight into how the brain interprets visual information. With patience and practice, observation skills can continue to improve far beyond the puzzle itself.

  • Drink Warm Water with Tulsi Leaves Every Morning for Clear Skin and Natural Glow

    Drink Warm Water with Tulsi Leaves Every Morning for Clear Skin and Natural Glow

    In India, traditional wellness habits are gaining fresh attention as people look for natural ways to improve skin health. One such morning ritual is drinking warm water infused with tulsi leaves, a practice deeply rooted in Ayurveda. Many individuals now claim that this simple habit supports clearer skin and a natural glow without expensive products. Tulsi, also known as holy basil, is valued for its purifying and balancing qualities. When combined with warm water, it becomes an easy daily drink that fits into busy lifestyles while gently supporting skin from within.

    Drinking Warm Water with Tulsi Leaves for Clear Skin

    Starting your day with warm water and tulsi leaves helps the body cleanse itself naturally, which reflects directly on the skin. Warm water aids digestion, while tulsi is known to support internal balance. Together, they help flush out impurities that often show up as breakouts or dullness. Regular intake may encourage gentle detox support, improve gut skin connection, and promote cleaner blood flow. Many people also notice fewer sudden pimples because this drink supports natural oil balance from within, making skin look calmer and more even over time.

    Why Warm Tulsi Water in the Morning Boosts Natural Glow

    Drinking tulsi-infused warm water on an empty stomach allows the body to absorb its benefits more effectively. Tulsi contains plant compounds that help the skin cope with daily stress and pollution. This habit can improve hydration at a cellular level, which is essential for glow. Over weeks, users report healthy skin radiance, smoother texture, and improved skin clarity. The warmth of the water also supports circulation, contributing to better nutrient delivery and a visible fresh morning glow without relying on makeup.

    Daily Tulsi Leaves Water Habit and Skin Health Benefits

    Consistency is key when it comes to natural remedies, and tulsi water is no exception. Making it a daily habit can help the skin adapt and respond positively. Tulsi is traditionally used to support immunity, which indirectly affects skin health. With time, this routine may lead to reduced skin inflammation, fewer irritation episodes, and balanced internal system. Many also appreciate how this drink supports simple morning wellness, creating a calm start that reflects as clearer looking skin throughout the day.

    Summary or Analysis

    Warm water with tulsi leaves is not a quick fix, but a supportive daily practice that works gradually. In the Indian context, where herbal remedies are familiar and accessible, this habit stands out for its simplicity. By supporting digestion, hydration, and internal balance, it helps skin improve naturally over time. When combined with a balanced diet and basic skincare, it can contribute to long term skin support, encourage natural glow development, and reinforce holistic beauty approach that focuses on inner health rather than surface-level solutions.

    Aspect Details
    Best Time Early morning on empty stomach
    Main Ingredient Fresh tulsi leaves
    Water Type Warm, not boiling
    Visible Results Usually after 2–4 weeks
    Suitable For Most skin types

    Frequently Asked Questions (FAQs)

    1. Can I drink tulsi water daily?

    Yes, drinking it daily in moderate amounts is generally considered safe.

    2. How many tulsi leaves should be used?

    About 4–6 fresh leaves are sufficient for one cup of water.

    3. Is tulsi water good for acne-prone skin?

    It may help support clearer skin when combined with proper hygiene.

    4. Can this replace skincare products?

    No, it works best as a supportive habit alongside regular skincare.

  • Why We Forget Names and Practical Ways to Remember Them Better

    Why We Forget Names and Practical Ways to Remember Them Better

    The instant you spot him your stomach sinks. You recognize this face. You definitely know this face. His eyes brighten & his smile grows wide as he walks directly toward you with the assurance of someone who knows you remember his name. Your brain scrambles to find any information like someone desperately searching through messy drawers. Nothing comes up. Not even a hint. You fall back on the most basic social trick available & say “Hey… you!” while hoping the ground will swallow you whole before he sees the brief flash of panic in your eyes.

    Names behave strangely inside human memory. You might clearly remember that a childhood neighbor owned three golden retrievers and collected odd ceramic frogs, yet their actual name has completely vanished. You can recall what someone wore, what they ordered, how they laughed, even their perfume—but the name refuses to surface. This isn’t carelessness or disrespect. Psychologists explain that names are “arbitrary labels.” A name like “Daniel” carries no built-in meaning about personality, behavior, or appearance. Unlike descriptive details, names arrive without hooks, making them fragile and easy for the brain to drop.

    Why Names Are Harder Than Faces or Stories

    The human brain evolved to remember meaning, patterns, emotion, and visuals. It loves stories and associations. Names, by contrast, are abstract sounds with no natural connection to who a person is. “The tall barista with astronomy tattoos” instantly creates imagery and context; a single name does not. Because names lack emotional or descriptive weight, they often fail to anchor themselves in memory. They float loosely, while everything else about the person—voice, posture, humor—stays firmly stored.

    Why Timing Works Against Name Memory

    Names are usually introduced at the worst possible moment: the start of an interaction. At that point, your attention is divided—reading social cues, thinking about what to say, wondering how you’re being perceived. The name arrives while your mind is busy elsewhere, so it gets encoded weakly. It’s not that the brain refuses to store it; it simply never receives enough focused attention to register deeply.

    The Tip-of-the-Tongue Experience Explained

    That frustrating moment when a name feels almost reachable reveals how memory works. You may recall the person’s face, voice, meeting location, even the first letter of their name—yet the word itself remains locked. Research shows that sound and meaning are stored in related but separate systems. Because names carry little meaning, the bridge between sound and identity is thin. When stress enters the picture, that bridge weakens further, making recall even harder.

    Stress and Social Pressure Block Recall

    Social pressure activates the brain’s threat system. In work events or introductions, anxiety narrows attention and tightens mental focus. The harder you try to pull the name out, the more it resists. Ironically, the name often returns hours later during a relaxed moment, when pressure disappears and neural pathways reconnect on their own.

    Hidden Factors That Push Names Out

    Modern life overwhelms memory. We meet more people than ever—online and offline—and the brain must prioritize. Names tied to brief encounters are downgraded. Distraction also plays a role: internal thoughts often drown out introductions. Similar names blur together, especially within shared cultures or age groups. Fatigue, hunger, stress, and poor sleep further reduce encoding strength. Forgetting names is usually resource management, not failure.

    How to Turn Names Into Memorable Stories

    Memory improves when names gain texture. The brain remembers scenes, images, and narratives far better than bare sounds. When you meet someone named “Leo,” mentally picture a small lion near them. It may feel silly, but the image creates a pathway. Pair the name with context—where you met, what you discussed—and you give your brain something rich to store instead of an empty label.

    Making Name Memory Feel Natural

    Effective memory habits don’t need to feel forced. Simply slow down when you hear a name. Repeat it naturally: “Nice to meet you, Aisha.” Ask a follow-up question using their name. This brief repetition strengthens encoding without awkwardness. Over time, the habit becomes automatic, blending smoothly into conversation.

    Training Your Brain Outside Conversations

    Name recall reflects overall attention health. Single-tasking strengthens memory; multitasking weakens it. Quality sleep supports memory consolidation. Daily association exercises—linking words, images, and ideas—train the brain to build faster connections. These small habits quietly improve recall across all areas of life.

    Remembering Names as an Act of Respect

    Using someone’s name communicates recognition. It tells them they are seen, not just passing through your awareness. Forgetting doesn’t mean you don’t care; trying does. When you approach name memory with patience rather than shame, it becomes a human skill, not a performance test. You may not remember every name, but the ones you do will be remembered with intention—and that intention carries real meaning.

  • Boys Trying Coffee Powder on Hair for the First Time — Grey Hair Hack You Didn’t Expect

    Boys Trying Coffee Powder on Hair for the First Time — Grey Hair Hack You Didn’t Expect

    Across India, boys are experimenting with unexpected home remedies to tackle early greying, and one trick gaining attention is using coffee powder on hair. What started as a casual experiment has turned into a viral grey hair hack discussed in hostels, gyms, and barber shops. Coffee is already a daily habit for many, so applying it to hair feels simple and affordable. The idea is not about instant miracles, but about exploring natural methods that may temporarily darken hair while improving overall texture and shine.

    Boys Using Coffee Powder on Hair for Grey Coverage

    When boys try coffee powder on hair for the first time, the goal is usually to hide grey strands without harsh chemicals. Brewed coffee or coffee paste is applied like a mask and left on for some time. Many notice temporary dark tone that makes grey hair less visible. Coffee also contains antioxidants that may support scalp health, giving a natural shine boost. While it does not permanently change hair colour, the process feels safer than dyes and offers a chemical-free option for young men experimenting at home.

    Why Coffee Powder Is Becoming a Grey Hair Hack

    The popularity of this method comes from its simplicity and accessibility. Coffee is easy to find, low-cost, and familiar, making it appealing for beginners. Users report quick visible effect after a few applications, especially on light grey strands. The mild staining property of coffee helps create a softer hair look compared to sharp dye colours. For many boys, it’s also about confidence—trying a DIY grooming trick that feels trendy without committing to salon treatments.

    First-Time Experience of Applying Coffee on Hair

    First-time users often mix coffee with conditioner or water to make application easier. The experience is usually mess-free and relaxing, similar to a hair spa at home. Some notice improved texture and reduced dryness, leading to better hair feel. Others appreciate that it washes out gradually, avoiding harsh lines. As a result, many see it as a low-risk experiment that fits into weekly grooming routines. The key is consistency and understanding that results remain short-term coverage, not a permanent fix.

    Summary or Analysis

    Coffee powder on hair is not a scientific cure for grey hair, but it works as a practical, temporary solution. For boys in India dealing with early greying, it offers an affordable and approachable option. The method stands out for being simple, natural, and easy to reverse. When used with realistic expectations, it can enhance appearance and confidence. Think of it as a natural styling aid rather than a treatment, useful for experimenting before turning to long-term solutions.

    Aspect Coffee Powder on Hair
    Purpose Temporary grey hair coverage
    Cost Very low and affordable
    Application Time 20–30 minutes
    Duration of Effect Lasts a few washes
    Suitability Best for mild greying

    Frequently Asked Questions (FAQs)

    1. Does coffee powder permanently remove grey hair?

    No, it only provides temporary colour and washes out over time.

    2. How often can boys apply coffee on hair?

    It can be applied once or twice a week safely.

    3. Is coffee powder safe for all hair types?

    Yes, but a patch test is recommended for sensitive scalps.

    4. Can coffee replace regular hair dye?

    No, it works as a short-term natural alternative, not a replacement.

  • A New Kitchen Device Threatens to Replace the Microwave With Faster Efficiency

    A New Kitchen Device Threatens to Replace the Microwave With Faster Efficiency

    From late-night leftovers to hurried office lunches, the microwave has long been a reflex in modern kitchens. Yet in 2025, a subtle change is taking place. More households are quietly unplugging it. In its place sits a compact appliance that looks part mini-oven, part control panel from a sci-fi film. Food creators talk about it in hushed tones. Energy specialists highlight its efficiency. Appliance brands are racing to release their own versions.

    On a dull Tuesday evening in London, a family put one to the test. There was no frozen meal in sight, just random fridge ingredients and a teenager asking how fast it could handle pasta. A few taps on the screen, no hovering, no guesswork.

    Three minutes later, the kitchen smelled like a proper restaurant. Something had clearly changed.

    The steady rise of the countertop “microwave alternative”

    Depending on the manufacturer, the device is called a smart convection oven, a rapid-cook oven, or a high-speed air oven. Strip away the branding and the idea stays the same: a compact box that blends powerful convection heat, fast-moving fans, and targeted infrared to cook food quicker than a traditional oven and far more evenly than a microwave.

    It feels familiar enough not to intimidate. But open the door and see golden, crisp chicken instead of pale, rubbery leftovers, and the difference becomes obvious. This isn’t reheating. This is cooking. That distinction comes up again and again. Microwaves zap. These devices cook.

    What energy tests reveal behind the scenes

    In a test facility near Berlin, an energy engineer compared three machines: a standard 800-watt microwave, a full-size oven, and a compact high-speed countertop model. Each reheated 400 grams of chilled pasta to the same internal temperature. The microwave finished fastest but used 0.16 kWh. The conventional oven took far longer and consumed 0.8 kWh. The countertop oven landed in between on time, yet used just 0.11 kWh.

    Scaled across a year in a busy household, those small gains add up. Less waiting, lower power use, and food that heats evenly rather than scorching at the edges. It’s not an overnight revolution, but a steady accumulation that starts to matter.

    Why these compact ovens work so efficiently

    Instead of exciting water molecules like a microwave, these ovens push very hot air around food at high speed, often reaching 220–260°C. Many add focused infrared heat to brown the surface. The result is even cooking with almost no preheating.

    Because the chamber is small, there’s far less wasted heat. Fans distribute warmth efficiently, reducing cold spots and cutting run time. For dishes that need crisping or browning, these devices often beat microwaves on both taste and energy use.

    How to use it so it actually outperforms a microwave

    These ovens shine when treated like a smart, impatient sous-chef. Start with shallow containers so hot air can reach more surface area. Leave space around the food to allow proper airflow. And learn the quick-crisp setting, where fries, pizza, and roasted vegetables suddenly taste intentional.

    The most common mistake is using it exactly like a microwave. Oversized bowls, no stirring, or maximum heat without thought can lead to uneven results. These appliances reward small adjustments, not blind trust. Ease into shorter times, test forgiving foods first, and don’t hesitate to check mid-cycle.

    What this shift says about modern kitchen habits

    The microwave didn’t just shorten cooking times; it reshaped routines. It normalised eating on the go and blurred meals into snacks. So replacing it isn’t just about appliances. It touches daily habits, comfort, and even nostalgia.

    Online, the contrast is already visible. Side-by-side photos show limp microwave pizza next to crisp, bubbling slices from high-speed ovens. Frozen pastries emerge flaky in minutes. The appeal isn’t flashy. It’s the comfort of real-tasting food on a stressful day.

    What the shift really means for energy and everyday life

    Modern high-speed ovens draw 1200–1800 watts, but only in short bursts. Because they heat instantly, the long preheat cycle of a full oven disappears. Independent tests show 20–40% lower energy use than microwaves for dense meals, and far less than standard ovens. On their own, the savings are modest. Combined with other efficient choices, they start to make a visible difference on the bill.

    Key points at a glance

    • New countertop devices: Compact high-speed ovens using convection and infrared for faster, more even cooking.
    • Energy and time savings: Around 30–40% less energy than microwaves for many meals, with similar cooking times.
    • Real-world habits: Shallow dishes, space for airflow, one trusted program, and regular light cleaning.
  • Lip Definition Trick: The Lip Liner Technique That Creates Fuller Looking Lips Without Overdrawing

    Lip Definition Trick: The Lip Liner Technique That Creates Fuller Looking Lips Without Overdrawing

    The girl in the café restroom has no idea she’s being observed, yet several people waiting quietly watch her lips with curiosity. She glides a pencil across them in two quick strokes, presses them together, and finishes with a touch of gloss. There’s no dramatic overlining or complex contouring. When she looks up, her lips appear rested, soft, and naturally full, like she’s just returned from a relaxing trip. There’s no visible border or bold outline—just dimension that feels effortless. Later, you try to recreate it with the same pencil and gloss, but the result looks flat. The difference is subtle: where she placed the pencil. It’s a tiny detail that changes everything.

    Lip Definition, Reimagined

    It’s Not About Bigger Lips, It’s About Directing Attention

    Why Traditional Lip-Liner Rules Stop Working

    The classic advice is familiar: trace slightly outside your natural lip line, blur it, fill it in, and move on. For years, that method worked well enough. But on real faces in natural light, heavy overlining can feel disconnected. Instead of enhancing your features, it can make the lips seem out of sync with the rest of the face, especially when viewed up close.

    The Subtle Change Modern Lip Artists Are Making

    Today’s leading lip artists take a more restrained approach. Rather than chasing the illusion of a much larger mouth, they focus on guiding the eye to specific points. The fullness you notice isn’t the objective—it’s the result. This is why the technique photographs beautifully, whether in selfies, video calls, or everyday conversations. The adjustment is minimal, yet the effect is striking.

    Why Millimetres Matter More Than Bold Lines

    The real transformation comes from micro-level placement, not thicker outlines. Once you notice where the pencil actually goes, your understanding of lip lining shifts. It’s not about reshaping your lips into something new; it’s about enhancing the structure that already exists. This precision keeps everything believable and softly defined.

    Where Makeup Artists Actually Apply the Liner

    If you pay attention on social platforms, a pattern emerges. Artists barely emphasize the corners of the mouth. Instead, they concentrate pigment on three areas: the peaks of the Cupid’s bow, the center of the lower lip, and the small, pillow-like zones just off-center. Around the edges, the liner is diffused and barely there, creating an outline that feels more like a suggestion than a statement.

    Why the Finish Looks Effortlessly Natural

    A London-based makeup artist once shared that she uses the same lip pencil on every client, adjusting only the placement based on how light hits their lips. People often ask which filler clinic she recommends. She laughs and points to a £7 lip liner and a grainy video of her technique. The most common response is, “I don’t know what you did, but I look rested.” Fuller lips suggest health, but the true effect is balance—the mouth suddenly feels in harmony with the face.

    The Simple Science Behind the Illusion

    This method works because our eyes don’t scan faces evenly. They jump to contrast and subtle shape changes. The dip of the Cupid’s bow, the curve at the center of the lower lip, and the light-catching areas where gloss naturally sits all draw focus. By enhancing these points and softening the corners, the brain interprets the lips as fuller without any obvious outline.

    The Exact Placement That Creates Fullness Without Overlining

    Begin with dry lips and keep your mouth relaxed—no posing. Take a sharpened nude liner that matches your lip tone. Draw a small bridge across the Cupid’s bow, gently connecting the peaks just above the natural dip. Think soft plateau, not a sharp M. Move to the center of the lower lip and place the pencil about a millimetre outside your natural line at the fullest point only. Sketch a short arc no wider than your iris. Leave the outer thirds almost untouched. Connect these central areas to the corners with light, feathery strokes that fade outward. Smudge softly with a fingertip, then tap a hint of gloss or balm in the center. The middle looks pillowy, the corners stay soft, and the result is hard to decode.

    The temptation is always to add more. A little extra on the sides, a bit more height, and suddenly the look slips into obvious overlining. It may appear fine on a phone screen, but harsh lighting tells a different story. Restraint keeps it believable. Work in stages, check your reflection from a distance, and only connect to the corners where truly needed.

    Why This Soft-Blur Technique Works in Real Life

    What makes this placement so appealing goes beyond appearance. On a tough morning, drawing a sharp line around your lips can feel like armor. This gentler method feels like enhancing what’s already there. People notice that you look refreshed rather than heavily made up. It also allows room for imperfection—if your hand slips or the line isn’t exact, the overall effect still holds. Under different lighting, from bright bars to dim restaurants, the lips keep definition in the center while staying soft at the edges. They move naturally with your expressions instead of looking fixed. It’s makeup that works with real faces, not against them.

  • 12 Yoga Poses: Improve Flexibility, Mobility and Daily Movement Ease

    12 Yoga Poses: Improve Flexibility, Mobility and Daily Movement Ease

    Flexibility & mobility matter for everyone in daily life. They help prevent injuries & keep joints healthy as you age. Modern habits like sitting all day and dealing with stress make the body tight and stiff over time. Yoga offers an effective yet gentle approach to regain flexibility while building better mobility and balance. Yoga differs from basic stretching because it engages muscles and joints & connective tissues all at once. When you practice regularly these poses allow your body to move with greater ease and comfort. The following 12 yoga poses can make a real difference in your flexibility and mobility when you do them consistently.

    Downward Facing Dog

    Downward Facing Dog stretches your spine and shoulders along with your hamstrings & calves and ankles. This pose also makes your shoulders more mobile and builds strength in your arms. Begin on your hands and knees and then lift your hips up while pushing your heels down toward the ground. Make sure your spine stays long and let your neck stay relaxed. This position makes your whole body more flexible and helps get rid of tightness that comes from sitting too much.

    Cat Cow Pose

    Cat Cow is great for keeping your spine mobile and flexible. It warms up your back gently & helps you stand straighter. Start by getting on your hands and knees. Breathe in while you arch your back and raise your chest upward. Breathe out while you curve your spine the other way & bring your chin down toward your chest. Move back and forth between these positions at a steady pace to make your spine more flexible and improve how your body moves together.

    Standing Forward Fold

    Standing Forward Fold Standing Forward Fold provides a deep stretch for your hamstrings and calves while also working your hips and lower back. Start by standing upright with your feet positioned comfortably. Bend forward from your hips and allow your upper body to hang down naturally. Your head should drop toward the ground without any tension in your neck. If you feel too much strain in your legs you can bend your knees a little bit to make the pose more comfortable. This position helps make the back of your body more flexible over time. It also promotes better blood flow throughout your system. The gentle inversion allows fresh blood to reach your brain while the stretch releases tightness that builds up from sitting or standing throughout the day.

    Low Lunge

    Low Lunge stretches the hips and makes the hip flexors & thighs more flexible. Place one foot forward in a lunge position and lower your back knee to the ground. Push your hips slightly forward and raise your chest upward. This position works well for anyone who spends most of their day sitting down.

    Butterfly Pose

    Butterfly Pose works on your inner thighs and hips while also stretching your lower back. Start by sitting up straight and pressing the bottoms of your feet together. Allow your knees to fall naturally toward the ground. You can move your knees up and down slowly or bend forward from your hips if you want a stronger stretch. This position helps make your hips more flexible and increases how well they move.

    Cobra Pose

    Cobra Pose Cobra Pose stretches your chest & shoulders and spine. It also makes your lower back stronger. Start by lying face down on the floor. Put your hands flat on the ground directly under your shoulders. Push down gently through your palms and raise your chest up off the floor. Your elbows should stay a little bent rather than locked straight. Let your shoulders drop down and stay loose instead of hunching them up toward your ears. This pose works well if you spend a lot of time slouching or sitting at a desk. It opens up the front of your body and helps reverse the rounded position that comes from poor posture. Regular practice can make your spine more flexible and help it move more easily through its full range of motion.

    Seated Forward Bend

    Seated Forward Bend Seated Forward Bend helps make your spine more flexible while also stretching your hamstrings and hips. Start by sitting down with your legs stretched out in front of you. Take a breath in and make your spine longer. Then bend forward from your hips. Try not to curve your back into a rounded position. This position helps you breathe calmly & gives your muscles a good stretch.

    Pigeon Pose

    Pigeon Pose works really well for making your hips more mobile & flexible. Start from a forward fold or downward dog position and bring one knee toward the front while you stretch the other leg behind you. Lower your hips down toward the mat and take some deep breaths. This pose helps release tension that builds up deep in your hips & makes your lower body move better overall.

    Triangle Pose

    Triangle Pose stretches your legs & hips along with your spine and chest. It also helps improve your balance and makes your joints more mobile. Stand with your feet positioned far apart from each other. Reach one arm down toward your front foot & place your hand on your shin or ankle. At the same time lift your other arm straight up toward the ceiling. This pose helps you build both strength and flexibility together.

    Garland Pose

    Garland Pose helps make your ankles hips and lower back more flexible. Stand with your feet a bit wider than your hips and squat down. Lower your hips toward the ground & press your hands together at your chest. Keep your back straight and long. This position helps your body move naturally and keeps your joints healthy.

    Bridge Pose

    Bridge Pose Bridge Pose stretches your hips and chest and spine. It also makes your back & legs stronger. Start by lying flat on your back. Bend your knees and place your feet on the floor about hip width apart. Push down through your feet and raise your hips up toward the ceiling. This pose helps your spine become more flexible. It also reduces stiffness in your lower body.

    Child’s Pose

    Child’s Pose provides a gentle stretch for your spine along with your hips and shoulders. You start by sitting back on your heels and then fold your body forward. Your arms can either extend out in front of you or rest comfortably alongside your body. This position helps increase your flexibility & also works to calm your nervous system while letting go of built-up tension.

    How to Practice Safely

    To improve flexibility and mobility you need to focus on consistency rather than pushing yourself too hard. Take your time with each pose and remember to breathe deeply throughout the movement. Never force your body into positions that cause discomfort or pain. Always warm up properly before attempting deeper stretches & feel free to use props such as blocks or cushions when necessary. If you practice these poses three to five times each week you will see clear improvements as time goes on. Even brief daily sessions can make your body feel lighter and help you move more easily.

  • You only need 20 minutes and 2 dumbbells to build full-body strength at home

    You only need 20 minutes and 2 dumbbells to build full-body strength at home

    One of the most challenging aspects of committing to regular exercise is figuring out where to begin. This is just as true for complete beginners as it is for experienced exercisers returning after time away.

    This 20-minute workout created by fitness trainer Lindsey Bomgren, founder of the Nourish Move Love YouTube channel, is designed to help you ease back into training. It’s especially suitable if you’re restarting after illness or an extended break.

    The session targets the entire body through two structured rounds of exercises, all of which can be completed within 20 minutes, including a short warm-up and cool-down.

    Equipment and Setup

    You’ll need a pair of dumbbells to complete the workout. Bomgren recommends using weights in the 15–25lb range as a general guide. If you’re using adjustable dumbbells, you can change the weight as needed to match each movement.

    Workout Structure Explained

    The workout features nine exercises, with some movements performed on both sides, resulting in 12 total moves per round. You complete two full rounds, aiming for 10 repetitions of each exercise, or 10 reps per side where applicable.

    Bomgren demonstrates every movement and sets the workout tempo, allowing you to follow along or slow down if needed. Another trainer, Rachel, also appears in the video to show modified versions of certain exercises for an easier option.

    Muscle Groups and Exercise Selection

    To maximize efficiency within the 20-minute timeframe, the workout focuses largely on compound exercises. Movements such as squats and lunges engage multiple joints and muscle groups at the same time.

    There are also more targeted exercises included, such as triceps extensions, along with core-focused movements like bicycle crunches and glute bridges.

    Warm-Up, Cool-Down, and Progression

    The session includes a brief warm-up and cool-down, both of which are highly beneficial. The warm-up helps prepare your body so you can perform the early exercises effectively, while the cool-down supports recovery and may reduce post-workout muscle soreness, particularly if it’s been a while since you last trained.

    If you’re new to exercise or find it difficult to keep up with the pace, you can lower the repetition count to six or eight reps per move. This allows you to focus on proper form without feeling rushed, helping you build confidence as you ease back into regular workouts.