Category: News

  • 7 Yoga Stretches You Can Do Daily to Improve Flexibility

    7 Yoga Stretches You Can Do Daily to Improve Flexibility

    Flexibility Through Yoga Flexibility is not about forcing your body into deep poses. It is about allowing your muscles and joints to open slowly & safely. Many people feel stiff due to long sitting hours or stress or poor posture or lack of regular movement. Yoga stretches improve flexibility by increasing blood flow and reducing muscle tightness and improving joint mobility. These seven yoga stretches are ideal for beginners and experienced practitioners alike. They focus on major tight areas like the hips and hamstrings and spine and shoulders and back. Practicing them consistently can help you move better and feel lighter & reduce everyday aches. ## Why Yoga Stretches Improve Flexibility Safely Muscles tighten when they are stressed or unused. Yoga uses steady breathing and controlled movement to gently lengthen muscles without strain. Unlike sudden stretching yoga allows the nervous system to relax which helps muscles release naturally. Over time this leads to lasting flexibility without injury. Flexibility also improves circulation and posture & balance which makes daily movements easier.

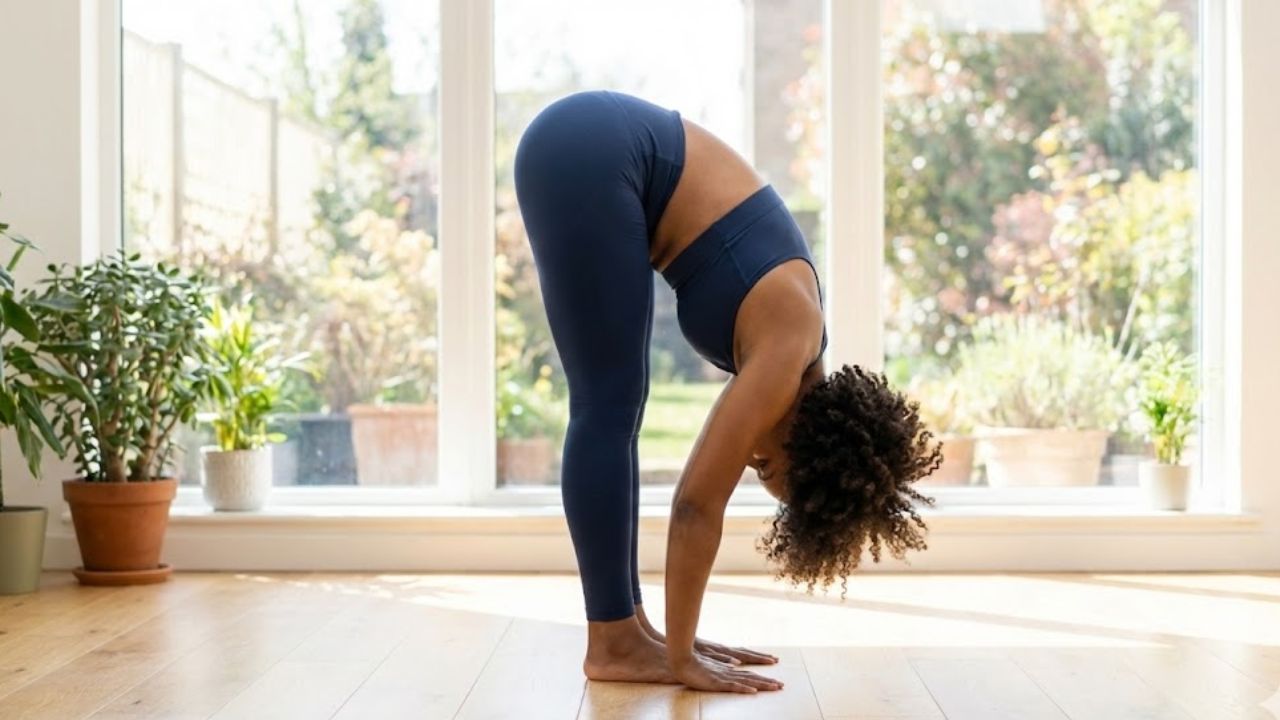
    Wake Up Your Body With Gentle Standing Forward Folds

    This stretch works on your hamstrings, calves lower back and neck. It helps reduce stiffness when you have been sitting for a long time. How to do it: Stand with your feet at hip width. Bend your knees a little & fold forward from your hips. Let your head hang down naturally. You can place your hands on the floor, your shins or use a block for support. Flexibility benefit: Doing this stretch regularly makes the back of your legs longer & reduces tension in your spine. Hold for: 45 to 60 seconds while breathing slowly.

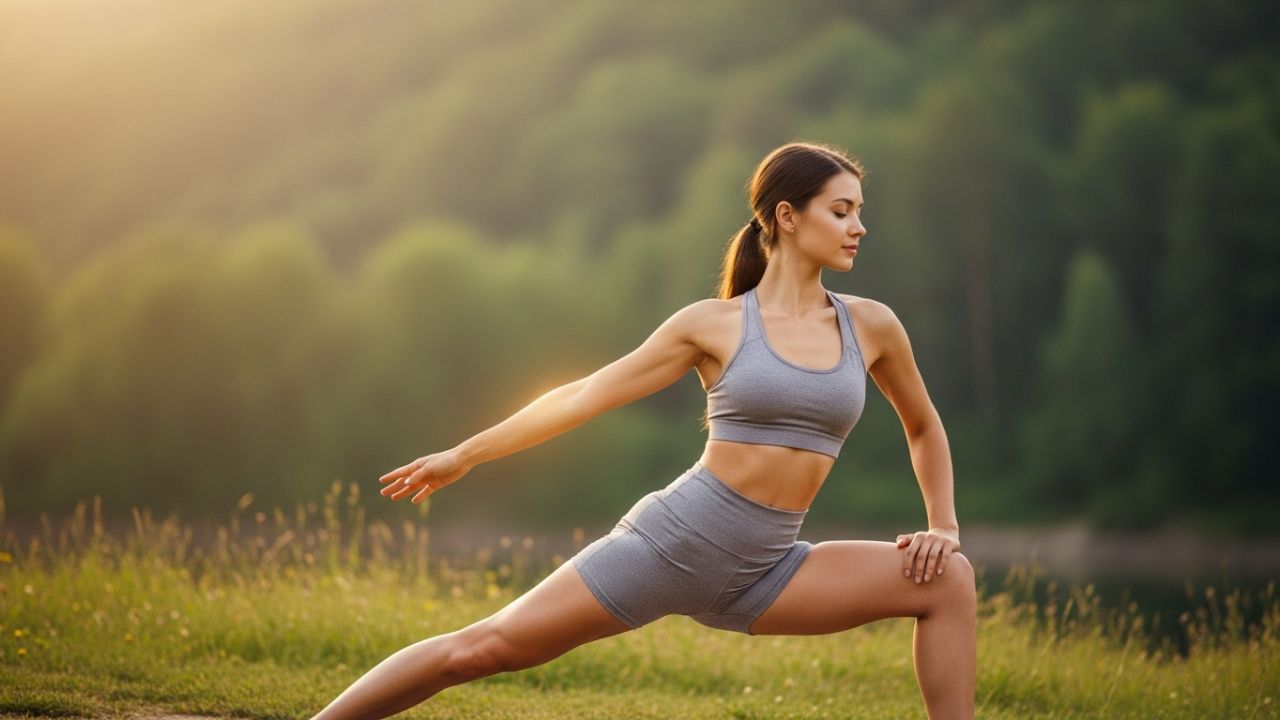
    Release Tight Hips and Legs Through a Deep Low Lunge Stretch

    Low Lunge provides a deep stretch for the hip flexors that typically become tight from prolonged sitting. How to do it: Place one foot forward and bring your back knee down to the mat. Keep your chest upright while allowing your hips to sink forward gently. You can rest your hands on your thighs or on the mat. Flexibility benefit: This stretch enhances hip mobility and helps improve your posture. Hold for: 30 to 60 seconds on each side.

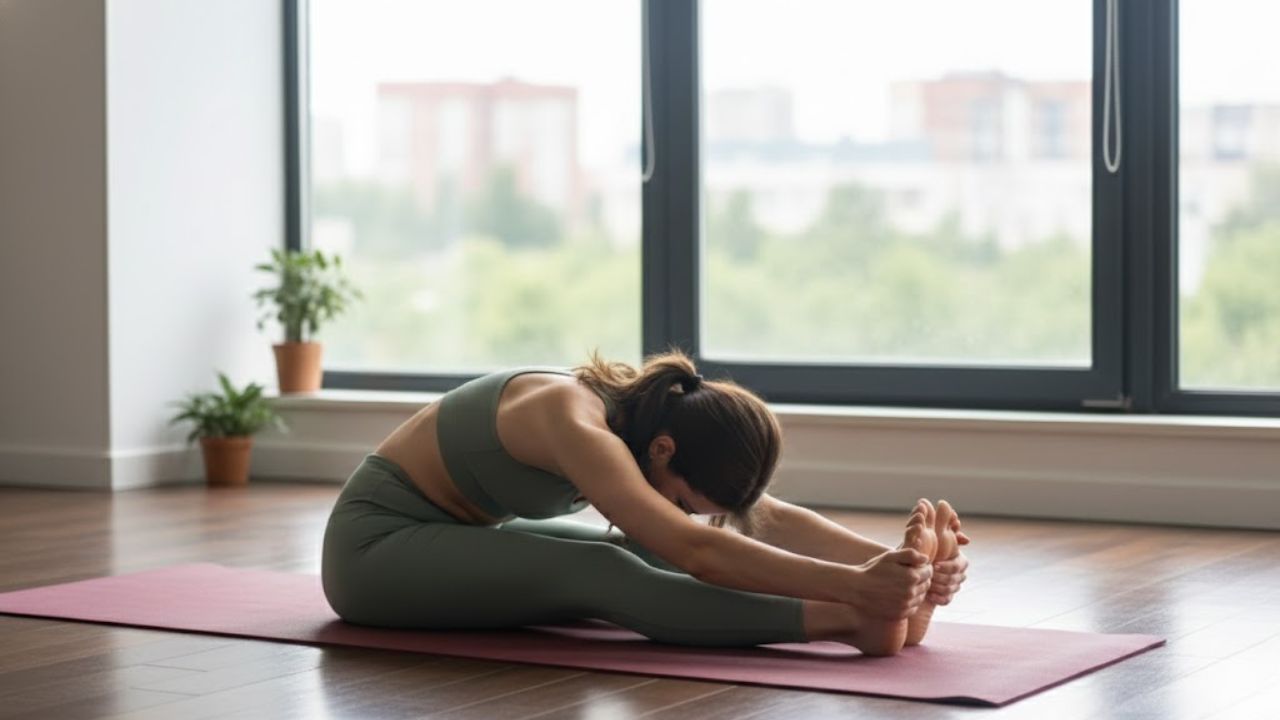
    Lengthen the Spine Daily Using a Calm Seated Forward Bend

    This gentle stretch targets your hamstrings along with your lower back and spine. Start by sitting on the floor with your legs straight out in front of you. Take a breath in while sitting up tall to extend your spine. Then breathe out as you bend forward at your hips. You can keep a slight bend in your knees if that feels more comfortable. This stretch helps your muscles lengthen slowly & naturally without pushing too hard. Stay in this position for 60 seconds while breathing normally and keeping your body relaxed.

    Open Inner Thighs and Improve Mobility With Butterfly Pose

    Butterfly Pose gently opens your hips and stretches the inner thighs. This position works well for releasing tension in your lower body. How to do it: Sit down and bring the bottoms of your feet together. Allow your knees to drop open to the sides in a relaxed way. Hold onto your feet or ankles while keeping your back straight. Flexibility benefit: This pose makes your hips more flexible and helps reduce tightness in the area around your pelvis.

    Stretch the Entire Body Effectively Using Downward Facing Dog

    Butterfly Pose opens your hips and stretches your inner thighs in a gentle way. This position helps release tension from your lower body. To perform this pose sit on the floor & press the soles of your feet together. Let your knees fall naturally toward the sides without forcing them. Grip your feet or ankles with your hands and maintain a straight spine throughout the stretch. This pose increases hip flexibility and loosens the muscles around your pelvis. Hold for:

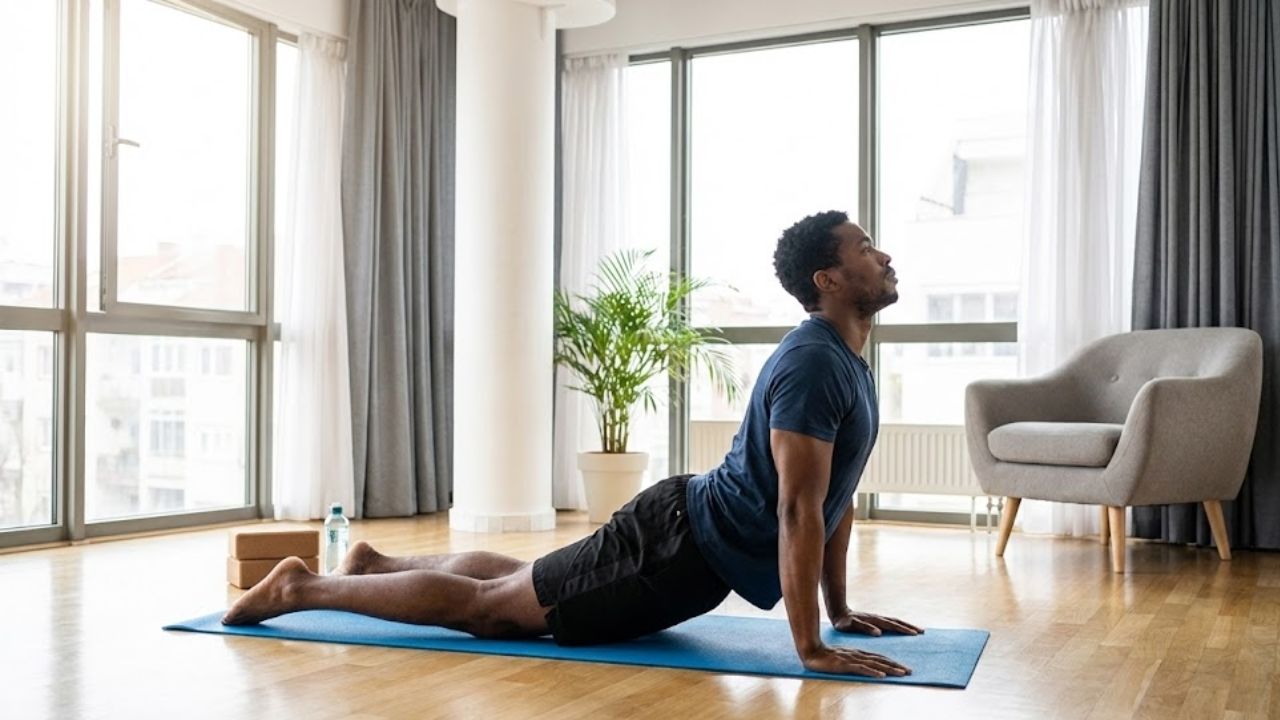
    Strengthen the Back and Increase Flexibility With Cobra Pose

    Cobra Pose stretches your chest & abdomen & spine. It makes your spine more flexible too. Here’s how you do it. Lie face down on the floor. Put your palms flat on the ground right under your shoulders. Push gently with your hands and raise your chest up. Don’t push too hard or you might hurt your lower back. This pose is great for your flexibility. It helps fix bad posture from slouching forward all day. Your spine will move better after practicing this regularly. Hold the position for 20 to 40 seconds. Do it one more time after a short rest.

    Relax the Spine and Ease Stiffness Using Supine Spinal Twist

    This easy stretch helps your spine relax and gently massages the organs inside your body. How to do it: Start by lying flat on your back. Pull one knee up toward your chest and then move it across to the opposite side of your body. Stretch your other arm straight out to the side. Make sure your shoulders stay loose and comfortable. Flexibility benefit: This movement makes your spine more flexible and helps ease tension in your lower back. Hold for: 45 seconds on each side.

    How to Practice These Yoga Stretches Daily for Maximum Flexibility Gains

    Flexibility gets better through regular practice rather than pushing yourself too hard. You should do these stretches every day or at least five days each week. Always move in a slow controlled way & never use bouncing movements when stretching. Your breathing pattern matters a lot. Breathe in to make room in your body and breathe out to go a bit deeper into the position. Stop and ease back a little if you feel any pain. Here is a basic flexibility routine that takes 10 minutes: Start with Standing Forward Fold. Then do Low Lunge on your left side & then your right side. Move into Downward Facing Dog next. After that do Seated Forward Bend followed by Butterfly Pose. Then practice Cobra Pose. Finish with Supine Spinal Twist on both your left and right sides.

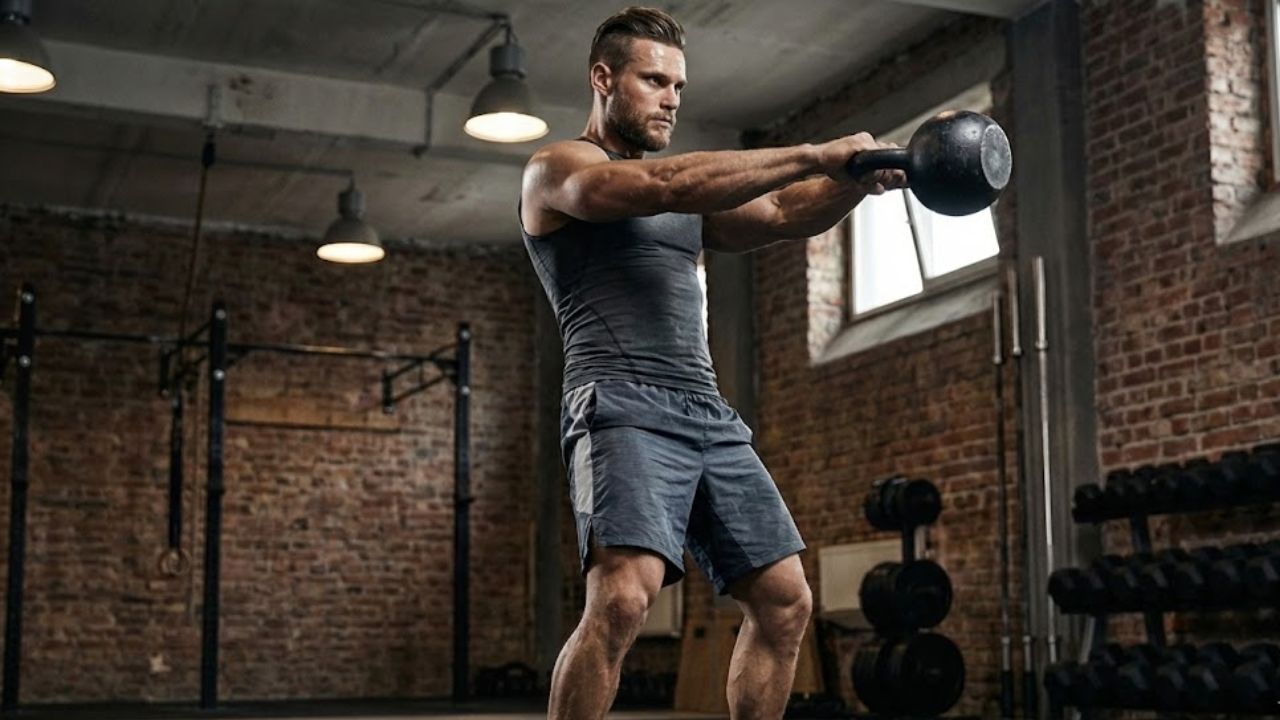
    Smart Daily Habits That Help You Stay Flexible for the Long Term

    Start with a warm up before you do any deep stretching. Your muscles will not stretch well when they are cold. Make sure you drink enough water because hydrated muscles are easier to stretch. Be patient with yourself since everyone improves their flexibility at different speeds. Do strength training along with your stretching routine to keep your joints and muscles safe.

    Who Should Practice These Yoga Stretches With Extra Care and Caution

    If you have recent injuries or joint problems or chronic pain you should keep your stretches gentle and well supported. You can use props like cushions or blocks whenever you need them. If you are pregnant you should adjust deep twists and forward bends to make them safer. You do not need to spend hours practicing to improve your flexibility. Just a few careful stretches each day can make a real difference in how your body feels and moves. If you would like I can put together a morning or evening flexibility yoga routine that fits your schedule and matches your comfort level.

  • 12 Yoga Poses to Release Body Stiffness and Improve Flexibility and Daily Comfort

    12 Yoga Poses to Release Body Stiffness and Improve Flexibility and Daily Comfort

    Body stiffness happens to many people because of sitting too long or not moving enough during the day. Stress and getting older can also make muscles tight. Even hard exercise sometimes causes stiffness instead of helping. When muscles & joints stay tight for a long time they stop moving as easily as they should. This creates pain in the neck & back & also in the hips & legs. Yoga helps loosen tight areas without pushing the body too hard. It works gently to bring back normal movement & makes the body more flexible over time. Here are 12 yoga poses that reduce stiffness and increase flexibility when you practice them often & breathe slowly while doing them.

    Mountain Pose (Tadasana) — Reset Body Alignment and Activate Stiff Muscles

    Mountain Pose helps improve how you stand and makes you more aware of your body position. When you stand up straight it helps your spine line up correctly and wakes up the muscles that help you stay flexible and balanced. This basic pose is the starting point for loosening up tight areas in your body.

    Neck Rolls — Relieve Neck Tightness Caused by Screens and Stress

    Neck rolls done gently can help reduce the stiffness that builds up from looking at screens & feeling stressed. When you move your neck slowly & with control it helps blood flow better through the area and makes the tension in your neck and shoulders feel less tight.

    Cat–Cow Flow — Gently Mobilise the Spine and Reduce Back Stiffness

    Cat-Cow is one of the best poses for relieving stiffness throughout your entire body. This flowing movement gently stretches your spine and also works your shoulders & hips and neck. It helps improve both flexibility and mobility at the same time.

    Downward-Facing Dog — Lengthen Muscles and Improve Full-Body Flexibility

    This pose works to lengthen your spine and open up your shoulders while also stretching the backs of your legs & calves. At the same time it builds strength in your arms & midsection. It works particularly well for easing the tightness that develops when you spend long periods sitting down.

    Standing Forward Bend — Release Hamstrings and Calm the Nervous System

    Standing Forward Bend provides a deep stretch for your back and the muscles along the back of your legs including the hamstrings and calves. This pose works to reduce tightness throughout your lower body while also helping to calm your nervous system and promote relaxation.

    Low Lunge — Open Tight Hip Flexors and Improve Lower-Body Mobility

    Low Lunge helps open up tight hips while stretching the thighs and groin area. This pose works particularly well for relieving stiffness that develops from sitting down for extended periods of time.

    Butterfly Pose — Ease Hip and Inner-Thigh Stiffness Naturally

    Butterfly Pose works to gently open your hips and inner thighs. The position helps decrease stiffness in your lower body & gradually increases how flexible your hips become.

    Seated Spinal Twist — Improve Spinal Rotation and Reduce Back Tension

    Seated twists help your spine move better & reduce tightness in your back and waist area. This twisting motion also aids your digestive system and makes your body more flexible overall.

    Cobra Pose — Counter Slouching and Relieve Lower-Back Tightness

    Cobra Pose builds strength in your back muscles and stretches both your chest and stomach area. This pose helps reduce the stiffness that comes from poor posture & slouching throughout the day. It also makes your spine more flexible and improves your overall spinal health.

    Child’s Pose — Deeply Relax Stiff Shoulders, Spine, and Hips

    Cobra Pose strengthens your back muscles while stretching your chest and stomach. This position helps reduce stiffness caused by poor posture and slouching during the day. It increases spine flexibility & supports better spinal health overall.

    Supine Figure Four — Target Hip Tension and Support Lower-Back Comfort

    This reclining position helps loosen tight hips and glutes while your spine stays supported. It works well for reducing stiffness in your lower body without putting stress on your muscles.

    Legs Up the Wall — Improve Circulation and Ease End-of-Day Body Fatigue

    Legs Up the Wall helps blood flow better through your body and makes your legs and lower back feel less tight. This pose also lets your whole body calm down and heal properly.

  • Most People Ruin Dishwasher Results Before It Starts by Rinsing Plates First

    Most People Ruin Dishwasher Results Before It Starts by Rinsing Plates First

    The plates seemed perfectly clean as she slid them into the dishwasher. A quick rinse under the tap, a swipe with the sponge, and that familiar nod of satisfaction before pressing “Start”. Everything felt right.

    The next morning, she opened the door and paused. The glasses wore dull spots. A fork carried a faint, greasy shadow. One plate somehow looked less clean than before.

    The machine had run properly. The water was hot. The detergent was fresh. So what had gone wrong?

    The surprising truth is this: by rinsing so carefully, she may have undermined the wash.

    Once you understand why, your relationship with the sink may never be the same.

    How a “Good Habit” Can Quietly Work Against You

    At the sink, rinsing feels like basic common sense. You spot sauce, you blast it away. You see crumbs, you sweep them into the drain. The plate looks “pre-cleaned”, so loading it feels tidy, responsible, civilized.

    It’s part of a familiar modern ritual. Dirty plate, slight guilt, quick rinse, into the machine, then you walk away feeling virtuous. Yet behind the closed door, the dishwasher is waiting for something you just removed.

    What you washed away is exactly what the machine needs to do its job properly.

    In lab-style demonstrations, brands love showing plates that go in heavily soiled and come out spotless. In real kitchens, many people unknowingly sabotage that process. One US survey found that over 70% of dishwasher owners “always” or “often” rinse dishes before loading.

    Ask around and the stories repeat. Someone grew up with a parent warning, “Never put that in without rinsing!” Another remembers an ancient dishwasher that left spaghetti fused on forever. So today, they rinse hard. And then blame the new machine when glasses come out cloudy.

    What most people never hear is this: modern dishwashers rely on sensors and smart cycles. They measure particles, dissolved food, and grime in the water. If the water seems too clean, the machine assumes the load isn’t very dirty and may shorten the cycle, lower the intensity, or reduce spraying.

    Detergents are also designed to attach to food and grease. When dishes go in almost clean, the detergent can end up working on bare surfaces instead of residues, leaving behind films and streaks. That careful pre-rinse can quietly become a recipe for a “not quite clean” result.

    The Simple Shift That Makes All the Difference: Scrape, Don’t Rinse

    The adjustment is small but powerful: scrape, don’t rinse. Remove solid leftovers into the bin or compost, then let the dishwasher handle the rest. The aim isn’t to load plates dripping in sauce, but to leave enough of a signal so the machine knows real cleaning is needed.

    A butter knife or spatula is often enough. Push leftovers away, give the plate a glance, and place it straight into the rack. No tap. No warm water. No guilt rinse just to feel better.

    Many people worry that skipping the rinse will turn the dishwasher into a nightmare of dried-on food. That fear usually comes from memories of old machines or poorly stacked loads. A modern dishwasher, with a solid program, good detergent, and correct stacking, can handle dried tomato sauce, cheese, and last night’s curry.

    Of course, real life isn’t perfect. Some days a burnt gratin pan feels like a crime scene. On those occasions, a short soak makes more sense than aggressively rinsing every plate. Soyons honnêtes : personne ne fait vraiment ça tous les jours. Be kind to yourself, but stop the one habit that quietly ruins the wash.

    As one dishwasher engineer put it:

    “If your dishes look almost clean when they go in, the machine has nothing to read and no real reason to work hard.”

    That idea flips the script. It’s not about being careless; it’s about working with the technology you already own. Once you understand how the machine “thinks”, the daily routine starts to change.

    • Scrape instead of rinse so sensors can detect dirt.
    • Leave light residue for detergent to bind correctly.
    • Choose a proper cycle, not always the shortest one.
    • Stack carefully so water reaches every surface.
    • Clean the filter regularly to maintain full power.

    Trusting Your Dishwasher to Do Its Job

    There’s a quiet relief in trusting the machine again. You finish eating, scrape plates into the bin, load them with the faint shadows of dinner still visible, close the door, and walk away. No tap ritual. No sink ballet.

    On busy weeknights, that small shift saves time and mental energy. The dishwasher stops feeling like a fragile device you must constantly assist, and starts acting like what it claims to be: a real appliance built to handle real dirt.

    Key Takeaways for Cleaner Results

    Rinsing can confuse sensors: Water that’s too clean makes the machine think dishes are already nearly spotless, leading to shorter, weaker cycles.

    Residue helps detergent work: Enzymes and cleaning agents grip grease and particles more effectively, reducing films and cloudy streaks.

    The right routine matters: Scraping, correct loading, choosing the right program, and maintaining the filter deliver truly clean dishes with less effort and less water.

  • 6 Simple Yoga Poses: Build Energy, Focus and Mental Clarity Through Daily Movement

    6 Simple Yoga Poses: Build Energy, Focus and Mental Clarity Through Daily Movement

    Feeling tired or foggy has become normal in our busy screen-filled lives. Most people grab coffee or candy when their energy drops but these quick solutions usually make things worse later. Yoga provides a better and longer-lasting method to increase energy and improve concentration. With intentional movement and focused breathing & better blood flow yoga energizes your body & brain. The six poses described below are easy to do and work for everyone. When you practice them regularly they can make you feel awake and focused and prepared for whatever comes next.

    Why Yoga Helps Improve Energy And Concentration

    Low energy & poor focus usually happen because of shallow breathing and tense muscles combined with too much mental stress. Yoga helps fix all these problems at the same time. When you do gentle stretches your blood flow increases & more blood reaches your brain. Deep breathing brings more oxygen into your body and this helps your mind work better. Moving mindfully also clears away mental clutter and lowers your stress levels. Energizing yoga poses are different from hard workouts that drain you. Instead they wake up your nervous system in a balanced way so you end up feeling refreshed instead of worn out.

    Mountain Pose

    Mountain Pose appears basic but serves as an effective foundation for developing body awareness and mental focus. Position your feet at hip width with your arms hanging naturally beside you and your spine extended upward. Distribute your weight equally across both feet and gently activate your thigh muscles. Draw your shoulders backward and downward as you reach the top of your head upward. Breathe slowly and deeply while paying attention to how you hold your body. This position enhances body alignment and expands breathing capacity while creating immediate mental clarity. It works well during times when your thoughts feel disorganized or your attention wanders.

    Standing Forward Bend

    Standing Forward Bend provides gentle energy to your body and helps quiet your thoughts. Start from Mountain Pose & bend forward from your hips while letting your head and neck hang loose. You can bend your knees a little if that feels better. Your arms can dangle down or you can grab opposite elbows. This position increases blood circulation to your brain and can improve your focus and mental clarity. The pose also helps release tightness in your neck and shoulders where stress typically builds up & reduces your mental stamina.

    Warrior Two Pose

    Warrior Two develops strength and stamina while improving your ability to concentrate. Start by stepping one foot back to create a wide stance & then bend your front knee as you stretch both arms out to each side. Look straight ahead over your front hand and tighten your core and leg muscles while keeping your shoulders loose. This pose demands physical work and mental concentration which makes it effective for building confidence and maintaining focus. Warrior Two teaches your mind to remain present when facing difficult situations.

    Chair Pose

    Chair Pose works your large muscle groups and helps boost your energy naturally. Start by standing with your feet together & bend your knees like you’re sitting down in a chair. Lift your arms up over your head and keep your chest up. Tighten your core muscles & breathe in a steady rhythm. This position makes your legs stronger and gets your blood flowing better so you feel less tired. Chair Pose also helps you feel more determined & focused so it works well before you start working or studying.

    Cobra Pose

    Cobra Pose is a mild backbend that energizes the spine & expands the chest area. Start by lying face down with your hands positioned beneath your shoulders. Breathe in as you raise your chest from the ground while your hips stay in contact with the floor. Pull your shoulders backward and direct your gaze slightly ahead. This position works against poor posture and enhances your ability to breathe deeply. When you stretch the front side of your body through Cobra Pose you can reduce tiredness and create feelings of increased awareness and drive.

    Tree Pose

    Tree Pose helps develop better balance and coordination while making your mind clearer. Begin by standing upright and moving your weight to one foot. Position the bottom of your other foot against your calf or the inside of your thigh. Put your palms together at chest level or extend them above your head. Look at a fixed spot ahead of you. Balance exercises like Tree Pose require complete focus and reduce mental noise while improving your ability to concentrate. Regular practice of balancing can enhance your attention span during everyday activities.

    How To Practice These Poses For Best Results

    To get the most benefit from these poses you should practice them in a calm and well ventilated space. Focus on slow & steady breathing throughout each movement. Holding each pose for five to ten breaths is enough to feel energized without strain. This sequence can be completed in fifteen to twenty minutes which makes it easy to fit into busy schedules. Morning practice is ideal for setting a focused tone for the day while afternoon sessions can help overcome midday slumps.

    Building A Consistent Energy Boosting Routine

    Regular practice matters more than how hard you push yourself when doing yoga for energy & focus. Brief daily sessions can create real changes in how you feel and think throughout your day. You might notice over time that you need fewer cups of coffee or energy drinks because mindful movement keeps you alert naturally. Yoga teaches you to recognize when stress starts affecting your body so you can rest before you feel completely drained. Making these six basic yoga poses part of your routine helps you build lasting energy and stay focused. You’ll handle your daily work with a calm and clear mindset that feels more sustainable.

  • Body Detox Yoga: 8 Poses That Support Cleansing and Digestive Health

    Body Detox Yoga: 8 Poses That Support Cleansing and Digestive Health

    Detoxifying the body goes beyond food choices—it also involves helping the body release stored toxins, ease mental tension, and improve circulation. Yoga provides an effective way to support detox through a blend of controlled breathing, mindful movement, and targeted poses that activate the body’s natural cleansing systems. Specific yoga postures encourage lymphatic flow, stimulate digestion, boost blood circulation, and help muscles release trapped waste. Below are eight powerful yoga poses that support detoxification while enhancing overall wellness.

    Downward Dog (Adho Mukha Svanasana)

    Downward Dog is a foundational posture that stretches the entire body while promoting healthy circulation and lymphatic movement. Start on your hands and knees, lift your hips upward, and straighten your legs as your body forms an inverted “V.” Press your heels gently toward the floor and hold for 30 seconds to one minute while breathing deeply.

    This pose activates the digestive organs, improves blood flow, and supports lymphatic drainage. The full-body stretch also helps ease tension and assists the body in releasing toxins stored in muscles and connective tissues.

    Twisted Chair Pose (Parivrtta Utkatasana)

    Twisted Chair Pose builds on the traditional Chair Pose by adding a detoxifying spinal twist. Lower into a seated position with bent knees, bring your palms together at your chest, and rotate your torso to one side, placing the opposite elbow against your knee. Hold for 30 seconds before switching sides.

    The twisting action gently massages internal organs, enhances digestion, and encourages the elimination of waste. It also improves spinal mobility while strengthening the legs and core.

    Cobra Pose (Bhujangasana)

    Cobra Pose is a mild backbend that opens the chest and stimulates key detox organs such as the liver and kidneys. Lie on your stomach, place your palms beneath your shoulders, and gently lift your chest while keeping the elbows slightly bent. Hold for 20–30 seconds before lowering down.

    This posture increases blood flow to the abdomen, helping toxins and waste move through the body more efficiently. It also lengthens the spine and enhances overall back flexibility.

    Revolved Triangle Pose (Parivrtta Trikonasana)

    Revolved Triangle Pose is a deep standing twist that supports detox by stimulating digestion and boosting circulation. With legs wide apart, rotate your torso as you hinge forward, placing one hand near your foot and extending the opposite arm upward. Hold for 30 seconds, then change sides.

    This pose helps activate digestive organs, improves nutrient absorption, and encourages toxin release. It also stretches the hamstrings, hips, and back while energizing the body through improved blood flow.

    Seated Forward Fold (Paschimottanasana)

    Seated Forward Fold is a calming posture that supports detox while encouraging deep relaxation. Sit with legs extended, lengthen your spine on an inhale, then fold forward from the hips as you exhale. Hold for 30 seconds to one minute, easing deeper with each breath.

    This pose stimulates the liver and kidneys, aiding the removal of toxins and waste. It also quiets the mind, reduces stress, and improves flexibility in the spine and hamstrings.

    Plow Pose (Halasana)

    Plow Pose is an inversion that increases blood flow to the abdominal area, supporting digestive health. From a lying position, lift your legs overhead and lower them behind your head, keeping them straight. Hold for 20–30 seconds before slowly releasing.

    This posture enhances circulation to internal organs, supports toxin removal, and improves digestion. It also stretches the spine, shoulders, and hamstrings.

    Cat-Cow Pose (Marjaryasana–Bitilasana)

    Cat-Cow is a gentle flowing sequence that mobilizes the spine and stimulates the digestive system. From a tabletop position, alternate between arching the back on inhalation and rounding it on exhalation. Continue for one to two minutes.

    This movement helps massage the organs, encourages lymph movement, and increases circulation. It also releases tension from the spine, neck, and shoulders while improving flexibility.

    Legs Up the Wall (Viparita Karani)

    Legs Up the Wall is a restorative pose that supports detox by promoting lymphatic drainage and calming the nervous system. Lie on your back with your legs extended vertically against a wall, arms relaxed by your sides. Remain here for five to ten minutes.

    This pose aids the return of blood flow to the heart, reduces swelling in the lower body, and promotes deep relaxation, making it ideal for stress relief.

    Key Benefits of Detoxing Through Yoga

    Improved digestion through gentle organ stimulation

    Enhanced lymphatic flow to support toxin removal

    Reduced stress levels that support overall cleansing

    Better circulation for oxygen and nutrient delivery

    Final Thoughts on Yoga-Based Detox

    Yoga is a powerful tool for supporting the body’s natural detox processes while improving digestion and overall wellbeing. Practicing these eight poses regularly can help you feel lighter, energized, and balanced. Focusing on slow, steady breathing during each posture further enhances toxin release and relaxation. With consistent practice, yoga can promote both physical clarity and mental calm while supporting long-term wellness.

  • Build power, strength and endurance with this kettlebell workout using 4 moves in 15 minutes

    Build power, strength and endurance with this kettlebell workout using 4 moves in 15 minutes

    This kettlebell workout is designed for busy people in India who want to build real fitness without spending hours in the gym. Using just four smartly chosen movements, this 15-minute routine blends strength training with cardiovascular effort, helping you develop power, muscular control, and stamina at the same time. Kettlebells are especially effective because they challenge multiple muscle groups in every rep while also improving coordination. Whether you train at home or in a small studio, this short session fits easily into daily life and delivers results that feel practical, energising, and sustainable.

    Kettlebell workout for building full-body power

    This kettlebell workout focuses on explosive movements that train your muscles to generate force quickly. Exercises like swings and cleans recruit the hips, glutes, and core, creating explosive hip drive that translates into better athletic performance. Because the bell moves dynamically, your body must maintain total body tension from start to finish. Over time, this style of training supports functional muscle power that carries over into daily tasks. Short rest periods also elevate the heart rate, improving cardio strength blend without traditional running or cycling. The result is a routine that feels challenging yet efficient, even in a short 15-minute window.

    Using kettlebell training to build strength fast

    Strength gains come from consistent tension and controlled movement, and kettlebell training delivers both. Moves like goblet squats and presses force you to stabilise the weight, encouraging deep core engagement with every repetition. Because one bell is often used at a time, muscles must correct imbalances, supporting joint stability focus. This approach also promotes balanced muscle loading, which can reduce injury risk over the long term. When performed with good form, these exercises stimulate multiple muscle groups simultaneously, leading to efficient strength gains without needing heavy machines or long sessions.

    Endurance benefits from a 15-minute kettlebell routine

    Endurance is not only about long workouts; it is also about sustaining effort under fatigue. This kettlebell routine challenges your ability to keep moving with good form, improving muscular endurance capacity. Timed sets encourage steady breathing control, which helps you manage fatigue more effectively. As your conditioning improves, you will notice heart rate resilience during everyday activities. The continuous flow of movements also trains mental workout focus, teaching you to stay calm and consistent even when muscles start to burn.

    Why this four-move kettlebell workout works

    The real strength of this workout lies in its simplicity. By repeating four well-chosen movements, you reinforce technique while progressively challenging the body. This structure supports time efficient training without sacrificing quality. Because power, strength, and endurance are trained together, you experience well rounded fitness rather than isolated improvements. The short duration also improves consistency, encouraging daily movement habit over occasional long workouts. For many people in India balancing work and family, this kind of routine offers sustainable fitness progress that feels achievable and rewarding.

    Workout Element Purpose Time Allocation
    Kettlebell Swings Power and conditioning 4 minutes
    Goblet Squats Lower-body strength 4 minutes
    Overhead Press Upper-body control 3 minutes
    Farmer Carry Grip and core endurance 4 minutes

    Frequently Asked Questions (FAQs)

    1. Is this kettlebell workout suitable for beginners?

    Yes, beginners can start with a lighter kettlebell and slower pace.

    2. How many times a week should I do this routine?

    It can be performed three to four times per week for balanced results.

    3. Do I need multiple kettlebells for this workout?

    No, one kettlebell with an appropriate weight is enough.

    4. Can this replace longer gym sessions?

    It can complement or temporarily replace longer workouts when time is limited.

  • Build mental and physical stamina at home with this 20-minute morning yoga routine

    Build mental and physical stamina at home with this 20-minute morning yoga routine

    Starting your day with a short yoga practice can make a noticeable difference in how you feel, both mentally and physically. In India, where busy mornings and long workdays are common, a simple 20-minute morning yoga routine at home offers a practical way to build stamina without expensive equipment or gym memberships. This routine focuses on steady movement, mindful breathing, and gentle strength-building so you feel energized rather than exhausted. With regular practice, it supports better focus, improved endurance, and a calmer mindset that carries through the rest of your day.

    How a 20-minute morning yoga routine builds stamina

    A well-structured morning yoga routine is designed to wake up your body gradually while challenging it just enough to grow stronger. Instead of rushing through poses, you move with intention, syncing breath and motion to develop steady energy levels throughout the practice. Holding poses for a few breaths improves muscle endurance, while smooth transitions encourage controlled breathing. Over time, this approach trains your body to stay active without quick fatigue. The mental side matters too, as focusing on alignment and breath builds mental resilience that helps you stay composed during stressful moments later in the day.

    Morning yoga routine benefits for mental stamina

    Mental stamina grows when you repeatedly practice staying present, and morning yoga offers exactly that opportunity. By dedicating just 20 minutes, you create space for clear morning focus before distractions take over. Slow, rhythmic breathing activates the nervous system in a way that reduces anxiety and supports emotional balance. As you hold poses and observe sensations, you train patience and mindful awareness. Many people notice improved decision-making and a calmer response to challenges, thanks to the stress regulation skills developed during these consistent morning sessions.

    Doing a 20-minute yoga routine at home safely

    Practicing yoga at home can be both effective and safe when you keep a few basics in mind. Choose a quiet spot with enough room to stretch and focus on proper body alignment rather than pushing for depth. Start with gentle warm-up movements to avoid strain and aim for joint-friendly movements that suit your flexibility level. Listening to your body helps prevent injury and builds long-term consistency. Over weeks, this steady approach leads to balanced strength gains without overwhelming your muscles or joints.

    Why consistency matters more than intensity

    When it comes to building stamina, showing up daily matters far more than how intense each session feels. A consistent 20-minute routine creates habits that support sustainable energy and reduce burnout. Instead of exhausting yourself, yoga encourages gradual progress through repetition and mindful effort. This steady rhythm helps your body adapt while reinforcing healthy morning habits. Mentally, consistency builds confidence and reinforces positive self-discipline, making it easier to maintain focus and motivation in both personal and professional life.

    Routine Element Purpose Time Allocation
    Warm-up stretches Prepare muscles and joints 5 minutes
    Standing poses Build strength and balance 7 minutes
    Seated or floor poses Improve flexibility and focus 5 minutes
    Breathing and relaxation Calm the mind and recover 3 minutes

    Frequently Asked Questions (FAQs)

    1. Is this 20-minute morning yoga routine suitable for beginners?

    Yes, it can be adapted easily by choosing gentler poses and shorter hold times.

    2. Do I need any special equipment to do this routine at home?

    No, a simple yoga mat and comfortable clothing are enough.

    3. How often should I practice to see stamina improvements?

    Practicing most days of the week brings noticeable results within a few weeks.

    4. Can this routine replace other forms of exercise?

    It supports stamina well but works best alongside light walking or strength training.

  • Safe Ways to Whiten Teeth at Home Without Harsh Strips or Costly Treatments

    Safe Ways to Whiten Teeth at Home Without Harsh Strips or Costly Treatments

    The first thing you notice is the mirror. Not how it hangs slightly crooked in the bathroom or the toothpaste splatter near the edge but how your smile looks a little more tired than you remember. The color is not exactly bad. It just does not match the bright & relaxed grin you see in commercials and on social media. You press your lips together and tilt your head while thinking about those whitening strips in the drugstore aisle. The ones that promise movie-star teeth but leave your gums buzzing and your wallet noticeably lighter. You think about booking a professional treatment and then remember the cost. A quieter question drifts in after that. Is there a gentler way? A way that does not involve harsh chemicals or aching sensitivity or a small panic attack at the dentist’s front desk?

    The American Obsession with White Teeth (And Why Yours Don’t Look “Perfect”)

    In the United States, teeth have become tiny billboards for identity. A bright smile is often read as a signal of health, success, confidence, and self-control. It quietly suggests, “I have my life together.” Meanwhile, daily life sends a very different message. Coffee in the morning, soda in the afternoon, wine at night, stress, aging, and time all leave their mark. The result is a gap between what people expect their teeth to look like and what most natural teeth actually look like.

    Most Americans do not have naturally glowing, paper-white teeth. The ultra-bright shades seen in advertisements are usually the result of bleaching, lighting tricks, and digital editing. Real teeth are typically off-white, with hints of yellow or grey. Enamel, the outer layer of the tooth, is slightly translucent, and beneath it lies dentin, which has a natural yellow tone. As enamel wears down with age and use, that dentin becomes more visible, making teeth appear darker over time.

    Why Teeth Change Color Over Time

    When people ask why their teeth look yellow, the answer is often very simple: life. Morning coffee before work, iced tea with lunch, red wine with friends, and deeply colored foods like berries, tomato sauce, and soy sauce all leave behind pigments. These stains don’t appear overnight. They settle slowly, building layer by layer, much like rings in a tree. Missed brushing sessions, rushed routines, and inconsistent flossing allow those pigments to cling even more easily.

    The encouraging news is that brightening your smile does not require harsh strips, painful lasers, or aggressive treatments. There are gentler, safer ways to improve the appearance of your teeth at home. These methods focus on patience, consistency, and respect for your enamel rather than chasing instant, extreme results.

    What “Safe” At-Home Whitening Really Means

    Before exploring whitening methods, it’s important to understand what safety actually means for your teeth. Enamel does not grow back. Once it is worn away or damaged, it is gone for good. Many aggressive whitening products rely on strong peroxide concentrations or abrasive particles that strip away surface stains along with healthy enamel. Over time, this can lead to sensitivity, gum irritation, micro-cracks, and an uneven, chalky appearance.

    Safe at-home whitening rests on three core ideas. First, protect your enamel by avoiding products that feel gritty, overly acidic, or painfully strong. If something burns or causes sharp sensitivity, it is not gentle care. Second, respect your gums, because healthy gums frame your smile and make teeth look better regardless of color. Third, practice patience. Slow, gradual brightening is far more sustainable than fast, dramatic changes that come at a cost.

    Daily Habit Effect on Whiteness How Gentle Is It?
    Brushing 2x/day with soft brush Prevents new stains, removes surface buildup Very gentle when done with light pressure
    Daily flossing Brightens between teeth, supports gum health Gentle if you avoid snapping into gums
    Rinsing with water after coffee/tea Reduces stain particles sticking to enamel Extremely gentle
    Using mild whitening toothpaste Gradual brightening over weeks Gentle if not overly abrasive

    Daily Habits That Naturally Brighten Your Smile

    Whitening does not begin with a product; it begins with habit. Brushing twice a day for two full minutes with a soft-bristled toothbrush is the foundation. Gentle circular motions along the gumline are far more effective than scrubbing hard. Brushing aggressively does not whiten faster; it simply wears down enamel.

    Using a mild whitening toothpaste can help lift surface stains without causing damage. Look for formulas with low levels of peroxide or gentle polishing agents. If sensitivity is an issue, alternate between regular fluoride toothpaste and whitening toothpaste. Daily flossing is equally important, as stains and plaque build up between teeth as well. Cleaner surfaces reflect light better, making teeth appear brighter even without active whitening.

    Simple Habits That Reduce New Stains

    If you enjoy coffee, tea, or red wine, rinsing your mouth with plain water afterward can make a noticeable difference. A quick swish for 10 to 20 seconds helps wash away pigments before they settle into enamel. This small habit does not erase existing stains, but it significantly slows the buildup of new ones.

    These habits work quietly in the background. Over time, they create a cleaner, healthier foundation that allows any whitening effort to be more effective and more comfortable.

    Gentle Home Rituals That Support Whitening

    Discussions about natural whitening often drift toward extremes, such as daily baking soda scrubs, lemon juice rinses, or abrasive charcoal powders. While these may feel effective in the moment, they can slowly damage enamel. Gentler home practices work best as supportive rituals, not aggressive treatments.

    Oil pulling is one such option. Swishing a small amount of coconut or sesame oil for five to ten minutes can help reduce plaque and leave the mouth feeling cleaner. It does not bleach teeth, but by removing buildup near the gumline, it can make teeth appear slightly brighter. Baking soda can also help when used sparingly. Limiting it to once a week, using a very thin paste, and brushing gently helps minimize abrasion.

    Using Peroxide Products the Smart Way

    Not all peroxide-based products are the same. Low-concentration options such as whitening toothpaste, gentle mouth rinses, or paint-on pens can gradually brighten teeth without excessive sensitivity. These products work slowly, often showing subtle results after one to two weeks and more visible improvement after consistent use over a month.

    It is important not to overload your routine. Using multiple strong products at the same time increases the risk of sensitivity and gum irritation. Following instructions carefully and listening to your body are essential. If your teeth begin to feel sharp, achy, or overly sensitive, scaling back is a sign of wisdom, not failure.

    Building a Balanced Whitening Routine

    A safe whitening routine works best when it is layered thoughtfully. Morning brushing with regular fluoride toothpaste, rinsing with water after dark beverages, and evening brushing with a mild whitening toothpaste can be enough for many people. Adding a low-strength whitening rinse a few times a week provides an extra boost without overwhelming your teeth.

    This balanced approach avoids harsh treatments while still creating noticeable improvement. Over time, teeth often look cleaner, brighter, and healthier, without the discomfort that comes from aggressive whitening.

    How Food Choices Affect Tooth Color

    Certain foods can actually support a brighter smile. Crunchy fruits and vegetables like apples, celery, and carrots stimulate saliva and gently scrub tooth surfaces as you chew. Dairy products such as cheese and yogurt provide calcium and phosphates that help strengthen enamel, improving how teeth reflect light.

    Water plays a powerful supporting role. Drinking it during meals helps rinse away pigments before they settle. You do not need to eliminate coffee or wine completely. Simple strategies, such as using a straw, drinking beverages in shorter time frames, and alternating with water, allow enjoyment without excessive staining.

    When At-Home Whitening Has Limits

    Not all discoloration can be addressed at home. Teeth that appear grey, have deep internal stains, or show uneven color due to trauma or medication may not respond to surface whitening. In these cases, pushing harder with DIY methods often leads to damage rather than improvement.

    A dental checkup is important if one tooth is noticeably darker, if sensitivity is persistent, or if there are visible spots or cracks. Sometimes focusing on dental health rather than color produces the most attractive result. A healthy, slightly off-white smile often looks better than an overly bleached one with irritated gums.

    Redefining What a “White” Smile Means

    There is relief in letting go of unrealistic standards. The blindingly white smiles in advertisements are often enhanced by editing and lighting. Natural teeth have warmth and variation. Wanting them to look cleaner and brighter does not mean erasing their history; it means caring for them thoughtfully.

    Safe home whitening is about removing the film of daily life, protecting enamel, and supporting gum health. With gentle care over time, your smile can look fresher and more confident without pain or extremes. The goal is not perfection, but comfort and confidence in the smile you already have.

  • Women Swear by Banana and Milk Face Mask for Wrinkle-Free Skin After 30

    Women Swear by Banana and Milk Face Mask for Wrinkle-Free Skin After 30

    Across India, women over 30 are turning to simple kitchen remedies to maintain youthful skin, and the banana and milk face mask is one of the most trusted options. As fine lines, dryness, and dullness begin to show with age, this natural blend is praised for being gentle, affordable, and easy to prepare at home. Instead of relying only on expensive creams, many women swear by this age-old mask for supporting skin elasticity and softness. Its popularity continues to grow because it fits seamlessly into busy routines while still delivering visible, nourishing care.

    Banana and Milk Face Mask Benefits for Aging Skin

    The banana and milk face mask is valued because it targets common skin concerns after 30 in a natural way. Banana is rich in vitamins that help maintain skin elasticity support and improve overall texture. Milk adds gentle nourishment that contributes to deep moisture care without feeling heavy on the skin. Together, they create a mask that encourages natural glow boost and smoother-looking skin over time. Women often notice that regular use helps soften the appearance of fine lines while keeping the face supple. This combination works best when applied consistently, allowing the skin to absorb nutrients slowly and steadily.

    How Banana and Milk Face Mask Reduces Wrinkles After 30

    As skin matures, it loses hydration and firmness, which makes wrinkles more noticeable. The banana and milk face mask helps counter this by offering gentle wrinkle care that supports the skin barrier. Banana contains antioxidants that assist with age defense nutrients, while milk provides lactic elements known for mild exfoliation help. This process removes dull surface cells and encourages fresher-looking skin. Women over 30 often prefer this mask because it feels soothing and does not irritate sensitive skin. With regular weekly use, the face appears smoother and more refreshed.

    Using Banana and Milk Face Mask Safely at Home

    Preparing this mask at home is simple, but proper use matters for the best results. Always start with a ripe banana and fresh milk to ensure clean ingredient choice. Mash and mix until smooth, then apply on a clean face for about 15 minutes. This routine supports weekly skin ritual and avoids overuse. Women with sensitive skin should do a patch test to ensure irritation free care. Rinsing with lukewarm water helps lock in softness and leaves the skin feeling calm and hydrated.

    Why Women Over 30 Trust This Natural Face Mask

    Many women prefer the banana and milk face mask because it aligns with a simple, mindful skincare approach. It supports balanced skin health without harsh chemicals and fits easily into weekly routines. Over time, users report improved softness, better hydration, and a more even appearance, contributing to confidence through care. While it is not an instant fix, consistent use encourages long term results that feel natural. This is why the mask remains popular among women seeking gentle yet effective solutions after 30.

    Aspect Details
    Suitable Age 30 years and above
    Main Ingredients Ripe banana and fresh milk
    Usage Frequency Once or twice a week
    Key Benefit Hydration and wrinkle support
    Skin Type Normal to dry skin

    Frequently Asked Questions (FAQs)

    1. Is the banana and milk face mask suitable for all skin types?

    It works best for normal to dry skin, while sensitive skin users should patch test first.

    2. How often should women over 30 use this face mask?

    Using it once or twice a week is enough for visible softness and hydration.

    3. Can this mask completely remove wrinkles?

    It helps soften the appearance of wrinkles but does not permanently remove them.

    4. Should the mask be followed with moisturizer?

    Yes, applying a light moisturizer afterward helps seal in hydration.

  • How Using Honey and Lemon on Your Face Daily Can Make You Look 5 Years Younger Naturally

    How Using Honey and Lemon on Your Face Daily Can Make You Look 5 Years Younger Naturally

    Natural skincare trends are gaining massive attention in India as people look for affordable, chemical-free ways to slow visible ageing. One routine that keeps resurfacing is the daily use of honey and lemon on the face. This simple kitchen-based combination is often praised for improving skin texture, brightness, and firmness over time. When used correctly, it fits easily into a morning or evening routine without expensive products. Many users claim it helps them look visibly younger by improving overall skin health naturally, especially in humid and polluted environments common across Indian cities.

    How Honey and Lemon for Face Works as a Natural Anti-Ageing Routine

    Honey and lemon work together in a surprisingly balanced way when applied to the skin. Honey acts as a natural humectant, drawing moisture deep into the skin and supporting skin hydration balance. Lemon, when diluted, gently exfoliates dead skin cells and promotes natural glow boost. Over time, this combination supports smooth texture feel and helps reduce the look of tired, dull skin. People who use it consistently often notice fresh looking skin because pores appear cleaner and skin tone becomes more even. The key is moderation, as lemon should never be used in excess.

    Daily Honey and Lemon Face Application Benefits for Youthful Skin

    Using honey and lemon daily can slowly improve how your skin behaves and responds to environmental stress. Honey supports the skin barrier, which helps maintain soft skin surface throughout the day. Lemon’s mild acidic nature encourages gentle cell renewal without harsh scrubs. Together, they may help reduce the appearance of fine lines by supporting elastic skin feel. Many users report a brighter morning face after a few weeks of consistent use, especially when combined with sunscreen during the day. The results are gradual but often long-lasting.

    Why This Honey Lemon Face Hack Is Popular for Looking Younger Naturally

    The popularity of this routine comes from its simplicity and accessibility. Honey is rich in antioxidants that help fight early ageing signs, while lemon supports clear skin appearance when used carefully. Unlike harsh treatments, this method encourages natural skin repair over time. People appreciate that it delivers visible freshness effect without expensive salon visits. In warmer climates, the light texture of honey also feels comfortable on the skin. The key reason it works is consistency paired with proper dilution and sun protection.

    Summary or Analysis

    Using honey and lemon on your face daily is not a miracle cure, but it can be a supportive habit for healthier-looking skin. When practiced responsibly, it helps maintain moisture, improve brightness, and support long term skin care. The routine encourages simple beauty habits rather than aggressive treatments. Over weeks, many users notice balanced skin tone and improved confidence. For best results, it should be combined with sunscreen, hydration, and a healthy lifestyle. Natural remedies work best when treated as supportive care, not instant fixes.

    Aspect Honey and Lemon Effect
    Skin Hydration Helps retain moisture naturally
    Skin Brightness Improves dull appearance over time
    Texture Improvement Smoother feel with regular use
    Anti-Ageing Support Reduces visible tiredness signs
    Cost Low-cost, home-based routine

    Frequently Asked Questions (FAQs)

    1. Can honey and lemon be used on all skin types?

    It suits most skin types, but sensitive skin users should patch test first.

    2. How often should this face pack be applied?

    Once daily or on alternate days is enough for safe results.

    3. Can I go out in the sun after applying lemon on my face?

    It’s best to use it at night or apply sunscreen during the day.

    4. How long does it take to see visible results?

    Most people notice subtle improvements within two to four weeks.