Category: News

  • How Using Honey and Lemon on Your Face Daily Can Make You Look 5 Years Younger Naturally

    How Using Honey and Lemon on Your Face Daily Can Make You Look 5 Years Younger Naturally

    Natural skincare trends are gaining massive attention in India as people look for affordable, chemical-free ways to slow visible ageing. One routine that keeps resurfacing is the daily use of honey and lemon on the face. This simple kitchen-based combination is often praised for improving skin texture, brightness, and firmness over time. When used correctly, it fits easily into a morning or evening routine without expensive products. Many users claim it helps them look visibly younger by improving overall skin health naturally, especially in humid and polluted environments common across Indian cities.

    How Honey and Lemon for Face Works as a Natural Anti-Ageing Routine

    Honey and lemon work together in a surprisingly balanced way when applied to the skin. Honey acts as a natural humectant, drawing moisture deep into the skin and supporting skin hydration balance. Lemon, when diluted, gently exfoliates dead skin cells and promotes natural glow boost. Over time, this combination supports smooth texture feel and helps reduce the look of tired, dull skin. People who use it consistently often notice fresh looking skin because pores appear cleaner and skin tone becomes more even. The key is moderation, as lemon should never be used in excess.

    Daily Honey and Lemon Face Application Benefits for Youthful Skin

    Using honey and lemon daily can slowly improve how your skin behaves and responds to environmental stress. Honey supports the skin barrier, which helps maintain soft skin surface throughout the day. Lemon’s mild acidic nature encourages gentle cell renewal without harsh scrubs. Together, they may help reduce the appearance of fine lines by supporting elastic skin feel. Many users report a brighter morning face after a few weeks of consistent use, especially when combined with sunscreen during the day. The results are gradual but often long-lasting.

    Why This Honey Lemon Face Hack Is Popular for Looking Younger Naturally

    The popularity of this routine comes from its simplicity and accessibility. Honey is rich in antioxidants that help fight early ageing signs, while lemon supports clear skin appearance when used carefully. Unlike harsh treatments, this method encourages natural skin repair over time. People appreciate that it delivers visible freshness effect without expensive salon visits. In warmer climates, the light texture of honey also feels comfortable on the skin. The key reason it works is consistency paired with proper dilution and sun protection.

    Summary or Analysis

    Using honey and lemon on your face daily is not a miracle cure, but it can be a supportive habit for healthier-looking skin. When practiced responsibly, it helps maintain moisture, improve brightness, and support long term skin care. The routine encourages simple beauty habits rather than aggressive treatments. Over weeks, many users notice balanced skin tone and improved confidence. For best results, it should be combined with sunscreen, hydration, and a healthy lifestyle. Natural remedies work best when treated as supportive care, not instant fixes.

    Aspect Honey and Lemon Effect
    Skin Hydration Helps retain moisture naturally
    Skin Brightness Improves dull appearance over time
    Texture Improvement Smoother feel with regular use
    Anti-Ageing Support Reduces visible tiredness signs
    Cost Low-cost, home-based routine

    Frequently Asked Questions (FAQs)

    1. Can honey and lemon be used on all skin types?

    It suits most skin types, but sensitive skin users should patch test first.

    2. How often should this face pack be applied?

    Once daily or on alternate days is enough for safe results.

    3. Can I go out in the sun after applying lemon on my face?

    It’s best to use it at night or apply sunscreen during the day.

    4. How long does it take to see visible results?

    Most people notice subtle improvements within two to four weeks.

  • This Turmeric and Milk Face Pack for Girls Is Secretly Used for Natural Glow Before Events

    This Turmeric and Milk Face Pack for Girls Is Secretly Used for Natural Glow Before Events

    This turmeric and milk face pack has quietly remained a go-to beauty ritual for girls across India, especially before weddings, festivals, and important celebrations. Rooted in traditional skincare wisdom, this simple homemade remedy is trusted for delivering a natural glow without harsh chemicals. With easy-to-find kitchen ingredients, it fits perfectly into pre-event beauty routines for those who want clear, radiant skin. From college students to brides-to-be, many rely on this age-old combination to prep their face naturally, safely, and affordably before stepping into the spotlight.

    Why Turmeric and Milk Face Pack Works for Natural Glow

    The magic of this face pack lies in how turmeric and milk complement each other on the skin. Turmeric is known for its antibacterial nature, while milk gently nourishes and softens. When combined, they help improve skin clarity and tone without irritation. Girls often notice instant brightness effect after use, making it popular before events. The pack supports even skin tone and encourages healthy skin barrier by reducing dryness. With regular use, it can support natural radiance boost while keeping the skin calm and refreshed.

    How Girls Use Turmeric Milk Face Pack Before Events

    Before events, many girls apply this face pack in the evening to let their skin rest overnight. A small pinch of turmeric mixed with raw milk is enough to cover the face evenly. The pack is left on for 10–15 minutes and washed off gently. This routine supports pre-event skin prep and allows the skin to absorb nutrients slowly. Users love it for its chemical-free skincare approach and gentle exfoliation support. Over time, it contributes to soft glowing skin without causing sensitivity.

    Best Skin Types for Turmeric and Milk Face Pack

    This face pack suits most skin types, but it is especially favored by those with normal to dry skin. Milk helps moisturize, while turmeric keeps breakouts under control. Girls with combination skin often use it once a week for balance. It is valued for oil control balance and calming skin care benefits. Those preparing for special occasions trust it for event-ready glow without heavy products. A patch test is always wise to ensure safe natural remedy results for sensitive skin.

    Why This Face Pack Remains a Pre-Event Secret

    Despite the rise of expensive beauty treatments, this turmeric and milk face pack remains quietly popular because it delivers reliable results. Girls appreciate how it fits into busy schedules and supports long-term skin health. Its appeal lies in traditional beauty wisdom combined with simple home routine. Unlike instant makeup fixes, it focuses on skin health first, which shows naturally during events. For many, this pack represents trusted glow solution that works without stress, cost, or complicated steps.

    Aspect Details
    Main Ingredients Turmeric powder and raw milk
    Recommended Use 1–2 times per week
    Application Time 10–15 minutes
    Best For Pre-event natural glow
    Skin Types Normal, dry, combination

    Frequently Asked Questions (FAQs)

    1. Can this face pack be used daily?

    No, using it 1–2 times a week is sufficient.

    2. Is turmeric safe for sensitive skin?

    A patch test is recommended before full application.

    3. Will turmeric stain the skin yellow?

    Using a small amount prevents staining.

    4. Can this replace event-day makeup?

    It enhances natural glow but does not replace makeup.

  • Men Are Rubbing Coconut Oil on Their Beard Before Bed — The Results Are Going Viral

    Men Are Rubbing Coconut Oil on Their Beard Before Bed — The Results Are Going Viral

    Across India and beyond, a simple nighttime grooming habit is catching attention online: men are rubbing coconut oil into their beard before bed. What started as a traditional practice has now gone viral, with men sharing before-and-after results that look noticeably healthier and fuller. Coconut oil is widely available in Indian households, making this trend easy to try without expensive products. Supporters say the overnight application allows nutrients to sink in deeply, helping beards feel softer by morning and look more manageable over time.

    Why Men Are Using Coconut Oil on Their Beard at Night

    Many men turn to coconut oil because it fits naturally into a simple routine and feels familiar. Applied before sleeping, the oil has hours to work without exposure to sun or pollution. Users often mention deep overnight hydration, natural fatty acids, and scalp-like nourishment as key reasons for sticking with the habit. Coconut oil helps reduce dryness around the beard area, which can otherwise lead to irritation. Over time, men notice softer beard texture and easier morning grooming. The ritual itself also encourages consistency, which is crucial for visible results. In India’s varied climate, this nightly care helps protect beard hair from daily environmental stress.

    Viral Beard Results Linked to Coconut Oil Application

    Social media clips and personal posts show why the trend is spreading fast. Men report beards looking denser and feeling healthier after a few weeks of regular use. Commonly cited benefits include reduced beard itch, improved natural shine, and less breakage. Because coconut oil coats the hair shaft, it can help lock in moisture overnight. Some men also feel their beard grows more evenly, though results vary. The visible change often comes from improved hair condition rather than sudden growth, leading to healthier beard appearance that photographs well and fuels the viral buzz.

    How to Apply Coconut Oil to Beard Before Bed

    Getting the method right matters for the best outcome. Men usually warm a few drops between their palms before massaging it into the beard and skin underneath. This helps with better oil absorption and avoids a greasy feel. Gentle circular motions support skin barrier repair and spread the oil evenly. It’s advised to use only a small amount to prevent clogged pores. Washing the beard in the morning removes residue while keeping benefits intact. With patience and consistency, many notice overnight moisture lock and smoother styling during the day.

    Summary and Beard Care Takeaway

    The viral coconut oil beard trend highlights how simple habits can deliver noticeable grooming improvements. In India, where coconut oil is affordable and trusted, men are rediscovering its value for beard care. The key lies in consistent nightly use, minimal product routine, and understanding that results come from healthier hair, not instant miracles. While outcomes differ by individual, most users appreciate the softer feel and reduced irritation. As trends come and go, this one stands out for its practicality and long-standing cultural roots.

    Aspect Details
    Best Time Before bedtime
    Oil Quantity 3–5 drops
    Visible Results 2–4 weeks
    Main Benefit Softer, hydrated beard
    Suitable Skin Normal to dry skin

    Frequently Asked Questions (FAQs)

    1. Can coconut oil help beard growth?

    It supports healthier hair but does not directly increase growth speed.

    2. Is it safe to use coconut oil daily on beard?

    Yes, using a small amount daily is generally safe for most men.

    3. Should the oil be washed off in the morning?

    Yes, rinsing or washing helps remove excess oil and prevent buildup.

    4. Does this work for patchy beards?

    It can improve hair condition, but patchiness depends on genetics.

  • The Hotel Cleaning Trick That Makes Shower Screens Look Brand New Again

    The Hotel Cleaning Trick That Makes Shower Screens Look Brand New Again

    Most people only tackle the shower when limescale buildup and soap residue become impossible to overlook. Yet hotels somehow keep glass panels crystal clear day after day. The reason lies in how showers naturally combine hot water, cleaning products, and humidity. Minerals in hard water cling to glass, while shampoos and gels leave behind a greasy film. Warm, trapped air then creates the perfect environment for mold growth and bacteria, leading to dull glass and dark marks.

    Because the shower is associated with cleanliness, it’s easy to miss how quickly it becomes one of the dirtiest zones in a home. Hygiene studies often place the shower area among the most contaminated indoor spaces. Mold usually starts as tiny grey or black dots around seals and grout. Left unchecked, these spread into stubborn stains that can affect airways, trigger allergies, and even make surfaces slippery.

    Unpleasant smells follow soon after. A constant damp film on glass and joints traps odours, even with occasional cleaning. This is where hotel routines stand out: they remove residue early, before it has time to harden or spread.

    The simple hotel secret: melamine foam sponges

    Instead of harsh chemicals, many hotel cleaning teams rely on a melamine foam sponge, commonly sold as a magic eraser. This low-cost tool restores glass panels between guests without strong smells or heavy scrubbing. It works on more than just glass, making it a staple in professional housekeeping.

    How melamine foam cleans without chemicals

    Although it feels soft, melamine foam has a rigid, microscopic structure. When dampened, it acts like ultra-fine sandpaper, removing dirt through mechanical abrasion rather than chemical reactions. This allows it to reach tiny surface grooves that cloths usually miss.

    This unique texture helps lift soap film, mineral deposits, and fingerprints from glass, plastic, and ceramic surfaces. Instead of spreading grime, the sponge gently sands it away, leaving surfaces visibly clearer with minimal effort.

    How to clean your shower like a hotel

    You can easily copy the hotel approach at home by following a short, efficient routine:

    • Rinse the glass with warm water to loosen surface dirt.
    • Cut the melamine sponge into smaller pieces for better control.
    • Dampen the sponge with clean water until it feels moist, not soaked.
    • Wipe the glass using light pressure in straight strokes.
    • Pay attention to dull patches and white streaks caused by limescale.
    • Rinse thoroughly to remove residue.
    • Dry with a microfiber cloth or squeegee for a streak-free finish.

    Most hotels avoid strong acidic cleaners unless scale is severe. Using melamine foam speeds up cleaning while keeping chemical odours low, which guests generally prefer.

    Surfaces to treat carefully with melamine foam

    Because melamine foam is mildly abrasive, it works well on many surfaces but not all. Understanding its limits prevents damage.

    • Tempered glass: Safe in most cases with gentle pressure.
    • Ceramic tiles: Effective for soap scum and light scale.
    • Acrylic panels: Use cautiously; test first for scratches.
    • Painted walls: Risky, as it may dull or remove paint.
    • Metal fittings: Limited use; avoid delicate coatings.

    Always test a small, hidden area first. If the surface dulls, switch to a softer option like a microfiber cloth with diluted vinegar.

    Daily habits hotels use to keep showers fresh

    The sponge handles buildup, but hotels rely on consistent routines to keep showers looking new. Short, repeated actions focus on moisture control rather than infrequent deep cleans.

    Managing moisture makes the biggest difference

    After cleaning, hotel staff remove steam quickly by opening doors, windows, or running fans. At home, leaving the shower door slightly open and ventilating the bathroom helps moisture escape. A quick pass with a squeegee takes under a minute and slows both scale formation and mold spread.

    When water doesn’t linger on glass, fewer minerals bond to the surface. This means less scrubbing, fewer chemicals, and clearer panels over time.

    Easy hotel-style rules you can follow daily

    • Squeegee glass and tiles after the last shower of the day.
    • Run the bathroom fan for 15–20 minutes after use.
    • Wipe seals and corners weekly with mild detergent.
    • Switch to low-residue shower products if buildup is frequent.

    These small habits reduce the need for harsh cleaners later. Hotels use them because they save time and extend the life of fixtures.

    Extra home tricks that complement the hotel method

    For tougher scale, pairing melamine foam with common household items can be effective.

    Using vinegar and baking soda for stubborn buildup

    In areas with very hard water, chalky deposits may appear near taps or along the base of glass panels. A simple approach works well:

    • Spray white vinegar on the scale and leave it for 10–15 minutes.
    • Wipe gently, then finish with a damp melamine sponge.
    • For grout, apply a baking soda paste with a toothbrush and rinse.

    This method tackles heavy buildup while limiting exposure to strong acids.

    Health, safety, and sustainability considerations

    Shower cleaning sits at the intersection of hygiene, air quality, and environmental impact. Strong cleaners often release lingering fumes in small bathrooms. Hotels deal with this daily, which is why many prefer low-odour methods that rely on physical cleaning rather than aggressive chemicals.

    At home, the same approach reduces the number of specialised products under the sink. While melamine foam does wear down with use, it often replaces multiple bottled cleaners. Combined with basic ventilation and simple acids like vinegar, it supports a more balanced routine.

    The key is moderation. Because the sponge gently abrades surfaces, reserve it for visible deposits and use a soft microfiber cloth for daily wipe-downs. Adopting a professional mindset — a minute of drying daily and a short refresh every few weeks — keeps your bathroom looking hotel-ready without exhausting cleaning sessions.

  • Skip push-ups and try this 25-minute standing workout for abs and arms

    Skip push-ups and try this 25-minute standing workout for abs and arms

    I recently welcomed my first baby, and one of the biggest surprises of pregnancy was how much strength I lost. Even though I kept up a consistent gym routine throughout all nine months, I noticed significant weakness in my upper body and core once I returned to exercise after giving birth.

    With a newborn at home, finding time to work out hasn’t been easy. Most of my training now happens at home during nap times or after bedtime. While scrolling through YouTube one evening for ideas, I came across certified trainer Lindsey Bomgren, also known as Nourishmovelove, and her 25-minute standing arms and abs workout.

    The workout title proudly highlights “no push-ups,” which immediately caught my attention. Push-ups have been particularly tough for me since pregnancy, so skipping them felt like a major plus. I grabbed my dumbbells and decided to give Bomgren’s routine a try.

    How to do Lindsey Bomgren’s 25-minute standing arms and abs workout

    Bomgren demonstrates the workout using several sets of dumbbells, ranging from 15 to 25 pounds. My options were more limited, so I worked with 10- and 15-pound dumbbells, and later switched to 3-pound weights when needed.

    The session starts with a four-minute warm-up, followed by five supersets. Each superset pairs one arm exercise with one abdominal movement. Exercises are performed for 40 seconds, followed by 15 seconds of rest. Each superset is completed twice before moving on. The workout finishes with a two-minute cool-down.

    Exercises included in the workout

    • Back flye
    • Single-arm row
    • Lateral raises
    • Dumbbell chop
    • Bicep curls
    • Squat with standing crunch
    • Standing chest fly
    • Dumbbell press out

    My experience with the standing arms and abs routine

    The warm-up felt purposeful and effective

    I appreciate when workouts include a proper warm-up, especially since I’ve skipped them in the past to save time. Many warm-ups tend to feel generic, but this one was different.

    Bomgren uses targeted mobility movements that prepare the shoulders, chest, obliques, and forearms, all of which are heavily involved throughout the workout. My shoulders are usually very tight, and taking the time to warm them up made a noticeable difference. I avoided my usual discomfort and felt I had better range of motion during the flyes and lateral raises.

    If you’re short on time, this is one warm-up that’s worth sticking with.

    Clear cues and exercise modifications stood out

    Many online workouts rely solely on music, with little verbal guidance from the instructor. While that works for experienced exercisers, it can be challenging for beginners.

    Bomgren provides consistent verbal cues throughout the session and includes a second instructor demonstrating modified versions of the exercises. Even though I was familiar with the movements, her cues helped me adjust my form at several points.

    This combination of guidance and modifications makes the workout approachable for a wide range of fitness levels. While complete beginners or those with specific mobility limitations may need to be cautious, most people should find it manageable.

    I needed to reduce my dumbbell weight

    Bomgren mentions that moves like lateral raises become harder as the weight moves farther from the body. That advice proved accurate.

    With flyes and lateral raises programmed back-to-back, fatigue set in quickly during the second round. My shoulders were burning and my neck started to tighten, so I swapped my 10-pound dumbbells for a much lighter 3-pound set.

    Even with lighter weights, the burn was still there by the end of the superset. Having a few lighter options on hand can be helpful.

    Repeating supersets worked well

    There are plenty of no-repeat workouts designed to keep things feeling fresh, but I don’t mind repeating exercises.

    Completing each superset twice felt ideal. The first round helped me get comfortable with the movements, and the second allowed me to refine my form and really push toward muscle fatigue. That’s something I rarely experience in workouts that constantly switch exercises.

    Despite the repetition, the workout maintains a steady pace and never feels overly repetitive.

  • Skip rucking and try the farmer’s walk to strengthen your entire body

    Skip rucking and try the farmer’s walk to strengthen your entire body

    Rucking has gained serious momentum recently. It’s based on walking or hiking while carrying extra weight, usually in a backpack or vest, using whatever heavy items are available — water bottles, dumbbells, bricks, or purpose-built gear.

    But here’s something worth asking: have you tried the farmer’s walk yet?

    You might not travel as far, but this movement delivers an intense, functional workout that can be done almost anywhere. If you haven’t tested it yet, let’s take a closer look at why the farmer’s walk could be the upgrade your weighted walking routine needs.

    Is the Farmer’s Walk Really Just Walking With Weights?

    In simple terms, yes — but the execution and impact go far beyond that. The farmer’s walk is a functional exercise that recruits nearly every major muscle group. You grip a trap bar or a pair of heavy weights and walk, choosing your own route and distance.

    Anyone familiar with Hyrox-style training will recognize how demanding weighted walking can be for both cardiovascular fitness and strength. You’ll feel the work most in your shoulders, arms, core, and grip — and that’s no drawback. Grip strength plays a vital role in long-term physical resilience.

    This movement mirrors everyday tasks like carrying groceries or heavy bags, making it practical as well as challenging.

    How the Farmer’s Carry Builds Strength and Conditioning

    Also known as the farmer’s carry, this technique is a compound exercise that activates multiple muscle groups at once. Performed with good form, it can enhance posture while building strength and muscle.

    You can adjust the stimulus depending on your goal. Lighter loads with faster movement support cardiovascular fitness, while heavier weights at a slower pace push strength, grip, and endurance.

    You’re free to vary the terrain too. Flat paths, hills, or stairs all change the challenge. Inclines place extra demand on the quads, glutes, and hamstrings while raising cardiovascular intensity. Higher effort over shorter periods can deliver strong results without long distances.

    What the Farmer’s Walk Trains Across Your Body

    Very few muscles escape the workload. The movement targets the biceps, triceps, shoulders, upper and lower back, core, hips, and legs. Under heavy loads, even the chest becomes involved.

    Loading exercises like weighted walking also support bone density and joint strength, helping maintain muscle, ligaments, and connective tissue as you age. This can contribute to longevity and help counter conditions such as osteoporosis.

    The farmer’s walk blends isometric work — where muscles like the core and shoulders stay braced — with isotonic movement in the legs. Research has even shown muscle activation patterns similar to deadlifts, but with less strain on the lower back.

    How to Perform the Farmer’s Walk

    You can carry one weight or two, depending on the variation you choose. Single-sided carries challenge balance, coordination, and stability, while carrying two weights allows for heavier loading.

    Dumbbells work well, but kettlebells and trap bars are equally effective. All you need is enough space to walk safely while maintaining control.

    Farmer’s Walk Technique Tips

    • Actively brace your muscles, especially the core and glutes, to support your lower back.
    • Draw your shoulder blades back and down to avoid rounding and to engage your lats.
    • Stand tall and maintain a neutral spine without over-arching.
    • Grip the weights firmly, wrapping your thumbs fully and keeping forearms engaged.
    • Use shorter, quicker steps to reduce strain and improve control.

    How Long Should You Do the Farmer’s Walk?

    The farmer’s walk fits easily into strength sessions, conditioning workouts, or walking routines. You can program it by distance, step count, or timed intervals with rest.

    Some people aim to accumulate as much distance as possible over multiple sets, while others work against a time limit or even turn it into a friendly race. Interval formats, such as short work periods with brief rest, also work well.

    Regardless of how you structure it, proper form matters. The rotator cuff muscles, along with the rhomboids and serratus anterior, stabilize the shoulders and support posture during loaded carries.

    If your shoulders begin to roll forward, certain muscles may overwork while others disengage, leading to imbalance and tension. Keep your posture upright, reduce the weight if needed, and stop the set if your form starts to break down.

  • Goodbye hair dyes: the new trend that covers grey hair and helps you look younger

    Goodbye hair dyes: the new trend that covers grey hair and helps you look younger

    The woman looking back from the mirror doesn’t seem old at all. Her skin still glows, her eyes remain alert, and her smile feels unchanged from her twenties. Yet the first thought that crosses her mind is simple: those roots need attention. On the bathroom shelf, three half-used hair dye boxes sit quietly, like evidence of a routine she’s no longer sure she wants to maintain.

    As she scrolls through her phone, a video stops her thumb. A woman her age appears on screen, her silver strands softly woven into a warm chestnut base. No sharp regrowth line. No obvious sign of a missed appointment. Just hair that looks vibrant and natural, even younger, without trying to rewind time. A comment underneath reads, “I stopped dyeing and somehow look fresher. How did this happen?”

    The subtle shift away from full-coverage colour

    Across salons in London, New York, and Paris, colourists are hearing the same request again and again. Fewer women want to “cover everything.” More are asking, “Can we blend my greys so they look intentional?” It sounds minor, but it changes the entire approach.

    Instead of a stark root line reappearing every few weeks, colour now fades gently from deeper tones into softer light. Grey stops being something to fight and becomes part of the overall design. Hair appears lighter, less rigid, less helmet-like. And the face? It suddenly looks more open, more rested.

    A salon moment that changes perspective

    On a quiet Tuesday afternoon in Manchester, Claire, 46, studies a familiar colour chart. For fifteen years, she’s chosen the same deep brown. This time, her stylist suggests something else: micro-highlights and lowlights woven around her natural silver. “Think of your greys as built-in highlights,” he says.

    Three hours later, there’s no solid block of colour. Instead, soft tones of beige, sand, and pearl melt into her natural base. The number of grey hairs hasn’t changed, but they no longer read as flaws. Claire takes a selfie, laughs, and says, “I look less tired. I didn’t sleep more. How is that possible?”

    Why blended greys make the face look fresher

    Grey blending and soft-light techniques are gaining ground for one clear reason: they play tricks on the eye. A flat, dark shade against lighter skin can cast shadows, sharpen features, and deepen the look of fine lines. When greys are dispersed through lighter tones, the face appears brighter. Contrast softens. Expressions look calmer, more relaxed.

    Colour experts also note that our brains associate natural variation with youth. Children’s hair is rarely one flat shade; it shifts with the light. When adult hair recreates that movement, it sends the same visual signal. You don’t just appear “less grey.” You look more alive.

    How modern grey-blending techniques actually work

    This approach sits somewhere between classic highlights and a full dye job. Rather than colouring every strand, the colourist focuses on key areas: the hairline, the parting, and spots where greys cluster most. Fine, delicate highlights lift darker hair by one or two levels, just enough to soften contrast.

    Lowlights come next, echoing your natural base and slipping between silver strands so the eye never lands on a solid block of grey. The result is controlled irregularity. There’s still colour, shine, and depth, but no harsh regrowth line as hair grows.

    A gentler routine at home

    Maintenance changes too. Semi-permanent glosses and tinted conditioners replace monthly box dyes. They restore warmth, enhance shine, and blur contrasts without masking every silver thread. Some women add a subtle face-framing light, a soft veil around the face that brightens the eyes more effectively than heavy makeup.

    Relief, not vanity, at the heart of the trend

    Many people discovering grey blending speak less about appearance and more about relief. Relief from calendar alerts warning of root touch-ups. Relief from stained towels, chemical smells, and the slightly artificial feel of jet-black hair at 58. On a human level, it often feels like reclaiming time and honesty.

    As one Paris-based colourist puts it, “They don’t ask to look younger. They ask to look like themselves on a good day, not a version they left behind years ago.”

    Why blended colour is easier to live with

    There’s an uncomfortable truth behind drastic colour: it demands constant upkeep. Miss two appointments with full coverage, and a clear band appears at the scalp. With a blended approach, grow-out stays soft, sometimes even sun-kissed.

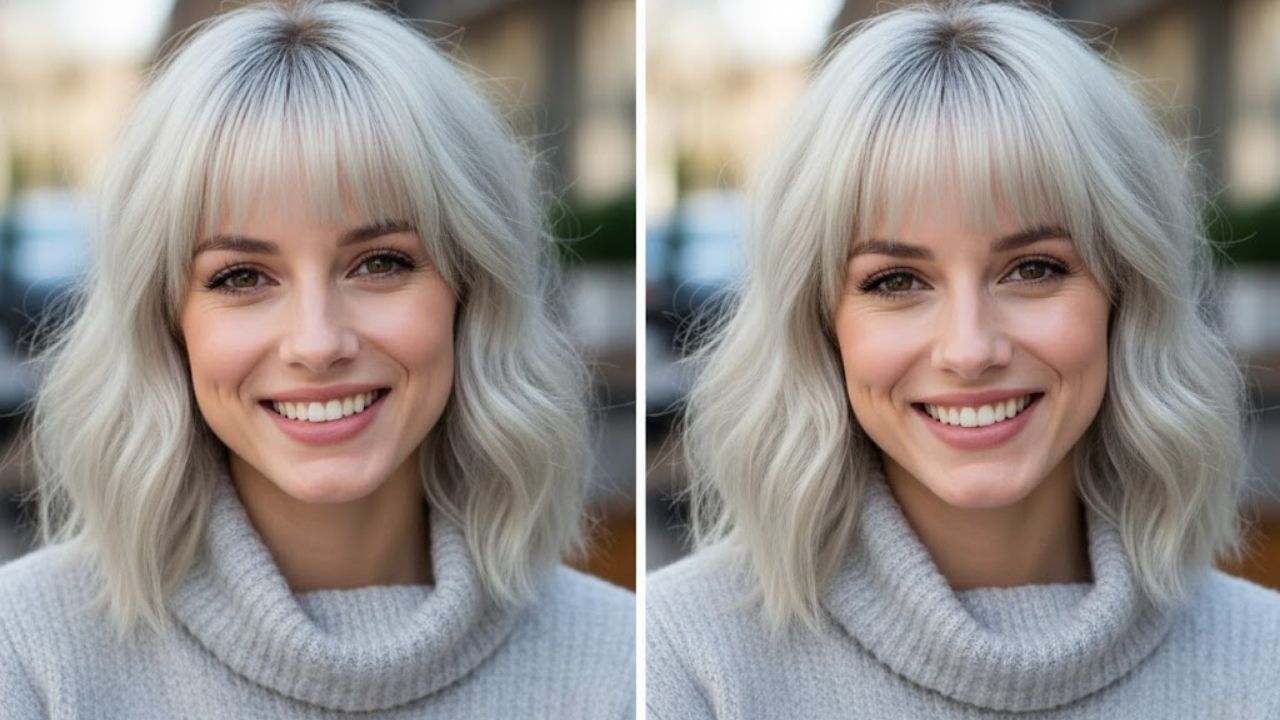
    Online, before-and-after videos now show transformations where the “after” is lighter, softer, and less severe. Women describe feeling seen rather than disguised. One UK salon chain reported a 38% rise in requests for grey-friendly colour services in just a year. This is no longer a niche choice.

    Grey blending: mixing natural silver with highlights and lowlights

    Root smudging: softening the line between new growth and colour

    Glossing: adding tone and shine without heavy coverage

    Face-framing lights: brightening around eyes and cheekbones

    A youthful effect without pretending to be 25

    A look that adapts to you

    The most practical aspect of this trend is its flexibility. A skilled colourist studies your skin tone, eye colour, and natural base before choosing shades that reflect light back onto your face. Think soft beige, champagne, mushroom brown, cool cocoa, rather than flat box-black or overly red tones. If greys cluster at the temples, depth can stay at the back while the front is lightened for a flattering halo. If hair is already mostly silver, strategic lowlights can turn a patchy transition into a deliberate, elegant grey.

    Common mistakes that hold people back

    One frequent error is trying to fix everything in a single at-home session. Box dyes promise miracles but don’t account for uneven porosity or dryness. That’s how hot roots and washed-out ends happen. Another trap is chasing the shade you wore ten years ago, instead of asking what truly lights up your face now.

    When silver becomes part of the story

    Emotionally, first greys often carry quiet shame. On a bad day, one white strand feels like a verdict. On a better day, it’s just hair. When blended well, it becomes texture, the kind photographers love because it tells a story.

    As one 52-year-old executive shared after switching techniques, “No one said, ‘Nice colour.’ They asked if I’d been on holiday. That’s how I knew it worked.”

    How to ask for the right result

    You don’t need expert vocabulary. Bring photos of hair that looks like a softer version of yours, not a celebrity with a different base. Say things like, “I want to blend, not hide,” or “I’d like a softer grow-out that includes my greys.”

    “Can we do grey blending instead of full coverage?”

    “I’d like face-framing highlights to brighten my eyes.”

    “Can we keep some natural depth at the roots?”

    “I want low maintenance, no harsh line in three weeks.”

    The phrase many stylists quietly appreciate most is simple: “I’m ready to work with my greys, not against them.” It opens the door to kinder, more creative colour and less anxiety under bright lighting.

    Seeing age differently, one strand at a time

    This move away from rigid dye toward blended greys mirrors a deeper shift in how we view ageing. The old binaries fade: young versus old, natural versus fake. Hair becomes a space for nuance.

    Those who step off the monthly dye cycle often mention the same benefits: less root anxiety, more freedom, and a face that feels aligned with real life. The colour remains; the obsession doesn’t.

    Some will always prefer full coverage, and that’s valid. Yet even then, more people are asking how to soften the transition when the time comes. The answer keeps pointing the same way: fewer aggressive cover-ups, more thoughtful blends.

    The next time a silver strand catches the light, the question may shift from “How fast can I hide this?” to “How could this work for me?” This isn’t a loud trend. It moves quietly, one appointment and one honest mirror moment at a time.

    Grey blending over full coverage: mixes silver with highlights and lowlights for a softer look

    Face-framing lightening: brightens the face by one or two levels

    Low-maintenance care: glosses and toners reduce stress, time, and cost

  • Top 10 Yoga Poses to Build Core Strength and Improve Flexibility

    Top 10 Yoga Poses to Build Core Strength and Improve Flexibility

    A strong and flexible core is essential for good posture and balance and helps improve your overall physical performance. Your core includes more than just your abs. It also involves your lower back and hips and the pelvic muscles that support almost every movement your body makes. Yoga offers an excellent way to strengthen these muscles while also improving flexibility. The practice uses slow and controlled movements combined with focused breathing to activate deep stabilizing muscles that regular workouts often miss. Here are 10 yoga poses that build core strength and increase flexibility when you practice them regularly.

    Plank Pose (Phalakasana): The Ultimate Foundation for Total Core Stability

    Plank Pose serves as a basic position that builds core strength. This posture works the abdominal muscles and also involves the shoulders arms, legs & back. Keeping correct body alignment and breathing steadily develops stability and endurance across the entire body.

    Boat Pose (Navasana): Fire Up Deep Abdominal Muscles and Balance Control

    Boat Pose Boat Pose works your abdominal muscles & hip flexors in a direct way. When you balance on your sit bones and lift your legs off the ground you strengthen your core & develop better balance. This position also helps you build mental focus and body control.

    Downward-Facing Dog: Stretch, Strengthen, and Reset the Entire Body.

    This traditional position builds core strength & stretches your spine along with your shoulders and hamstrings. When you gently activate your abdominal muscles it provides support for your lower back & enhances both flexibility & blood flow throughout your body.

    Warrior III (Virabhadrasana III): Build Core Power While Training Full-Body Balance

    Warrior III needs you to engage your core muscles firmly to maintain balance and proper body position. The pose builds strength in your abdominal muscles, lower back area and leg muscles. At the same time it enhances your coordination skills, improves your stability, and increases awareness of how your body moves and holds itself in space.

    Forearm Plank: Next-Level Core Endurance and Shoulder Strength Builder

    Forearm Plank makes the exercise harder by bringing your body closer to the floor. This position strengthens the deep muscles in your core and improves shoulder stability while building endurance. It works well for developing strength that you can use in everyday activities.

    Side Plank (Vasisthasana): Sculpt Obliques and Improve Lateral Stability

    Side Plank works the oblique muscles on the sides of your torso and builds strength throughout your lateral body. This exercise also makes your arms and shoulders stronger while improving your balance and helping you develop better control of your entire core region.

    Cobra Pose (Bhujangasana): Strengthen the Spine While Improving Back Flexibility

    Cobra Pose works to strengthen your lower back & abdominal muscles in a gentle way while making your spine more flexible. This backward bending position helps reverse the damage caused by sitting for long periods and promotes better posture throughout your day. The pose targets the muscles that support your spine and core area.

    Chair Pose (Utkatasana): Activate Core Muscles Through Controlled Lower-Body Strength

    Chair Pose works your core muscles along with your legs and glutes. When you hold this position your abdominal muscles stay active to keep your upper body straight. This continuous effort helps you build both strength and endurance over time.

    Bridge Pose (Setu Bandhasana): Open the Chest While Engaging Glutes and Core

    Bridge Pose builds strength in your core muscles along with your glutes & lower back. At the same time it opens up your chest & hip areas. This pose helps your spine stay flexible & works to improve how your pelvis is positioned.

    Seated Twist (Ardha Matsyendrasana): Detox the Spine and Boost Rotational Flexibility

    Seated twists work the oblique muscles while helping your spine move more freely. These twisting exercises build flexibility and better posture while improving how your core muscles work together.

    How Yoga Builds Core Strength and Flexibility at the Same Time

    Yoga brings together poses that build strength with intentional stretching and breathing techniques. This well-rounded method works the deep muscles in your core while loosening up stiff spots in your body. It helps you stand and move better while lowering your chances of getting hurt and making daily activities easier.

  • Make Old Tiles and Grout Look Brand New Again Using Fast Natural Cleaning Tricks at Home

    Make Old Tiles and Grout Look Brand New Again Using Fast Natural Cleaning Tricks at Home

    The tiles beneath your feet hold more history than you might realize. They have absorbed years of wet footprints and muddy paw prints along with spills from rushed morning meals & dust that settles after long days. One day you look down and notice the floor that used to be bright now appears worn out. The grout lines that were once clean & light have become dark borders that make the entire room seem lifeless. You drag a finger across a grout line and it leaves a gray mark. It is not a major problem but it makes your home feel less inviting. The thought of using strong chemical cleaners with rubber gloves & harsh fumes seems as tiring as dealing with the dirt itself. However it does not need to be that way. Using a few natural ingredients and some effort you can bring back that brightness without much trouble.

    The First Time You Notice the Fading Shine

    It usually reveals itself quietly. A line of afternoon sunlight stretches across the kitchen floor, and suddenly every smudge, streak, and speck stands out. Areas that once reflected light now look muted. Grout lines appear darker, almost absorbing brightness instead of returning it. When you look closer, details emerge—a faint ring near the stove from an old spill, gritty marks by the door left behind after a rainy day. You didn’t notice the change happening. It crept in slowly. What you see now is the gentle loss of shine and the way a once-bright room feels slightly flat. The urge to scrub hits instantly, but so does the memory of harsh chemical fumes, stinging eyes, and artificial scents that never feel quite right.

    The Gentle Strength of Natural Cleaning Methods

    Natural cleaning approaches can work just as effectively as commercial products when used correctly. The secret lies in pairing simple ingredients with warm water, soft brushes, and patience. Most of what you need is already nearby, tucked into a pantry shelf or under the sink. These ingredients work by interacting with grime in a straightforward way. While they may act more slowly than strong chemicals, they remove buildup without releasing toxic fumes or leaving residues behind. This keeps the air breathable, protects surfaces, and creates a safer environment for both family members and pets.

    Baking Soda: A Gentle Scrub That Responds to Touch

    Baking soda feels light and powdery in your hands, almost silky with a mild grit beneath your fingers. That texture makes it ideal for tile and grout. It provides enough gentle abrasion to lift dirt without scratching or wearing down surfaces. Rather than stripping material away, it loosens grime and carries it off, leaving the tile intact and refreshed.

    Vinegar: A Clean, Direct Way to Restore Clarity

    The sharp scent of vinegar is unmistakable the moment you open the bottle. Mixed with warm water, it cuts through soap scum, water spots, and cloudy buildup that dull ceramic and porcelain tiles. When used alongside baking soda on grout, the reaction creates bubbles that push dirt out from tight spaces. It may look impressive, but it’s simply basic chemistry using everyday household items to bring floors back to life.

    Lemon, Soap, and Salt: Helpful Extras That Make a Difference

    For a brighter, fresher cleaning experience, lemon juice adds a clean citrus aroma while its natural acids help break down stains and mineral deposits. Rubbing a cut lemon along tile edges leaves both fresh scent and clarity behind. A small amount of castile soap or mild dish soap helps solutions spread evenly and dissolve greasy residue. When stains resist, a pinch of fine salt adds extra scrubbing support, gently working away marks left by daily use.

    Step 2: Rozana Tiles Chamkane Ka Aasaan Solution Banayein

    Samagri Miqdaar Faida
    Garam pani 2 liter (taqreeban 8 cups) Mail ko dheela karta hai aur cleaner ko tiles par barabari se failata hai
    Safed sirka (White Vinegar) 1/2 cup Jami hui parat ko hata kar tiles ki chamak wapas lata hai
    Liquid castile ya halki dish soap 1–2 chhoti chamach Rozana ki grease aur gandagi ko asaani se saaf karta hai
    Optional: Essential oil ke drops 3–5 boondein Safai ke baad halki aur fresh khushboo chhodta hai

    An Easy Natural Routine to Restore Tile Brightness

    Imagine open windows, warm light, and a bowl of water resting on the counter beside a few familiar ingredients. Tile care doesn’t need to feel like a chore. It can feel more like quiet maintenance for a surface that has supported everyday life for years.

    Step One: Clear the Space, Sweep Slowly, Reset the Room

    Start by removing chairs, rugs, and small items. As the floor opens up, each tile and grout line becomes visible. Sweep with unhurried movements, listening as dust and crumbs gather. A quick pass with a dry mop helps remove remaining debris. Even before washing, the room feels more open and orderly.

    Focused Grout Cleaning with Baking Soda and Vinegar

    Speed does not require harshness. Natural methods can deliver noticeable results in a short time without filling your home with chemical odors. Understanding what your floors need—and what they don’t—is what matters most. Aggressive products are often unnecessary.

    Choosing the Right Method for Each Tile Type

    Different tiles require different care. Ceramic and porcelain tiles handle vinegar solutions, baking soda paste, and mild soap well. Natural stone surfaces such as marble, slate, limestone, or travertine are more sensitive. Acidic cleaners like vinegar and lemon can damage them and cause dull patches. For stone, stick to warm water and pH-neutral soap with microfiber tools. Glazed tiles have a protective finish, while unglazed tiles absorb more moisture and need gentler handling. When unsure, always test cleaning methods in a hidden area first.

    Maintaining the Shine with Simple Daily Habits

    Once tiles gleam and grout looks fresh, the entire room feels transformed. Light travels more freely, colors appear clearer, and the space feels more welcoming. This change affects more than appearance—it influences how the room is experienced.

    Easy Daily and Weekly Floor Care

    Keeping floors bright doesn’t require constant deep cleaning. Place mats at entrances to catch dirt before it spreads. Sweep or dry mop regularly to prevent dust from settling into grout lines. Clean spills quickly to avoid stains. A weekly light mop with warm water and mild soap is usually enough. Use vinegar only when buildup becomes visible. Opening windows while cleaning helps floors dry faster and keeps the room comfortable.

    The Final Touch: Gentle Hand Buffing

    After the floor dries, take a clean microfiber cloth or flat mop and lightly buff the tiles. This removes lingering moisture and faint streaks. Under your hands, the surface shifts from clean to softly reflective. Light stretches across the room again, catching subtle reflections that make the space feel calm and complete.

    When Cleaning Feels Like Caring for Your Home

    Restoring shine to tile and grout is about more than appearance. It reconnects you with the surfaces that carry daily life. Natural methods fit seamlessly into that process—no harsh fumes, no discomfort, just warm water, baking soda, citrus, and vinegar. Pets move freely, air stays fresh, and results appear quickly. In a short time, the room feels lighter, the grout looks renewed, and the tiles reflect light once more. The next time sunlight crosses the floor, it meets a surface ready to return that brightness, bringing a quiet sense of satisfaction with it.

  • How to make hardwood floors shine brilliantly using one unexpected pantry item that homeowners swear by

    How to make hardwood floors shine brilliantly using one unexpected pantry item that homeowners swear by

    Late afternoon light cut through the living room, exposing every scuff, dull streak, and footprint pressed into what were meant to be elegant hardwood floors. It was the kind of light that reveals everything. A friend stepped inside, glanced down, paused, and then offered the polite response: “Oh, I love your floors.”

    They were oak—once expensive, once warm and glowing. But years of kids, a dog, and winter boots had drained that rich, honeyed finish you see in magazines. Every typical solution had already been tried: pricey so-called miracle cleaners, sticky polishes that left residue, and trendy homemade sprays that smelled sharp and achieved nothing.

    Then an older neighbor shared one quiet suggestion, delivered with the confidence of someone who had tested it all. “Use this,” she said simply. The change was immediate. The floors didn’t just appear cleaner. They looked restored.

    The simple pantry staple hardwood owners quietly trust

    The understated hero here is plain white vinegar. Not a designer cleaning blend or anything with bold eco claims—just the basic bottle sitting near the olive oil. When mixed properly, it brings hardwood floors back to life, making them reflect light in a way that stops you mid-stride.

    Vinegar has a familiar, slightly sharp scent that often recalls an old kitchen. When diluted for floors, it leaves no sticky coating behind. Instead, it cuts through built-up residue from soaps, waxes, and everyday wear that dull the wood’s natural character.

    Used correctly, it doesn’t coat the surface—it clears it. The grain becomes more defined, the tone looks richer, and the floor no longer feels like it’s sealed under a plastic layer.

    Jenna, a homeowner in her thirties juggling work, two kids, and a high-energy labrador, learned this the hard way. She had tried several name-brand polishes promising “mirror shine.” What she ended up with were slippery boards and cloudy patches where product accumulated.

    One weekend, frustrated by wasted money, she mixed a solution she’d seen mentioned online: one cup of white vinegar in a bucket of warm water. She mopped once, let it dry, and snapped a photo because the difference seemed unreal.

    The contrast was striking. Before, the floor looked tired and greasy. After, the wood lines were crisp again, reflecting light naturally. No artificial gloss—just clean, honest shine. She sent the photo to her sister with a simple message: “Turns out the fix cost less than a dollar.”

    This method spreads quietly for a reason. Vinegar is mildly acidic when diluted, enough to dissolve mineral deposits, soap residue, and grime without harming sealed finishes. Where many products add layers, vinegar removes what doesn’t belong.

    Most commercial shine formulas rely on acrylics, oils, or silicone. They impress briefly, then streak and trap dust. Vinegar works in reverse. By clearing buildup, it allows the original finish to do what it was designed to do.

    It won’t repair scratches, but by cleaning around them, those marks often become less noticeable. Light reflects more evenly, giving the floor a clearer appearance—much like cleaning fogged glasses you didn’t realize were dirty.

    How to safely use vinegar for brighter hardwood floors

    The ratio matters. Mix 1 cup of white vinegar with about 1 gallon (4 liters) of warm water. Stir gently and resist the urge to add more vinegar. Stronger isn’t better—it only risks stressing the finish.

    Begin by sweeping or vacuuming thoroughly, as grit scratches surfaces and kills shine. Lightly dampen a microfiber mop—never soaking—and move in small sections, ideally following the wood grain.

    Allow the floor to air-dry naturally. No fans or towels needed. Within minutes, the dull haze often fades, replaced by a soft, natural glow. Sometimes the difference only becomes obvious after leaving the room and coming back.

    Overuse is the most common mistake. Because vinegar is cheap and simple, it’s tempting to rely on it constantly. Professionals recommend treating this method as a periodic reset, not a daily habit. Every few weeks is enough for busy households.

    Vinegar should not be used on unsealed or waxed wood. If the finish is unknown, always test a small, hidden area and observe how it dries.

    Some manufacturers discourage vinegar to protect warranties. Still, many professional cleaners quietly rely on it. As one cleaner with 20 years of experience puts it: “It doesn’t create shine. It reveals it.”

    Habits that make this method even more effective

    Use microfiber mops to prevent streaks and lint.

    Replace the solution once it turns cloudy.

    Add one or two drops of essential oil if the scent is bothersome.

    Keep shoes near the door—grit dulls floors fast.

    Spot-clean spills instead of re-mopping entire rooms.

    Why this modest method feels so rewarding

    There’s a quiet satisfaction in realizing beautiful floors don’t require shelves of branded products. Just one pantry item, warm water, and a few focused minutes. It cuts through the noise of constant promises to buy more.

    When floors regain their glow, rooms feel different. Morning light hits clean wood instead of streaks, and the space feels sharper and calmer.

    It also offers something deeper. Amid endless images of perfect homes online, improving your own lived-in space—even slightly—feels grounding. Not flawless. Just better.

    This trick spreads subtly: a neighbor’s comment, a cleaner’s aside, a buried forum reply. It’s rarely the headline, yet it’s the method people keep returning to after trends fade.

    It doesn’t demand rigid schedules or perfection. That flexibility may be why people stick with it. The reward is visible, quick, and honest.

    Diluted white vinegar: 1 cup per gallon of warm water for an easy, affordable mix.

    Best for sealed hardwood: Ideal for polyurethane finishes; always patch-test first.

    Use occasionally: Apply every few weeks to refresh shine without harming the finish.