Category: News

  • Quick Ways to Heal Dry Cracked Heels at Home Using Safe and Effective Kitchen Ingredients

    Quick Ways to Heal Dry Cracked Heels at Home Using Safe and Effective Kitchen Ingredients

    The first signs of cracked heels often appear quietly. Fine white lines form across the heel, resembling a dry riverbed. At first, they seem harmless and easy to ignore. You may blame walking barefoot indoors or wearing those favorite sandals every day. But then one morning, as you step out of bed, the floor feels rough beneath your feet. There’s a sharp sting and pulling sensation. The cracks have deepened, becoming sore, and sometimes they even catch on your socks.

    A Simple and Effective Way to Heal Dry Heels

    At some point, a quiet realization sets in that it’s time to act. Dry, cracked heels tend to creep up unnoticed until discomfort becomes unavoidable. Every step becomes a reminder that your feet have been needing care for some time. They support you through long hours and busy days. The encouraging part is that relief doesn’t require costly products or complicated routines. Many effective solutions are already sitting in your kitchen, stored in familiar jars and bottles you use daily.

    This approach is about reconnecting with your heels and turning the end of your day into a calming self-care moment. Simple ingredients like oil, honey, milk, and salt can gently soften neglected skin. With regular use, these natural remedies help cracks heal steadily and comfortably.

    The Quiet Message Your Heels Reveal

    Your heels work harder than you might realize. They absorb the first impact with every step and bear constant pressure when you stand or walk for long periods. Because they’re usually covered and out of sight, they’re easy to overlook. You might notice roughness during a shower and promise yourself you’ll deal with it later, only to forget again.

    Over time, your skin reflects what it endures. Dry, cracked heels often signal prolonged pressure, friction, and lack of moisture. Walking barefoot on hard floors, wearing open-backed shoes, or using footwear with thin soles can all contribute. Long hot showers, cold weather, and indoor heating further dry out the skin.

    The skin on your heels is naturally thick to protect you, but when it loses flexibility, it can’t bend as you walk. Instead, it splits and forms painful cracks. The good news is that your skin constantly repairs itself. When you provide moisture, gentle care, and protection, healing can happen faster than expected.

    Your Kitchen as a Gentle Healing Corner

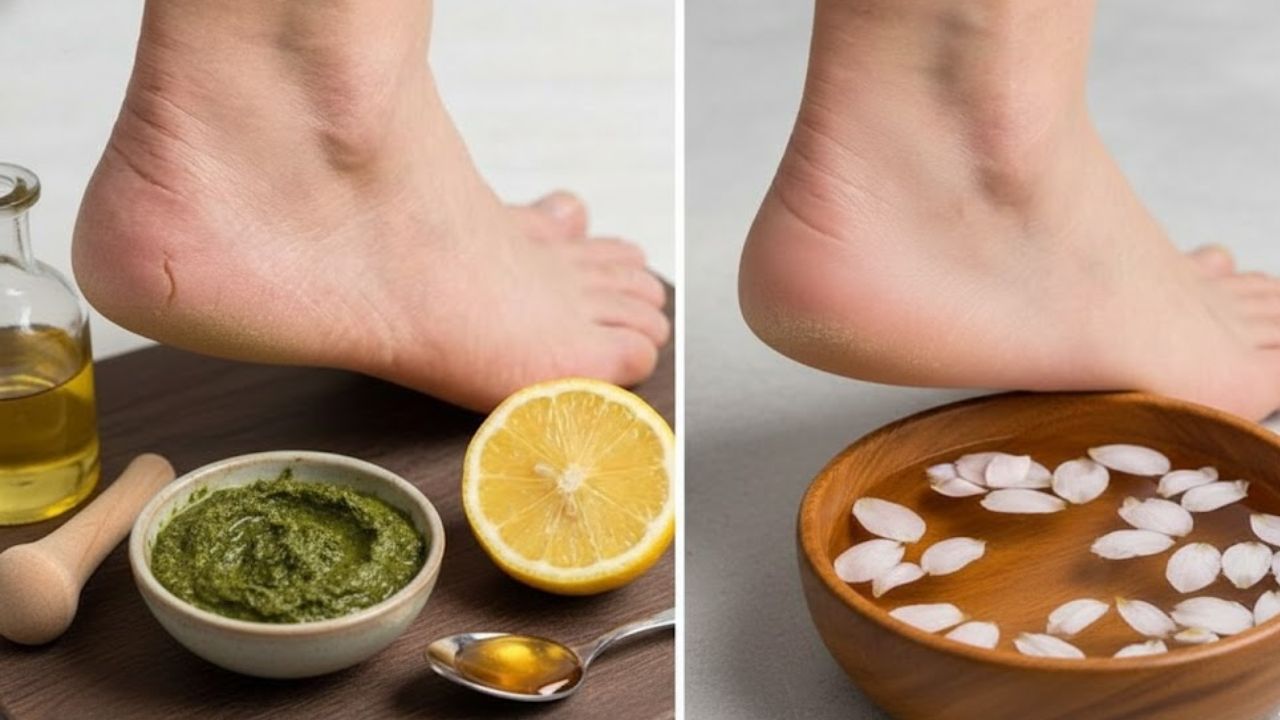
    Your kitchen offers more than meals—it holds simple, effective skin remedies. Olive oil or coconut oil deeply moisturizes rough, dry heels. Honey helps draw moisture into the skin while soothing irritated areas. Milk and yogurt naturally soften flaky skin. When sugar or salt is mixed with oil, it creates a gentle scrub that removes dead skin cells.

    Using everyday ingredients feels reassuring because they’re familiar and easy to trust. There’s no need for complex labels or specialty products. These are basic items with textures and scents you already know. Understanding how each ingredient helps makes your care routine even more effective.

    • Olive Oil / Coconut Oil: Deeply hydrates cracked heels and softens hardened skin; ideal for night massages and DIY scrubs.
    • Honey: Seals in moisture, calms irritation, and supports skin repair; works well as a healing mask.
    • Milk / Yogurt: Gently loosens dead skin through natural lactic acid; suitable for foot soaks or softening packs.
    • Sugar / Salt: Exfoliates rough layers and smooths uneven skin; best used after soaking feet.
    • Banana / Avocado: Nourishes skin with vitamins and healthy fats; helpful for deeply cracked heels.

    A Calm Evening Routine for Cracked Heels

    Think of this routine as a peaceful pause at the end of the day. The house grows quieter, and you set aside just fifteen minutes to care for your feet.

    Step 1: Warm Milk and Salt Foot Soak

    Fill a basin with warm water that feels soothing on your skin. Add half a cup of milk, one or two spoons of salt, and a small amount of olive oil. Soak your feet for ten to fifteen minutes. The warmth relaxes the skin, the milk softens dry areas, and the oil begins restoring moisture.

    Step 2: Gentle Exfoliation for Smoothness

    Combine sugar or fine salt with olive oil or coconut oil to form a thick paste. Gently massage it onto your heels using slow, circular motions, focusing on rough patches. Avoid scrubbing too hard, as gentle care works better than harsh rubbing. Rinse with warm water when finished.

    Step 3: Honey and Yogurt Repair Mask

    Mix one tablespoon of honey with one tablespoon of thick yogurt and add a few drops of oil. Apply the mixture generously to cracked areas and leave it on for ten to fifteen minutes. This mask delivers deep hydration and soothing relief. Rinse gently and pat your feet dry.

    Overnight Oil Therapy for Lasting Softness

    Before bedtime, warm a small amount of olive oil or coconut oil and massage it into your heels for several minutes. Put on clean cotton socks to lock in moisture while you sleep. By morning, your heels often feel noticeably softer, smoother, and far less tender.

    Daily Habits to Keep Heels Healthy

    Once your heels heal, simple habits help prevent cracks from returning. Apply moisturizer after showers, avoid overly hot water, rotate your shoes, and stay well hydrated throughout the day. At the first sign of dryness, take action. These small steps can prevent more serious discomfort later.

    When Home Care Isn’t Enough

    If heel cracks become very deep, start bleeding, or fail to improve with consistent care, professional guidance may be necessary. Certain health conditions can slow healing, and a doctor or podiatrist can suggest appropriate treatment. While home remedies offer comfort and support, medical advice ensures proper recovery.

    In most cases, cracked heels are simply a sign of dry skin needing attention. With warmth, oils, patience, and everyday household ingredients, your feet can become comfortable again—ready to support you through daily life.

  • Spot the Difference Challenge: Find All 3 Differences in the Park Image in 8 Seconds

    Spot the Difference Challenge: Find All 3 Differences in the Park Image in 8 Seconds

    Spot the Difference puzzles offer a great way to test your observation skills. They seem easy at first but once the timer begins even tiny details can go unnoticed. This park scene challenge gives you just 8 seconds to find three hidden differences which makes it a real test of concentration and quick thinking. People of all ages enjoy these puzzles because they are fast and mentally stimulating. You don’t need special knowledge or equipment to play them. All you need are your eyes and a little focus. The challenge feels tricky because our brains naturally overlook small changes when scanning images quickly. What makes it enjoyable is the satisfaction of spotting something others might miss and the way it sharpens your attention to detail without feeling like work.

    Why Spot the Difference Puzzles Are So Popular

    Spot the Difference games have existed for many decades. You might recall finding them in newspapers or puzzle books or magazines. Now they appear frequently online on social media platforms and brain game websites. These games work well because they challenge your brain in a relaxed way. Your mind stays engaged while comparing two similar images and looking for small changes. This activity sharpens your attention to detail and strengthens visual memory with regular practice. Even a quick puzzle provides a good mental exercise.

    Understanding the Man in Park Image Challenge

    In this puzzle you see two pictures of a man sitting in a park. When you first look at them everything seems identical. The man and the bench and the bird and the background all look the same. However there are three small differences hidden in these pictures. Your job is to spot all three differences in just 8 seconds. The short time limit makes the puzzle more challenging and exciting. You need to look quickly and trust your instincts rather than studying every detail too carefully. This challenge tests both your observation skills & your speed.

    Best Way to Scan the Image Quickly

    Many people struggle with these puzzles when they examine the image without a clear plan. A better method involves dividing the image into specific areas. Begin by focusing on the central figure in the picture. Examine his facial features and what he is wearing before moving forward. After that shift your attention to the items near him including the seat and his bag. Then review the surrounding details such as any animals or plants and minor objects in the scene. This organized approach keeps your mind focused and makes it less likely that you will overlook subtle differences.

    The Three Differences Hidden in the Image

    The first difference appears in the man’s hair. One image shows his hair looking full and uniform. The other image has a small gap missing near the top section. This detail is quite subtle & can be overlooked when you concentrate on the bigger elements in the scene. The second difference relates to the bird perched on the bench. The first image displays a yellow bird. The second image shows the same bird in brown. Color variations are typical elements in Spot the Difference games since people tend to remember colors as constant without checking them carefully. The third difference concerns the man’s briefcase. One image includes a visible handle on the briefcase. The other image lacks this handle completely. This particular detail challenges your ability to notice small features on items that might seem secondary when you first look at the picture.

    What Your Performance Says About You

    If you found all three differences in 8 seconds your observation skills are strong. You probably notice small details quickly & stay calm when time is limited. If it took you more time that is completely normal. These puzzles are made to challenge even careful observers. With regular practice most people improve their speed and accuracy. The key is to stay focused and methodical instead of rushing blindly.

    Why Park Scenes Make Great Puzzles

    Park scenes work really well for Spot the Difference games. They appear calm and recognizable so your mind tends to let its guard down. When you feel relaxed like this it becomes tougher to notice what has changed. Things such as benches and birds and trees and other objects create lots of spots where tiny differences can hide. Your brain assumes everything should look the way it normally does in a park setting. This expectation makes it much harder to detect the alterations that are actually there.

    Benefits of Playing Spot the Difference Games Regularly

    Playing these puzzles on a regular basis can enhance more than your ability to observe things. They strengthen your focus and help you think more clearly while also making your brain process visual information faster. A lot of people use them as a brief mental exercise when their schedule gets hectic. These puzzles work well for everyone regardless of age. Children develop better concentration through them while adults refine their eye for small details & seniors maintain mental sharpness. Spending just a couple of minutes daily with these puzzles can lead to noticeable improvements as time goes on.

  • Plank Hold Timing Explained: How Long You Should Hold a Plank to Build Core Strength at Every Age

    Plank Hold Timing Explained: How Long You Should Hold a Plank to Build Core Strength at Every Age

    The floor feels cool beneath your forearms. Your toes press into the mat, your legs engage, and your breathing settles into a steady rhythm. Between the tightness in your core and the focus in your mind, a familiar question surfaces: how long should this last? Ten seconds? Thirty? Two long minutes that feel endless?

    Planks are often treated as a basic, one-size-fits-all exercise, yet they are really a conversation between your body and gravity—one that evolves over time. What feels strong and simple at 18 can feel demanding at 48, or require extra care at 68. At every age, your core remains your foundation, quietly supporting your spine, protecting your back, and helping you move with ease.

    So how long should you hold a plank to build strength without tipping into strain, pain, or ego? The answer lies in understanding your body exactly as it is today.

    Understanding Plank Hold Timing

    The Silent Work Happening Inside Your Core

    Most workouts announce themselves loudly—feet pounding, weights clanging, breath cutting through the air. Planks arrive differently. You line your body into one long shape, shoulders stacked over elbows or wrists, heels reaching back, head floating comfortably between them. On the surface, nothing seems to move.

    Inside, however, a quiet storm of coordination unfolds. The transverse abdominis wraps your midsection like a supportive belt. The multifidus offers subtle protection to the spine. The diaphragm links breath to effort, while the pelvic floor provides steady support from below. These muscles thrive on calm, precise effort, repeated consistently.

    This is why quality matters more than duration. A tense, collapsing one-minute plank delivers less benefit—and more risk—than a clean twenty-second hold performed with control and ease. Time matters, but only up to the point where your form begins to fade.

    Why the Two-Minute Plank Is Overrated

    Fitness culture often glorifies extremes: two-minute planks, five-minute challenges, and viral clips of bodies shaking under strain. Somewhere along the way, longer became synonymous with better.

    The quieter truth is less dramatic. Beyond a certain point, extending a plank builds tolerance for discomfort more than useful strength. Research and experienced coaching consistently show that short, high-quality holds repeated regularly are more effective for core strength and spinal health than occasional marathon efforts.

    Long planks aren’t automatically harmful, but the benefit-to-risk ratio shifts as fatigue creeps in. Over time, the focus naturally moves from “How long can I last?” to “How well am I supporting my body right now?”

    Age, Gravity, and Changing Needs

    As the years pass, the body recalculates. Recovery slows slightly, tissues become less forgiving, and balance asks for more attention. A plank that once felt effortless may now feel deliberate—and that change reflects normal biology, not weakness.

    Instead of one universal rule, it helps to think in flexible ranges. The ideal hold time ends just before your alignment begins to unravel. Below are general guidelines for healthy adults without major injuries or medical concerns.

    • Teens (13–19): 20–40 seconds, 2–4 sets, 2–4 days per week
    • 20s–30s: 30–60 seconds, 2–4 sets, 3–5 days per week
    • 40s: 20–45 seconds, 2–4 sets, 3–4 days per week
    • 50s: 15–40 seconds, 2–3 sets, 2–4 days per week
    • 60s–70s+: 10–30 seconds, 2–3 sets, 2–4 days per week

    These ranges are guideposts, not judgments. What matters most is the integrity of each second you choose to hold.

    Your 20s and 30s: Strength Without Limits

    In your 20s and 30s, the body often feels generous. Recovery is fast, tissues are resilient, and strength builds easily. This is when many people chase longer plank times, and with good form, thirty to sixty seconds can be an effective range.

    The hidden risk isn’t weakness—it’s overlooking subtle breakdowns. Hips begin to dip, shoulders inch upward, and the lower back sends quiet signals. Dividing your effort into multiple shorter, high-quality holds often delivers better results than one long, punishing attempt.

    Your 40s: Power With Awareness

    By your 40s, feedback becomes clearer. Old injuries may resurface, stiffness arrives sooner, and recovery requires more respect. Strength is still present, but it benefits from greater awareness.

    For many, the most effective plank range now sits between twenty and forty-five seconds, repeated a few times. Some days allow more; others call for less. The priority shifts toward sustainability and long-term spinal support.

    Your 50s, 60s, and Beyond: Smart, Steady Strength

    Later decades invite a new definition of strength. Muscle mass may slowly decline and recovery may take longer, but adaptation remains possible. Planks continue to offer value, even when they look different.

    Shorter holds—ten to thirty seconds—performed with excellent alignment can be deeply effective. Modified versions, such as knee or incline planks, aren’t compromises; they are intelligent adjustments that protect posture, stability, and confidence.

    Recognizing the Right Moment to Stop

    Your body always signals when a plank shifts from productive to risky. Common cues include sagging in the lower back, shoulders creeping toward the ears, held breath, or tension spreading across the face. When these appear, it’s time to stop.

    Ending a plank at the first sign of form loss isn’t quitting—it’s skilled training. This approach teaches efficiency and control rather than collapse.

    Making Planks a Sustainable Habit

    Planks don’t need drama. They can slip easily into daily routines—a brief hold before coffee, another after work, one more before bed. Over time, these small efforts add up.

    The true reward isn’t a personal record. It’s the quiet ease of standing taller, moving with confidence, and supporting your body through everyday life. Hold as long as your form feels honest. Rest. Repeat. That’s where lasting core strength is built.

  • Optical Illusion Challenge: Can You Spot the Number 3 Hidden Among S in 5 Seconds

    Optical Illusion Challenge: Can You Spot the Number 3 Hidden Among S in 5 Seconds

    Optical illusion challenges attract attention because they seem easy but force the brain to make rapid judgments. A visual test gaining popularity online presents what looks like a straightforward task. The challenge is to find the number 3 concealed in a grid filled with the letter S in only 5 seconds. When you first look at it everything seems the same. All the characters appear identical & your eyes might scan across without detecting anything different. This is precisely what makes it difficult. The illusion works by exploiting how the brain recognizes familiar forms. Because the letter S and the number 3 both have similar curved shapes the brain automatically treats them as the same thing. The hidden number fits into the pattern so seamlessly that most people overlook it during their first try particularly when working against a strict time constraint.

    Why This Optical Illusion Tricks So Many People

    The main reason this illusion works so well comes down to how our brains process patterns. Humans are naturally built to identify repeated symbols fast because it conserves mental energy. When you look at a grid packed with identical characters your brain makes an assumption about consistency and stops examining every individual shape with care. The number 3 in this puzzle has been deliberately crafted to mirror the font characteristics of the letter S that surrounds it. The size matches perfectly and the color is identical which makes spotting the difference incredibly difficult. If you had unlimited time you would probably find it without much trouble. But when a 5 second timer is counting down your brain shifts into a mode where speed becomes more important than precision. Visual fatigue plays a significant role as well. When your eyes scan across an image filled with repetitive shapes they can get tired quickly. This exhaustion causes certain details to blend into the background which makes finding the unusual character much harder than it should be.

    What This 5 Second Challenge Tests About Your Mind

    This optical illusion does more than entertain you. It quietly measures different mental skills. The most important one is selective attention. You need to spot tiny differences in shapes while ignoring the confusion caused by seeing the same pattern repeated many times. The puzzle also measures visual discrimination. Your brain must recognize the small structural difference between an S & a 3. These characters look alike but their curves are different. The number 3 has a more open form while the S flows in a smoother way. Processing speed matters too. You are not simply finding a difference but doing it quickly. People who succeed at this challenge usually stay calm & look through the image in an organized way instead of rushing through it.

    Simple Techniques to Spot the Number 3 Faster

    If you want to solve this illusion within 5 seconds the way you scan the image is important. Instead of viewing the entire grid at once, examine small sections. Work through it row by row or column by column so your eyes do not miss any areas. Another useful trick is to examine the openings in each character. The number 3 typically has a more distinct separation between its top and bottom curves compared to the letter S. This small difference becomes easier to spot when you understand what to search for. You can also soften your gaze rather than staring hard at the image. Sometimes the odd shape appears more clearly when your eyes are not tense. Staying relaxed is important. Rushing often causes sloppy scanning and overlooked details.

    Where the Hidden Number Is Located

    If you could not find the number 3 in time the answer is easy to see once you know where to look. The hidden number sits in the third row from the bottom and leans a bit to the left side of the grid. It blends in well because it has the same color and size as the letters around it. The shape is what makes it different. The number 3 does not have the same smooth curve as the letter S. When you notice that difference, the puzzle suddenly seems much simpler. This is how most people feel when they solve puzzles like this one.

    Why Shape Based Optical Illusions Are So Popular

    These challenges become popular on the internet because they are straightforward and immediately capture attention. The rules are not complex at all. You look at the picture & set a timer and give it your best effort. This basic format works well for short mental exercises during the day. These puzzles also bring out people’s competitive nature. Individuals enjoy sending these brain teasers to their friends and comparing who finishes first. The brief countdown adds thrill and makes people want to try again. The element of surprise contributes to why so many people like them. After seeing the answer many participants feel amazed that they came so close without noticing the solution earlier. This sudden understanding creates a lasting impression that sticks with them.

    Common Mistakes People Make While Solving It

    Common Mistakes When Searching for Hidden Numbers One frequent error is scanning the grid too quickly. When people hurry through the task their eyes tend to glide across the surface without properly examining the shapes. This rushing behavior often results in missing the hidden number entirely. Another typical mistake involves paying attention to the wrong visual elements. Many people concentrate on color variations or size differences rather than examining the actual structure of each character. In this particular illusion the number 3 closely resembles the letter S in its overall appearance. The most dependable way to find it is by carefully studying the shape of each element. Some individuals also use a random search pattern by jumping from one section of the grid to another without any clear method. This disorganized approach frequently causes them to scan the same areas multiple times while completely overlooking other sections. Using a systematic search method produces much better results

  • Naturally Boost Eyebrow and Eyelash Growth at Home Using Everyday Oils for Fuller Results

    Naturally Boost Eyebrow and Eyelash Growth at Home Using Everyday Oils for Fuller Results

    You don’t notice your eyebrows getting thinner in some dramatic moment. It happens quietly under the bathroom light when you lean in close with a cotton pad. A few hairs at the end look shorter than before. The arch that used to be bold now seems patchy. It might be from getting older or from plucking too much in the early 2000s or maybe just from stress and dry heated air. Whatever caused it makes your face look different somehow like something important is missing from around your eyes. Then you start paying attention to every single lash that falls in the sink when you take off your mascara at night.

    The Gentle Strength of Everyday Kitchen Oils

    Before spending money on costly serums or analysing complicated ingredient labels, it is worth slowing down and noticing what is already within reach at home. In many UK kitchens, everyday oils sit quietly in cupboards and on counters — olive oil by the hob, coconut oil near the kettle, or a small bottle of castor oil stored away. These oils may lack luxury branding, but they offer steady nourishment built on patience and consistency. When it comes to brows and lashes, which are simply delicate hairs, this kind of gentle care can support visible improvement over time.

    The Personal Importance of Brows and Lashes

    Eyebrows and eyelashes often hold deeper emotional significance. Many women recall years of overplucking, heavy makeup trends, or periods of hormonal changes that affected natural hair growth. When brows thin or lashes weaken, it can subtly change how you recognise yourself, leaving the face looking tired or unfamiliar. Choosing a natural routine feels calmer and more aligned with a mindful, slower lifestyle. Oils do not promise overnight change, but with regular use, they gently support the body’s natural growth cycle.

    Everyday Oils Known to Support Hair Strength

    Castor oil is often mentioned first because of its thick consistency, which helps it cling to fine hairs and reduce breakage. Coconut oil is useful for dryness caused by frequent mascara use, while olive oil offers mild conditioning for brows. Lighter options such as almond oil or argan oil are suitable for sensitive skin and absorb quickly. These oils do not force growth; instead, they protect, strengthen, and support healthier conditions for brows and lashes.

    Oil Name Texture & Absorption Benefits for Brows & Lashes
    Castor Oil Dense, slightly tacky feel High in ricinoleic acid, helps lock in moisture, strengthen hair fibres, and minimise lash and brow breakage.
    Coconut Oil (Regular or Fractionated) Light to medium, melts quickly on contact Penetrates the hair shaft to reduce protein loss, leaving brows and lashes softer and shinier.
    Olive Oil Medium weight, mildly heavy Rich in antioxidants, supports the skin barrier around hair roots and improves hair flexibility.
    Sweet Almond Oil Smooth, silky, absorbs well Very gentle and calming, making it suitable for sensitive eye areas while nourishing fine hairs.
    Argan Oil Lightweight, non-greasy Loaded with vitamin E and essential fatty acids, helps improve smoothness, strength, and overall resilience.

    Building a Relaxing Night-Time Care Habit

    Consistency is key, and the most effective routines are those that blend easily into your evening. Begin with clean, makeup-free eyes and freshly washed hands. Select one oil or a simple mix, apply a small amount to the brows using a clean spoolie, and lightly coat the upper lashes with care. Gently blot away any excess oil to avoid irritation. Repeating this process nightly over several weeks transforms it into a calming ritual rather than another task.

    Being Mindful of Eye and Skin Sensitivity

    The skin around the eyes is delicate, so paying attention to how it responds is essential. Always patch test any new oil and begin with very small amounts. If irritation appears, switch to a lighter oil. Avoid allowing oil to enter the eyes, and rinse gently if it does. Anyone with existing eye conditions or ongoing treatments should seek advice from a pharmacist or GP. Results develop slowly, so focus on reduced shedding and gradual fullness rather than quick changes.

    Daily Habits That Support Healthier Growth

    Oils are most effective when paired with supportive daily habits. Limiting waterproof mascara, removing makeup gently, and maintaining a balanced diet rich in protein, healthy fats, and minerals all contribute to healthier hair. Managing stress and being mindful of hormonal health also play a role. Think of oils as external care, while nutrition, rest, and lifestyle form the foundation underneath.

    Creating Your Own Simple Oil Blend

    Once you feel comfortable, making a small custom blend at home can keep your routine straightforward. A mix of castor oil for thickness, almond oil for softness, and argan oil for light nourishment works well. Store the blend in a clean bottle, label it with the date, and use it within a few months. This approach keeps ingredients transparent, familiar, and trusted.

    Observing Progress Without Pressure

    Noticing change gently helps prevent unnecessary stress. Taking a makeup-free photo every few weeks under the same lighting can reveal subtle progress over time. Fuller lines, fewer gaps, and stronger lashes often appear gradually. Missing a few nights does not erase progress — simply return to the routine when you can. The goal is not perfection, but steady, quiet care for what you already have.

  • Spot the Difference Test: Find 3 Differences in the Boy Drawing Image

    Spot the Difference Test: Find 3 Differences in the Boy Drawing Image

    Are you ready for a mental challenge? Spot the Difference puzzles have always been a popular way to test your observation skills. Today we have an exciting puzzle for you called Spot the 3 Differences in the Boy Doodling with Color Pencils. This brain teaser shows two almost identical images of a young boy who is focused on drawing with colorful pencils. However there is a twist. Three small differences have been hidden between the two pictures & you only have 10 seconds to find them. The clock is ticking so let’s start this fun challenge.

    Why “Spot the Difference” Puzzles Are More Than Just Fun

    “Spot the Difference” puzzles may look like simple entertainment, but they offer powerful mental benefits as well. These puzzles demand focused attention, pushing your brain to concentrate deeply on small visual details. As you compare two similar images, your ability to notice subtle changes improves over time. This process also strengthens short-term memory, as your mind works to remember patterns and locations. Beyond cognitive gains, these puzzles act as a calming mental break, helping reduce stress and improve mood. It’s this mix of fun and brain training that makes them so effective for overall mental well-being.

    The Challenge: Spot the 3 Differences in the Boy’s Doodling Scene

    In this engaging challenge, you’re shown two images of a boy doodling with colorful pencils. At first glance, both images appear exactly the same. But look closely—three carefully hidden differences are waiting to be discovered. These changes are subtle and placed in unexpected areas, such as the background, the boy’s appearance, or the objects around him. The challenge lies in training your eyes to slow down and truly observe every detail rather than relying on first impressions.

    The Countdown Begins!

    You have just 10 seconds to find all three differences. With time ticking away, your brain must work quickly and efficiently. Scan every part of the image—the boy, his clothes, the desk, the pencils, and the background. Differences may include slight color changes, missing objects, or altered shapes. Staying calm while scanning methodically is the key to success, as rushing often leads to overlooked details.

    Smart Strategies to Spot Differences Faster

    Start by checking the background, as small changes are often hidden behind the main subject. Next, examine the boy’s clothing for missing buttons, altered colors, or pattern shifts. Then focus on the doodling tools—pencils and crayons are common places for color changes. Move your eyes in a structured way instead of jumping randomly, and keep your focus steady to avoid missing subtle clues.

    The Solution: Here Are the Three Differences

    If you struggled to find all three differences, don’t worry—the solution is here. First, the wall clock shows a different time in each image, with the hands slightly shifted. Second, a button on the boy’s shirt appears in one image but is missing in the other. Finally, one of the crayons changes color—from purple in one image to yellow in the other. These small details are easy to miss, especially under time pressure.

    How These Puzzles Sharpen Your Mind

    “Spot the Difference” puzzles actively improve visual processing by training your brain to analyze images more efficiently. The time limit encourages fast thinking, boosting mental agility. Over time, repeated practice enhances attention to detail, a skill that benefits daily life, work, and learning. What starts as a simple game gradually becomes a powerful tool for sharpening cognitive performance.

    Where to Find More “Spot the Difference” Puzzles

    If you enjoyed this challenge, there are many ways to explore more puzzles. Puzzle apps offer themed challenges with varying difficulty levels and progress tracking. Websites often provide daily or weekly puzzles, sometimes with competitive elements. Books and magazines are ideal for screen-free relaxation, while online communities and social platforms frequently share new puzzles you can solve alone or with others.

  • Grow Healthier Lashes and Brows Naturally With a Simple Daily Castor Oil Routine Method

    Grow Healthier Lashes and Brows Naturally With a Simple Daily Castor Oil Routine Method

    The first time you notice the sound of your own eyelashes, it feels almost like a quiet magic trick. Lean near a window on a windy evening or rub your eyes after a long, tiring day, and there it is—a soft brushing sound, tiny hairs whispering against skin. Lashes and brows are so small and subtle that we forget about them completely, until one day they don’t look the same. They seem less full, less dark, less bold than before. Under harsh bathroom lighting, you pause and wonder when this thinning began, and soon you are searching for serums, pencils, and gels that promise fast results.

    The Slow Beauty of Ritual

    There is another path—slower, quieter, and deeply satisfying. It comes in a small amber bottle, thick and golden, with a faint earthy scent: castor oil. Not a glossy miracle serum, but something simple, almost old-fashioned. This plant oil, pressed from castor bean seeds, has a history rooted in patience. Its use for lashes and brows is not about instant drama. It is built on consistency, gentle care, and small daily rituals that feel personal and grounding.

    Creating a Nightly Rhythm

    Imagine the end of the day when the house grows quiet and screens finally dim. You stand at the sink, moving through familiar steps—warm water, cleanser, towel. Makeup melts away softly. Then comes the extra minute you give yourself. You reach for the bottle, feel its weight, and watch the oil catch the light. It does not promise overnight miracles. Instead, it encourages a kinder relationship with your face and with time itself, night after night.

    The Soft Science Behind Castor Oil

    Castor oil surprises many people with its thick, syrup-like texture. Warmed between fingers, it spreads easily. This richness comes from ricinoleic acid, a fatty acid known for its ability to lock in moisture. While scientific studies on lash growth are limited, its practical benefit is clear: it protects fragile hairs from dryness, friction, and daily makeup stress. It does not create new hair, but it helps preserve what you already have.

    The Power of Gentle Massage

    Applying oil changes how you touch your face. Movements become slower and softer. This gentle massage can support local circulation and help follicles feel comfortable and nourished. Combined with a calm routine, it turns a simple step into a moment of care rather than correction.

    How to Begin a Lash and Brow Ritual

    The ritual begins in the quiet bathroom, with water draining softly from the sink and the mirror slightly fogged. Each step is simple, intentional, and unhurried.

    Step-by-Step Castor Oil Routine

    Step Action Purpose
    Cleanse Remove all makeup gently using a mild cleanser Prevents residue from blocking follicles
    Prepare Tools Use a clean mascara wand or cotton swab Ensures hygienic application
    Decant Oil Place a small drop on your hand or dish Keeps oil clean and controlled
    Apply to Lashes Brush lightly from mid-length to tips Reduces breakage without irritation
    Nourish Brows Comb oil along natural brow direction Supports softness and fullness

    Noticing Change Over Time

    The hardest part of natural care is waiting. In the first few weeks, the change you notice is softness rather than length. Lashes feel less brittle, brows smoother, and makeup applies more easily. Over time—often after one or two months—you may see subtle fullness, fewer gaps, and healthier-looking hairs that stay longer in their growth cycle.

    Supporting the Ritual With Daily Habits

    This ritual works best when paired with gentle daily choices. Use lash curlers sparingly, take mascara-free days, avoid over-tweezing, and remove makeup with care. Nourishing your body with enough protein, healthy fats, and water also supports hair health from within.

    Listening to Your Skin

    Even natural oils require attention. If you notice redness, itching, or bumps, pause and rinse gently. Some people do better applying castor oil every other night. Always choose a pure, fragrance-free oil, and if your eyes are sensitive, consult a professional before continuing.

    Letting Your Natural Frame Return

    As lashes and brows grow stronger, your face begins to feel more like you again. You may find yourself using less makeup or skipping it altogether on some days. The change is quiet and earned, like tending a small, private garden over time—one gentle night at a time.

  • Spot the Difference Challenge: Test Observation Skills With the Bear Puzzle

    Spot the Difference Challenge: Test Observation Skills With the Bear Puzzle

    Have you ever tried a Spot the Difference puzzle to test your brain? These puzzles are entertaining and they help improve your focus & ability to notice small details. Today we have a special challenge for you involving two cute bear images. Your task is to find three small differences between them in just 9 seconds. This activity will measure how fast you can concentrate and how sharp your mind is.

    Why “Spot the Difference” Puzzles Are Great for You

    “Spot the Difference” puzzles are an enjoyable way to keep your brain active while also helping you relax. They combine fun with mental exercise, making them suitable for all ages. These puzzles challenge your eyes and brain to work together, encouraging sharper thinking without pressure. Whether you play for a few minutes or longer, they offer meaningful mental benefits that can carry over into daily life.

    How These Puzzles Improve Your Mind

    – Improves Visual Perception: Carefully comparing two similar images trains your eyes to notice fine details, which can sharpen awareness in everyday situations.

    – Boosts Cognitive Skills: Searching for differences strengthens memory, attention, and problem-solving skills in a calm, low-stress way.

    – Enhances Focus and Concentration: Time limits push you to concentrate quickly, helping improve sustained attention over time.

    – Provides Mental Stimulation: Just like physical exercise keeps the body fit, puzzles keep the brain active and responsive.

    The Challenge: Spot the 3 Differences Between the Bear Images

    In this challenge, you are shown two images featuring cute bears enjoying a playful moment. At first glance, both images look almost identical, but three small differences are hidden within them. You have only 9 seconds to find all three, so stay alert and focused.

    The differences may involve changes in color, missing elements, or slight shifts in position. Some details are subtle and easy to miss, making the challenge both fun and rewarding.

    Tips for Spotting the Differences

    – Start With the Background: Scan areas like the sky, trees, or surroundings first, as changes are often hidden there.

    – Look for Color Changes: A slightly different shade or a missing color detail can signal a difference.

    – Check for Missing or Extra Objects: Items such as bees, clouds, or small accessories may appear in one image but not the other.

    – Focus on Symmetry: If something seems symmetrical, double-check both sides for small mismatches.

    – Use Peripheral Vision: Quickly scanning without focusing too hard can sometimes make differences stand out more clearly.

    The Solution: What Are the Three Differences?

    – Cloud Shape: The cloud on the left side of the image is complete in one picture but appears slightly altered in the other.

    – Bees and Honeycomb: One bee near the honeycomb has a different position, creating a noticeable change between the images.

    – Bear’s Belly Spot: The smaller bear has a dark brown belly spot in one image that is missing in the other.

    How These Puzzles Improve Mental Focus

    As you search for differences, your brain learns to focus on fine details and process information more efficiently. Over time, this can improve attention span, visual accuracy, and quick decision-making. Comparing images also strengthens memory by training your brain to recall details accurately.

    Why You Should Try More “Spot the Difference” Puzzles

    Completing one puzzle is just the beginning. Regularly playing “Spot the Difference” games can sharpen your observation skills and keep your mind active. With endless themes—animals, nature, and abstract designs—these puzzles never get boring. They are also a great way to enjoy friendly competition with family or friends while giving your brain a healthy workout.

  • Spot the Difference Test: Can You Find 3 Differences in the Dog Images Within 10 Seconds

    Spot the Difference Test: Can You Find 3 Differences in the Dog Images Within 10 Seconds

    Spot the Difference games remain among the most popular visual puzzles for everyone regardless of age. They appear easy and feel calming but they secretly test your brain in meaningful ways. In this 10 second challenge you see two dog pictures that look nearly identical. Your goal is to find three hidden differences before the timer ends. When you first look at them both images appear to match perfectly. The dog seems the same & the background looks familiar and nothing seems wrong. But this is exactly how the puzzle tricks you. The differences are small & deliberately hidden to measure how well you catch tiny details when you’re under pressure.

    Why Spot the Difference Games Are So Popular

    The appeal of spot the difference puzzles lies in how they combine entertainment with mental exercise. No special abilities or complicated rules are required. The only thing needed is concentration. These puzzles attract people of all ages including kids, grown-ups and older individuals because they are simple to grasp yet often challenging to complete. They appear regularly in newspapers puzzle collections, school lessons and smartphone applications. Over recent years they have gained traction on the internet since they take little time to try and can be easily shared with others.

    How This Dog Puzzle Challenges Your Brain

    This puzzle evaluates three fundamental abilities. It measures observation skills attention to detail and visual memory. The brain attempts to conserve energy when it encounters two similar images placed next to each other by treating them as identical. This automatic process frequently leads people to overlook minor modifications. The dog images exploit this tendency deliberately. The primary subject remains unchanged to reduce vigilance. The differences are concealed in sections that most viewers examine hastily or disregard entirely.

    The Role of the 10 Seconds Time Limit

    Adding a 10 second limit transforms a relaxed task into a thrilling test. The pressure of time alters brain function. Rather than methodically examining each part most people hurry & depend on rapid instincts. Successful participants typically use an organized method. They examine the picture systematically from one side to the other or from top to bottom rather than looking around randomly. Maintaining composure during the countdown often determines whether someone succeeds.

    Common Mistakes Players Make

    One common mistake is focusing only on the dog itself. While the dog matters these puzzles often hide changes in the background. Flowers and grass and small objects are popular hiding places. Another mistake is assuming differences must be large. In reality the smallest changes are often the hardest to spot. A missing color or a tiny object or a slight shape change can be enough to throw off the entire image.

    The Three Hidden Differences Explained

    If you found all three differences in 10 seconds your observation skills are excellent. If you did not find them here is what changed between the two images. The first difference is on the left side. One purple flower from the original picture became a group of white flowers in the second image. This change is hard to notice because the flowers blend into the background. The second difference is on the dog. The red ring around the tag on the dog’s collar is gone in the second image. Many people miss this detail even though the collar is still there. The third difference is near the dog’s tail on the right side. A section of green grass was replaced with gray rocks in the second image. This background change is subtle but you can see it when you look closely at that spot.

    What Your Result Says About Your Observation Skills

    Finding all three differences quickly shows that you have strong attention to detail and good visual processing abilities. It means your brain can resist making assumptions and can carefully analyze what it sees. If you missed one or more differences it does not mean you have poor observation skills. It simply shows how powerful visual illusions can be. With practice your ability to notice small changes will improve significantly.

    Mental Benefits of Spot the Difference Puzzles

    Spot the difference games offer more than just entertainment. They help improve concentration by making the brain stay focused on a single task. They also build visual memory since you need to remember details from one image while looking at another. These puzzles appear frequently in educational settings because they promote patience and careful thinking. Just a few minutes of daily practice can help sharpen mental clarity.

    Tips to Get Better at Spot the Difference Games

    To improve your performance you should divide the image into sections and scan one section at a time. This approach reduces the chance of missing hidden details. Another useful tip is to look for color changes first since they are often easier to detect than shape changes. Most importantly you need to stay relaxed. A calm mind processes visual information more accurately than a rushed one.

    Final Thoughts on the Dog Spot the Difference Challenge

    The “Within 10 Seconds Spot the 3 Differences in the Dog Pictures” game shows how small details matter. What seems easy at first often turns into a real challenge that tests your focus & patience. Whether you found all the differences right away or needed help with the answer every try helps improve your brain function. Keep working on similar puzzles and you will see your observation skills improve with each new challenge.

  • Gentle Yoga Relief: 7 Low-Impact Poses That Ease Muscle Tension While Protecting Joints and Soft Tissues

    Gentle Yoga Relief: 7 Low-Impact Poses That Ease Muscle Tension While Protecting Joints and Soft Tissues

    Seven Yoga Poses for Deep Relaxation and Recovery Yoga provides excellent benefits for your physical and mental health. Some poses work especially well when you want to relax after a tough day. These positions help loosen tight muscles while calming your thoughts and lowering stress levels. They play an important role in supporting your overall health and wellness. The following seven yoga poses can help you achieve deep relaxation & inner peace.

    The Science of Gentle Yoga: How Slow, Supported Movements Safely Melt Muscle Tension

    Child’s Pose provides a soothing stretch for the hips, thighs, and spine while gently settling the mind. This calming posture encourages the release of built-up tension and creates a quiet pause within your yoga practice. By focusing on steady, mindful breathing, the body slowly relaxes and mental stress begins to dissolve.

    – Start in a kneeling position with your big toes touching and your knees comfortably apart.

    – Slowly hinge forward from the hips, lowering your torso down and resting your chest toward the mat, with your forehead gently placed on the floor.

    – Extend your arms forward for a lengthening stretch, or place them alongside your body with palms facing up for deeper relaxation.

    – Breathe deeply and evenly, remaining in this pose for 30 seconds to 1 minute.

    Child’s Pose (Balasana): A Comforting Restorative Posture That Signals the Body to Let Go

    This posture offers a deep stretch to the back, hamstrings, and calves while strengthening the arms and shoulders. It helps release built-up tension along the spine and enhances blood flow to the brain. As circulation improves, mental fog begins to lift, leaving you feeling refreshed, focused, and energized.

    – Begin in a tabletop position, with your hands placed slightly in front of your shoulders and your knees stacked directly beneath your hips.

    – Press evenly through your palms as you lift your hips upward, slowly straightening your legs and gently guiding your heels toward the floor.

    – Position your head comfortably between your arms, allowing the neck to remain relaxed and free of strain.

    – Hold the pose for 30 seconds to 1 minute, maintaining slow, deep, and steady breaths throughout the practice.

    Downward-Facing Dog (Adho Mukha Svanasana): A Modified Full-Body Stretch That Relieves Tightness Without Joint Stress

    Legs Up the Wall is a soothing restorative pose that gently calms the body and mind. Elevating the legs helps improve circulation, ease lower-back tension, and reduce feelings of stress and anxiety. This pose is ideal for deep relaxation and mental clarity.

    – Sit sideways close to a wall, then carefully swing your legs up so they rest vertically against the wall as you lower your back onto the floor.

    – Keep your legs comfortably straight and place your arms alongside your body in a relaxed, open position.

    – Focus on slow, steady breathing and remain in this posture for 5 to 10 minutes, allowing your body to fully unwind.

    Legs Up the Wall (Viparita Karani): A Soothing Inversion That Reduces Fatigue and Calms Overworked Muscles

    This posture gently opens the hips and broadens the chest, encouraging deep, steady breathing and a sense of inner calm. It helps release built-up tension in the lower body while soothing and relaxing the nervous system.

    – Lie down comfortably on your back and bring the soles of your feet together, allowing your knees to fall open naturally to each side.

    – Rest your hands on your abdomen or place them relaxed on the floor beside your body.

    – Close your eyes and take slow, deep breaths, staying in this position for a few minutes to fully relax.

    Reclining Bound Angle (Supta Baddha Konasana): A Passive Hip-Opening Pose for Deep, Effortless Muscle Release

    Savasana is a restorative relaxation pose usually practiced at the conclusion of a yoga session. It gives the body time to fully integrate the effects of the practice while creating a deep sense of rest and mental ease. This pose helps anchor awareness in the present moment and supports the body’s natural process of recovery after physical movement.

    – Lie flat on your back in a comfortable position, with your arms relaxed alongside your body and palms turned upward.

    – Softly close your eyes and gently shift your attention to your breathing as your body gradually releases tension.

    – Stay in this posture for 5 to 10 minutes, allowing any lingering stress or tightness to gently fade away.

    Savasana (Corpse Pose): Total Physical and Mental Reset for Long-Lasting Tension Relief

    This flowing exercise increases spine flexibility & decreases back tension while boosting energy flow throughout your body. It serves as an effective warmup and removes stiffness from your neck and back regions. Steps to Perform: Start on your hands & knees with your wrists positioned directly under your shoulders and your knees under your hips. Inhale as you arch your back downward and lift your head and tailbone upward. Exhale as you round your spine upward and bring your chin and tailbone downward. Repeat this pattern for one to two minutes while coordinating your breath with each movement.

    Cat–Cow Flow (Marjaryasana–Bitilasana): Gentle Spinal Mobility to Ease Stiffness and Restore Natural Movement

    This calming posture gently stretches the spine and the muscles running along the back of the legs. It supports overall flexibility while releasing built-up tension in the back. By encouraging slow, mindful breathing, the pose helps quiet the mind, reduce stress, and promote a deep sense of relaxation.

    – Sit comfortably on the floor with both legs extended straight in front of you.

    – Take a deep inhale and lengthen your spine by lifting through the top of your head.

    – As you exhale, hinge forward from the hips, allowing your hands to reach toward your shins, ankles, or feet.

    – Remain in this position for 30 seconds to one minute, focusing on smooth, deep, and steady breaths.