Category: abook

  • 8 Yoga Exercises at Home to Support a Healthy and Active Body

    8 Yoga Exercises at Home to Support a Healthy and Active Body

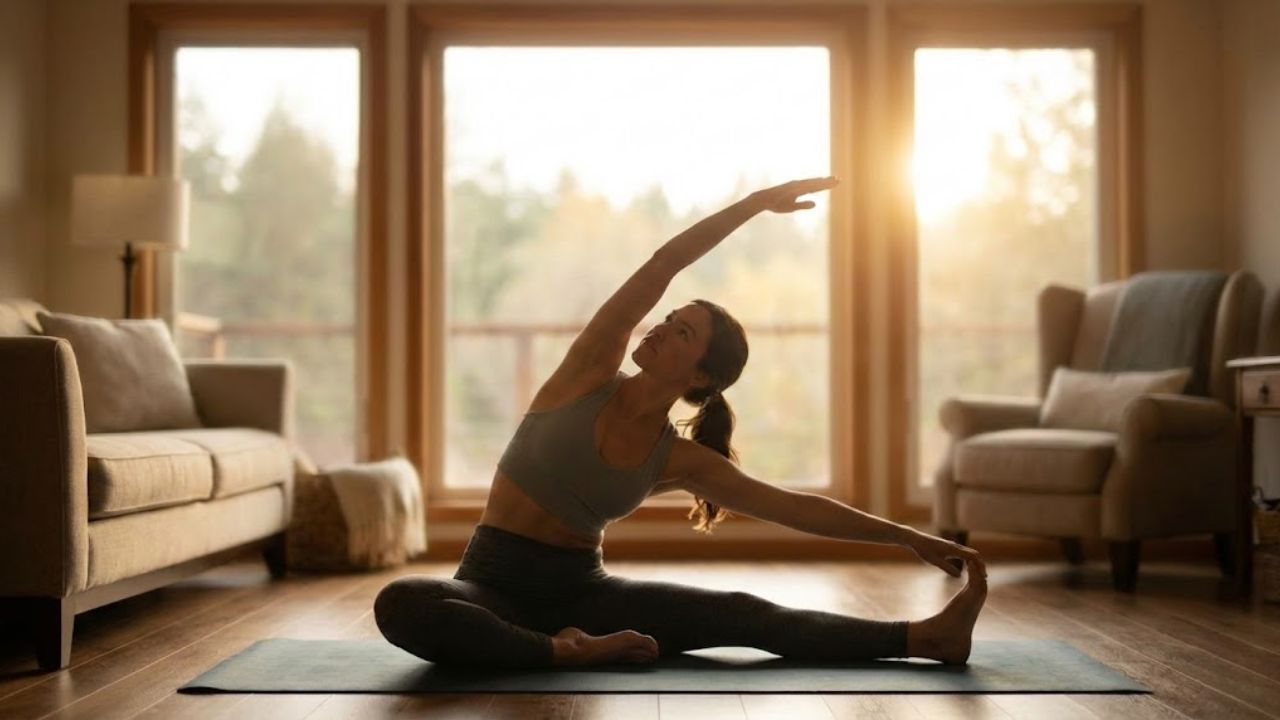
    Eight Simple Yoga Exercises to Keep Your Body Healthy at Home Staying healthy does not mean you need to spend hours at the gym or follow complicated workout routines. Yoga provides a natural and accessible way to maintain flexibility and strength while improving your overall balance. Practicing yoga at home makes it even better because you can work at your own speed without feeling rushed or judged. When you make yoga part of your daily routine you will notice improvements in how your joints feel and how well your body digests food. Your posture will get better & your immune system will become stronger. You will also feel calmer and more centered in your mind. The eight yoga exercises described here are straightforward and safe for most people to try. They work well for anyone who wants to build a healthier body through consistent practice at home. You do not need special equipment or previous experience to get started. Each exercise targets different parts of your body & contributes to your overall wellness in its own way. By practicing these poses regularly you create a foundation for long-term health that fits naturally into your daily life.

    Build Strong Alignment and Awareness with Mountain Pose

    Mountain Pose serves as the base for every standing yoga position. Stand straight with your feet placed together & let your arms hang naturally while keeping your spine extended. Pay attention to steady breathing and feel connected to the ground through your feet. This position helps correct your posture & makes your leg muscles stronger while increasing awareness of your body. Good posture keeps your spine healthy and prevents extra stress on your muscles and joints.

    Mobilise the Spine Gently Using Cat–Cow Flow

    Cat and Cow Pose helps move the spine gently and reduces stiffness. Start by getting on your hands and knees. Breathe in and curve your back downward while raising your head up. Breathe out and curve your spine upward while bringing your chin down toward your chest. This flowing motion makes the spine more flexible & increases blood flow to the area. The pose works well for anyone who sits most of the day or feels tightness in their back.

    Energise the Entire Body Through Downward Facing Dog

    Cat and Cow Pose helps your spine move gently and reduces stiffness. Get on your hands & knees to start. Breathe in and arch your back down while lifting your head up. Breathe out and round your spine up while tucking your chin toward your chest. This smooth movement makes your spine more flexible & brings more blood to the area. The pose works well for people who sit most of the day or have a tight back.

    Strengthen and Protect the Back with Cobra Pose

    Cobra Pose Cobra Pose works to strengthen your spine & open up your chest area. Start by lying flat on your stomach and place your palms directly under your shoulders. Slowly lift your chest upward while making sure your hips stay pressed against the floor. This position builds strength in your back muscles & helps improve your posture over time. It also increases your breathing capacity by expanding the chest. Regular practice of this pose can reduce the stiffness that develops from sitting too much during the day. People who work at desks or spend long hours in one position will find this especially beneficial for relieving tension in the back and shoulders.

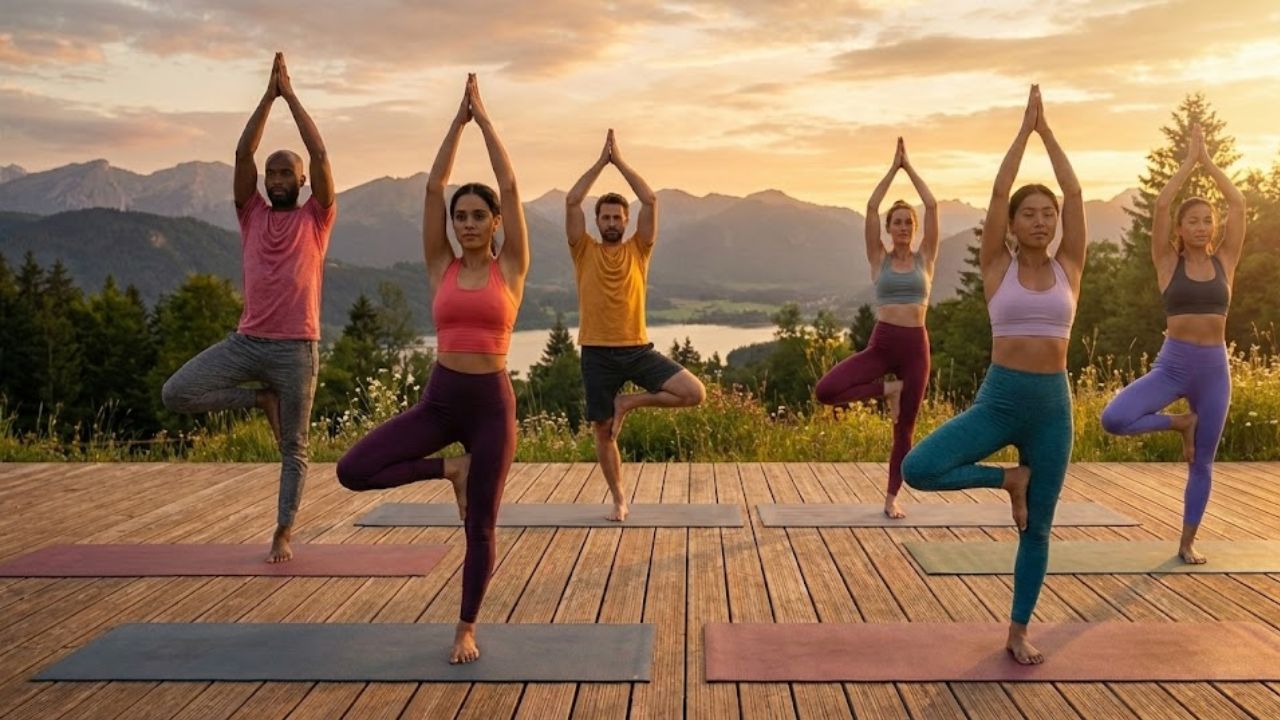
    Improve Balance and Focus Through Tree Pose Practice

    Cobra Pose Cobra Pose strengthens your spine & opens your chest. Lie flat on your stomach and put your palms under your shoulders. Lift your chest slowly while keeping your hips on the floor. This position makes your back muscles stronger and improves your posture. It also helps you breathe better by expanding your chest. Doing this pose regularly reduces stiffness from sitting too long. People who work at desks or stay in one position for hours will find it helpful for easing back and shoulder tension.

    Activate Core and Glutes Using Bridge Pose

    Bridge Pose builds strength in your glutes and core muscles while supporting your lower back. Start by lying flat on your back and bending your knees so your feet rest firmly on the floor. Push through your feet and raise your hips toward the ceiling. This position helps align your spine properly and boosts blood flow throughout your body while toning your legs and buttocks. The pose naturally opens up your chest area and makes breathing easier.

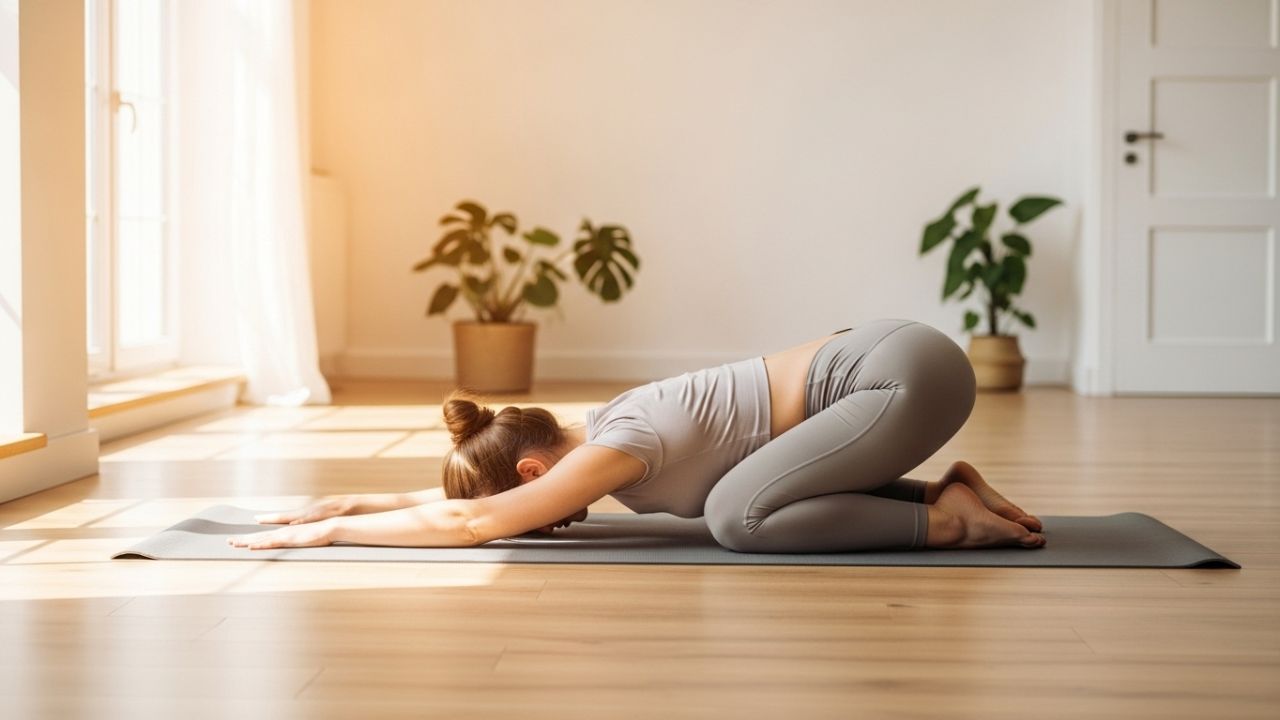
    Increase Flexibility and Inner Calm with Seated Forward Bend

    Bridge Pose strengthens your glutes & core while providing support to your lower back. Begin by lying on your back and bend your knees with your feet flat on the floor. Press down through your feet and lift your hips upward toward the ceiling. This movement helps align your spine correctly & increases blood circulation through your body while firming your legs and buttocks. The pose opens your chest naturally and improves your breathing.

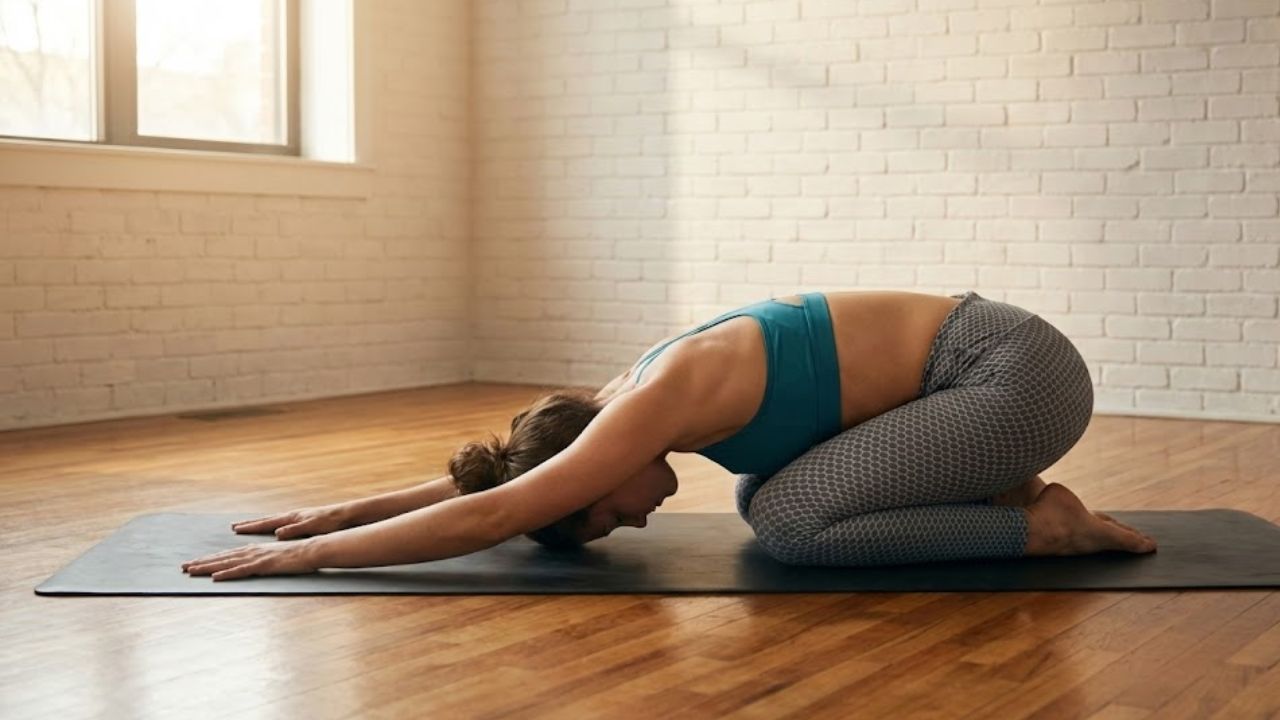
    Release Tension and Restore Energy in Corpse Pose

    Corpse Pose helps your body relax and recover completely. You lie flat on your back with your arms resting at your sides and your eyes closed. Focus on breathing slowly and naturally. This pose reduces stress & improves mental clarity while letting your muscles recover after exercise. It plays an important role in any healthy yoga routine.

    How Home Yoga Builds Long-Term Strength, Mobility, and Wellness

    Corpse Pose allows your body to relax and recover fully. You lie flat on your back with your arms at your sides & your eyes closed. Focus on breathing slowly and naturally. This pose reduces stress and improves mental clarity while helping your muscles recover after exercise. It serves as an essential part of any healthy yoga routine.

    Simple Home Yoga Tips to Maximise Daily Results

    Practice when your stomach is empty or after eating something light. Put on comfortable clothing & find a quiet spot. Move at a slow pace & pay attention to what your body tells you. Being consistent matters more than how long you practice. Just twenty minutes each day can create noticeable changes as time goes on. Building a healthy body happens through thoughtful movement & taking care of yourself regularly. These eight yoga exercises create a balanced routine that helps with strength and flexibility while improving posture & bringing inner peace. When you practice steadily at home yoga becomes a strong habit that supports your health and wellbeing throughout your life.

  • 6 Yoga Exercises Designed to Help Relax the Mind and Manage Stress

    6 Yoga Exercises Designed to Help Relax the Mind and Manage Stress

    Yoga works wonderfully for reducing stress & helping you relax. Modern life moves fast and stress builds up easily. This affects your body and mind in negative ways. When you add yoga to your daily schedule you can let go of tension and refresh yourself mentally and physically. These six easy yoga exercises will help you handle stress better while boosting relaxation and improving how you feel overall.

    1. Child’s Pose (Balasana) — A Grounding Posture for Mental Calm

    Child’s Pose works well for relaxation & managing stress because it creates a deeply peaceful state. The position relaxes your mind and gently stretches your back along with your hips and thighs. It also helps you focus on breathing mindfully which brings a feeling of calm and peace. To perform this pose you begin on your hands and knees. Spread your knees apart widely & move your hips back so they rest near your heels. Stretch your arms forward along the mat and place your forehead down on the ground. Take deep breaths and let your body relax deeper into the stretch each time you breathe out. This pose offers several benefits. It releases tension from your back and shoulders and neck. It calms your mind & encourages relaxation while supporting deep breathing patterns.

    2. Cat–Cow Flow (Marjaryasana–Bitilasana) — Gentle Movement to Release Tension

    Why it helps you relax and manage stress: Moving smoothly between Cat and Cow Pose releases tightness in your spine and the muscles around your shoulders and neck. The steady breathing pattern that goes with these movements calms your nervous system & creates a peaceful feeling. How to do it: Start on your hands and knees in a tabletop position. Breathe in as you let your belly sink toward the floor while lifting your chest and tailbone upward for Cow Pose. Breathe out as you arch your back upward and bring your chin toward your chest for Cat Pose. Keep moving back and forth between these positions while matching your breathing to each movement. Benefits: Eases tension in your back & neck. Improves how well your spine can move. Calms your mind and body by focusing on your breathing.

    3. Legs Up the Wall Pose (Viparita Karani) — Restorative Inversion for Nervous System Relief

    Why this pose helps you unwind: Legs Up the Wall is a gentle resting position that calms your body & eases mental tension. It releases tightness in your lower body while boosting blood flow and settling your nervous system. How to practice it: Position yourself sideways next to a wall while sitting. Slowly lower your back to the floor as you lift your legs up against the wall. Let your arms rest naturally at your sides with your palms turned upward. Close your eyes and take slow breaths as you sink deeper into relaxation. Hold this position for 5 to 10 minutes. What you gain: Eases tightness in your legs & lower back. Improves blood circulation throughout your body. Decreases feelings of worry and tension. Brings mental clarity and peace.

    4. Standing Forward Fold (Uttanasana) — Deep Stretch to Quiet Racing Thoughts

    Why it helps with relaxation and stress relief: Forward Fold is a soothing pose that releases tightness in your back and neck & shoulders. This inverted position also promotes calmness and relaxation by boosting blood circulation to your brain. How to perform it: Stand upright with your feet positioned at hip width. Take a breath in to extend your spine and then breathe out while bending forward from your hips. Allow your head to drop naturally and let your chest move closer to your thighs. When you can manage it you should put your hands on the ground or grip your legs. Maintain a slight bend in your knees to prevent strain on your lower back. Benefits: Reduces tightness in your back and neck and shoulders and promotes deeper breathing and calms your nervous system.

    5. Reclining Bound Angle Pose (Supta Baddha Konasana) — Opening the Body to Emotional Ease

    Why it helps with relaxation & stress management: Reclining Bound Angle Pose provides a deeply soothing stretch that opens your hips and chest while releasing tension from your lower body and creating a peaceful feeling. This gentle pose helps you focus on slow and mindful breathing that naturally reduces stress. How to do it: Start by lying flat on your back with both knees bent and your feet resting on the floor. Press the bottoms of your feet together and let your knees drop open toward each side. Rest your arms alongside your body with your palms turned upward. Take slow deep breaths and let your body sink into the stretch for several minutes. Benefits: This pose opens your hips and chest while encouraging complete relaxation. It calms both your mind & body and helps reduce stress and physical tension.

    6. Savasana (Corpse Pose) — Complete Relaxation for Mind–Body Reset

    Why it helps with relaxation and stress management: Savasana is the most relaxing pose in yoga. It gives your body and mind time to take in all the benefits from your practice while helping you feel completely relaxed & less stressed. This pose is important for clearing your mind and finding emotional balance. How to do it: Lie flat on your back with your legs stretched out and your arms resting at your sides with palms facing upward. Close your eyes and pay attention to your breathing. Let your entire body relax & release any tightness in your muscles. Remain in this position for 5 to 10 minutes while letting go of all thoughts and distractions. Benefits: Creates deep relaxation; lowers stress & anxiety; enhances mental clarity; brings back energy & balance.

  • 6 Yoga Moves for Better Posture: Natural Alignment Support and an Instant Height Lift Effect

    6 Yoga Moves for Better Posture: Natural Alignment Support and an Instant Height Lift Effect

    Standing upright with confidence is closely linked to maintaining good posture. Unfortunately, many people develop habits like slouching or hunching, which can negatively affect both their appearance and physical health. Yoga provides a natural and effective solution to correct posture and help you appear taller almost instantly. With regular practice of specific poses, you can elongate the spine, strengthen supportive muscles, and fix postural imbalances. Below are six powerful yoga poses that can help you stand taller, feel stronger, and instantly improve your posture.

    1. Mountain Pose (Tadasana)

    Mountain Pose is one of the most basic yet powerful yoga postures and forms the foundation for many other poses. It plays a key role in posture correction by teaching proper body alignment and balance.

    To practice Mountain Pose, stand upright with your feet together or slightly apart, toes facing forward. Press your feet firmly into the ground and activate your thigh muscles. Lift your chest, roll your shoulders back, and lengthen your spine. Raise your arms overhead with palms facing each other, and visualize your body being pulled upward from the top of your head. This pose promotes awareness of alignment, helping reduce slouching and creating a taller, more confident posture.

    2. Cobra Pose (Bhujangasana)

    Cobra Pose is excellent for strengthening the muscles of the back while opening the chest and shoulders. These benefits are essential for maintaining an upright posture and relieving spinal stiffness.

    Begin by lying face down on your mat with your palms placed beside your shoulders. Keep your elbows close to your ribs. Press gently into your hands and lift your chest off the floor, extending your spine upward. Keep a slight bend in your elbows and engage your back muscles rather than forcing the lift. Ensure your legs remain grounded. This pose opens the chest, strengthens the spine, and helps counteract rounded shoulders, giving you a more upright and lifted posture.

    3. Downward-Facing Dog (Adho Mukha Svanasana)

    Downward-Facing Dog is a full-body pose that both stretches and strengthens, making it highly effective for posture improvement. It targets the spine, hamstrings, calves, and shoulders, all of which support proper alignment.

    Start on all fours with your hands under your shoulders and knees under your hips. Lift your hips upward, straightening your legs as much as comfortable. Press your heels toward the floor and extend your arms forward, spreading your fingers wide. Allow your head to relax between your arms while keeping your spine long. This pose encourages spinal length, improves alignment, and helps your body feel elongated from head to toe.

    4. Warrior I (Virabhadrasana I)

    Warrior I is a strong, empowering pose that builds stability in the legs while opening the hips and chest. It supports good posture by reinforcing a tall spine and open upper body.

    Stand with your feet wide apart and turn one foot outward. Bend the front knee so it stays aligned above the ankle, while keeping the back leg straight. Raise your arms overhead and open your chest, keeping your gaze forward. Distribute your weight evenly and maintain a strong, upright spine. This pose strengthens posture-supporting muscles and encourages a lifted, confident stance.

    5. Extended Triangle Pose (Utthita Trikonasana)

    Extended Triangle Pose provides a deep stretch to the spine, hips, and legs while promoting balance and alignment. It helps lengthen the torso and open the chest, which supports better posture.

    Stand with your legs wide apart and turn one foot outward. Extend your arms out to the sides at shoulder height. Reach forward with your front arm and lower it to your shin, ankle, or the floor, keeping your torso open. Extend the opposite arm upward, forming a straight line through your body. Focus on lengthening your spine and keeping your chest open. This pose improves flexibility, posture, and creates a feeling of added height.

    6. Seated Forward Fold (Paschimottanasana)

    Seated Forward Fold is a gentle yet effective pose that stretches the hamstrings and lower back while promoting spinal length. It also helps release built-up tension that can contribute to poor posture.

    Sit on the floor with your legs extended straight ahead. Inhale deeply to lengthen your spine, then exhale as you hinge forward from the hips. Reach toward your feet, ankles, or shins without rounding your back. Keep your spine long and your shoulders relaxed. This pose encourages proper spinal alignment, improves flexibility, and contributes to a more elongated and upright posture.

  • Time-Saving Yoga Moves: 10 Gentle Exercises for Busy Schedules

    Time-Saving Yoga Moves: 10 Gentle Exercises for Busy Schedules

    Finding time for yourself feels impossible when work and commuting and family duties take up the entire day. The good news is that yoga does not need a full hour to help. A short mindful sequence done with steady breathing and gentle focus can loosen tight muscles & reset your posture & calm a busy mind during a hectic schedule. This routine works for short breaks. You can do parts of it at your desk or in a quiet corner at home or even in a hotel room while traveling. The goal is not perfect form or deep stretching. It is about creating space in the body and slowing down your breath and leaving the session feeling more comfortable than when you started.

    How to Fit This Fast Yoga Flow Into a Packed Daily Routine

    Think of this as a menu rather than a fixed workout. Choose 3 to 5 moves when you only have a few minutes or complete the full sequence when you can spare 8 to 12 minutes. Move slowly & breathe through your nose while avoiding pain. If a stretch feels intense then back off until you can breathe smoothly. A simple breath guide that works well is to inhale for 4 counts & exhale for 6 counts. Longer exhales tell your nervous system it is safe to relax. This is why even a short session can feel surprisingly restorative.

    Gentle Neck and Shoulder Loosening to Melt Desk Tension

    Neck and Shoulder Release Long hours at a desk or staring at screens usually create tension in your neck & upper back first. This simple stretch helps blood flow better and gets rid of that stiff feeling around your collar after a full day of work. **How to do it:** Sit up straight or stand with good posture. Let your shoulders drop down naturally away from your ears. Tilt your right ear slowly toward your right shoulder while keeping your chin level and not pointing up. Stay in this position for several breaths and then repeat on the left side. For a stronger stretch you can roll your shoulders gently or look down slightly toward your armpit.

    Standing Forward Fold for Instant Calm and Mental Reset

    A forward fold helps decompress your spine while stretching your hamstrings hips, calves & the entire back of your body. This position naturally calms your mind by promoting slower breathing and turning your attention inward. How to perform it: Stand with your feet positioned at hip width and bend forward from your hips. Feel free to bend your knees as much as necessary since this actually protects your lower back and improves the stretch rather than diminishing it. Allow your head to hang freely and keep your jaw relaxed. Stay in this position for 55 to 88 slow breaths before rising gradually to standing.

    Seated Spinal Twist to Ease Tightness and Support Digestion

    Seated Spinal Twist Sitting for extended periods can make your lower & middle back feel stiff & tight. A simple twisting movement helps restore movement to your spine and often feels relaxing after you have been sitting still for a long time. Some people also notice that twists help their digestion work better after eating a large meal. Instructions:Sit up straight either on a chair or on the floor. Put your right hand on the surface behind you and place your left hand on your right thigh. Breathe in while making your spine longer & breathe out as you slowly turn your body to the right. Make sure you twist gradually and do not push your neck too hard. After taking several breaths hold the position and then repeat the same movement on the other side.

    Cat–Cow Flow to Wake Up the Spine Safely

    Cat-Cow is one of the best quick movements for posture because it takes the spine through flexion & extension while matching movement with breath. It works well if your back feels achy from sitting or if you feel compressed after a long day. How to do it: get on all fours. Breathe in to arch your back and lift your chest for Cow pose. Breathe out to round your spine and pull your belly in for Cat pose. Move through 6 to 10 rounds and keep it smooth rather than fast.

    Low Lunge Stretch to Reverse Long Hours of Sitting

    Sitting at a desk all day and traveling in cars often leads to tight hip flexors. The low lunge pose helps open up the front of your hips and stretches your thighs. This makes it easier to stand up straight and move around without feeling stiff. Here’s how to perform this stretch: Place one foot in front of you and lower your other knee down to the ground. Slowly push your hips forward until you notice a stretch in the front of your back hip. Make sure to keep your upper body upright. Stay in this position for 30 to 45 seconds on each side. If your knee feels uncomfortable you can put a folded towel underneath it for cushioning.

    Seated Forward Fold for Deep Relaxation and Inner Stillness

    This pose releases tension in your lower back and hips and helps calm an overstimulated mind. The goal is not to touch your toes but to relax and breathe while allowing your nervous system to settle. How to do it: Sit with your legs extended or bend your knees if needed. Breathe in to lengthen your spine & breathe out as you fold forward slightly. Place your hands wherever feels comfortable and keep your chest relaxed. Hold this position for several slow breaths.

    Child’s Pose for Stress Relief and Grounded Breathing

    Child’s Pose works like a reset button for your body. This position creates a gentle stretch through your back and hips while naturally slowing down your breathing pattern. You can use it whenever you need to relax without putting in much physical effort. Here’s how to get into the pose: Start by kneeling on the floor and touch your big toes together behind you. Spread your knees apart or keep them touching based on what feels comfortable. Lean your upper body forward and lower yourself down until your forehead rests on the ground. Focus on breathing deeply into the sides & back of your ribcage. Hold this position for forty-five to ninety seconds.

    Bridge Pose to Restore Energy and Improve Posture

    Bridge strengthens the glutes and opens the chest to help fix the hunched posture that develops from sitting too much. It can also boost your energy when your mind feels unclear. How to do it: lie on your back with your knees bent and feet flat on the floor. Push through your feet and raise your hips upward. Keep your ribs from sticking out by lightly tightening your core muscles. Hold this position for 20 to 40 seconds and then lower your hips back down. Repeat this movement 2 times.

    Final Resting Pose to Recharge the Body and Mind Fully

    Even sixty seconds of stillness helps your body absorb the benefits of movement. You can lie down or sit in a comfortable position and then close your eyes while breathing slowly. Allow your shoulders to relax and release any tension in your hands. This simple finishing practice often creates the reset feeling that people typically associate with longer yoga sessions. The brief moment of rest gives your nervous system time to process the physical work you just completed. Your heart rate gradually returns to its normal rhythm during this period. Many people find that this short pause helps them transition back into their regular activities with a calmer mindset. Taking even this minimal amount of time for stillness can make a noticeable difference in how you feel afterward. The practice does not require any special equipment or extensive training. You simply need to give yourself permission to pause and let your body settle into a state of rest before moving on with your day.

  • Skip lunges and try this 3-move kettlebell workout to improve balance in 15 minutes

    Skip lunges and try this 3-move kettlebell workout to improve balance in 15 minutes

    Skipping lunges doesn’t mean skipping balance training. In India, where many people look for joint-friendly and time-efficient workouts, a short kettlebell routine can be a practical alternative. This 3-move kettlebell workout focuses on controlled strength, coordination, and stability, helping you improve balance in just 15 minutes. It’s designed for home practice, requires minimal space, and suits busy schedules. By using simple yet effective movements, this routine challenges your core and lower body without the repetitive strain that lunges can cause.

    Why a kettlebell balance workout works better than lunges

    A kettlebell balance workout shifts the focus from repetitive forward motion to controlled, multi-directional movement. Unlike lunges, kettlebell exercises demand constant adjustments, activating stabiliser muscles that often get ignored. This approach encourages core engagement focus, improves joint stability control, and builds functional strength patterns. Because the weight is offset, your body naturally works harder to stay upright, which enhances coordination. Over time, this leads to better movement awareness and smoother transitions in daily activities like climbing stairs or carrying groceries.

    Three-move kettlebell routine to improve balance fast

    This kettlebell routine includes three simple moves performed slowly and with intention. Start with a kettlebell deadlift to establish grounding, followed by a single-arm kettlebell hold to challenge posture, and finish with a controlled kettlebell halo for mobility. Together, they create full-body balance demand while remaining accessible. The sequence promotes steady posture alignment and reinforces controlled weight shifting. Practising these moves back-to-back keeps the workout efficient and helps develop confidence without overwhelming beginners.

    How to structure a 15-minute kettlebell balance session

    A 15-minute session works best when divided into focused rounds. Spend five minutes on each move, resting briefly between sets. This structure supports time-efficient training and reduces fatigue-related mistakes. Maintaining slow reps improves mind muscle connection and encourages safe movement mechanics. Because balance relies on quality rather than quantity, fewer reps done well offer better results. Over weeks, this consistent approach leads to noticeable gains in stability and everyday confidence.

    Summary or Analysis

    Replacing lunges with a short kettlebell routine can be a smart choice for improving balance without stressing the knees. The combination of offset weight and controlled pacing develops long-term balance gains and encourages body awareness growth. For many in India seeking simple home workouts, this method offers a practical path to stronger movement habits. When practised regularly, these three moves create a foundation that supports both fitness goals and daily comfort.

    Workout Element Purpose Time Allocation
    Kettlebell Deadlift Builds base stability 5 minutes
    Single-Arm Hold Challenges balance 5 minutes
    Kettlebell Halo Improves control 5 minutes
    Total Session Full balance focus 15 minutes

    Frequently Asked Questions (FAQs)

    1. Is this kettlebell workout suitable for beginners?

    Yes, beginners can start with light weight and slow movements.

    2. Do I need a heavy kettlebell for balance training?

    No, moderate weight works best for control and safety.

    3. How often should I do this 15-minute routine?

    Practising three to four times a week is usually effective.

    4. Can this replace leg workouts entirely?

    It can complement leg training but shouldn’t fully replace strength work.

  • A mobility coach says this daily routine can help you feel 10 years younger

    A mobility coach says this daily routine can help you feel 10 years younger

    Feeling stiff, tired, or older than you should doesn’t always come from age—it often comes from how your body moves each day. In India, where long sitting hours and low daily movement are common, mobility coaches are increasingly recommending simple daily routines to restore natural motion. This approach focuses on joint health, posture, and controlled movement rather than intense workouts. When practiced consistently, these routines can help improve flexibility, reduce aches, and make everyday activities feel lighter, often giving people the sensation of feeling years younger.

    How a daily mobility routine helps you feel younger

    A well-designed daily mobility routine targets the joints and muscles that quietly lose movement over time. Instead of pushing intensity, it restores range and control through slow, intentional exercises. Mobility coaches often explain that stiffness comes from inactivity, not aging itself. Gentle sequences wake up the hips, spine, shoulders, and ankles, allowing the body to move more freely throughout the day. Over time, this leads to joint freedom gains, better posture, and smoother daily movement. Many people notice less discomfort during walking or bending and experience lighter body feeling as the body stops compensating for tight areas.

    Why mobility coaches recommend this daily routine

    Mobility coaches favor daily routines because consistency matters more than duration. Short sessions done every day help retrain the nervous system to move efficiently again. These routines also reduce injury risk by improving awareness and control. In everyday life, that means fewer sudden strains and more confidence in movement. Practitioners often highlight controlled joint loading and pain-free movement patterns as key benefits. Over weeks, improved circulation and muscle activation can create noticeable energy lift, making common tasks feel easier without needing heavy exercise or equipment.

    What to expect after following the routine consistently

    People who commit to a daily mobility routine usually report changes within a few weeks. Morning stiffness often reduces, and posture naturally improves during sitting and walking. The body feels more responsive rather than rigid. Mobility coaches note that improved movement quality supports long-term health by keeping joints resilient. With time, practitioners experience better movement confidence, reduced daily stiffness, and improved body awareness. These benefits combine to create a younger, more capable feeling that supports both physical comfort and overall well-being.

    Summary or Analysis

    A daily mobility routine works because it aligns with how the body is designed to move—frequently and gently. For people in India balancing work, family, and limited time, this approach offers a realistic path to feeling better without exhausting workouts. By focusing on quality over intensity, mobility training builds resilience gradually. Over months, consistent practice encourages long-term joint health, supports sustainable movement habits, and promotes age-defying mobility that helps individuals stay active, independent, and confident as they grow older.

    Routine Element Primary Benefit
    Spinal mobility drills Improves posture and flexibility
    Hip openers Enhances walking comfort
    Shoulder rotations Reduces upper-body stiffness
    Ankle mobility work Supports balance and stability
    Controlled breathing Encourages relaxation and control

    Frequently Asked Questions (FAQs)

    1. How long should this mobility routine take daily?

    Most routines take 10–20 minutes and focus on consistency rather than duration.

    2. Is this routine suitable for beginners?

    Yes, it uses gentle movements that can be adapted to all fitness levels.

    3. When will results usually become noticeable?

    Many people notice reduced stiffness and better movement within 2–3 weeks.

    4. Can this replace regular workouts?

    It complements workouts but can also stand alone for general movement health.

  • Try these 6 essential stability stacking exercises to improve balance and reduce fall risk safely

    Try these 6 essential stability stacking exercises to improve balance and reduce fall risk safely

    Maintaining good balance becomes increasingly important as we age, especially for older adults looking to stay independent and confident in daily life. In India, where multi-generational households and active lifestyles are common, improving balance can significantly reduce the risk of dangerous falls. Stability stacking exercises focus on layering simple movements that train muscles, joints, and the nervous system to work together more efficiently. When practiced consistently, these exercises help build strength, coordination, and awareness, making everyday activities like walking, climbing stairs, or standing for long periods feel safer and more controlled.

    Stability stacking exercises that strengthen balance foundations

    Stability stacking exercises work by gradually adding layers of challenge, allowing your body to adapt safely. You might begin with a stable stance and then introduce arm movements, head turns, or controlled weight shifts. This method supports joint alignment control, improves core muscle awareness, and enhances postural stability training without overwhelming the body. For beginners or seniors, this approach feels manageable because each layer builds on the last. Over time, these stacked movements encourage smoother reactions and better balance during real-life situations, such as avoiding obstacles or adjusting quickly on uneven ground.

    How stability stacking workouts reduce fall risk safely

    One of the biggest advantages of stability stacking workouts is their focus on safety and gradual progression. Instead of fast or risky movements, these exercises promote controlled movement patterns, reinforce neuromuscular coordination gains, and support safe strength building. By training the body to respond calmly to small challenges, the risk of sudden slips or missteps is reduced. Many people also notice improved confidence, as the body learns how to correct itself before a loss of balance becomes a fall, making daily movements feel more secure.

    Essential stability stacking exercises for daily confidence

    The six essential stability stacking exercises typically include single-leg stands, heel-to-toe walking, gentle squats with support, standing arm reaches, slow marching, and balance holds with eye focus changes. Together, they improve lower body strength, sharpen balance reflex response, and enhance everyday movement safety. Practicing these exercises a few times a week can make a noticeable difference in how steady you feel. They are especially helpful for older adults who want practical improvements without intense workouts.

    Summary and practical takeaways

    Stability stacking exercises offer a simple yet powerful way to improve balance and reduce fall risk, particularly for seniors. By focusing on gradual balance challenges, encouraging mind body connection, and supporting long term mobility, these exercises fit easily into daily routines. Consistency matters more than intensity, and even short sessions can bring lasting benefits. When practiced safely and patiently, stability stacking can help individuals stay active, independent, and confident in their movements.

    Exercise Name Main Benefit Difficulty Level
    Single-Leg Stand Improves leg balance Easy
    Heel-to-Toe Walk Enhances coordination Easy
    Supported Squat Builds lower strength Moderate
    Standing Arm Reach Boosts stability control Easy
    Slow Marching Improves balance rhythm Moderate

    Frequently Asked Questions (FAQs)

    1. Who can try stability stacking exercises?

    They are suitable for most adults, especially seniors, with basic mobility.

    2. How often should these exercises be done?

    Practicing them three to four times a week is generally effective.

    3. Do I need special equipment?

    No, most exercises use body weight and simple household support.

    4. Can stability stacking really reduce fall risk?

    Yes, regular practice improves balance and reaction control, lowering fall risk.

  • Cucumber and Aloe Vera Eye Patches That Reduce Puffiness and Dark Circles

    Cucumber and Aloe Vera Eye Patches That Reduce Puffiness and Dark Circles

    The first time I used cucumber & aloe eye patches under my eyes the world felt quieter and calmer. The day had been exhausting with too much screen time and coffee and not enough sleep. My reflection showed how tired I was. But when I placed those green patches under my eyes I felt myself relax. The scent reminded me of fresh cucumbers and wet leaves. The coolness felt good on my skin. For a brief time I stopped thinking about emails and work deadlines & scrolling through my phone late at night. It was just me breathing & feeling the soothing effect of the natural ingredients doing their work.

    How Our Eyes Reveal Our Lives

    You rarely notice the moment it begins. One late night quietly becomes several. The glass of water you planned to drink turns into another cup of coffee. Your room glows blue well past midnight. Then, one morning, the mirror tells on you. Puffiness that narrows your eyes, shadows that seem deeper than before, skin that feels thinner and more delicate than you remember.

    The skin around the eyes is the most fragile terrain on the face. It is thinner, softer, and far more sensitive, with blood vessels resting close to the surface. When sleep is short, salt is high, screens are constant, or emotions run heavy, lymphatic fluid can linger here. That trapped fluid becomes swelling, and when circulation slows or pigment gathers, dark circles appear like soft bruises made of light.

    It’s easy to blame age, stress, or genetics. But the under-eye area is less a flaw to fix and more a quiet signal. It reflects how we live. That’s why small rituals—like placing cucumber and aloe eye patches beneath tired eyes—can feel like a gentle act of resistance against exhaustion.

    The Green Duo: Why Cucumber and Aloe Work Together

    Cold cucumber slices over the eyes are a familiar comfort, but when those benefits are refined into eye patches, the effects become more consistent and evenly delivered. These curved patches hug the under-eye area, allowing soothing ingredients to sink in more effectively than a simple slice ever could.

    Cucumber is deeply hydrating and naturally calming. Its high water content and mild antioxidants help soothe irritation and temporarily tighten the appearance of puffiness by gently constricting surface blood vessels. The cooling sensation alone brings fast relief, easing swelling and refreshing tired skin.

    Aloe vera complements cucumber perfectly. Where cucumber refreshes, aloe restores. Its gel is rich in water-binding sugars, vitamins, and minerals that support skin repair. Aloe forms a breathable layer over the skin, creating a moist environment that allows stressed under-eyes to recover and rehydrate.

    Slowing Down with Eye Patches

    Applying eye patches can feel surprisingly ceremonial. You lift them from their tray, glossy and cool, and press them gently into place. There’s an instant chill, followed by a slow, calming spread of coolness that settles into the skin.

    As the patches rest, circulation responds. Puffiness begins to soften as blood vessels contract slightly and lymphatic flow improves. Aloe smooths over fine lines, delivering moisture where the skin needs it most.

    Those ten or fifteen minutes can become something more than skincare. You might lie back, close your eyes, and notice the quiet of your space. When the patches come off, the change is subtle but real—less swelling, brighter skin, and an overall look that feels more rested.

    The Science Behind the Comfort

    Under-eye puffiness is often caused by fluid retention and mild inflammation. Cool temperatures help narrow blood vessels and encourage fluid movement, reducing swelling. Cucumber naturally supports this process with mild astringent properties.

    Aloe works on hydration and repair. The under-eye area loses moisture quickly, which can exaggerate shadows and fine lines. Aloe helps bind water to the skin’s surface, plumping it slightly and reducing the appearance of tiredness. Consistent hydration also supports the skin barrier, minimizing irritation that can deepen dark circles.

    Turning Eye Patches into a Gentle Ritual

    The real power of cucumber and aloe eye patches lies in the pause they create. In a world that rewards constant movement, taking a few minutes to do nothing can feel revolutionary. These patches invite stillness.

    Rather than saving them only for emergencies, try making them part of a regular rhythm. A couple of times a week, place them under your eyes and allow yourself to rest. Light a candle, sip warm tea, or simply breathe. These moments help reshape how you view your face—not as something to correct, but as something to care for.

    Managing Expectations and Seeing Results

    Cucumber and aloe eye patches are excellent for calming swelling, easing irritation, and improving hydration. They help dark circles appear lighter by reducing puffiness and improving skin texture.

    However, not all dark circles are the same. Those caused by genetics or naturally thin skin may only improve slightly. In these cases, eye patches work best as part of a broader routine that includes good sleep, hydration, reduced salt intake, and regular breaks from screens.

    Choosing and Using Eye Patches Wisely

    When selecting cucumber and aloe eye patches, check the ingredient list carefully. These ingredients should appear near the top, not buried beneath fragrance or fillers. The under-eye area is sensitive, so gentle formulas matter.

    For best results, apply patches to clean skin, positioning the wider end toward the outer corner of the eye. Chilling them in the refrigerator can enhance their soothing effect. After removal, gently tap in any remaining essence and follow with a light eye cream to seal in moisture.

    A Small Ritual with a Lasting Effect

    Cucumber and aloe eye patches don’t promise miracles. What they offer instead is relief—cooling tired skin, softening swelling, and easing the visible weight of long days.

    More than that, they remind you that your face is not just something others see; it’s where you experience the world. Caring for your eyes with simple, plant-based comfort is a way of acknowledging everything they carry for you. And often, as the skin calms, so does the mind.

    A Quick Look at Benefits and Tips

    Cucumber and aloe eye patches help reduce puffiness, soothe irritation, hydrate delicate skin, and create a moment of rest in busy days. Use them consistently, gently, and with realistic expectations to get the most from their quiet, restorative power.

    Key Benefit Visible Effect Helpful Care Tip
    Reduced eye swelling Under-eye area appears smoother, firmer, and less puffy Refrigerate patches before use; avoid salty foods late in the day
    Brighter under-eyes Dark circles look softer and more evenly toned Use regularly; support with quality sleep and mild sun protection
    Improved moisture balance Skin looks hydrated, with fine lines appearing less prominent Apply to freshly cleansed skin; finish with a gentle eye cream
    Cooling relief Eyes feel refreshed and relaxed after strain or travel Use after long screen sessions or flights; take short eye breaks
    Relaxing self-care moment A sense of calm and mental pause during the day Enjoy 10–20 minutes without devices while patches are on
  • My father is 72 and we use this exercise daily to improve strength and mobility

    My father is 72 and we use this exercise daily to improve strength and mobility

    Plenty of people say this about their dads, but mine truly doesn’t move like someone his age. He’s one of the most active people I know — and I can say that with confidence because I train him twice a week. Alongside our sessions, he lifts weights, runs, and spends time gardening, which keeps his daily activity levels consistently high.

    One area of fitness that took us years to improve is mobility. Mobility naturally declines with age and drops even faster when activity levels fall. When it’s combined with resistance training — whether that’s lifting weights or using bodyweight movements like squats and push-ups — it becomes one of the most effective tools for longevity and long-term health.

    I rely on a small group of foundational exercises in his strength routine because our top priority is consistency. With that in mind, I want to share one movement I truly stand by. It’s a standout exercise that only requires a single dumbbell, though weight choice is entirely optional.

    What is this dumbbell exercise?

    This movement combines a weighted prisoner squat with a good morning exercise, creating a powerful test of thoracic, hip, knee, and ankle mobility. Holding the prisoner position — with hands placed behind the head — encourages a more upright torso, activates the upper and mid-back, and helps open the chest and shoulders.

    Because squatting in this position is more demanding, it places greater emphasis on mobility and upper-body engagement. The squat portion works the core, hips, glutes, quads, and hamstrings, while the good morning targets the posterior chain, including the back, glutes, and hamstrings. The dumbbell adds resistance while also providing counterbalance and control.

    Together, this compound movement builds strength and mobility across the entire body. It also offers several ways to assess how efficiently your body moves throughout the range.

    How to perform the weighted prisoner squat to good morning

    • Stand with your feet about shoulder-width apart.
    • Hold a dumbbell with both hands across your upper back, avoiding pressure on the neck.
    • Pull your elbows back and squeeze your shoulder blades to open the chest.
    • Engage your core before initiating the movement.
    • Push your hips back and descend into a deep squat, keeping your heels grounded.
    • Maintain an upright chest and straight torso.
    • Pause briefly at the bottom, then hinge forward until your torso is parallel to the floor, lifting your hips back with a slight bend in the knees.
    • Reverse the motion by lifting the chest and lowering the hips back into the squat.
    • Drive through your legs to stand, fully extending the hips and knees.

    Common mistakes to watch for

    This exercise requires focus, which helps you stay aware of your movement quality rather than going through the motions. One frequent issue is the knees collapsing inward, often linked to limited mobility or muscle imbalances. Think about pushing the floor away and keeping your knees aligned with your toes.

    Another sign of restricted mobility is heels lifting off the ground during the squat. This can stem from the hips, knees, ankles, or even the spine. Practicing standard squats and incorporating regular hip mobility work can help improve your range of motion.

    Upper-body fatigue often shows up as elbows drifting forward or the chest dropping as you squat. While the chest should hinge forward during the good morning portion, it should remain upright and forward-facing during the squat itself.

    Why thoracic mobility matters

    The thoracic spine plays a key role in supporting muscles of the chest, back, and shoulders, while enabling rotation, flexion, and extension. It’s essential for movements like twisting and stabilizing weight overhead, yet it tends to be less mobile than other areas, making exercises like the prisoner squat more challenging.

    Including full-body mobility sessions in your routine can help improve posture, open the shoulders and chest, and strengthen the supporting back muscles.

    Recommended sets and reps

    Aim for 2 sets of 8–12 repetitions. We typically use an 8kg dumbbell, but the weight can be adjusted or removed entirely to focus on mastering the movement with bodyweight first.

  • 18 Hip Opening Yoga Stretches to Improve Mobility and Flexibility

    18 Hip Opening Yoga Stretches to Improve Mobility and Flexibility

    18 Hip-Opening Yoga Stretches to Improve Mobility and Flexibility Tight hips have become a widespread problem in our modern world. Spending long hours sitting at desks and moving less throughout the day creates stiffness in the hip flexors and surrounding muscles. When you add stress and poor posture to the mix, your hips pay the price. This tightness doesn’t stay isolated either. It can lead to lower back pain & reduced mobility and even affect how well you perform in sports or daily activities. Yoga provides a practical solution for restoring hip mobility and flexibility. The practice combines intentional stretching with mindful breathing to release tension that builds up in your hips over time. Regular practice strengthens the muscles around your hip joints while improving their overall health. This guide presents 18 hip-opening yoga stretches that instructors recommend most often. These poses work for everyone from complete beginners to experienced practitioners. Whether you spend your days at a desk or you’re an active athlete looking to improve your range of motion these stretches can help you move better & feel more comfortable in your body. The following poses target different areas around your hips to give you a complete approach to releasing tightness and building strength. You can practice them individually or combine several into a flowing sequence that addresses your specific needs.

    Why Hip Mobility Matters

    Healthy hips play a vital role in everyday movement and long-term physical well-being. They support essential actions such as walking, running, bending, and sitting. Strong, mobile hips also help protect the lower back and knees from excess strain. When hip joints move properly, posture and body alignment naturally improve. Athletic performance benefits as well, thanks to better power transfer and balance. Tight hips force other areas of the body to compensate, which often leads to discomfort, pain, and muscular imbalances over time.

    Types of Hip Muscles Yoga Targets

    Hip-opening yoga stretches focus on a wide range of muscles that influence mobility and stability. These include hip flexors that tighten from prolonged sitting, underactive glutes that affect posture, and inner thigh muscles known as adductors. Yoga also targets the outer hips and deep hip rotator muscles. Creating a balance between flexibility and strength in these areas improves movement efficiency, coordination, and joint health.

    How Often Should You Practice Hip-Opening Yoga?

    For noticeable improvements, practicing hip-opening yoga three to five times per week is ideal. Poses should be held anywhere from thirty seconds to two minutes, depending on comfort and experience level. Movements should be slow and controlled, with steady breathing throughout. Forcing a stretch can cause strain, so patience is essential. Consistent, mindful practice delivers better results than pushing intensity.

    Hip-Opening Yoga Stretches to Improve Mobility and Flexibility

    Low Lunge (Anjaneyasana)

    Targets: Hip flexors, quadriceps
    Benefits: Reduces stiffness from sitting and improves stride length
    Step one foot forward into a lunge, lower the back knee, and gently shift the hips forward while maintaining an upright torso.

    Pigeon Pose (Eka Pada Rajakapotasana)

    Targets: Glutes, outer hips
    Benefits: Deep tension release and relaxation
    Fold forward over the front leg and allow the breath to soften tight areas.

    Butterfly Pose (Baddha Konasana)

    Targets: Inner thighs, hips
    Benefits: Improves hip rotation and flexibility
    Sit tall, bring the soles of the feet together, and gently guide the knees toward the floor.

    Garland Pose (Malasana)

    Targets: Hips, ankles, inner thighs
    Benefits: Enhances mobility and supports digestion
    Lower into a deep squat while keeping the heels grounded when possible.

    Lizard Pose (Utthan Pristhasana)

    Targets: Hip flexors, groin
    Benefits: Builds deep hip strength and mobility
    Lower onto forearms for a deeper stretch if comfortable.

    Frog Pose (Mandukasana)

    Targets: Inner thighs, groin
    Benefits: Releases deep hip tension
    Use props for support and ease into the pose gradually.

    Happy Baby Pose (Ananda Balasana)

    Targets: Hips, lower back
    Benefits: Gentle release and relaxation
    Hold the feet or ankles and softly rock side to side.

    Figure Four Stretch (Supine or Seated)

    Targets: Glutes, outer hips
    Benefits: Relieves lower back tightness
    Cross one ankle over the opposite knee and press gently away.

    Warrior II (Virabhadrasana II)

    Targets: Hips, inner thighs
    Benefits: Builds strength and mobility
    Maintain a strong stance with active external hip rotation.

    Extended Side Angle Pose

    Targets: Hip flexors, inner thighs
    Benefits: Improves lateral hip mobility
    Lengthen the side body while grounding firmly through the legs.

    Cow Face Pose (Gomukhasana – Legs)

    Targets: Outer hips
    Benefits: Enhances hip alignment
    Stack the knees if comfortable and sit upright.

    Fire Log Pose (Agnistambhasana)

    Targets: Deep hip rotators
    Benefits: Advanced hip flexibility
    Support the knees with blocks if needed.

    Wide-Legged Forward Fold

    Targets: Inner thighs, hips
    Benefits: Increases adductor flexibility
    Fold forward while maintaining a neutral spine.

    Crescent Lunge Twist

    Targets: Hip flexors, spine
    Benefits: Improves balance and mobility
    Add a gentle twist to enhance circulation.

    Reclined Bound Angle Pose

    Targets: Hips, inner thighs
    Benefits: Passive release and relaxation
    Use bolsters or pillows to support the knees.

    Half Split Pose (Ardha Hanumanasana)

    Targets: Hamstrings, hips
    Benefits: Improves posterior chain flexibility
    Shift the hips back while extending the front leg.

    Yogi Squat with Twist

    Targets: Hips, spine
    Benefits: Functional mobility
    Add a gentle rotation to deepen the stretch.

    Supine Windshield Wipers

    Targets: Outer hips, lower back
    Benefits: Gentle mobility and relaxation
    Slowly drop bent knees from side to side.

    Tips for Safe Hip Opening

    Always warm up before deep stretching. Use blocks, bolsters, or blankets for support. Stretching should feel strong but never painful. Deep breathing helps release muscular tension, and progress develops gradually with regular practice.

    Who Benefits Most from Hip-Opening Yoga?

    Hip-opening yoga is especially beneficial for desk workers, runners, cyclists, older adults, individuals with lower back discomfort, and anyone experiencing limited mobility.

    Why Hip Openers Can Feel Emotional

    The hips are often associated with stored emotional tension. During practice, emotional release, deep relaxation, or increased mental clarity may occur. Practicing with patience and awareness allows these sensations to pass naturally.

    How to Build a Hip-Opening Routine

    An effective routine includes a gentle warm-up, five to eight hip-opening poses, longer holds with steady breathing, and a calming final posture. Even fifteen to twenty minutes of focused practice can create meaningful improvements.

    Conclusion

    Hip-opening yoga stretches go beyond improving flexibility—they support better posture, reduced pain, and smoother movement in daily life. With consistent practice, mindful breathing, and patience, these eighteen stretches can transform how the body moves and how it feels. Healthy hips form the foundation of a healthy body.