Category: abook

  • 7 Home Yoga Exercises That Help You Stay Fit Naturally

    7 Home Yoga Exercises That Help You Stay Fit Naturally

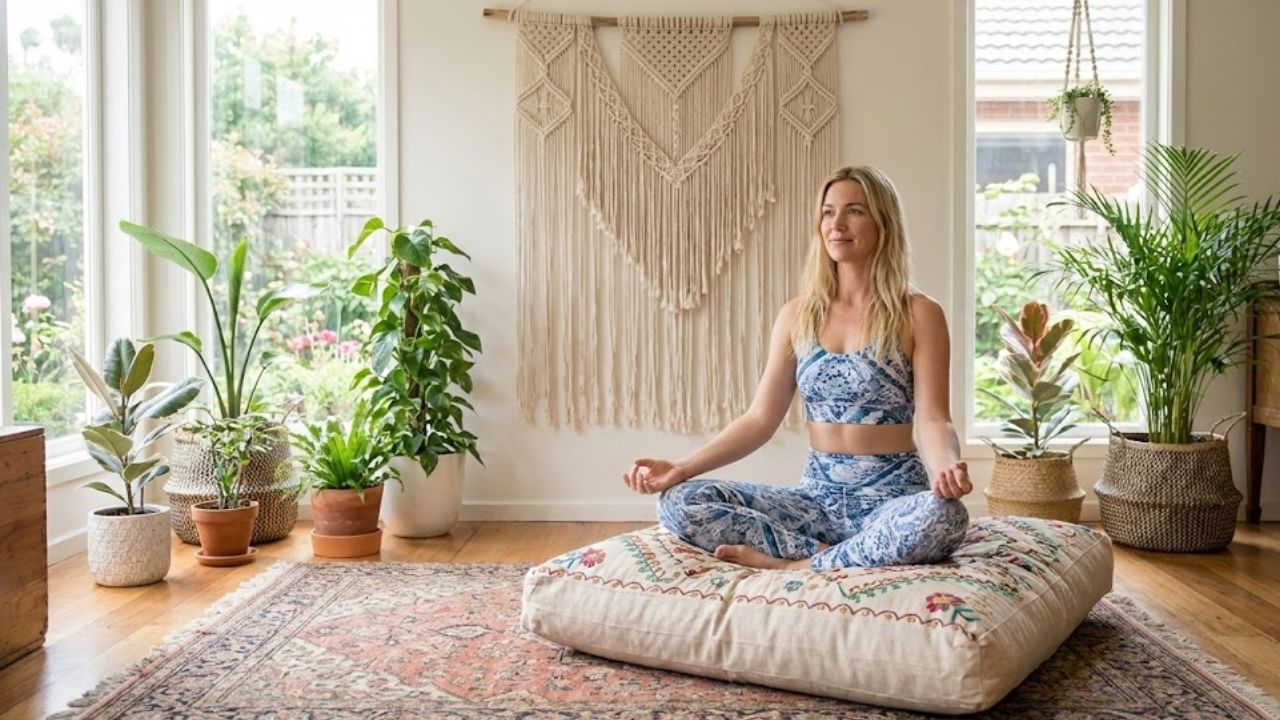
    Seven Simple Yoga Exercises to Stay Fit at Home Staying fit does not always require heavy workouts or gym equipment. Yoga offers a natural and balanced way to keep the body strong and flexible while boosting energy levels. Practicing yoga at home fits perfectly into modern routines where time and space are often limited. With consistent practice yoga supports muscle tone & improves posture while aiding digestion and stress control. These seven home yoga exercises are simple and effective for anyone who wants to stay fit naturally.

    Mountain Pose for Natural Posture and Strength

    Mountain Pose: The Foundation of Your Yoga Practice Mountain Pose serves as the starting point for countless yoga movements. To perform it correctly you should stand upright with your feet positioned close together. Let your arms hang naturally at your sides while keeping your spine in a straight alignment. Direct your attention to maintaining steady breathing patterns and feel the connection between your feet & the ground beneath you. This fundamental pose delivers several physical benefits. It works to strengthen the muscles throughout your legs while simultaneously working on your overall posture. Regular practice also sharpens your awareness of how your body moves and holds itself in space. Making Mountain Pose part of your daily routine can lead to lasting improvements in how you carry yourself.

    Downward Facing Dog for Total Body Fitness

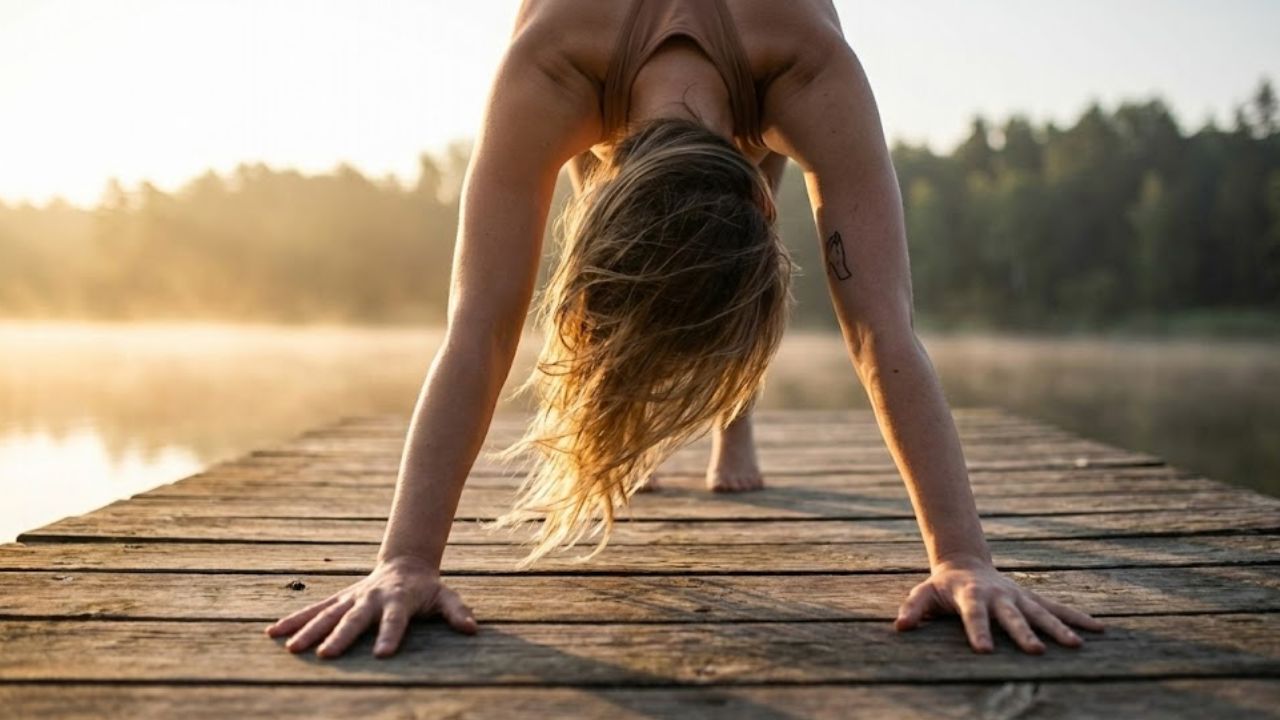
    Downward Facing Dog engages nearly all the major muscle groups in your body. Start from a hands & knees position & lift your hips upward while pressing your chest gently toward your thighs. This pose provides a stretch for the back & shoulders along with the calves & hamstrings. At the same time it builds strength in both the arms and legs. The position enhances blood circulation throughout the body & increases your energy levels. Regular practice of this pose at home supports ongoing flexibility & builds stamina without putting excessive strain on your body.

    Cobra Pose for a Healthy Spine

    Downward Facing Dog works almost every major muscle group in your body. Begin on your hands and knees and then lift your hips up while gently pressing your chest toward your thighs. This pose stretches your back and shoulders as well as your calves and hamstrings. It also strengthens your arms and legs at the same time. The position improves blood flow through your body and boosts your energy. Practicing this pose regularly at home helps maintain flexibility & builds endurance without placing too much stress on your body.

    Bridge Pose for Core and Lower Body Strength

    Bridge Pose strengthens the glutes and lower back along with the core muscles. You start by lying on your back and bending your knees so your feet rest flat on the floor. Then you lift your hips upward and press your feet firmly into the mat. This pose supports spinal health and improves circulation while toning the lower body. Regular practice helps maintain natural body strength and stability over time.

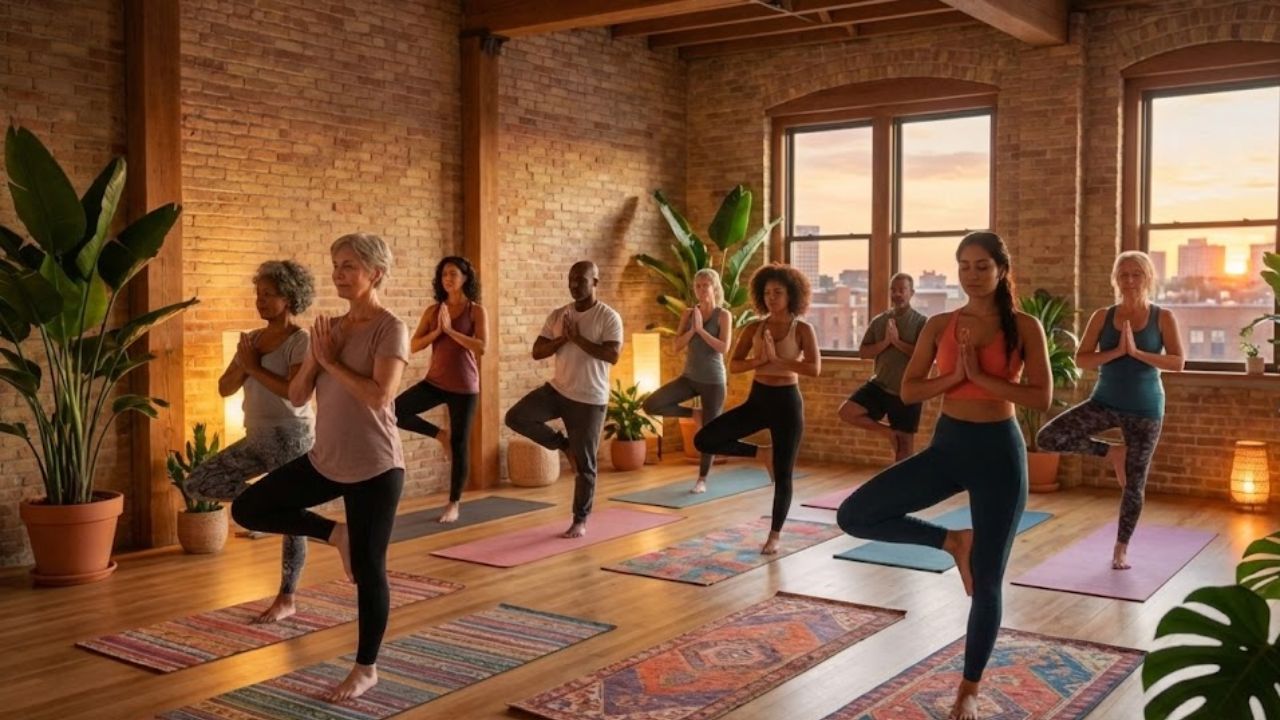
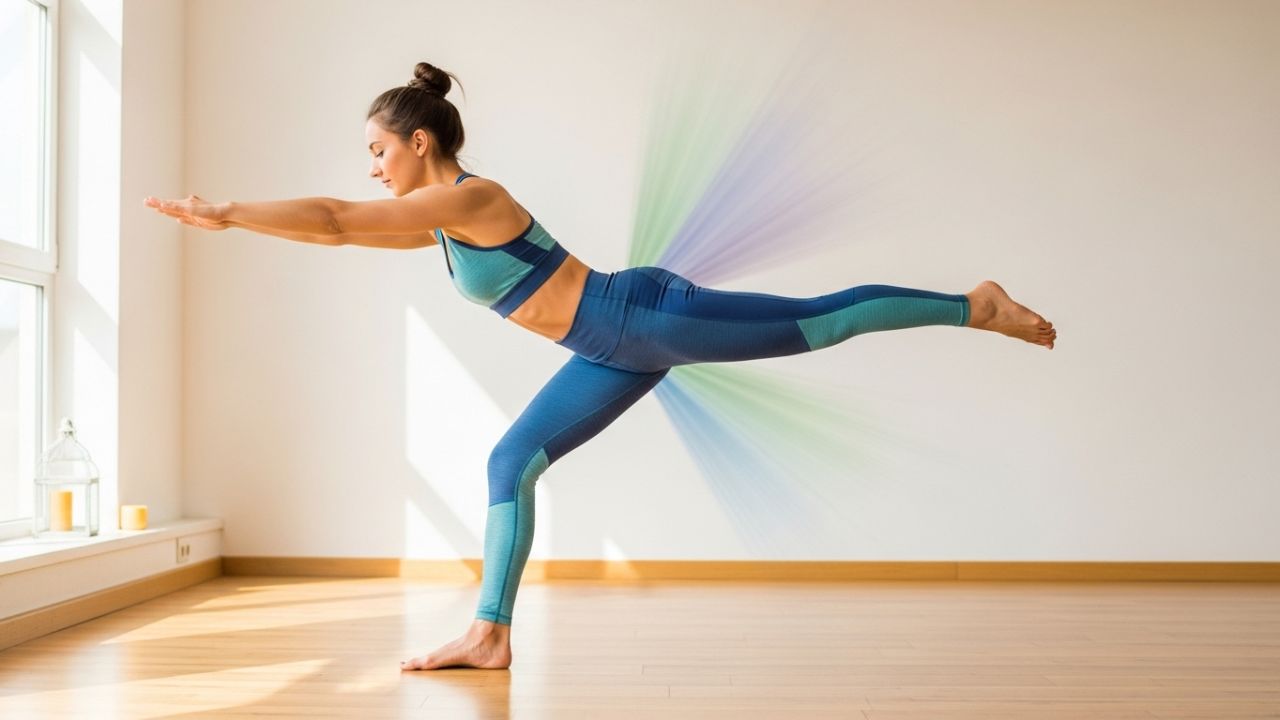
    Tree Pose for Balance and Body Control

    Tree Pose helps you develop better balance and makes your legs stronger. To do this pose you need to stand on one leg while placing your other foot against your calf or inner thigh. Put your hands together in front of your chest & look at something that isn’t moving. This type of exercise works on your physical stability and mental concentration at the same time. When you practice balancing poses regularly you gain better control over your muscles and learn to focus your mind more effectively. These skills are important for maintaining your fitness through natural movement & body awareness.

    Plank Pose for Full Body Toning

    Plank Pose works as an effective exercise for building total body strength. You position yourself on your hands and feet while keeping your entire body straight & tight through the middle. This position works your stomach muscles along with your arms & shoulders while also strengthening your back and legs. When you practice plank consistently you develop better stamina and create firmer muscles using only your body weight. This makes it one of the most practical strength exercises you can do at home without needing any special gear.

    Child Pose for Recovery and Relaxation

    Fitness requires proper recovery to be effective. Child Pose provides deep relaxation and helps release muscle tension. Start by kneeling on the floor and sitting back on your heels before folding forward gently. This position relaxes your spine along with your shoulders and hips while it calms your nervous system. The pose helps your body recover and gets you ready for your next workout or daily activities.

    Why Home Yoga Supports Natural Fitness

    Yoga works on balancing your entire body instead of targeting individual muscles. The practice brings together physical strength with flexibility while also incorporating breathing techniques & mental awareness. Modern approaches to health & wellness place importance on moving in ways that feel natural to your body while reducing daily stress & maintaining regular exercise patterns. Yoga addresses each of these wellness goals effectively. When you practice yoga in your own home you gain a sense of comfort and the freedom to move at your own pace. This home environment helps you establish a consistent routine that supports lasting fitness habits without creating unnecessary pressure or stress about performance.

    Simple Tips to Stay Consistent

    Practice yoga at the same time each day before eating and keep your sessions manageable. Pay attention to how well you move instead of pushing yourself too hard. Just twenty minutes of daily practice can help maintain your natural fitness level. Yoga offers a gentle but effective approach to staying fit without artificial methods. These seven home exercises build strength throughout your body while increasing flexibility & sharpening your mind. When you practice consistently yoga transforms from a simple workout into something deeper. It becomes a natural part of your routine that promotes lasting health and wellbeing.

  • 14 Yoga Poses That Help Open Tight Hips and Improve Mobility

    14 Yoga Poses That Help Open Tight Hips and Improve Mobility

    Tight hips affect many people who spend hours sitting or doing the same movements repeatedly. When your hips become stiff they can cause discomfort and bad posture & sometimes even pain in your lower back. Yoga offers an excellent solution for releasing this tension while building flexibility & better movement in your hip area. The 14 yoga poses described here focus on opening your hips and stretching the muscles around them to boost your overall flexibility.

    Child’s Pose (Balasana)

    Why it works for hip flexibility: Child’s Pose stretches your lower back and hip area while loosening tight thigh muscles. This makes it a good beginner pose for improving hip mobility.

    How to perform it: Start in a kneeling position with your hands flat on the floor. Sit back slowly until your bottom moves toward your heels and stretch your arms forward. Rest your forehead on the mat & breathe slowly and deeply.

    What you gain: This pose stretches your hips & thighs while releasing lower back tension. It also helps calm your mind and body.

    Pigeon Pose (Eka Pada Rajakapotasana)

    Why it works for hip opening: Pigeon Pose ranks among the most effective stretches for loosening hip flexors & releasing tension in the glutes and lower back. How to perform it: Start on your hands & knees in a tabletop position. Move one knee forward and position it behind the corresponding wrist. Straighten the other leg behind you & gently lower your hips down toward the ground. Stay in this position for multiple breaths before switching to the other side. Benefits: This pose provides a deep hip opening while stretching the glutes and hip flexors along with the lower back muscles.

    Lizard Pose (Utthan Pristhasana)

    Why it works for hip opening: Lizard Pose focuses on the hip flexors and groin area to provide an intense stretch that loosens tight hips. How to perform it: Begin in a high plank position & bring one foot forward to land outside your hands. Drop your hips down while keeping your back leg straight. For a more intense stretch you can lower your forearms to the floor. Benefits: This pose stretches the hip flexors & groin and hamstrings while building better flexibility.

    Butterfly Pose (Baddha Konasana)

    Why it works for hip flexibility: Butterfly Pose loosens tightness in your inner thighs and groin area while creating more space in your hip joints. How to perform it: Start by sitting down with the soles of your feet pressed together. Let your knees fall open to each side. Grab your feet with both hands and apply light pressure to push your knees closer to the ground. For a deeper stretch you can hinge forward from your hips. Benefits: Increases hip mobility and flexibility while targeting the inner thigh muscles and groin region.

    Reclining Bound Angle Pose (Supta Baddha Konasana)

    Why it works for hip opening: This version of Butterfly Pose gently stretches your hips while helping your body relax and unwind. How to perform it: Start by lying flat on your back. Press the bottoms of your feet together & allow your knees to drop naturally toward the floor on each side. Place your arms comfortably beside your body with your palms turned upward and take slow deep breaths. Benefits: Stretches the hip and groin areas while releasing tension throughout your lower body.

    Happy Baby Pose (Ananda Balasana)

    Why it works for hip flexibility: Happy Baby Pose opens up the hip joints while stretching your groin area & inner thighs. It also helps loosen your lower back muscles. How to perform it: Start by lying flat on your back. Draw both knees up toward your chest. Reach up & hold the outside edges of your feet with your hands while keeping your knees bent. Your hips should stay wide apart. Apply gentle pressure to push your knees down toward the ground. What you gain: This pose stretches your hip flexors and inner thigh muscles while releasing tightness in your lower back region.

    Low Lunge (Anjaneyasana)

    Why it works for hip flexibility: Low Lunge effectively stretches the hip flexors while building leg strength. This combination makes it excellent for releasing tension in tight hips. How to perform it: Begin by standing upright. Step one foot forward and bend that knee to form a right angle. Bring your back knee down to rest on the floor. Keep your hips facing forward and gently push them toward the front of your mat. For a deeper stretch you can lift both arms above your head. What it does: This pose lengthens the hip flexors and stretches both the quadriceps & hamstrings. It also builds strength throughout the legs.

    Crescent Lunge (Anjaneyasana)

    Why it works well for hip flexibility: Crescent Lunge builds on the basic Low Lunge position by creating additional stretch through the hip flexor muscles. This pose also helps develop better balance and core stability during practice. How to perform it: Begin by standing upright with feet together. Take a large step forward with one foot and lower into a lunge by bending the front knee. Your back leg should remain extended with the heel off the ground. Lift both arms straight up toward the ceiling & slowly push your hips forward to deepen the stretch. Benefits: This pose increases hip mobility & flexibility. It lengthens tight hip flexor muscles and builds strength throughout the leg muscles.

    Squat Pose (Malasana)

    Why it works well for hip flexibility Crescent Lunge takes the basic Low Lunge position and adds more stretch to your hip flexor muscles. It also improves your balance and strengthens your core while you hold the pose. # How to perform it Stand up straight & take a big step forward with one foot. Bend your front knee and keep your back leg straight with the heel lifted off the floor. Raise both arms overhead and gently push your hips forward. # What you gain This pose makes your hips more mobile and stretches your hip flexors while making your leg muscles stronger.

    Seated Forward Bend (Paschimottanasana)

    Why it works for hip flexibility: This pose mainly targets the hamstrings but also loosens tight areas in your hips and lower back. How to perform it: Start by sitting on the floor with both legs stretched out in front of you. Take a breath in while sitting up tall and lengthening through your spine. As you breathe out fold forward from your hips and reach your hands toward your feet. Try to maintain a straight back as you go deeper into the position. Benefits: This stretch works your hamstrings & hip muscles while also releasing tension in your lower back. It helps improve overall flexibility in these areas.

    Lunge with a Twist (Parivrtta Anjaneyasana)

    Why it works for hip flexibility: This position targets your hips and groin area while also stretching your lower back. The twisting motion helps your spine move more freely. How to perform it: Start in a Low Lunge position. Put the hand opposite to your front leg down on the ground. Turn your upper body toward your bent leg and reach your other arm straight up toward the ceiling. Try to keep your hips facing forward while you twist deeper. What you gain: Your hips become more open and flexible. Your groin muscles get a good stretch. Your spine gains better range of motion.

    Warrior II (Virabhadrasana II)

    Why it works well for hip flexibility: Warrior II builds leg strength & increases hip and chest mobility at the same time. This pose effectively enhances your flexibility and helps you maintain better balance. How to perform it: Stand with your feet positioned far apart and rotate one foot so it points outward. Lower your body by bending the front knee until it forms a right angle while your back leg stays extended. Stretch both arms out to the sides so they are level with the floor & look straight ahead. What you gain: Better hip mobility and stronger leg muscles along with improved balance.

    Frog Pose (Mandukasana)

    Why it works well for hip flexibility: Warrior II strengthens your legs & opens up your hips & chest at the same time. This pose improves your flexibility and helps you balance better. How to perform it: Stand with your feet wide apart and turn one foot outward. Bend your front knee to create a right angle while keeping your back leg straight. Extend both arms out to your sides at shoulder height and gaze forward. What you gain: Greater hip mobility & stronger legs with better balance.

    Bound Angle Pose (Baddha Konasana)

    Butterfly Pose for Hip Flexibility This seated position effectively stretches your hips and groin area while making your inner thighs more flexible. Start by sitting on the floor with your legs straight out in front of you. Bring the bottoms of your feet together so they touch. Let your knees fall naturally to the sides. Grab your feet with both hands and apply gentle pressure to push your knees closer to the ground. This pose helps open up tight hips and stretches the groin muscles. It also works on increasing flexibility in your inner thigh area.

  • Japanese Hair-Washing Method for Stronger Shinier Hair Without Salon Treatments or Harsh Chemicals

    Japanese Hair-Washing Method for Stronger Shinier Hair Without Salon Treatments or Harsh Chemicals

    The Japanese hair-washing method has gained global attention for its gentle yet effective approach to achieving healthier, shinier hair without relying on salon treatments or harsh chemicals. Rooted in traditional beauty practices from Japan, this method focuses on scalp care, mindful cleansing, and long-term hair health rather than quick cosmetic fixes. In Japan, hair is seen as an extension of overall well-being, which is why daily routines prioritize balance and prevention. By adopting these simple techniques at home, many people are discovering smoother texture, improved strength, and a natural shine that lasts.

    Japanese hair-washing method for healthier scalp care

    At the heart of the Japanese hair-washing method is the belief that a clean, balanced scalp leads to beautiful hair. Instead of aggressively scrubbing, the focus is on scalp-first cleansing using fingertips to gently lift dirt and oil. This encourages better blood flow and supports natural oil balance, which many modern routines disrupt. In Japan, washing frequency is adjusted to lifestyle and climate, avoiding over-washing that causes dryness. Lukewarm water is preferred to protect delicate scalp skin, while slow, mindful movements reduce stress and tension. Over time, this approach helps reduce irritation, flakiness, and excess oil production.

    Japanese hair-washing technique using gentle products

    Another key aspect of the Japanese hair-washing technique is choosing products that respect hair’s natural structure. Traditional routines emphasize low-foam shampoos that cleanse without stripping moisture. Ingredients are often plant-based, supporting chemical-free care and minimizing buildup. Shampoo is diluted with water before application, allowing even product spread and reducing friction. Instead of piling hair on the head, lengths are cleansed indirectly as the rinse flows through. This method protects weak hair strands and helps maintain softness and shine without conditioners overloaded with silicone.

    Japanese hair-washing routine for stronger, shinier hair

    Consistency is what makes the Japanese hair-washing routine so effective. Hair is gently towel-dried without twisting, preventing breakage prevention habits from being ignored. Many people in Japan allow partial air drying to reduce heat tool damage, using dryers only when necessary. Scalp massage before washing is also common, encouraging nutrient delivery roots and relaxation. Over time, this routine supports long-term hair strength rather than temporary smoothness. The result is hair that feels lighter, looks shinier, and grows healthier without expensive treatments.

    Why the Japanese hair-washing method works long term

    The success of this method lies in its simplicity and respect for the body’s natural systems. By avoiding aggressive techniques and harsh formulas, it promotes sustainable hair health and reduces dependency on styling products. The focus on routine over results encourages patience, while small daily habits create visible change. This approach aligns hair care with self-care, making it easier to maintain consistency. For those tired of quick fixes, the Japanese method offers balanced beauty philosophy that supports shine, strength, and comfort over time.

    Routine Step Japanese Method Common Alternative
    Scalp Cleaning Gentle fingertip massage Aggressive scrubbing
    Shampoo Type Low-foam, mild formulas High-foam, strong cleansers
    Water Temperature Lukewarm Very hot
    Drying Method Pat dry, air dry Rough towel drying

    Frequently Asked Questions (FAQs)

    1. Is the Japanese hair-washing method suitable for all hair types?

    Yes, it can be adapted easily for straight, wavy, curly, or fine hair.

    2. How often should hair be washed using this method?

    Washing frequency depends on scalp condition, usually two to four times weekly.

    3. Do I need special Japanese products to follow this routine?

    No, mild and gentle products available locally work well.

    4. How long before results become noticeable?

    Most people notice improved texture and shine within a few weeks.

  • Restore Grey Hair Naturally With This Effective Colour-Reviving Alternative

    Restore Grey Hair Naturally With This Effective Colour-Reviving Alternative

    Grey hair is a natural part of ageing, but many people in India are now looking for gentler ways to restore their original colour without relying on harsh chemical dyes. Natural colour-reviving alternatives focus on nourishing the scalp, supporting melanin production, and improving overall hair health rather than masking grey strands overnight. These methods appeal to those who want gradual, believable results while keeping their hair strong and manageable. With consistent care and the right ingredients, it’s possible to enhance natural tones and feel more confident about your hair’s appearance.

    Restore grey hair naturally using colour-reviving methods

    Natural colour-reviving methods work by supporting the hair’s internal pigment process instead of coating strands with artificial colour. Ingredients like plant extracts, oils, and minerals help improve scalp circulation and follicle health, which may encourage better pigment retention over time. Many people prefer this route because it avoids irritation and dryness linked to dyes. When used regularly, these approaches promote natural pigment support, improve scalp nourishment, and encourage healthy hair growth. While results are gradual, users often notice improved texture, shine, and depth of colour, making grey strands blend more naturally with existing hair.

    Colour-reviving alternatives that reduce grey hair appearance

    Unlike instant dyes, colour-reviving alternatives focus on consistency and patience. Herbal rinses, oil infusions, and nutrient-rich treatments slowly deepen hair tone while strengthening strands from within. These methods are popular among people who want subtle change without obvious regrowth lines. Over time, hair may appear darker and fuller, creating a softer transition between grey and natural shades. Benefits often include gradual tone revival, chemical-free care, and improved hair strength. This approach suits those who value long-term hair health as much as appearance.

    Why natural grey hair restoration suits long-term hair care

    Choosing natural restoration methods is about building a sustainable hair routine rather than chasing quick fixes. Many colour-reviving alternatives double as treatments that reduce breakage and dryness. They also help maintain moisture balance, which is essential as hair ages. People following these routines often report less scalp irritation, better moisture retention, and stronger hair strands. While no method can reverse ageing completely, natural care supports healthier-looking hair that ages gracefully and confidently.

    Summary and practical outlook

    Restoring grey hair naturally is less about reversing time and more about enhancing what your hair can do with proper care. Colour-reviving alternatives offer a balanced path for those who want subtle improvement without harsh chemicals. When paired with good nutrition and gentle hair habits, these methods support long-term hair wellness, encourage consistent natural results, and promote confidence in ageing. For many, this approach feels more authentic and easier to maintain over the years.

    Method Type Main Benefit Result Speed
    Herbal oils Improves scalp health Slow
    Plant-based rinses Enhances natural tone Gradual
    Nutrient treatments Supports pigment retention Moderate
    Chemical dyes Instant colour change Fast

    Frequently Asked Questions (FAQs)

    1. Can natural methods completely reverse grey hair?

    No, they mainly improve appearance and support healthier pigmentation.

    2. How long do colour-reviving alternatives take to show results?

    Most people notice subtle changes after several weeks of consistent use.

    3. Are these methods safe for sensitive scalps?

    Generally yes, as they avoid harsh chemicals, but patch testing is advised.

    4. Can I combine natural methods with hair dye?

    Yes, many people use them alongside dyes to improve overall hair health.

  • Optical Illusion Test: Spot the Numbers 37 and 81 Among 31 in 5 Seconds

    Optical Illusion Test: Spot the Numbers 37 and 81 Among 31 in 5 Seconds

    Optical illusion challenges have become a popular way to test attention, focus, and quick-thinking skills, especially among puzzle lovers in India. This optical illusion test asks readers to spot the numbers 37 and 81 hidden among repeated 31s within just five seconds. At first glance, the grid may look simple, but the visual similarity between the numbers makes it surprisingly tricky. Such brain games are not just entertaining; they also help sharpen observation skills, improve concentration, and offer a refreshing mental break from daily routines.

    Optical Illusion Test to Spot Hidden Numbers Quickly

    This optical illusion test is designed to challenge how fast your eyes and brain can work together under pressure. When dozens of similar numbers are placed close together, your brain tends to follow patterns instead of details. That is where the challenge begins. To succeed, you need sharp visual focus, pattern-breaking attention, and rapid mental scanning. Many people find that slowing down slightly actually helps them identify the odd numbers faster. The trick is not to read each number but to look for shape differences, spacing changes, or unusual curves that don’t match the surrounding 31s.

    Why Finding 37 and 81 Among 31 Is So Challenging

    The difficulty of this illusion lies in how the human brain processes repetitive information. When the same number appears repeatedly, the brain switches to autopilot, making it easier to miss subtle changes. Spotting 37 and 81 requires detail-oriented vision, cognitive alertness, visual discrimination skill, and mental flexibility. The shapes of the digits are intentionally similar, especially when viewed quickly. This is why time pressure increases the challenge and makes the test more exciting for participants of all ages.

    How Optical Illusion Challenges Improve Brain Performance

    Regularly attempting optical illusion tests can offer surprising cognitive benefits. These puzzles encourage focused eye movement, faster decision making, and attention control training. Over time, such challenges can improve your ability to notice small details in everyday tasks. Many people use these puzzles as a fun mental warm-up before work or study. Since they are short and engaging, they help reduce stress while still providing a productive mental exercise that keeps the brain active and responsive.

    Summary and Final Analysis

    This optical illusion test is more than just a quick visual game; it is a reflection of how perception and focus work together. Successfully spotting 37 and 81 among 31s depends on visual awareness growth, pattern interruption ability, mental speed balance, and concentration under pressure. Whether you solve it in seconds or take a bit longer, the experience itself strengthens observation skills. Such puzzles remain popular because they are simple, engaging, and surprisingly effective at keeping the mind sharp.

    Feature Description
    Challenge Type Optical illusion number puzzle
    Target Numbers 37 and 81
    Distractor Number 31
    Time Limit 5 seconds
    Primary Skill Tested Visual focus and attention

    Frequently Asked Questions (FAQs)

    1. What is the goal of this optical illusion test?

    The goal is to quickly identify the numbers 37 and 81 hidden among multiple 31s.

    2. How much time is given to solve the puzzle?

    You are given only five seconds to spot both hidden numbers.

    3. Are optical illusion tests good for the brain?

    Yes, they help improve focus, attention, and visual processing skills.

    4. Can anyone try this optical illusion challenge?

    Yes, it is suitable for all ages and does not require special skills.

  • 7 Yoga Exercises You Can Easily Practice at Home Without Stress

    7 Yoga Exercises You Can Easily Practice at Home Without Stress

    Seven Simple Yoga Exercises You Can Do at Home Practicing yoga at home has grown in popularity because it adapts well to hectic schedules without demanding expensive gear or spacious rooms. A mat and a peaceful spot are enough to develop physical strength & mental clarity while improving your flexibility. Home yoga lets you progress according to your own rhythm & pay attention to what your body tells you. The following seven exercises are straightforward and beneficial for newcomers and people getting back into a consistent routine. These positions are useful and appropriate for maintaining daily health.

    Mountain Pose Tadasana for Full Body Awareness

    Mountain Pose: A Simple Foundation for Better Posture Mountain Pose might appear basic at first glance but it serves as the foundation for countless yoga positions. To perform it correctly you should stand upright with your feet placed together and your arms hanging naturally at your sides while keeping your spine extended. The key is to concentrate on pressing your feet firmly into the ground while simultaneously reaching the top of your head toward the ceiling.

    Downward Facing Dog for Strength and Flexibility

    Downward Facing Dog is one of the most recognized yoga poses. Start from your hands and knees & lift your hips back to form an inverted V shape. This pose stretches your spine and hamstrings along with your shoulders and calves. It strengthens your arms & legs at the same time. The pose boosts blood circulation throughout your body and helps fight fatigue. You can practice this pose at home to energize yourself in the morning or to loosen up your muscles in the evening.

    Cobra Pose Bhujangasana for a Stronger Back

    Downward Facing Dog is a well-known yoga pose that many people recognize. You begin on your hands and knees and then lift your hips upward and backward until your body creates an inverted V shape. This position stretches multiple areas including your spine & hamstrings as well as your shoulders and calves. It also builds strength in both your arms and legs while you hold the pose. The position improves blood flow through your entire body and reduces feelings of tiredness. You can do this pose at home when you wake up to feel more energized or later in the day when you need to relax tight muscles.

    Tree Pose Vrikshasana for Balance and Focus

    Tree Pose helps you work on balance while making your mind feel calm. You stand on one leg & put the bottom of your other foot against your calf or the inside of your thigh. You can bring your hands together at your chest or lift them above your head. This pose makes your legs stronger and helps you coordinate better while improving your ability to focus. When you practice balance poses at home you develop more patience and mental stability that helps you in everyday situations.

    Child Pose Balasana for Deep Relaxation

    Tree Pose helps you work on balance while calming your mind. You stand on one leg and place the sole of your other foot against your calf or inner thigh. You can press your hands together at your chest or raise them overhead. This pose strengthens your legs and improves your coordination while sharpening your focus. When you practice balance poses at home you build patience and mental stability that benefits you in daily life.

    Bridge Pose Setu Bandhasana for Core and Glute Strength

    Bridge Pose Benefits and Instructions Bridge Pose works well for building strength in your core muscles and lower back area while also targeting your glutes. Start by lying flat on your back and bending both knees so your feet rest on the ground about hip width apart. Push your feet firmly into the floor as you raise your hips toward the ceiling. This position helps maintain a healthy spine & may ease tension or mild pain in your lower back region. The pose creates an opening across your chest area which can enhance your ability to breathe more deeply and efficiently.

    Seated Forward Bend for Flexibility and Calm

    The seated forward bend stretches your spine and hamstrings while helping your lower back relax. It also calms your mind. Start by sitting down with your legs stretched out in front of you. Take a breath in to make your spine longer. Then breathe out as you slowly bend forward. This position helps your body become more flexible. It can also release tension after you have had a busy day. When you practice this pose at home in a peaceful space it works even better to help you feel calm.

    Why Practicing Yoga at Home Works So Well

    Home yoga gives you the chance to practice regularly without feeling rushed. You can set your own schedule and modify poses to match your comfort level while paying close attention to your breathing technique. Given today’s focus on mental health and managing stress, yoga provides a natural approach that works well with contemporary living. These poses need no special equipment and fit easily into your everyday routine making them practical for maintaining wellness over time.

    Tips to Stay Consistent with Home Yoga

    Begin with brief fifteen to twenty minute sessions and slowly increase the duration over time. Make sure your practice area stays tidy and free from interruptions. Pay attention to your breathing and never force your body beyond comfortable limits. Regular practice is more valuable than pushing yourself too hard. Even a mild routine performed every day produces meaningful long-term results. Practicing yoga at home does not require you to be perfect. The goal is simply to commit to the practice while staying aware of how your body feels and moving with purpose. These seven yoga exercises provide a well-rounded way to develop strength and flexibility while promoting relaxation. They can help you build a healthier & more conscious lifestyle without leaving your house.

  • 6 Yoga Poses for Weight Loss and Toning: Effective Moves for Strength and Balance

    6 Yoga Poses for Weight Loss and Toning: Effective Moves for Strength and Balance

    Six Yoga Poses That Help With Weight Loss and Toning Many people think yoga is only about stretching and relaxing. While those benefits are real, yoga can also help you lose weight and tone your body when you practice it regularly with focus. Some yoga poses work large muscle groups and speed up your metabolism. They help your digestion and burn calories while building lean muscle. Yoga is different from intense workouts because it helps you lose weight in a way that lasts. It lowers your stress levels and balances your hormones while teaching you to move with awareness. Here are six yoga poses that work well for weight loss and toning your whole body. They give the best results when you do them often & combine them with healthy eating & lifestyle habits.

    Surya Namaskar (Sun Salutation)

    Surya Namaskar is widely regarded as one of the most effective yoga sequences for supporting weight loss. It is a continuous flow of multiple postures performed in a rhythmic manner, which helps raise the heart rate, enhance blood circulation, and activate nearly every major muscle group in the body.Practicing several rounds of Surya Namaskar helps burn calories, tone the arms, legs, core, and back, and improve overall stamina. It also promotes better digestion and supports a healthy metabolism, both of which play an important role in fat loss. Performing this sequence in the morning on an empty stomach can further enhance its benefits.

    Utkatasana (Chair Pose)

    Utkatasana is a powerful standing posture that strengthens the lower body while actively engaging the core. It primarily targets the thighs, glutes, hips, and abdominal muscles, helping to tone and shape these areas effectively.Holding Chair Pose builds muscular endurance and increases calorie expenditure as the body works against gravity. The pose also improves posture and balance while activating deep core muscles that support a stronger and flatter midsection. With steady and controlled breathing, Utkatasana can quickly elevate the heart rate and support fat burning.

    Plank Pose (Phalakasana)

    Plank Pose is one of the most effective yoga postures for full body toning. While it strongly targets the core, it also strengthens the shoulders, arms, chest, back, and legs. Sustained muscle engagement in this pose helps burn fat and build lean muscle.Regular practice of Plank Pose improves core stability, gradually reduces belly fat, and enhances overall strength. It also boosts metabolism by engaging multiple muscle groups at the same time. Beginners can modify the pose by lowering the knees while still gaining significant benefits.

    Virabhadrasana II (Warrior II)

    Warrior II is a strong standing pose that tones the legs, hips, arms, and shoulders. It builds strength in the thighs and glutes while improving balance and muscular endurance. Holding this posture challenges the body and encourages calorie burn through sustained effort.This pose also improves focus and body awareness, helping to develop a stronger mind body connection. When practiced with deep, steady breathing, Warrior II supports fat loss, increases stamina, and helps sculpt the lower body.

    Naukasana (Boat Pose)

    Boat Pose is highly effective for strengthening and toning the abdominal muscles, making it especially useful for weight loss around the waist. It deeply engages the core while also activating the hip flexors and lower back.Holding Naukasana stimulates the digestive organs and supports a healthy metabolism, which can help reduce belly fat over time. The pose requires balance and control, making it both physically and mentally challenging. With regular practice, it leads to a tighter core and improved posture.

    Dhanurasana (Bow Pose)

    Dhanurasana is a backbend that stimulates the abdominal organs and boosts digestion, making it beneficial for weight management. It stretches the front of the body while strengthening the back, core, arms, and legs.This pose increases blood circulation, improves flexibility, and helps reduce fat around the abdomen and hips. Bow Pose also energizes the body and supports spinal health, which contributes to better movement and activity throughout the day.

    How Yoga Supports Sustainable Weight Loss

    Yoga supports weight loss in a more holistic way compared to many traditional workouts. Instead of focusing only on calorie burn, yoga helps regulate hormones such as cortisol, which is often linked to stress related weight gain. By calming the nervous system, yoga reduces emotional eating and improves sleep quality.Yoga also enhances digestion, circulation, and muscle tone while encouraging mindful awareness of eating habits and daily lifestyle choices. This balanced approach makes weight loss more sustainable and less physically and mentally stressful.

    Tips to Maximize Results

    Consistency is essential for visible results. Practicing these yoga poses at least four to five times a week can make a noticeable difference. Combining them into a short flow or sequence helps keep the heart rate elevated and improves overall effectiveness.Focus on controlled breathing and proper alignment rather than rushing through movements. Pair your yoga practice with a balanced diet rich in whole foods, adequate hydration, and proper rest to support long term fat loss and overall well being.

    Final Thoughts

    Yoga can be a safe, effective, and enjoyable way to lose weight and tone the body without putting excessive strain on the joints. These six yoga poses work together to strengthen muscles, improve metabolism, and support long term weight management.With regular practice, patience, and mindful effort, yoga can help you build a stronger, leaner, and more balanced body naturally over time.

  • Optical Illusion Test: Can You Spot the Number 38 Among 83 and 23 in 8 Seconds

    Optical Illusion Test: Can You Spot the Number 38 Among 83 and 23 in 8 Seconds

    Optical illusions never fail to surprise and challenge our perception of reality. The latest puzzle making waves online is a number-based illusion that tests your visual focus and mental sharpness. The task appears straightforward—spot the number 38 hidden among a sea of confusing 83s and 23s within just eight seconds. However, as many have discovered, this challenge is trickier than it seems. The arrangement of similar numbers causes the eyes to miss subtle differences, leaving even the quickest observers second-guessing what they see.

    The Psychology Behind Optical Illusions

    Optical illusions work because our brains are wired to recognize familiar patterns quickly. This ability helps us understand our surroundings efficiently, but it can also make us prone to mistakes when visual cues are deliberately manipulated. In this number illusion, the similarity between the digits 8, 3, and 2 causes the brain to interpret them collectively as repetitive visual patterns. Since 83 and 23 dominate the grid, the eyes automatically expect to see them, allowing the hidden 38 to stay undetected for a few moments.

    This clever design highlights how perception doesn’t always align with reality. When our minds predict what should appear next, we unconsciously filter out anomalies that don’t fit the pattern. That’s what makes this illusion both challenging and fascinating—it directly confronts our brain’s natural bias toward visual consistency.

    The Eight-Second Challenge

    Time pressure amplifies the difficulty of this puzzle. The goal is to identify the number 38 in under eight seconds, which forces the brain to process a dense cluster of numbers at lightning speed. The repetition of 83s and 23s in alternating colors—usually blue and pink—strengthens the illusion by creating contrast that confuses depth and focus. Your eyes may instinctively jump from one cluster to another without picking out the exact difference that reveals the elusive 38.

    Many participants report that during their first attempt, their vision blurs slightly as the numbers blend together. This happens because your eyes are attempting to adjust between similar shapes in rapid succession. On the other hand, those with sharper visual discrimination or trained observation skills tend to spot the 38 more quickly.

    How to Train Your Eyes to Spot the Difference

    Overcoming optical illusions involves retraining your visual focus and adopting a systematic approach. Here are some effective tips to improve your ability to solve puzzles like this:

    – Scan methodically: Instead of looking at the entire image at once, divide it into sections and examine each part individually.

    – Focus on digit transitions: In this illusion, the distinguishing factor lies in where the second digit differs. Pay attention to how the numbers shift from “8” to “3” or “2”.

    – Relax your eyes: Straining your gaze makes you more likely to overlook details. Blink often and let your vision move naturally across the grid.

    – Take advantage of color patterns: Since colors separate rows or groups of numbers, use them as guides to isolate potential irregularities.

    – By practicing these techniques, your visual recognition skills become sharper and your mental alertness improves—helpful not just for puzzles but for real-life tasks that depend on observational accuracy.

    Where the Hidden 38 Is Located

    For those who gave it their all but came up short, the number 38 can be found in the lower-right region of the grid. Looking closely, you’ll notice a blue “3” followed by an “8”, which stands out subtly among neighboring 83s and 23s. Once your brain distinguishes this small difference, it instantly “clicks,” and you can’t unsee it afterward. The sense of achievement that follows feels surprisingly satisfying, reflecting how our visual cognition reacts when finding order in complexity.

    The Science of Focus and Perception

    This challenge is more than an entertaining game—it reveals how attention and perception interact under pressure. According to visual cognition research, humans process visual information selectively. Our minds filter an overwhelming amount of input every second, keeping only the details deemed important. Optical illusions exploit this by making unimportant details seem prominent and transforming the actual focus point into a hidden element. Through repeated exposure to such puzzles, the brain learns to process minor inconsistencies faster, improving your ability to detect irregularities in other contexts, from reading fine print to analyzing visual data.

    Why Optical Illusions Go Viral

    The popularity of visual puzzles like this can be traced to their balance of simplicity and depth. They offer instant engagement—anyone can attempt them—but the combination of psychological intrigue and competitive time limits keeps audiences hooked. Online platforms, especially social media feeds and discovery sections, amplify this effect as users challenge friends to “beat eight seconds.” The viral appeal lies in the universal human curiosity to test one’s limits and prove attentiveness in a world full of distraction.

    Final Thoughts

    The “Spot the Number 38 Among 83 and 23” challenge isn’t merely a test of eyesight—it’s a playful exploration of human perception. Each attempt reinforces the idea that seeing isn’t always the same as noticing. Whether you found the number in seconds or needed a few tries, the exercise stimulates cognitive flexibility and observation precision. Such simple yet scientifically rich challenges remind us that our brains, though powerful, can still be delightfully deceived—and that training focus can make a real difference in how we interpret the world around us.

  • Fast Ways to Repair Dry Cracked Heels at Home Using Safe Everyday Kitchen Ingredients

    Fast Ways to Repair Dry Cracked Heels at Home Using Safe Everyday Kitchen Ingredients

    The first time you notice the cracks, they look harmless. Thin, pale lines begin to appear across your heel, almost like patterns on dry earth. At first, it feels easy to ignore them. You might blame walking barefoot at home or wearing your favorite open sandals too often. But then one morning, as your feet touch the floor, you feel a rough pull and a faint sting. The cracks have deepened. They feel sore, sometimes even catching on your socks. Quietly, you realize it’s time to give your heels some care. Dry, cracked heels often appear slowly, and by the time we notice them, they’re already uncomfortable. The good news is that relief doesn’t need expensive products. Simple kitchen ingredients can gently restore softness over time.

    The Hidden Story Your Heels Are Sharing

    Your heels work harder than you realize. With every step, they absorb pressure and impact, especially when you stand or walk for long hours. Because they’re usually covered and out of sight, they’re easy to forget. You may feel roughness during a shower and plan to deal with it later, only to forget again. Over time, lack of moisture combined with pressure causes the skin to lose flexibility. Walking barefoot on hard floors, wearing thin-soled or open-back shoes, long hot showers, cold weather, and indoor heating all contribute to dryness. Heel skin is naturally thick for protection, but when it becomes too dry, it cracks instead of bending. The encouraging part is that skin repairs itself when given moisture, gentle care, and protection.

    Your Kitchen as a Healing Space

    Your kitchen is filled with simple ingredients that can comfort and heal dry skin. Oils like olive or coconut oil deeply moisturize and soften rough heels. Honey helps draw moisture into the skin while calming irritation. Milk and yogurt gently loosen flaky skin, thanks to natural lactic acid. When sugar or salt is mixed with oil, it becomes a mild exfoliator that removes dead skin cells. Using familiar ingredients feels comforting because you already trust them. There’s no need for complicated labels or expensive products. Understanding how each ingredient works makes your heel-care routine simple, effective, and soothing.

    Natural Ingredients and Their Benefits

    Natural Ingredient How It Helps Cracked Heels Best Way to Use
    Olive Oil / Coconut Oil Provides deep moisture, repairs dryness, and softens thick, rough heel skin Massage onto heels at night or use as a base for DIY scrubs
    Honey Locks in hydration, calms irritation, and promotes natural healing Apply as a moisturizing mask mixed with milk or oil
    Milk / Yogurt Helps loosen dead skin cells with gentle lactic acid exfoliation Use in a warm foot soak or as a softening foot pack
    Sugar / Salt Removes rough layers and improves overall heel smoothness Scrub heels gently after soaking feet in warm water
    Banana / Avocado Feeds dry skin with vitamins and healthy fats for repair Apply a thick mask on very dry or cracked heels

    A Gentle Evening Ritual for Heels

    Think of heel care as a calm moment at the end of your day. The house is quiet, and you take just fifteen minutes to focus on yourself and your feet.

    Step 1: Warm Milk and Salt Soak

    Fill a basin with comfortably warm water. Add half a cup of milk, one to two spoons of salt, and a small amount of olive oil. Soak your feet for ten to fifteen minutes. The warmth relaxes your skin, the milk softens dryness, and the oil begins restoring moisture.

    Step 2: Gentle Exfoliating Scrub

    Mix sugar or fine salt with olive or coconut oil to create a thick paste. Massage it gently onto your heels using circular movements. Focus on rough areas, but avoid scrubbing too hard. Gentle care works better than harsh rubbing. Rinse with warm water once finished.

    Step 3: Honey and Yogurt Mask

    Combine one tablespoon of honey with one tablespoon of thick yogurt and a few drops of oil. Apply generously to cracked areas and leave it on for ten to fifteen minutes. This mask deeply moisturizes and calms irritated skin. Rinse gently and pat dry.

    Overnight Oil Treatment

    Before bedtime, warm a small amount of olive or coconut oil and massage it into your heels for a few minutes. Put on clean cotton socks to lock in moisture while you sleep. By morning, your heels usually feel softer, smoother, and far less painful.

    Daily Habits to Prevent Cracks

    Once your heels heal, simple habits help keep them that way. Moisturize after showers, avoid very hot water, rotate your footwear, and drink enough water daily. Treat dryness as soon as it appears. Small, consistent steps prevent serious cracking later.

    When Home Care Is Not Enough

    If heel cracks become very deep, start bleeding, or don’t improve with regular care, professional advice may be necessary. Certain health conditions can slow healing, and a doctor or podiatrist can suggest proper treatment. Most cracked heels are simply a sign of dryness and neglect. With patience, warmth, oil, and everyday kitchen ingredients, your feet can become comfortable again and continue supporting you through daily life.

  • Plank Hold Timing Explained: How Long to Hold Planks for Stronger Core Gains at Any Age

    Plank Hold Timing Explained: How Long to Hold Planks for Stronger Core Gains at Any Age

    The mat feels cool beneath your forearms as your toes dig in and your legs quietly strain. Your breathing evens out, steady and controlled. Somewhere between the tightness in your abdomen and the focus in your mind, a familiar question surfaces: how long should this be held? Ten seconds? Thirty? A full two minutes that stretches endlessly? Planks are often treated as a simple exercise with a universal answer, but in reality they are a living conversation between your body and gravityone that changes with time. What feels effortless at 18 becomes demanding at 48, and at 68 requires thoughtful care. At every stage of life, your core foundation supports the spine, protects the back, and allows smooth, confident movement. Finding the right hold time means understanding your body exactly as it is today.

    The Quiet Storm Inside Your Core

    Most workouts announce themselves loudly—pounding footsteps, clanging weights, sharp exhales echoing through the room. Planks arrive without noise. You align your body into one long line: shoulders stacked above elbows or wrists, heels reaching back, neck relaxed. From the outside, nothing appears to move.

    Inside, however, a subtle storm unfolds. The transverse abdominis tightens like a natural corset, the multifidus provides delicate spinal support, the diaphragm coordinates breath with effort, and the pelvic floor steadies everything from below. These deep stabilizers respond best to calm, precise effort performed consistently. This is why quality matters more than duration. A steady twenty-second plank with clean form often delivers far more benefit than a shaky minute fueled by tension and pride.

    The Myth of the Two-Minute Plank

    Modern fitness culture celebrates extremes. Two-minute holds. Five-minute challenges. Viral clips of bodies trembling under strain. Somewhere along the way, longer became equated with better.

    The quieter reality is less dramatic. After a certain point, extending a plank mainly builds tolerance to discomfort rather than meaningful strength. Coaches and research alike suggest that short, controlled holds, repeated regularly, support core strength and spinal health more effectively than occasional endurance tests. Long planks are not inherently harmful, but their return diminishes as fatigue increases and alignment quietly slips. With time, the goal naturally shifts from survival to support.

    Age, Gravity, and the Plank Equation

    As the years pass, the body recalculates. Recovery slows, tissues become less forgiving, and balance requires more attention. A plank that once felt automatic now asks for intention. This is not decline—it is biology.

    Rather than one fixed rule, flexible ranges work best. The ideal hold ends just before form begins to unravel. Below are realistic guidelines for healthy adults without major injuries, meant as reference points rather than rigid targets.

    Age Group Recommended Hold Duration (Per Set) Number of Sets Weekly Practice Frequency
    Teens (13–19 years) 20–40 seconds 2–4 2–4 days per week
    Adults (20s–30s) 30–60 seconds 2–4 3–5 days per week
    Midlife (40s) 20–45 seconds 2–4 3–4 days per week
    Older Adults (50s) 15–40 seconds 2–3 2–4 days per week
    Seniors (60s–70s+) 10–30 seconds 2–3 2–4 days per week

    Your 20s and 30s: Strength Without Restraint

    In early adulthood, the body often feels forgiving. Recovery is quick, tissues are resilient, and strength develops easily. Holding a plank for thirty to sixty seconds with good form can be productive.

    The risk here isn’t weakness—it’s ignoring subtle breakdowns. Hips dip, shoulders creep upward, and the lower back quietly protests. Dividing effort into multiple shorter holds often produces better results than one long, punishing attempt.

    Your 40s: Strength With Awareness

    By the 40s, feedback becomes clearer. Old injuries speak up and stiffness appears sooner. Strength remains, but it demands respect.

    For many, the most effective range sits between twenty and forty-five seconds per hold. Some days allow longer efforts; others call for restraint. The focus shifts toward sustainable strength—supporting posture, spine health, and daily movement for the long term.

    Your 50s, 60s, and Beyond: Resilient, Not Reckless

    Later decades redefine strength. Muscle mass may decline gradually and recovery may slow, but adaptation remains possible. Planks continue to offer value, even when modified.

    Shorter holds of ten to thirty seconds performed with excellent alignment are highly effective. Knee planks or incline planks are not compromises; they are smart adjustments that protect joints while maintaining core engagement.

    Knowing When to Stop

    Your body always signals when a plank shifts from helpful to risky. Sagging in the lower back, shoulders tightening toward the ears, held breath, or facial tension are all cues to stop.

    Ending a hold at the first sign of form loss is not failure—it is skilled training. Over time, this approach builds efficiency rather than collapse.

    Turning Planks Into a Practice

    Planks do not need drama. They can fit easily into daily life—a brief hold before coffee, another after work, one before bed. These small, consistent efforts quietly accumulate.

    The true reward isn’t a record-breaking time. It’s standing taller, moving with confidence, and supporting your body through everyday tasks. Hold only as long as your form remains honest. Rest. Repeat. That is where lasting core strength lives.