Author: admin

  • Get Softer Lips This Winter With These 8 Top Rated Scrubs and Treatments

    Get Softer Lips This Winter With These 8 Top Rated Scrubs and Treatments

    Winter weather can be tough on lips, especially in India where cold air, low humidity, and indoor heating work together to cause dryness and cracking. That’s why switching to targeted lip scrubs and treatments during the colder months can make a visible difference. From gently exfoliating away flakes to sealing in long-lasting moisture, the right products help restore softness and comfort. This guide explores how top-rated scrubs and treatments support healthier lips, making winter care simple, effective, and easy to maintain even with busy daily routines.

    Why Winter Lip Scrubs Matter for Softer Lips

    Using a lip scrub in winter is not just about smoothness; it’s about keeping lips healthy when conditions are harsh. Gentle exfoliation removes dead skin that can block moisture from penetrating, allowing treatments to work better. Many top-rated scrubs are formulated to polish without irritation, making them suitable for regular use. When applied correctly, scrubs help prevent cracking and uneven texture, supporting gentle exfoliation, smooth lip texture, and better moisture absorption. For best results, choose formulas with nourishing oils or sugars that melt into the lips, offering comfort during cold while preparing them for balms and masks.

    Top Winter Lip Treatments for Deep Hydration

    After exfoliation, winter lip treatments step in to repair and protect. These products often include occlusive and hydrating ingredients that lock in moisture for hours, even overnight. In colder months, consistency matters more than quantity, so applying treatments daily can significantly reduce dryness. Well-reviewed options focus on intense moisture care, overnight lip repair, and long-lasting softness without feeling heavy. Many treatments are designed to shield lips from wind exposure, making them ideal for outdoor commutes. Over time, this routine supports healthy lip barrier and visibly plumper-looking lips.

    How to Choose the Best Lip Scrubs and Treatments

    With so many options available, selecting the right scrub or treatment depends on your lip concerns. Sensitive lips benefit from mild exfoliants, while extremely dry lips need richer formulas. Look for products that balance care and performance, offering non-irritating formulas, daily winter use, and skin-friendly ingredients. Texture also plays a role; creamy scrubs and balm-like treatments are easier to use consistently. Paying attention to reviews can help identify products that deliver visible softness results and fit seamlessly into your winter routine.

    Winter Lip Care Summary and Takeaways

    Achieving softer lips in winter comes down to pairing the right scrub with a reliable treatment. Exfoliation clears the way, while hydration restores comfort and prevents further damage. In India’s winter climate, maintaining this balance ensures lips stay supple despite changing temperatures. A simple routine focused on consistent lip care, seasonal protection needs, and hydration-first approach can transform dry lips into a smoother, healthier pout. With the right products, winter lip care becomes effortless and rewarding.

    Product Type Main Benefit Best Time to Use
    Lip Scrub Removes dead skin 2–3 times weekly
    Hydrating Balm Daily moisture Daytime
    Overnight Mask Deep repair Before bed
    Nourishing Treatment Barrier protection Morning and night

    Frequently Asked Questions (FAQs)

    1. How often should I use a lip scrub in winter?

    Most people benefit from using a gentle lip scrub two to three times a week.

    2. Can lip treatments replace regular lip balm?

    Lip treatments complement balms by offering deeper repair, especially overnight.

    3. Are winter lip scrubs safe for sensitive lips?

    Yes, as long as you choose mild, non-abrasive formulas designed for sensitivity.

    4. When will I see results from a winter lip care routine?

    With consistent use, most people notice softer lips within one to two weeks.

  • Fix Scratches on Glass Cooktops Quickly at Home Without Replacement

    Fix Scratches on Glass Cooktops Quickly at Home Without Replacement

    The first time you notice it your heart sinks. That shiny black glass cooktop you used to love now has a pale jagged scratch running across it. Perhaps it appeared when you moved a heavy pot too quickly or when a tiny grain of salt got stuck under a pan. The scratch is small but every time you enter the kitchen you spot it immediately. When you touch the surface you can feel the rough edge. You begin to worry that the damage is permanent and wonder if you need to replace the entire cooktop or simply accept the flaw.

    Why Scratches Appear on Glass Cooktops (Even With Careful Use)

    Glass cooktops look smooth, modern, and almost unbreakable—like a dark, glossy surface that can handle daily cooking without trouble. In reality, the glass is more sensitive than it appears. Tiny abrasions can form even when you’re careful. Sliding a heavy pot, a grain of salt trapped under cookware, or a cast-iron pan with a rough base can all quietly mark the surface. Often, the scratch isn’t noticed right away. It shows up later while cleaning, bringing that familiar mix of irritation and regret. The important thing to know is that many of these scratches are not permanent and can often be reduced with gentle care.

    Understanding the Scratch: How Serious Is It?

    Before trying to fix anything, it helps to understand what kind of scratch you’re dealing with. Look at the cooktop under bright light and from different angles. If the scratch appears only at certain angles and your fingernail doesn’t catch on it, it’s likely a light surface mark. These are usually the easiest to improve. If your nail catches slightly, the scratch may still be manageable. Deep grooves that clearly catch your nail are more serious and can’t be fully removed at home. Thinking of scratches in levels—light haze, visible lines, and deep grooves—helps you choose the right approach and set realistic expectations.

    Preparing the Right Tools: Gentle, Not Aggressive

    Start by cleaning the cooktop thoroughly so no grease or debris interferes with the repair. Use a soft cloth and a cooktop-safe cleaner, then dry the surface completely. For polishing, choose mild options only. Baking soda paste, non-gel toothpaste, ceramic cooktop cream, or a glass polishing compound are all suitable for light to medium scratches. These products work by gently smoothing the surface rather than grinding it down. Always use a soft microfiber cloth and avoid harsh sponges, steel wool, or anything gritty that could add new scratches.

    At-Home Methods That Can Reduce Scratches

    Begin by testing your chosen method on a small, hidden area. If the finish remains clear, move on to the scratch. For light scratches, apply baking soda paste or toothpaste and rub gently in small circles. Wipe clean, check progress, and repeat if needed. For more visible scratches, ceramic cooktop cream or glass polishing compound often works better. Apply with light pressure and patience, letting the product do the work. Deep scratches won’t disappear, but careful polishing can soften their appearance and make them far less noticeable.

    Finishing the Surface After Polishing

    Once the scratch looks improved, clean the area again to remove residue. Many people like to finish with a cooktop cleaner that leaves a light protective shine. Buff gently with a dry microfiber cloth until the surface reflects evenly. The scratch may still exist faintly, but it usually fades into the background rather than standing out.

    Method Used Most Effective For Main Advantages Possible Drawbacks
    Baking Soda Paste Minor surface marks and dull patches Low cost, easily available at home, gentle on glass Not effective for deep or clearly visible scratches
    Non-Gel Toothpaste Light but noticeable scratches Simple application, mild abrasive helps polish glass Needs repeated attempts for visible results
    Cooktop Polishing Cream Light to moderate scratch damage Specifically made for glass cooktops, restores shine safely More expensive than basic household options
    Glass Polishing Compound Multiple or stubborn scratch marks Stronger polishing power, better visible improvement Requires careful use to prevent surface damage

    How to Prevent Future Scratches on Your Cooktop

    Prevention is mostly about changing small habits. Lift cookware instead of sliding it. Wipe the bottoms of pots and pans before placing them on the glass. Clean spills—especially sugar or salt—before cooking again. Avoid storing heavy or rough cookware directly on the cooktop. If you use protective mats or covers, make sure they are designed specifically for glass cooktops and safe for heat.

    When Repair Isn’t Enough and Replacement Is Safer

    If a scratch looks more like a crack, spreads over time, or feels deeply gouged, it’s best to stop and seek professional advice. Structural damage can affect how the glass handles heat and may become a safety issue. However, most everyday scratches are cosmetic and don’t require replacement. With gentle methods and patience, you can restore much of the cooktop’s smooth appearance and continue using it with confidence.

    Final Thoughts on Caring for a Glass Cooktop

    A glass cooktop is both practical and reflective, showing signs of daily cooking life over time. Scratches don’t always mean failure or neglect—they’re often just part of regular use. Learning how to soften or reduce them helps keep your kitchen looking calm and cared for. More importantly, it builds confidence in maintaining your appliance without panic, allowing you to focus on cooking rather than worrying about every small mark.

  • Simple Balance Drills That Improve Stability as You Get Older

    Simple Balance Drills That Improve Stability as You Get Older

    The first time you notice your balance has changed it usually happens without warning. It’s a subtle shift. You might reach for something on a high shelf and feel your body sway in an unfamiliar way. You might step down from a curb and find your foot pausing instead of moving forward smoothly. Or you might realize that standing on one leg to put on pants has become difficult when it used to be automatic. Between your daily routines and the passing years your sense of balance began to fade without you really noticing.

    The Subtle Art of Staying Upright

    Balance is one of those invisible skills like breathing or blinking that we rarely think about until something goes wrong. Yet it works constantly in the background with tiny muscles in your feet adjusting to uneven ground and joints communicating with your brain while your inner ear tracks how your body tilts and sways. This silent coordination changes as we get older. Muscle fibers become thinner. Reaction times get slower. Vision becomes less sharp around the edges. The inner ear that acts as our natural level and compass can lose some of its precision. None of this means you are fragile but it does mean your body is being more direct about what it needs. Sometimes it simply asks for a little help. The encouraging part is that balance can be improved at any age. Your nervous system remains adaptable and your muscles still respond to training. You don’t need expensive gym equipment or complex routines to help your body regain its steadiness. What you need is simple & regular practice along with some curiosity and a willingness to feel a bit unsteady on purpose. Imagine yourself standing with bare feet on the floor and your toes spreading out like roots while you breathe calmly as your body learns to organize itself with more grace. The exercises that follow are not flashy or impressive. Nobody will share videos of you doing them online. But they could make the difference between catching yourself when you stumble and falling to the ground. They might help you move through your daily life with quiet and renewed confidence as you take each careful step.

    Awakening Your Feet: The Foundation of Balance

    Balance starts in a place you might not expect. It does not begin with your mind or your goals. It begins at the point where your body connects with the ground beneath you. Your feet are remarkably sensitive structures filled with countless nerves that send constant signals to your brain. These signals tell you about the texture of the surface under you and how your weight shifts from side to side. They also inform you about whether the ground is flat or uneven. Modern life has changed how our feet work. When you wear rigid shoes that limit natural movement your feet lose some of their ability to sense the world. When you spend most of your day sitting at a desk or on a couch those important signals become weaker. The connection between your feet and your brain starts to fade. Your nervous system receives less information about balance and position. Over time this makes it harder for your body to maintain stability & respond quickly to changes in your environment.

    Drill 1: The Four Corners Stand

    Take off your shoes and stand with your feet positioned about hip-width apart. Allow your toes to spread naturally. You can do this on kitchen tiles or a wood floor or even a rug. Think of each foot as having four corners: the ball beneath your big toe & the ball beneath your little toe along with the two sides of your heel. Gently shift your weight until all four corners press equally into the ground. You might notice at first that you favor the outer edges or lean more into your toes than your heels. Let your weight move slowly in a circle by going forward and then right and then back and then left. This creates a slow wobbly ring around those four corners. After that you can gradually bring your weight back to the center. Hold this balanced position for 20 to 30 seconds at a time & rest when you need to. Breathe as though the air is reaching down to your feet. This exercise is not just about muscles but about reestablishing the connection between your feet & your brain.

    Drill 2: Heel-to-Toe Rocking

    Stay barefoot and stand next to a counter or solid chair that you can hold for balance. Position your feet directly under your hips. Gently shift your weight forward until your heels start to lift slightly off the ground. Then shift back until your toes relax & your heels press down firmly. Take your time with each movement. Keep the motion small & controlled because the goal is not to lose balance but to discover how far you can lean in each direction. Notice how your ankles make tiny adjustments and how the muscles in your calves & shins work together. Pay attention to when your toes grip the floor and when they let go. Do this rocking motion 10 to 15 times slowly. Think of this exercise as warming up a skill that has not been used much lately. These basic exercises work better than you might expect. When your feet can properly feel the floor beneath them your entire body moves more efficiently & with less strain.

    Standing Still, Feeling Everything

    Stillness is never truly still. When you stand completely motionless your body makes countless small adjustments similar to a boat floating on calm water. Getting better at balance begins with recognizing this subtle activity.

    Drill 3: Single-Leg Support (With Training Wheels)

    Find a counter, table, or the back of a sturdy chair. Stand tall with your feet hip-width apart. Lightly rest one hand on your support. Shift your weight onto your left foot, then slowly lift your right foot a few inches off the ground, bending the knee so the toes hover. You are not aiming to balance like a flamingo; the goal is to feel supported, alert, and steady.

    Spread the toes of your standing foot. Gently engage your belly as if bracing for a soft poke. Fix your gaze on something still in front of you—a mark on the wall or a cupboard handle works well. Begin with 10–15 seconds on each leg. If your ankle trembles or your muscles quiver, that is a good sign; it means your body is learning.

    As this becomes easier, reduce how much you rely on your support. Progress may look like using only fingertip contact, then hovering your hand just above the surface, ready if needed. Over time, you may find yourself standing for 30 seconds on each leg, breathing calmly, your body making subtle, steady adjustments.

    Drill 4: The Soft-Standing Challenge

    Once single-leg standing feels familiar, add a gentle variation by softening your knees. Many people lock their knees without noticing, turning their legs into rigid pillars that respond poorly to change. Instead, stand on both feet with your knees slightly bent, as if you were about to sit down and then changed your mind.

    Now lift one foot just an inch or two off the floor. Notice how the softly bent knee on your standing leg allows more flexibility. It may feel less elegant than a straight-legged pose, but it is more honest and far safer when life surprises you with a slippery surface or sudden turn.

    Practice 3–5 rounds on each side, holding for 10–20 seconds at a time. Let your arms float out for balance if needed. This small bend is often the difference between being rigid and being ready.

    Walking the Line: Turning Everyday Steps into Training

    Walking is a series of controlled falls, one foot catching you again and again. As we age, that control can feel less reliable. Instead of moving automatically from task to task, you can turn a few steps into intentional practice, creating a quiet training ground woven into daily life.

    Drill 5: Tightrope Walk (With Safety Nets)

    Find a clear stretch of floor such as a hallway, living room path, or kitchen walkway. If you feel unsteady, stay near a wall or countertop so you can reach out if needed.

    Imagine a thin line painted on the floor. Place the heel of one foot directly in front of the toes of the other, as if walking on that imaginary line. Take one slow step, then another. Let your arms extend slightly to the sides. Keep your gaze forward rather than down; this trains your vision and inner ear to work together.

    Take 8–10 steps along your invisible line, then walk back normally. If it feels too wobbly, widen your steps. Over time, you may notice your feet aligning more naturally and your steps growing more confident.

    Drill 6: Backward and Sideways Steps

    Life rarely moves in perfect straight lines. You step back from the fridge, move sideways past a table, or dodge someone moving quickly. Training these directions prepares your balance for real-world demands.

    For sideways stepping, stand tall with your feet together. Lightly hold a wall or counter if needed. Step your right foot to the side, then bring your left foot to meet it. Take 8–10 steps in one direction, then return, noticing how your hips and thighs work differently.

    For backward stepping, keep the movement small. Step back gently with your right foot, then bring your left foot to meet it. Keep your gaze forward, occasionally checking your path. Focus on control rather than speed.

    Upper Body, Inner Calm: Using Breath and Posture

    Balance involves more than feet and legs. The way you hold your spine, ribs, and head plays a major role. When shoulders round or the head juts forward, your center of gravity shifts, making it harder to stay upright.

    Drill 7: The Tall String

    Stand or sit with your feet flat on the floor. Imagine a gentle string lifting you from the crown of your head. Let your chin soften slightly as your head rises upward.

    Roll your shoulders up, back, and down, keeping them relaxed. Feel your ribcage stacking over your pelvis. Take three slow breaths, inhaling through your nose as your ribs expand, and exhaling through your mouth as if fogging a window.

    Holding this tall posture while breathing trains your postural muscles without strain and helps calm your nervous system, which supports steadier balance.

    Drill 8: Head Turns with a Steady Body

    Stand with your feet hip-width apart, lightly holding a chair or counter if needed. Fix your gaze on a steady point. Slowly turn your head to look over your right shoulder, return to center, then look over your left shoulder.

    Complete 5–8 turns each way. This movement helps your eyes and inner ear coordinate with your body, preparing you for everyday situations like crossing a street or scanning a room.

    Weaving Practice into a Real Life

    Balance practice does not require a special schedule or gym clothes. It can blend into ordinary moments throughout your day.

    Stand on one leg while brushing your teeth, keeping your hand near the sink. Hold a single-leg stance at the counter while waiting for the kettle. Rock heel to toe while washing dishes. Use pauses in your day to notice where your weight is and whether you can breathe without tension.

    Consistency matters more than intensity. Think of these moments as small daily deposits into your balance savings account.

    Quick Reference Summary

    Drill What It Trains How Often
    Four Corners Stand Foot awareness, weight distribution Daily, 30–60 seconds
    Heel-to-Toe Rocking Ankle control, forward–back balance 3–4 times per week, 10–15 rocks
    Single-Leg Support One-leg stability, core engagement Daily, 10–30 seconds each leg
    Tightrope Walk Gait control, coordination 3–5 passes, 3 times per week
    Tall String + Head Turns Posture, eye–inner ear coordination Daily, 1–2 minutes

    Listening to Your Edges, Honoring Your Pace

    There is a difference between helpful challenge and unnecessary risk. Gentle wobbling is fine; sharp pain is not. Effort is welcome; panic is not. The aim is to invite your body to remember its abilities, not to force it.

    If you have a history of falls, dizziness, joint replacements, or complex medical conditions, consider reviewing these drills with a healthcare professional or physical therapist. Using support or progressing slowly is a sign of wisdom, not weakness.

    Progress often arrives quietly. One day you may realize you have been standing on one leg longer than before, breathing steadily, feeling grounded. Age moves forward, but you are not only a passenger. Each mindful step is a vote for your future mobility, stability, and independence.

  • Simple Morning Hydration Routine That Supports Better Skin and Daily Energy

    Simple Morning Hydration Routine That Supports Better Skin and Daily Energy

    The first sip catches you off guard. You’re up earlier than usual & the morning light looks pale and uncertain through the window. Your thoughts feel cloudy and slow. You haven’t reached for your phone or glanced at the clock. You’re just standing in the kitchen without shoes on and lifting a glass of water to your mouth. Something feels different though. This isn’t the quick mindless swallow you usually take before rushing to make coffee. This time you drink slowly and the cool water seems to wake something in you. Your body responds to it the way dry earth soaks up rain after weeks without it.

    The Quiet Science of That First Glass

    Most of us wake up already dehydrated. During the night your body has been working without pause. It breathes and repairs skin & regulates temperature and processes what you ate the day before. All of this requires water. When morning comes you sit up in bed slightly depleted like a plant that has gone too long without water. You might not feel obviously thirsty. Instead you notice something less obvious. Your skin looks dull and needs extra makeup or moisturizer to appear healthy.

    There is a heaviness behind your eyes. Your thinking feels slow and sticky where even simple decisions take effort. Mild dehydration rarely makes itself obvious but it affects almost everything you do. Now imagine that for just four minutes each morning you replace what the night took from you. No supplements are needed. No expensive powders are required. No complicated recipes are involved. Just a simple deliberate water ritual that wakes up your cells and gives your skin an advantage & lifts your energy before your day begins. This is the hydrating four-minute morning water routine. It is a small practice that makes your body feel like someone finally remembered to turn on the lights.

    The Four Minute Routine: A Small Ritual With Big Ripples

    Most of us wake up already dehydrated. During the night your body has been working without pause. It breathes & repairs skin & regulates temperature and processes what you ate the day before. All of this requires water. When morning comes you sit up in bed slightly depleted like a plant that has gone too long without water.

    Minute 1: The Wake-Up Glass

    Before you reach for coffee or tea or check your emails drink your first glass of water at room temperature. Pour yourself about 250 to 300 ml. The water should not be cold or hot. Just neutral. Room temperature water enters your body smoothly without causing any shock. Your stomach stays calm instead of contracting & your system can absorb the water easily instead of resisting it. You can stand by the window or step onto your balcony if you have one.

    Keep your feet flat on the ground and let your shoulders hang loose. Take a breath. Drink the water slowly & with focus. Notice the water touching your tongue & moving down your throat until it reaches your stomach. This first glass accomplishes something surprisingly basic yet important. It ends the long period without water that your cells experienced during the night. They have been waiting for this moment.

    Minute 2: Add Minerals, Add Glow

    Your second minute focuses on enhancing your water with simple additions. Regular water works well but adding a small amount of minerals can make it more effective for energy and skin health. In your second glass of water (another 200 to 250 ml) you can add one or two of these options based on what you have available and what suits your body: A small pinch of quality sea salt or Himalayan salt (just enough to barely notice the taste) A squeeze of fresh lemon for vitamin C and mild acidity Or a small amount of coconut water if you want something slightly sweet and naturally high in potassium Mix it and take a moment to look at the glass.

    This is more than just water now. It becomes a solution your cells can recognize & use more quickly. The light stream of electrolytes helps your body retain hydration instead of passing it through too fast. Your skin cells respond particularly well to this. When cells are properly hydrated they become fuller and smoother and maintain a stronger protective barrier. As you drink this second glass imagine it reaching the small neglected areas of your body that felt empty twenty minutes earlier.

    Minute 3: Skin-First Sips

    The third minute is not about drinking more water but about paying attention. You can pour a little more water if you want or just keep sipping your mineral water from the second minute. Think of this as your skin minute. While you drink run your fingertips gently across your face. Pay attention to how your skin feels on your cheeks and forehead and that spot under your eyes that shows every late night and every glass of water you skipped. You are not being critical but simply observing.

    Picture this water creating a healthy glow by tomorrow morning. Drinking water will not change your skin in ten minutes. But if you do it regularly it will change how your skin works over time. It affects how your skin heals after breakouts and how it handles dry winter air or air conditioning and how fast it bounces back from sun exposure and stress and lack of sleep. During this minute the water also helps your circulation. As water moves through your body it supports your blood volume and helps blood flow better. Better circulation means nutrients reach where they need to go and waste products leave your body faster. Your skin is often the first place where you can see these changes happening.

    Minute 4: Breath, Posture, and a Promise

    The third minute is not about drinking more water but about paying attention. You can pour a little more water if you want or just keep sipping your mineral water from the second minute. Think of this as your skin minute. While you drink run your fingertips gently across your face. Pay attention to how your skin feels on your cheeks and forehead and that spot under your eyes that shows every late night and every glass of water you skipped. You are not being critical but simply observing. Picture this water creating a healthy glow by tomorrow morning. Drinking water will not change your skin in ten minutes.

    But if you do it regularly it will change how your skin works over time. It affects how your skin heals after breakouts and how it handles dry winter air or air conditioning and how fast it bounces back from sun exposure and stress and lack of sleep. During this minute the water also helps your circulation. As water moves through your body it supports your blood volume and helps blood flow better. Better circulation means nutrients reach where they need to go & waste products leave your body faster. Your skin is often the first place where you can see these changes happening.

    How This Tiny Routine Shows Up on Your Skin

    Your skin connects directly to the rest of your body. It functions as a living organ that reflects your internal health. When you feed it properly from the inside your skin begins to act differently. It becomes less reactive & more stable and forgiving. This simple four-minute morning water habit can create visible changes in your face & body as time passes: Smoother texture happens because hydrated skin cells absorb water and expand slightly. This creates an even surface. Fine lines around your eyes and mouth that come from dehydration often become less visible. Stronger barrier function develops when skin stays hydrated.

    Your skin holds onto its natural oils better and blocks out irritants more effectively. Random dry spots may disappear and your moisturizer seems to work more efficiently. Better bounce occurs when cells fill with water. Your skin feels firmer when you touch it and looks less dull or thin. The tired appearance after a poor night of sleep fades faster because your skin has what it needs. Calmer feelings about your appearance emerge over time. When you notice your skin gradually looking brighter or see redness decreasing or watch texture improving slowly your feelings about your reflection improve as well. These changes happen quietly like a plant that gets proper light and regular water. Nothing changes dramatically in one day. Everything changes across many days.

    Energy: The Invisible Upgrade

    We often think slow mornings happen because we didn’t sleep enough or need more coffee. We forget about hydration but it plays a major role in how alert we feel. Blood contains mostly water. Your brain does too. Even a slight decrease in hydration makes you feel heavier and slower and more irritable. When you start your day by drinking water on purpose you restore the fluid your body uses to move oxygen around and deliver nutrients and activate neurons & control temperature. Three common changes many people see after doing this for a few weeks include the following. Mornings feel more consistent.

    You don’t crash an hour after your first coffee anymore. Instead you experience a steadier energy level. Hydration reduces the extreme ups and downs. Your focus improves. Mild dehydration makes thinking feel difficult. Sometimes that afternoon slump happens simply because your brain needs water instead of more caffeine. You crave less food. Thirst and hunger send similar messages to your body. When you stay underhydrated for a long time you might grab snacks or sugar when your cells actually need water. You won’t transform into someone who loves mornings. But things feel clearer. The mental fog reduces. You handle your day with more stability like your internal systems finally learned to recharge correctly.

    Making It Your Own: Personalizing the Four Minutes

    We often think slow mornings happen because we didn’t sleep enough or need more coffee. We forget about hydration but it plays a major role in how alert we feel. Blood contains mostly water and your brain does too. Even

    Adjusting the Amount

    If drinking two large glasses seems overwhelming you can begin with smaller portions of 150 to 200 ml each and gradually increase the amount over time. The purpose is not to push yourself into discomfort or force down water. Instead you want to focus on steady and gentle hydration that feels natural to your body.

    Temperature Tweaks

    Warm water works well if you have a sensitive stomach or live somewhere cold. The warmth feels gentle and helps your digestive system wake up slowly. Cool water is better in hot weather & can make you feel more alert. Just avoid drinking very cold water right after waking up because it might make your stomach or throat feel uncomfortable.

    Flavor Without Fuss

    Warm water is a good choice if your stomach is easily upset or if you live in a cold climate. The warmth is soothing and helps your digestive system start working gradually. Cool water works better when the weather is hot and can help you feel more awake. However you should not drink very cold water immediately after waking up because it can cause discomfort in your stomach or throat.

    Habit Hooks

    Attach your four-minute ritual to something you already do every day. You might do it right after you make your bed or while the kettle boils for coffee or tea. Another option is to practice it just before your skincare routine. Over time the sequence becomes automatic. You wake up and drink water & breathe and begin your day.

    Seeing It in Practice: A Simple Comparison

    To understand how this can play out in a real day, imagine two versions of your morning—one with the ritual, one without:

    Without a Morning Water Habit With a Four-Minute Morning Water Habit
    You wake up feeling heavy and unfocused, immediately scrolling your phone
    and relying on coffee to feel alert.
    You wake up and head straight to the kitchen, drinking your first glass of
    water before checking your phone or having caffeine.
    Your skin appears tired and flat, so makeup is used to cover dullness rather
    than enhance natural features.
    Your skin gradually looks fresher and more balanced, allowing makeup to be
    lighter and more effortless.
    Energy rises quickly after coffee but drops sharply by mid-morning, leaving
    you feeling drained.
    Energy builds more steadily, with water helping your body respond better to
    caffeine later.
    By afternoon, focus fades, cravings increase, and productivity becomes harder
    to maintain.
    Afternoon focus feels more stable, with fewer cravings and clearer, calmer
    decision-making.

    Patience, Not Perfection

    Water rituals will not replace the basics like sleep, food, stress management and exercise but they help those systems function more effectively. When your body has enough water your skin repairs itself faster. Your muscles bounce back better after workouts. Your brain handles stressful situations with less panic. We live in a world that pushes extreme solutions like elaborate skincare systems, brutal workout programs and complex health tricks.

    This four-minute practice stands out because it is so straightforward. That simplicity is what makes it work. It fits into your daily routine without forcing you to change everything else. You do not need fancy equipment or tracking software. All you need is a drinking glass, access to clean water & four minutes that you protect from other demands. When you skip a day you have not ruined anything. You simply start again the following morning. On hectic days you might only drink one large glass instead of two. That still matters. Your body tracks patterns over many weeks and months rather than judging individual days.

    At some point you will look at yourself in harsh bathroom lighting & notice something different. Your skin appears more alive even when you feel tired. Your eyes seem clearer and less clouded. You might think back to that first morning when you drank water right after waking up and decided to treat yourself like something that deserves care and nourishment instead of just something that needs to keep running. The glass sits there waiting each morning. Four minutes of your time. Two glasses of water. A brief personal ritual that declares one thing: before anyone else needs anything from me I will take care of this one essential need for myself.

  • Yoga Teachers Share Three Standing Poses to Improve Balance in Older Adults

    Yoga Teachers Share Three Standing Poses to Improve Balance in Older Adults

    How confident do you feel climbing a flight of stairs? Do you move step by step, or stride upward without a second thought? Balance is something most people take for granted—until it starts to slip.

    Your sense of balance often goes unnoticed, yet it’s a skill everyone benefits from developing, regardless of age or fitness level.

    Balance isn’t just physical, it’s an attitude of attention, inner steadiness and calm,” says YogaGo yoga teacher Amanda York.

    She explains that the mind–body connection plays a crucial role, as the body naturally follows where the mind is focused.

    When the mind scatters, the body wobbles. When attention settles, the body follows,” she says.

    Factors such as joint instability, injury, or limited mobility can affect balance, but so can a lack of practice, confidence, and mental focus.

    “In my 15 years of teaching yoga, I’ve noticed balance poses are especially appealing to more mature students, largely due to aging bones and natural muscle loss,” York explains.

    “But truly, balance poses benefit everyone. No matter your age, sex, or ability, balance work builds strength, stability, and confidence that carry over into everyday life.”

    Standing balance poses strengthen the legs, hips, core, and back while also offering psychological benefits.

    “By focusing on standing balance, you become more aware of your posture and center of gravity,” York says.

    With regular practice, these poses help strengthen muscles, train the core to engage effectively, and support both yoga practice and daily functional movement.

    Three Standing Balance Poses to Practice

    Here are three balance poses York recommends to improve stability, focus, and confidence.

    1. Tree Pose

    Hold: Five breaths

    York selected this pose to develop foundational stability and a strong sense of grounding.

    “Tree pose teaches you how to stand firmly on one leg while maintaining ease and steadiness,” she says.

    How to do it:

    • Stand tall with your feet together, distributing weight evenly.
    • Shift your weight onto one foot.
    • Place the sole of your other foot on your inner thigh, calf, or ankle, avoiding the knee joint.
    • Fix your gaze on a steady point ahead.
    • Bring your palms together at your chest or extend them overhead.
    • Press your standing foot into the floor, engage your core, and breathe steadily.
    • Hold for five breaths, then release slowly and repeat on the other side.

    Expert tips:

    • Externally rotate the lifted thigh from the hip.
    • Keep a slight bend in the standing knee if needed.
    • Practice near a wall for extra support.

    2. Warrior III

    Hold: Five breaths

    This pose builds core strength, focus, and full-body coordination.

    “Building on the grounding of tree pose, warrior III challenges balance as the body extends in opposite directions,” York explains.

    How to do it:

    • Begin standing and step one foot back into a high lunge.
    • Shift your weight into your front foot and look down for balance.
    • Hinge forward from the hips, lifting your back leg straight behind you.
    • Extend your arms forward, forming a straight line from fingertips to heel.
    • Engage your core and breathe deeply for five breaths.
    • Lower with control and repeat on the opposite side.

    Expert tips:

    • Keep your hands on your hips if balance feels challenging.
    • Lift the back leg only as high as feels stable.

    3. Half Moon Pose

    Hold: Five breaths

    This pose enhances lower-body strength, torso openness, and overall body awareness.

    “Half moon builds on warrior III by adding rotation, openness, and confidence,” says York.

    How to do it:

    • From standing, step your right foot forward and turn your left foot 90 degrees outward.
    • Hinge at the hips and shift your weight onto your right leg.
    • Lower your torso and place your right hand on the floor or a block.
    • Lift your back leg until it’s parallel to the floor.
    • Rotate your torso to the right and extend your left arm upward.
    • Gaze downward for stability, to the side for challenge, or upward for intensity.
    • Hold for five breaths, then release slowly and repeat on the other side.

    Expert tips:

    • Use a block under your supporting hand.
    • Maintain a slight bend in the standing leg.
    • Flex the lifted foot to help stabilize the hips.
  • Natural Sunscreen Properties Discovered in Hot Springs Bacteria

    Natural Sunscreen Properties Discovered in Hot Springs Bacteria

    Scientists have uncovered an exciting breakthrough in skin protection by studying bacteria that thrive in extreme environments. Researchers exploring geothermal pools found that certain microbes naturally produce compounds capable of blocking harmful ultraviolet radiation. This discovery has drawn strong interest in the United States, where demand for safer and more sustainable skincare solutions continues to grow. By learning how these heat-loving bacteria protect themselves, scientists hope to develop new sunscreen ingredients that are both effective and environmentally responsible, offering a promising alternative to traditional chemical-based sun protection.

    Natural sunscreen properties found in hot springs bacteria

    Bacteria living in hot springs survive under intense sunlight and high temperatures, conditions that would damage most life forms. To cope, they produce UV absorbing compounds that act like a built-in sunscreen, protecting their cells from radiation. These microbes have evolved extreme heat survival strategies over thousands of years, making their protective systems remarkably efficient. Scientists believe this natural microbial shield could inspire new ways to protect human skin. Unlike synthetic filters, these biological compounds break down naturally, which could reduce environmental harm while still offering strong sun defense.

    How hot springs bacteria create natural sunscreen effects

    Researchers discovered that these bacteria generate bioactive pigments that reflect or absorb UV rays before damage occurs. Early experiments show promising DNA damage reduction when these compounds are applied in controlled settings. This has sparked interest in eco friendly skincare solutions that rely on biology rather than harsh chemicals. However, scientists stress that the process is still in the laboratory testing phase, with careful evaluation needed to confirm stability, effectiveness, and safety for everyday human use.

    Future potential of bacteria-based natural sunscreen solutions

    The discovery opens doors for commercial sunscreen development using naturally derived ingredients. Before reaching consumers, products must pass strict regulatory safety checks to ensure they are safe for all skin types. Scientists are also exploring scalable fermentation methods to produce these compounds in large quantities without harming natural hot spring ecosystems. If successful, this approach could reshape the sunscreen industry by offering high protection with a lower environmental footprint.

    Summary and scientific outlook

    This research highlights how nature can guide future skin protection strategies in surprising ways. By blending microbiology with skincare science, experts see opportunities for sustainable biotech innovation that benefits both people and the planet. While challenges remain, the long term research impact could be significant, potentially leading to safer sunscreens and a deeper understanding of how life adapts to extreme environments.

    Aspect Details
    Source Hot springs bacteria
    Main Benefit Natural UV protection
    Environmental Impact Lower chemical pollution
    Development Stage Research and testing
    Future Use Skincare and sunscreen products

    Frequently Asked Questions (FAQs)

    1. What makes hot springs bacteria special?

    They survive extreme heat and sunlight by producing natural UV-protective compounds.

    2. Can this replace current sunscreens?

    Not yet, but it may complement or improve future sunscreen formulations.

    3. Is this safe for human skin?

    Safety studies are ongoing and required before consumer use.

    4. Why is this discovery important?

    It offers a sustainable and potentially safer approach to sun protection.

  • Nine Conditioners That Balance Oily Hair According to Celebrity Stylists

    Nine Conditioners That Balance Oily Hair According to Celebrity Stylists

    Finding the right conditioner for oily hair can feel frustrating, especially when most formulas seem to weigh strands down instead of balancing them. In the United States, celebrity stylists often emphasize that oily scalps still need conditioning, just with smarter product choices. The key is using lightweight, oil-controlling formulas that hydrate the ends without overwhelming the roots. From salon favorites to stylist-approved formulas, these conditioners are designed to restore balance, improve texture, and keep hair looking fresh for longer without sacrificing softness or shine.

    Best conditioners for oily hair recommended by stylists

    Celebrity stylists agree that the best conditioners for oily hair focus on balance rather than stripping moisture completely. Many of these products use ingredients that gently hydrate while supporting scalp oil control and reducing heaviness. Lightweight textures are essential, as they help avoid buildup and maintain root freshness throughout the day. Stylists also look for formulas that improve manageability and enhance natural hair movement. When used correctly, these conditioners can leave hair soft, smooth, and noticeably lighter, making them ideal for people who struggle with greasy roots but dry or frizzy ends.

    How oily hair conditioners maintain healthy balance

    Conditioners designed for oily hair work by supporting the scalp’s natural ecosystem instead of fighting it. According to professionals, these formulas often include clarifying botanicals that promote oil regulation support while still delivering hydration where it’s needed most. The goal is to prevent overproduction of oil caused by dryness, which helps maintain longer clean feel between washes. Celebrity stylists also note that balanced conditioners improve strand elasticity and reduce flatness, allowing hair to look fuller without feeling coated or sticky.

    Choosing the right conditioner for oily scalp needs

    Selecting the right conditioner depends on understanding your hair’s specific concerns. Stylists recommend applying conditioner mainly to mid-lengths and ends to protect scalp moisture balance. Look for labels that mention volumizing or purifying benefits, as these often enhance lightweight hydration without clogging pores. The right product can also improve styling results by supporting daily hair manageability. With consistent use, a well-matched conditioner can transform oily hair into something that feels cleaner, healthier, and easier to style.

    Expert summary on balancing oily hair

    Celebrity stylists consistently highlight that oily hair doesn’t need harsh solutions, but thoughtful care. The best conditioners combine gentle cleansing support with hydration to encourage healthy scalp harmony. Over time, this approach helps reduce excess oil while improving shine and texture. Stylists also stress the importance of proper application techniques and product rotation to avoid buildup. When paired with the right shampoo, these conditioners support consistent hair freshness and deliver results that feel salon-worthy without overcomplicating your routine.

    Conditioner Type Main Benefit Hair Texture Suitability
    Lightweight Volumizing Reduces flatness Fine to medium
    Clarifying Conditioner Controls excess oil Oily scalp
    Botanical-Based Balances moisture All hair types
    Protein-Infused Strengthens strands Weak or limp hair

    Frequently Asked Questions (FAQs)

    1. Can people with oily hair use conditioner daily?

    Yes, daily use is fine if the conditioner is lightweight and applied mainly to the ends.

    2. Do conditioners make oily hair worse?

    No, the right formula actually helps balance oil production when used correctly.

    3. Should conditioner touch the scalp for oily hair?

    Stylists recommend keeping conditioner off the scalp to avoid buildup.

    4. Are salon conditioners better for oily hair?

    Salon formulas often use refined ingredients, but many drugstore options work just as well.

  • Use These 13 Deeply Nourishing Night Creams to Support Skin Repair and Better Overnight Recovery

    Use These 13 Deeply Nourishing Night Creams to Support Skin Repair and Better Overnight Recovery

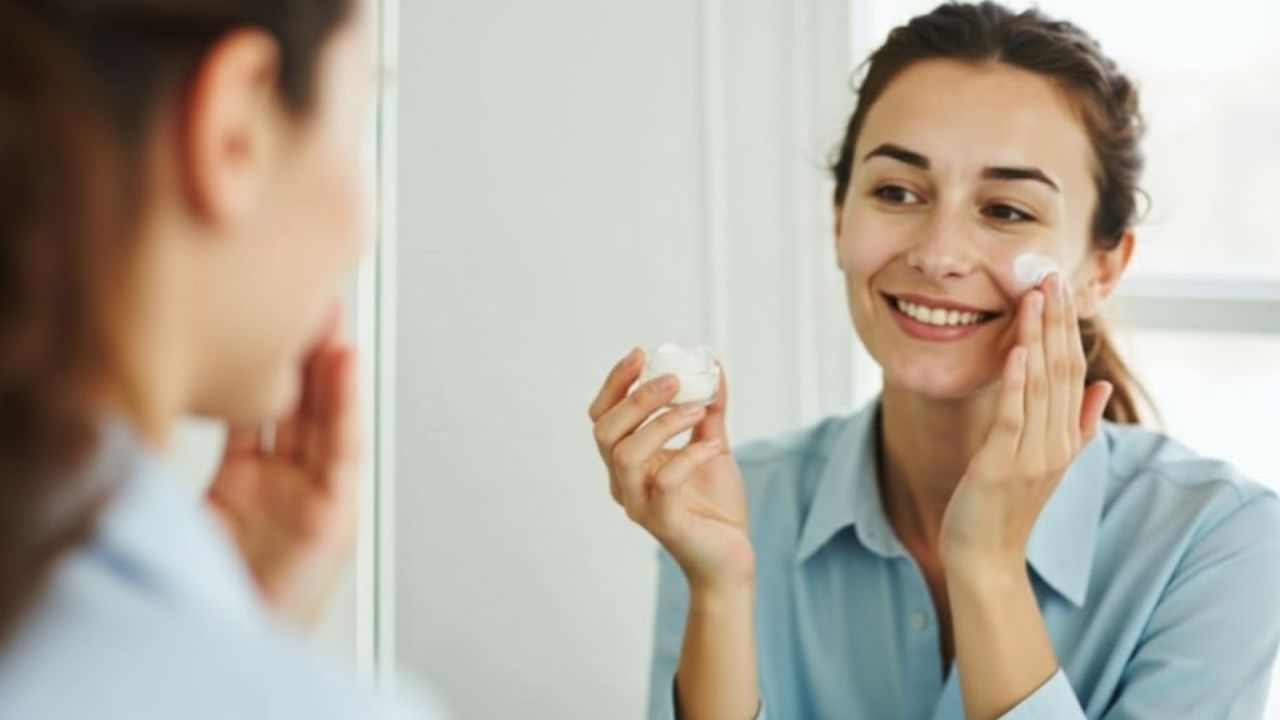
    Keeping up with a solid sleep hygiene routine supports your overall wellness—and your complexion. While you rest, the body focuses on renewal, and your skin shifts into high gear to repair, restore, and rebalance after a day of environmental stress. You may already use a daily moisturizer, but the best night creams go further by delivering deeper hydration so skin looks plumper, smoother, and more comfortable by morning.

    These formulas are designed to work alongside your daytime moisturizer, adding extra moisture plus skin-supporting ingredients for overnight recovery. As dermatologist Margarita Lolis explains, using a night cream is a key step in an advanced routine because the skin experiences a major physiological shift during sleep—making nighttime an ideal window for repair, renewal, and regeneration. A well-formulated night cream can help support the skin’s natural processes while you sleep.

    With multitasking ingredients that help replenish moisture, soften the look of fine lines and wrinkles, and strengthen the skin barrier, these standout options are worth adding to your bedtime routine.

    Featured Night Cream Picks

    Lolis counts this Clinique moisturizer among her favorites. She describes it as an anti-aging cream that uses peptides to support collagen production and improve firmness, along with hyaluronic acid for added hydration and brightening agents to help reduce the look of discoloration. What makes it especially notable, she says, is its smart hydration technology, which adjusts moisture based on what your skin needs in real time—helping keep a balanced feel without tipping into dryness or excess shine.

    La Mer The Rejuvenating Night Cream

    If you already know the original La Mer Moisturizing Cream, this upgraded night version builds on that reputation. It includes MRA-3, a retinol alternative designed to help skin feel firmer and reduce the appearance of fine lines overnight.

    EltaMD Skin Recovery Night Moisturizer Mask

    Lolis also recommends this EltaMD overnight mask, pointing to its patented formula designed to support the skin’s natural nighttime repair cycle. She notes that it can help improve the hydration barrier and is especially distinct for how it may reduce redness while you sleep.

    Mother Science Molecular Genesis Barrier Repair Moisturizer

    Dermatologist Hadley King notes that one of the most helpful things to look for in a night cream is humectants, such as hyaluronic acid and glycerin, which bind water to the skin. She recommends this option because it includes both, plus moisture-sealing emollients like ceramides, triglycerides, and squalane to support the barrier, and occlusives like shea butter to help lock in hydration. King also highlights malassezin, an antioxidant that supports skin barrier repair and replenishes essential lipids.

    Beekman 1802 Milk RX Advanced Better Aging Cream

    King also recommends this cream for its “perfect combination” of humectants, including glycerin, polyglutamic acid, and collagen, which help draw in moisture and hydrate the skin. Emollient triglycerides, squalane, ceramides, and shea butter support the skin barrier overnight, while occlusives like mango seed butter help seal it all in.

    It also includes niacinamide to help improve tone and texture, plus allantoin for soothing support. The brand’s goat milk ingredient has been reworked into milk protein exosomes to help strengthen the barrier, while reneseed polypeptide is included to support collagen production.

    Fig.1 Beauty Retinol Night Cream Level 1

    If you’re easing into retinol, this option is designed to support a gradual routine. King likes that Fig.1 offers three retinol levels for different skin needs and sensitivities. Each level uses encapsulated retinol that releases over time to help minimize irritation. The base also includes humectants for hydration, emollients to support the skin barrier, and anti-aging peptides.

    Lancer Skincare Intensive Night Treatment

    Dermatologist Harold Lancer created this intensive formula with hyaluronic acid and peptides to help smooth and firm while restoring moisture. It also includes marula oil, rich in fatty acids, to help skin feel more plumped. A bio-engineered soybean extract is added to help reduce flakiness associated with dry skin.

    Tatcha Indigo Overnight Repair

    Fragrance-free and formulated with ceramides, this overnight cream is a strong choice for skin prone to sensitivity, redness, or seasonal dryness. It also includes a spatula to support cleaner application.

    Dermalogica Sound Sleep Cocoon Night Gel-Cream

    If you prefer a lighter feel, this gel-cream delivers hydration without heaviness. It includes ingredients like tamarind seed to support barrier function while keeping the texture airy and refreshing. It also features lavender and sandalwood to help promote a more calming nighttime routine.

    Made with a “bio retinol” sourced from blue-green microalgae, this night cream is designed to support firmer-looking skin with visible results in as little as two weeks. Despite its cushiony feel, the texture remains surprisingly lightweight, leaving skin feeling comfortable rather than coated.

    Yon-Ka Elastine Nuit Anti-Wrinkle Night Cream

    Vitamin C can be helpful at night, too. This formula uses vitamin C to help improve the look of dark spots while you sleep, alongside peptides to soften the look of fine lines and shea butter to nourish and support overnight recovery.

    The Outset Restorative Niacinamide Night Cream

    This night cream has a rich, buttery texture that feels substantial without seeming overly heavy. It focuses on radiance and hydration with a streamlined formula that avoids unnecessary extras.

    Meet the Experts

    • Margarita Lolis, M.D., board-certified dermatologist at Schweiger Dermatology Group in Hackensack, New Jersey.
    • Hadley King, M.D., board-certified dermatologist specializing in medical and cosmetic dermatology and clinical instructor at Weill Medical College of Cornell University.
    • Harold Lancer, M.D., board-certified dermatologist, global skincare authority based in Beverly Hills, and founder of Lancer Skin Care.

    Why Night Creams Are So Important

    Nighttime skincare matters for several reasons. Lolis explains that skin experiences a peak in transepidermal water loss (TEWL) overnight, meaning it becomes more permeable and more likely to lose moisture. To help offset this, night creams formulated with ceramides, hyaluronic acid, and glycerin can act as both humectants and occlusives, helping to lock in hydration and reinforce the epidermal barrier. This support can be crucial for reducing the risk of irritation, inflammation, and environmental damage, leaving skin feeling more resilient by morning.

    Your skin is also especially active while you sleep. Lolis notes that the skin’s regenerative capacity rises at night, with keratinocyte proliferation and DNA repair reaching peak levels during sleep—around three times faster than in the daytime. That’s why bedtime is often the best moment to use cell-supporting actives such as retinoids, peptides, growth factors, and exfoliating agents.

    Night Cream vs. Daily Moisturizer: What’s the Difference?

    You can apply a standard moisturizer at night, but Lolis emphasizes that a dedicated night cream serves a different purpose. A night cream functions as a targeted reparative treatment that aligns with the skin’s circadian rhythms to support renewal, strengthen the barrier, and restore moisture levels. These formulas are often enriched with bioactive ingredients designed to address TEWL, promote cell turnover, and support collagen synthesis over time for a more resilient-looking complexion.

    Since skin works harder to restore itself while you rest, nighttime is also a strategic time to put actives like retinol and peptides to work. Beyond sun protection, retinoids remain the most proven topical choice for anti-aging, while certain peptides—such as argireline (acetyl hexapeptide-3)—may create a mild Botox-like effect by influencing neurotransmitter release that contributes to wrinkle formation. King also notes that other peptide formulations can behave like growth factors, encouraging skin cells to turn over more quickly.

    What Ingredients Should a Great Night Cream Include?

    King describes three essential categories to look for in a night cream: humectants, emollients, and occlusives. Ideally, a formula includes all three. Humectants draw moisture into the skin, but they work best when paired with other components for fuller support. Emollients contribute to barrier function, membrane fluidity, and cell signaling, helping improve skin texture and overall appearance.

    Common emollients include squalene, fatty acids, and ceramides. Occlusives are the final seal, forming a protective layer that helps reduce transepidermal water loss. Common occlusives include petrolatum, beeswax, mineral oil, silicones, lanolin, and zinc oxide.

    How to Apply Night Cream the Right Way

    Harold Lancer recommends a simple four-step routine to get the most out of your night cream:

    • Begin with a polish and thorough cleanse to support cell turnover and remove makeup, dirt, and sunscreen.
    • Apply serums first, such as retinol or hydrating formulas.
    • Use a pea-sized amount of your chosen night cream.
    • Massage gently upward over the face and neck, then let it absorb before sleep to maximize overnight repair.

    More Skincare to Explore

    • The Best Red Light Wands for Smoother, Brighter Skin in a Flash
    • The Best Drugstore Eye Creams, Ranked by Dermatologists
    • Why Appointments With “It” Facialists Are the Ultimate Skincare Status Symbol
    • The Best Niacinamide Serums for a Gorgeous Glow
    • The Best Face Masks for Mature Skin

    Why Trust Harper’s Bazaar?

    For more than 150 years, Harper’s Bazaar has been a leading fashion and beauty authority for women of all ages. The publication covers what’s new and what’s next in beauty by working with top experts across dermatology, plastic surgery, cosmetics, skincare, haircare, and fragrance. Each story is researched and reviewed by its team of beauty editors and industry specialists.

  • Dermatologists Say This Old Fashioned Moisturizer Outperforms Luxury Creams People Overspend On

    Dermatologists Say This Old Fashioned Moisturizer Outperforms Luxury Creams People Overspend On

    A short, sturdy white jar with a slightly yellowed label sits forgotten in the back of the bathroom cabinet, wedged between old painkillers and a dusty perfume bottle. You twist it open out of curiosity, touched by memory — your grandmother’s moisturizer, the one she applied every night without fail. The scent arrives first: clean, powdery, faintly medicinal. You smooth a little onto your hand, expecting something thick and greasy. Instead, your skin absorbs it instantly, as if it recognizes the texture.

    An hour later, your hand still feels soft and comfortable. Meanwhile, the £80 cream on your shelf suddenly looks more like a decorative object than a solution. Some old products don’t age well. This one feels almost frustratingly effective. It quietly raises a question you can’t ignore: what else were we never told?

    Why Grandma’s Moisturizer Keeps Winning Quietly

    Dermatologists see the pattern every day. Faces inflamed by acids, eyes irritated by retinol, skin reacting badly to fragrances marketed as “luxurious.” Then someone arrives with calm skin and balanced texture and admits, almost sheepishly, that they use the same basic cream their mother always used. That’s when dermatologists lean in.

    More often than not, that “cheap cream” is an old-school occlusive moisturizer. Think classic pharmacy staples built around simple formulas: petrolatum, glycerin, mineral oil, lanolin. These products skip trendy ingredients and marketing language. They aren’t glamorous or designed for social media. They simply focus on barrier repair and moisture retention, quietly doing the work while newer products compete for attention.

    When Less Skincare Does More for Your Skin

    One London dermatologist described a patient who spent over £3,000 in a single year on luxury skincare. Her shelves were full of glass bottles, influencer-endorsed sets, and imported creams. Her skin, however, was angry, tight, and constantly breaking out. The solution wasn’t another product. Her routine was reduced to a basic cleanser and a classic pharmacy moisturizer. Within six weeks, her skin settled.

    There was no miracle ingredient. Just consistent hydration and a repaired barrier. Consumer surveys reflect this reality. In blind tests, many people can’t reliably distinguish between luxury creams and drugstore options. Still, premium skincare sales continue to rise, powered by the belief that higher price equals better results. Dermatologists point out that this assumption is where many routines go wrong.

    The Unexciting Truth About What Skin Actually Needs

    The reality is simple and unglamorous: skin doesn’t recognize logos. It responds to ingredients, texture, and regular use. Old-school creams rich in petrolatum and glycerin excel at one crucial task — preventing water loss. That single function supports everything people describe as “glow.”

    When the skin barrier is healthy, redness fades, products behave better, and fine lines soften temporarily. When it’s compromised, even the best active ingredients can worsen irritation. Grandmother-style creams work precisely because they do less. And for many faces, that restraint is exactly what’s needed.

    How to Use a Classic Cream the Right Way Today

    Think of the old jar as a finishing layer, not the centerpiece. Cleanse with a gentle cleanser. While the skin is still slightly damp, apply any lightweight serum you normally use. Then take a pea-sized amount of the classic cream, warm it between your fingers, and gently press it onto the skin — cheeks, forehead, chin, around the nose.

    There’s no need for aggressive rubbing. Imagine you’re sealing everything underneath with a soft protective layer. At night, you can apply a bit more, especially to dry areas or fine lines. This is when overnight barrier repair happens, quietly and consistently.

    For oily or acne-prone skin, dermatologists often suggest spot occlusion. Apply the heavier cream only where dryness appears — corners of the mouth, sides of the nose, around the eyes, or areas irritated by retinoids. The rest of the face can stay lighter.

    This approach allows active ingredients like retinol, vitamin C, and exfoliating acids to work more comfortably. One New York dermatologist even referred to basic petrolatum as the most effective over-the-counter barrier saver, a statement unlikely to sell gold-embossed jars.

    Many people struggle not because of the product, but because of routine overload. Too many steps, wrong order, unrealistic expectations. Or the belief that an expensive cream should function as a complete routine on its own. It doesn’t. It’s still just a moisturizer — like the one sitting in your grandmother’s cabinet, only packaged with a better story.

    Daily life is messy. We rush, skip steps, forget sunscreen, fall asleep with makeup on, then try to fix everything overnight. Old-school formulas are forgiving. They don’t demand a ten-step routine. They ask for clean skin, a bit of moisture, and time.

    There’s also a quiet sense of guilt people admit to — feeling cheap or behind for using basic creams. As if skincare were a status competition instead of simple care. Dermatologists consistently repeat the same message: the best product is the one you use consistently, not the one saved for special occasions.

    A French dermatologist put it bluntly: if you spend more on a jar than on sunscreen, you’re buying a story, not skincare. Stories can be comforting. Luxury offers ritual and escape. But skin cells respond only to moisture, lipids, and low irritation.

    • Use classic cream at night to seal in moisture and support barrier repair.
    • Keep mornings simple with light hydration and broad-spectrum SPF.
    • Watch your skin, not the marketing — reduced redness and smoother makeup are real signals.

    The Quiet Rebellion Hiding in Your Bathroom Cabinet

    That forgotten jar represents a small rebellion. It’s the choice to step away from constant upgrades and seasonal “must-haves,” and still enjoy comfortable, rested-looking skin. There’s no punishment for returning to basics.

    It’s also a kind of reconciliation — with your current face, with family habits once dismissed as outdated, with the idea that care doesn’t always need to be optimized. Sometimes it just needs to be repeated quietly, night after night.

    A familiar scent or texture can pull you back decades in an instant. Applying a simple cream slowly, almost meditatively, can draw attention away from screens and back into your body. That shift doesn’t appear in before-and-after photos, yet it changes how skin feels to live in.

    Perhaps that’s the real luxury. Not the logo or the price, but the calm of knowing you’re no longer chasing promises. You can still enjoy your favorite serums and oils. Just remember: in a jar that looks like it belongs in another decade may be the product doing the quietest and most reliable work of all.

    • Old-school creams support the skin barrier by locking in moisture and calming irritation.
    • Higher price doesn’t guarantee better results, as basic formulas often perform just as well.
    • Using classic creams as a seal provides a simple, effective routine you can start immediately.
  • Grey Hair Coverage Moves to Natural Techniques That Promise Younger Looking Results Without Traditional Dyes

    Grey Hair Coverage Moves to Natural Techniques That Promise Younger Looking Results Without Traditional Dyes

    Grey strands often mark a turning point in personal style. Some choose to embrace them, while others look for ways to soften their appearance without drastic change. Across the globe, many people now want to minimise greys and restore a fresher look without relying on harsh chemical dyes. This growing preference reflects a wider rethink of ageing and beauty. Instead of aggressive treatments that weaken hair over time, the focus is shifting to methods that support hair health and maintain natural texture. Traditional dyes commonly contain ammonia and similar agents that strip away moisture, leaving hair dry and fragile. In contrast, newer approaches aim to gently blend greys while nourishing strands, creating a more balanced and natural finish.

    Understanding Grey Hair and Its Visual Effects

    Hair does not turn grey overnight. Each strand grows from a follicle where pigment-forming cells, known as melanocytes, add colour during growth. This pigment, melanin, determines natural hair shade. With time, influences such as ageing, genetics, prolonged stress, and lifestyle factors can slow or stop this process. When melanocytes reduce activity, new hair emerges with little or no pigment, appearing grey or white. Grey hair is therefore new growth without melanin, not faded old hair. Hair’s core protein, keratin, has a naturally pale tone that becomes more visible as pigment disappears. Ageing also reduces scalp oil, making grey hair feel coarser and duller, with more frizz and texture changes that affect how it sits.

    Why Conventional Hair Dyes Are Falling Out of Favour

    For decades, permanent dye has been the standard answer to grey coverage. These formulas lift the cuticle using ammonia or similar chemicals, pushing pigment deep into the hair through oxidation. While results may look sleek initially, repeated use often leads to weakened cuticles, especially in delicate grey hair. This damage can cause tangling and breakage, alongside scalp discomfort like itching or sensitivity. Another drawback is upkeep. Strong dyes create sharp regrowth lines that demand frequent touch-ups. As beauty preferences evolve, many now seek low-maintenance colour that preserves depth and softness rather than flawless uniformity. The emphasis has shifted toward subtle enhancement instead of complete concealment.

    Natural Colour Softening: From Pantry Fixes to Hair Care

    Plant-based and food-derived colour boosters are becoming popular for those wanting a gentler option. These treatments do not bleach or permanently alter hair structure. Instead, they sit on the surface, slowly adding a translucent wash of colour while boosting shine. Among these options, cocoa powder stands out. Cocoa contains natural pigments and polyphenols that gradually deepen light to medium brown hair. On grey strands, it reduces stark brightness, helping hair blend more smoothly. Rather than acting like a permanent dye, cocoa works as a tinted conditioning mask, improving texture while softly enhancing tone over time.

    The Way Cocoa Gradually Deepens Grey Hair

    Cocoa-based applications lightly coat the hair shaft, forming a soft brown layer that fades slowly with washing. When blended with conditioners or oils, cocoa supports moisture retention and smooths the cuticle. With consistent use, many notice grey hair becoming shinier and softer, with less wiry texture. The result is not full coverage, but a more even and natural-looking tone that reduces contrast and enhances overall harmony.

    An Easy Cocoa Treatment You Can Do at Home

    For short to medium-length hair, combine one tablespoon of pure, unsweetened cocoa powder with a generous amount of lightweight, oil-free conditioner. Mix until the colour is smooth and even.

    Apply to freshly washed, towel-dried hair, concentrating on visible grey areas like the hairline, parting, and temples. Use a wide-tooth comb to ensure even distribution. Leave the mixture on for 15 to 20 minutes, then rinse with lukewarm water. Avoid shampooing straight away, as this can remove much of the surface pigment.

    How Different Hair Colours Respond to Cocoa Treatments

    • Light brown hair: Gains a warm tone, with greys blending more quickly when used 1–2 times weekly.
    • Medium brown hair: Appears richer, with greys mixing in naturally after weekly use.
    • Dark brown or black hair: Benefits mainly from added shine and mild warmth when applied every 7–10 days.
    • Blonde hair: May develop uneven or dull tones, so patch testing is recommended or use avoided.

    Can Cocoa-Based Care Create a More Youthful Look?

    Grey hair alone does not determine age. Elements like haircut, skin condition, posture, and clothing matter just as much. However, strong contrast between dark hair and white strands can emphasise shadows and fine lines. By softening this contrast, cocoa treatments help produce a more balanced appearance. Youthful-looking hair prioritises shine and hydration over total grey coverage. Smooth, reflective strands frame the face more gently, making features appear brighter and more refreshed, both in daily life and on camera.

    Where Gentle Colour Methods Work Best

    Natural colour enhancers such as cocoa, coffee, black tea, or sage are most effective for those with up to 40–50% grey who want blending rather than complete concealment. These options suit people who prefer gradual change, warmer hues, and minimal maintenance. Dramatic results are unlikely in a single session, as these methods depend on repeated use. Even natural treatments require care. Cocoa can cause sensitivity in some individuals, making a patch test essential. Occasional use of a mild clarifying shampoo helps prevent build-up and keeps hair looking fresh.

    The Influence of This Shift on Modern Beauty Standards

    The growing popularity of cocoa and similar treatments reflects evolving beauty ideals. Perfectly uniform colour is no longer the only sign of youth. Blended greys, soft washes of colour, and translucent finishes are now widely accepted in fashion and social spaces. Many people choose to soften rather than erase greys, pairing gentle colour methods with thoughtful haircuts, scalp care, and balanced nutrition. While supplements cannot reverse greying, nutrients like omega-3s, iron, zinc, and B vitamins support healthy hair growth and overall strand quality.

    Gentle Methods That Work Well Together

    Cocoa treatments can be alternated with mild options such as black tea or coffee rinses to deepen tone, or sage and rosemary infusions for light shading and scalp freshness. Rotating methods helps avoid overly warm or flat colour. Professional advice can also be valuable. Many colourists now specialise in grey blending techniques that use low-impact dyes and plant-based glosses. Maintaining colour at home with cocoa or tea masks extends time between salon visits and reduces chemical exposure. Always test on a small hidden section first to ensure the hair responds well.