Author: admin

  • Goodbye Hair Dyes: The Viral Grey Hair Trend Making Natural Coverage Look Youthful Again

    Goodbye Hair Dyes: The Viral Grey Hair Trend Making Natural Coverage Look Youthful Again

    The woman staring back from the mirror doesn’t look “old.” Her skin still has a healthy glow after a short walk, her eyes are clear and bright. Yet her focus drops to the fine silver line emerging at her roots. She lifts a strand, tilts her head, zooms in with her phone. The reaction is almost audible. Grey again. Too soon.

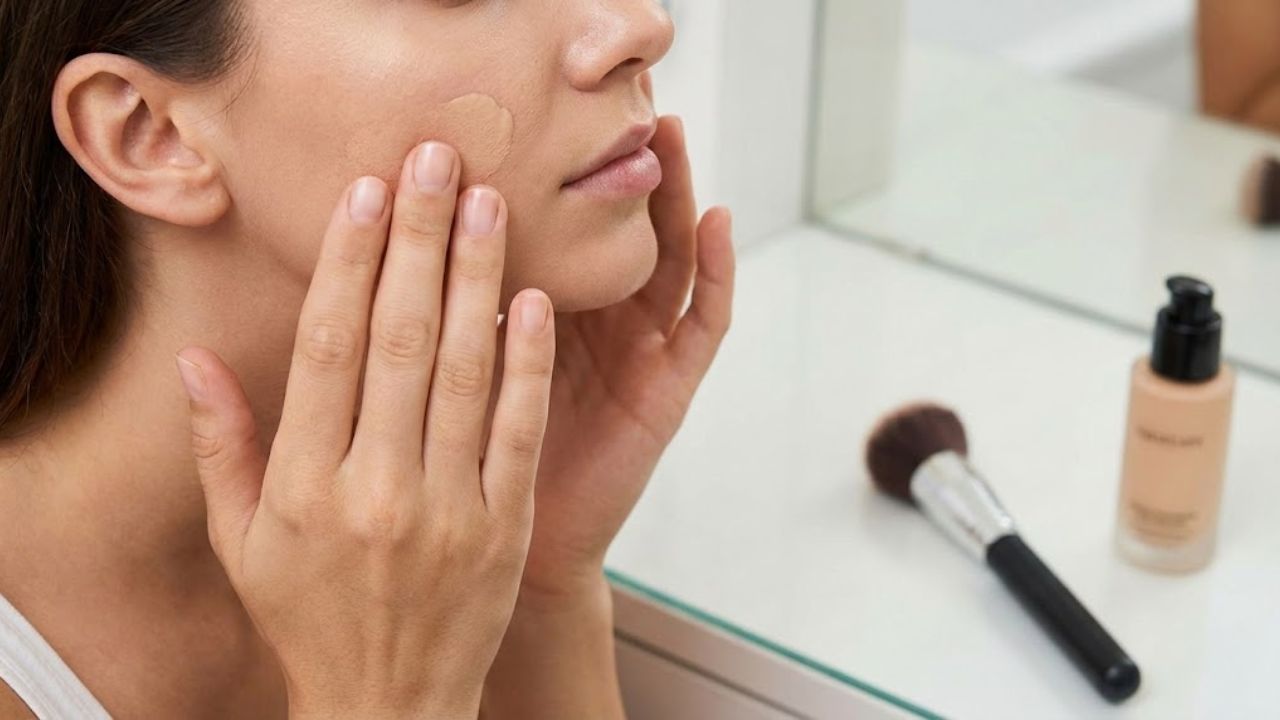
    Bottles on the shelf whisper promises: “10 years younger”, “salon results at home”. They all sell time, but none offer calm. Her hand hesitates, then moves past them to a soft brown hair gloss she bought on a whim.

    She applies it quickly, without ceremony. Twenty minutes later, the greys aren’t erased. They’re softened, diffused, woven into her natural colour. She looks closer. She looks rested. Her shoulders drop, just a little.

    Goodbye full-coverage dye. Something else is taking its place.

    A quiet shift away from full grey coverage

    This emerging movement isn’t about eliminating grey hair. It’s about letting it exist without dominating the look. In salons from London to Los Angeles, conversations are changing. Stylists talk more about blending, glazing, toning, and glossing, and less about heavy coverage, flat colour, and monthly root anxiety.

    Clients aren’t asking to rewind time. They’re saying, “I’m exhausted from chasing my roots.” They want shine, softness, and dimension. Above all, they want hair that doesn’t announce how long they spent trying to hide age. The difference may look subtle online, but in real life, it’s transformative.

    A Paris-based colourist followed her regular clients over twelve months. Out of 120 women who once booked full coverage every four to six weeks, more than half extended appointments to eight or even twelve weeks after switching to lower-maintenance techniques. Many chose to keep some grey visible, deliberately.

    One woman in her early fifties moved from dark box dye to a semi-permanent blend that allowed silver to show at the temples. She didn’t appear dramatically younger. She looked softer and more refreshed. Friends didn’t comment on her colour; they asked if she’d been resting more.

    That’s the understated strength of this approach. When every grey strand isn’t treated as an enemy, facial features relax. Heavy, opaque colour on ageing skin can sharpen lines and flatten texture. Softer tones and blended greys create depth and light, similar to a subtle filter that doesn’t draw attention to itself. Modern hair formulas now prioritise this balance, using demi-permanent colours, tinted masks, and clear glosses that respect the hair fibre instead of stressing it month after month.

    How grey-blending techniques actually work

    The principle is simple: stop aiming for zero grey and aim for better-looking grey. Hair glosses, tinted conditioners, and demi-permanent colours don’t mask silver strands completely. They gently stain them, soften their brightness, and often turn them into natural highlights. The result is familiar, just calmer—less contrast, fewer harsh root lines, and more light reflecting off the hair.

    One widely used salon method is the root smudge. Instead of applying a solid colour from scalp to ends, the stylist uses a slightly deeper, softer shade at the roots and blends it seamlessly into the existing colour. Grey hairs are toned rather than buried. As the hair grows, the transition remains blurred, turning natural regrowth into part of a gradient rather than a stark divide.

    Another technique flips traditional highlighting on its head. Rather than placing bright streaks on untouched hair, colourists add fine babylights and lowlights around areas where grey concentrates, such as the temples and parting. This disperses dense silver patches and spreads light evenly. A clear or tinted gloss finishes the look, allowing grey to read as intentional shimmer. The visual logic is straightforward: high contrast signals ageing, while harmony suggests youthfulness.

    Covering grey without fully hiding it

    If a salon visit feels like too big a step, begin with small changes at home. Replacing your regular conditioner once or twice a week with a tinted mask close to your natural shade can make a noticeable difference. Leave it on for five to ten minutes before rinsing. The greys won’t disappear, but they’ll soften, reducing the sharp white line that shows up under bright lighting.

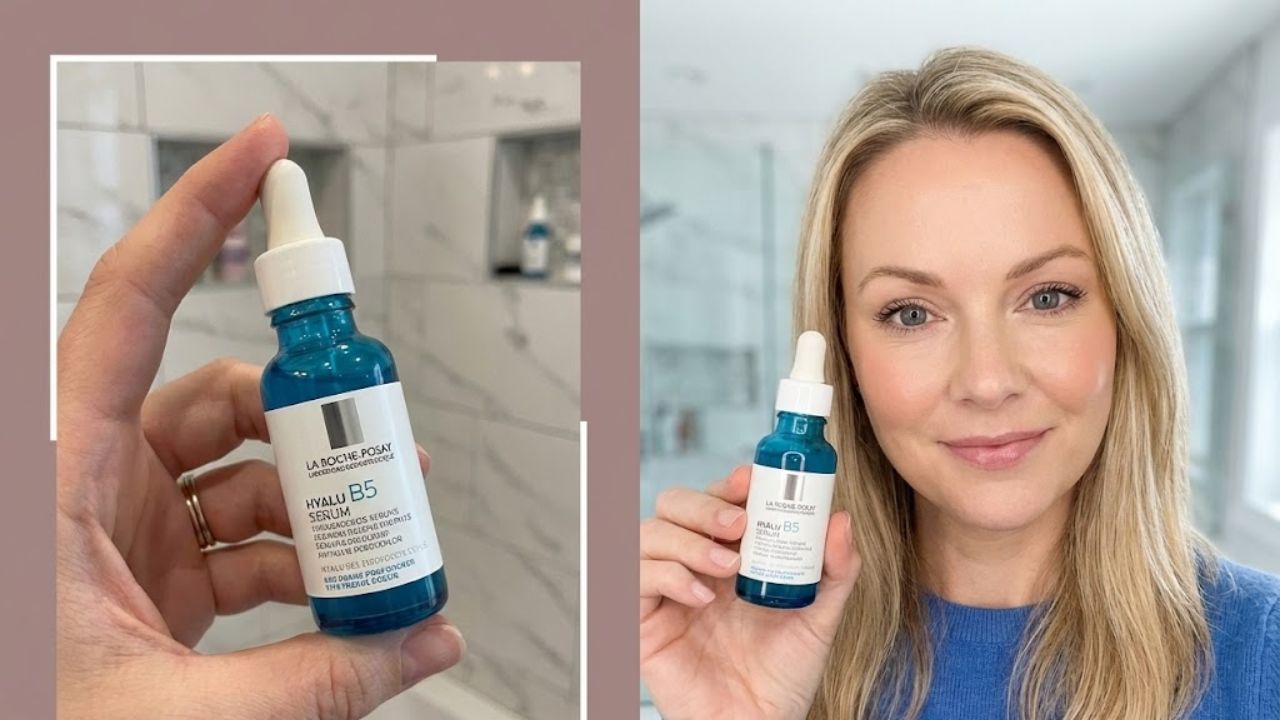
    The next option is a demi-permanent gloss, either applied at home or professionally. Unlike permanent dye, these formulas fade gradually and don’t create a rigid regrowth line. Shades labelled “sheer,” “translucent,” or “grey-blending” are designed for this purpose. Choosing a slightly warmer tone can help revive a dull complexion by reflecting more light. If the result isn’t right, it washes away over time.

    In the salon, describe the outcome you want rather than focusing only on colour names. Saying “I want to look rested” opens the door to techniques like root smudging, low-contrast balayage, and glossing. Many stylists welcome clients who are comfortable keeping some grey, as it allows for a more tailored and creative approach. What begins as a simple cover-up request often ends with a result that feels natural, lived-in, and easy to maintain.

    Building a routine that fits real life

    Let’s be honest: few people maintain elaborate routines every day. What looks impressive on social media often falls apart on a rushed morning. The goal is a low-effort rhythm you can realistically sustain, focusing on consistency rather than intensity.

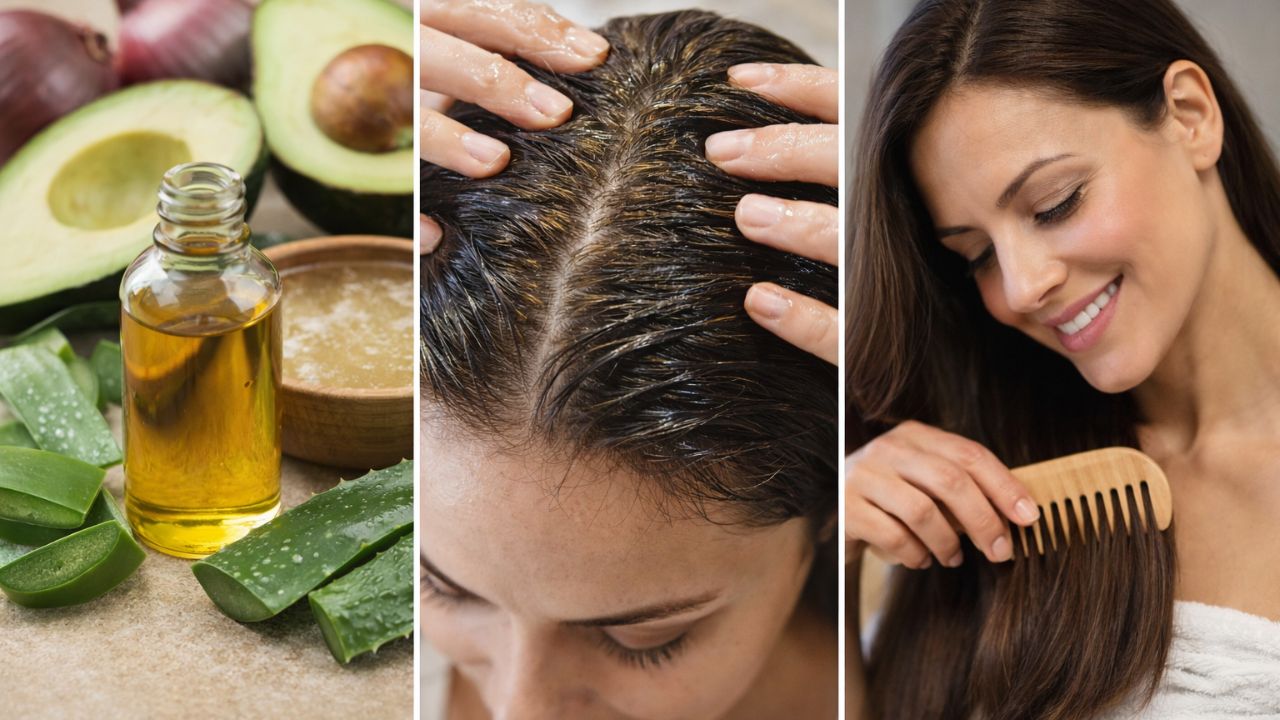
    One effective habit is prioritising scalp health. A healthier scalp supports shinier hair and reduces frizz around coarse silver strands. Gentle massage with a light oil or serum once or twice a week before washing can improve circulation and encourage smoother growth. Keep heat styling minimal and controlled, as excessive heat can make grey hair feel rough and more noticeable.

    Common missteps include going too dark or too opaque too quickly. Jumping from a medium shade with greys to very dark colour often has the opposite of the intended effect, drawing attention to facial lines. Another frequent issue is layering box dye repeatedly, which leads to dull, flat hair where new greys stand out even more.

    “I used to believe youthful hair meant no grey at all,” says Anna, 49, who transitioned from permanent dye to grey-blending glosses. “Now I feel younger with some silver showing, because I’m no longer playing a part that doesn’t fit me.”

    This mindset reflects a broader, quieter change. Many recognise that the discomfort they feel isn’t about ageing itself, but about a hair colour that no longer matches who they are. That realisation is guiding them toward a softer, more cohesive version of looking younger—less about numbers, more about alignment.

    • Start small with one tinted product or gloss instead of a full colour change.
    • Describe feelings at the salon, not just shades.
    • Protect shine with gentle shampoo, cooler water, and heat protection.
    • View silver as texture, not failure.
    • Give changes time, allowing at least two growth cycles before judging.

    Redefining what “younger hair” means

    Beneath these techniques lies a deeper shift. Looking younger no longer means pretending grey hair doesn’t exist. It now means appearing energised, cohesive, and natural, as if hair and face belong to the same moment in life. When colour is rigid, facial features carry the emotional weight. When it’s softened, they’re free to relax.

    There’s also a psychological ease in stepping off the root-chasing treadmill. Missing an appointment isn’t catastrophic. Travel plans don’t revolve around colour schedules. Swimming no longer comes with calculations about damage. That freedom shows on the face as clearly as any cosmetic change.

    Full-coverage dye will always be the right choice for some, and that remains valid. This shift isn’t about limiting options, but expanding them. Grey-blending techniques, tinted masks, and glosses offer a middle ground between embracing full silver and hiding every strand. For many, that middle space is where true youthfulness lives—not as a miracle solution, but as a gentler conversation with time.

    Key Point Updated Explanation Why It Matters for You
    Grey Blending over Full Coverage Soft techniques like demi-permanent colour, gloss treatments, and subtle highlights are used to blend greys naturally instead of completely hiding them. Prevents harsh regrowth lines and creates a smoother, more youthful appearance.
    Low-Maintenance Hair Care Root smudging, tinted conditioning masks, and extended gaps between salon visits reduce daily upkeep. Saves time, lowers salon dependency, and gives more freedom in everyday routines.
    Shine & Tone Focus, Not Grey Elimination Emphasis is placed on hair shine, balanced tones, warmth, and overall scalp health rather than removing every grey strand. Brightens the face naturally and refreshes your look without drastic colour changes.
  • Natural Hair Care Treatments That Strengthen Roots and Reduce Hair Fall With Consistent Use

    Natural Hair Care Treatments That Strengthen Roots and Reduce Hair Fall With Consistent Use

    The moment you spot extra strands on your pillow or gathered in the shower drain, something quietly changes. With damp fingers pressed to your scalp, you try to recall when your hair began to feel thinner. A gentle sense of panic appears, rarely shared with others, yet impossible to ignore. It feels easier to blame stress, weather shifts, a new shampoo, or tight hairstyles than to accept that a deeper imbalance may be developing.

    Understanding the Signals Your Hair Sends

    Hair communicates in subtle ways. It reflects late nights, missed meals, harsh products, and prolonged periods of pressure. Hormonal changes, seasonal transitions, and time itself leave quiet marks long before hair fall feels alarming. The body often asks for rest, nutrition, and gentler care, but modern routines make these cues easy to overlook. When shedding increases, many seek fast solutions, though slower home remedies can support the body more naturally.

    Oil Rituals That Nourish the Roots

    Hair oiling is a traditional practice built on patience. Warming oil between the palms and working it into the scalp does more than soften strands; it encourages circulation and relaxation. Coconut oil helps reduce protein loss, while castor oil, used sparingly, supports scalp moisture. Almond, sesame, and olive oils each contribute unique benefits. There is no universal choice, and custom blends often work best. Consistent oiling with gentle massage strengthens the roots over time.

    Why Scalp Massage Deserves Attention

    The massage itself is as important as the oil used. Slow, circular movements with the fingertips stimulate blood flow, allowing oxygen and nutrients to reach the follicles. Beginning at the hairline and moving backward gradually awakens the scalp. Just five to ten minutes several times a week can show results. Beyond physical effects, this practice helps ease tension, which quietly contributes to long-term shedding.

    Herbal Oils and Thoughtful Infusions

    Those who prefer a more mindful approach often infuse oils with herbs at home. Common choices include rosemary, curry leaves, hibiscus, and fenugreek. Slowly warming these herbs in oil allows their natural compounds to transfer. Rosemary is linked with circulation support, while hibiscus and fenugreek aid conditioning and strength. The process encourages intention and results in a deeply nourishing oil.

    Kitchen-Based Remedies for Gentle Nourishment

    Many supportive hair treatments already exist at home. Ingredients such as seeds, yogurt, eggs, and aloe help maintain scalp health and limit breakage. These remedies focus on consistency rather than instant change, reconnecting hair care with everyday self-care through simple preparation.

    Fenugreek: Small Seeds with Lasting Support

    Fenugreek seeds are often soaked overnight and blended into a paste for scalp use. Rich in proteins and natural compounds, they are traditionally applied to reduce shedding and improve texture. Used once or twice weekly for short periods, fenugreek can help hair feel thicker and stronger, provided scalp sensitivity is respected.

    Aloe Vera: Cooling Care for the Scalp

    Aloe vera provides relief for irritated or oily scalps. Its gel calms inflammation, balances oil levels, and clears buildup that may block follicles. When applied for twenty to thirty minutes, aloe supports a healthier scalp environment and can be combined with oils or yogurt for added nourishment.

    Protein Masks from Everyday Foods

    Hair exposed to heat or sunlight often benefits from protein support. Masks using egg and plain yogurt temporarily reinforce the hair shaft, improving smoothness and reducing breakage. Applied to damp hair and rinsed with cool water, these masks work best when used occasionally.

    The Role of Food, Stress, and Overall Balance

    Hair condition often mirrors overall health. Nutrient gaps, ongoing stress, hormonal shifts, and poor sleep frequently show up as thinning or increased shedding. While topical care supports the scalp, internal balance is just as important. Diets rich in protein, iron, zinc, and healthy fats, along with proper hydration, quietly support long-term strength.

    How Stress Influences Hair Fall

    Stress or illness can trigger delayed shedding, where hair enters a resting phase and falls months later. Gentle movement, breathing practices, adequate rest, and reduced screen time help regulate stress hormones. As balance returns, hair growth cycles can gradually stabilize.

    Daily Choices That Preserve Hair Strength

    Everyday habits shape hair health. Using mild shampoos, avoiding excessive washing, and cleansing mainly at the scalp help preserve natural oils. Conditioning the lengths reduces friction, while limiting heat styling and choosing loose hairstyles protect fragile strands.

    Key Nutrients That Support Healthy Hair

    • Protein: Forms keratin for strength and structure; found in lentils, eggs, fish, paneer, tofu, nuts, and seeds.
    • Iron: Supports oxygen delivery to roots; sourced from spinach, beetroot, lentils, kidney beans, and pumpkin seeds.
    • Biotin and B Vitamins: Aid energy production and follicle renewal; present in whole grains, eggs, almonds, and leafy greens.
    • Omega-3: Maintains scalp moisture and reduces inflammation; found in flaxseeds, chia seeds, walnuts, and oily fish.
    • Zinc and Selenium: Assist tissue repair and follicle protection; available in nuts, seeds, legumes, whole grains, and dairy.

    Gentle Detangling as a Daily Practice

    The way hair is handled makes a difference. Detangling slowly from the ends upward with a wide-toothed comb reduces unnecessary shedding. Adding a small amount of oil or leave-in conditioner minimizes friction. This habit turns routine grooming into a moment of awareness, helping catch early signs of dryness or weakness.

    Building a Simple, Sustainable Routine

    Hair care does not need to feel complicated. A manageable rhythm of regular oil massage, weekly nourishing masks, gentle daily handling, balanced meals, and stress relief can be effective. Over time, reduced shedding, better texture, and new growth begin to appear.

    Reconnecting with Your Body Through Care

    Home remedies are not instant solutions. They encourage patience, observation, and adaptation. What suits one person may not suit another, making attentiveness essential. Using familiar ingredients and gentle rituals supports more than hair health, fostering a kinder connection with your body from root to tip.

  • Bodyweight Leg Exercises Build Strength Effectively Without Gym Equipment

    Bodyweight Leg Exercises Build Strength Effectively Without Gym Equipment

    The stairs you see every day are ordinary steps until you turn them into a powerful leg training tool. That park bench might seem like a spot to sit down but you can use it for squats or step-ups to build leg strength. The floor in your living room offers more workout possibilities than costly gym equipment when you learn to use your body weight effectively. You don’t need a gym membership or special gear. All you need is gravity and the decision to get stronger using what you already have around you.

    Strength Starts at Home: The Power of Bodyweight Leg Workouts

    Stand barefoot in an open space and feel the floor beneath your feet. It is steady, cool, and indifferent. Spread your toes slightly and shift your weight from heel to forefoot. Your legs are the quiet pillars that carry you from bed to coffee maker to bus stop, constantly calculating to keep you balanced. Bodyweight leg training begins here, in the simple dialogue between your feet and the ground. Removing machines and heavy weights doesn’t reduce effectiveness—it removes excuses. The work becomes simpler and more honest. Squat, lunge, hinge, push, jump, and balance. These movements predate gyms, sports, and even the word “workout.” Think of bodyweight leg training not as a gym routine but as sharpening your ability to move through the world with strong, aware muscles. Hills, stairs, and even standing in line can become part of the practice. The benefit extends beyond quads and calves—it’s knees that feel stable on rocky trails, hips that move without pain, and a body that acts as a partner, not a burden.

    Waking Up Your Legs: Preparing Muscles for Action

    Before your legs push, pull, and burn, they need to wake up. This isn’t about bouncing stretches but small, intentional movements signaling that something important is coming. A bodyweight leg warm-up requires only a few square feet and focused attention. Start by marching in place for a minute, swinging your arms, letting your heels softly touch the floor. Slowly circle each ankle, drawing invisible moons in the air. Gently bend and circle your knees, coaxing them into a full range of motion. Walk your hands down your thighs into a light forward fold with knees slightly bent, letting your hamstrings awaken. Finish with a few shallow bodyweight squats, noticing how your hips and knees move today. Some days they glide, some days they complain—both are fine. This warm-up is part of your workout’s story, where hips, knees, ankles, and balance introduce themselves. Skip it, and the story never makes sense.

    Using Gravity as Resistance: Core Movements for Strong Legs

    Bodyweight leg training is like cooking with simple ingredients: when approached carefully, it’s effective, adaptable, and satisfying. You don’t need dozens of exercises—just a small set of foundational movements to refine over time. Begin with exercises you already know. Squats teach controlled sitting and standing, while lunges improve balance and one-legged movement.

    Bodyweight Squats: Building Strength from the Ground Up

    Stand with feet shoulder-width apart. Imagine sitting back into a chair slightly farther than usual. Hips move backward, knees bend, chest stays upright. Weight rests on your heels while toes maintain contact with the floor like roots. Pause briefly at the bottom and breathe. Feel your quadriceps, glutes, and hamstrings. Rising up, press deliberately against the floor. Once squats feel easy, increase difficulty by slowing down, holding the bottom position, or adding pulses. Equipment isn’t necessary—tempo and control create enough challenge.

    Controlled Lunges: Developing Balance and Stability

    Lunges turn everyday walking into focused strength work. Step one foot forward, bend both knees while keeping your front knee over the foot, and lower the back knee gently toward the floor. Maintain a straight upper body and look ahead. Press through the front leg to return upright, then switch sides. Notice differences between your legs—they provide feedback on areas needing attention. Variations like walking lunges or reverse lunges change the challenge and protect your knees. Lunges teach your hips to stabilize and your feet to adjust, strengthening movement control over raw force.

    Glute Bridges: Engaging the Posterior Chain

    Lie on your back with knees bent and feet flat. Press your lower back lightly toward the floor, then lift your hips until your body forms a straight line from shoulders to knees. Squeeze your glutes at the top, hold briefly, and lower slowly, vertebra by vertebra. This works your glutes and activates the posterior chain supporting hips and lower back. Progress to single-leg bridges to increase intensity without weights, relying on your body and gravity alone.

    Calf Raises: Strengthening Often-Neglected Muscles

    Stand with feet hip-width apart, resting a fingertip on a wall or chair for balance. Rise onto the balls of your feet, lifting heels as high as possible. Hold, then lower slowly. Your calves act as shock absorbers and springs, improving climbing, hiking, and running. Elevate your feet on a step to expand range of motion for added challenge.

    Step-Ups: Turning Everyday Objects into Strength Tools

    Use a stable surface like a bench, chair, or low wall. Step up with one foot, press through it to stand tall, bring the other foot up, then step down carefully. Step-ups engage the leg fully from hip to calf, mirroring real-world movements like climbing vans or stairs. Increase difficulty by using higher surfaces, slower tempos, or pausing at the top to test balance.

    Progressing Without Weights: Smart Ways to Challenge Your Legs

    Bodyweight training can still plateau without added resistance, but reps, leverage, and tempo can provide continuous growth. Increase reps, sets, or transform squats into jump squats. Explore one-leg pistol squat progressions with support. Tempo challenges muscles by slowing movements, e.g., a nine-second squat with pauses at the bottom. Leverage adjustments, such as elevated feet for glute bridges or steps during lunges, intensify effort. None of these require equipment beyond your surroundings, yet each tweak drives adaptation.

    Exercise Sets Reps / Duration Focus & Tips
    Bodyweight Squats 3 10–15 reps Perform each rep slowly, keep feet shoulder-width apart, and pause briefly at the bottom.
    Reverse Lunges (Each Leg) 3 8–12 reps Step backward carefully to protect the knees; maintain an upright torso and steady core.
    Glute Bridges 3 12–15 reps Press firmly through your heels, squeeze glutes at the top, and lower slowly.
    Step-Ups (Each Leg) 2–3 8–10 reps Use a stable platform; focus on controlled movement while stepping down.
    Standing Calf Raises 3 15–20 reps Raise heels fully, hold at the top for a second, then lower slowly for better activation.

    Simple Bodyweight Leg Routine

    No complex plan is needed. Choose a few exercises, commit to performing them several times a week, and focus on quality over quantity. Rest 45–75 seconds between sets. Adjust reps to ensure the last few are challenging but maintain perfect form. Progress by increasing reps, sets, slowing movement, or trying advanced variations like jump squats, Bulgarian split squats, or single-leg bridges.

    Transforming Everyday Spaces into a Leg Gym

    Look around—the world is filled with training tools. Curbs become platforms for calf raises, low walls for step-ups, tree branches for gentle leg swings. Sidewalks, park benches, and apartment steps can all integrate into training. On a walk, convert the last block into a mini workout: stop for 10 squats, step-ups, or calf raises. Bodyweight training is free, convenient, and versatile. It blends workouts with daily life. Legs trained this way are ready for hikes, long days on foot, or spontaneous sprints. Strength without equipment isn’t a compromise—it reconnects you to your body and the ground beneath you, building trust and capability step by step.

  • The Ordinary New Serum Nicknamed Filler in a Bottle Gave My Skin a Youthful Look in My 40s

    The Ordinary New Serum Nicknamed Filler in a Bottle Gave My Skin a Youthful Look in My 40s

    In India, skincare conversations in your 40s often revolve around firmness, fine lines, and finding products that actually deliver visible results. That’s why The Ordinary’s new serum, often nicknamed a “filler in a bottle,” has been creating so much buzz among women looking for subtle yet noticeable skin improvements. Rather than promising overnight miracles, this serum focuses on hydration-driven plumping and smoother texture, making skin look refreshed and youthful without invasive treatments. For many Indian users balancing work, family, and self-care, this kind of simple, effective skincare feels both practical and empowering.

    The Ordinary serum that works like a filler alternative

    What sets this Ordinary serum apart is how it mimics the effects of professional fillers using hydration science instead of needles. The formula focuses on attracting and retaining moisture deep within the skin, creating a naturally plump appearance. With consistent use, skin begins to show visible plumping effect, especially around areas prone to lines like the cheeks and smile zones. Users in their 40s often notice smoother skin texture and a soft bounce that makes makeup sit better. Rather than feeling heavy, it delivers lightweight hydration boost, making it suitable for India’s varied climates. Over time, many report improved facial fullness without irritation.

    Why this filler-like serum suits skin in your 40s

    Skin in your 40s tends to lose moisture faster, which can exaggerate fine lines and dullness. This serum targets that exact concern by reinforcing the skin’s hydration reserves. Regular application supports deep moisture binding, helping skin appear more resilient throughout the day. Many users appreciate the non-greasy finish, especially in humid Indian weather. The formula also encourages softened fine lines by keeping skin supple rather than tight. Over weeks of use, there’s often a noticeable refreshed youthful look, making the face appear well-rested even on busy days.

    How to use the serum for best youthful results

    Using this serum correctly can make a real difference in the results you see. It works best when applied to slightly damp skin, allowing better absorption and performance. A few drops are enough to deliver intense hydration layers without overwhelming the skin. Follow with a moisturiser to lock in the benefits and enhance the plump skin appearance. Many users prefer it both morning and night for consistent results. Over time, this routine supports daily skin resilience and maintains long-lasting smoothness that feels natural, not overdone.

    Summary and real-world results

    For women in their 40s across India, this Ordinary serum offers a realistic approach to youthful-looking skin. It doesn’t replace cosmetic procedures, but it delivers visible improvements that feel achievable at home. With continued use, skin often shows healthier skin bounce, a more even surface, and a subtle glow. The appeal lies in its simplicity and affordability compared to in-clinic treatments. When paired with good skincare habits, it supports naturally fuller skin and enhances confidence without drastic changes. For many, it’s a smart addition to a mature skincare routine.

    Feature What It Offers
    Main Benefit Hydration-based plumping effect
    Ideal Age Group 40s and above
    Texture Lightweight, fast-absorbing
    Usage Frequency Once or twice daily
    Skin Types Normal, dry, combination

    Frequently Asked Questions (FAQs)

    1. Is this serum suitable for sensitive skin?

    Yes, it is generally well-tolerated, but a patch test is recommended.

    2. Can it replace professional fillers?

    No, it offers a temporary plumping effect, not permanent filler results.

    3. How long before results are visible?

    Many users notice improved hydration and smoothness within one to two weeks.

    4. Can it be used under makeup?

    Yes, its lightweight texture works well as a makeup-friendly base.

  • Seven K-Beauty Makeup Trends Expected to Shape Routines in 2026

    Seven K-Beauty Makeup Trends Expected to Shape Routines in 2026

    K-beauty is globally known for its innovative skincare, but Korean makeup stands out just as much. A quick glance at K-pop idols like Jennie, IVE, and BabyMonster reveals an array of soft hues, delicate textures, and ethereal finishes. After spending a full year immersed in Seoul’s beauty scene—and gathering insights from local insiders and industry professionals—this curated roundup highlights the top Korean makeup trends expected to be everywhere in 2026.

    Skin-Like Makeup With Barely-There Definition

    Just as the best lingerie feels invisible, this refined makeup approach is designed to blend seamlessly with your skin rather than mask it. The focus is on muted beige shades and soft matte textures that subtly enhance and contour your natural features without looking heavy or overdone.

    Inner-Corner Shimmer for Instant Brightness

    A signature detail in K-pop idol makeup is a touch of shimmer at the inner corners of the eyes, a look famously worn by Blackpink’s Jennie. Whether achieved with a sparkling eyeshadow or an iridescent highlighter, this precise placement delivers an immediate brightening effect that opens up the eyes.

    Lower-Lash Focus for Soft Eye Definition

    An even more understated way to highlight the eyes is by emphasizing the lower lashes, as seen on Eunchae from Le Sserafim. Applying a generous coat of mascara and gently clumping the lashes together with tweezers creates definition without the need for eyeliner, resulting in a clean and natural finish.

    Bold Yet Blended Blush Placement

    One makeup trend that’s impossible to miss across Seoul is noticeable but expertly diffused blush. Swept across the bridge of the nose and softly connecting the area between the undereyes and upper cheeks, this technique relies on careful placement and a light hand. The goal is a fresh, flushed glow rather than an overpowering burst of color.

    Pink Tones From Eyes to Lips

    A stroll through Olive Young, Korea’s largest beauty retailer, reveals an endless selection of products in every shade of pink. Loved for its instant brightening effect, pink is commonly worn from eyelids to lips. To maintain balance, mixing textures—such as a matte pink blush with a glossy pink lip—creates a harmonious, radiant look.

    Glazed Lavender Lips Take Center Stage

    The standout nude lip color for 2026 is glazed lavender. Popular among fifth-generation K-pop idols like Illit, this unexpected neutral is gaining momentum as spring approaches. While lavender can lean cool-toned, newer formulas combine pink and purple pigments with high-shine finishes to ensure lips look luminous and alive.

    Warm Caramel Makeup With a Sultry Glow

    Korean makeup trends extend beyond soft pinks and shimmering accents. Singer Dayoung has sparked interest with a contrasting style built around caramel brown tones. This warmer palette offers a more intense take on the skin-enhancing lingerie makeup look, delivering a richer glow with added depth and allure.

    A Legacy of Beauty Expertise

    For over 150 years, Harper’s Bazaar has remained a leading authority in fashion and beauty for women of all ages. The publication covers both emerging and future trends by collaborating with top experts in dermatology, plastic surgery, cosmetics, skincare, hair, and fragrance. Every feature is carefully researched and reviewed by experienced beauty editors and industry specialists.

  • ‘This dead bug variation engages your upper abs and builds core stability and endurance,’ says a personal trainer, and believe us when we say it’ll torch your core

    ‘This dead bug variation engages your upper abs and builds core stability and endurance,’ says a personal trainer, and believe us when we say it’ll torch your core

    If dead bugs are already part of your ab routine, you’ll know how powerful they are for firing up the core muscles. But if you want to dial up the challenge or try a variation that places extra emphasis on the upper abdominals while improving anterior core stability, the wall press dead bug is a smart upgrade.

    According to Tom’s Guide personal trainer Sam Hopes, this variation activates the upper abs while building long-lasting core strength and endurance. When performed correctly, it also reinforces a neutral spine position, which is essential not just for dead bugs, but for all effective strength training.

    Below, you’ll learn how to perform the movement correctly, along with key form cues to keep in mind. If you’re new to exercise, pregnant or postpartum, or returning after an injury or long break, it’s always wise to consult a qualified professional before adding a new exercise to your routine.

    How To Perform The Wall Press Dead Bug Correctly

    To begin the wall press dead bug, place a yoga mat close to a wall and lie on your back so your head is near the base of the wall.

    • Brace your core by gently drawing your belly button toward your spine.
    • Bend your elbows and press both hands firmly into the wall, instead of reaching your arms upward.
    • Lift your legs into a tabletop position, keeping your knees bent at 90 degrees and stacked over your hips.
    • Slowly extend one leg toward the floor, keeping the foot flexed while maintaining pressure through your hands.
    • Return to the starting position with control, then repeat on the opposite side.

    You should feel consistent tension through the front of your core. Move slowly and deliberately—the slower the tempo, the harder your abdominal muscles have to work.

    Key Form Tips For Better Results

    Maintain steady pressure against the wall, but avoid pushing excessively. Pressing too hard can cause your lower back to lift off the mat, which increases the risk of strain. Focus on drawing your ribcage down and keeping your spine neutral.

    As with traditional dead bugs, rushing through the reps is a common mistake. Controlled movement delivers far better core engagement and results.

    Breathing is just as important. Exhale as you extend your leg away from your body, and inhale as you return to the tabletop position.

    Benefits Of The Wall Press Dead Bug

    The wall press dead bug significantly increases the core challenge by forcing every abdominal muscle to stay engaged. Your deep core muscles and upper abs work harder than they do in the standard version due to the added intra-abdominal pressure created by pressing into the wall.

    This bracing action also prepares your body for compound lifts like squats and deadlifts, where maintaining a stable torso is essential, making it an excellent warm-up exercise.

    Additionally, your upper body plays a greater role in this variation. As you press into the wall, your lats activate, adding another layer of engagement. The wall contact also encourages proper alignment, helping you avoid common dead bug mistakes like arching the lower back.

    Add the wall press dead bug to your next ab workout and be ready to feel a deeper, stronger core connection from head to toe.

  • 7-Move Morning Mobility: Routine That Improves Circulation Boosts Energy and Eases Stiffness Fast

    7-Move Morning Mobility: Routine That Improves Circulation Boosts Energy and Eases Stiffness Fast

    What’s the first thing you usually do after waking up? Maybe you check your phone, brew a cup of coffee, or head straight into the shower before breakfast. While those habits are common, fitness instructor Justin Agustin recommends doing something else first.

    Before eating or scrolling, he suggests completing a gentle seven-move mobility routine designed to loosen stiff joints, improve circulation, and prepare your body for the day ahead.

    Why This Morning Routine Works

    Agustin specializes in exercise therapy for beginners, seniors, and people with limited mobility. He explains that this easy morning flow helps set a positive tone for the day. According to him, it boosts energy, supports digestion, and eases morning aches.

    Moving before eating also gently activates your metabolism and mindset, helping you start the day feeling calm, focused, and ready to go.

    What Is The Workout?

    This routine is beginner-friendly and senior-safe, designed to mobilize the entire body in just a few minutes. Agustin recommends aiming for 10–15 repetitions per exercise or holding each movement for 30–60 seconds.

    The Seven Mobility Exercises

    • Single leg swing
    • Knee taps
    • Side rotations
    • Shoulder rolls
    • Standing leg marches
    • Arm raises
    • Overhead side stretch

    Benefits Of Morning Mobility Exercises

    Moving first thing in the morning offers multiple benefits. According to Agustin, it helps lubricate the joints, reducing stiffness and discomfort, while also preparing muscles for daily movement. When practiced consistently, it can improve flexibility, balance, and overall mobility.

    Morning movement may also help reduce stress and anxiety. Research shows that exercising earlier in the day can support better consistency and contribute to weight management over time.

    A 2024 study published in Social Science & Medicine found that mobility-focused exercise has a significant positive impact on individual health, suggesting active mobility as a valuable public health strategy.

    Keep It Simple And Stay Consistent

    These seven exercises are a great starting point, but Agustin emphasizes that the most important thing is simply to keep moving.

    That movement could be a walk outside, light exercises at home or the gym, or even gentle mobility work beside your bed. The key is finding something you can sustain long term. Over time, consistent movement can help you feel stronger, more mobile, and better overall.

  • Home Remedies That Strengthen Hair and Help Prevent Hair Loss Naturally

    Home Remedies That Strengthen Hair and Help Prevent Hair Loss Naturally

    The first time you see extra hair on your pillow or in the shower drain something shifts inside you. You stand there with your fingers on your scalp trying to remember when your hair started feeling thinner. It creates a quiet panic that you can mostly hide from other people. But hiding it from yourself is impossible. You might tell yourself it’s just stress or maybe the weather. Perhaps you changed shampoos recently or tied your hair too tight. These explanations feel safer than admitting something might actually be wrong.

    Listening to What Your Hair Is Trying to Tell You

    Hair has its own quiet language. It records late nights, missed meals, rushed showers, tight hairstyles, harsh products, and long weeks of stress. It reflects hormonal shifts, seasonal changes, and the slow passage of time. Long before hair fall feels alarming, the body often sends subtle signals asking for rest, nourishment, and gentler care. Modern routines make it easy to ignore these signs. We color, heat-style, and over-wash, pushing hair to keep up. When shedding increases, many turn to quick fixes. Yet a slower, more supportive path exists—home remedies that work in harmony with the body rather than forcing results.

    Oil Rituals: Feeding the Roots from the Outside In

    Oiling the hair is an age-old practice rooted in tradition and care. Warming oil between the palms and massaging it into the scalp does more than condition strands—it supports circulation and relaxation. Coconut oil helps reduce protein loss and protects dry, brittle hair. Castor oil, thicker in texture, is often used in small amounts to support scalp moisture. Almond, sesame, and olive oils each add their own benefits. There is no single perfect oil; blends often work best. Regular oiling, paired with gentle massage, nourishes the scalp, supports stronger roots, and creates a moment of calm in busy routines.

    Scalp Massage: The Overlooked Essential

    Massaging the scalp is just as important as the oil itself. Using fingertips in slow, circular motions encourages blood flow, helping deliver oxygen and nutrients to hair follicles. Starting at the hairline and moving backward, this practice wakes up the skin beneath the hair. Five to ten minutes, a few times a week, can make a noticeable difference. Beyond physical benefits, scalp massage often becomes a signal to slow down—reducing tension and stress that can silently contribute to hair shedding over time.

    Herbal Oils and Natural Infusions

    For those who enjoy a deeper approach, oils can be infused with herbs at home. Rosemary, curry leaves, hibiscus, and fenugreek are commonly used. Gently warming these herbs with oil and allowing them to steep transfers plant compounds into the oil. Rosemary is often associated with improved circulation, while hibiscus and fenugreek support conditioning and strength. The process is slow and intentional, resulting in a personalized oil that feels both nourishing and grounding.

    The Quiet Strength of Kitchen Remedies

    Many effective hair remedies already exist in the kitchen. Simple ingredients like seeds, yogurt, eggs, and aloe can support scalp health and reduce breakage. These remedies may not promise instant transformation, but they encourage consistency and mindfulness. Preparing them by hand reconnects hair care with self-care, reminding us that nourishment does not always come from store-bought products.

    Fenugreek: Small Seeds, Steady Support

    Fenugreek seeds are traditionally soaked overnight, then blended into a paste for scalp application. Rich in proteins and natural compounds, fenugreek is often used to reduce shedding and improve hair texture. Applied once or twice a week for short periods, it can help hair feel thicker and more resilient. As with all natural remedies, moderation and attention to scalp sensitivity are important.

    Aloe Vera: Cooling and Calming the Scalp

    Aloe vera offers soothing relief for irritated or oily scalps. Its gel helps calm inflammation, balance oil production, and gently remove buildup that may clog follicles. Applied directly to the scalp for twenty to thirty minutes, aloe supports a healthier environment for hair growth. It can also be combined with oils or yogurt for added nourishment.

    Protein Masks from Simple Foods

    Hair benefits from protein support, especially when exposed to heat or sun. Masks made with egg and plain yogurt help temporarily strengthen the hair shaft, improving smoothness and reducing breakage. Applied to damp hair and rinsed with cool water, these masks are best used occasionally, offering reinforcement without overloading the hair.

    Food, Stress, and the Deeper Roots of Hair Health

    Hair health reflects overall well-being. Nutrient gaps, chronic stress, hormonal shifts, and poor sleep often appear first through increased shedding or thinning. While topical remedies support the scalp, internal balance is equally important. Diets rich in protein, iron, zinc, and healthy fats provide the building blocks hair needs. Hydration and mindful eating quietly support long-term strength and growth.

    Stress and Its Hidden Impact on Hair Fall

    Periods of stress or illness often lead to delayed hair shedding, a response where hair enters a resting phase before falling out months later. Managing stress through gentle movement, breathing exercises, rest, and reduced screen time supports the body’s natural repair processes. When stress hormones decrease, hair cycles can slowly return to balance.

    Daily Habits That Protect Hair Strength

    Hair care is shaped by everyday choices. Using mild shampoos, avoiding excessive washing, and focusing cleansing on the scalp help maintain natural oils. Conditioning the lengths reduces friction and breakage. Limiting heat styling, choosing loose hairstyles, and using smooth pillowcases all protect fragile strands from unnecessary damage.

    Nutrient Role in Hair Health Common Daily Food Options
    Protein Essential for forming keratin, which gives hair its strength and structure. Lentils, pulses, eggs, fish, paneer, tofu, mixed nuts, seeds
    Iron Helps carry oxygen to hair roots, supporting healthy growth cycles. Spinach, beetroot, kidney beans, lentils, pumpkin seeds
    Biotin & B-Complex Vitamins Promote energy production and cell renewal in hair follicles. Whole grains, eggs, almonds, seeds, green leafy vegetables
    Omega-3 Fatty Acids Maintain scalp moisture and help calm inflammation around follicles. Flaxseeds, chia seeds, walnuts, oily fish
    Zinc & Selenium Assist in repairing hair tissue and protecting follicles from damage. Seeds, nuts, whole grains, milk products, legumes

    Gentle Detangling as an Act of Care

    How hair is handled matters. Detangling slowly from the ends upward with a wide-toothed comb prevents unnecessary shedding. Adding a small amount of oil or leave-in conditioner reduces friction. This simple habit turns routine grooming into a moment of awareness, allowing early signs of dryness or weakness to be addressed before damage worsens.

    Creating a Sustainable Weekly Rhythm

    Hair care does not need to feel overwhelming. A simple routine—oil massage a few times a week, one nourishing mask weekly, gentle daily handling, balanced meals, and regular stress relief—can be both manageable and effective. Results often appear gradually over several months as reduced shedding, improved texture, and new growth. These changes reflect not just healthier hair, but a body that feels supported and safe enough to grow again.

    Strengthening the Bond with Your Body

    Home remedies are not about quick fixes. They encourage patience, listening, and adaptation. What works for one person may not suit another, making observation essential. Caring for hair with familiar ingredients and gentle rituals builds trust with the body. In the end, these practices support more than hair—they nurture a deeper, kinder relationship with oneself, from root to tip.

  • Stop slowing down: An 83-year-old trainer’s guide to lifelong strength

    Stop slowing down: An 83-year-old trainer’s guide to lifelong strength

    Harry W King is living proof that getting older doesn’t mean slowing down. Now 83, he still trains four times a week, combining strength training with sessions on the rowing machine, while also coaching others as a trainer at Planet Fitness.

    Movement has always been part of my life, and it continues to give me energy and independence,” Harry shares during our conversation. His fitness story began in high school with basketball, followed by service in the Marine Corps, where he also achieved a second-degree black belt in Karate.

    “Over time, my routine has evolved due to advanced osteoarthritis, rheumatoid arthritis, and age — I’m 83 now. Still, staying active is not optional for me,” he explains.

    Below, Harry opens up about his weekly training routine, the walking workout he relies on, and the guidance he offers seniors who want to return to exercise. If you’re coming back after a long break, it’s always wise to consult a qualified professional first.

    What Does His Weekly Training Routine Look Like?

    “I work out four days each week, combining weight training with cardio on machines like the bike, elliptical, and my favorite — the rowing machine,” Harry says.

    He strongly encourages resistance training to improve muscle strength, endurance, balance, bone density, and weight management. “I also suggest working with a trainer to ensure proper form,” he adds.

    Harry typically divides workouts by muscle group across three days: upper body, lower body, and core-focused sessions.

    When it comes to choosing weights, his advice is simple: progress gradually. “Seniors can follow similar programs to younger people, as long as they listen to their bodies and avoid lifting heavy too quickly,” he says.

    Beginner-Friendly Bodyweight Exercises He Recommends

    For those new to fitness or returning after a long pause, Harry suggests starting with these basic bodyweight movements:

    • Push-ups
    • Crunches
    • Crossover crunches
    • Chin-ups
    • Squats
    • Crab walks
    • Lunges

    The Walking Workout He Swears By

    Walking is one of the most accessible exercises at any age. It doesn’t require equipment, and you can do it almost anywhere,” Harry explains. He recommends adding variety to keep it effective and enjoyable.

    “On a treadmill, interval walking works well. For example, walk briskly for two minutes, then slow down for one minute to recover. Alternating intensity helps improve endurance and keeps things interesting.”

    Those looking for additional walking routines may also find value in structured approaches like the Japanese Walking Method, which focuses on cardiovascular fitness and fat loss.

    His Advice for Complete Beginners

    “I encourage anyone in the aging population to either continue or begin their fitness journey,” Harry says. “Start small and don’t feel intimidated. You don’t need a complex plan in the beginning.”

    He suggests focusing on simple, consistent actions such as walking, gentle stretching, or practicing standing up from a chair without using your hands. “Small habits, done regularly, can create meaningful change,” he adds.

    His Current Fitness Goals at 83

    “My goals now are about staying strong, mobile, and independent,” Harry explains. Maintaining muscle strength and balance remains a priority.

    “I focus on exercises I truly enjoy and stay consistent with them. Consistency is what has kept me feeling young all these years,” he says.

    Looking for More Motivation?

    Harry’s story is a reminder that it’s never too late to move, rebuild strength, and prioritize health at any stage of life.

  • Forget ‘new year, new me’ — these 5 ‘old school’ muscle-building moves sculpt you in all the right place

    Forget ‘new year, new me’ — these 5 ‘old school’ muscle-building moves sculpt you in all the right place

    You don’t need the latest fitness trends to gain strength and muscle in the gym. What truly matters is training intelligently and sticking to a few proven principles. Fitness is often overcomplicated, yet simplicity is what delivers long-term, sustainable results.

    It’s time to cut through the noise of modern “fitfluencers” and return to classic training foundations refined long before social media dictated workout routines. Think of lifters like Arnold Schwarzenegger, who built legendary physiques using progressive overload (gradually increasing training volume), adequate protein intake, a balanced diet, and above all, consistency and repetition.

    When applied consistently, these exercises fit seamlessly into a strength program. They promote balanced muscle growth, enhance functional strength, and allow steady progression as fitness improves. Try them out and see which becomes your favorite.

    Five Old-School Exercises That Still Deliver Results

    1. Arnold Press

    For this movement, a pair of dumbbells or kettlebells works best, allowing a full and natural range of motion.

    Designed by Arnold himself, the Arnold press is a distinctive upper-body push exercise that develops the shoulders, upper chest, and triceps. Its defining feature is the rotational motion, which activates all three heads of the shoulders: the anterior, lateral, and posterior deltoids. This delivers a complete shoulder workout in one efficient movement.

    Overhead pressing also enhances pushing strength and challenges the core, as maintaining an upright, stable torso is essential to avoid using leg momentum.

    Beyond muscle growth, the Arnold press is highly functional, closely mimicking everyday overhead lifting tasks. It also strengthens the rotator cuff, helping stabilize and protect the shoulders during movement.

    2. Forward-Lean Bulgarian Split Squats

    The Bulgarian split squat can be performed with one or two dumbbells or kettlebells, depending on preference. This unilateral leg exercise heavily targets the glutes while also working the quads, hamstrings, calves, and hips, all while challenging balance and stability.

    A slight forward lean increases glute engagement. This involves hinging at the hips and guiding the chest over the front thigh while maintaining a neutral spine. The lean should be subtle, just enough to emphasize the working glute of the lead leg.

    Simple yet highly effective, this exercise requires only a bench and a weight. Even bodyweight alone can be extremely effective for beginners.

    3. Sissy Squats

    The sissy squat is a demanding movement that primarily targets the quads and core. Popularized by bodybuilder Vince Gironda in the 1950s and 1960s, it focuses on deep knee flexion with the knees traveling over the toes to isolate the quadriceps.

    This variation minimizes hip involvement, shifting the workload directly onto the quads to drive strength and muscle growth. Unlike traditional squats, the movement is performed on the balls of the feet, which also activates the calves.

    Strong core engagement and controlled movement are essential. Leaning back helps counterbalance as the knees move forward. Beginners should prioritize form and control over depth.

    Using a wall or squat rack for support can help build confidence. A proper mobility warm-up is strongly recommended before attempting this exercise.

    4. Drag Curls

    Drag curls are most effective with a barbell or EZ bar, though dumbbells can also be used. The key is dragging the weight close to the body while keeping the elbows pulled back throughout the movement.

    This technique places significant emphasis on the biceps, especially the long head, creating a powerful peak contraction at the top. The shoulders remain relatively inactive, maximizing time under tension compared to standard curls.

    Controlled execution is crucial. Focus on a slow, deliberate lowering phase to increase muscle engagement.

    • Stand with feet shoulder-width apart, holding the bar with an underhand grip.
    • Pull the shoulders back and engage the core.
    • Bend the elbows and drag the bar upward, driving the elbows behind the body.
    • Pause at full flexion and squeeze the biceps.
    • Lower the bar slowly, maintaining a vertical path.

    5. Pullovers

    Although often associated with shoulder training, pullovers effectively work the chest, lats, triceps, and anterior deltoids. They also contribute to improved shoulder mobility.

    This upper-body exercise demands strict control. Keep the core engaged and avoid excessive lower-back movement. Advanced lifters may use a slight back arch if core stability is maintained, but the back should generally remain supported by the bench.

    As the dumbbell moves behind the body, the lack of bench support increases the range of motion and difficulty. Lower the weight only as far as control allows, progressing gradually. Expect a deep stretch during the descent and strong resistance during the lift.

    Sets and Reps Guidelines

    Aim for 8–12 repetitions across 3–4 sets for each exercise. You can integrate individual movements into an existing routine or combine all five for a full-body workout. Supersets or circuit-style training can also be used to increase intensity.

    Consistency with these time-tested exercises is what ultimately delivers lasting strength and muscle gains.