Author: admin

  • 5 Slow Yoga Moves That Improve Flexibility and Body Control

    5 Slow Yoga Moves That Improve Flexibility and Body Control

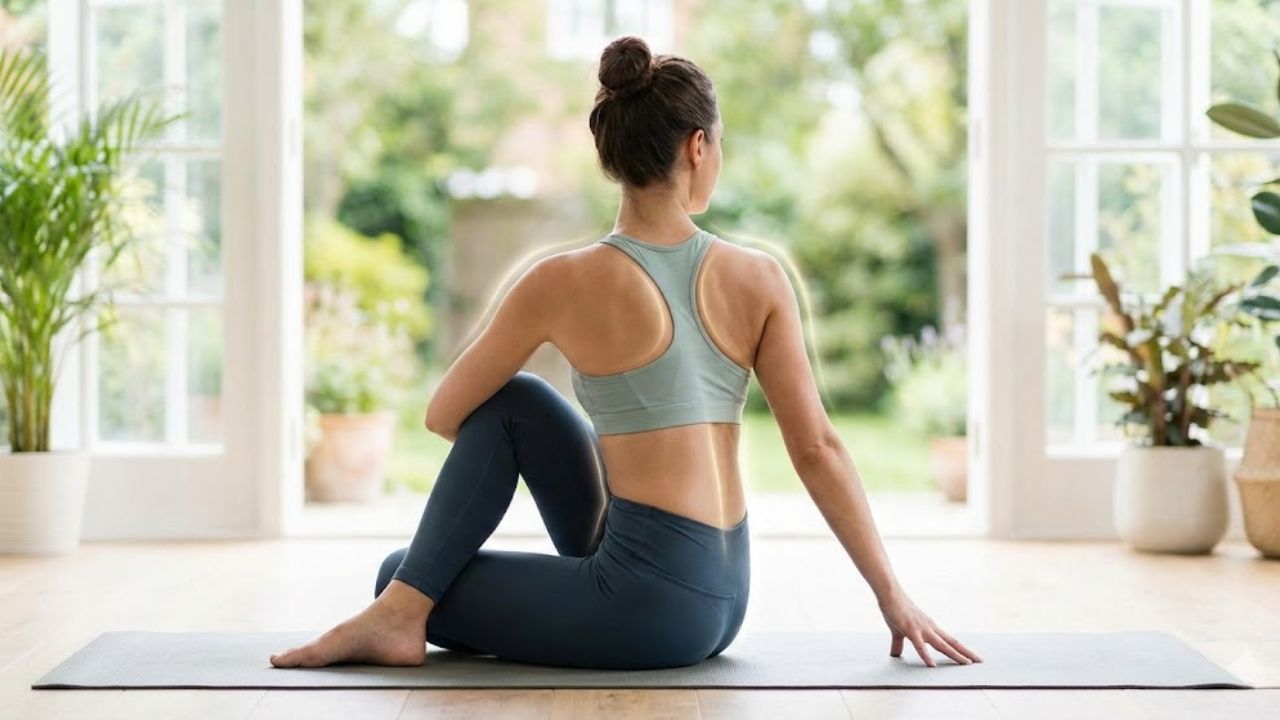
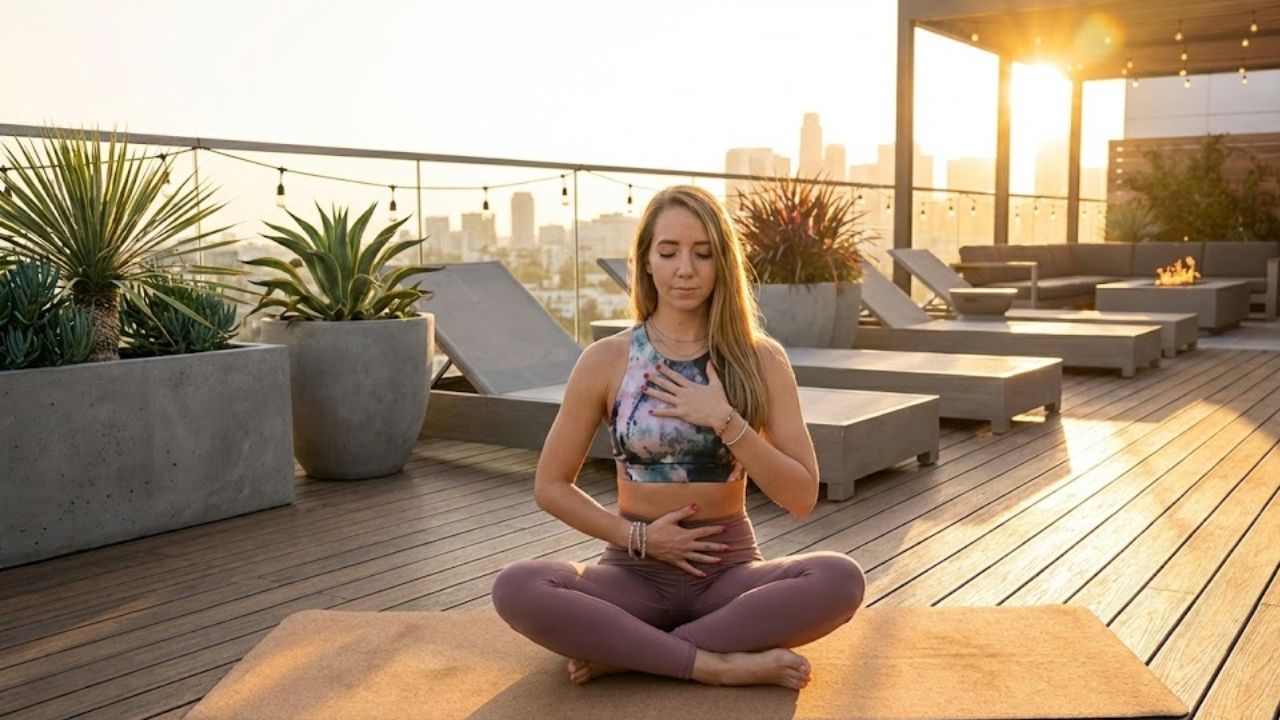
    Five Slow Yoga Moves to Improve Flexibility Flexibility develops through patience and steady breathing rather than forcing your body into deep stretches. The key is allowing your muscles to lengthen gradually over time. Slow yoga offers one of the safest & most effective approaches to improving flexibility for people who feel stiff or sit for extended periods during the day. It also works well for anyone returning to physical activity after taking time off. The five slow yoga moves described here emphasize gentle stretching and mindful control to help your body open up naturally without causing strain.

    Why Slow Yoga Works for Flexibility

    Slow yoga allows your muscles enough time to properly relax. When you move too quickly through poses, your body naturally tenses up as a protective response. By holding positions gently and deliberately, you give your nervous system a chance to calm down. This helps your muscles let go of tension in a more natural way. The slower approach lowers your chance of getting injured while building flexibility that actually lasts. Beyond flexibility slow yoga brings other benefits to your body. It helps your joints move more freely & improves blood flow throughout your system. You also develop better awareness of how your body feels and functions. If you practice regularly, even short sessions of just a few minutes each day can make a real difference. You’ll notice improvements in both how your body feels during daily activities and how easily it moves.

    Seated Side Stretch for Spine and Waist

    The seated side stretch is a gentle exercise that opens up your spine and the muscles around your ribs & waist. It helps make your upper body more flexible & encourages you to breathe deeply. Start by sitting on the floor in a comfortable position with your legs either crossed or stretched out in front of you. Put your right hand on the floor next to your body. Breathe in & raise your left arm above your head. As you breathe out lean slowly toward the right side while making sure both hips stay flat on the ground. Stay in this position for six to ten slow breaths. You should feel a stretch along the entire left side of your body. Then switch to the other side and do the same thing. This exercise is useful for reducing the stiffness that comes from sitting for long periods and it helps your spine move more easily.

    Butterfly Pose for Inner Thighs and Hips

    Butterfly Pose Butterfly Pose works well for loosening tight hips and inner thighs. This pose helps people who sit for most of their day. Start by sitting up straight and placing the bottoms of your feet together. Allow your knees to drop naturally toward the ground. Use your hands to hold onto your feet or ankles. Keep your back straight and breathe slowly. When you feel ready you can lean forward from your hips while maintaining a straight spine. Avoid pushing your knees down with force. Hold this position for one to three minutes. Regular practice of this pose improves hip flexibility and helps you maintain better posture.

    Low Lunge for Hip Flexors and Legs

    Tight hip flexors happen often in people who spend a lot of time sitting. The low lunge provides a gentle and steady stretch that opens up these muscles without risk. Place one foot ahead of you in a lunge stance while your back knee touches the ground. Your front knee should align directly above your ankle. Move your hips forward gradually as you maintain an upright upper body position. Rest your hands on either your hips or thighs. Stay in this position for eight to twelve breaths before switching to the other side and doing it again. This exercise increases flexibility throughout your hips and thighs as well as your lower back.

    Reclined Hamstring Stretch for Gentle Lengthening

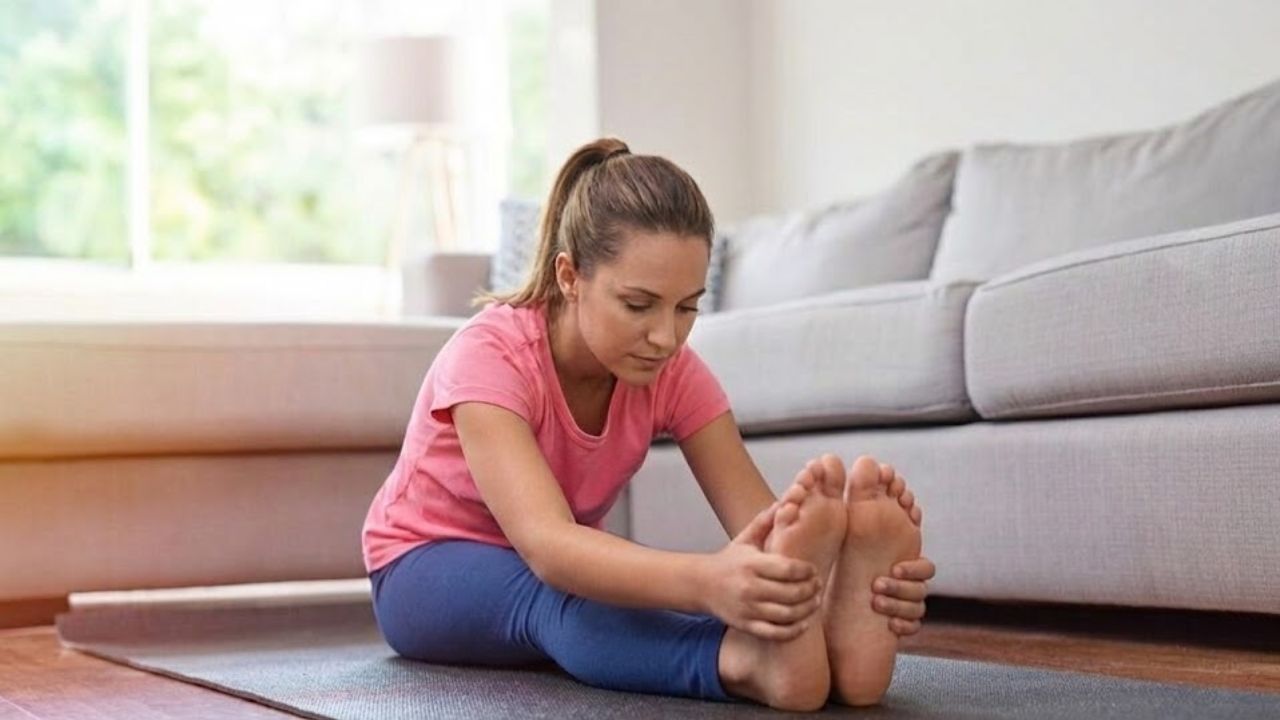
    This pose provides a gentle method to stretch your hamstrings while keeping your lower back safe from strain. Start by lying flat on your back with one leg stretched out along the floor. Bend your other knee & place your hands behind your thigh or calf. Gradually straighten the raised leg upward toward the ceiling and stop when you notice a comfortable stretch. Make sure your shoulders stay loose and maintain even breathing throughout. Stay in this position for one to two minutes before switching to the other leg. This exercise enhances hamstring flexibility and reduces tightness in your lower body.

    Child’s Pose for Full Body Release

    Child’s Pose is a resting position that helps your whole body relax. It stretches your spine and hips and shoulders in a gentle way while helping your mind feel calm. Get down on your knees and sit back so your bottom rests on your heels. Lean forward and place your forehead on the floor or a cushion. You can reach your arms out in front of you or let them rest alongside your body. Hold this position for two to three minutes. Breathe slowly & let your body relax more with each breath out. This pose helps improve your flexibility because it lets your muscles relax deeply.

    How to Practice These Moves Safely

    Always move into each stretch at a slow pace. You should experience gentle tension rather than actual pain. If you notice your breathing becoming difficult you need to back off a little. Props such as yoga blocks or cushions help make the poses easier and more comfortable to hold. Evening sessions of slow yoga work particularly well because your muscles have warmed up throughout the day and respond better to stretching. Morning practice can also work if you approach it with care and gentleness.

    How Often to Practice for Best Results

    Regular practice beats intense effort every time. If you do these five exercises three to five times each week you will see real improvements in your flexibility within just a few weeks. Short practice sessions work well as long as you stick with them. Your flexibility will get better slowly over time. Give your body the time it needs to adjust and change. Checking your progress every single day can make you feel discouraged so pay attention to how your body feels when you look back over longer periods instead.

    Who Can Benefit from Slow Yoga

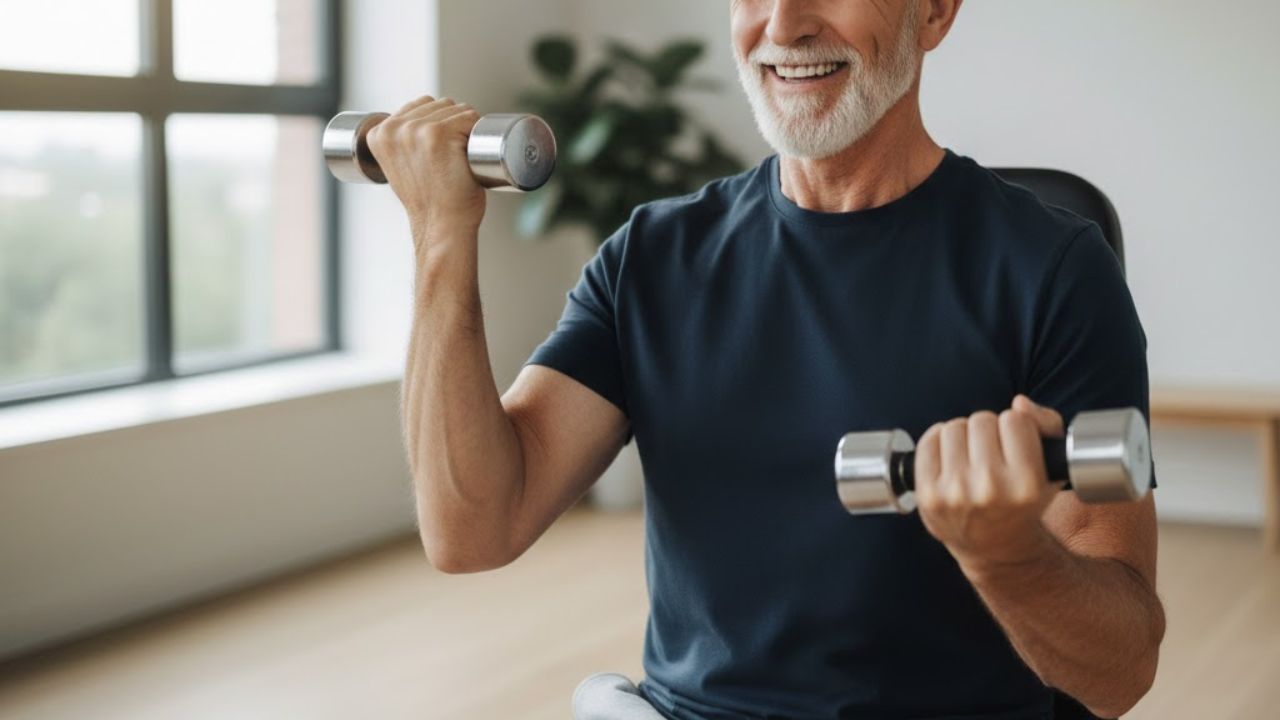
    Slow Yoga: Who Should Practice It? Slow yoga works well for people who are just starting their yoga journey. It also suits older adults who want a gentle way to stay active without putting too much strain on their bodies. If you are recovering from an injury or dealing with stiffness in your muscles and joints slow yoga can help you heal gradually. The gentle movements allow your body to release tension without forcing anything. People who experience high levels of stress also find this practice helpful because it calms the nervous system and promotes relaxation. Athletes often benefit from slow yoga even though they already have strong bodies. Their training usually focuses on building strength and endurance, but they sometimes neglect flexibility. Slow yoga helps them stretch tight muscles and prevent injuries that come from repetitive movements. It creates a better balance between power & mobility. However you should take some precautions if you have existing injuries or health conditions. Always modify the poses to match your current abilities rather than trying to achieve the perfect form. Listen to your body and stop if something feels painful or uncomfortable.

    Creating a Relaxing Yoga Space

    Choose a quiet space where you have enough room to move around freely. Soft lighting helps create the right atmosphere and keeping distractions to a minimum makes it easier to concentrate. Wear clothes that allow you to move without restriction and consider using a mat that provides good support to make your practice more comfortable.

    Ending Your Practice

    After you finish the stretches take a moment to lie down or sit quietly for about a minute. Pay attention to how your body feels and notice your breathing pattern. This quiet pause helps your body absorb all the good effects from the practice. Slow yoga helps your body become more flexible in a gradual and safe way. These five gentle movements can make you more flexible and reduce stiffness. You will also feel more comfortable when you move around during your daily activities.

  • 12 Yoga Poses: Improve Flexibility, Mobility and Daily Movement Ease

    12 Yoga Poses: Improve Flexibility, Mobility and Daily Movement Ease

    Flexibility & mobility matter for everyone in daily life. They help prevent injuries & keep joints healthy as you age. Modern habits like sitting all day and dealing with stress make the body tight and stiff over time. Yoga offers an effective yet gentle approach to regain flexibility while building better mobility and balance. Yoga differs from basic stretching because it engages muscles and joints & connective tissues all at once. When you practice regularly these poses allow your body to move with greater ease and comfort. The following 12 yoga poses can make a real difference in your flexibility and mobility when you do them consistently.

    Downward Facing Dog

    Downward Facing Dog stretches your spine and shoulders along with your hamstrings & calves and ankles. This pose also makes your shoulders more mobile and builds strength in your arms. Begin on your hands and knees and then lift your hips up while pushing your heels down toward the ground. Make sure your spine stays long and let your neck stay relaxed. This position makes your whole body more flexible and helps get rid of tightness that comes from sitting too much.

    Cat Cow Pose

    Cat Cow is great for keeping your spine mobile and flexible. It warms up your back gently & helps you stand straighter. Start by getting on your hands and knees. Breathe in while you arch your back and raise your chest upward. Breathe out while you curve your spine the other way & bring your chin down toward your chest. Move back and forth between these positions at a steady pace to make your spine more flexible and improve how your body moves together.

    Standing Forward Fold

    Standing Forward Fold Standing Forward Fold provides a deep stretch for your hamstrings and calves while also working your hips and lower back. Start by standing upright with your feet positioned comfortably. Bend forward from your hips and allow your upper body to hang down naturally. Your head should drop toward the ground without any tension in your neck. If you feel too much strain in your legs you can bend your knees a little bit to make the pose more comfortable. This position helps make the back of your body more flexible over time. It also promotes better blood flow throughout your system. The gentle inversion allows fresh blood to reach your brain while the stretch releases tightness that builds up from sitting or standing throughout the day.

    Low Lunge

    Low Lunge stretches the hips and makes the hip flexors & thighs more flexible. Place one foot forward in a lunge position and lower your back knee to the ground. Push your hips slightly forward and raise your chest upward. This position works well for anyone who spends most of their day sitting down.

    Butterfly Pose

    Butterfly Pose works on your inner thighs and hips while also stretching your lower back. Start by sitting up straight and pressing the bottoms of your feet together. Allow your knees to fall naturally toward the ground. You can move your knees up and down slowly or bend forward from your hips if you want a stronger stretch. This position helps make your hips more flexible and increases how well they move.

    Cobra Pose

    Cobra Pose Cobra Pose stretches your chest & shoulders and spine. It also makes your lower back stronger. Start by lying face down on the floor. Put your hands flat on the ground directly under your shoulders. Push down gently through your palms and raise your chest up off the floor. Your elbows should stay a little bent rather than locked straight. Let your shoulders drop down and stay loose instead of hunching them up toward your ears. This pose works well if you spend a lot of time slouching or sitting at a desk. It opens up the front of your body and helps reverse the rounded position that comes from poor posture. Regular practice can make your spine more flexible and help it move more easily through its full range of motion.

    Seated Forward Bend

    Seated Forward Bend Seated Forward Bend helps make your spine more flexible while also stretching your hamstrings and hips. Start by sitting down with your legs stretched out in front of you. Take a breath in and make your spine longer. Then bend forward from your hips. Try not to curve your back into a rounded position. This position helps you breathe calmly & gives your muscles a good stretch.

    Pigeon Pose

    Pigeon Pose works really well for making your hips more mobile & flexible. Start from a forward fold or downward dog position and bring one knee toward the front while you stretch the other leg behind you. Lower your hips down toward the mat and take some deep breaths. This pose helps release tension that builds up deep in your hips & makes your lower body move better overall.

    Triangle Pose

    Triangle Pose stretches your legs & hips along with your spine and chest. It also helps improve your balance and makes your joints more mobile. Stand with your feet positioned far apart from each other. Reach one arm down toward your front foot & place your hand on your shin or ankle. At the same time lift your other arm straight up toward the ceiling. This pose helps you build both strength and flexibility together.

    Garland Pose

    Garland Pose helps make your ankles hips and lower back more flexible. Stand with your feet a bit wider than your hips and squat down. Lower your hips toward the ground & press your hands together at your chest. Keep your back straight and long. This position helps your body move naturally and keeps your joints healthy.

    Bridge Pose

    Bridge Pose Bridge Pose stretches your hips and chest and spine. It also makes your back & legs stronger. Start by lying flat on your back. Bend your knees and place your feet on the floor about hip width apart. Push down through your feet and raise your hips up toward the ceiling. This pose helps your spine become more flexible. It also reduces stiffness in your lower body.

    Child’s Pose

    Child’s Pose provides a gentle stretch for your spine along with your hips and shoulders. You start by sitting back on your heels and then fold your body forward. Your arms can either extend out in front of you or rest comfortably alongside your body. This position helps increase your flexibility & also works to calm your nervous system while letting go of built-up tension.

    How to Practice Safely

    To improve flexibility and mobility you need to focus on consistency rather than pushing yourself too hard. Take your time with each pose and remember to breathe deeply throughout the movement. Never force your body into positions that cause discomfort or pain. Always warm up properly before attempting deeper stretches & feel free to use props such as blocks or cushions when necessary. If you practice these poses three to five times each week you will see clear improvements as time goes on. Even brief daily sessions can make your body feel lighter and help you move more easily.

  • Homemade Eyebrow Gel Using Aloe and Cocoa Creates Soft Hold Without Crunchiness

    Homemade Eyebrow Gel Using Aloe and Cocoa Creates Soft Hold Without Crunchiness

    The radiator ticked on with its familiar metallic cadence, a sound that usually signals relief from the cold. Beyond the glass, wind threaded through bare branches and tapped the window frames, quietly confirming that winter had arrived. Inside, the temperature felt adequate, yet the air carried a dry edge. Your throat turned rough, your skin felt tight, and your nose hinted at an oncoming sneeze. You remembered a long-held tip—perhaps shared by a family member or read somewhere—about setting a glass of water near the radiator to make a room feel warmer. It sounded like folklore, almost too simple. Still, as the evening wore on and the dryness lingered, you filled a glass and placed it beside the heat. Gradually, something subtle changed—the way winter often reveals its truths, softly.

    The Quiet Science Behind a Simple Glass of Water

    The idea that a single glass of water could enhance comfort without increasing heating costs can feel surprisingly reassuring. Water doesn’t produce heat, nor does it function as a hidden heater. The effect is more delicate. The glass doesn’t raise the temperature; it helps your body perceive warmth more effectively. Comfort isn’t just about degrees—it’s about how the air interacts with your skin and breath. When a radiator runs, it warms the air while drawing moisture out of it. This dryness often goes unnoticed at first, showing up as a scratchy throat, tight skin, static in clothing, or tiny shocks from metal surfaces. What’s less obvious is how dry air subtly changes the way warmth is felt.

    Why Dry Indoor Air Often Feels Colder

    Your body is constantly exchanging heat with the air around it. In very dry spaces, moisture evaporates more quickly from your skin and with each breath you release. That evaporation pulls heat away, creating a cooling sensation even when the room is warm on paper. The heating system may be doing its job, yet your body registers something else. This is where the glass of water plays a quiet role. Set near a heat source, it slowly warms and releases moisture through gentle evaporation. Even a modest increase in humidity can reduce moisture loss from your skin and lungs. The temperature remains unchanged, but the room feels calmer and warmer because your body isn’t losing heat as rapidly.

    Aloe Vera as a Soft, Natural Brow Base

    Aloe vera has been used to soothe skin for generations, long before it appeared in modern containers. Pure aloe gel feels cool and light, never stiff or sticky. When applied to eyebrows, it works as a gentle styling aid, offering flexible hold without harshness. In a homemade brow gel, aloe forms the foundation. Its natural consistency provides light-to-medium control, guiding brow hairs while keeping them soft. Selecting a clean, high-quality gel with minimal additives also brings subtle hydration, turning a daily routine into care rather than correction.

    Cocoa Powder for a Soft, Natural Brow Tint

    Cocoa powder brings warmth, depth, and a naturally rich pigment. Its soft brown tone suits brows surprisingly well, especially for light to medium-dark shades. When blended with aloe, cocoa creates a sheer, stain-like color instead of a heavy or painted look. The appeal lies in its adjustability. A small amount offers gentle definition, while adding more deepens the shade. The result blends smoothly with natural brows, avoiding sharp lines. There’s a quiet satisfaction in using the same ingredient that enriches warm drinks to subtly frame your face—simplicity and beauty sharing a common source.

    Preparing a Simple, Thoughtful Brow Kit

    Making your own brow gel feels less like a cosmetic task and more like a small ritual. Clean jars, a simple spoon, a spoolie brush—each item has purpose. The process is calm and unhurried, encouraging focus. At its core, the recipe needs only aloe vera gel and cocoa powder. Optional additions, such as a drop of jojoba oil for smoothness or a pinch of coffee or charcoal for deeper tones, can be explored later. The charm of this formula is its restraint: two humble ingredients, combined with care.

    Essential Items and Their Purpose

    • Pure aloe vera gel – Serves as the base, offering hold, smooth application, and moisture
    • Unsweetened cocoa powder – Provides a natural tint to enhance brow color
    • Small clean jar – Keeps the mixture safe and fresh
    • Spoolie or angled brush – Helps apply and shape brows evenly
    • Mini spoon or stick – Used to blend ingredients smoothly

    Blending the Gel with Care

    Add about two teaspoons of aloe vera gel to a clean jar. Sprinkle in roughly a quarter teaspoon of cocoa powder and stir slowly, pressing out any lumps. The clear gel gradually becomes a smooth, earthy brown. Test the shade on the back of your hand and let it dry briefly. Adjust as needed—more cocoa for depth, more aloe for softness. The texture should feel creamy and light, yet thick enough to cling to a brush. Once blended, close the jar and let it rest for an hour so the mixture settles evenly.

    Applying with Intention and Ease

    This homemade gel encourages a gentle touch. Start with clean, dry brows. Lightly dip a spoolie into the jar and wipe away excess. Brush through using short, feathered strokes, following the natural direction of hair growth. Begin at the inner brow and move outward, shaping rather than drawing. For added definition, allow the first layer to dry before applying another, focusing on sparse areas. An angled brush can help mimic individual hairs if needed. The finish stays soft and flexible, never stiff or heavy.

    Embracing Simplicity in Everyday Beauty

    Creating a simple product at home carries quiet meaning. It reduces waste, limits unnecessary additives, and reconnects you with the act of making. Each refill replaces another disposable tube, and each use reinforces that beauty doesn’t need complexity. Natural solutions aren’t universal, and listening to your skin remains essential. Patch testing and small adjustments matter. Still, there’s something grounding about slowing down, stirring by hand, and shaping your brows with care. In that small moment—brush in hand, cocoa-scented gel nearby—you’re reminded that beauty can be gentle, practical, and personal, often beginning with the simplest things.

  • Upgrade Your Treadmill Walking Workout Using This Trainer Approved Technique for Faster Results

    Upgrade Your Treadmill Walking Workout Using This Trainer Approved Technique for Faster Results

    Exercise does not need to feel complicated to be effective. Walking up and down a hill is enough to challenge your fitness, and this is exactly what certified personal trainer Jordan Langhough does during her treadmill sessions. She uses a pyramid-style workout that gradually increases intensity before tapering back down, closely mimicking the feeling of climbing and descending a hill.

    Langhough enjoys treadmills for their consistency, safety, and controlled environment, especially when outdoor conditions are not ideal. While outdoor walks offer benefits like fresh air and time in nature, she emphasizes that the most effective option is the one that helps you stay active consistently.

    Treadmill Pyramid Hill Walk Overview

    If a treadmill makes walking more accessible, this workout is worth trying. The full session lasts 34 minutes from warm-up to cool-down and follows a hill-walking pyramid. The incline gradually rises to a peak and then slowly returns to flat. Although designed for a treadmill, this routine can also be adapted to an exercise bike or elliptical by adjusting resistance instead of incline.

    Choose a brisk, steady pace that raises your heart rate and breathing while still allowing you to speak one or two words between breaths. The goal is to feel challenged without feeling overwhelmed.

    Uphill Pyramid Phase (14 Minutes)

    • 2 minutes at 3% incline
    • 1 minute at 2% incline
    • 2 minutes at 4% incline
    • 1 minute at 3% incline
    • 2 minutes at 5% incline
    • 1 minute at 4% incline
    • 2 minutes at 6% incline
    • 1 minute at 5% incline
    • 2 minutes at 7% incline
    • 2 minutes at 8–10% incline

    At the peak, maintain your pace or increase to a light jog if you want an added challenge.

    Downhill Pyramid and Cool Down (12 Minutes)

    • 2 minutes at 7% incline
    • 1 minute at 5% incline
    • 2 minutes at 6% incline
    • 1 minute at 4% incline
    • 2 minutes at 5% incline
    • 1 minute at 3% incline
    • 2 minutes at 4% incline
    • 1 minute at 2% incline
    • 3 minutes at 0–1% incline

    As the incline lowers, gradually reduce your speed and bring the treadmill back to flat. This allows your heart rate to recover smoothly and completes the workout.

  • 5 Simple Yoga Poses That Improve Flexibility Without Strain

    5 Simple Yoga Poses That Improve Flexibility Without Strain

    Yoga helps you become more flexible while improving your posture & releasing body tension. These benefits apply whether you just started or have practiced for years. Specific poses work on tight areas and gradually increase your range of motion. Regular yoga stretching improves how your body moves & supports mental health through focused awareness. Below are five straightforward yoga poses that build flexibility. Anyone can do these poses regardless of experience level. Practice them every day to see lasting improvements.

    Downward-Facing Dog (Adho Mukha Svanasana)

    Why it’s great for flexibility: Downward-Facing Dog is a classic yoga posture that works the entire body while deeply stretching key muscle groups. It mainly targets the hamstrings, calves, shoulders, and spine, helping to release stiffness and improve overall flexibility in the legs and lower back.

    How to do it: Start in a tabletop position with your hands under your shoulders and knees under your hips. Lift your hips upward and back, forming an inverted V-shape. Keep your arms straight, fingers spread wide, and shoulders relaxed. Press your heels gently toward the floor while lengthening your spine.

    Benefits: Lengthens the hamstrings, calves, and spine; supports better posture; builds full-body strength and flexibility.

    Forward Fold (Uttanasana)

    Why it’s great for flexibility: Forward Fold is a calming stretch that deeply targets the hamstrings, lower back, and neck. It helps elongate the spine and improve leg flexibility while encouraging mental relaxation and stress relief.

    How to do it: Stand upright with feet hip-width apart. Inhale to lift and lengthen the spine, then exhale as you hinge forward from the hips. Let your hands reach toward the floor, ankles, or shins. Keep a slight bend in your knees if needed to protect your lower back.

    Benefits: Improves flexibility in the legs and lower back; releases spinal tension; promotes calmness and mental clarity.

    Seated Forward Bend (Paschimottanasana)

    Why it’s great for flexibility: This seated posture offers a deep stretch for the hamstrings, spine, and lower back. It is especially beneficial for people who sit for long periods, helping counter tightness and poor posture.

    How to do it: Sit on the floor with both legs extended straight. Inhale to lengthen your spine, then exhale as you fold forward from the hips. Reach for your feet, shins, or use a yoga strap if needed. Keep your chest open and spine long.

    Benefits: Stretches the back and hamstrings; increases spinal flexibility; encourages relaxation and mindfulness.

    Butterfly Pose (Baddha Konasana)

    Why it’s great for flexibility: Butterfly Pose focuses on opening the hips and stretching the inner thighs and groin. It gently improves lower-body flexibility and supports better hip mobility.

    How to do it: Sit upright with your legs stretched forward, then bring the soles of your feet together. Let your knees drop outward and hold your feet with your hands. Gently press your knees toward the floor and, if comfortable, lean slightly forward.

    Benefits: Enhances hip mobility; stretches inner thighs and groin; supports better lower-body flexibility.

    Cobra Pose (Bhujangasana)

    Why it’s great for flexibility: Cobra Pose is a gentle backbend that opens the chest and stretches the spine and shoulders. It improves spinal flexibility while counteracting slouched posture.

    How to do it: Lie face down with legs extended and the tops of your feet resting on the mat. Place your hands under your shoulders, elbows close to your sides. Inhale and slowly lift your chest using your back muscles, keeping the neck relaxed and avoiding strain on the lower back.

    Benefits: Increases spinal and shoulder flexibility; opens the chest; supports healthier posture and back mobility.

  • 9 Simple Yoga Poses Suitable for All Ages and Fitness Levels

    9 Simple Yoga Poses Suitable for All Ages and Fitness Levels

    Yoga is a practice that works for everyone regardless of age. It helps people of all generations become more flexible and strong while improving balance and overall health. The great thing about yoga is that you don’t need special skills or expensive gear. You just need your body and a mat. Here are nine basic yoga poses that anyone can do. These poses will help improve your physical health and mental focus at any stage of life.

    Mountain Pose (Tadasana)

    Why it’s suitable for all ages: Mountain Pose may look simple, but it plays a key role in building correct posture, balance, and body awareness. It forms the base for many standing yoga poses and can be practiced safely by people of all age groups.

    How to practice: Stand upright with your feet together and arms resting alongside your body. Distribute your weight evenly through both feet, lift your chest gently, and lengthen your spine upward. Keep your core engaged and breathe slowly and steadily.

    Benefits: Enhances posture, strengthens leg muscles, and encourages mindfulness.

    Child’s Pose (Balasana)

    Why it’s suitable for all ages: Child’s Pose is a deeply calming posture that gently stretches the body while allowing complete relaxation. It’s ideal for beginners, seniors, or anyone needing a restorative break.

    How to practice: Begin on your hands and knees, then slowly sit your hips back toward your heels. Stretch your arms forward and lower your forehead to the mat, allowing your neck and shoulders to relax.

    Benefits: Gently stretches the back, hips, and thighs while calming the nervous system.

    Cat–Cow Pose (Marjaryasana–Bitilasana)

    Why it’s suitable for all ages: This flowing movement supports spinal health by increasing flexibility and releasing tension. It’s especially helpful for people who sit for long hours.

    How to practice: Come onto all fours with wrists under shoulders and knees under hips. Inhale to arch your spine and lift your gaze (Cow), then exhale as you round your back and tuck your chin (Cat). Move slowly with your breath.

    Benefits: Improves spinal mobility, eases back tension, and supports better posture.

    Downward-Facing Dog (Adho Mukha Svanasana)

    Why it’s suitable for all ages: Downward Dog offers a full-body stretch while gently strengthening muscles. It improves circulation, balance, and overall flexibility.

    How to practice: From all fours, lift your hips upward to form an inverted V-shape. Press your palms firmly into the mat, keep your spine long, and allow your heels to move toward the floor.

    Benefits: Strengthens arms and legs, stretches hamstrings, and improves posture.

    Warrior II (Virabhadrasana II)

    Why it’s suitable for all ages: Warrior II builds strength and stability while opening the hips and chest. It’s excellent for improving confidence and endurance.

    How to practice: Stand with feet wide apart, turning one foot outward. Bend the front knee while extending both arms parallel to the floor. Keep your shoulders relaxed and gaze forward.

    Benefits: Strengthens legs, improves balance, and increases hip flexibility.

    Tree Pose (Vrksasana)

    Why it’s suitable for all ages: Tree Pose challenges balance while promoting mental focus. It’s helpful for improving coordination and stability.

    How to practice: Stand tall and shift your weight onto one leg. Place the sole of the opposite foot on the calf or inner thigh, avoiding the knee. Bring hands together at the chest or raise them overhead.

    Benefits: Enhances balance, strengthens legs, and sharpens concentration.

    Seated Forward Bend (Paschimottanasana)

    Why it’s suitable for all ages: This calming stretch targets the lower body and spine, making it ideal for people who sit for extended periods.

    How to practice: Sit with legs extended straight ahead. Inhale to lengthen your spine, then exhale and gently fold forward, reaching toward your feet while keeping your back long.

    Benefits: Stretches hamstrings and spine while encouraging relaxation.

    Bridge Pose (Setu Bandhasana)

    Why it’s suitable for all ages: Bridge Pose is a mild backbend that strengthens the lower body and counteracts the effects of prolonged sitting.

    How to practice: Lie on your back with knees bent and feet flat on the floor. Press through your feet to lift your hips upward, keeping your shoulders grounded and neck relaxed.

    Benefits: Strengthens the lower back, glutes, and legs while opening the chest.

    Savasana (Corpse Pose)

    Why it’s suitable for all ages: Savasana allows the body and mind to fully relax and absorb the benefits of the practice. It’s an essential part of every yoga session.

    How to practice: Lie flat on your back with arms relaxed at your sides and palms facing upward. Close your eyes and focus on slow, natural breathing.

    Benefits: Promotes deep relaxation, reduces stress, and improves mental clarity.

  • Stop guessing: A massive 50-year study finally reveals when our bodies really start to age

    Stop guessing: A massive 50-year study finally reveals when our bodies really start to age

    A 47-year Swedish study set out to uncover when the human body truly starts to age by examining changes in fitness, strength, and muscle endurance throughout adulthood. The findings were eye-opening: physical decline can begin as early as age 35. However, there’s encouraging news — staying physically active can help slow this decline.

    How the Study Tracked Fitness Over Decades

    Conducted at the Karolinska Institutet and published as part of the Swedish Physical Activity and Fitness (SPAF) study, the research followed several hundred randomly selected men and women born in 1958. Participants underwent detailed testing to measure maximal aerobic capacity, muscular endurance, muscle power, and overall physical performance through a range of athletic assessments.

    Peak Physical Performance Comes Earlier Than Expected

    Researchers discovered that the general population experiences physical changes similar to those seen in elite athletes. In both groups, peak physical performance is typically reached before the age of 35, after which gradual declines become noticeable.

    Physical Activity Can Slow Performance Loss

    Importantly, the study also highlighted positive outcomes for those who increased their activity levels. Adults who became more physically active showed performance improvements of 5–10%, proving that regular movement can significantly slow down the loss of physical capacity.

    Expert Insight on Staying Active

    Maria Westerståhl, lecturer at the Department of Laboratory Medicine and lead author of the study, emphasized the importance of movement, stating that it is never too late to start being active. The findings show that while physical activity may not completely stop decline, it can meaningfully reduce its pace. Researchers are now working to understand why peak performance occurs around age 35 and how activity helps delay deterioration.

    What Comes Next in the Study

    The research is ongoing, and participants will be re-evaluated as they turn 68 years old. Scientists aim to connect changes in physical capacity with lifestyle choices, health factors, and underlying biological mechanisms.

  • Winter Nail Polish Shades Everyone Is Choosing for a Fresh Seasonal Update

    Winter Nail Polish Shades Everyone Is Choosing for a Fresh Seasonal Update

    Royal purple and ruby red remain standout choices for True Winter color palettes, while those who prefer neutral aesthetics still have a wide range of refined options. Cool-toned tastes now include an unexpectedly broad selection of crisp whites, reminiscent of sunlit snow. This same richness carries into layered gray variations and deep burgundy families such as cranberry, deep berry, and merlot. World champion nail artist and beauty educator Valeriia Telemaniuk shared with Byrdie that winter consistently brings renewed attention to timeless nail styles, including French manicures, cool grays, soft blues, and deep reds in both bold and softened finishes.

    Refined Chocolate Ganache Brown

    Once-trending brownie pudding nails are giving way to a more polished winter favorite: ganache brown. Nail artist and educator Sofiia Mazur describes this shade as a deep, indulgent color inspired by melted dark chocolate. Similar to tones like Red Iguana’s Ganache gel or Dazzle Dry’s Fringe, it feels warm, luxurious, and elevated. Ganache brown projects quiet confidence and pairs effortlessly with gold accessories, neutral wardrobes, and streamlined black ensembles.

    Soft and Muted Berry Shades

    This winter signals a shift toward grounded, deeper nail tones. Juanita Huber-Millet, founder and creative director of Townhouse Salons, notes increasing interest in espresso browns, soft mauves, and muted berry hues. These shades balance warmth with refinement, making them suitable for everyday wear. Subdued berry tones provide a softer alternative to classic bright reds, delivering depth and richness without overwhelming the overall look.

    Light Ocean Blue With Pearlescent Shine

    A light ocean blue finished with a gentle pearly sheen is emerging as a seasonal highlight. Nail professional Amy Ling Lin describes these tones as calming, luminous, and uplifting. Shades like Sundays Studio’s L09 introduce a refreshing contrast to darker winter palettes, while the pearl finish subtly reflects light, creating added dimension and elegance.

    Modern Cool Gray Neutrals

    Cool gray nails are becoming a winter staple for those seeking a refined neutral. According to OPI Global Ambassador Coca Michelle, this shade feels effortless, chic, and sophisticated, blending seamlessly with seasonal wardrobes. Cool gray also works well with mixed-metal jewelry. Notable options include OPI Peace of Mined, Case of Glamnesia, and Suzi Talks with Her Hands, each offering a sleek, adaptable finish.

    Timeless Deep Navy Blue

    Deep navy is widely viewed as an ideal post-holiday transition shade. This calming color carries smoothly through winter and into the New Year while remaining easy to wear. A true classic, navy suits both special occasions and everyday office looks. Popular choices include OPI Less is Norse, Havin’ a Candy Ol’ Time, and Suzi & the Arctic Fox.

    The Shift Toward Barely-There Nails

    As winter deepens, many are choosing nail colors that convey calmness and clarity. Huber-Millet highlights growing interest in soft milky shades, cool neutrals, and subtle pastels. Colors such as Coconut Milk, Glazed Marshmallow, and Milkshake from Townhouse’s Flawless Collection feel clean, restorative, and fresh, offering a gentle departure from autumn’s darker tones.

    Warm and Deep Red Essentials

    A warm, deep red continues to be a winter must-have. Amy Ling Lin describes this shade as cozy, polished, and quietly powerful. It delivers instant warmth during colder months while maintaining a refined, festive feel. This versatile color transitions effortlessly from everyday elegance to holiday-ready styles.

    Earth-Inspired Metallic Accents

    Earth-toned metallic finishes are gaining momentum this winter. Sofiia Mazur points to shades like bronze, clay gold, and olive chrome, often paired with matte or stone-inspired textures. These finishes catch light gently, creating a refined glow that feels luxurious without appearing flashy, whether worn alone or as understated accents.

    Elegant Black Cherry Tones

    Black cherry nails bring subtle drama by combining deep darkness with a hint of red warmth. Mazur explains that this balance keeps the shade elegant and wearable. Long favored by fashion icons, black cherry works equally well with eveningwear and relaxed outfits like oversized blazers or vintage denim.

    Clean and Crisp Winter Whites

    Crisp white nails are making a noticeable return this season. Following Pantone’s introduction of Cloud Dancer, pure white shades such as Mineral Fusion Ice Breaker are seeing renewed attention. This clean, modern color echoes snowy landscapes and frosty mornings, reinforcing white as a defining element of winter minimalism.

    Soft Gray-Lavender Blends

    Gray-lavender shades combine cool gray foundations with a subtle touch of purple, making them especially suited to winter. Telemaniuk notes that shorter days and cooler moods are drawing interest toward muted, soothing tones like this. Gray-lavender feels modern, minimal, and refined, offering a versatile option for the colder season.

  • Dermatologists Depend on These Underrated Skincare Products Despite Their Plain Packaging

    Dermatologists Depend on These Underrated Skincare Products Despite Their Plain Packaging

    Let’s be realistic: a skincare product’s success often depends as much on its presentation as on its performance. In today’s crowded beauty market, visibility matters, and products with sleek packaging and heavy marketing budgets are far more likely to go viral and reach mass sales.

    That said, while brands like Rhode and Tatcha deserve their praise, they are far from the only formulas delivering results. Many low-profile brands and no-frills formulations perform just as well—sometimes even better—despite lacking aesthetic appeal or social media hype. A product not looking chic on your shelf doesn’t mean it isn’t among the best skincare solutions available.

    With this perspective, I consulted respected industry experts to identify nine so-called “unsexy” skincare essentials that dermatologists consistently recommend. From multi-tasking barrier creams to ultra-gentle cleansers, these are reliable formulas worth your money, regardless of packaging trends or online popularity.

    Dermatologist-Approved Skincare Staples That Truly Perform

    Aestura Atobarrier 365 Cream

    A cult favourite in South Korea, Aestura’s Atobarrier 365 Cream is designed to repair the skin barrier without clogging pores or feeling heavy. While the packaging may seem underwhelming, the formula delivers deep hydration, barrier reinforcement, and overnight recovery support. Multiple dermatologists recommend it for stressed or compromised skin, especially when irritation or inflammation is present.

    La Roche-Posay Toleriane Dermo-Cleanser for Sensitive Skin

    This cleanser proves that simple formulas work best. Free from harsh actives, it gently removes impurities while maintaining skin comfort and barrier integrity. Its milky texture cleanses effectively without stripping, making it ideal for daily use and suitable for sensitive or acne-prone skin, especially as part of a double-cleansing routine.

    Environ Youth+ Serience Night Serum

    Quietly effective and science-backed, this night serum targets skin fatigue and early signs of ageing. Enriched with antioxidants and a Malachite-Neuropeptide Complex, it helps soften fine lines while restoring vitality. It’s particularly beneficial when skin appears dull, tired, or depleted.

    Epaderm Cream

    This pharmacy staple may lack glamour, but it’s highly effective for chronic dryness and skin conditions. Frequently recommended for concerns like keratosis pilaris and eczema-prone skin, it offers reliable moisture support without unnecessary ingredients—all at a very accessible price point.

    Cetaphil Gentle Skin Cleanser

    A longstanding favourite in dermatology, this cleanser is fragrance-free, non-stripping, and suitable for sensitive or eczema-prone skin. While understated in appearance, it delivers consistent results and pairs perfectly with drying acne treatments by maintaining long-term skin balance.

    Clinisoothe Skin Purifier

    Powered by hypochlorous technology, this spray helps protect against impurities while calming inflamed or acne-prone skin. Applied after cleansing, it supports breakout prevention and skin recovery. Though far from flashy, its soothing benefits make it a trusted staple in sensitive skincare routines.

    Eucerin Aquaphor Soothing Skin Balm

    A true dermatology classic, this occlusive balm creates a protective barrier that locks in moisture and supports skin healing. It’s widely used for cracked lips, dry cuticles, post-procedure care, and areas of severe irritation, making it one of the most versatile products available.

    Vanicream Moisturizing Cream

    Ideal for skin that’s post-procedure or highly reactive, Vanicream is known for its gentle formulation and dependable hydration. Free from unnecessary additives, it’s frequently recommended for sensitive skin and recovery periods following treatments like injectables or microneedling.

    Advanced Nutrition Programme Skin Accumax

    While not a topical product, these supplements play a valuable role in supporting acne-prone skin. Formulated with vitamins A, C, and E alongside phytonutrients, they help enhance the results of topical routines. Often overlooked in favour of trend-driven alternatives, their low-key formulation delivers meaningful internal support.

  • Tricky Eye Challenge: Can You Spot the 3 Hidden Clues in the Painter Pictures in 7 Seconds

    Tricky Eye Challenge: Can You Spot the 3 Hidden Clues in the Painter Pictures in 7 Seconds

    Do you enjoy puzzles that engage your mind while keeping things fun and exciting? If yes, this classic Spot the Difference challenge is perfect for you. In this activity, your goal is to find three hidden differences in a painter’s image within just 7 seconds. While it may seem simple at first, the ticking clock turns it into a real test of focus, speed, and attention to detail. Get ready to see how sharp your observation skills really are.

    Why Spot the Difference Puzzles Are So Enjoyable

    Spot the Difference puzzles are among the most popular visual games because they challenge players to compare two almost identical images. At first glance, everything appears the same. However, with closer inspection, small visual changes begin to emerge.

    Beyond entertainment, these puzzles serve as an effective mental workout. Regularly playing them helps strengthen visual awareness, memory, and concentration. The more you practice, the more efficiently your brain learns to recognize subtle details.

    The 7-Second Challenge: Find 3 Differences Quickly

    This version of the puzzle raises the difficulty by adding a strict 7-second time limit. Your task is to identify three subtle differences in a painter-themed image before time runs out. The images may look identical at first, but careful observation reveals small changes hidden in plain sight.

    The pressure of the countdown makes the experience even more thrilling. Spotting all the differences within the time limit can feel incredibly rewarding, especially when every second counts.

    How Spot the Difference Puzzles Benefit Your Brain

    Playing Spot the Difference puzzles regularly can improve several important mental skills. Here are some key benefits:

    1. Sharper Attention to Detail

    These puzzles train your brain to detect tiny visual variations between similar images. Over time, this enhances your ability to notice small details, which can be useful in everyday tasks such as reading, working, and problem-solving.

    2. Faster Visual Processing

    The short time limit encourages your brain to process visual information quickly. This helps improve reaction speed and decision-making, especially in situations that require rapid visual assessment.

    3. Stronger Focus and Concentration

    To succeed, you must stay fully engaged with the image. The challenge promotes deep concentration and minimizes distractions, skills that are valuable in work, study, and daily life.

    4. Better Memory Retention

    As you compare both images, your brain actively remembers visual details. This strengthens short-term memory and improves your ability to retain and recall visual information.

    5. Improved Mental Agility

    Finding differences under time pressure enhances quick thinking and mental flexibility. These abilities are especially useful in high-pressure situations where fast decisions are required.

    The Three Hidden Differences in the Painter’s Image

    Let’s break down the three differences hidden in the painter’s image. If you missed any, here’s what to look for:

    1. Paint Roller Detail

    In the first image, the paint roller appears completely clean. In the second image, however, there is a small blue spot on the roller. This minor color change is easy to miss without careful observation.

    2. Door Handle Design

    The second difference appears on the door handle. One image includes a small decorative element, while the other does not. This subtle change blends into the background, making it tricky to spot quickly.

    3. Painter’s Overalls

    The final difference is found on the painter’s outfit. In one image, the overalls feature a button on the strap, while in the other image, the button is missing. It’s a small detail, but it makes all the difference.

    Tips to Spot Differences More Quickly

    If you found the challenge difficult, these tips can help you improve your performance:

    1. Scan One Area at a Time

    Instead of looking at the entire image at once, divide it into sections. Focus on one area at a time, such as clothing, tools, or background elements.

    2. Watch for Tiny Changes

    Many differences involve color shifts, missing items, or altered shapes. Paying attention to small details can make a big difference.

    3. Trust Your Instincts

    If something feels off, trust that feeling. Your brain often recognizes visual inconsistencies before you consciously identify them.

    4. Practice Consistently

    Like any skill, observation improves with practice. Regularly solving these puzzles will help you become faster and more accurate over time.

    Final Thoughts: How Did You Perform?

    Were you able to find all three differences within 7 seconds? If yes, well done—you’ve demonstrated strong observation and quick thinking. If not, don’t be discouraged. With continued practice, your focus and attention to detail will steadily improve.

    Spot the Difference puzzles are an enjoyable way to challenge your mind while sharpening essential cognitive skills. Keep practicing, stay confident, and see how quickly you can solve the next one.