Author: admin

  • 4 Therapeutic Yoga Poses That Help Reduce Chronic Inflammation and Support Healing

    4 Therapeutic Yoga Poses That Help Reduce Chronic Inflammation and Support Healing

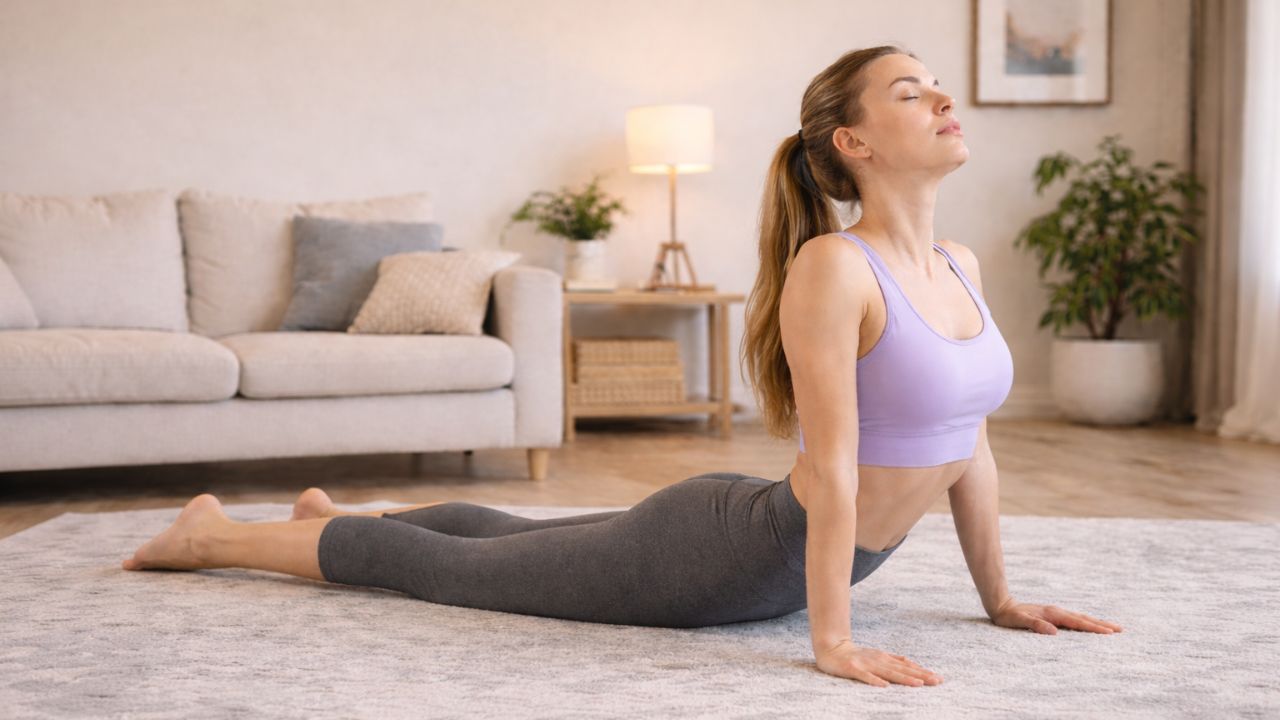
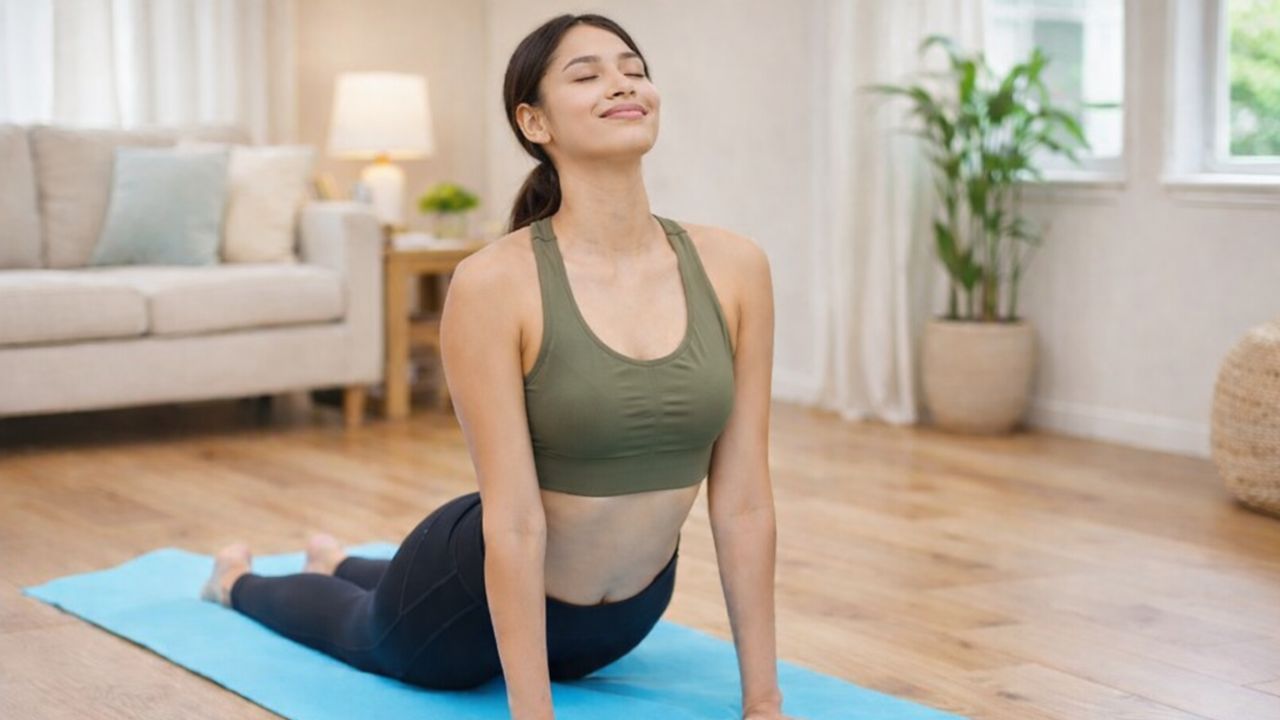
    Chronic inflammation is often experienced as a quiet, ongoing strain on the body. It may appear as joint stiffness, muscle aches, digestive discomfort, persistent fatigue, or a general sense of physical unease. While medication and nutrition are important factors, gentle movement can be equally supportive. When practiced slowly and regularly, yoga stretches help calm the nervous system, enhance circulation, and ease inflammatory responses. The most effective approach focuses on relaxation over effort. These four therapeutic yoga stretches are widely recognized for supporting the body’s natural healing process while remaining suitable for most individuals.

    Why Gentle Yoga Can Help Reduce Inflammation

    Inflammation is strongly connected to chronic stress, limited circulation, and restricted movement. When the body stays tense, stress hormones remain elevated, which can aggravate inflammatory conditions. Gentle yoga movements stimulate the parasympathetic nervous system, commonly known as the rest-and-repair response. This shift allows muscles to relax, blood flow to improve, and internal systems to operate more efficiently. With consistent practice, this calming effect may help lower ongoing inflammation and minimize flare-ups. The stretches below emphasize slow breathing, supported postures, and mindful awareness, making them especially therapeutic.

    Child’s Pose for Deep Whole-Body Relaxation

    Child’s Pose is one of the most restorative yoga stretches and is especially helpful for calming inflammation linked to stress and fatigue. It gently lengthens the hips, lower back, and shoulders while encouraging slow, steady breathing.

    To practice, kneel on the floor with your knees slightly apart and lower your hips toward your heels. Fold forward, resting your torso over your thighs. Extend your arms in front of you or allow them to relax alongside your body. Place your forehead on the mat or on a cushion for support. Remain here for one to three minutes, breathing evenly and without effort.

    This posture helps release tension in the spine and hips, areas where inflammation often develops due to prolonged sitting or poor posture. Gentle abdominal compression may also support digestive function, which plays a role in regulating inflammatory responses.

    Supported Bridge Pose for Circulation and Joint Comfort

    Supported Bridge Pose provides the benefits of a mild backbend without placing strain on the spine or joints. It encourages healthy circulation and helps counter inflammation caused by stiffness and limited mobility.

    Lie on your back with your knees bent and feet flat on the floor. Lift your hips slightly and place a yoga block or firm cushion beneath your sacrum. Allow your hips to rest fully on the support without engaging the muscles. Keep your arms relaxed at your sides and let the chest open naturally. Hold this position for one to two minutes while maintaining calm, steady breathing.

    This stretch enhances blood flow to the spine and pelvis and gently stimulates the endocrine system, which is important for inflammation regulation. Because the pose is passive, it allows the body to release tension without effort, making it suitable for those experiencing chronic pain or joint sensitivity.

    Seated Forward Fold to Calm Internal Inflammation

    Seated Forward Fold is a soothing stretch that targets the back body while also calming the nervous system. It can be especially beneficial for individuals whose inflammation is connected to digestive or autoimmune concerns.

    Sit on the floor with your legs extended straight ahead. Inhale to lengthen your spine, then slowly hinge forward from the hips. Rest your hands on your legs or feet without forcing the stretch. Keep your neck relaxed and allow the back to soften as needed. Hold the position for up to one minute with slow, controlled breathing.

    This posture gently massages the internal organs, supports digestion, and encourages circulation to areas that may feel tight or inflamed. Forward folds are also known for quieting mental activity, helping reduce stress-related inflammatory triggers.

    Supine Spinal Twist for Mobility and Detox Support

    Supine spinal twists are effective for easing inflammation by improving spinal mobility and supporting gentle detoxification. Twisting movements help release tension along the spine while stimulating circulation in the abdominal organs.

    Lie on your back with your knees bent. Draw your right knee toward your chest, then guide it across your body to the left side. Extend your right arm outward and gently turn your head to the right if it feels comfortable. Hold for several slow breaths before switching sides.

    This stretch helps reduce stiffness in the lower back and hips while supporting digestive and lymphatic flow. Because it is performed on the floor, it places minimal stress on the joints and is well suited for those managing chronic inflammation.

    Safe Practice Tips When Managing Inflammation

    When inflammation is present, gentleness matters more than intensity. Move slowly, avoid sharp or painful sensations, and use props whenever needed. Let deep, relaxed breathing guide each movement. Practicing these stretches five to six days a week, even for ten minutes at a time, can be more beneficial than pushing the body too hard occasionally. Listening to your body and resting when necessary is an essential part of healing.

    A Gentle Approach to Long-Term Comfort

    Chronic inflammation does not resolve overnight, but small daily habits can create meaningful change. Therapeutic yoga stretches offer a non-invasive way to reduce tension, improve circulation, and calm the systems that drive inflammation. By practicing these four poses regularly, you allow your body the space it needs to restore balance. Over time, this gentle routine can support greater comfort, improved mobility, and a stronger sense of overall well-being.

  • Eight Night Yoga Poses That Stretch the Body and Support Overall Health Recovery

    Eight Night Yoga Poses That Stretch the Body and Support Overall Health Recovery

    A peaceful nighttime yoga routine is one of the most effective ways to unwind after a demanding day and support overall well-being. Hours of sitting, physical activity, or mental stress often leave tension stored in the neck, shoulders, hips, and lower back. Practicing slow, gentle yoga before sleep helps loosen tight muscles, calm the nervous system, and prepare both the body and mind for restorative rest. These eight calming night yoga poses are easy to perform and ideal for ending the day feeling balanced and relaxed.

    Why Night Yoga Matters for the Body

    Night yoga emphasizes relaxation over effort. During sleep, the body repairs tissues, regulates hormones, and restores energy levels. When tension remains, this recovery process can be disrupted. Gentle stretching before bed helps soothe the nervous system, improve circulation, and ease discomfort that may interfere with sleep. With regular practice, night yoga supports flexibility, posture, and joint health over time.

    Preparing for a Restful Bedtime Yoga Session

    Choose a quiet, softly lit space and wear comfortable, loose clothing. Use a yoga mat or any supportive surface. Avoid practicing immediately after heavy meals, and keep movements slow and controlled. Maintain steady, deep breathing throughout the routine. Bedtime yoga is not about precision or intensity but about comfort, awareness, and releasing the day.

    Child’s Pose for Lower Back and Hip Relief

    Child’s Pose gently stretches the lower back, hips, and thighs while promoting mental calm. Kneel, sit back on the heels, and fold forward with relaxed arms. Allow breathing to slow naturally. This pose helps reduce fatigue and eases spinal pressure, making it ideal for preparing the body for rest.

    Seated Forward Bend for a Complete Back Stretch

    The Seated Forward Bend targets the spine, hamstrings, and shoulders, areas that often tighten during the day. Sit with legs extended and hinge forward gently from the hips. Keep the neck relaxed and avoid forcing the movement. This pose encourages circulation and supports spinal flexibility when practiced regularly at night.

    Supine Twist to Ease Spinal Tension

    Supine Twist is a calming posture that enhances spinal mobility and supports digestion. Lying on your back, bend one knee and guide it gently across the body while keeping the shoulders grounded. Practice on both sides. This slow twist releases stiffness and promotes healthy circulation.

    Knees-to-Chest Pose for Digestive Ease

    Knees-to-Chest Pose applies gentle pressure to the abdomen and lower back, helping relieve bloating and tension. While lying on your back, draw both knees toward the chest and breathe deeply. Light rocking can be added if comfortable. This pose supports digestive comfort and reduces lower body stiffness.

    Reclining Butterfly Pose for Hip Relaxation

    Reclining Butterfly Pose stretches the hips and inner thighs while encouraging deep relaxation. Lie on your back, bring the soles of the feet together, and let the knees fall open naturally. Pillows can be used for support. This pose improves hip mobility and eases tension from prolonged sitting.

    Legs Up the Wall Pose to Improve Circulation

    Legs Up the Wall Pose is ideal for soothing tired legs and calming the body before sleep. Lie on your back with legs extended vertically against a wall and arms resting comfortably at your sides. This posture enhances blood flow, reduces leg swelling, and relaxes the nervous system.

    Cat-Cow Pose for Gentle Spinal Movement

    When performed slowly, Cat-Cow Pose can be just as beneficial at night as it is in the morning. From hands and knees, alternate between rounding and arching the spine with the breath. This gentle movement releases spinal tension and maintains flexibility without overstimulation.

    Corpse Pose to Finish the Practice

    Corpse Pose allows the body to fully absorb the benefits of night yoga. Lie flat on your back with arms and legs relaxed. Focus on slow, natural breathing and let the body settle into stillness. This final pose signals the body that it is time to rest and recover.

    Breathing Techniques That Support Night Yoga

    Deep nasal breathing that expands the belly helps relax muscles and quiet the mind. Longer, slower exhalations reduce stress hormones and guide the body into a deeper state of calm. During nighttime yoga, breathing should always remain smooth, gentle, and unforced.

    How Often to Practice Night Yoga

    Practicing night yoga four to six times per week can deliver noticeable results. Even sessions lasting ten to twenty minutes may improve flexibility and sleep quality. Consistency is more important than length. Over time, the body learns to relax more quickly and recover more efficiently each night.

    Common Bedtime Yoga Mistakes to Avoid

    Avoid fast movements or strong poses that overstimulate the nervous system. Never push stretches beyond a comfortable range, especially before sleep. Limit screen exposure during practice to preserve a calm atmosphere. Night yoga should always feel soothing and supportive, not demanding.

    Final Thoughts on Night Yoga for Overall Wellness

    These eight simple night yoga poses can significantly improve how the body feels the following morning. By gently stretching muscles, relaxing the spine, and calming the mind, nighttime yoga supports physical recovery and long-term health. When practiced with patience and awareness, it becomes a powerful habit for relaxation, flexibility, and overall well-being.

  • Six Chest Opening Yoga Poses That Improve Oxygen Intake and Posture After 35

    Six Chest Opening Yoga Poses That Improve Oxygen Intake and Posture After 35

    After the age of 35, many people begin to notice gradual changes in breathing capacity, posture, and overall energy. Extended desk work, lower physical activity, daily stress, and habitual shallow breathing can slowly reduce mobility in the chest area. When the chest tightens, the lungs are unable to expand fully, often leading to fatigue, upper body stiffness, and a mild sense of breathlessness during routine tasks. Chest opening yoga poses offer a gentle yet effective way to create space in the upper body and support healthier oxygen intake without placing strain on the body.

    Why Chest Tightness Often Develops After 35

    As the body ages, muscles and connective tissues naturally lose some of their elasticity. When this is combined with prolonged sitting, frequent screen use, and limited upper body movement, the chest and shoulders often begin to round forward. This posture restricts rib cage expansion and places added pressure on the lungs. Stress further contributes by promoting shallow breathing patterns, which limits full lung engagement. Chest opening yoga counteracts these effects by encouraging upright alignment, deeper breathing, and relaxed upper body muscles.

    How Chest Opening Yoga Enhances Oxygen Intake

    Chest opening poses gently stretch the muscles surrounding the ribs, shoulders, and upper spine. This added space allows the lungs to expand more freely during inhalation. These poses also help retrain breathing habits by promoting slow, deep breaths into the chest. Improved posture and circulation support more efficient oxygen delivery throughout the body. With regular practice, many people experience better stamina, improved focus, and greater respiratory comfort.

    Mountain Pose with Heart Lift for Breath Awareness

    Mountain Pose with a subtle heart lift may appear simple, yet it forms the foundation for healthier breathing. Standing tall with the chest gently lifted and the shoulders relaxed opens the front of the body. This alignment supports fuller breaths without tension. Practicing this pose with steady, mindful breathing helps retrain posture and increases awareness of chest movement during each inhale and exhale.

    Cobra Pose to Expand the Rib Cage

    Cobra Pose is a powerful chest opener that supports lung expansion. While lying on the stomach, gently lifting the upper chest stretches the front of the body and opens the rib cage. Keeping the elbows softly bent and the shoulders relaxed ensures the pose remains supportive rather than strained. When paired with slow breathing, Cobra Pose encourages deeper inhalation and strengthens the muscles that promote upright posture.

    Bridge Pose for Chest Opening and Circulation

    Bridge Pose provides a gentle chest opening while also strengthening the back and hips. As the hips lift, the chest naturally rises and expands. This position promotes healthy blood flow to the upper body and supports improved oxygen delivery. Practicing Bridge Pose with calm breathing helps counter rounded shoulders and encourages long-term chest mobility.

    Seated Chest Expansion for Everyday Use

    Seated Chest Expansion is a practical pose that fits easily into daily life. Sitting upright and gently drawing the shoulders back opens the chest without compressing the lower back. Interlacing the fingers behind the body or resting the hands back creates space across the front of the shoulders. This pose is especially useful for those who sit frequently and want a simple, effective daily chest opener.

    Puppy Pose for Gentle Shoulder and Chest Release

    Puppy Pose delivers a deep chest opening stretch without placing pressure on the lower body. With the hips lifted and the chest lowering toward the floor, this pose stretches the shoulders, upper spine, and rib cage. It encourages deep breathing into areas that often feel tight or restricted. Puppy Pose is ideal for improving oxygen intake while keeping the practice calm and controlled.

    Supported Fish Pose for Relaxed Deep Breathing

    Supported Fish Pose is one of the most soothing chest opening poses, particularly after 35. Placing a cushion or folded blanket beneath the upper back allows the chest to open passively. This support minimizes strain while encouraging slow, deep breaths. Many people find this pose helpful for enhancing breathing capacity and relieving upper body tension at the end of the day.

    Safety Tips for Chest Opening Yoga After 35

    • Warm up the body before attempting deeper chest opening poses
    • Move slowly and avoid forcing the chest into extreme positions
    • Use props to support the back and neck when needed
    • Prioritize steady breathing over pose depth
    • Choose gentle, consistent practice over intensity

    Final Thoughts on Yoga and Better Oxygen Intake

    After 35, maintaining healthy breathing and posture becomes increasingly important. Chest opening yoga poses offer a safe, natural way to improve oxygen intake while easing upper body tension. With patience and mindful practice, these poses help restore comfort in breathing, support energy levels, and strengthen the connection between body and breath. Over time, the chest feels more open, breathing becomes deeper, and everyday movements feel lighter and more comfortable.

  • 14 Yoga Poses That Help Open Tight Hips and Improve Mobility

    14 Yoga Poses That Help Open Tight Hips and Improve Mobility

    Tight hips affect many people who spend hours sitting or doing the same movements repeatedly. When your hips become stiff they can cause discomfort and bad posture & sometimes even pain in your lower back. Yoga offers an excellent solution for releasing this tension while building flexibility & better movement in your hip area. The 14 yoga poses described here focus on opening your hips and stretching the muscles around them to boost your overall flexibility.

    Child’s Pose (Balasana)

    Why it works for hip flexibility: Child’s Pose stretches your lower back and hip area while loosening tight thigh muscles. This makes it a good beginner pose for improving hip mobility.

    How to perform it: Start in a kneeling position with your hands flat on the floor. Sit back slowly until your bottom moves toward your heels and stretch your arms forward. Rest your forehead on the mat & breathe slowly and deeply.

    What you gain: This pose stretches your hips & thighs while releasing lower back tension. It also helps calm your mind and body.

    Pigeon Pose (Eka Pada Rajakapotasana)

    Why it works for hip opening: Pigeon Pose ranks among the most effective stretches for loosening hip flexors & releasing tension in the glutes and lower back. How to perform it: Start on your hands & knees in a tabletop position. Move one knee forward and position it behind the corresponding wrist. Straighten the other leg behind you & gently lower your hips down toward the ground. Stay in this position for multiple breaths before switching to the other side. Benefits: This pose provides a deep hip opening while stretching the glutes and hip flexors along with the lower back muscles.

    Lizard Pose (Utthan Pristhasana)

    Why it works for hip opening: Lizard Pose focuses on the hip flexors and groin area to provide an intense stretch that loosens tight hips. How to perform it: Begin in a high plank position & bring one foot forward to land outside your hands. Drop your hips down while keeping your back leg straight. For a more intense stretch you can lower your forearms to the floor. Benefits: This pose stretches the hip flexors & groin and hamstrings while building better flexibility.

    Butterfly Pose (Baddha Konasana)

    Why it works for hip flexibility: Butterfly Pose loosens tightness in your inner thighs and groin area while creating more space in your hip joints. How to perform it: Start by sitting down with the soles of your feet pressed together. Let your knees fall open to each side. Grab your feet with both hands and apply light pressure to push your knees closer to the ground. For a deeper stretch you can hinge forward from your hips. Benefits: Increases hip mobility and flexibility while targeting the inner thigh muscles and groin region.

    Reclining Bound Angle Pose (Supta Baddha Konasana)

    Why it works for hip opening: This version of Butterfly Pose gently stretches your hips while helping your body relax and unwind. How to perform it: Start by lying flat on your back. Press the bottoms of your feet together & allow your knees to drop naturally toward the floor on each side. Place your arms comfortably beside your body with your palms turned upward and take slow deep breaths. Benefits: Stretches the hip and groin areas while releasing tension throughout your lower body.

    Happy Baby Pose (Ananda Balasana)

    Why it works for hip flexibility: Happy Baby Pose opens up the hip joints while stretching your groin area & inner thighs. It also helps loosen your lower back muscles. How to perform it: Start by lying flat on your back. Draw both knees up toward your chest. Reach up & hold the outside edges of your feet with your hands while keeping your knees bent. Your hips should stay wide apart. Apply gentle pressure to push your knees down toward the ground. What you gain: This pose stretches your hip flexors and inner thigh muscles while releasing tightness in your lower back region.

    Low Lunge (Anjaneyasana)

    Why it works for hip flexibility: Low Lunge effectively stretches the hip flexors while building leg strength. This combination makes it excellent for releasing tension in tight hips. How to perform it: Begin by standing upright. Step one foot forward and bend that knee to form a right angle. Bring your back knee down to rest on the floor. Keep your hips facing forward and gently push them toward the front of your mat. For a deeper stretch you can lift both arms above your head. What it does: This pose lengthens the hip flexors and stretches both the quadriceps & hamstrings. It also builds strength throughout the legs.

    Crescent Lunge (Anjaneyasana)

    Why it works well for hip flexibility: Crescent Lunge builds on the basic Low Lunge position by creating additional stretch through the hip flexor muscles. This pose also helps develop better balance and core stability during practice. How to perform it: Begin by standing upright with feet together. Take a large step forward with one foot and lower into a lunge by bending the front knee. Your back leg should remain extended with the heel off the ground. Lift both arms straight up toward the ceiling & slowly push your hips forward to deepen the stretch. Benefits: This pose increases hip mobility & flexibility. It lengthens tight hip flexor muscles and builds strength throughout the leg muscles.

    Squat Pose (Malasana)

    Why it works well for hip flexibility Crescent Lunge takes the basic Low Lunge position and adds more stretch to your hip flexor muscles. It also improves your balance and strengthens your core while you hold the pose. # How to perform it Stand up straight & take a big step forward with one foot. Bend your front knee and keep your back leg straight with the heel lifted off the floor. Raise both arms overhead and gently push your hips forward. # What you gain This pose makes your hips more mobile and stretches your hip flexors while making your leg muscles stronger.

    Seated Forward Bend (Paschimottanasana)

    Why it works for hip flexibility: This pose mainly targets the hamstrings but also loosens tight areas in your hips and lower back. How to perform it: Start by sitting on the floor with both legs stretched out in front of you. Take a breath in while sitting up tall and lengthening through your spine. As you breathe out fold forward from your hips and reach your hands toward your feet. Try to maintain a straight back as you go deeper into the position. Benefits: This stretch works your hamstrings & hip muscles while also releasing tension in your lower back. It helps improve overall flexibility in these areas.

    Lunge with a Twist (Parivrtta Anjaneyasana)

    Why it works for hip flexibility: This position targets your hips and groin area while also stretching your lower back. The twisting motion helps your spine move more freely. How to perform it: Start in a Low Lunge position. Put the hand opposite to your front leg down on the ground. Turn your upper body toward your bent leg and reach your other arm straight up toward the ceiling. Try to keep your hips facing forward while you twist deeper. What you gain: Your hips become more open and flexible. Your groin muscles get a good stretch. Your spine gains better range of motion.

    Warrior II (Virabhadrasana II)

    Why it works well for hip flexibility: Warrior II builds leg strength & increases hip and chest mobility at the same time. This pose effectively enhances your flexibility and helps you maintain better balance. How to perform it: Stand with your feet positioned far apart and rotate one foot so it points outward. Lower your body by bending the front knee until it forms a right angle while your back leg stays extended. Stretch both arms out to the sides so they are level with the floor & look straight ahead. What you gain: Better hip mobility and stronger leg muscles along with improved balance.

    Frog Pose (Mandukasana)

    Why it works well for hip flexibility: Warrior II strengthens your legs & opens up your hips & chest at the same time. This pose improves your flexibility and helps you balance better. How to perform it: Stand with your feet wide apart and turn one foot outward. Bend your front knee to create a right angle while keeping your back leg straight. Extend both arms out to your sides at shoulder height and gaze forward. What you gain: Greater hip mobility & stronger legs with better balance.

    Bound Angle Pose (Baddha Konasana)

    Butterfly Pose for Hip Flexibility This seated position effectively stretches your hips and groin area while making your inner thighs more flexible. Start by sitting on the floor with your legs straight out in front of you. Bring the bottoms of your feet together so they touch. Let your knees fall naturally to the sides. Grab your feet with both hands and apply gentle pressure to push your knees closer to the ground. This pose helps open up tight hips and stretches the groin muscles. It also works on increasing flexibility in your inner thigh area.

  • 11 Gentle Yoga Stretches for Beginners to Boost Flexibility Safely and Comfortably

    11 Gentle Yoga Stretches for Beginners to Boost Flexibility Safely and Comfortably

    Starting yoga without being naturally flexible can seem scary at first. You might think you won’t do the poses right or that you’ll struggle to keep up with everyone else in class. But here’s the truth: yoga was made for regular people with regular bodies. You don’t need to be flexible before you start yoga. Flexibility comes from practicing yoga regularly. When you begin with easy stretches designed for beginners you allow your body to adjust at its own pace without forcing anything. If you stick with it you’ll notice real changes in how your body moves and feels during normal daily activities. The most important thing to remember is that yoga focuses on getting better over time rather than being perfect right away. Each stretch you do and each breath you take helps improve your movement and makes you feel better overall.

    Why Gentle Yoga Is the Safest Starting Point for New Flexibility Gains

    Beginning with a gentle approach is a wise decision when you start any flexibility program. Basic yoga stretches help you concentrate on correct positioning and understanding your body. This approach lowers your chance of getting hurt and creates a solid base for improvement down the road. Easy poses help you build a stronger connection between your mind and body. When the movements are simple you can better observe how your body reacts and recognize your boundaries & when you should back off. This understanding creates confidence and that confidence encourages you to keep practicing regularly. Studies on exercise patterns show that people who begin with reasonable routines have much better success staying with their program. Starting with difficult workouts too soon typically results in muscle pain or exhaustion or injuries. A steady progression leads to better long-term commitment and superior outcomes. When you learn fundamental stretches first you get your muscles and joints and nervous system ready for harder yoga poses in the future. This makes your practice safer & easier to maintain over time and more pleasant overall.

    11 Beginner-Safe Yoga Stretches That Gradually Unlock Full-Body Flexibility

    Beginner Yoga Stretches for Tight Muscles This collection of beginner yoga stretches helps loosen up areas that commonly feel tight. You’ll work on your neck and back along with your hips & hamstrings. The key is to move slowly and breathe steadily while staying comfortable. Don’t worry about how deep you can stretch.

    Slow Neck Circles to Release Daily Tension

    Neck Circles What it works:This exercise targets your neck muscles and the upper part of your shoulders.

    How to perform it: Move your head in gentle circular motions while breathing steadily throughout the movement.

    Why it helps:This stretch releases tightness that builds up from looking at screens and sitting at a desk all day. It also helps your neck move more freely.

    Tips for beginners:Make sure you move slowly and stay in control of the motion. Never push your neck beyond what feels comfortable.

    Seated Spinal Twist for a Looser, Healthier Back

    Seated Spinal Twist What it works:This exercise targets your spine along with your waist and the oblique muscles on the sides of your torso.

    How to perform it: Start by sitting in a comfortable position with your back straight. Slowly turn your upper body toward one side while keeping your hips facing forward. Hold this position briefly and then rotate back to center before repeating the movement on the opposite side.

    Why it helps: Regular practice of this twist promotes better spinal mobility & helps reduce stiffness in your back. It gently stretches the muscles surrounding your spine and can provide relief from tension that builds up from sitting for long periods.

    Advice for beginners: Place your hands on your knees or armrests to provide gentle support during the movement. Only rotate as far as your body allows without forcing the stretch or experiencing discomfort. Your range of motion will naturally increase over time with consistent practice.

    Cat–Cow Flow to Wake Up the Spine Gently

    Cat-Cow Stretch What It Works: This exercise targets your spine while engaging your core muscles and shoulders.

    How to Perform It: Start by positioning yourself on your hands and knees on the floor. From this base position you will move between two shapes. First round your back upward like a cat that feels threatened. Then reverse the movement by arching your back and letting your belly drop toward the floor. Continue switching between these two positions in a steady rhythm.

    Why It Helps: The cat-cow stretch makes your spine more flexible and mobile. It also helps your body relax and release tension that builds up during the day.

    Advice for Beginners: Focus on coordinating your breathing with each movement. Inhale during one position and exhale during the other. Make sure you transition slowly between the two shapes rather than jerking or moving too quickly. This controlled approach helps you get better results and prevents strain.

    Child’s Pose for Deep Relaxation and Hip Ease

    Child’s Pose  What it works: This pose targets your lower back along with your hips and shoulders.

    How to perform it: Start by sitting back so your bottom rests on your heels. Then stretch your arms out in front of you or place them alongside your body.

    Why it helps: Child’s Pose provides deep relaxation while giving your spine a gentle stretch.

    Tip for beginners: Place cushions or a folded blanket under you if you need extra support.

    Thread the Needle Stretch to Open Shoulders Safely

    Thread the Needle Stretch Targets: Upper back shoulders, neck

    How to do it: Start on your hands and knees in a tabletop position. Take one arm and slide it underneath your chest toward the opposite side. Allow your shoulder and the side of your head to gently rest on the floor. Your other hand can stay planted on the ground for support or you can extend it forward. Hold this position while breathing deeply and then switch to the other side.

    Benefits: This stretch effectively releases built-up tension in your shoulders and upper back area. It helps improve mobility in your thoracic spine and can reduce stiffness from sitting or poor posture throughout the day.

    Beginner tip: If you feel uncomfortable or your shoulder doesn’t reach the floor easily, place a folded pillow or yoga block under your shoulder for extra support. This modification allows you to ease into the stretch without straining.

    Seated Butterfly Pose for Flexible Hips and Inner Thighs

    Targets: This stretch works your glutes & hips

    How to do it: Start by lying flat on your back on a comfortable surface. Bend both knees & keep your feet flat on the ground. Take your right ankle and place it on top of your left knee. Your right knee should point out to the side while your left foot stays planted. You can gently pull your left thigh toward your chest to deepen the stretch. Hold this position for about 30 seconds and then switch sides.

    Benefits: This stretch helps reduce tightness in your hips and relieves discomfort in your lower back. It’s especially useful if you sit for long periods during the day or feel stiffness after workouts.

    Beginner tip: Make sure to keep your raised foot flexed throughout the stretch. This means pulling your toes back toward your shin. Keeping your foot flexed protects your knee joint from unnecessary strain and helps you get the most out of the stretch without risking injury.

    Reclined Figure-Four Stretch for Gentle Hip Mobility

    Targets: This stretch works your glutes and hips

    How to do it: Start by lying flat on your back on a comfortable surface. Bend both knees and keep your feet flat on the ground. Take your right ankle and place it on top of your left knee. Your right knee should point out to the side while your left foot stays planted. You can gently pull your left thigh toward your chest to deepen the stretch. Hold this position for about 30 seconds and then switch sides.

    Benefits: This stretch helps reduce tightness in your hips and relieves discomfort in your lower back. It works well if you sit for long periods during the day or feel stiffness after workouts.

    Beginner tip: Make sure to keep your raised foot flexed throughout the stretch. This means pulling your toes back toward your shin. Keeping your foot flexed protects your knee joint from unnecessary strain and helps you get the most out of the stretch without risking injury.

    Knees-to-Chest Pose to Relax the Lower Back

    argets: Hips, inner thighs, lower back

    How to do it: Grip the backs of your thighs or your ankles and slowly open your hips outward.

    Benefits: This position helps release tightness in your hips and takes pressure off your spine.

    Beginner tip: If you cannot reach your feet easily hold behind your knees instead.

    Happy Baby Pose for Stress-Free Hip Opening

    Seated Forward Bend

    Targets: This pose works your hamstrings calves and spine.

    How to do it: Start by sitting up straight with good posture. Keep your back long as you fold forward from your hips. Let your upper body move toward your legs while maintaining length through your spine.

    Benefits: This stretch helps make your hamstrings more flexible over time. It also has a calming effect on your nervous system and can help you feel more relaxed.

    Beginner tip: If you’re new to this pose, it’s okay to keep a bend in your knees. Your main focus should be on keeping your spine long rather than trying to fold deeply. This approach protects your back and helps you build flexibility safely.

    Seated Forward Fold to Lengthen the Spine Calmly

    Standing Forward Bend Targets: Hamstrings back, shoulders

    How to do it: Bend forward from your hips while keeping your knees slightly bent. Let your arms hang down naturally without any tension. Your head and neck should be completely relaxed as you fold over.

    Benefits: This pose stretches the entire back side of your body from your heels up to your neck. It helps release physical tension and calms your nervous system. Many people find it reduces mental stress and anxiety.

    Beginner tip: Allow your body to hang heavy and let gravity pull you deeper into the stretch. Avoid bouncing or forcing yourself down. Stay still & breathe steadily instead.

    Clear Signs Your Body Is Ready for Deeper Yoga Poses

    After about six to eight weeks of regular practice you might see signs that your body is ready for something different. You can hold simple poses without much difficulty. Areas that used to feel tight now move more easily. You practice regularly every week. You pay more attention to how you breathe & position your body. You feel interested rather than nervous about learning new poses. When you reach this point you can try longer practice sessions or beginner flow classes. You can also experiment with small changes to poses you already know. This approach works better than moving directly to advanced yoga.

    Creating Lasting Flexibility—One Comfortable Stretch at a Time

    Flexibility takes time to develop and there is no way to rush the process. Being consistent and patient with your body will give you better results than trying to force quick progress. These basic yoga stretches help build a solid foundation for better movement and reduced tension over the long term. Continue practicing regularly and remember that each small step contributes to your overall progress.

  • Dermatologists Warn Frequent Hair Washing Can Throw Off Scalp Balance More Than Skipping Washes

    Dermatologists Warn Frequent Hair Washing Can Throw Off Scalp Balance More Than Skipping Washes

    In the early morning light, a young woman studies her reflection in the mirror. A towel rests on her shoulders, her hair already damp again. She washed it the night before dinner, yet she is about to wash it once more before work. The reason feels urgent: greasy roots and an important meeting where looking unkempt feels unacceptable.

    Her boyfriend, still half asleep, pauses at the doorway and asks, “Didn’t you just wash it?” She barely reacts. Instead, she reaches for the shampoo and scrubs hard, as if trying to erase stress itself. Her scalp turns pink, the ends squeak with dryness. What she doesn’t realise is that this daily ritual, repeated in millions of bathrooms, may be causing more damage than skipping a wash ever would. The issue isn’t dirt. It’s disruption.

    When freshly washed hair starts causing trouble

    In a crowded subway carriage, the scent of perfume, conditioner, and styling spray fills the air as commuters lean forward together. There are fresh blow-dries, damp ponytails, and hair still warm from straighteners. Everything looks polished and clean. Beneath the surface, dermatologists say, the scalp is quietly reacting with stress.

    Each wash removes a thin, protective layer of natural oils and beneficial microbes that keeps the scalp balanced. Occasional washing allows recovery. Daily washing, sometimes twice a day, leaves no time for reset. The scalp responds with more oil, itching, and flakes. What feels clean begins to feel uncomfortable.

    During a video call with dermatologists from three different countries, the response to one question was almost identical. How harmful is skipping a wash? “Almost not at all,” they said. “It’s the constant over-washing that breaks the balance.”

    A real case that revealed the problem

    A London-based dermatologist described a 29-year-old marketing manager who arrived convinced she had a serious scalp condition. She had red patches, tenderness along the hairline, and roots that turned greasy within hours of washing. She had tried clarifying shampoos, scalp scrubs, and daily detox routines found online.

    When asked how often she washed her hair, she hesitated before admitting, “Twice a day when I’m stressed.” Morning gym sessions followed by evening showers meant up to 28 washes a week. Her scalp microbiome—the natural mix of bacteria and yeast—was completely unsettled.

    The solution was simple but uncomfortable. Washing was reduced to three times a week, a gentle fragrance-free shampoo replaced harsh formulas, and she was asked to endure two weeks of “bad hair.” The first days brought extra oil and frizz. Then the redness faded, the greasiness slowed, and her scalp began regulating itself again.

    Why frequent washing keeps backfiring

    Dermatologists describe the cycle clearly. When too much oil is stripped away, the sebaceous glands treat it as an emergency and produce even more sebum. Hair feels greasy faster, leading to another wash. The more often this happens, the more the scalp believes it is under attack. Skipping a wash may leave hair slightly flat, but the protective barrier stays mostly intact.

    Frequent shampooing also disrupts the scalp’s microbiome. Certain yeasts linked to dandruff thrive when balance is disturbed. Ironically, people who shampoo repeatedly to fight flakes may be feeding the very issue they want to solve. Skipping a shampoo occasionally is far less dramatic for the scalp than we’ve been led to believe.

    Reducing washes without feeling uncomfortable

    Dermatologists often recommend a gradual approach. Stretch your routine by one extra day for two to three weeks. Daily washers can try every other day. Those washing every other day can move to every three days. The aim is not to stop washing, but to reduce the shock to the scalp.

    On non-wash days, rinsing with lukewarm water and gently massaging the scalp can remove sweat without stripping oils. Dry shampoo can be used sparingly at the roots, more like a touch-up than a solution. The less it’s relied on, the more the scalp can relearn its rhythm.

    Stylists also suggest having one reliable hairstyle for “in-between” days. Loose buns, low ponytails, or soft braids benefit from a bit of natural grip. Slightly unwashed hair often holds these styles better than freshly washed strands.

    Common habits that quietly worsen scalp health

    One frequent mistake is using harsh clarifying shampoos as an everyday product. These formulas are designed for occasional buildup removal, not daily cleansing. Overuse roughens the scalp, dries the hair, and signals distress to oil glands.

    Another issue is confusing scalp care with hair care. Conditioner is often applied too close to the roots, while shampoo is worked into the ends. Experts repeat a simple rule: shampoo focuses on the scalp; conditioner belongs on lengths and ends. Let the lather rinse through without scrubbing fragile tips.

    The third mistake is emotional. Many people equate “clean hair” with being a responsible adult. One bad hair day while washing less can trigger panic and a return to daily shampooing, preventing the scalp from ever adapting.

    “Skipping a wash is rarely the problem,” says Dr. Aurélie B., a French dermatologist. “What destabilises the scalp is repetition without rest. Another wash often feeds the issue instead of fixing it.”

    Practical steps for a healthier routine

    • Reduce washing gradually rather than making sudden changes.
    • Use gentle, sulfate-free shampoos for regular cleansing.
    • Apply conditioner only to lengths and ends, not the scalp.
    • Use dry shampoo sparingly, not as a daily habit.
    • Allow at least three weeks for the scalp to adjust.

    Redefining what “clean hair” really means

    It can be surprisingly freeing to realise that the scalp isn’t a surface that needs constant disinfecting. It is living skin with its own ecosystem and rhythm. When dermatologists say over-washing is more disruptive than skipping a wash, they are challenging our idea of cleanliness.

    Clean hair doesn’t have to mean stripped, squeaky, or heavily perfumed. It may look like roots that don’t feel tight, ends that move naturally, and a scalp that stays calm after showering. Paying attention to how your scalp feels, not just how it looks, reveals clear patterns.

    For some people, especially those with very oily scalps or living in humid, polluted cities, washing less may seem unrealistic. Still, dermatologists insist the balance point is often much lower than expected. Many people could wash less often if they allowed time for adaptation.

    More openly, people are beginning to admit they don’t wash their hair every day. This honesty creates space for a kinder standard of what looks presentable. In the end, the question isn’t how often hair should be washed, but when the scalp stops thriving. For many, the missed shampoo isn’t the real threat. The endless ones might be.

    Key takeaways

    • Over-washing vs skipping: Frequent washing disrupts the scalp more than missing a shampoo.
    • Scalp microbiome: Repeated shampooing upsets natural bacteria and yeast balance.
    • Gradual routines: Slow, gentle changes help restore long-term scalp stability.
  • Ditch sit-ups and crunches — blast your abs in 10 minutes with this 4-move standing core workout

    Ditch sit-ups and crunches — blast your abs in 10 minutes with this 4-move standing core workout

    There are many ways to develop core strength, and the good news for anyone who dislikes long workouts or traditional sit-ups is that you can shape stronger abs and obliques in just 10 minutes using this effective standing routine.

    This standing abs workout was created by fitness trainer Kat Boley and features four targeted movements. She recommends using a light-to-medium dumbbell during the session—she demonstrates with a 10lb weight—along with an extra-light looped resistance band.

    If you don’t have access to these tools, you can still complete the workout without them. However, adding resistance increases the challenge. For example, a can of food can be used as a dumbbell substitute if needed.

    Why Resistance Bands Are Worth Using

    Lightweight resistance bands are a useful addition to any core routine thanks to their portability and versatility. Picking up a looped band for this workout means you’ll likely find plenty of other uses for it in future training sessions.

    How the 10-Minute Standing Abs Workout Works

    The workout consists of three rounds of four core-focused exercises. Aim to complete 10–12 repetitions per movement, performing reps on both sides when required.

    By keeping a steady pace and minimizing rest between exercises, the full routine can easily be finished in under 10 minutes. That said, it’s important to rest longer if your body needs it.

    Kat Boley demonstrates each exercise in her Instagram post, so it’s helpful to watch all the movements in advance to understand proper form before starting.

    The Four Standing Core Exercises

    • Standing crunch with dumbbell and band
    • Standing side crunch with dumbbell
    • Alternating standing toe taps
    • Side-to-side toe taps with band

    Why This Workout Is Effective

    This routine is designed to engage the upper abs, lower abs, and obliques using just four movements. Completing all three rounds will leave you feeling the impact on your core strength.

    While floor-based exercises like sit-ups are effective, they can place strain on the neck for some people. Standing abs workouts offer a joint-friendly alternative, especially for beginners or those returning to fitness.

    Whether you’re training on the floor or standing, consistency is key. Aim to complete this workout or similar core sessions two to three times per week, then gradually move on to more challenging routines as your strength improves.

    If you enjoy this approach and want a longer session, a 20-minute standing core workout is a great next step to build on this foundation.

  • Grey Hair Coverage Shifts Toward New Natural Methods Gaining Rapid Attention

    Grey Hair Coverage Shifts Toward New Natural Methods Gaining Rapid Attention

    The Gentle Shift in Hair Coloring Gray hairs bring a decision point. You can either show them off or cover them up in a way that feels natural. People everywhere are looking for something different now. They want to reduce the appearance of gray hair and look more vibrant without using strong chemical dyes. A gentler method of coloring hair is becoming popular in homes around the world. This shift reflects a broader change in how we think about aging and beauty. Many individuals are moving away from harsh treatments that damage their hair over time. Traditional dyes often contain ammonia & other aggressive ingredients that strip hair of its natural moisture. These products can leave hair feeling dry and brittle after repeated use. The new approach focuses on nourishing the hair while gradually blending away the gray. This method respects the natural texture and health of your hair rather than fighting against it. The appeal of gentler coloring options extends beyond just avoiding chemicals.

    The Science Behind Grey Hair and Its Impact on Appearance

    Hair does not suddenly turn grey. Each strand emerges from a follicle in the scalp, where specialized pigment-producing cells called melanocytes inject colour into the hair shaft during growth. This pigment, primarily melanin, defines your natural hair shade. Over time, factors like ageing, genetics, long-term stress, and lifestyle habits can slow down or stop melanocyte activity. When this occurs, new hair grows with reduced or no pigment, appearing grey or white. Grey hair is therefore not discoloured old hair, but entirely new hair forming without melanin.

    The protein structure of hair, keratin, naturally has a pale yellow hue. As melanin disappears, this tone becomes visible, especially under bright lighting. Ageing also reduces scalp sebum, which keeps hair smooth and shiny. Lower oil production makes grey hair feel rougher, look dull, and frizz more easily. Changes in texture affect how hair bends and sits, explaining why grey strands often feel wiry or unruly.

    Visually, even a few white hairs against darker hair create a sharp contrast around the face. This contrast can highlight shadows, under-eye circles, and fine lines, making features appear more tired. For many, changes in texture and light reflection influence appearance more than the colour shift itself.

    Why Traditional Hair Dye Is Losing Popularity

    Permanent hair dye has long been the go-to solution for greys. These products open the hair cuticle with ammonia or similar agents, allowing pigment to penetrate deeply through an oxidising process. While the initial results can look polished, repeated applications often weaken hair, especially fragile grey strands. Damaged cuticles lead to tangling, dryness, and brittleness, and sensitive scalps may experience itching or irritation.

    Maintenance is another challenge. Permanent dye produces visible regrowth lines every few weeks, requiring regular salon visits. As beauty trends shift, many prefer gentler, lower-maintenance options that preserve natural dimension rather than demanding perfection. The focus is now on subtle changes rather than full coverage.

    Natural Darkening: From Kitchen Remedies to Hair Treatments

    Plant- and food-based colour boosters are gaining traction as part of a softer approach. These methods do not bleach or permanently alter hair structure. Instead, they sit on the surface, gradually creating a translucent layer of colour while enhancing shine. Among these, cocoa powder has emerged as particularly effective.

    Cocoa contains natural pigments and polyphenols that gently deepen light to medium brown hair over time. On grey strands, it softens stark whiteness, allowing hair to blend more naturally. Rather than acting like permanent dye, cocoa functions as a tinted conditioning treatment that gradually enhances colour while improving texture.

    How Cocoa Works to Darken Grey Hair

    Cocoa-based treatments coat the hair shaft, forming a soft brown veil that washes out gradually. Mixed with conditioners or oils, cocoa helps retain moisture and smooth the cuticle. Many notice that grey hair becomes shinier, less coarse, and easier to manage with regular use. The effect is subtle, creating a more harmonious overall tone rather than full coverage.

    A Simple At-Home Cocoa Treatment

    For short to medium hair, mix one tablespoon of pure, unsweetened cocoa powder with a generous amount of lightweight, oil-free conditioner. Stir until smooth and evenly coloured.

    Apply to freshly washed, towel-dried hair, focusing on visible grey areas such as temples, partings, and hairline. Use a wide-tooth comb for even distribution. Leave on for 15–20 minutes, then rinse with lukewarm water. Avoid shampooing immediately afterward, as this removes most surface pigment.

    Natural Hair Colour Result After Cocoa Application Recommended Usage Frequency
    Light Brown Visible warm tone boost, grey strands blend faster Apply 1–2 times weekly
    Medium Brown Enhances richness, greys appear naturally mixed Once per week
    Dark Brown / Black Adds shine with mild warmth, minimal colour shift Every 7–10 days for gloss effect
    Blonde May turn patchy or dull in tone Patch test advised or avoid use

    Can Cocoa Treatments Make You Look Younger?

    Grey hair alone does not define age. Haircut, skin quality, posture, and clothing all play a role. However, high contrast between dark hair and white strands can accentuate facial shadows and fine lines. By softening this contrast, cocoa treatments help create a more balanced and rested appearance.

    Younger-looking hair focuses on shine, hydration, and shape rather than complete grey coverage. Smooth, reflective hair frames the face, brightening the eyes and subtly lifting features. Reduced frizz around the face also enhances how skin looks both in person and on camera.

    Where Natural Methods Are Effective—and Where They Are Not

    Natural colour adjusters like cocoa, coffee, black tea, or sage work best for individuals with up to 40–50% grey who want blending rather than full coverage. These methods appeal to those who favour gradual change, warmer tones, and minimal upkeep. Dramatic shifts in one session are unlikely, as these treatments require repeated use and patience.

    Even natural methods carry some risk. Cocoa may trigger reactions in sensitive individuals, making a patch test essential. Over time, build-up may occur, so occasional use of a mild clarifying shampoo helps maintain shine and lightness.

    How This Trend Is Shaping Modern Beauty

    The rise of cocoa and similar treatments reflects changing beauty ideals. Uniform hair colour is no longer the sole marker of youth. Blended greys, soft tints, and translucent coverage now appear in fashion and social media, promoting individuality over strict correction.

    Many people now choose to soften greys without fully erasing them, combining natural tints with strategic cuts, scalp care, and nutrition. While supplements cannot reverse greying, nutrients such as omega-3s, iron, zinc, and B vitamins support healthy new hair growth.

    Complementary Gentle Options

    Cocoa treatments can be paired with mild methods like black tea or coffee rinses to deepen tone, or sage and rosemary infusions for subtle shading and scalp freshness. Rotating treatments prevents hair from appearing too warm or flat.

    Professional guidance can help too. Colourists now specialize in grey blending using low-impact dyes alongside plant-based glosses. Maintaining results at home with cocoa or tea masks extends time between salon visits and reduces chemical stress. Testing on a small hidden section first ensures the hair responds well.

  • I train my 72-year-old father using these 5 exercises for strength and longevity

    I train my 72-year-old father using these 5 exercises for strength and longevity

    When you purchase through links on our site we may earn an affiliate commission. Here’s how it works.

     I admit that I can be a bit pushy when it comes to giving my parents exercise advice. There are five strength exercises that I regularly encourage my loved ones to do so they can stay strong & mobile as they get older.

     You don’t need much equipment to do these exercises but I would suggest investing in a good set of kettlebells or adjustable dumbbells. This allows you to increase the resistance as you build strength over time. The ability to adjust the weight means the exercises will continue to challenge you since you can modify the load and the number of repetitions and sets based on your fitness level.

    If you’re ready to get started you can check out the exercises and their benefits below.

    Your calf muscles play an important role in keeping your lower body joints stable & they help you walk and run by pushing you forward. The tip-toe farmers walk is different from calf raises because it requires you to stay up on the balls of your feet the entire time you walk. This keeps your calf muscles contracted throughout the exercise.

     I recommend using lighter weights for this movement because your balance will be tested and you need to keep your body stable. This variation activates the smaller stabilizer muscles throughout your body including your core muscles. The technique involves walking at a consistent pace while holding two weights at your sides as shown in the video above. Then you lift up onto the balls of your feet and keep walking in that position. If you are just starting out you can switch between normal walking and tip-toe walking. When you feel more comfortable you can progress to walking on your tip-toes for the full distance.

    Prisoner Squats: A Full-Body Mobility Challenge Prisoner squats work your upper body more than regular squats while testing how well your thoracic spine can move. They also challenge the flexibility of your hips and the range of motion in your knees and ankles. All of these elements work together to help you maintain an upright position as you lower yourself down. Many people have a tendency to lean forward when they squat. This forward lean usually indicates limited mobility in key areas of the body.

    Prisoner squats are done by placing your hands gently behind your head as you squat down. Focus on pressing your weight into your heels & keeping your chest lifted while lowering your hips as close to the floor as possible. Occasionally I add variety by having people push their hips backward at the lowest point of the squat and then lean forward from the hips until their chest becomes parallel with the floor. This position resembles the bottom part of a good morning exercise and effectively works the hamstrings. Make sure to return to the regular squat position before standing back up. When you build more strength you can add challenge by wrapping a resistance band around your thighs or holding a weight behind your head.

    Split squats work well for beginners who struggle with lunges because you keep your feet in one position instead of stepping forward or backward with each repetition. This makes it much easier to stay balanced. You start by placing your legs in a split stance and then lower your back knee toward the floor before pushing yourself back up to the starting position. After you get comfortable with both feet on the ground you can try putting your back foot on an elevated surface. This makes the exercise harder and targets your glutes more effectively. Adding weights to each hand can actually help with balance while also increasing the challenge for your leg muscles. This extra resistance makes the lower body work harder during the movement. One effective technique is to slow down the lowering portion of the movement and then push up quickly. Taking three to four seconds or longer to lower yourself creates more time under tension for your muscles. This approach builds stronger legs and glutes efficiently. If you want to emphasize your glutes even more you can lean your torso slightly forward while maintaining a straight back throughout the exercise.

    Pike push-ups work your shoulders and triceps by using your own body weight in a vertical position. Think of it as doing an overhead press while upside down. You don’t need any equipment for this exercise and it challenges your upper body strength along with your hamstring and shoulder flexibility. Begin by getting into a downward dog position and move your hands and feet a bit closer to each other. Then shift your weight forward while keeping your hips elevated. Remember that this is different from a regular push-up so try to maintain a vertical angle. Lower the top of your head until it lightly touches the ground just ahead of your hands. Push yourself back up to the starting downward dog position.

    Overhead squats work your upper body more than prisoner squats and challenge your thoracic mobility and squat depth. Keep your chest up and back straight while holding your arms locked overhead near your ears.

    Start with bodyweight or light weights. I have my clients hold a barbell plate with both hands. For a harder version try holding weight in just one hand to challenge each side of your body separately.

    Maintain an upright torso as you squat and distribute your weight evenly through your feet using the tripod position. This means pressing through three points: your heels and your big toes and little toes. Watch out for your knees caving inward and your chest leaning forward. Gradually try to squat lower over time. Picture yourself holding a tray of drinks overhead that you need to keep steady.

    Sam Hopes works as a level 3 qualified trainer & holds a level 2 Reiki practitioner certification. She serves as the fitness editor at Tom’s Guide and is currently completing her Yoga For Athletes training course. Throughout her career Sam has contributed to numerous fitness brands and websites. She has worked with several Future brands including Live Science, Fit&Well Coach & T3. Her background includes coaching at fitness studios such as F45 and Virgin Active where she worked as a personal trainer. These days Sam focuses mainly on teaching outdoor bootcamps and specializes in bodyweight training, calisthenics and kettlebell workouts. She teaches mobility and flexibility classes multiple times each week. Sam believes that genuine strength develops through a comprehensive approach to physical training. Sam has participated in two mixed doubles Hyrox competitions held in London & the Netherlands. She completed her first doubles event with a time of 1:11.

  • Why Rosemary and Coarse Salt Belong Together in a Jar Inside Your Home

    Why Rosemary and Coarse Salt Belong Together in a Jar Inside Your Home

    Thick sea-salt crystals, a rosemary sprig pressed against the glass, tiny green needles suspended like snow. Someone twisted the lid, leaned in, and smiled without a word. The room already carried the warmth of roasted vegetables and garlic, but this scent was different. Cleaner, brighter. Like mountain air drifting through a city apartment.

    Later, once the plates were stacked and the music softened, the host picked up the jar almost unconsciously. She rubbed a pinch of salt between her fingers, as if testing a secret she wasn’t ready to give away. “This stays on the counter all year,” she said.

    A few of us went home thinking about that jar. About why rosemary and coarse salt become something more when they live together.

    Why this simple jar shifts the entire kitchen mood

    The first thing you notice isn’t taste. It’s the aroma. Open the lid and a wave of pine, lemon, and sea air rises gently. A tired midweek kitchen suddenly feels like an herb garden after rain. It’s so simple it almost feels unfair.

    Most kitchens hide salt in a cupboard and forget rosemary in a dried packet behind the pasta. Put them together in a clear jar and your brain responds differently. They stop being “ingredients” and turn into a tiny ritual: twist, inhale, pinch, sprinkle. Those three seconds slow you down just enough to remember you’re cooking for a person, not just filling a plate.

    We’ve all had meals that are technically fine but lifeless. Plain roast chicken, soft potatoes, an omelette that tastes like nothing in particular. A rosemary salt jar by the stove becomes a quiet rescue plan. One pinch on hot fries and they suddenly taste seaside. Rubbed into meat before searing, it feels like borrowing a chef for half a minute. Soon you start experimenting: tomatoes, popcorn, even the rim of a Bloody Mary glass. Each time, the same thought returns: how can something so cheap and effortless matter this much?

    There’s a simple reason. Coarse salt is dry and stable, naturally pulling moisture and aroma from whatever it touches. Rosemary, rich in essential oils, releases its fragrance slowly into the crystals. The jar becomes a kind of slow infusion. No tools, no timers. Just time and contact. The salt protects the herb; the herb perfumes the salt. A small ecosystem on the counter.

    Practically speaking, your hands learn the habit. Instead of juggling multiple seasonings, you reach for one familiar jar. You season earlier, more evenly, and with more confidence. The result feels restaurant-level without following a recipe. That’s how this modest jar quietly reshapes home cooking.

    How to prepare and use an indoor rosemary salt jar

    Start with a clean, completely dry glass jar with a tight lid. Nothing special is required; a recycled jam jar works if it seals well. Fill it about two-thirds with coarse sea salt or kosher salt. Avoid fine table salt, which can’t hold aroma or texture the same way.

    Add two to three fresh rosemary sprigs, washed and thoroughly dried on a cloth. No moisture should remain. Slide the rosemary down so it’s surrounded by salt, gently buried. Top up with more salt, leaving a small space at the top. Close the lid, shake slowly once, and keep it on the counter or a cool shelf away from direct sun.

    After a few days, open it and smell. The change starts quickly. After about a week, it’s ready to use as your new kitchen companion.

    Many people stop at roasted potatoes. That barely scratches the surface. Use it where heat meets fat: chicken skin before baking, focaccia dough, grilled vegetables, mushrooms hitting a hot pan. Some even crush a pinch over fried eggs. Use restraint. The salt is assertive, and rosemary can overpower when pushed too far. Think of it as punctuation, not the entire sentence.

    • Why do we feel like we’re falling just before we fall asleep?
    • Goodbye minimalist kitchens: the comfort-first approach homeowners now want
    • The perfect sidewalk tree: tough, street-smart, and irresistible to hummingbirds
    • After 70: not daily walks, not weekly gyms, the movement pattern that upgrades healthspan
    • Stimulus payment January 2026: IRS direct deposit relief and tariff dividend fact check
    • Convenient but not eco-friendly: the habit quietly harming the planet
    • Modern parenting backlash: nine popular habits psychologists warn against
    • Day turns to night during the century’s longest total solar eclipse

    Soyons honnêtes: no one uses it every single day. You’ll forget the jar, then rediscover it on a bleak Tuesday and fall in love again. That’s part of the comfort. You’re not chasing perfection. You’re building small shortcuts to better meals. And this one waits patiently.

    Some worry about getting it wrong. Relax. The usual mistake is adding rosemary while it’s still damp, causing the needles to darken faster. Or using flavored salts with additives that clash with rosemary’s clean scent. If it ever smells off or looks clumpy, throw it out and start again. You’re losing a handful of salt and a sprig of rosemary, nothing more.

    One chef described it this way:

    “A jar of rosemary salt doesn’t just season food. It reminds you that you’re allowed to care about small things, even when dinner is late and you’re exhausted.”

    That’s the quiet strength of keeping it in sight. You notice it while making coffee, and it plants a small idea: maybe tonight I cook something that smells incredible. The jar becomes a visual nudge toward a gentler routine.

    • Seasoning: rub onto meat, fish, or vegetables before cooking for deeper flavor.
    • Finishing: crush a pinch between fingers over hot dishes just before serving.
    • Atmosphere: open the jar while you cook and let the scent reset your mood.

    It isn’t about doing everything right. It’s about having one fragrant ally on the counter when your day feels long.

    Why this tiny ritual resonates so deeply

    There’s a reason this trick spreads so easily online. It reaches beyond the idea of a “life hack.” Keeping rosemary and coarse salt together is like keeping a promise to yourself: home cooking can be simple without being dull. The jar radiates quiet care, even in a messy kitchen.

    On stressful evenings, when delivery feels tempting, the jar offers a different pull. A pan, a few potatoes, oil, and a generous pinch of rosemary salt. The scent travels faster than your frustration. The kitchen shifts from workspace to a small refuge.

    We already know home cooking is cheaper and often healthier. The challenge isn’t knowledge. It’s energy, mood, and motivation. This jar lowers the emotional barrier. When flavor feels guaranteed by one easy gesture, starting feels lighter.

    There’s also something grounding about the ingredients themselves. Rosemary carries long associations with memory and focus. Salt has symbolized preservation and value across cultures. Together, they form a daily ritual that quietly links you to generations of cooks before convenience flavoring existed.

    You keep the jar. You refill it. You replace the sprigs every few months. Friends notice. Some ask how you made it; others simply copy it at home. It spreads through shared meals and quiet observation.

    Maybe that’s the real secret. The jar isn’t just about seasoning. It’s about visible intention. An ordinary object that gently suggests a different way of living in your kitchen.

    • Salt and rosemary alliance: the salt absorbs and releases rosemary’s essential oils over time, transforming flavor.
    • Visual ritual: a clear jar on the counter encourages fresh seasoning without conscious effort.
    • Versatile use: works as seasoning, finishing touch, and even a subtle kitchen scent.