Author: admin

  • Create Your Own Natural Eyebrow Gel at Home Using Aloe Vera and Cocoa for Flexible Hold

    Create Your Own Natural Eyebrow Gel at Home Using Aloe Vera and Cocoa for Flexible Hold

    At first thought, the idea that a simple glass of water could make a room feel warmer—without raising heating costs—sounds almost too gentle to be true. Water doesn’t create heat, and it certainly isn’t acting like a tiny heater perched on your windowsill. The real science is quieter and more nuanced. It’s not about adding warmth to the room, but about helping your body sense existing warmth more efficiently. The effect is subtle, but deeply tied to how humans experience comfort indoors.

    Why Dry Air Can Make Heated Rooms Feel Cooler

    When a radiator is running, it warms the air while also stripping away moisture. This dryness often shows up in small, familiar ways—tight skin, scratchy throats, static electricity, or minor shocks from metal surfaces. What’s easier to miss is how dry air interferes with temperature perception. Your body constantly exchanges heat with its surroundings. In low humidity, moisture evaporates faster from your skin and from each breath you release. That evaporation pulls heat away, creating a faint cooling effect—even when the thermostat says the room is warm.

    This is where placing a glass of water near a heat source makes a difference. As the water slowly warms, it releases moisture into the air through gentle evaporation. The shift in humidity may be modest, but it can reduce moisture loss from your skin and lungs. The actual temperature remains unchanged, yet the space feels warmer, softer, and more comfortable to your body.

    Aloe Vera: A Naturally Gentle Balancer

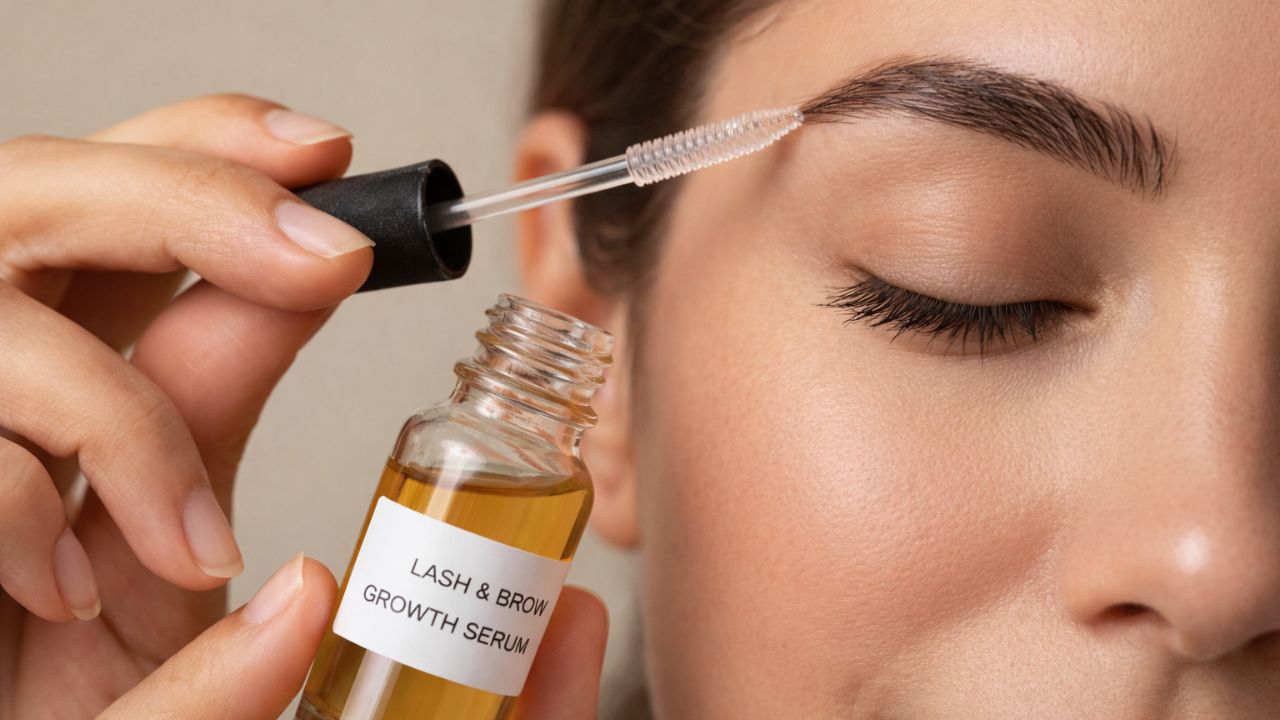
    Aloe vera has a long history of calming and conditioning skin, long before it became a bottled staple. In its pure form, the gel feels cool, lightweight, and smooth, never stiff or sticky. When applied to eyebrows, it works quietly—offering structure without harshness.

    In homemade brow gel, aloe acts as the base. Its natural consistency provides light-to-medium hold, guiding brow hairs while keeping them flexible. Choosing a high-quality gel with minimal additives adds another benefit: subtle hydration with every use. The result feels less like styling and more like gentle daily care.

    Cocoa Powder: Natural Depth and Soft Definition

    Cocoa powder adds warmth, richness, and natural pigment. Its deep brown tone blends surprisingly well into brow products, especially for light to medium-dark shades. When mixed with aloe, cocoa creates a soft, diffused tint rather than a bold, painted finish.

    The appeal lies in its flexibility. A small amount offers subtle definition, while adding more deepens the shade gradually. The color melts into natural brows, avoiding sharp edges. There’s something quietly satisfying about using an ingredient familiar from the kitchen to gently frame your face—beauty and simplicity sharing the same roots.

    Preparing Your Simple Mixing Setup

    Creating your own brow gel feels less like a beauty task and more like a calming ritual. Clean containers, a small spoon, and a spoolie brush each have their place. The process is unhurried, hands-on, and grounding.

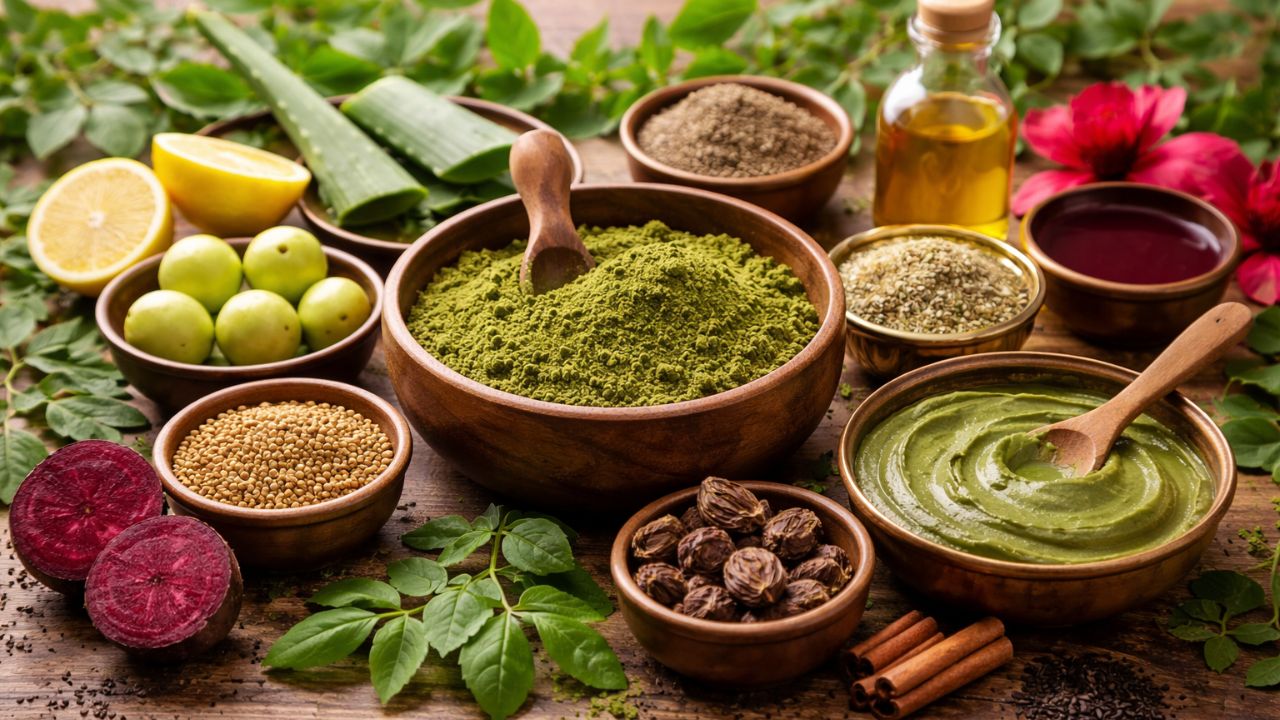
    At its core, the recipe relies on just two ingredients: aloe vera gel and cocoa powder. Optional additions—like a drop of jojoba oil for smoothness or a touch of coffee or charcoal for deeper tones—can come later. The charm of this blend is its simplicity: minimal ingredients, thoughtfully combined.

    Item Role & Use
    2 teaspoons pure aloe vera gel (clear, unscented) Acts as the main base, providing natural hold, smooth application, and moisture
    ¼–½ teaspoon unsweetened cocoa powder Adds a soft, natural tint to enhance brow color
    Small clean glass jar or lidded container Used to safely store the prepared mixture
    Clean spoolie or angled eyebrow brush Helps apply and shape the product evenly on brows
    Mini spoon or mixing stick Used to combine and blend all ingredients smoothly

    Blending the Gel: A Calm, Careful Process

    Add about two teaspoons of aloe vera gel to a clean jar. Sprinkle in roughly a quarter teaspoon of cocoa powder, stirring slowly to smooth out any clumps. As you mix, the clear gel shifts into a soft, earthy brown.

    Test the shade on the back of your hand and allow it to dry briefly. Adjust the balance as needed—more cocoa for depth, more aloe for a lighter finish. The final texture should be creamy and spreadable, yet thick enough to cling to a brush. Once mixed, seal the jar and let it sit for about an hour so the ingredients settle evenly.

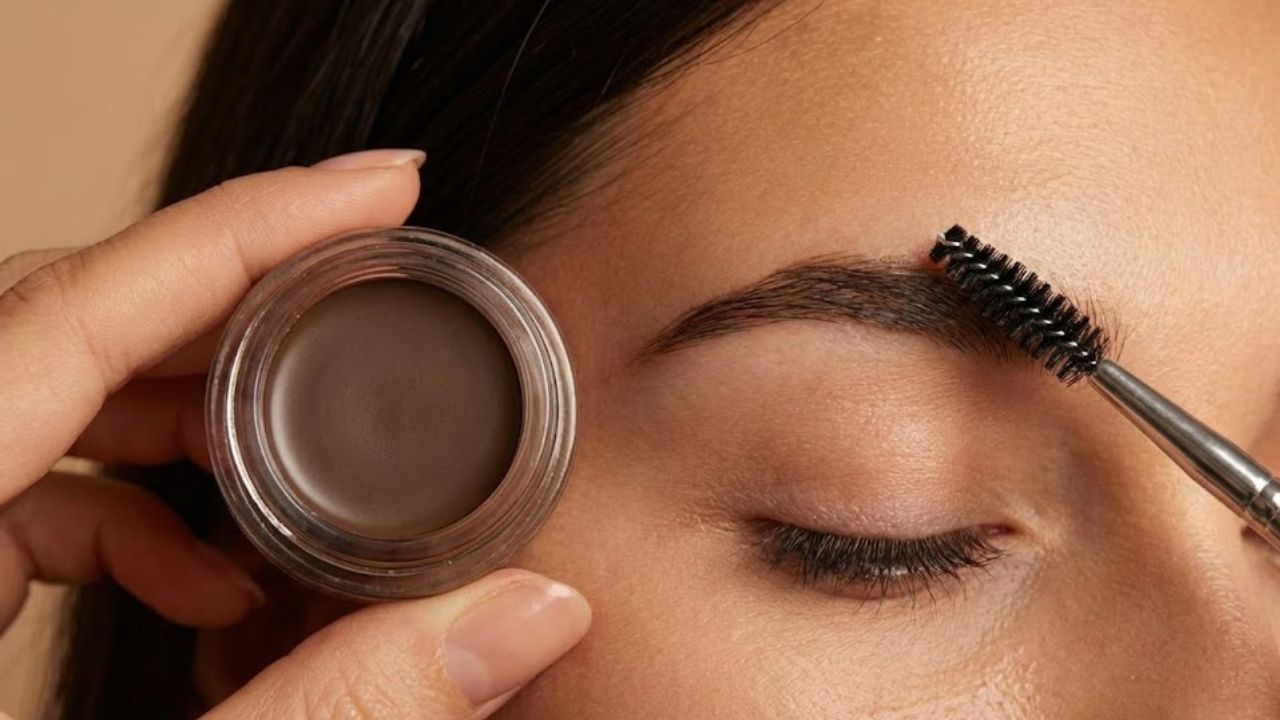
    Applying with Patience and Precision

    This homemade gel encourages a slower, more intentional routine. Begin with clean, dry brows. Dip a spoolie lightly into the jar, wiping away excess. Brush through the brows using short, gentle strokes that follow the natural hair direction.

    Start at the inner brow and move outward, focusing on shaping rather than drawing. For added definition, allow the first layer to dry before applying another, concentrating on sparse areas. An angled brush can help mimic individual hairs if needed. The finish stays soft, flexible, and natural, never stiff or heavy.

    Simplifying Beauty Through Nature and Choice

    Making a small product at home carries quiet intention. It reduces waste, limits unnecessary additives, and reconnects you with the act of creating something by hand. Each refill replaces another disposable tube. Each use reinforces the idea that beauty doesn’t need complexity.

    Natural solutions are personal, and paying attention to your skin is essential. Patch testing matters, and adjustments are part of the process. Still, there’s value in slowing down, mixing something yourself, and shaping your brows with care instead of urgency. In that quiet moment—brush in hand, cocoa-scented gel nearby—you’re reminded that beauty can be gentle, practical, and deeply personal, often beginning with the simplest choices.

  • A Personal Trainer Shares 4 Gentle Seated Exercises That Safely Improve Core Strength in Older Adults

    A Personal Trainer Shares 4 Gentle Seated Exercises That Safely Improve Core Strength in Older Adults

    I work with many clients who are 65 and older. Some of them struggle to get down on a yoga mat for regular floor exercises. But that does not mean we skip core work completely. Ab training remains important even when we need to modify the movements. A strong core is valuable at any age but it becomes particularly crucial for seniors. Core muscles like the transverse abdominis and internal obliques help with breathing and posture and balance. These areas often matter most to older adults who want to remain active and independent. When I train someone with mobility challenges I use these four seated exercises in their core strengthening program. Even if you can exercise on the floor easily these movements can add variety and present a fresh challenge to your abdominal workouts.

    How to Do These Chair-Based Core Exercises Correctly

    This simple workout can be done using only a sturdy chair, making it easy to perform almost anywhere.

    Before starting a new fitness routine, it’s essential to check in with your medical team. Working alongside a certified personal trainer is also highly recommended, particularly if you’re new to exercising. A qualified professional can help fine-tune your form and offer appropriate adjustments or alternatives when needed.

    Aim to complete each movement for 1–3 sets of 10–15 repetitions. Beginners should start with fewer reps and sets, then gradually build up as strength and confidence increase.

    Seated Core Exercise Instructions

    Seated Torso Twists

    • Sit near the front of the chair with your feet flat on the floor.
    • Keep your spine neutral and engage your core muscles.
    • Cross your arms and rest your hands on your shoulders.
    • Rotate your torso to the right while staying tall.
    • Return to center, then rotate to the left.
    • Alternate sides for 10–15 repetitions per side.

    Seated Knee Lifts

    • Sit upright on the chair’s edge with your feet grounded.
    • Activate your core and maintain a tall posture.
    • Slowly lift your right foot while keeping the knee bent.
    • Lower it back down with control.
    • Repeat the movement on the left side.
    • Continue alternating for 10–15 reps per side.

    Seated Side Bends

    • Sit on the edge of the chair with your feet flat.
    • Engage your core and keep a neutral spine.
    • Place both hands behind your head.
    • Lower your left elbow toward the floor, squeezing the left side of your torso.
    • Return to center, then repeat on the right side.
    • Alternate sides for 10–15 repetitions per side.

    Seated Bicycle Movements

    • Sit tall with your core fully engaged.
    • Place your hands behind your head.
    • Lift your right foot and rotate your torso, bringing your left elbow toward the right knee.
    • Return to the starting position.
    • Repeat on the opposite side.
    • Alternate for 10–15 reps per side.

    If touching your elbow to your knee feels difficult, reduce the range of motion and move only as far as feels comfortable.

    Why Seated Core Exercises Are Beneficial

    This chair-based routine targets essential core muscles such as the rectus abdominis, internal and external obliques, and the transverse abdominis. These muscles play a key role in stabilizing the body, supporting internal organs, assisting vital bodily functions, and maintaining proper posture.

    Many standard core workouts require getting down on the floor, which may not be practical for individuals with mobility limitations or certain injuries. Because these exercises are performed while seated, they are accessible to a wide range of fitness levels and can be safely modified or progressed with guidance from a qualified personal trainer or physical therapist.

  • A New Grey Hair Coverage Trend Is Helping People Look Younger Without Using Traditional Hair Dye

    A New Grey Hair Coverage Trend Is Helping People Look Younger Without Using Traditional Hair Dye

    Grey hair has stopped being something people want to hide in India as beauty habits move toward healthier & easier routines. A fresh approach to covering grey hair helps people look younger without using regular hair dye. This method skips harsh chemicals and uses gentle color blending with nourishing treatments and clever styling tricks that make grey hair less obvious. The outcome is a natural & fresh appearance that fits modern life with packed schedules and increased concern about keeping hair and scalp healthy.

    A Contemporary Approach to Covering Grey Hair with Subtle Enhancements

    This modern grey hair covering trend focuses on soft enhancement rather than a full colour transformation. Instead of traditional dyes, many people now prefer tinted conditioners, colour-depositing masks, or herbal blends that gently tone grey strands over time. These options blend seamlessly with your natural shade, adding depth, shine, and dimension without creating a flat finish. Users appreciate the gradual, visible results and the natural-looking outcome. Because the process is gentle, hair often feels healthier and smoother with continued use, making it ideal for those who value flexibility and an authentic appearance.

    How This Grey Hair Trend Creates a More Youthful Look

    Looking younger often depends on achieving a fresh, balanced hair tone. This trend helps by reducing the stark contrast between grey and darker strands, which can otherwise make features appear harsher. By evening out tonal differences, it creates a softer frame around the face. Many users notice a brighter overall appearance, less visual harshness, and a more refined look with regular use. Since these products also provide conditioning benefits, hair appears shinier, fuller, and more vibrant, delivering a youthful effect without dramatic changes.

    Why This Method Is Replacing Conventional Hair Dye Routines

    Traditional hair dye often involves frequent touch-ups and exposure to strong chemical formulas. This newer approach offers a more adaptable option that suits modern lifestyles. Rather than spending hours in salons, people simply incorporate these products into their regular wash routine or weekly hair care. Key advantages include:

    – Low-maintenance upkeep

    – Scalp-friendly formulations

    – Adjustable colour intensity

    – Reduced chemical exposure

    Over time, users value the ability to control the level of coverage or pause the process whenever they choose, offering freedom without long-term commitment.

    Summary

    This evolving grey hair covering trend reflects a broader move toward mindful beauty choices. Instead of completely concealing greys, it enhances natural hair for an effortless, healthy-looking finish. By combining care and colour, it builds confidence through simplicity, improved hair appearance, and age-positive styling. For many in India, this approach offers the perfect balance between looking youthful and staying true to oneself, showing that modern beauty is driven by smart, thoughtful choices rather than dramatic transformations.

    Feature New Grey Hair Trend Traditional Hair Colour
    Application Method Step-by-step, natural blending ke saath Ek baar mein complete colour coverage
    Maintenance Requirement Kam maintenance, user ke control mein Zyada maintenance aur regular touch-ups
    Effect on Hair Health Hair-friendly formula, nourishment provide karta hai Chemicals ke kaaran baalon ko dry kar sakta hai
    Level of Commitment Temporary choice, jab chahe stop kar sakte hain Long-term commitment aur repeat colouring
  • Healthier Lashes and Brows Grow Naturally With a Daily Castor Oil Routine That Shows Results

    Healthier Lashes and Brows Grow Naturally With a Daily Castor Oil Routine That Shows Results

    The first time you hear the faint sound of your own eyelashes, it feels almost surreal. Lean close to a window on a breezy evening or rub your eyes after a long, exhausting day, and a soft brushing noise appears—tiny hairs moving gently against skin. Lashes and brows are so delicate that they often go unnoticed until something changes. One day, they appear less full, lighter, and less defined. Under bright bathroom lights, you pause, wondering when the thinning began, and soon find yourself searching for serums, pencils, and gels that promise quick fixes.

    A Slower, More Intentional Approach to Care

    There is a different option—calmer, slower, and quietly rewarding. It comes in a small amber bottle, thick and golden, with a subtle earthy scent: castor oil. It is not a glossy miracle product but something simple and traditional. Extracted from castor bean seeds, this oil carries a history built on patience. Its role in lash and brow care is not about instant transformation. Instead, it relies on consistency, gentle care, and mindful daily habits.

    Building a Peaceful Nighttime Habit

    Picture the end of the day as the house grows still and screens fade to black. At the sink, you move through familiar motions—warm water, cleanser, towel. Makeup lifts away gently. Then comes the extra minute you give yourself. You pick up the bottle, feel its weight, and watch the oil catch the light. It offers no overnight promise. What it does offer is a more patient relationship with your skin and time, repeated quietly each night.

    The Gentle Science Behind Castor Oil

    Many people are surprised by castor oil’s thick, syrup-like texture. When warmed between the fingers, it spreads smoothly. This richness comes from ricinoleic acid, a fatty acid known for helping retain moisture. While scientific research on lash growth is limited, its practical benefit is clear: it shields delicate hairs from dryness, friction, and the stress of daily makeup. It does not create new hair, but it helps protect and maintain existing lashes and brows.

    Why Gentle Massage Matters

    Applying oil naturally changes the way you touch your face. Movements slow down and become more mindful. This light massage can help support local circulation and keep follicles comfortable and nourished. Combined with a calm routine, it turns a basic step into a moment of care rather than correction.

    Starting a Simple Lash and Brow Ritual

    The ritual begins in a quiet bathroom, water draining softly and the mirror lightly fogged. Each step is straightforward, deliberate, and unhurried.

    Step-by-Step Castor Oil Routine

    • Cleanse: Gently remove all makeup using a mild cleanser to prevent residue from blocking follicles.
    • Prepare Tools: Use a clean mascara wand or cotton swab to maintain hygienic application.
    • Decant Oil: Place a small drop on your hand or a clean dish to keep the oil controlled and uncontaminated.
    • Apply to Lashes: Lightly brush from mid-length to the tips to reduce breakage without irritation.
    • Nourish Brows: Comb the oil along the natural brow direction to support softness and fullness.

    Recognizing Progress With Time

    The most challenging part of natural care is waiting. In the early weeks, the first change you notice is improved softness rather than length. Lashes feel less brittle, brows appear smoother, and makeup applies more evenly. With time—often after one or two months—you may notice subtle fullness, fewer sparse areas, and healthier-looking hairs that remain longer in their growth cycle.

    Daily Habits That Support the Ritual

    This routine works best when paired with mindful daily choices. Use lash curlers sparingly, allow mascara-free days, avoid excessive tweezing, and remove makeup gently. Supporting your body with adequate protein, healthy fats, and proper hydration also helps maintain hair health from within.

    Paying Attention to Skin Signals

    Even natural oils require care and awareness. If redness, itching, or small bumps appear, pause and rinse gently. Some individuals find better results by applying castor oil every other night. Always select a pure, fragrance-free oil, and if your eyes are sensitive, consult a professional before continuing.

    Allowing Your Natural Features to Rebalance

    As lashes and brows become stronger, your face may begin to feel more familiar again. You might reach for less makeup or skip it altogether on certain days. The change is subtle and earned, like tending a small, private garden over time—one calm evening at a time.

  • Optical Illusion Challenge Test Your Focus by Finding 3554 Hidden Before Time Completely Runs Out

    Optical Illusion Challenge Test Your Focus by Finding 3554 Hidden Before Time Completely Runs Out

    Optical illusion challenges are a fun way to test your visual awareness and mental agility. While they may look simple at first, these puzzles often include tiny visual differences that the brain easily misses. In this challenge, the focus is on number recognition and quick thinking. Your task is to spot the number 3554 hidden among repeated rows of 3545, all within an eight-second time limit. Although it sounds easy, many people realize how tricky it is once the clock starts.

    At first glance, all the numbers appear identical. This happens because the brain is designed to recognize patterns quickly rather than inspect every detail. When similar numbers repeat across rows, your mind assumes they are the same. This natural behavior is what allows the different number to remain hidden in plain sight.

    As you scan the image, your eyes may jump rapidly from one row to another without fully processing each number. This is where patience and concentration become essential. Instead of rushing, slow down and check each digit carefully. Focus on the number sequence rather than the overall look. The number 3554 blends in closely with the surrounding 3545s, making careful observation necessary.

    If you managed to find the number within eight seconds, it reflects strong visual processing skills and sharp attention to detail. If not, there’s no need to feel discouraged. These challenges are intentionally designed to be difficult. With regular practice, your brain becomes better at spotting small differences, especially when time is limited.

    Many people enjoy these puzzles because they offer more than entertainment. They help improve focus, strengthen short-term memory, and give the brain a quick workout. Spending just a few minutes each day on visual challenges can lead to noticeable improvements over time.

    Cracking the Puzzle: Were You Able to Spot 3554?

    If you are still looking for the hidden number, try this helpful approach. Scan the image row by row instead of jumping around. Pay attention to the middle digits first, then verify the entire number. The 3554 is often placed where your eyes least expect it, usually near the edges or corners rather than the center.

    Once you finally notice it, you may wonder how it escaped your attention before. That sudden realization is what makes optical illusion challenges so satisfying.

    Why Optical Illusions Go Viral and Capture Attention

    Challenges like this attract widespread interest because they test both visual perception and mental processing at the same time. The time limit adds urgency, making the experience more exciting. These puzzles are also easy to share, allowing people to challenge friends and family in a fun and engaging way.

    Optical illusions highlight how closely the eyes and brain work together. What we see is not always an exact reflection of reality. The brain relies on quick shortcuts to interpret visuals, and optical illusions reveal these processes in a safe and entertaining way.

  • Daily Collagen Broth Rituals That Support Firmer More Hydrated Skin and Improved Elasticity Over Time Naturally

    Daily Collagen Broth Rituals That Support Firmer More Hydrated Skin and Improved Elasticity Over Time Naturally

    The first time I prepared a collagen-rich broth and let it cook slowly for hours, my home took on the stillness of a winter retreat. Soft steam drifted upward, lightly fogging the windows, while the pot remained calm and steady. There was no aggressive boiling, only the occasional gentle bubble. It felt less like cooking and more like tending to something patiently. The process asked for time, not effort, and carried a soothing rhythm. At the time, I didn’t realize this simple habit would become one of my most meaningful ways to support my skin.

    Why Drinking Your Skincare Feels Comforting

    For many people, skin care begins with what we apply on the outside. Creams and serums promise smoother texture and brighter tone. Supporting skin from within, however, offers a quieter strength. Sipping something warm creates a sense of nourishment flowing through the body rather than sitting on the surface. Collagen broth reflects an older way of eating, when bones were simmered into stock and leftovers became soups. Nothing was wasted, and nourishment was simply part of daily life. In today’s screen-filled world, this simplicity can feel grounding. Collagen broth relies on basic ingredients—bones, connective tissue, water, gentle aromatics, and time. As it cooks, collagen transforms into gelatin and amino acids that help support skin internally. This practice also supports joints, digestion, and overall balance, highlighting how closely skin health is tied to the entire body.

    The Internal Framework Behind Supple, Hydrated Skin

    Skin health depends on what lies beneath the surface. Think of skin as fabric stretched across a frame; it looks smooth when the structure underneath remains strong. Collagen serves as this internal support, providing firmness and elasticity within the dermis. As natural collagen production slows with age, this inner cushion gradually thins. Elasticity decreases, and fine lines begin to form. While topical products work externally, collagen-rich broth offers internal support. Once digested, collagen and gelatin break down into amino acids like glycine and proline, which assist the body in rebuilding collagen, maintaining elasticity, and supporting the moisture barrier. Digestion also influences skin health. Gelatin can help calm the gut lining, allowing the body to focus more on repair than inflammation. Over time, subtle changes appear—less tightness after cleansing and makeup settling more smoothly. With consistency, dehydration lines soften, showing the difference between surface moisture and lasting internal hydration.

    Making Broth Part of a Simple Daily Ritual

    A meaningful daily habit does not need to be complicated. Collagen broth can become a steady and supportive part of everyday life. Some enjoy it early in the morning, holding a warm mug before the day begins. The gentle heat and rising steam offer nourishment before screens and schedules take over. Others prefer it in the afternoon as a calming pause, replacing another coffee or a sugary snack with something more sustaining. Small touches, like using a favorite mug or taking a moment to notice the warmth spreading through the body, make the practice feel intentional. Over time, the body begins to associate this moment with care and comfort, supporting overall well-being, including the skin.

    Preparing a Deeply Nourishing Collagen Broth at Home

    Making collagen broth at home can feel both calming and rewarding. While ready-made options are convenient, slowly simmering your own broth brings a deeper sense of satisfaction. The process is straightforward. Begin with bones that contain plenty of collagen, such as joints, knuckles, chicken feet, necks, or fish frames. Cover them with water and add a small amount of acid, like apple cider vinegar or lemon juice, to help release minerals and collagen. Allow the mixture to simmer gently for several hours. Aromatics like onion, garlic, bay leaf, or peppercorns add depth without overpowering the flavor. As it cooks, the liquid turns cloudy and develops a rich golden color. Once cooled, a well-prepared broth often becomes softly gelled, showing that collagen has been properly extracted. After straining, store it in glass jars, freezing most and keeping some refrigerated for easy access.

    Simple Flavor Variations to Keep the Habit Enjoyable

    Small adjustments can keep the routine inviting. A squeeze of lemon with a pinch of sea salt brightens the taste. Fresh ginger adds warmth and depth. Soft herbs stirred in just before drinking bring a light, fresh note. A touch of turmeric combined with a bit of fat adds richness and color. These subtle changes help the ritual remain enjoyable and allow the broth to match different moods and needs.

    How Broth Supports an Overall Skin-Friendly Lifestyle

    Collagen broth works best as part of a broader approach to skin care rather than as a stand-alone solution. Skin benefits from proper hydration, healthy fats, adequate sleep, and internal balance. Drinking warm broth contributes to hydration while supplying minerals and amino acids that plain water cannot provide. These nutrients help strengthen the skin’s foundation and support moisture retention from within. Improved gut health can also reduce skin concerns. Broth becomes most effective when paired with consistent rest, gentle movement, and regular fluid intake. Together, these habits help the body absorb and use nutrients efficiently.

    Building a Gentle Daily Rhythm With Broth

    Broth fits naturally into everyday routines. A small mug in the morning after water can ease the start of the day. Another cup in the afternoon can support energy during natural lulls. In the evening, broth can serve as the base for a light soup with vegetables and protein. There is no need for rigid rules. The real benefit comes from steady use over time rather than striving for perfection.

    Practical Tips for Choosing and Storing Broth

    For busy days, keeping things simple is key. Homemade broths or those simmered slowly with minimal ingredients are ideal. When chilled, broth that turns gel-like usually indicates the presence of collagen. Many people find that one to two cups per day works well when consumed consistently. Broth can be refrigerated for several days or frozen in small portions for convenience. Visible skin benefits tend to appear gradually, often after several weeks of regular use. Those who avoid animal products will not obtain collagen directly from plants, but mineral-rich vegetable broths and foods high in vitamin C can support the body’s natural collagen production. Even without collagen, the practice of warm, mindful nourishment still holds value.

    Returning to Care Through Nourishment

    When collagen broth becomes a regular part of life rather than a passing trend, it takes on deeper meaning. Skin care shifts from a surface-focused task to a reflection of how well the body is nourished internally. Each pot of broth and every warm cup represent a quiet commitment to self-care. Over time, skin may appear more hydrated and radiant, but the greater value lies in treating the body with patience and respect. Collagen-rich broth is not about resisting age; it is about moving through life feeling supported and gentle. Let the steam fill the kitchen, hold the warm mug, and enjoy nourishment that feels simple and deeply restorative.

  • Safe Henna Hair Dye Blends Made at Home for Rich Long Lasting Colour Without Chemical Damage

    Safe Henna Hair Dye Blends Made at Home for Rich Long Lasting Colour Without Chemical Damage

    The first time I used henna to color my hair, the kitchen filled with a scent reminiscent of an old apothecary. The air carried notes of damp earth and dried leaves, warm and unexpectedly comforting, like soil steeped in hot water. On the counter sat a ceramic bowl holding a deep green, glossy paste, thick and rich, almost like melted chocolate blended with plants. I hesitated, spoon hovering, unsure whether this muddy mixture could truly compare to the shiny boxed dyes lining drugstore shelves. Then I began applying it, section by section. The paste felt cool and dense, similar to a face mask against my scalp, quietly staining my hands and hair—and ultimately reshaping how I viewed beauty.

    Why Henna Retains Its Magic Amid Chemical Hair Dyes

    A stroll through a modern hair dye aisle can feel overwhelming, with sharp chemical smells, bold promises, and cautionary fine print everywhere. Achieving a precise shade often means accepting ammonia, peroxide, and synthetic formulas. Henna offers a completely different path. Derived from the Lawsonia inermis plant, henna has colored hair, skin, and textiles for thousands of years. When mixed with warm liquid, its lawsone pigment releases slowly and bonds gently to keratin. Rather than stripping hair, henna coats each strand, leaving it stronger, glossier, and healthier. Its earthy aroma—closer to tea and leaves than perfume—turns hair coloring into a calming ritual instead of a rushed cosmetic chore.

    Selecting Pure and Clearly Labeled Henna Powder

    Henna quality makes all the difference. Authentic henna should be 100% pure, body-art-quality powder, completely free of metallic salts or synthetic dyes. Many negative experiences stem from compound hennas that conceal chemical additives. High-quality henna feels finely sifted, smells fresh and grassy, and never sparkles or gives off an artificial scent. Freshness matters, as henna loses its staining power over time. Reading labels carefully and purchasing from reputable sources is essential. You are not just buying color—you are choosing a carefully grown and processed plant material. When treated as a living ingredient, henna delivers richer and more reliable results.

    Setting Up Henna the Simple, Traditional Way

    Henna preparation requires no special tools. A glass, ceramic, or stainless-steel bowl, a spoon, gloves, an applicator brush, plastic wrap, and an old towel are enough. Reactive metals should be avoided, and skin and clothing should always be protected. More important than equipment is patience. Henna develops color slowly, over hours rather than minutes. Compared to quick chemical dyes, the process feels like preparing a slow-cooked meal—unhurried, intentional, and rewarding.

    Common Natural Additions and Their Hair Benefits

    • Amla Powder – Softens bright red tones into cooler auburn shades while adding volume; ideal for toning down orange hues.
    • Indigo Powder – Deepens henna into dark brown or near-black shades; suitable for strong gray coverage or rich brunette results.
    • Cassia (Neutral Henna) – Adds shine and gentle golden warmth without major color change; best for light or blonde hair.
    • Black Tea or Coffee – Enhances overall depth and richness; helpful for medium to dark hair.
    • Chamomile Tea – Brightens hair with soft golden highlights; suited to lighter shades.
    • Aloe Vera Gel – Improves moisture, smoothness, and paste texture; beneficial for dry or damaged hair.
    • Essential Oils – Such as lavender or rosemary, enhance scent and support scalp comfort.

    A Traditional Henna Blend for Warm Copper Tones

    The simplest henna recipe creates warm copper shades. Pure henna powder is mixed with strong, warm tea until it reaches a yogurt-like texture. Optional lemon juice or apple cider vinegar can help release dye if the scalp tolerates mild acidity. The mixture should rest for 4–8 hours until the color deepens. Apply evenly to clean hair, wrap securely, and leave on for 2–4 hours. After rinsing, the color may appear bright orange initially, but it gradually oxidizes into a more natural copper or auburn over the following days.

    Creating Auburn and Brown Shades With Plant Blends

    Henna tones can be adjusted using other natural powders. Mixing henna with amla reduces brightness, introduces cooler auburn notes, and supports hair texture. For brown or chocolate hues, a two-step approach works best: apply henna first to establish a red base, then follow with indigo to darken the shade. This method offers greater control and predictability, especially for light to medium hair, producing colors ranging from chestnut to near black.

    Using a Henna Gloss for Subtle Color and Shine

    For a softer result, a henna gloss is an excellent choice. A small amount of henna paste is mixed with a silicone-free conditioner and applied like a hair mask. After 45–90 minutes, it is rinsed out. This technique adds gentle warmth, soft highlights, and visible shine without a dramatic color shift, making it ideal for those new to henna.

    Finding Your Ideal Shade Through Layering

    Henna color builds gradually. Each application adds depth, richness, and gloss. Light hair develops golden-copper tones, medium hair shifts toward auburn or chestnut, and dark hair reveals red highlights in sunlight. Gray strands become warm accents rather than disappearing completely. Because henna fades slowly, starting with lighter applications allows you to deepen the shade over time while protecting hair health.

    Safety Tips and Understanding Your Hair History

    Even natural dyes require care. Always perform a patch test by applying a small amount to the skin and observing for 24–48 hours. Extra caution is necessary if the hair has been treated with chemical dyes, especially those containing metallic salts. Pure henna is generally safe, but low-quality products can cause unpredictable results. Protect the hairline with oil, ensure proper ventilation, and allow the process to unfold without rushing.

    Aftercare for Long-Lasting, Healthy Color

    Rinsing henna takes time, but patience and warm water help remove the paste thoroughly. Many people avoid shampooing for the first 24 hours so the color can settle. Over the next few days, the shade deepens and stabilizes. With gentle cleansing and minimal sulfates, henna color lasts well. Occasional gloss treatments or root touch-ups maintain even color while preserving strength and shine.

    The Quiet Power of Plant-Based Hair Color

    Henna works in harmony with natural hair. Grays turn into highlights, and natural variations remain visible. Choosing henna is a gentle step away from harsh chemicals and rushed routines. It invites patience, connection, and earthiness. The result is not a perfectly uniform salon shade, but a living color shaped by time, light, and nature—personal, grounded, and enduring.

  • Professional Knife Sharpening Results Are Possible at Home With the Right Method

    Professional Knife Sharpening Results Are Possible at Home With the Right Method

    The first time I opened a bottle of store-bought cleaner after returning from a long walk in the woods, the smell hit instantly. Artificial lemon. Sharp chemical notes. My eyes stung, my throat tightened, and the calm trail I had left behind felt impossibly distant. Out there, water moved slowly through soil and stone, filtered by roots and time. Inside, under bright lights and surrounded by plastic bottles, everything felt engineered. I remember wondering why a home had to smell like a laboratory to be considered clean.

    When Your Home Becomes Part of the Ecosystem

    Once you see it, it’s impossible to ignore. The way bright blue liquid swirls down the sink, disappearing even though you know it continues into pipes, treatment plants, rivers, and oceans already under strain. The mist from glass cleaner lingering in sunlight, forming a faint chemical haze you breathe in without thinking. The recycling bin filling with hard plastic bottles that once held something strong enough to make your head spin. We often talk about the environment as if it exists somewhere else, but the truth is simple: you live inside an ecosystem. Your home isn’t sealed. Air, dust, and water move through it constantly, carrying traces of everything you use.

    A Cupboard That Tells a Different Story

    There’s something quietly radical about opening a cupboard and finding not rows of neon liquids, but a few familiar items: baking soda, vinegar, a bar of plain soap, a lemon, maybe a small bottle of essential oil. These are ingredients your great-grandparents would recognize. Combined thoughtfully, they make a home smell like a place where people cook, read, rest, and open windows—not like a showroom.

    The Hidden Power of Everyday Ingredients

    Your kitchen already holds everything needed for effective cleaning. The shift comes from recognizing how ordinary items work. Baking soda feels soft and fine between your fingers. White vinegar smells sharp but cuts cleanly through grime. A lemon’s waxy skin leaves your fingers slightly sticky when sliced. Olive oil pours slowly, smooth and heavy. These simple materials can replace many commercial cleaners without changing the results.

    Related Reading

    Microwaves Face a Serious Challenger as a Faster Kitchen Device Emerges

    Practical Recipes for a Low-Waste Cleaning Routine

    These methods bring that quiet kitchen apothecary into daily use. They work because they adapt to what you already have. There’s no need for special tools or stressful precision. A little common sense and willingness to experiment are enough. The recipes are forgiving, allowing small adjustments or substitutions. The goal is simple: solutions that fit real life, not ideas that stay unused.

    All-Purpose Surface Spray

    This is the cleaner you’ll reach for most—ideal for countertops, door handles, light switches, and unexpected sticky spots. It’s straightforward and effective.

    Mix equal parts white vinegar and water in a spray bottle. For a light scent, add a few drops of essential oil such as lemon, lavender, or tea tree. Shake gently to combine. There’s no waiting period or complex process.

    Spray on hard surfaces and wipe with a cloth. Avoid natural stone like marble or granite, as vinegar can damage them. The initial smell fades quickly, and over time it starts to signal cleanliness rather than harsh chemicals.

    Gentle Scrub for Sinks, Tubs, and Stovetops

    This scrub works well on surfaces that look tired—bathtub rings, dull sinks, or residue around burners. It cleans thoroughly without scratching.

    Combine half a cup of baking soda with enough water to form a thick paste. For extra grease-cutting ability, add a tablespoon of castile or plain liquid soap. Mix until smooth. It can be made fresh or stored briefly in a covered container.

    Apply with a damp cloth or sponge, scrub gently, and rinse well. On stainless steel or enamel, it leaves a soft, honest shine—clean without being overly glossy.

    Glass and Mirror Cleaner

    This solution focuses on clarity, leaving no streaks, no haze, and no heavy scent.

    Mix equal parts white vinegar and water in a spray bottle. For improved results on mirrors, add one teaspoon of rubbing alcohol per cup of solution. Shake lightly before use.

    Spray sparingly and wipe with a lint-free cloth or old cotton T-shirt. The glass reflects light and space, not artificial fragrance.

    Wood Surface Polish

    This polish suits wooden furniture marked by everyday use—coffee rings, worn armrests, or shelves needing more than dusting. It nourishes rather than hides wear.

    Combine two parts olive oil with one part lemon juice or white vinegar in a small container. Shake before each use, as separation is natural.

    Apply a small amount to a soft cloth, rub along the grain, then buff gently. The result is wood that looks cared for, not brand new.

    Related Reading

    This Winter Boiling Ritual Combines Lemon Ginger and Cinnamon for a Reason

    Deodorizing Carpet or Mattress Shake

    This mixture refreshes soft surfaces like carpets, rugs, and mattresses without masking odors.

    Mix one cup of baking soda with 10–15 drops of essential oil if desired. Stir thoroughly to distribute the scent evenly.

    Sprinkle lightly, let sit for 15–30 minutes, then vacuum. What remains is simply the absence of unpleasant smells.

    Eco-Cleaning Starter Kit: Quick Reference

    • Baking soda – scrubbing and deodorizing sinks, tubs, ovens, and refrigerators
    • White vinegar – degreasing and removing limescale; avoid natural stone
    • Castile or plain soap – base for general cleaning, dishes, and floors
    • Lemon or citrus – deodorizing and light bleaching; use carefully on fabrics
    • Salt – added scrubbing power for pans, boards, and drains
    • Essential oils – light scent and mild antimicrobial properties when used sparingly

    When Cleaning Feels Like Care

    Replacing harsh products with pantry staples subtly changes cleaning itself. It becomes less aggressive and more intentional, closer to cooking or tending plants. You mix, test, and adjust based on what’s needed.

    As you clean, small details stand out—fingerprints, smudges, signs of daily life. The focus shifts from erasing living to preparing space for what comes next.

    Scrubbing with baking soda offers effort and response. The result isn’t advertisement-level shine, but something more honest: a surface that feels clean, without concern about lingering residues.

    Staying Safe and Knowing the Boundaries

    Eco-friendly cleaning still requires care. Not every ingredient mixes safely, and not every mess suits homemade solutions.

    Never mix vinegar with bleach, as it creates toxic chlorine gas. Use vinegar cautiously on delicate surfaces. Label homemade mixtures clearly, especially around children or pets, and test new solutions before full use. Ensure proper ventilation.

    There are moments when commercial products are appropriate, such as serious mold or post-illness disinfection. Thoughtful cleaning isn’t about perfection, but choosing gentler defaults whenever possible.

    From Under the Sink to Beyond the Home

    Everything used in cleaning continues beyond your walls. Water carries residues through pipes and treatment systems before returning to the environment.

    Simple ingredients like soap, vinegar, and baking soda are familiar to natural systems and break down more easily. The benefits are immediate too: cleaner indoor air, gentler contact with skin, and less plastic waste.

    Over time, the space under your sink changes—fewer bottles, more refillable containers, and a sense of calm. Cleaning becomes a quiet partnership with your home and the wider world, rooted in care rather than control.

  • Rose Water and Ice Cube Face Hack Women Are Using Worldwide for Clear Glass Skin Naturally

    Rose Water and Ice Cube Face Hack Women Are Using Worldwide for Clear Glass Skin Naturally

    In India, natural skincare solutions are rapidly gaining popularity as women search for easy, budget-friendly ways to maintain healthy, glowing skin at home. One method that has quietly gained attention is the rose water and ice cube face hack, often associated with achieving a smooth, glass-like skin finish without relying on costly products. Rooted in traditional beauty practices yet suited to modern routines, this approach appeals to various age groups. Its simplicity and gentle nature make it especially suitable for hot and humid Indian weather.

    Rose Water and Ice Cube Hack for Glass-Like Skin

    The rose water and ice cube face hack works by blending hydration with cold therapy to revive tired-looking skin. Rose water is widely known for its calming and soothing properties, while ice helps with instant pore tightening. Together, they offer a quick ritual that promotes skin cooling, supports natural pore tightening, enhances surface glow, and improves the overall fresh-face feel. With consistent use, many women report a smoother skin texture and reduced dullness. This hack is particularly helpful in India, where heat, sweat, and pollution often leave skin looking fatigued.

    How Frozen Rose Water Helps Improve Skin Texture

    Applying frozen rose water cubes to the face may help calm irritation and support oil balance over time. The cold temperature encourages a circulation boost, while rose water provides gentle toning support. This combination promotes improved blood flow, offers mild redness relief, supports oil control, and gives a hydrated skin appearance. Many users favor this approach because it avoids harsh chemicals and aligns well with minimalist skincare routines. With regular use, skin may appear firmer, clearer, and more refreshed.

    Why Women Choose This Rose Water Ice Routine

    Women across different regions prefer this routine because it is affordable, quick, and adaptable to multiple skin types. In India, its popularity is driven by the easy availability of rose water. The routine supports daily skin refreshment, works as a makeup prep base, encourages a cooling facial massage, and builds a natural glow habit. Whether practiced in the morning or evening, it offers a relaxing self-care moment without interrupting busy daily schedules.

    Summary and Skincare Overview

    The rose water and ice cube skincare hack stands as a clear example of how simple ingredients can provide visible skin benefits. Although results may vary, consistent use can help improve skin comfort and overall appearance. This routine supports a gentle skincare approach, encourages daily consistency, enhances skin comfort levels, and reinforces a natural beauty focus. For those seeking glass-like skin without heavy products, it offers a refreshing and low-risk option.

    Key Routine Details

    • Main Ingredients: Pure rose water and clean ice cubes
    • Best Time to Use: Morning or evening
    • Suitable Skin Types: Normal, oily, combination
    • Primary Benefit: Cooling, toning, glow enhancement
    • Recommended Frequency: Once daily or 3–4 times weekly

    Frequently Asked Questions

    • Can this hack be used daily? Yes, it can be used daily if your skin tolerates cold well.
    • Is it suitable for sensitive skin? Those with sensitive skin should test briefly and avoid prolonged ice contact.
    • How long should the ice cube be applied? Gently massage for 30–60 seconds only.
    • Can moisturizer be applied afterward? Yes, applying moisturizer afterward helps lock in hydration.
  • Optical Illusion Test: Can You Spot 37 and 81 Among 31 in 5 Seconds?

    Optical Illusion Test: Can You Spot 37 and 81 Among 31 in 5 Seconds?

    Optical illusions have interested people for hundreds of years & they give us a fun way to challenge our minds & improve how well we notice things. These illusions fool our brains by creating pictures that look different from what is actually there or trick our senses in surprising ways. It might be shapes that look like they are moving or numbers that seem to change position. These puzzles show us how complicated human perception really is. Today we have a new challenge that will test how well you can focus visually and mentally.

    How Optical Illusions Work and Why They Fascinate Us

    An optical illusion is a visual experience where the brain interprets what the eyes see in a way that differs from reality. This happens because the brain processes visual information based on patterns, contrast, depth, and prior experience. As a result, certain shapes, numbers, or objects may appear distorted, hidden, or misleading, even though they are clearly present. Optical illusions can be simple designs or complex visual puzzles that play with light, color, and perception.

    The real charm of optical illusions lies in how they challenge both visual awareness and mental processing. They are entertaining, but they also stimulate focus, creativity, and quick thinking. Many illusions are designed to test how well we can detect small differences under pressure, encouraging the brain to stay alert while filtering out distractions.

    The Puzzle Explained: Finding 37 and 81 Among Repeating 31s

    In this visual challenge, you are presented with a grid packed with the number 31, arranged in an orderly pattern. Hidden within this grid are two different numbers: 37 and 81. The goal is to identify both of them in just five seconds.

    At first glance, the task appears straightforward since the grid seems uniform. However, optical illusions thrive on subtle variations. The numbers 37 and 81 are carefully disguised among the repeated 31s, making them difficult to detect instantly. This challenge tests how well your eyes and brain can work together when time is limited.

    Why a Time Limit Makes Optical Illusions Harder

    The five-second limit adds an extra layer of difficulty to the illusion. When time is restricted, the brain relies on rapid visual scanning rather than slow analysis. Humans are naturally good at recognizing patterns, but urgency forces us to stay focused and avoid hesitation.

    Research in cognitive science suggests that time-based visual challenges can improve attention span, decision-making speed, and visual recognition skills. Regular exposure to these puzzles helps train the brain to process information faster, which can be useful in everyday situations that require quick observation.

    Solution Breakdown: Locations of the Hidden Numbers

    Once the challenge is complete, the illusion becomes easier to understand. Both hidden numbers are placed strategically within the grid to blend in with the surrounding 31s.

    The number 81 is located near the upper center area of the image, slightly offset to the left. Its positioning makes it difficult to notice immediately because it aligns closely with the surrounding pattern.

    The number 37 appears toward the lower-right section of the grid. Like the 81, it is cleverly masked by the repetition of 31s, requiring careful attention to spot the difference.

    Together, these placements force viewers to question their perception and look beyond surface-level patterns, which is the core purpose of this illusion.

    What Optical Illusions Reveal About Visual and Cognitive Skills

    Optical illusions are more than simple distractions. They offer insight into how the brain interprets visual data and adapts to complex environments. When solving these puzzles, the brain actively scans for inconsistencies, sharpening focus and analytical thinking.

    Studies have shown that engaging with visual challenges can strengthen memory, concentration, and problem-solving abilities. Even if the hidden elements are not immediately found, the mental effort involved still provides valuable cognitive exercise.

    Tips to Get Better at Optical Illusion Challenges

    If this puzzle felt difficult, that’s completely normal. Optical illusions are designed to stretch perception skills. With regular practice, spotting hidden details becomes easier over time.

    – Practice consistently to train your brain to recognize visual patterns faster.

    – Stay calm during timed challenges to avoid missing small details.

    – Improve peripheral vision to notice elements outside the center of focus.

    – Try different illusion types to strengthen various cognitive skills.

    By challenging your brain regularly, you can enhance both your visual perception and mental agility, making future optical illusions easier and more enjoyable.