Author: admin

  • Add Just Two Drops to Your Mop Water for a Home That Smells Fresh for Days

    Add Just Two Drops to Your Mop Water for a Home That Smells Fresh for Days

    It wasn’t the familiar “just cleaned” promise you expect from a bottle. Instead, a faint mix of damp mop and tired tiles lingered in the corners and under the sofa. She had spent a full hour mopping, scrubbing, even changing the water twice. Still, the house carried that stubborn, overworked detergent smell. Later, at a friend’s home, she noticed something strange. Same basic mop. Same worn floors. Yet the air felt calm, clean, almost spa-like. “What are you using?” she asked. Her friend smiled, lifted the bucket, and revealed a tiny brown bottle. Two drops. That was all. No vinegar. No lemon. And that’s where everything shifted.

    Why Most Homes Don’t Smell Bad — Just Used

    Most homes don’t actually smell unpleasant. They smell lived-in. A quiet blend of laundry, old wood, last night’s dinner, and whatever hides behind the bin. You only notice it after being away for a few days, or when a guest steps inside and pauses for half a second.

    The twist is that floor cleaner fragrance rarely lasts beyond drying time. For an hour, it shouts “fresh!” Then it disappears. What remains is the deeper scent of mop water, soap residue, humidity, and the floor itself.

    This is where those two drops matter. Not to overpower the detergent, but to gently anchor scent at its source — in the water, on the surface, and at nose level for pets, children, and you.

    A small cleaning company once tested this quietly. Clients were asked how their homes smelled 24 hours after a normal mop, then after a mop enhanced with fragrance oils. The difference was clear. On standard days, responses were “clean” or “neutral.” On enhanced days, people said things like “spa,” “hotel lobby,” or “someone’s been here.” Same cleaner. Same dirt removed. Only the bucket had changed.

    In a professional cleaners’ forum, one woman admitted she had started adding two drops of her own oil blend to each mop bucket. She didn’t advertise it or raise prices. Yet tips increased. Reviews began mentioning the smell almost every time. One client wrote, “My flat still smells amazing two days later. I don’t know what she used, but I’m never letting her go.”

    What Really Happens When You Mop

    Mopping isn’t just about removing dirt. You’re spreading a microscopic film over every hard surface. If that film is only detergent, the scent fades fast. Add a tiny amount of oil-based fragrance, and some molecules cling longer to floors and baseboards.

    As the room warms and cools throughout the day, those molecules gently rise, settle, and rise again. That’s why the scent can last days instead of minutes.

    The logic is simple: water carries the fragrance, the floor holds it, and the air reveals it slowly. In effect, your floor becomes a quiet, slow-release diffuser.

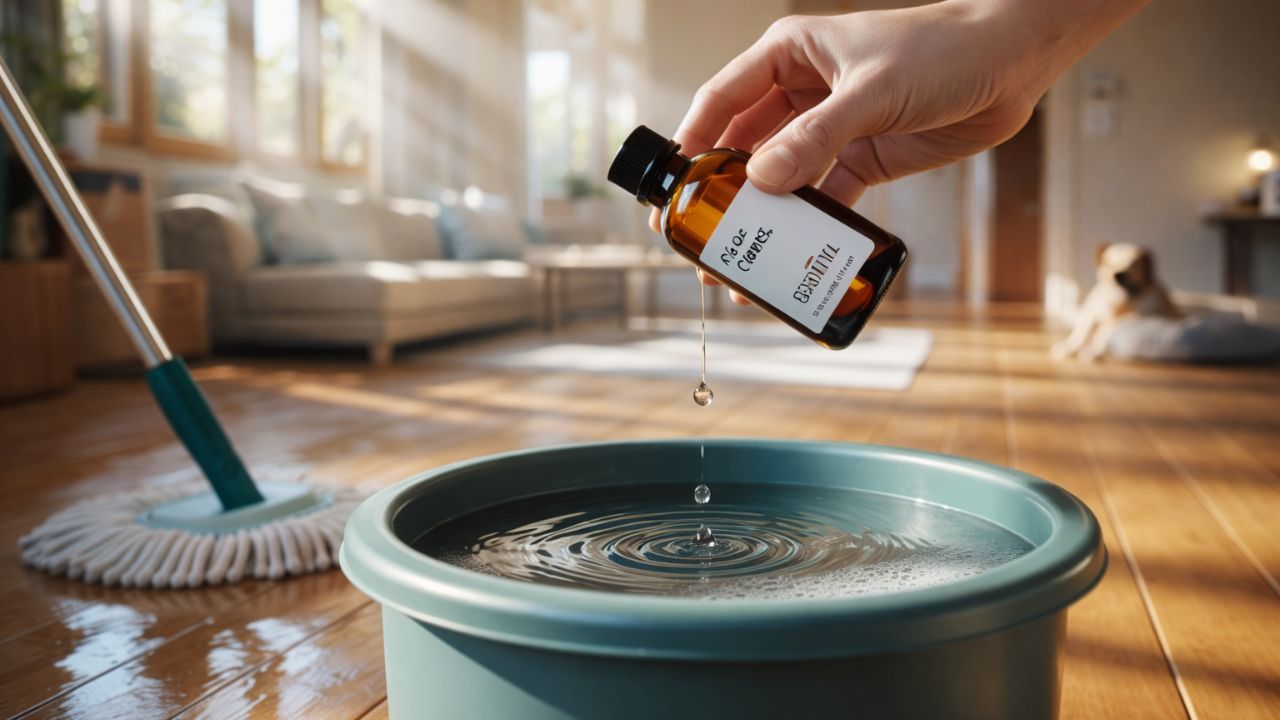
    The Two-Drop Method Professionals Rely On

    This is the understated trick professionals use when they want a home to smell clean without screaming chemicals. Fill your mop bucket with warm water and your usual floor cleaner. No special brand needed.

    Next, take a small bottle of high-quality essential oil or a floor-safe fragrance oil. Scents like lavender, cotton, eucalyptus, white tea, or a soft woody blend work well.

    Add exactly two drops to the bucket. Not more. Swirl the mop gently to distribute the fragrance. Mop as usual, focusing on entryways, hallways, and the area around the sofa — your natural scent corridor.

    Once the floor dries, step outside for ten minutes. When you return, the difference is subtle but unmistakable.

    Common Mistakes That Ruin the Effect

    Many people make the same mistake they do with perfume. They assume more means better. That’s how you end up with a living room that smells like a candle shop disaster. Stick to the tiny dose. You want atmosphere, not a headache.

    Another error is using cheap burner oils filled with dyes or heavy solvents. These can leave streaks or sticky patches. Choose pure essential oils or floor-safe fragrance oils from trusted sources.

    If you have pets, read labels carefully. Oils like tea tree or strong peppermint can irritate cats and dogs. Your home’s scent should comfort everyone living there.

    A house doesn’t need to smell like chlorine or baked goods. A gentle, clean aroma that people notice but can’t quite identify feels far more refined.

    Why This Small Habit Changes How Home Feels

    After a long day, the first thing you encounter isn’t your sofa or your phone. It’s the air. It silently tells you whether you’re home or still behind on chores. When your floors release a soft, clean scent from days earlier, your body relaxes without effort. Shoulders drop before you realise why.

    Scent is one of the strongest memories a home leaves behind. Guests won’t remember your candle brand, but they’ll remember that your place always smells good. Children grow up saying, “Mum’s house has its own smell,” even if they can’t explain it.

    Practically speaking, this habit is simple, affordable, and surprisingly powerful. No plug-ins in every room. No sprays on every cushion. Just mop water, cleaner, and two drops. No vinegar bite. No fake lemon competing with dinner. Just a calm trail that lingers quietly into the next day.

    Key Takeaways at a Glance

    • Use only two drops: Adds long-lasting scent without overpowering the space.
    • Choose gentle oils: Lavender, cotton, eucalyptus, or soft woody blends work best.
    • Focus on key areas: Entryways and living spaces deliver the strongest impact.
  • Optical Illusion Challenge: Only Sharp Minds Can Find the Hidden Number 034

    Optical Illusion Challenge: Only Sharp Minds Can Find the Hidden Number 034

    Optical illusions continue to capture attention because they go beyond simple entertainment. They push the brain to think deeper, sharpen focus, and demonstrate how easily visual perception can be misled. This popular visual puzzle has gone viral for challenging viewers to locate the hidden number 034 within a pattern that appears uniform at first glance. Many believe only those with strong observation skills and quick mental processing can solve it in seconds.

    At first glance, the image looks straightforward and repetitive. Rows of identical numbers appear evenly arranged, sharing the same font, color, and background. The brain quickly accepts this visual uniformity and stops actively searching for differences. This automatic assumption is what makes the illusion tricky. The number 034 is subtly blended into the pattern, remaining unnoticed unless each group is examined carefully.

    Why Optical Illusions Like This Fool the Brain

    The human brain is naturally wired to recognize patterns rapidly. This ability helps us process information efficiently in daily life, but it also makes us vulnerable to visual deception. When the brain repeatedly sees the same number, such as 084, it begins to predict the next one without fully checking it.

    This illusion exploits that shortcut. The difference between 084 and 034 is minimal, especially when the font design causes the number 3 to resemble parts of an 8 at a quick glance. Since spacing and color remain unchanged, the brain does not immediately detect the variation. Viewers must consciously slow down and override pattern recognition to spot the difference.

    What Makes the Number 034 Difficult to Detect

    One major reason this puzzle feels challenging is its visual consistency. Every group uses the same white font on a solid purple background. There are no visual cues like color shifts, shadows, or spacing changes to guide the eye. The only difference lies in a single digit, which is easy to overlook when scanning quickly.

    Placement also plays a role. The hidden 034 is positioned toward the lower-right area of the image. Most people scan from the top left and move systematically across rows. As focus decreases over time, subtle changes become easier to miss. This strategic placement significantly increases the difficulty.

    How This Illusion Tests Focus and Mental Sharpness

    Although intelligence cannot be defined by one puzzle, illusions like this do challenge important cognitive abilities. These include attention to detail, sustained focus, and visual discrimination. Those who solve it quickly often slow down their scanning process and verify each number instead of relying on assumptions.

    Time pressure adds another layer of difficulty. Many versions of this challenge give viewers only nine seconds to find the hidden number. This forces the brain to balance speed with accuracy. Spotting 034 under these conditions reflects strong concentration and visual awareness.

    Helpful Tips to Find the Hidden Number Faster

    If you did not spot the number right away, that is completely normal. Optical illusions are designed to challenge even sharp minds. One useful technique is to scan the image vertically instead of horizontally. Changing the scanning direction disrupts pattern expectations and helps reveal differences.

    Another effective approach is to focus on the middle digit of each number group. In this puzzle, identifying a 3 instead of an 8 is the key. By briefly ignoring the surrounding digits and checking each center number, the hidden 034 becomes easier to detect.

    The Clear Explanation of the Solution

    In the image, nearly all number groups display 084. Each set shares identical font weight, spacing, and color, making them appear the same. However, in the lower-right section, one group reads 034 instead.

    The difference is subtle because the curved shape of the number 3 blends into the design. A closer look reveals that its curves do not fully connect the way an 8 does. Once this detail is noticed, the hidden number becomes obvious.

    Why Optical Illusions Like This Are So Popular

    Visual challenges such as this are trending on social media because they are quick, engaging, and easy to share. They spark curiosity and provide a sense of achievement when solved. Many people enjoy comparing results with friends, which helps these puzzles spread rapidly.

    With shorter attention spans becoming more common, content that delivers instant engagement is in high demand. Optical illusions meet this need perfectly by offering a brief mental workout that leaves a lasting impression.

    Final Thoughts on the Hidden Number 034 Puzzle

    This optical illusion shows that seeing is not always believing. What looks identical at first glance can hide clever details that only appear through focused observation. Whether you found the hidden number immediately or needed more time, the challenge highlights how perception shapes what we notice.

    Puzzles like this are an excellent way to sharpen the mind, improve concentration, and step away briefly from routine thinking. If you enjoyed this challenge, exploring more number-based illusions can further train your brain to slow down, observe carefully, and question what seems obvious.

  • Optical Illusion Challenge: Find the Hidden Number 653 Before Time Runs Out

    Optical Illusion Challenge: Find the Hidden Number 653 Before Time Runs Out

    Are you confident in your visual awareness? Optical illusion puzzles go beyond eyesight. They test how efficiently and accurately your brain interprets what it sees. What seems obvious at first often becomes misleading once repetition and visual patterns take over. That is exactly what makes this illusion deceptively difficult and widely shared.

    In this challenge, the task is to locate the hidden number 653 within a grid packed with nearly identical numbers. The twist is subtle. The variation is minimal. Your brain works against you by assuming everything follows the same structure. Many people pass over the answer multiple times without noticing it.

    Why Optical Illusions Challenge More Than Your Eyes

    Optical illusions succeed because the brain favors speed and efficiency. When it encounters repeated shapes or numbers, it stops examining each one carefully. Instead, it recognizes a pattern and fills in the rest automatically. This habit is useful in daily life, but in puzzles like this, it causes errors.

    That is why optical illusion challenges are often associated with IQ-style tests. They do not measure intelligence scientifically, but they highlight focus, attention to detail, and how easily the mind relies on pattern-based shortcuts.

    Breaking Down the Hidden 653 Puzzle

    At first glance, the grid appears neat and uniform. Rows of numbers look identical in font, spacing, and color. Your eyes quickly register them as the same number repeated throughout. This sense of consistency is what conceals the odd one.

    The challenge suggests that only people with high intelligence can spot the hidden 653. The reality is more nuanced. The number is not missing. It has been altered. One entry in the grid looks almost the same as the rest but contains a subtle digit rearrangement.

    Because the surrounding numbers repeat flawlessly, your brain reads them automatically. It assumes every set displays 653 and moves on without checking each digit closely.

    How Time Pressure Makes the Illusion Stronger

    Most people attempt this puzzle under tight time limits, often within seven or eight seconds. That pressure changes how the image is processed. Instead of carefully examining each number, you scan quickly and trust your first impression.

    This is where the illusion becomes especially effective. Speed encourages assumptions. The faster you move, the more likely your brain is to miss the tiny difference hiding in plain sight. Even people who consider themselves highly detail-oriented often miss the answer on their first attempt.

    The Solution Explained Simply

    If you struggled to find the hidden number, you are not alone. The solution reveals that the odd number is actually 635, not 653. It appears near the lower central area of the grid. The font, spacing, and color match the surrounding numbers perfectly, making the difference hard to detect at a quick glance.

    The key trick lies in the reversal of the middle and last digits. Because your brain expects to see 653 repeatedly, it reads 635 as 653 without noticing the swap. Once revealed, the difference becomes obvious, and many people are surprised they overlooked it.

    This moment clearly shows how strongly expectation influences perception.

    What This Puzzle Shows About Focus and Intelligence

    Finding the hidden number is less about intelligence and more about attention control. Those who spot it quickly tend to slow down and question what they are seeing. They verify each digit instead of trusting the overall pattern.

    Those who miss it are not less capable. Their brains are simply doing what they are designed to do, which is save time by recognizing patterns. Optical illusions expose this habit in a way that feels surprising and sometimes frustrating.

    Why Number-Based Illusions Spread So Fast

    Puzzles like this gain popularity because they are easy to understand and hard to solve. A short challenge that claims to test IQ immediately captures attention. People want to test themselves, challenge others, and share outcomes.

    Number-based illusions work especially well because numbers feel familiar. We encounter them daily, so we assume we can read them instantly. That confidence strengthens the illusion when it proves us wrong.

    Tips to Spot Hidden Numbers More Quickly

    To improve at puzzles like this, adjust how you scan the image. Instead of reading the entire number, focus on one digit position at a time. Scan only the middle digits or only the last digits across the grid. This disrupts the pattern your brain depends on.

    Another useful approach is to slow down slightly. Rushing increases mistakes. Careful observation reveals differences. Even one extra second can make a significant difference.

    Final Thoughts: Did You Notice the Hidden 653?

    Whether you spotted the hidden number immediately or needed the solution, this optical illusion delivers a clear reminder. What we believe we see is often shaped by expectation rather than reality.

  • Optical Illusion Challenge: Can You Spot the Letter B Hidden Among Ds in 5 Seconds

    Optical Illusion Challenge: Can You Spot the Letter B Hidden Among Ds in 5 Seconds

    Do you think your eyes can catch tiny visual details under pressure? Optical illusion challenges like this are built to test that exact skill. They may look easy at first, but once the countdown begins, your brain quickly realizes the task is far more demanding. This five-second visual test has drawn attention because it pushes focus and reaction speed to the edge.

    In this challenge, you are shown a grid packed with the lowercase letter “d”. At first glance, every character looks identical. However, hidden among them is one lowercase “b”. Your mission is to locate it in just five seconds. The difference is subtle, the time is tight, and your brain is tempted to make quick assumptions.

    How the Five-Second Letter B Illusion Works

    This illusion depends on repetition and visual similarity. The letters “b” and “d” are mirror versions of each other, making them ideal for confusion. When repeated across a dense grid, your eyes tend to skim rather than carefully inspect each shape.

    At first glance, the brain labels the entire grid as uniform. It assumes all the letters are the same and switches into pattern-recognition mode. That is where the illusion takes over. The hidden “b” only becomes visible when you slow down and focus on the exact shape of each letter.

    Why This Puzzle Confuses the Brain

    The human brain is designed to conserve energy. When it notices repeated objects, it stops analyzing each one in detail. While this is useful in daily life, optical illusions take advantage of this shortcut.

    In this puzzle, the loop of the “d” appears on one side, while the loop of the “b” sits on the opposite side. Under a five-second limit, the brain often overlooks this difference. It fills in what it expects to see instead of what is actually there.

    This is why many people miss the hidden “b”, even when their eyes pass directly over it.

    The Five-Second Countdown: Can You Beat It?

    Five seconds feels extremely short once scanning begins. Most people start from the top left and rush through each row. Others move randomly, hoping something will stand out.

    As time slips away, pressure increases. Your eyes move faster, but accuracy drops. That tension is what makes the challenge engaging. It forces the brain to juggle speed and precision at the same time.

    Finding the “b” immediately suggests strong visual focus. Struggling does not indicate weak ability. It simply highlights how powerful repetition becomes when combined with time pressure.

    Where the Hidden Letter Is Located

    If you could not locate the letter in time, the solution brings instant clarity. The lowercase “b” is placed in the final row near the bottom-right corner of the grid. Once revealed, the difference becomes clear.

    The main visual clue is the direction of the loop. The “b” has its closed loop on the right side, while every “d” has the loop on the left. Knowing this detail makes the letter easy to spot.

    This moment of realization is what makes optical illusions so rewarding. Something that once seemed invisible suddenly becomes obvious.

    What This Illusion Reveals About Focus

    Puzzles like this show how attention behaves under pressure. When rushed, the brain relies on assumptions. It decides that checking every detail is unnecessary and moves on quickly.

    People who perform well often focus on shape orientation instead of overall patterns. They train themselves to search for differences rather than similarities. Practicing visual challenges like this can improve patience and attention to detail over time.

    Why Letter-Based Optical Illusions Go Viral

    Letter and number illusions are especially effective because they use familiar symbols. Since the brain sees letters like “b” and “d” daily, it becomes easier to overlook small differences.

    These challenges are also easy to share. A five-second test fits perfectly into short attention spans and social feeds. Friends challenge friends, comments fill with guesses, and people return to try again.

    This balance of simplicity and difficulty keeps these puzzles trending.

    Tips to Get Better at Spot-the-Difference Puzzles

    To improve at challenges like this, slow down your scanning method. Instead of sweeping across the grid, focus on small sections one at a time. Watch for orientation, curves, and spacing rather than the full pattern.

    Another useful technique is to search for what does not belong. Rather than looking for a “b”, scan for any letter whose loop faces the wrong direction. This simple mindset shift can greatly improve results.

    Final Takeaway: Did You Find the Letter B in Time?

    Whether you spotted the hidden “b” within five seconds or needed the answer, this optical illusion gave your brain a quick mental workout. It tested focus, challenged assumptions, and showed how easily visual perception can be tricked.

  • Gentle Yoga Stretches Help Beginners Improve Flexibility Without Overstraining

    Gentle Yoga Stretches Help Beginners Improve Flexibility Without Overstraining

    Starting yoga without being naturally flexible can feel intimidating at first. You may worry about doing poses incorrectly or falling behind others in class. The truth is simple: yoga is designed for real people with real bodies. You do not need flexibility before you begin. Flexibility develops through consistent practice. When you start with gentle, beginner-friendly stretches, your body adapts gradually without pressure. Over time, you may notice improvements in how your body moves and feels during everyday activities. Yoga emphasizes steady progress rather than instant perfection. Every stretch and every breath supports better mobility and overall comfort.

    Why Gentle Yoga Is the Smartest Way to Build Flexibility Safely

    Beginning with a gentle yoga approach is one of the safest ways to improve flexibility. Simple stretches help you focus on proper alignment and body awareness. This reduces the risk of injury and builds a strong foundation for future growth. Gentle poses also strengthen the mind–body connection. Slower movements make it easier to notice physical limits and recognize when to ease off. This awareness builds confidence and encourages consistent practice. Research on exercise habits shows that people who start with manageable routines are more likely to stay committed long term. Gradual progression prepares your muscles, joints, and nervous system for more advanced poses while keeping your practice comfortable and sustainable.

    Beginner-Friendly Yoga Stretches for Tight Muscles

    This collection of beginner-safe yoga stretches focuses on areas that commonly feel tight, including the neck, back, hips, and hamstrings. Move slowly, breathe evenly, and stay within a comfortable range. The goal is not depth, but steady and relaxed movement.

    Slow Neck Circles to Release Daily Tension

    What it targets: Neck muscles and upper shoulders.

    How to perform: Gently move your head in slow circular motions while maintaining steady breathing.

    Why it helps: This stretch releases stiffness caused by screen time and prolonged sitting, allowing your neck to move more freely.

    Beginner tip: Keep movements controlled and never push beyond what feels comfortable.

    Seated Spinal Twist for a More Mobile Back

    What it targets: Spine, waist, and oblique muscles.

    How to perform: Sit upright with a straight back. Slowly rotate your upper body to one side while keeping your hips forward. Return to center, then switch sides.

    Why it helps: This twist improves spinal mobility and reduces stiffness from prolonged sitting.

    Beginner tip: Use your hands for light support and rotate only as far as feels natural.

    Cat–Cow Flow to Gently Awaken the Spine

    What it targets: Spine, core, and shoulders.

    How to perform: Begin on hands and knees. Round your back upward, then slowly arch it while letting your belly drop. Continue alternating smoothly.

    Why it helps: This flow increases spinal flexibility and helps release built-up tension.

    Beginner tip: Match each movement with your breath and transition slowly.

    Child’s Pose for Relaxation and Hip Comfort

    What it targets: Lower back, hips, and shoulders.

    How to perform: Sit back on your heels and extend your arms forward or rest them alongside your body.

    Why it helps: This pose promotes deep relaxation while gently stretching the spine.

    Beginner tip: Use cushions or folded blankets for added support if needed.

    Thread the Needle Stretch for Shoulder Release

    What it targets: Upper back, shoulders, and neck.

    How to perform: From a hands-and-knees position, slide one arm under your chest toward the opposite side. Rest gently and breathe deeply, then switch sides.

    Why it helps: This stretch eases shoulder tension and improves upper-back mobility.

    Beginner tip: Place a pillow or block under your shoulder if reaching the floor feels uncomfortable.

    Seated Butterfly Pose for Hip and Inner Thigh Flexibility

    What it targets: Hips and glutes.

    How to perform: Sit upright and bring the soles of your feet together. Allow your knees to relax outward while keeping your spine tall.

    Why it helps: This stretch gently opens the hips and inner thighs.

    Beginner tip: Sit on a folded blanket if your hips feel tight.

    Reclined Figure-Four Stretch for Gentle Hip Mobility

    What it targets: Glutes and hips.

    How to perform: Lie on your back with knees bent. Place one ankle over the opposite knee and gently draw the supporting leg toward your chest. Switch sides after holding.

    Why it helps: This stretch reduces hip tightness and eases lower-back discomfort.

    Beginner tip: Keep the raised foot flexed to protect your knee.

    Knees-to-Chest Pose to Ease Lower-Back Tension

    What it targets: Hips, inner thighs, and lower back.

    How to perform: Hug your knees toward your chest or hold behind your thighs while gently opening your hips.

    Why it helps: This pose releases hip tension and reduces pressure on the spine.

    Beginner tip: Hold behind your knees if reaching your feet is difficult.

    Seated Forward Bend for Calm Hamstring Stretching

    What it targets: Hamstrings, calves, and spine.

    How to perform: Sit tall and hinge forward from your hips while keeping your spine long.

    Why it helps: This stretch gradually improves hamstring flexibility and promotes relaxation.

    Beginner tip: Bend your knees slightly and focus on lengthening your spine.

    Standing Forward Bend for Full Back-Body Release

    What it targets: Hamstrings, back, and shoulders.

    How to perform: Fold forward from the hips with soft knees and relaxed arms.

    Why it helps: This pose stretches the entire back of the body and calms the nervous system.

    Beginner tip: Let gravity work naturally and avoid forcing the stretch.

    Signs Your Body Is Ready for Deeper Yoga Practice

    After about six to eight weeks of regular practice, you may notice positive changes. Simple poses feel easier to hold, tight areas move more freely, and your breathing feels more controlled. You may practice consistently and feel curious rather than anxious about new poses. At this stage, longer sessions or beginner flow classes can be explored. Small adjustments to familiar poses are often more effective than jumping straight into advanced yoga.

    Building Flexibility Gradually and Comfortably

    Flexibility develops with time, patience, and consistency. Trying to rush progress often leads to discomfort or injury. These gentle yoga stretches create a reliable foundation for better movement and reduced tension. Continue practicing regularly and remember that each comfortable stretch contributes to long-term progress.

  • Plank Hold Timing Shifts by Age and Impacts Core Strength More Than Expected

    Plank Hold Timing Shifts by Age and Impacts Core Strength More Than Expected

    The floor feels cool beneath your forearms. Your toes press firmly into the mat, your legs switch on, and your breathing settles into a steady, controlled rhythm. Between the tight engagement of your core and the sharp focus in your mind, a familiar question appears: how long should you hold this? Ten seconds? Thirty? Or two long minutes that seem to stretch forever?

    Planks are often seen as a simple, one-size-fits-all exercise, but in reality, they are an ongoing conversation between your body and gravity. That conversation changes with time. What feels strong and effortless at 18 can feel demanding at 48, or require thoughtful adjustment at 68. No matter your age, your core remains your foundation, supporting your spine, protecting your back, and helping your body move smoothly.

    So how long should a plank be held to build strength without drifting into strain, pain, or ego-driven effort? The answer comes from understanding your body exactly as it is today.

    The Quiet Strength at Work Inside Your Core

    Many workouts make themselves known through noise and motion—feet striking the ground, weights clanging, breath becoming loud and sharp. Planks arrive differently. Your body lines up into one long shape, shoulders stacked over elbows or wrists, heels reaching back, and the head resting comfortably between them. From the outside, nothing appears to move.

    Inside, however, a precise and steady effort unfolds. The transverse abdominis wraps around your midsection like a supportive belt. The multifidus offers subtle protection to the spine. The diaphragm connects breath to effort, while the pelvic floor provides stable support from below. These muscles respond best to calm, controlled work repeated consistently.

    This is why quality matters more than duration. A tense, collapsing one-minute plank offers fewer benefits—and more risk—than a clean twenty-second hold performed with control. Time only matters until the moment your form begins to fade.

    Why the Two-Minute Plank Gets Too Much Attention

    Modern fitness culture often celebrates extremes: two-minute planks, five-minute challenges, and viral clips of bodies shaking under pressure. Over time, longer holds became associated with better results.

    The reality is far quieter. Beyond a certain point, extending a plank mainly builds tolerance for discomfort rather than meaningful strength. Research and experienced coaching consistently show that shorter, high-quality holds done regularly are more effective for core strength and spinal health than occasional endurance-based efforts.

    Long planks are not automatically harmful, but as fatigue sets in, the balance shifts. The focus naturally moves from “How long can I last?” to “How well am I supporting my body right now?”

    Age, Gravity, and Changing Body Needs

    As the years pass, the body recalibrates. Recovery slows slightly, tissues become less forgiving, and balance demands more attention. A plank that once felt effortless may now feel intentional, and that shift reflects normal biology, not weakness.

    Instead of following a single rule, it helps to think in flexible ranges. The ideal plank duration ends just before your alignment begins to break down. The ranges below apply to healthy adults without major injuries or medical concerns.

    • Teens (13–19): 20–40 seconds, 2–4 sets, 2–4 days per week
    • 20s–30s: 30–60 seconds, 2–4 sets, 3–5 days per week
    • 40s: 20–45 seconds, 2–4 sets, 3–4 days per week
    • 50s: 15–40 seconds, 2–3 sets, 2–4 days per week
    • 60s–70s and beyond: 10–30 seconds, 2–3 sets, 2–4 days per week

    These ranges are guideposts, not judgments. What matters most is the integrity of every second you choose to hold.

    Your 20s and 30s: Building Strength With Confidence

    In your 20s and 30s, the body often feels generous. Recovery is quick, tissues are resilient, and strength develops easily. This is when many people pursue longer plank holds, and with proper form, thirty to sixty seconds can be effective.

    The hidden risk is not weakness but missed signals. Hips may begin to dip, shoulders may creep upward, and the lower back may quietly complain. Splitting effort into multiple shorter, well-controlled holds often produces better results than one long, exhausting attempt.

    Your 40s: Strength Guided by Awareness

    By your 40s, the body’s feedback becomes clearer. Old injuries may reappear, stiffness arrives sooner, and recovery requires more respect. Strength remains, but it thrives when paired with greater awareness.

    For many people, the most effective plank range now sits between twenty and forty-five seconds, repeated several times. Some days allow more, while others call for less. The emphasis shifts toward sustainability and long-term spinal support.

    Your 50s, 60s, and Beyond: Steady and Intelligent Strength

    Later decades invite a broader definition of strength. Muscle mass may gradually decline, and recovery may take longer, but adaptation remains possible. Planks continue to offer value, even when they look different.

    Shorter holds of ten to thirty seconds, performed with excellent alignment, can be highly effective. Modified options, such as knee or incline planks, are not compromises. They are smart adjustments that protect posture, stability, and confidence.

    Knowing When It’s Time to Stop

    Your body always signals when a plank moves from productive to risky. Common signs include sagging in the lower back, shoulders lifting toward the ears, breath being held, or tension spreading across the face. When these cues appear, it is time to stop.

    Ending a plank at the first sign of form loss is not giving up. It is skilled training that prioritizes control and efficiency over collapse.

    Turning Planks Into a Sustainable Routine

    Planks do not need intensity or drama. They can fit easily into daily life—a brief hold before coffee, another after work, and one more before bed. Over time, these small, consistent efforts add up.

    The real reward is not a personal record. It is the quiet ease of standing taller, moving with confidence, and supporting your body through everyday movement. Hold the plank only as long as your form stays honest. Rest. Repeat. That is where lasting core strength is built.

  • Yoga Poses Designed for All Ages Support Flexibility Strength and Safe Movement

    Yoga Poses Designed for All Ages Support Flexibility Strength and Safe Movement

    Yoga is a gentle and adaptable practice that suits people of all age groups. It supports better flexibility, strength, and balance while contributing to overall well-being. One of yoga’s biggest advantages is its simplicity—you don’t need advanced skills or costly equipment. All you need is your body and a mat. Below are nine beginner-friendly yoga poses designed to support both physical health and mental focus at any stage of life.

    Nine Easy Yoga Poses for All Ages

    Mountain Pose (Tadasana)

    Why it works for everyone: Mountain Pose may appear basic, but it plays an important role in developing proper posture, balance, and body awareness. It forms the foundation for many standing poses and is safe for all age groups.

    How to practice: Stand upright with your feet together and arms resting by your sides. Spread your weight evenly across both feet, gently lift your chest, and lengthen your spine upward. Engage your core and maintain slow, steady breathing.

    Benefits: Improves posture, strengthens the legs, and supports mindfulness.

    Child’s Pose (Balasana)

    Why it works for everyone: Child’s Pose is a deeply restorative posture that allows the body to relax while providing a gentle stretch. It’s especially suitable for beginners, older adults, or anyone needing a calming break.

    How to practice: Start on your hands and knees, then slowly sit your hips back toward your heels. Extend your arms forward and rest your forehead on the mat, allowing the neck and shoulders to soften.

    Benefits: Gently stretches the back, hips, and thighs while calming the nervous system.

    Cat–Cow Pose (Marjaryasana–Bitilasana)

    Why it works for everyone: This flowing movement supports spinal flexibility and helps release built-up tension. It’s particularly helpful for people who spend long hours sitting.

    How to practice: Come onto all fours with your wrists under your shoulders and knees under your hips. Inhale to arch your spine and lift your gaze (Cow), then exhale to round your back and tuck your chin (Cat). Move smoothly with your breath.

    Benefits: Enhances spinal mobility, reduces back tension, and encourages better posture.

    Downward-Facing Dog (Adho Mukha Svanasana)

    Why it works for everyone: Downward Dog offers a full-body stretch while gently building strength. It supports circulation, balance, and overall flexibility.

    How to practice: From an all-fours position, lift your hips upward to create an inverted V shape. Press your palms firmly into the mat, keep your spine long, and allow your heels to move toward the floor.

    Benefits: Strengthens the arms and legs, stretches the hamstrings, and improves posture.

    Warrior II (Virabhadrasana II)

    Why it works for everyone: Warrior II helps build strength and stability while opening the hips and chest. It also supports endurance and body awareness.

    How to practice: Stand with your feet wide apart and turn one foot outward. Bend the front knee while extending both arms parallel to the floor. Keep your shoulders relaxed and gaze forward.

    Benefits: Strengthens the legs, improves balance, and increases hip flexibility.

    Tree Pose (Vrksasana)

    Why it works for everyone: Tree Pose encourages balance and mental focus. It’s useful for improving coordination and stability.

    How to practice: Stand tall and shift your weight onto one leg. Place the sole of the opposite foot on your calf or inner thigh, avoiding the knee. Bring your hands together at your chest or extend them overhead.

    Benefits: Enhances balance, strengthens the legs, and sharpens concentration.

    Seated Forward Bend (Paschimottanasana)

    Why it works for everyone: This calming pose gently stretches the spine and lower body, making it ideal for people who sit for extended periods.

    How to practice: Sit with your legs extended straight ahead. Inhale to lengthen your spine, then exhale and fold forward from the hips, reaching toward your feet while keeping your back long.

    Benefits: Stretches the hamstrings and spine while promoting relaxation.

    Bridge Pose (Setu Bandhasana)

    Why it works for everyone: Bridge Pose is a gentle backbend that strengthens the lower body and helps counter the effects of prolonged sitting.

    How to practice: Lie on your back with your knees bent and feet flat on the floor. Press through your feet to lift your hips, keeping your shoulders grounded and your neck relaxed.

    Benefits: Strengthens the lower back, glutes, and legs while opening the chest.

    Savasana (Corpse Pose)

    Why it works for everyone: Savasana allows the body and mind to fully rest and absorb the benefits of the practice. It’s an essential closing pose in any yoga session.

    How to practice: Lie flat on your back with your arms relaxed by your sides and palms facing upward. Close your eyes and focus on slow, natural breathing.

    Benefits: Encourages deep relaxation, reduces stress, and improves mental clarity.

  • 6 Yoga Poses That Support Weight Loss with Safe and Steady Movement

    6 Yoga Poses That Support Weight Loss with Safe and Steady Movement

    Yoga for Weight Loss: Six Effective Poses That Actually Work Yoga for weight loss works differently than most people expect. It does not rely on rushing through poses or pushing your body past its limits. Instead it uses controlled strength & steady movement combined with mindful breathing to build lean muscle and speed up your metabolism while reducing the urge to stress eat. Many people quit yoga for weight loss too soon because they want immediate results. The reality is that yoga supports fat loss in a way that lasts when you practice it correctly & stick with it over time. These six poses were selected because they engage large muscle groups and gently elevate your heart rate while improving how aware you are of your body. These poses work well for beginners but remain effective even for people who practice regularly.

    Why Yoga Supports Weight Loss

    Weight loss is not just about burning calories. Stress hormones such as cortisol strongly influence belly fat and food cravings. Yoga helps calm the nervous system, improve sleep quality, and support hormonal balance. Many yoga poses also build muscle, and muscle naturally burns more calories even when the body is resting. When mindful breathing is combined with movement, the body becomes more efficient. Over time, this leads to fat loss, smoother digestion, and higher energy levels throughout the day.

    Chair Pose (Utkatasana)

    Chair Pose may look simple, but it quickly activates the lower body. It primarily works the thighs, glutes, and core, which are among the largest muscle groups in the body.

    How to do it:
    Stand upright with feet hip-width apart. Bend your knees and sit back as if lowering into a chair. Lift your arms overhead with palms facing each other. Keep your chest open and your weight grounded in the heels.

    Why it helps weight loss:
    Strong leg muscles require more energy. Holding Chair Pose builds endurance and gently raises the heart rate, supporting calorie burn.

    Hold for:
    30 to 60 seconds. Rest and repeat once.

    Boat Pose (Navasana)

    Boat Pose is one of the most effective poses for core strength. A stronger core improves posture and helps flatten the abdominal area over time.

    How to do it:
    Sit on the mat and lean back slightly while keeping the spine long. Lift your legs so the shins are parallel to the floor. Extend your arms forward. If comfortable, slowly straighten the legs.

    Why it helps weight loss:
    This pose activates deep abdominal muscles that are difficult to target with basic exercises. A strong core supports efficient movement.

    Hold for:
    20 to 40 seconds. Repeat two times.

    Plank Pose

    Plank Pose is a powerful full-body strength exercise. It engages the arms, shoulders, core, back, and legs simultaneously.

    How to do it:
    Begin on hands and knees. Step your feet back until the body forms a straight line. Stack shoulders over wrists. Tighten the core and avoid dropping the hips.

    Why it helps weight loss:
    Plank builds lean muscle mass. The more muscle the body has, the more calories it burns throughout the day.

    Hold for:
    30 to 60 seconds. Increase gradually as strength improves.

    Warrior II (Virabhadrasana II)

    Warrior II builds stamina while strengthening the legs and hips. It also promotes mental focus and steady breathing.

    How to do it:
    Step one foot back and bend the front knee. Keep the back leg straight. Stretch the arms out to the sides and gaze over the front hand.

    Why it helps weight loss:
    This pose strengthens the thighs and glutes while challenging balance. Holding it improves endurance and blood circulation.

    Hold for:
    45 seconds on each side.

    Downward Facing Dog

    Downward Facing Dog is often used as a recovery pose, but when held with awareness, it also builds strength and supports fat loss.

    How to do it:
    From hands and knees, lift the hips upward and back. Press the palms firmly into the mat and lengthen the spine. Heels may remain lifted.

    Why it helps weight loss:
    It strengthens the arms and shoulders while engaging the core. This pose also aids digestion and helps reduce bloating.

    Hold for:
    60 seconds with calm, steady breathing.

    Bridge Pose

    Bridge Pose strengthens the lower body and opens the chest, making it especially helpful for people who spend long hours sitting.

    How to do it:
    Lie on your back with knees bent and feet hip-width apart. Press the feet into the mat and lift the hips upward. Keep the thighs active and chest open.

    Why it helps weight loss:
    This pose activates the glutes and helps reduce stress, which supports hormone balance and reduces cravings.

    Hold for:
    30 to 45 seconds. Repeat two times.

    How to Practice These Poses for Better Results

    Consistency is more important than intensity for weight loss. Practice these poses four to five days a week. Flow through them instead of doing each pose separately. Maintain smooth breathing by inhaling through the nose and fully exhaling.

    Sample 15-minute routine:
    -Chair Pose

    – Plank Pose

    – Downward Facing Dog

    – Warrior II (right side)

    – Warrior II (left side)

    – Boat Pose

    – Bridge Pose

    Repeat once if time allows.

    Simple Tips to Support Yoga-Based Weight Loss

    Yoga is most effective when combined with healthy daily habits. Drink enough water and eat balanced meals. Avoid heavy food before practice. Prioritize good sleep, as poor rest slows progress. Be patient, because yoga transforms the body gradually, but the results are long-lasting.

    Who Should Practice With Caution

    Those with knee pain should modify or skip Chair Pose. For lower back discomfort, keep Boat Pose with bent knees. Pregnant individuals or people with medical conditions should consult a professional before beginning.

    Yoga for weight loss is not about pushing the body every day. It is about consistency, mindful movement, and trusting the process.

  • Boiling Orange Peels Instantly Freshens the Home With a Cozy Long-Lasting Winter Scent

    Boiling Orange Peels Instantly Freshens the Home With a Cozy Long-Lasting Winter Scent

    Your cheeks burn from the cold, your fingers feel clumsy, and your keys slip onto the floor as you step inside. Then it hits you. The entire house smells like a sun-drenched orange grove somewhere in southern Spain, even though it’s late January and already pitch dark outside.

    You follow the scent into the kitchen. A small saucepan sits on the stove, gently steaming, releasing slow curls of warm, fragrant air. There’s no candle flickering, no electric diffuser humming, no pricey seasonal spray. Just a few orange peels saved from the compost, quietly simmering in water.

    The shift is almost immediate. The space feels warmer, calmer, softer somehow. Your shoulders relax without you noticing. Your mind settles into a simple thought: this feels good. And in that moment, something ordinary starts to feel like a small, comforting secret.

    Why simmering orange peels feels like winter magic

    Indoor air in winter turns stale fast. Heating systems dry everything out, windows stay shut, and smells hang around longer than they should. Cooking aromas, damp coats, laundry drying indoors, that unmistakable “just came in from the rain” dog scent — it all lingers.

    When orange peels start to simmer, the contrast is striking. Heavy, flat air suddenly picks up a new layer — bright, zesty, gently sweet. It doesn’t overpower the room like artificial fragrance. Instead, it drifts quietly from space to space, almost as if it’s resetting the mood along the way.

    That’s why the effect feels bigger than simply smelling nice. It’s more like pressing a reset button on the entire home. A small, effortless action that subtly changes how the space feels for hours afterward.

    There’s beauty in how it begins. Someone peels an orange at the table, sets the skin aside, then hesitates. Instead of tossing it out, they grab a small pot, add water, and drop the peels in with a soft splash.

    A few minutes after the water starts to boil, the scent comes alive. In a medium-sized flat, it can reach the hallway and bedroom within ten to fifteen minutes. In a larger home, it spills out of the kitchen first, settling into the living room on currents of warm air.

    People who try it often say the same thing: they didn’t expect it to work so well. One UK home blogger shared that her children nicknamed it “orange house day” and asked for it again instead of lighting a candle. It’s not scientific proof, but the pattern is clear — the effort is tiny, the emotional payoff is surprisingly large.

    There’s also a practical reason this works better than spraying synthetic citrus scents. Orange peels contain natural aromatic compounds such as limonene and linalool. When heated, these molecules evaporate into the steam and disperse gently through the air.

    Unlike many room sprays that simply cover up odours, the steam itself helps lift and disperse lingering smells. Kitchens that still carry traces of fried onions or fish calm down more quickly. The added moisture can also ease winter dryness, making the air feel softer and less harsh.

    And because you’re using something that would have been thrown away, there’s a quiet sense of satisfaction. You’re turning waste into atmosphere. On a grey day, that small feeling can completely change how you experience your home.

    How to simmer orange peels for a lasting scent

    The method couldn’t be simpler. Save your orange peels, place them in a small saucepan with water, bring it to a boil, then reduce to a gentle simmer. Let it run for 30 to 60 minutes, topping up the water if it starts to get low.

    Fresh peels work best. One or two oranges are enough for a small flat, while three or four suit a larger or more open space. Leave the lid off so the steam can escape and travel naturally through the house.

    For a deeper, more seasonal scent, you can add a cinnamon stick, a few cloves, or a slice of fresh ginger. This shifts the aroma from bright citrus to something warmer and more winter-friendly, without losing its natural feel.

    There are a few easy ways to dilute the effect. Using a pot that’s too large and filling it nearly to the top weakens the scent by throwing off the peel-to-water ratio. Letting it simmer unattended for hours can also backfire — once the water evaporates, the peels can burn, and that smell is the opposite of cozy. Setting a simple timer helps avoid that.

    It’s also worth managing expectations. This isn’t a hotel-lobby diffuser. The scent is soft, organic, and uneven from room to room, and that’s part of the appeal. If you prefer a stronger aroma, adding extra peel or a drop of essential oil can help.

    “The first time I tried this, I didn’t say anything,” one person shared. “My husband walked in, stopped in the hallway, and asked what candle I’d lit. He said it smelled like we’d cleaned the entire house. We hadn’t. It was just the peels from breakfast.”

    To make this habit easy to keep, let it fit into your routine:

    • Store peels in a glass jar in the fridge for up to two or three days
    • Start the pot while cooking or making tea
    • Use a small, heavy-bottomed saucepan for a gentle simmer
    • Add apple cores or lemon peels for subtle variation
    • Open interior doors so the scent can move freely

    The quiet comfort of a home that smells like oranges in winter

    On a basic level, citrus scents gently stimulate the brain. Research on smell and mood often links orange and lemon aromas with reduced stress and improved alertness, even at low levels. Your nose recognises it immediately as clean and fresh.

    There’s also the seasonal contrast. Winter narrows daily life — the same walls, early darkness, heavy coats drying indoors. When your home suddenly smells bright and sunny, your mind receives a small but powerful signal: the world isn’t only cold and grey.

    On a more personal level, this simple ritual says something important: you’re taking care of your space. Not in a grand or picture-perfect way, but in a quiet, everyday way. On a difficult evening, that can be the difference between enduring the night and actually relaxing into it.

    There’s a social element too. Visitors notice. Children remember. A neighbour drops by and casually says, “Your place always smells so good in winter.” That comment lingers longer than you’d expect.

    On a cold Sunday, letting orange peels simmer while soup bubbles nearby anchors you in the present. You’re not chasing trends or aesthetics. You’re simply making the air around you a little kinder.

    We’ve all opened the door after a long day and thought, “It feels stuffy in here.” It’s subtle but discouraging. A small pot of citrus steam can turn that moment into something entirely different.

    Once you experience that shift, it’s hard to forget.

    This ritual scales easily. A tiny studio with a single hob needs just one orange and ten minutes. A busy family home benefits from a few oranges simmering through the afternoon. You can share it without preaching — mention it to a friend tired of synthetic sprays, make it when someone’s under the weather, or let children toss the peels into the pot as part of a winter routine.

    The scent fades, but the feeling stays.

    Key points at a glance

    • Simple winter ritual: Simmer leftover orange peels for 30–60 minutes to refresh your home quickly
    • Natural, lasting aroma: Citrus oils and steam travel gently without synthetic chemicals
    • Emotional comfort: Creates a cozy, cared-for atmosphere that lifts winter moods
  • Only Sharp Eyes Can Find the Inverted 91 Hidden Among Inverted 19s

    Only Sharp Eyes Can Find the Inverted 91 Hidden Among Inverted 19s

    An Optical Illusion IQ Test offers an entertaining method to exercise your brain and measure your visual thinking skills. These tests use images or patterns that trick your eyes to assess how well your mind processes information. This particular challenge examines how carefully you observe details & how quickly you can identify visual differences. The task is straightforward but requires focus. You need to find the distinction between the numbers 91 & 19 when they appear flipped upside down within a time limit of 9 seconds. This exercise demonstrates how your brain interprets visual information under pressure & whether you can maintain concentration when searching for small variations in similar-looking elements.

    Understanding Optical Illusion IQ Tests

    Optical illusion IQ tests use cleverly designed images that allow for more than one interpretation. These visuals rely on subtle tricks, forcing the brain to work harder than usual. Often, they include hidden elements, complex patterns, or tiny visual differences that demand strong observation skills. By identifying these details quickly, the test examines how efficiently your brain processes visual information.

    The idea behind optical illusion IQ tests comes from cognitive psychology. These challenges assess abilities such as attention to detail, focus, pattern recognition, and spatial awareness. Together, these skills contribute to mental agility and fast decision-making, both of which play an important role in everyday tasks and problem-solving situations.

    Why Optical Illusion IQ Tests Matter

    Optical illusions go far beyond simple entertainment. They actively stimulate several cognitive functions at once. Solving these puzzles regularly can strengthen your brain’s ability to concentrate, process information, and think critically. Over time, this mental exercise sharpens awareness and improves your ability to notice details that are easy to overlook.

    These tests are also known to engage the right side of the brain, which governs creativity and visual-spatial skills. These abilities are especially valuable in areas such as design, architecture, and analytical problem-solving. Because of this balance between challenge and enjoyment, optical illusion IQ tests offer an engaging way to assess cognitive ability without feeling overwhelming.

    The Visual Challenge: Finding the Inverted 91

    In this specific optical illusion IQ test, the goal is simple but demanding. You must spot the inverted “91” hidden among multiple inverted “19s” within just 9 seconds. At first glance, every number appears nearly identical, since both combinations use the same digits. The challenge lies in the fact that all numbers are flipped upside down, making visual distinction more difficult.

    The grid is filled primarily with inverted “19s.” However, one entry is different. That single number forms an inverted “91.” Your task is to identify which number breaks the pattern by carefully examining how the digits are arranged in their flipped state.

    The Key Strategy to Solving the Puzzle

    To solve this illusion, focus closely on the number arrangement rather than the digits themselves. While inverted “19” and inverted “91” appear similar at first, there is a subtle structural difference. When the number “91” is flipped, it creates a distinct visual alignment that sets it apart from the others.

    By stepping back and scanning the grid carefully, you can notice that one number does not follow the same pattern. The inverted “91” is located in the bottom-left corner of the grid, and its reversed digits do not align like the surrounding numbers, making it identifiable with focused observation.

    Why This Optical Illusion Is Difficult

    The difficulty of this test comes from the high visual similarity between the numbers 19 and 91. The brain naturally tries to recognize familiar patterns quickly, which can lead to mistakes when many objects look nearly the same. Under time pressure, this tendency becomes even stronger.

    The 9-second time limit adds urgency, pushing your brain to process visual information rapidly. This combination of similarity and speed makes the illusion an effective way to evaluate mental focus, attention span, and visual processing efficiency.

    Cognitive Abilities Tested by This Illusion

    Attention to Detail

    This challenge requires you to detect very small differences between nearly identical visuals. Strong attention to detail is essential in roles that demand accuracy, careful observation, and analytical thinking.

    Pattern Recognition

    Quickly identifying patterns and noticing when something does not belong reflects how effectively your brain processes information. This skill is critical for problem-solving and decision-making.

    Visual-Spatial Awareness

    Visual-spatial awareness helps you understand how objects relate to one another in space. This illusion tests your ability to interpret flipped or rotated visuals and recognize differences in orientation.

    Speed of Thinking

    The limited time forces rapid evaluation and response. Your ability to act quickly under pressure highlights your cognitive speed and mental responsiveness.

    Mental Flexibility

    Successfully completing this test also relies on mental agility. The ability to shift focus, adapt your thinking, and reassess visual information plays a major role in completing the challenge accurately.

    Solution: Locating the Inverted 91

    After carefully reviewing the grid, the solution becomes clear. The inverted “91” is positioned in the bottom-left corner of the image. It stands out because it does not match the alignment of the surrounding inverted “19s.” Once you know where to focus, the difference becomes immediately noticeable.

    Final Takeaway

    Optical illusion IQ tests provide an engaging way to challenge your brain while sharpening key cognitive skills. By encouraging close observation, pattern analysis, and quick thinking, these puzzles help strengthen mental agility and visual awareness. The inverted 91 challenge is a clear example of how a simple visual task can effectively test and refine your cognitive abilities.