Blog

  • Short Haircuts for Fine Hair: 4 Volume-Boosting Styles That Lift Flat Roots and Add Body Fast

    Short Haircuts for Fine Hair: 4 Volume-Boosting Styles That Lift Flat Roots and Add Body Fast

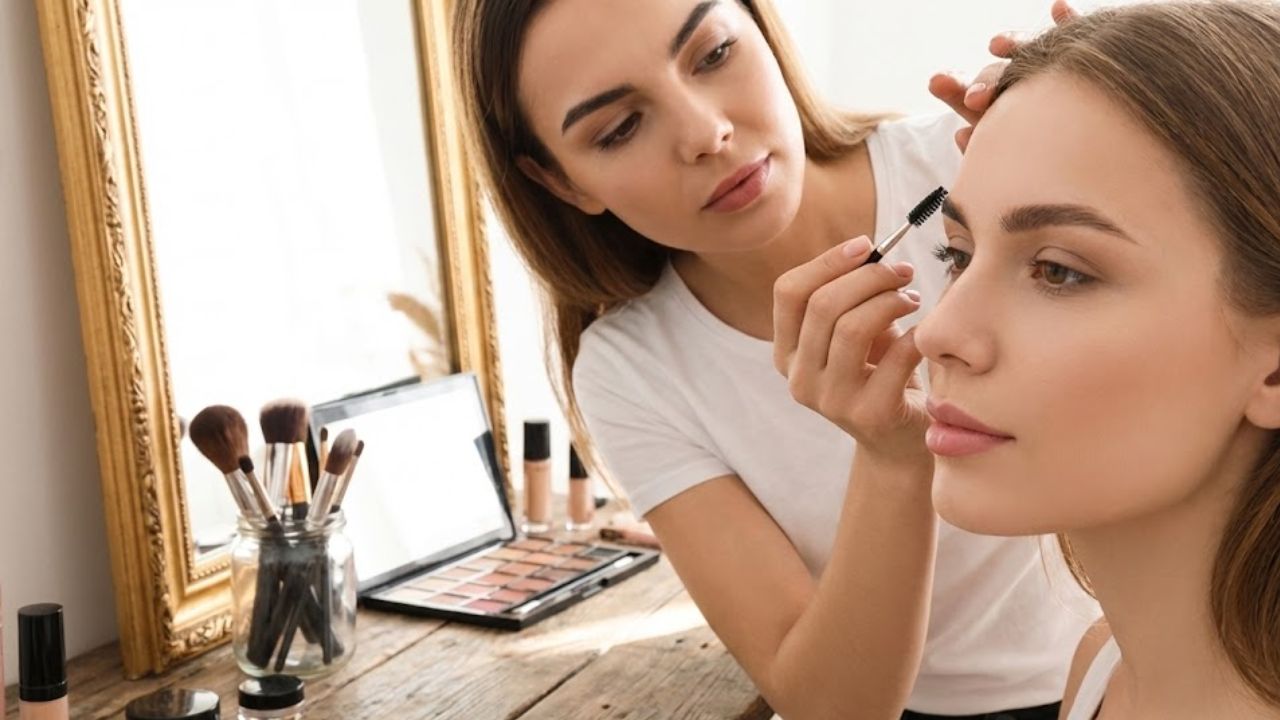
    She twists the ends of her short bob around her fingers, watching her reflection soften and sink under the harsh salon lights. Her hair is freshly washed, glossy, and healthy—yet it rests flat and lifeless against her face. The stylist lifts a section, releases it, and the shape collapses instantly, like air escaping a failed soufflé. They laugh it off, but her eyes sting slightly.

    She scrolls through her phone and shows a photo: a short haircut that looks light, full, and effortless, clearly worn by someone with far more strands. “I just want it to look thicker,” she says, repeating the same request she’s made for years. The stylist nods, suggests a new approach, and reaches for the scissors. A few careful snips later, the hair suddenly moves. It looks alive. Nothing was added—only adjusted.

    The secret wasn’t more hair. It was choosing the right short haircut for fine hair.

    Why Certain Short Haircuts Drain Volume From Fine Hair

    Fine hair behaves like silk thread: smooth, delicate, and slippery. While it feels beautiful, it struggles to hold structure. When cut incorrectly, it clings to the scalp, especially around the crown and jaw, creating that unwanted flat “helmet” shape. This happens often when weight sits in the wrong place.

    Short styles can easily exaggerate thinness if the length hits poorly. A blunt bob at the jaw with no movement, for example, tends to stick to the face. Volume doesn’t come from length—it comes from strategic cutting, layering, and weight removal. That’s where shape and lift are born.

    In London, stylist Maya R. demonstrated this with a client whose long bob had grown dull over months. The hair wasn’t damaged, just extremely fine, with roots that fell flat hours after washing. A smart cut changed everything.

    A Smart Cut Can Instantly Change the Look of Density

    Maya recommended a softly layered bixie cut, blending elements of a bob and a pixie. She shortened the back, kept length at the front, and opened the neckline. In under twenty minutes, the hair appeared noticeably fuller. The client didn’t say “I love it” at first—she said, “Is that really all my hair?”

    From a technical standpoint, fine hair dislikes two things: heavy weight at the ends and blunt, motionless lines. When too much bulk sits at the bottom, everything is dragged down, preventing the roots from lifting.

    Volume-friendly short cuts redistribute weight. Excess bulk is removed where it flattens the shape, while soft structure is added to encourage lift at the crown and around the face. Airy layers, light tapers, and slightly irregular edges stop strands from clumping together, making hair look thicker without growing a single strand.

    The Four Best Short Haircuts That Make Fine Hair Look Fuller

    The bixie cut is the first standout. This hybrid style keeps comforting length around the face while shaping the back and sides closer to the head. The contrast instantly adds dimension, and subtle crown layers prevent hair from falling into one flat sheet. With a touch of texturizing cream, strands separate and reflect light, creating the illusion of density.

    Next comes the modern French bob. Not overly blunt or heavy, this version features softened ends and hidden internal layers, sitting between the lip and jaw. It works both tucked behind the ears and worn tousled. For many with fine hair, this is the first style where flat roots finally feel manageable.

    Lightweight Pixies and Graduated Bobs That Add Lift

    The soft layered pixie avoids harsh, ultra-short lines. Instead, it offers a feathered, feminine shape with longer length on top for movement. With less overall weight, fine hair naturally lifts. A small amount of mousse and quick blow-dry often does the job, making daily styling faster and easier.

    The final lifesaver is the stacked nape bob. Short and slightly graduated at the back, with longer front sections, this cut builds volume at the occipital bone. The layered stacking creates natural lift, keeping the outline full. Whether styled sleek or wavy, it makes fine hair appear significantly thicker.

    How to Style Short Fine Hair So Volume Actually Lasts

    The haircut sets the foundation, but drying technique makes the difference. Fine hair dries flat when pressed to the scalp. Start by rough-drying the roots with your head upside down until about 80% dry, using fingers to lift at the crown. Only afterward should a brush be used to refine the ends.

    A small amount of lightweight mousse at the roots can dramatically enhance lift. Perfection isn’t required. One woman with a French bob refreshed her hair in five minutes by dampening the front, lifting the roots with warm air, and leaving the back slightly undone. It still looked intentional.

    The biggest mistake is believing that more product equals more volume. Heavy creams, oils, and layered sprays often suffocate fine hair. Instead, day-two tricks matter more. Applying dry shampoo at night absorbs oil overnight, making morning volume easier.

    Living Confidently With Short Fine Hair

    Choosing short hair with fine strands often feels like a quiet rebellion against years of limp ponytails. It’s a decision to stop comparing and start working with what you have. One woman ran her hand through her stacked bob and said, “I stopped waiting for my hair to be something it isn’t.”

    Short, well-cut hair reveals the neck, jaw, and cheekbones. It frees the face. Some days the fringe won’t cooperate, and humidity may win. Other days, air-dried texture feels just right. Both moments are part of the process.

    Between the bixie, French bob, soft pixie, and stacked bob, most people with fine hair find their shape family. From there, it’s all refinement. The real change happens when the question shifts from hiding fine hair to making the most of its texture. In the mirror, that shift changes everything.

  • Goodbye Hair Dyes New Grey-Cover Trend Is Everywhere – The Before-After Photos Are Wildly Convincing

    Goodbye Hair Dyes New Grey-Cover Trend Is Everywhere – The Before-After Photos Are Wildly Convincing

    Les premières racines argentées sont presque invisibles pour les autres, mais impossibles à ignorer pour elle. Sur le rebord du lavabo, un tube de coloration chimique déjà entamé, des gants oubliés, et cette sensation familière qui serre l’estomac : est-ce que le temps est en train de me rattraper, là, maintenant ?

    Plus tard, au salon, une amie évoque sa récente évolution capillaire. Rien de spectaculaire, aucune couleur criarde ni balayage trop voyant. Juste des mèches délicates, une lumière nouvelle, et des cheveux blancs qui semblent enfin assumés. Ce moment de doute, beaucoup le connaissent : continuer à masquer… ou repenser complètement les règles.

    Le grey blending, une tendance discrète mais assumée

    La tendance s’installe doucement, portée par les discussions entre amies, les vidéos sur les réseaux et les confidences chez le coiffeur. Le principe est simple : conserver ses cheveux naturels, y compris les blancs, mais les intégrer autrement. Le grey blending ne cherche plus à effacer le gris, il l’harmonise.

    Contrairement aux colorations uniformes, cette technique mélange les cheveux blancs à la couleur naturelle pour créer un ensemble fluide. Les racines deviennent moins visibles, le contraste s’adoucit, et le gris se transforme en reflet lumineux plutôt qu’en signe de négligence. Beaucoup constatent un visage plus doux, plus frais, parfois même plus jeune qu’avec une teinte trop foncée.

    Pourquoi le résultat paraît plus naturel et flatteur

    Des coloristes observent aujourd’hui une demande croissante, aussi bien chez les trentenaires que chez les femmes plus mûres. Certaines ont vu apparaître leurs premiers cheveux blancs après une période de stress ou une grossesse. D’autres les couvraient depuis des années avec des couleurs intenses, au point de durcir leurs traits sur les photos. Le passage au grey blending crée souvent une surprise : traits adoucis, regard plus lumineux, et une harmonie retrouvée entre peau et cheveux.

    Les tendances confirment ce virage. Les colorations complètes reculent, tandis que les techniques de fondu gagnent du terrain : mèches fines, reflets subtils, gloss transparents. Ce changement n’est pas seulement esthétique, il touche aussi à la perception de l’âge : on ne l’efface plus, on le nuance.

    La logique du contraste doux appliquée aux cheveux

    Le principe ressemble à celui du maquillage. Une couvrance trop lourde fige le visage ; une couleur uniforme trop foncée fait la même chose sur les cheveux. Le regard se fixe alors sur la démarcation des racines. En réintroduisant de la lumière, de la transparence et des mèches plus claires autour du visage, l’équilibre visuel revient naturellement.

    Les professionnels parlent souvent de soft contrast, une notion liée à la jeunesse perçue. Moins de lignes nettes, plus de nuances. Même si la technique est précise, le résultat paraît spontané, presque évident, sans donner l’impression de cheveux fraîchement teints.

    Comment couvrir les cheveux blancs sans teinture classique

    Tout commence par une autre manière de penser la couleur. On ne choisit plus un numéro précis, mais on observe l’implantation des cheveux blancs : raie, tempes, sommet du crâne. Cette cartographie guide toute la stratégie.

    La combinaison la plus fréquente associe un gloss ton sur ton pour la brillance, quelques mèches claires autour du visage et des mèches légèrement plus foncées à l’intérieur pour éviter l’effet uniforme. Le gloss ne masque pas totalement le blanc, mais il floute les contrastes et révèle la lumière au lieu de la bloquer.

    À la maison, des solutions plus légères existent : sprays temporaires pour la raie, mascaras ciblés pour les tempes, soins repigmentants en masque. L’objectif n’est plus de tout couvrir, mais de prolonger l’effet entre deux rendez-vous, sans contrainte quotidienne.

    Les erreurs les plus courantes viennent d’une tentation compréhensible : retrouver exactement sa couleur d’autrefois. Une teinte trop foncée accentue les traits, tandis qu’un éclaircissement excessif fragilise la fibre et donne un rendu artificiel. Les sourcils servent souvent de repère idéal pour conserver la bonne profondeur et préserver l’harmonie du visage.

    Entretenir un grey blending réussi sur le long terme

    Le discours autour de ces techniques a évolué. On parle moins de camouflage et davantage d’accompagnement. Un grey blending réussi demande du temps, parfois plusieurs rendez-vous, afin d’éviter les chocs visuels et la casse. C’est un processus progressif, pensé pour durer.

    Au quotidien, les cheveux mêlés de gris réclament plus de douceur. Adapter sa routine devient essentiel pour préserver la brillance et la souplesse.

    • Utiliser un shampooing doux sans sulfates agressifs pour éviter le dessèchement.
    • Appliquer un masque nourrissant une fois par semaine afin de maintenir l’éclat.
    • Employer ponctuellement un soin violet ou bleu pour prévenir les reflets jaunes.

    Vivre avec des cheveux gris fondus et assumés

    Ce choix séduit aussi pour la liberté qu’il offre. Moins de stress lié aux racines, moins de rendez-vous de dernière minute. Les cheveux cessent de dicter l’agenda. Pour beaucoup, le grey blending devient un allié dans la vie professionnelle, permettant d’éviter à la fois l’excès de jeunesse forcée et l’étiquette soudaine de senior.

    Sur le long terme, les possibilités restent ouvertes : laisser le gris prendre plus de place, ajuster les reflets selon les saisons, ou même retirer progressivement la couleur restante. Certaines découvrent qu’elles aiment tant leur poivre et sel qu’elles choisissent de le révéler pleinement.

    Ce qui marque le plus dans cette tendance, ce n’est pas la technique elle-même, mais la réflexion qu’elle suscite. Elle invite à repenser le rapport à l’âge, au regard des autres, et à l’image que l’on souhaite projeter. Finalement, le véritable luxe pourrait bien être d’avoir des cheveux qui racontent sa vie, sans chercher à entrer dans une case prédéfinie.

    • Grey blending plutôt qu’une teinture totale : mélange subtil de mèches et de gloss pour un rendu naturel et durable.
    • Choisir la bonne profondeur de couleur : éclaircir légèrement la base pour éviter l’effet rigide des teintes trop foncées.
    • Un entretien ciblé à domicile : soins doux et nourrissants pour préserver l’éclat entre les visites au salon.
  • Goodbye Hair Dyes New Grey-Cover Trend Is Everywhere – Here’s Why Stylists Say It Works So Well

    Goodbye Hair Dyes New Grey-Cover Trend Is Everywhere – Here’s Why Stylists Say It Works So Well

    Ces racines argentées, presque invisibles pour les autres, attirent immédiatement son regard. Posé sur le rebord du lavabo, un tube de coloration chimique entamé, des gants abandonnés, et cette question silencieuse qui serre l’estomac : est-ce que le vieillissement commence vraiment ici ?

    Au salon, une amie raconte sa récente “transformation” capillaire. Pas de couleur tape-à-l’œil ni de balayage spectaculaire. Juste des mèches délicates, une brillance nouvelle, et des cheveux blancs qui semblent soudain assumés. Ce moment de doute est universel : continuer à masquer… ou changer complètement d’approche.

    Le grey blending : quand les cheveux gris deviennent un choix

    La tendance progresse discrètement, portée par les discussions entre amies, les vidéos sur les réseaux sociaux et les confidences chez le coiffeur. Le principe est simple : garder ses cheveux, y compris les blancs, mais les intégrer autrement. Le grey blending remplace la coloration uniforme par un mélange subtil qui respecte la couleur naturelle.

    Le résultat surprend souvent au début. Les racines cessent de créer une démarcation nette après quelques semaines. Le gris se fond dans l’ensemble, évoquant des reflets lumineux plutôt qu’un signe de négligence. Beaucoup constatent un visage plus doux, parfois même plus frais, qu’avec une teinte trop foncée et rigide.

    Une technique adoptée à tous les âges

    Des coloristes observent une demande croissante, aussi bien chez les trentenaires que chez les sexagénaires. Certaines découvrent leurs premiers cheveux blancs après un burn-out, d’autres après une grossesse. Une cliente de 42 ans, longtemps fidèle à un brun intense, remarquait que cette couleur saturée durcissait ses traits. Le passage au grey blending a donné l’impression d’un lifting capillaire : traits plus ouverts, regard plus clair, contraste adouci avec la peau.

    Des chiffres qui confirment le changement

    De nombreuses chaînes de salons en Europe signalent une baisse des colorations totales et une hausse des techniques de fondu : babylights, lowlights, gloss transparents. Sur les réseaux sociaux, les contenus liés au grey blending cumulent des millions de vues. Au-delà de l’esthétique, la démarche est aussi psychologique : on ne supprime plus l’âge, on l’estompe.

    Pourquoi le contraste doux rajeunit visuellement

    La logique rappelle celle du maquillage. Un fond de teint trop couvrant fige le visage ; une teinture uniforme, surtout foncée, produit le même effet. L’œil se fixe sur la frontière entre racines et couleur, soulignant précisément ce que l’on voulait cacher. En réintroduisant du relief et de la transparence, la lumière revient naturellement autour du visage.

    Les coiffeurs parlent souvent de “soft contrast”. Moins de lignes dures, plus de nuances. Le cerveau interprète cela comme un signe de vitalité et de naturel, même si la technique est élaborée. C’est ce qui rend le grey blending si rassurant : il embellit sans afficher ouvertement une coloration.

    Couvrir les cheveux blancs sans teinture classique

    La première étape consiste à repenser la couleur. Plutôt que de choisir un numéro précis, on observe la répartition des cheveux blancs : raie, tempes, sommet du crâne. Cette analyse guide toute la stratégie.

    Pour beaucoup, la combinaison efficace repose sur un gloss ton sur ton pour la brillance, des mèches fines légèrement plus claires autour du visage, et quelques mèches plus foncées à l’intérieur pour éviter l’effet masse grise. Le gloss ne cache pas tout, mais il floute les contrastes et donne aux cheveux blancs un aspect lumineux.

    Entretenir le résultat à la maison

    Il existe aussi des solutions légères pour le quotidien : sprays temporaires pour la raie, mascaras détournés pour les tempes, soins repigmentants en masque. L’objectif n’est plus de tout recolorer, mais de gagner du temps visuel entre deux rendez-vous, sans contrainte quotidienne excessive.

    Les erreurs à éviter absolument

    La plus fréquente consiste à vouloir retrouver exactement sa couleur d’il y a dix ans. Une teinte trop foncée accentue les ridules et fige les traits. À l’inverse, éclaircir brutalement jusqu’au blond très clair peut fragiliser la fibre et donner un rendu artificiel.

    Un repère simple : observer la couleur des sourcils. Ils indiquent la profondeur idéale à conserver. Beaucoup de professionnels recommandent d’éclaircir la base d’un à deux tons, puis d’ajouter des reflets chauds — miel, noisette, cuivre léger — pour réchauffer le teint. Sur des cheveux poivre et sel, un gloss beige ou champagne crée souvent ce changement subtil qui donne l’impression d’un visage reposé.

    Accompagner le gris plutôt que le cacher

    Le discours professionnel évolue. On parle moins de dissimulation et davantage d’accompagnement. Les coiffeurs prennent en compte la routine, le budget et la patience, car un grey blending réussi s’inscrit dans la durée. La transition est souvent étalée sur plusieurs rendez-vous afin d’éviter le choc visuel et la casse.

    Comme le résume une coloriste expérimentée : l’objectif n’est plus d’effacer les cheveux blancs, mais de leur donner l’air d’un choix assumé.

    Adapter sa routine capillaire

    • Utiliser un shampooing doux sans sulfates agressifs pour limiter le dessèchement.
    • Appliquer un masque nourrissant hebdomadaire afin de préserver la brillance.
    • Employer occasionnellement un soin violet ou bleu pour éviter les reflets jaunes.

    Vivre avec un gris fondu : liberté et cohérence

    Ce qui séduit le plus, c’est le soulagement qu’offre cette approche. Moins d’urgences liées aux racines, moins de rendez-vous de dernière minute. L’agenda cesse d’être dicté par la repousse.

    Sur le plan professionnel, le grey blending permet aussi de reprendre le contrôle de son image. Il évite l’impression de vouloir paraître plus jeune à tout prix, sans pour autant donner le sentiment d’un vieillissement brutal. Le visage et les cheveux racontent la même histoire.

    À long terme, plusieurs options s’ouvrent : laisser le gris prendre plus de place progressivement, jouer avec des reflets saisonniers, ou même retirer les pigments restants. Pour certaines, le poivre et sel devient une signature.

    Quand la couleur devient une conversation

    Au-delà de la technique, cette tendance ouvre un dialogue sur l’âge, la fatigue et le regard des autres. Un simple rendez-vous couleur peut devenir un moment d’introspection, où l’on accepte que la jeunesse ne se mesure pas uniquement à la quantité de pigments sur les racines.

    Face à un poivre et sel lumineux, sans démarcation visible, une question s’impose parfois naturellement : et si le véritable luxe était d’avoir des cheveux qui reflètent sa vie, plutôt qu’une teinte figée sur un nuancier ?

    Points clés à retenir

    • Grey blending plutôt que coloration totale : mélange de mèches fines, lowlights et gloss pour un rendu plus naturel et des retouches espacées.
    • Profondeur de couleur adaptée : éclaircir d’un à deux tons et s’aligner sur la couleur des sourcils pour éviter l’effet casque.
    • Entretien ciblé à domicile : soins doux et protecteurs pour préserver l’éclat et la durabilité du fondu.
  • Goodbye Grey Hair: This Shampoo Add-In Naturally Darkens Strands

    Goodbye Grey Hair: This Shampoo Add-In Naturally Darkens Strands

    She twirls a strand of hair between her fingers, trying to remember when it stopped feeling like hers and started looking simply tired. The box dye on the shelf feels like a promise she’s too drained to keep. The salon price list tucked in her bag feels almost laughable. Online, strangers swear by tiny tweaks—adding everyday ingredients to shampoo and claiming the greys soften, the brown returns, and hair suddenly looks calmer and richer.

    She loosens the shampoo cap, pauses, then reaches for a jar on the counter. The idea is simpler than it sounds. Not a dramatic change—just a small adjustment.

    Why grey hair feels so hard to ignore

    Open any bathroom cabinet and you’ll see a quiet resistance to ageing. Bottles, tubes, and serums line up like silent promises. Hair sits at the centre of it all. Fine lines can be blurred with makeup, but silver roots catch the light no matter what. Grey hair itself isn’t the problem—it’s how suddenly it shows up. Patchy, dull, and often making the rest of the colour look flat, as if the saturation has been turned down overnight.

    What people chase isn’t perfection, but a sense of control. Hair has always been tied to identity and mood. When the colour shifts, it can feel like a part of that identity is slipping away. Stylists see it daily: clients smoothing their hair, asking quietly how noticeable it really is. It’s rarely dramatic—just unfamiliar. A few strands at the parting, a halo near the ears, a streak that photographs brighter than everything else.

    Surveys echo that reaction. Many people say the first visible grey makes them feel older than they are, even when others don’t notice. Those early strands carry an emotional weight far heavier than their size.

    What grey hair actually does to colour

    Grey hair isn’t pigment disappearing overnight. Each strand gradually loses melanin, growing in with less colour and more air inside the shaft. The texture often becomes coarser, and the way it reflects light changes. That’s why greys look brighter and more obvious against darker hair.

    Haircare brands responded with frequent touch-ups, harsh dyes, and root sprays that rub off on pillowcases. The cycle often leads to a stressed scalp, dry lengths, and colour that fades quickly anyway. Financially and mentally, it can feel exhausting.

    That’s when a quieter question began to surface: what if the solution wasn’t more chemicals, but a smarter use of what’s already at home?

    The coffee-in-shampoo method explained

    The technique circulating in bathrooms and group chats is surprisingly straightforward: mix strong black coffee into your regular shampoo. Brew a very strong cup—around two tablespoons of ground coffee for a small mug—and let it cool completely. Heat can interfere with shampoo formulas.

    Combine roughly one part coffee with two parts shampoo in a separate bottle and shake until evenly blended. Massage the mixture into damp hair, focusing on areas where grey stands out most. Leave it on for 5–10 minutes, then rinse thoroughly.

    Used a couple of times a week, it won’t transform hair overnight. Instead, it gently darkens, warms, and softens the contrast of scattered greys, creating a more blended, richer overall look.

    Who sees the best results

    This method works with your natural colour, not against it. Medium to dark hair—especially brown to black—tends to show the most noticeable shift. Coffee pigments lightly cling to the cuticle, adding subtle depth and shine. On very light blonde or fully white hair, the effect is softer and warmer, leaning more beige than dark.

    It won’t erase fully uniform greys. What usually changes first is how harsh they appear next to the rest of the hair.

    How people actually use it

    Most don’t apply it daily. It slips into a weekly rhythm—a quiet Sunday wash, a ten-minute pause on the sofa. Stylists describe clients returning after weeks saying their hair looks less tired. That’s the goal. Not hiding age, but letting hair reflect how you feel.

    • Use plain black coffee, with no sugar or milk.
    • Apply 1–2 times a week, leaving it on for 5–10 minutes.
    • Condition well, as coffee can feel slightly drying over time.
    • Rinse thoroughly to avoid lingering scent.
    • Patch-test first if your scalp is sensitive.

    What this small change really affects

    When you stop fighting every new grey, something shifts. This simple tweak doesn’t just adjust colour—it changes how you look at yourself. There’s less anxiety about roots and more curiosity about how your hair evolves. Skipping a salon visit no longer feels like neglect. Cuts, texture, and movement become easier to enjoy because the base colour feels softer and more forgiving.

    There’s also a quieter practical benefit. Gentle, pigment-based habits—like coffee blends or plant-based rinses—can stretch the time between professional appointments. They don’t replace salon work entirely, but they can make it feel less urgent.

    Experts note that repeated harsh dyes can stress hair over time. Softer routines create a more sustainable rhythm. You’re still ageing, still human—but the grey no longer dominates the room. Your expression, posture, and confidence take centre stage instead.

    For many, this is just the beginning. A small ritual leads to better care: gentler shampoos, fewer high-heat tools, maybe that long-delayed haircut. No dramatic reveal, no instant makeover. Just a modest habit that slowly brings hair closer to how it feels on your best days.

    The greys remain. They just stop feeling like an announcement.

    • Coffee-infused shampoo: Mix cooled strong coffee with shampoo and leave on briefly to soften greys.
    • Best for darker hair: Most visible on brown to black shades, subtler warmth on lighter hair.
    • A routine, not a miracle: Consistent use encourages a low-stress, sustainable approach.
  • Hang This Near the Shower and Say Goodbye to Moisture With One Simple Bathroom Hack

    Hang This Near the Shower and Say Goodbye to Moisture With One Simple Bathroom Hack

    Your bathroom often ends up smelling like a blend of shampoo, steam, and trapped moisture. You crack the window open in winter and shiver, or you leave the extractor fan running far too long and notice the electricity bill creeping up. It feels like the only solutions are expensive gadgets or a full renovation.

    But what if the real shift came from something far simpler—an item so small and unobtrusive you could hang it right beside the shower rail? No noise, no cables, no effort. Just a quiet presence that slowly changes the balance.

    Day after day, that constant dampness begins to lose its grip. Moisture stops lingering. The air feels lighter. And your bathroom finally gets a chance to dry properly between showers.

    Why Bathrooms Stay Damp (What Usually Goes Unnoticed)

    Most bathrooms act like tiny climate chambers. Hot water meets cold tiles, steam rises instantly, and within minutes you’ve recreated a private rainforest. Walls absorb moisture, towels stay clammy, and even plastic bottles feel slick to the touch.

    You wipe the mirror, leave the door ajar, or run the fan for a while. Things feel better briefly, then the cycle repeats. This is how mold spots appear overnight and grout slowly shifts from bright white to dull grey.

    It’s easy to dismiss it as “just humidity,” but your bathroom is signaling a deeper issue—trapped moisture with nowhere to go.

    A Familiar Story of Steam and Stalemate

    Imagine a small apartment on the fifth floor of a busy European city. The bathroom window barely opens. The tenant showers twice daily, sometimes more in summer. Within a year, paint near the shower begins to bubble. A dark shadow forms above the tiles. Towels never feel fully dry, even straight from the wash.

    He tries covering the smell with scented candles. He scrubs silicone joints every weekend. The landlord blames poor ventilation. Friends shrug and say bathrooms are always like this. Yet each shower feeds the same hidden reservoir of moisture.

    Nothing truly changes—until one simple object is hung beside the shower.

    Why Catching Steam Early Makes All the Difference

    The logic is straightforward. Steam must go somewhere. It either escapes outdoors, gets pulled out by a fan, or settles into surfaces like paint, grout, silicone, and wood. Once these materials absorb enough moisture, they stay damp and create the ideal environment for mold.

    Fans help, but many are weak or used too briefly. Windows help only when the weather allows. Most bathrooms end up stuck between daily steam and half-hearted ventilation.

    Placing a moisture trap right by the shower changes this dynamic. Instead of fighting humidity after it spreads, you intercept it at the source.

    The Simple Hanging Trick People Are Switching To

    The idea couldn’t be simpler. Hang a compact moisture-absorbing bag or container near the shower, roughly at head or shoulder height. It might contain mineral pellets, hygroscopic beads, or a reusable desiccant pouch.

    Hook it onto the curtain rail, a nearby wall hook, or the side of a shelf. Each time you shower, rising steam meets this moisture magnet. Instead of drifting upward and settling on walls, a portion of that water is captured and stored.

    No buttons. No plugs. It simply hangs there, quietly absorbing steam.

    Small Changes People Notice First

    At first, the differences are subtle. The mirror clears faster. The bath mat doesn’t stay damp all day. That faint musty smell starts to fade.

    In shared flats, people report that ceiling mold stops spreading. In busy family homes, towels dry properly between uses. Windows stay closed more often in winter because the air no longer feels heavy.

    No one changes their shower habits. They simply move the battle closer to where the moisture begins.

    How Moisture Traps Actually Work

    Hanging absorbers rely on desiccant materials such as calcium chloride, silica gel, or treated mineral beads. These substances attract water molecules from the air and pull humidity toward them.

    Steam doesn’t float aimlessly anymore—it’s drawn into contact with the absorber. Over time, the captured moisture turns into liquid and collects in a small reservoir or saturates the bag.

    The result is a lower and shorter humidity spike after each shower. Surfaces dry fully between uses instead of staying constantly damp.

    How to Hang It Correctly (Common Mistakes to Avoid)

    Choose a moisture absorber designed for hanging. Place it close to the shower but out of direct spray. Ideal spots include the shower rail, a hook opposite the showerhead, or the back of the bathroom door if it’s nearby.

    Keep it high enough to meet rising steam, yet visible enough that you remember to check it. When it fills or shows saturation, empty or replace it. That’s the entire routine.

    The most common mistake is treating it like décor—hanging it too far away, hiding it behind products, or expecting one tiny bag to handle a large, heavily used bathroom.

    A Practical Checklist Many People Follow

    • Hang absorbers close to the shower, away from direct water spray.
    • Use enough traps for the room size, adding more for busy bathrooms.
    • Check weekly and empty or replace when full.
    • Pair with light ventilation instead of long, cold drafts.
    • Watch the signs: clearer mirrors, drier towels, no new mold spots.

    A Small Habit That Quietly Changes the Room

    Once moisture is intercepted near the shower, the bathroom feels different. Towels feel like towels again. The air after an evening shower is fresher, not heavy. Mornings start without the smell of dampness.

    This isn’t a flashy upgrade. No one will admire it like a designer sink. But you’ll notice it every time the floor mat is dry under bare feet.

    The hanging moisture trap doesn’t replace windows or fans—it supports them. Over time, you scrub mold less often, repaint less frequently, and enjoy a space that finally feels balanced.

    Sometimes, the simplest fix—a hook, a handful of crystals, and quiet consistency—does more than any gadget ever could.

  • Goodbye Kitchen Islands The Smart Alternative More Homeowners Are Choosing Instead

    Goodbye Kitchen Islands The Smart Alternative More Homeowners Are Choosing Instead

    The real estate agent paused at the doorway and laughed softly. “So… where’s the island?”
    The couple exchanged a glance—slightly nervous, quietly proud.
    At the center of the kitchen, there was no massive slab of quartz, no heavy rectangle dividing the space. Instead, a long, light surface traced the wall and flowed naturally toward the dining area, as if it had always belonged there.

    The agent walked the room slowly, testing the flow, pulling out a stool, miming an imaginary meal.
    After a moment, she nodded. “This actually feels… easier.”
    No one said it aloud, but the thought lingered: perhaps the era of the oversized kitchen island is fading—and something more thoughtful is taking its place.

    Why many homeowners are quietly letting go of kitchen islands

    Step into most homes built in the 2010s and you’ll spot the same feature: a large island anchored in the middle of the kitchen, proudly displayed like a brunch monument.
    It still looks stunning in listing photos and social media posts.
    But conversations with people who live with these islands tell a different story.

    They talk about bumping into each other while carrying hot pans, or backpacks piling up right where dinner prep is supposed to happen. Others mention cooking with their backs to the room, facing upper cabinets, while guests sit awkwardly across a stone barrier. What was once the symbol of a dream kitchen now often feels like a daily obstacle.

    Designers noticed the shift early. An informal survey shared by several U.S. kitchen firms revealed that nearly four in ten remodels during 2023–2024 replaced traditional islands with peninsulas, worktables, or wall-focused layouts. Less emphasis on a central block, more attention to smooth movement. In real homes, daily use exposes the limits of islands faster than any glossy photo ever could.

    What’s really changing in modern kitchen layouts

    The shift isn’t about swapping one trend for another. It’s about adopting a new mindset—moving away from bulky, fixed islands toward flexible, perimeter-driven designs. Homeowners are choosing peninsulas that double as dining areas, slim tables on legs, integrated benches, and continuous wall counters.

    The goal isn’t to follow fashion. It’s to reclaim space—to move comfortably, talk easily, and live in the kitchen without circling a massive stone block. These layouts prioritize flow, visibility, and everyday comfort over dramatic centerpieces.

    The smarter alternatives: peninsulas, slim tables, and perimeter counters

    The most common island replacement is the kitchen peninsula. Instead of standing alone, it connects to a wall or cabinet run, forming an L or U shape. You still get casual seating, but circulation improves immediately, as the room is no longer cut in half.

    In a small 1950s Manchester home, one family removed a bulky island that forced everyone into a narrow passage. They replaced it with a slim peninsula extending toward the dining nook. The result was a clear path from the back door to the living room. Meals still happened on stools, but the cook could turn, chat, and pass plates without constantly asking someone to move.

    Worktables and perimeter counters quietly winning hearts

    Another standout option is the worktable. Unlike built-in islands, these are table- or counter-height pieces on legs, sometimes on wheels. They provide prep space when needed and open floor space when not. Occasionally, they double as a homework desk or a temporary bar during gatherings.

    Then there’s the understated powerhouse: perimeter counters. Long, uninterrupted wall runs with smart storage and fewer upper cabinets handle prep, coffee, and serving with ease. They may not photograph dramatically, but in daily life, they often outperform central islands.

    All three options share the same philosophy: free movement, open sightlines, and fewer obstacles. They reflect a simple truth many homeowners admit privately—the kitchen functions more like a hallway than a showroom. Flow matters more than stone thickness.

    Designing a no-island kitchen that still feels premium

    If skipping the island feels risky, that reaction is normal. Years of home shows have equated luxury with size. The key is identifying what you actually valued in an island and redistributing those functions intelligently.

    List the real purposes: extra prep space, casual seating, storage, and a drop zone for groceries. Then assign each role a better location. Prep shifts to a long counter near the sink. Seating moves to a peninsula facing the living area. Storage fits into a pantry or window bench. One function per zone, instead of everything competing on one surface.

    Prioritizing circulation and real-life habits

    Next comes circulation. Map how you move—from door to fridge, stove to sink, table to bin. Notice where paths collide. If an island forces awkward detours, a wall-based or peninsula layout will feel calmer almost immediately.

    Designers typically aim for at least 100 cm of clear walkway around work zones. Without an island, that space naturally expands, allowing multiple people to move comfortably. On busy evenings, that matters more than extra drawers.

    Real life isn’t styled fruit bowls or restaurant plating. It’s homework, laundry piles, deliveries, and rushed lunches. A good layout respects that reality by including designated mess zones: a drop area for bags, a charging drawer, and a section of counter near the fridge that can absorb daily chaos.

    The subtle but powerful emotional shift

    The change isn’t dramatic—it’s emotional. Without a central slab broadcasting clutter, the kitchen feels calmer, more livable. One Austin homeowner described it simply:

    “We removed the island, and suddenly I could breathe. The kids stopped circling like planes waiting to land. We didn’t lose function—we lost friction.”

    Many homeowners echo the same sentiment. Conversations change too. Without a barrier, people stand side by side or at gentle angles, not separated like customers at a bar.

    • Include one long, uninterrupted counter for serious cooking
    • Keep seating within easy talking distance of prep areas
    • Protect a clear movement lane that avoids hot zones

    A kitchen without an island can still be the heart of the home

    On a rainy Tuesday, this layout looks like a teenager spreading textbooks along a slim peninsula while someone preps dinner nearby. Friends drift in and out without hitting a stone barricade. On a sunny Sunday, a light worktable rolls toward the window as pancakes move easily along the perimeter.

    The space feels less rigid, more like a studio than a showroom. The “center” shifts with the day, not with a fixture bolted down years ago. Gatherings spread naturally along edges, benches, and stools, leaving room to turn, step back, and breathe.

    Kitchen islands aren’t disappearing everywhere. Large rooms can still benefit from them. But the quiet move away from default islands reflects a broader desire: less performance, more ease, more conversation, and more adaptability.

    The next time you admire a perfect marble island online, imagine the same space with a slim peninsula and a movable table. The finishes stay the same—but the room gains freedom. That’s the smarter choice many homeowners are making, even if it doesn’t always steal the spotlight.

    • Shift toward perimeter layouts: Peninsulas, worktables, and wall counters replace bulky centers
    • Design for movement and daily life: Layouts shaped by habits, clutter, and flow
    • Flexibility over fixed features: Multi-use zones instead of one oversized focal point
  • Goodbye to Retirement at 67: The New Social Security Age Reshaping Life Planning

    Goodbye to Retirement at 67: The New Social Security Age Reshaping Life Planning

    The line at the Social Security office in Phoenix stretches beyond the entrance, filled with people who don’t fit the old image of someone “retiring at 67.” A 72-year-old Uber driver still wearing his work vest stands nearby. A 64-year-old nurse arrives straight from a night shift, scrubs and all. A 58-year-old teacher clutches a folder packed with highlighted printouts.

    They aren’t here because of a minor rule tweak. They’re here because the foundation beneath them feels unstable. The age to collect Social Security, the definition of retirement, and the expectations people relied on for decades are all shifting at once.

    Some quietly talk about 70 becoming the new 67. Others scroll through short videos explaining claiming strategies like a competition. No one appears fully at ease. The same unspoken question passes from person to person.

    Goodbye to 67: Why the Old Retirement Script Is Fading

    The long-held belief that you simply retire at 67 and start collecting benefits is slowly disappearing in the United States. With longer life spans, pressure on the Social Security trust fund, and ongoing political debate over costs, the familiar formula is being rewritten in real time.

    Instead of circling one clear date on the calendar, many people now juggle several: early claiming at 62, full retirement age, and delayed credits up to 70. On top of that, policymakers continue to discuss raising the full retirement age again, sending a clear message beneath the technical language.

    Work longer. Claim later. Manage it yourself. For millions of Americans, this reshapes what the so-called golden years may actually look like.

    A Real-World Example of a Moving Finish Line

    Linda, 63, from Ohio always expected to retire at 67, just as the Social Security booklet once suggested. Then her employer froze pensions, healthcare costs surged, and she began reading about the trust fund facing strain in the 2030s.

    Her own full retirement age is already 67, not 65 like her parents’. When she ran the numbers online, the reality was stark. Claiming at 62 would reduce her monthly benefit by roughly 30% for life. Waiting until 70 would raise it by about 24% compared with claiming at 67.

    She feels mentally sharp, but her knees tell a different story. Retail work keeps her on her feet all day. A less demanding role is available, but it comes with fewer hours and lower pay. This is the modern trade-off: protect your body or protect your future income.

    Why Raising the Age Hits Some Workers Harder

    Zooming out, Social Security trustees project that without changes, the system may only cover about three-quarters of promised benefits in just over a decade. Among the most discussed fixes is raising the age for full benefits once again.

    That doesn’t mean Social Security disappears. It means the point at which you receive a full check can inch upward, while the real-world impact of claiming early becomes more severe. For people with office jobs and solid savings, working longer may feel manageable. For warehouse workers, nurses, and home health aides, it can feel like a slow-building trap.

    On television, raising the age sounds simple. In a body shaped by decades of physical work, it feels very different.

    Rethinking Claiming: The New Rules of the Game

    In this changing landscape, one decision matters more than almost any other: treating your Social Security claiming age as a major life choice, not an automatic checkbox.

    This means sitting down with real numbers and mapping out clear scenarios:

    • Claiming at 62: what does the permanently reduced check look like?
    • Claiming at full retirement age: how does this support your monthly expenses?
    • Waiting until 70: where does income come from in the meantime, and what is the payoff?

    Running these scenarios turns vague fear into concrete figures you can actually work with.

    What the Numbers Reveal in Everyday Homes

    On a gray Tuesday in Milwaukee, a volunteer financial counselor reviews projections for a couple in their late fifties. The husband wants to leave his factory job at 62. The wife, a school secretary, is thinking 67. Both are exhausted, and the idea of staying longer feels punishing.

    The calculations stop the conversation. Claiming at 62 would mean hundreds less each month than waiting until full retirement age. Over a 20-year retirement, that gap becomes tens of thousands of dollars.

    Instead of lecturing, the counselor asks whether they could stretch work a bit longer or shift into lighter roles. At home, they begin listing side work, part-time options, and expenses they might cut. This is what the new retirement debate looks like in living rooms across the country.

    What You Can Control in an Uncertain System

    Policy discussions continue in the background: changes to cost-of-living adjustments, debates about tax caps, and proposals affecting spousal benefits. All of it eventually funnels down to one question at the kitchen table.

    What can you control?

    You can’t steer Congress, but you can decide when you claim, how long you work, and how you combine Social Security with savings or part-time income. For many, retirement now looks less like a cliff and more like a dimmer switch, gradually reducing work instead of stopping abruptly at 67.

    Practical Steps When 67 Is No Longer the Target

    One strategy stands out: creating a bridge plan between leaving full-time work and the age you plan to claim benefits.

    A bridge plan asks a simple question: if you wait until 68, 69, or 70, what fills the gap each year? That bridge might be part-time work, earlier use of savings, downsizing housing, or seasonal employment.

    The key is matching dates with dollars. Instead of a vague promise to “work longer,” you define which years, what kind of work, and how those choices affect your future check.

    Common Missteps to Avoid

    • Ignoring your Social Security account until the last minute
    • Assuming full-time work will be possible into your late sixties
    • Underestimating long-term health and housing costs

    For most Americans, Social Security isn’t extra money. It’s the backbone of retirement. When that backbone shifts, the entire plan must adjust.

    A New Story About Age, Work, and Security

    “Goodbye to retirement at 67” may sound like a policy headline, but on the ground it represents a cultural shift. The old image of a gold watch and a clean break from work is giving way to something far messier and more realistic.

    One person may leave a main job at 62, start a small business at 64, claim benefits at 69, and work part-time into their seventies. Another may push through a job they dislike just to protect future income. Someone else may be forced out early and claim sooner than planned.

    The new Social Security age isn’t just a number. It’s a question about how long you can work, how long you want to work, and what you want the later chapters of life to feel like. The conversations happening now, at kitchen tables and in long office lines, will shape how an entire generation ages.

    Key Takeaways at a Glance

    • Full retirement age is shifting: younger workers already face 67, with proposals to raise it further.
    • Claiming age affects income for life: early claims can cut benefits by 25–30%, while waiting can significantly increase them.
    • Bridge planning is essential: combining work, savings, and delayed claiming offers a realistic path forward.
  • Pinterest Predicts Five Colours Set to Dominate 2026 Trends

    Pinterest Predicts Five Colours Set to Dominate 2026 Trends

    New year, fresh energy, and a renewed color vision. For the third consecutive year, Pinterest has unveiled its highly anticipated Pinterest Palette, highlighting shades expected to influence fashion, beauty, and home decor in the year ahead. While Pantone opted for a softer direction for 2026 with Cloud Dancer (a clean white), Pinterest forecasted a lineup of bold, expressive tones: Cool Blue, Jade, Plum Noir, Wasabi, and Persimmon.

    By analyzing keyword searches, visual engagement, and cultural signals from its 600 million users, Pinterest has become a trusted source for identifying emerging trends and predicting what’s next.

    With a background in fashion, I’ve been tracking how these shades are already appearing across industries. To gain deeper insight, I spoke with Senior Beauty & Style Director April Franzino and Home Design Director Monique Valeris about how these colors are likely to shape everyday style in 2026.

    Cool Blue

    This icy, muted blue is the coolest tone in the palette and closely aligns with Pantone’s subtle white-forward prediction. Pinterest reports that searches for this shade have climbed by 85%, a trend that hasn’t gone unnoticed. Franzino notes that this frosty blue is emerging as a standout nail polish color, supported by a 230% increase in searches for “icy nails winter.”

    While Pinterest highlights cool blue accessories, I’ve observed a rise in softer baby blue hues within clothing, particularly in cozy knitwear, fuzzy sweaters, and relaxed sweat sets. This marks a shift away from the bright cobalt shades that previously dominated.

    In home design, Valeris explains that industry experts are revisiting vintage-inspired paint colors like cool blue. Light blue was widely used in the 1700s and is now resurfacing for its calming yet crisp appeal.

    Jade

    Pinterest describes jade as a green that sits between mint and moss, but its appeal goes beyond color alone. The stone-like, marbled texture—blending greens and whites—is just as significant as the shade itself.

    Especially prominent in home decor, jade is valued for its natural, grounding energy. Valeris notes that Benjamin Moore’s 2026 Color Trends Palette features a similar hue called Raindance, reinforcing jade’s growing influence. Jade green kitchen cabinets, green appliances, and serene bathroom designs are all on the rise.

    Jade has already taken over my own bedroom, from wallpaper to bedding and rugs. In beauty, Pinterest reports a striking 450% surge in searches for “jade marble nails,” making it a standout trend for nail art.

    Plum Noir

    The deepest shade in the lineup, Plum Noir is a rich, moody purple infused with brown undertones. According to Pinterest, searches for “dark plum” and “deep purple” have increased by over 200%.

    In fashion, the evolution from bright red to maroon appears to be settling into this purple-burgundy territory. With plum tones appearing on runways just a few seasons ago, the color is now poised for broader adoption.

    For interiors, Valeris recommends plum for the color-drenching trend, where walls, trim, and ceilings are painted in the same shade. For a subtler approach, purple works beautifully in artwork, accent chairs, or painted trim.

    Franzino highlights plum as a standout for eye makeup, including eyeshadow, liner, mascara, and nail color. Burgundy mascaras in particular have proven flattering across various skin tones and eye colors.

    Wasabi

    Described by Pinterest as electric and high-voltage, Wasabi is a vibrant yellow-green bursting with energy. This playful hue is already making waves in fashion, especially as spring approaches, showing up in bold matching sets, satin dresses, and statement footwear.

    Pinterest reports a 70% increase in searches for “lime green weddings” and a 175% rise for “chartreuse,” signaling growing interest in bright green palettes.

    While Valeris notes a broader shift toward maximalism in interiors, she believes wasabi works best as a strategic accent—ideal for throw pillows or accent chairs rather than full-room paint.

    Persimmon

    After gaining momentum in 2025 through pop culture moments, bright orange continues its rise with a softer, fruit-inspired variation known as persimmon. Pinterest predicts this reddish-orange hue as a major trend, especially when paired with complementary shades. Searches for “orange color combo” have climbed by 75%.

    In beauty, persimmon is appearing in metallic press-on nails and bold lip colors. Pinterest also recorded a 105% increase in searches for “orange color suits,” hinting at a retro-inspired revival in menswear.

    The shade is also gaining traction in women’s activewear and home accents. Valeris sees persimmon as a dynamic pop color, ideal for dinnerware, lamps, furniture, and decorative details rather than large-scale applications.

  • Dublin Press Technique Builds Serious Shoulder Strength With Precision

    Dublin Press Technique Builds Serious Shoulder Strength With Precision

    Compound lifts like the overhead press work several muscle groups at once, including the shoulders, making them a smart choice if you want maximum efficiency in your workouts. Isolation movements, by contrast, focus on a single muscle, allowing for higher volume and more direct stimulus to support hypertrophy.

    The Dublin press is a highly effective isolation exercise designed to challenge the shoulders and deliver gains in both strength and muscle size.

    Understanding the Dublin Press

    The Dublin press is a strict overhead pressing variation performed with dumbbells. The weights travel from shoulder height to overhead, but instead of following a straight vertical path, they move at a slightly wider angle. The exercise is most commonly performed in a seated position.

    ‘By taking leg drive out of the equation and reducing compensations, the Dublin press makes the upper body and core do the work,’ explains Daniel Booth, performance coach at MyoLab. ‘If your core isn’t braced or your shoulder mechanics aren’t solid, it becomes obvious immediately. That’s what makes it so effective for building honest pressing strength and revealing weak points.’

    Muscles Worked in the Dublin Press

    Booth describes the Dublin press as an upper-body movement that quickly turns into a stability test.

    The anterior and medial deltoids—the front and side heads of the shoulder—are the primary movers, driving the arms overhead and assisting with internal rotation. The triceps extend the elbows to complete the press, while the upper chest contributes to the initial phase of the lift.

    Beyond the main movers, the Dublin press places significant demands on key stabilising muscles, including:

    • Core muscles (obliques, transverse abdominis, rectus abdominis) to prevent leaning back and excessive spinal extension
    • Upper back and scapular stabilisers to maintain shoulder alignment and control overhead motion
    • Hip flexors and postural muscles, which help maintain an upright seated position

    How to Perform the Dublin Press

    • Sit on the edge of a bench with your feet firmly planted on the floor and dumbbells held at shoulder height, palms facing forward.
    • Keep the elbows slightly tucked and press the dumbbells upward and slightly outward until your arms are fully extended, without locking the elbows.
    • Slowly lower the weights back to the starting position while maintaining an upright posture.

    Booth recommends starting lighter than you would for a standing or traditional overhead press. ‘The Dublin press looks simple, but it’s tougher than most people expect,’ he says. ‘If you start leaning back or flaring the ribs, the weight is too heavy. Only increase load when your posture stays solid throughout every rep.’

    Key Benefits of the Dublin Press

    ‘I rate the Dublin press very highly as an accessory movement for men aiming to build stronger shoulders and better trunk control,’ Booth says. ‘It’s straightforward, honest, and demanding in the right way.’

    Builds Strict Overhead Strength

    When performed seated, the Dublin press eliminates leg drive and momentum, forcing pure pressing strength from the upper body.

    Enhances Trunk Stability

    The seated setup challenges the core to resist spinal extension under load, developing strong anti-extension control.

    Refines Shoulder Mechanics

    The movement encourages cleaner pressing patterns and improved scapular stability, supporting healthier shoulder function.

    Highlights and Corrects Weak Links

    If you rely on leg drive or excessive arching during overhead presses, this exercise quickly exposes those habits and helps correct them.

    Transfers to Sport and Training

    Stronger, more stable shoulders can enhance performance in lifting, overhead tasks, and contact-based sports.

    ‘The compromise is that it’s not designed for maximal loading,’ Booth notes. ‘If your goal is lifting the heaviest weight possible, this isn’t the lift to chase. But if you want cleaner mechanics and resilient strength, it’s a very smart addition to your programme.’

    A Note of Caution

    The wider pressing angle places increased demand on the anterior deltoids and surrounding stabilising muscles. While this can improve joint stability when performed with good form and appropriate load, those with limited shoulder mobility or discomfort during overhead movements may benefit from choosing an alternative, such as a landmine press.

  • The Beauty Treatment Experts Say Instantly Makes You Look More Rested and Refreshed

    The Beauty Treatment Experts Say Instantly Makes You Look More Rested and Refreshed

    A lash lift is a semi-permanent beauty treatment that enhances your natural lashes by lifting and curling them from the root. The result is a more open, defined eye look that mimics the effect of longer, fuller lashes. It’s often described as a perm for your lashes, delivering shape and definition without extensions.

    The Treatment Process Explained

    Before booking your appointment, a patch test is essential to identify any potential reactions to the solutions used during the treatment. At Blink Brow Bar, clients must complete this test at least 48 hours before their lash lift.

    On the day of the treatment, the therapist begins with a detailed consultation, assessing lash condition and discussing your desired outcome. The lashes are then carefully cleansed to remove make-up, oils, or residue that could interfere with results.

    A silicone shield is selected based on your lash length, eye shape, and preferred lift. Your natural lashes are wrapped over the shield, after which a lifting solution is applied to break down the hair bonds. This is followed by a setting solution to lock in the new shape. The treatment finishes with a nourishing lotion to restore moisture and condition the lashes.

    It’s one of those high-maintenance-to-be-low-maintenance treatments that instantly makes you look polished. After experiencing the Korean version, I was won over by the soft, natural-looking results.

    Orin Carlin, Beauty Writer

    Why a Lash Lift Is Worth It

    For anyone who prefers effortless beauty, a lash lift is an ideal option, requiring minimal upkeep. The lashes appear naturally lifted and curled, eliminating the need for a traditional lash curler. Many people even skip mascara altogether, especially when the lift is paired with a lash tint, which is particularly beneficial for those with lighter lashes.

    Essential Lash Lift Aftercare

    To maintain the best possible results, keep your lashes dry and free from steam for the first 24 to 48 hours after your appointment. Avoid sleeping directly on your lashes, as pressure can alter their shape.

    It’s also important to steer clear of heavy oils and waterproof mascaras. Instead, choose lightweight formulas rich in hydrating and nourishing ingredients to support lash health. Daily brushing with a tamer or spoolie brush helps keep lashes neat and evenly separated.

    With proper care, a lash lift can last between six and eight weeks.

    Recommended Lash Products

    • Brow Spoolie Brush – NARS
    • Lash Boost – BBBLondon
    • Luscious Lash Oil – BBBLondon
    • Lash Idôle Curl Goddess – Lancôme

    The Formula Update You Should Know

    Traditional lash lifts rely on thioglycolic acid to break down the hair bonds, while Korean lash lifts use a gentler cysteamine-based formula. Both methods reshape the lashes, but the Korean technique follows a two-step root lift process.

    First, the lashes are relaxed using a flat shield, followed by a shaping shield that creates curl and lift from root to tip. In contrast, the signature lash lift uses a single shield, with the TGA formula applied only at the curve to achieve a result similar to what you’d get from a lash curler.

    The Korean lash lift often appears to last longer, as the lift starts at the root without creating a kink, and the cysteamine-based solution supports a smoother, more enduring finish.

    Where to Book a Lash Lift

    With locations across the UK, Blink Brow Bar is a popular choice for high-quality lash treatments. Known for their expertise, the technicians work quickly while maintaining exceptional precision.

    London is also home to several highly regarded, beauty editor-approved independent lash artists, including Daxita Vaghela, Teresa Smith, and Asma Docrat.