Blog

  • CeraVe’s New Budget-Friendly Anti-Aging Line Is Being Compared to Much More Expensive Skincare Brands

    CeraVe’s New Budget-Friendly Anti-Aging Line Is Being Compared to Much More Expensive Skincare Brands

    CeraVe’s latest launch has sparked major interest across the United States, especially among skincare users looking for effective results without luxury pricing. Known for dermatologist-backed formulas, the brand’s new budget-friendly anti-aging line is being compared to high-end skincare labels that cost significantly more. From social media reviews to expert commentary, many are questioning whether affordable products can truly deliver visible results. With growing awareness around ingredients, skin barriers, and long-term care, this new line has quickly become a talking point for consumers seeking smart, science-led skincare choices.

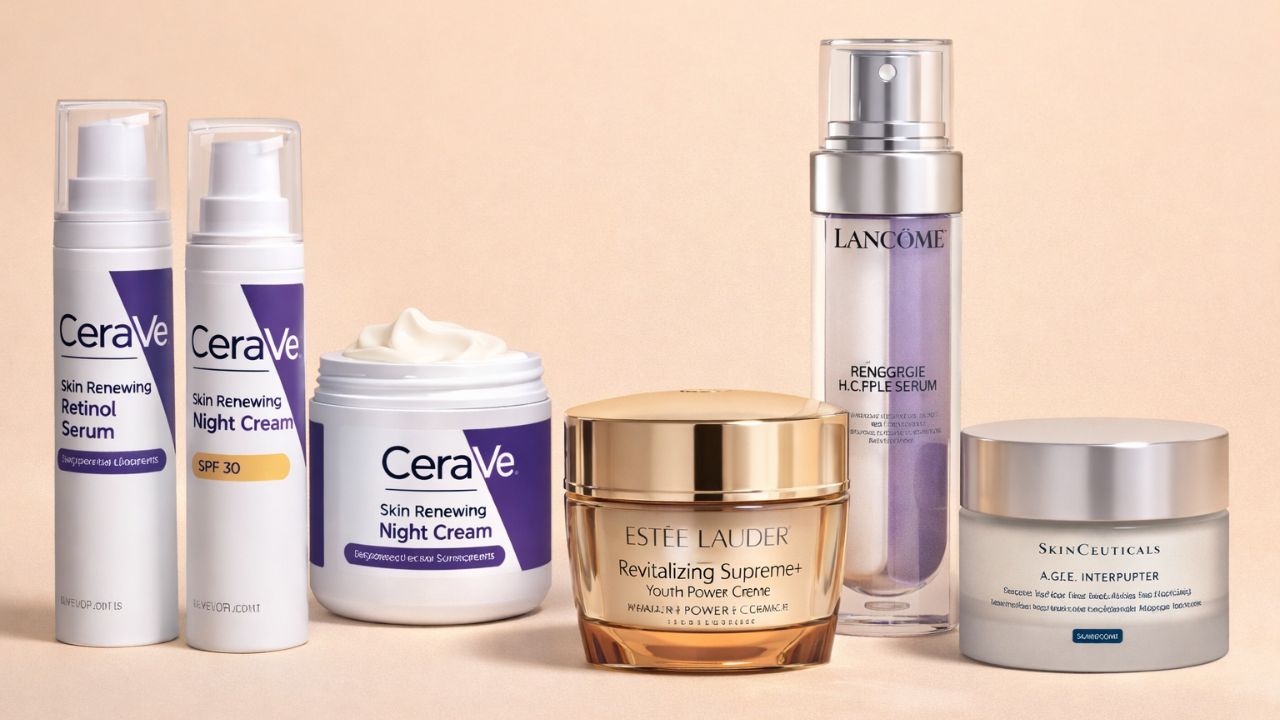
    CeraVe budget-friendly anti-aging skincare explained

    CeraVe’s approach focuses on combining proven dermatological science with everyday affordability. The new anti-aging range is designed to support skin health while targeting concerns like fine lines and uneven texture. Products emphasize ceramide-rich formulas, gentle active ingredients, and barrier repair support that help skin retain moisture over time. Unlike luxury brands that rely heavily on prestige marketing, CeraVe prioritizes clinical formulation focus and accessibility. This strategy resonates with consumers who want consistent results without unnecessary fragrance or irritation. As awareness grows, many users are discovering that effective anti-aging care doesn’t always require premium price tags.

    Why CeraVe anti-aging products rival luxury brands

    Comparisons to expensive skincare brands stem from ingredient lists that look surprisingly similar. Many formulas include dermatologist-developed blends, hydration-lock technology, and skin barrier science that rival high-cost alternatives. Experts note that visible results often come from consistent use rather than brand prestige. CeraVe’s ability to deliver daily-use compatibility while minimizing irritation gives it an edge for sensitive skin types. This balance of performance and tolerance explains why skincare professionals increasingly recommend affordable options that prioritize skin health over luxury packaging.

    CeraVe anti-aging line and real user results

    User feedback highlights improvements in texture, hydration, and overall skin comfort within weeks. Many report that the products layer well with existing routines and feel lightweight, supporting long-term skin comfort. Consistent use encourages visible smoothness gains without overwhelming the skin. Consumers also appreciate the fragrance-free benefit, especially those prone to irritation. With routine-friendly pricing, users are more likely to stay consistent, which plays a key role in achieving noticeable anti-aging results over time.

    Summary and skincare analysis

    CeraVe’s new anti-aging range demonstrates that effective skincare does not have to be expensive. By focusing on ingredient transparency, science-backed care, and accessible formulations, the brand challenges the long-held belief that luxury equals better results. While premium brands still hold appeal, this comparison highlights a shift toward informed consumer choices. For many, reliability, comfort, and affordability now matter more than exclusivity, making CeraVe a strong contender in the modern anti-aging skincare market.

    Feature CeraVe Anti-Aging Line Luxury Skincare Brands
    Price Range Affordable High-end
    Key Ingredients Ceramides, actives Similar actives
    Fragrance Fragrance-free Often fragranced
    Dermatologist Input Yes Varies

    Frequently Asked Questions (FAQs)

    1. Is CeraVe’s anti-aging line suitable for sensitive skin?

    Yes, it is formulated to be gentle and fragrance-free.

    2. Can budget skincare really replace luxury brands?

    In many cases, similar ingredients can deliver comparable results.

    3. How long before visible results appear?

    Most users notice changes within a few weeks of consistent use.

    4. Are these products dermatologist recommended?

    Yes, CeraVe products are widely recommended by dermatologists.

  • I didn’t know my core needed strengthening until I tried Pilates ‘flutter kicks,’ and now I’m humbled

    I didn’t know my core needed strengthening until I tried Pilates ‘flutter kicks,’ and now I’m humbled

    I never used to enjoy Pilates, but over time I’ve grown to genuinely appreciate the way it helps me build strength, increase mobility, and refine overall body control. With weekly Pilates sessions alongside CrossFit, yoga, and my work as a personal trainer, I’ve developed what I consider to be a solid core.

    Even without visible six-pack abs, a strong midsection delivers far more than aesthetics. It supports good posture, spinal stability, and injury prevention, helping the body move efficiently and safely at any age. This is well supported by existing research.

    Recently, I decided to focus on an exercise that appears frequently in Pilates sessions: flutter kicks. While commonly associated with Pilates, this move is widely used across many ab workouts. I’ve also relied on it for years when training my own clients.

    To test my core strength and see the effects firsthand, I committed to doing flutter kicks every day for one week. Here’s what I noticed — and what didn’t change.

    Understanding the Flutter Kicks Exercise

    Flutter kicks involve lying on your back, lifting your upper body slightly off the mat, and moving your legs in a controlled, alternating up-and-down motion while they hover just above the floor. This exercise appears in both mat and reformer Pilates, although it’s considered more modern than the original movements created by Joseph Pilates.

    Despite the fast leg motion, flutter kicks should be driven by your core muscles. Momentum should never take over. You may hear them referred to as scissor kicks, but regardless of the name, proper execution relies on controlled, intentional movement powered from the midsection.

    How to Perform Flutter Kicks Correctly

    • Lie flat on your back with your legs fully extended.
    • Place your hands by your sides, or slide them under your upper glutes if you struggle to keep your lower back connected to the mat.
    • Engage your core by drawing your belly toward your spine and gently tucking your pelvis.
    • Lift both legs to hover above the mat, point your toes, and raise your shoulders slightly while keeping your gaze forward.
    • Begin fluttering your legs up and down, alternating steadily.
    • If needed, softly bend your knees to reduce strain or prevent discomfort in the hips or lower back.

    Prioritize control and rhythm over speed. If lifting your upper body feels too challenging, keep your head supported on the mat. Avoid arching your lower back, as this shifts the workload away from your core and places unnecessary stress on your lumbar spine.

    Doing Flutter Kicks Daily for One Week: What Changed

    Flutter kicks maintain constant tension in the core, promote deep muscle activation, and help build long-term endurance in the hips and torso. After practicing them daily for a week, several things became clear.

    1. Flutter Kicks Work More Than Just Your Abs

    It’s important to distinguish between ab muscles and the entire core. The rectus abdominis is only one part of a larger system that includes the internal and external obliques, transverse abdominis, erector spinae, multifidus, pelvic floor, diaphragm, hip flexors, and glute muscles.

    All of these muscles work together around the pelvis, spine, and ribcage. Training the core as a whole improves functional strength, supports posture, and may help reduce discomfort and pain.

    Flutter kicks effectively engage the deep core muscles, particularly the transverse abdominis, while also challenging the lower abs, hips, and legs. If the exercise is felt mainly in the hips or lower back, it usually indicates insufficient core engagement.

    Despite considering my core strong, flutter kicks proved extremely demanding. Keeping both the legs and upper back elevated requires continuous bracing, increasing muscular endurance and reinforcing the principle of time under tension.

    CrossFit enhanced my maximal strength and power, while Pilates refined my control, balance, stability, and ability to slow movements down. Strength alone doesn’t guarantee endurance, and this exercise highlighted that difference clearly.

    While lifting heavy weights feels achievable, maintaining flutter kicks for repeated intervals — such as 10 rounds of 45 seconds on and 15 seconds off — was a serious challenge.

    Performing the movement required full-body awareness: keeping the shoulder blades lifted, compressing the abdomen, pressing the lower back into the mat without arching, stabilizing the hips, and controlling leg motion. Even breathing became something I had to consciously correct.

    Proper breathing is essential for core engagement, especially since the diaphragm plays a central role in core stability. Shallow breathing and poor posture are closely linked — a reminder I learned quickly.

    Unlike sit-ups, crunches, or Russian twists, flutter kicks keep the back supported on the floor, limiting repeated spinal flexion and extension. While this doesn’t automatically make the exercise suitable for everyone with back pain, my own spine certainly felt less strained.

    Anti-flexion, anti-extension, and anti-rotation exercises like flutter kicks help the body learn how to resist movement while maintaining tension and stability. Incorporating them regularly can make traditional ab exercises feel far less necessary.

  • 6-12-25 Workout Method: Trainer’s Functional Plan to Build Lean Muscle Mass and Strength

    6-12-25 Workout Method: Trainer’s Functional Plan to Build Lean Muscle Mass and Strength

    Whether we notice it or not, most training routines are built around numbers — reps, sets, and rest. One structured approach that’s gained serious traction is the 6-12-25 workout rule. Popularized by bodybuilders, this method focuses on driving muscle growth and strength gains through a high-volume training style.

    This isn’t light-weight, endurance-style training. Instead, it’s all about heavy lifts, intense pumps, and hypertrophy-focused overload. As with any effective program, proper technique matters. Following the method correctly is key if you want to see results. Below is a complete breakdown of how the 6-12-25 system works.

    Understanding the 6-12-25 Training Method

    The 6-12-25 protocol was developed by renowned strength coach Charles Poliquin. It uses giant sets to push muscles into growth through hypertrophy training. A giant set involves performing three or more exercises back-to-back with little or no rest, moving seamlessly from one movement to the next.

    This structure significantly boosts training volume while cutting down rest time, making workouts both challenging and efficient. Typically, each giant set targets one muscle group using three exercises performed consecutively.

    How Reps, Sets, and Rest Are Structured

    The name comes from the repetition scheme: six reps, 12 reps, and 25 reps, performed for three to five sets. Rest is taken only after completing all three exercises, usually around three minutes between sets.

    Lower reps focus on maximal strength using heavier loads and compound lifts. Moderate reps slightly reduce weight and emphasize supporting movements. High-rep sets rely on lighter loads and isolation exercises to create metabolic stress and deep muscle fatigue.

    Example Splits for Major Muscle Groups

    Here’s how the method can be applied across different muscle groups:

    • Chest (3–5 sets)
      • Bench press – 6 reps
      • Shoulder press – 12 reps
      • Reverse flyes – 25 reps
    • Back (3–5 sets)
      • Pull-ups – 6 reps
      • Single-arm rows – 12 reps
      • Weighted superman – 25 reps
    • Legs (3–5 sets)
      • Front squats – 6 reps
      • Good mornings – 12 reps
      • Hamstring curls – 25 reps

    Programming, Recovery, and Key Benefits

    You can spread these sessions across the week — for example, chest one day, back the next, and legs later — or combine muscle groups depending on your schedule. Full-body sessions are possible, but adequate recovery of at least 24 to 48 hours is essential.

    This method blends strength development, muscle hypertrophy, and endurance training into one system. By adjusting loads and progressively increasing resistance, you can continue to adapt and grow stronger. The mix of compound movements and isolation exercises enhances muscle balance, blood flow, and delivers an intense post-workout pump driven by sheer volume and effort.

  • Best Cleansing Balms for All Skin Types How They Work Key Ingredients and Proper Usage Tips

    Best Cleansing Balms for All Skin Types How They Work Key Ingredients and Proper Usage Tips

    In modern skincare, few steps feel as luxurious yet essential as the first cleanse. The era of harsh soaps and eye-watering makeup removers is long gone. Today, the cleansing balm stands out as a rich, buttery solution that has reshaped how we cleanse our skin.

    Whether you are chasing a flawless “glass skin” glow or aiming to simplify an overwhelming routine, learning how to use a cleansing balm can be a true turning point for your complexion.

    Understanding What a Cleansing Balm Is

    A cleansing balm is a solid-to-oil facial cleanser created to melt away makeup, sunscreen, and daily environmental buildup.

    Unlike liquid oils, these balms stay solid at room temperature, making them travel-friendly and spill-proof. Once warmed between the hands, the balm transforms into a smooth oil that glides effortlessly across the skin, cleansing deeply while protecting the skin’s moisture barrier.

    How a Cleansing Balm Cleanses the Skin

    The principle behind cleansing balms is straightforward: like dissolves like. Makeup, sunscreen, and excess sebum are typically oil-based. A well-formulated cleansing balm uses botanical oils and emollients to bind with these impurities.

    Because the balm closely resembles the skin’s natural oils, it can reach into pores to lift out buildup that many water-based cleansers leave behind.

    Key Benefits of Using a Cleansing Balm

    Switching from micellar water to a cleansing balm offers benefits that extend far beyond convenience:

    • Effortless Makeup Removal: Breaks down waterproof mascara and long-wear foundation without harsh rubbing.
    • Supports the Skin Barrier: Nourishing lipids help prevent the tight, stripped feeling caused by foaming cleansers.
    • Deep Pore Cleansing: Dissolves excess oil to reduce blackheads and congestion.
    • Encourages Mindful Skincare: The smooth texture allows for gentle facial massage, supporting circulation and lymphatic flow.
    • Intense Hydration: A cleansing balm for dry skin delivers essential fatty acids, leaving skin soft and comfortable.
    • Foundation of Double Cleansing: Removes oil-based debris first, allowing the second cleanser to work more effectively.
    • Gentle for Sensitive Skin: Free from abrasive pads and harsh surfactants, making it ideal for reactive skin types.

    Essential Ingredients to Look for in a Cleansing Balm

    Choosing the right cleansing balm means balancing performance and skin nourishment. Look for formulas that include:

    • Natural Seed Oils: Rosehip, Jojoba, or Almond oil for vitamins and fatty acids.
    • Vitamin E: An antioxidant that calms skin and stabilizes the formula.
    • Emulsifiers: Ingredients such as PEG-20 Glyceryl Triisostearate that help the balm rinse clean.
    • Soothing Additives: Oat kernel oil or Bisabolol to minimize redness during cleansing.

    Selecting the Right Cleansing Balm for Your Skin Type

    Despite common misconceptions, cleansing balms can suit every skin type when chosen correctly:

    • Cleansing balm for dry skin: Rich formulas with Shea butter or Avocado oil help seal in moisture.
    • Cleansing balm for oily skin: Lightweight, non-comedogenic options with Grapeseed oil help regulate sebum.
    • Cleansing balm for acne-prone skin: Clean-rinsing formulas with Salicylic acid or Tea Tree oil are ideal; mineral oil-free options are best.

    How to Use a Cleansing Balm Correctly

    Proper technique ensures you get the full benefit of your cleansing balm:

    • Start Dry: Apply to a completely dry face using dry hands.
    • Warm It Up: Melt a small amount between your fingers until it turns oily.
    • Massage Gently: Use circular motions for about 60 seconds, focusing on makeup-heavy areas.
    • Emulsify: Add lukewarm water to turn the oil into a milky texture.
    • Rinse or Wipe: Rinse thoroughly or remove with a warm, damp cloth.
    • Follow with a Second Cleanse: Use a water-based cleanser to complete the routine.

    Common Cleansing Balm Mistakes to Avoid

    • Applying to Wet Skin: Water reduces the balm’s ability to grip makeup.
    • Using Too Much: Excess product can be difficult to rinse and may clog pores.
    • Skipping the Hairline: Makeup residue often gathers around the edges of the face.
    • Ignoring the Second Cleanse: Double cleansing helps skincare products absorb properly.

    Final Thoughts on Cleansing Balms

    A cleansing balm is not just about removing makeup—it is a skin-respecting ritual. By selecting a formula suited to your needs, whether a lightweight cleansing balm for oily skin or a deeply nourishing option for dry skin, you create the perfect foundation for a balanced, radiant complexion.

  • 6 Eye Shadow Primers That Keep Makeup Smooth Vibrant and Crease-Free From Morning to Night

    6 Eye Shadow Primers That Keep Makeup Smooth Vibrant and Crease-Free From Morning to Night

    This article may include compensation from retailers or from purchases made through selected product links. The best eye shadow primers often decide whether your makeup looks fresh all day or fades before lunchtime. With just one application, a quality primer helps eye shadow appear more vibrant, blend more smoothly, and stay put without creasing or fading. Think of it as properly prepping your eyelids before makeup. Today’s formulas go beyond hold alone. They help smooth texture, even out skin tone, and deliver added benefits like hydration or oil control. If you notice fine lines around your eyes or want shimmer shades to look brighter and last longer, the right primer can completely change the result. Below, you’ll find editor and artist-approved options showing that great eye makeup starts before the shadow goes on.

    Editor Favorites: Eye Shadow Primers That Truly Deliver

    Why Editors Love It

    The Urban Decay Eye Primer Potion has remained a trusted staple among editors and makeup artists for years. Miami-based makeup artist Natalie Dresher, who previously spoke with Allure, notes that it helps eye shadow last longer without settling into fine lines or feeling heavy. The lightweight formula has a nearly serum-like texture that glides on evenly without buildup or patchiness. It feels slightly tacky, which helps shadow stay in place throughout the day without becoming sticky. The Original shade appears as a sheer translucent beige, Eden offers a matte beige, and Sin delivers a soft champagne shimmer. There is also an anti-aging version made for mature skin that includes plumping peptides and brown algae. Overall, this primer suits nearly anyone looking to improve eye makeup wear.

    Best All-Day Hold: Urban Decay Primer That Keeps Color Locked

    Why It Stands Out

    Milk Hydro Grip Eye Primer goes on completely invisible and works almost like double-sided tape for eye shadow, without sinking into fine lines. Pittsburgh makeup artist Patty Bell explains that its thinner consistency makes it easy to blend over the delicate eyelid area. Once applied, it keeps eye makeup in place for up to eight hours. The formula contains hyaluronic acid to add moisture and create a softly blurred finish. It’s also made with blue agave for grip, plus niacinamide and aloe for extra hydration. Bell even suggests using it under the eyes to help reduce concealer creasing, making it a truly multi-use product.

    Great for Aging Eyes: Milk Hydro Grip for Smooth Wear

    Why It’s a Smart Pick

    The NYX Professional Makeup Ultimate Shadow & Liner Primer is one of Bell’s favorite affordable options and delivers performance well beyond its price point. The formula feels light on the skin and spreads quickly, making it easy for anyone to apply. It comes in four natural-looking shades that can double as a subtle cream eyeshadow on their own. These shades help cover visible veins and uneven tone while creating a smooth base. Infused with vitamin E, the primer keeps eyelids moisturized throughout the day and helps prevent dryness or flaking.

    Best Affordable Option: NYX Primer with Pro-Level Results

    Why Artists Trust It

    NARS Pro-Prime Smudge Proof Eyeshadow Base is a behind-the-scenes essential that quietly improves every eye look. The sheer formula disappears on contact, leaving behind a barely-there layer. New York City makeup artist Nick Barose has shared with Allure that he appreciates how it grips shadow without feeling heavy or altering the color applied on top. He notes it has been his go-to for decades because it allows the pigment to truly stand out. The formula includes rice extract and sea whip extract to help hydrate and protect the delicate eye area. It wears more like skincare than traditional makeup and avoids dryness while improving wear time and blending.

    Best for Dry Lids: NARS Base That Stops Flaking

    Why It Works So Well

    If you use a Too Faced palette, the brand’s Shadow Insurance Eye Primer helps those shades perform at their best. The formula features oil-absorbing silica to control shine and keep lids smooth all day. Its silky, colorless texture works across all skin tones and creates a reliable base that helps shadow adhere properly. This leads to brighter color payoff, easier blending, and longer wear. The waterproof formula resists fading and smudging, even in humid or rainy conditions. While the brand claims 24-hour wear, it comfortably holds up through 12-hour days, which is still impressive.

    Best for Oily Lids: Too Faced Primer with Long-Lasting Control

    Why It’s Worth Using

    The Laura Mercier Eye Basics Primer is available in two shades and works especially well for evening out eyelid tone. The light blue shade helps neutralize purple and pink undertones, including redness and visible veins. The peach shade brightens dull-looking skin and creates a more awake appearance. Once applied, eyelids look smooth and balanced, and eye shadow stays in place throughout the day with both powder and cream formulas. The formula also provides skin benefits, featuring aloe to soothe and hydrate, lanolin acid to lock in moisture, and safflower seed oil to nourish the skin

  • Daily Exercise Over 60: Personal Trainer Shares the 1 Move Worth Practicing Every Single Morning

    Daily Exercise Over 60: Personal Trainer Shares the 1 Move Worth Practicing Every Single Morning

    It might come as a surprise how many people struggle to perform calf raises with proper control and stability. True control means lifting into the movement over three to four seconds, holding briefly at the top, then lowering just as slowly. This approach demands far more balance and coordination than most expect. Too often, people focus on rushing through repetitions and miss the opportunity to slow down, stay present, and fully engage the muscles.

    I encourage you to improve your mind-muscle connection by deliberately slowing your calf raises the next time you train—or by adding them to your routine if you don’t already. It’s one exercise I recommend practicing daily, particularly for those over the age of 60, as it supports long-term strength and movement quality.

    Why Calf Raises Matter More as You Age

    Age has nothing to do with capability—I’ve trained incredibly strong and fit individuals well into their seventies. Still, natural changes do occur over time. Muscle mass and bone density gradually decline, joints can stiffen, and overall mobility may decrease. These shifts can raise the risk of losing balance and falling, especially if lower-body strength isn’t maintained.

    From a trainer’s perspective, calf raises remain one of the most effective exercises for preserving ankle mobility and lower-body strength. They play a key role in helping the body stay stable, coordinated, and resilient during everyday movement.

    What Are Calf Raises?

    Calf raises are performed by standing with your feet hip-width apart, either flat on the ground or on the edge of a step. From there, you lift your heels, rising onto the balls of your feet, before slowly lowering your heels back down. For those who find standing balance challenging, seated calf raises are a suitable alternative.

    Performing calf raises on a step creates a greater range of motion, allowing your heels to dip below ground level. This variation gently stretches the ankles and Achilles tendons, helping to improve flexibility and overall movement capacity.

    How to Perform Calf Raises Correctly

    • Stand with your feet hip-width apart
    • Keep a tall posture and engage your core
    • Place your hands by your sides, on your hips, or hold weights if desired
    • Lift onto the balls of your feet slowly, counting three to four seconds
    • Pause at the top and squeeze your calves
    • Lower your heels back down with control
    • If using a step, allow your heels to drop as far as balance allows before rising again
    • Complete 3–4 sets of 6–12 reps

    The Benefits of Calf Raises

    The calf is made up primarily of the gastrocnemius muscles, which activate when you lift off the ground. These muscles mimic the action of pushing forward during walking, running, and jumping, helping you stay upright and balanced while maintaining posture.

    The gastrocnemius also supports the knees, ankles, and feet, playing an important role in fall prevention and lower-body stability. Beneath it lies the soleus muscle, which assists with plantar flexion—pressing down through the toes—and helps prevent the body from tipping forward.

    Calf raises strengthen both muscle groups, supporting joint health and efficient gait. When these muscles are weak, the risk of strains, tears, and compensatory injuries increases. If balance is an issue, holding onto a stable surface allows you to move slowly and with purpose, improving muscle activation and neural coordination. Using a step to stretch the calves also increases time under tension, further enhancing strength and mobility.

  • This Optical Illusion Tests Your Vision as You Search for the Inverted 500 in 7 Seconds

    This Optical Illusion Tests Your Vision as You Search for the Inverted 500 in 7 Seconds

    From time to time, a visual brain teaser captures the internet’s attention, surprising people with how easily their eyes overlook something obvious. The newest challenge poses a deceptively simple task: find the inverted “500” hidden among dozens of perfectly upright ones—all within seven seconds. It sounds effortless, until your eyes actually meet the image.

    At first glance, the picture shows neat rows of blue “500”s set against a gentle background. Each number appears identical, blending into a uniform pattern. Yet hidden somewhere in this orderly grid is one upside-down “500”. Although its rotation noticeably changes its shape, your brain instinctively assumes sameness, turning a basic search into a true test of perception and speed.

    Why This Inverted “500” Challenge Feels Surprisingly Difficult

    The difficulty stems from a mental shortcut known as perceptual grouping. The human brain is designed to process information efficiently by clustering similar elements together. When faced with repeated numbers, your visual system stops inspecting each one individually and assumes they are all the same.

    While this habit is useful in everyday life, it works against you in puzzles like this. When flipped, the digits in “500” lose their familiar balance. The “5” takes on an awkward reversed curve, and the zeros subtly shift alignment. However, because every number shares the same color, size, and font, your attention must rely purely on orientation—one of the hardest differences to detect quickly.

    The seven-second limit intensifies the challenge. Under pressure, your eyes jump rapidly across the image. These fast movements, known as saccades, actually reduce accuracy, as the brain lacks enough time to stabilize and properly analyze each shape.

    The Science That Makes This Illusion Work

    This puzzle offers a clear window into how human vision and attention truly function. Studies in neuroscience show that identifying rotated objects requires more complex processing than recognizing basic shapes.

    Early visual regions of the brain automatically register simple features like lines, curves, and color contrast. However, deciding whether something is upright or inverted engages higher-level areas responsible for spatial awareness and feature integration.

    This challenge aligns with Feature Integration Theory, which explains why some differences instantly stand out while others do not. Obvious traits like color changes are detected immediately. In contrast, differences involving a combination of shape and rotation require focused, step-by-step attention.

    As a result, the inverted “500” does not visually “pop out.” Instead, your brain must conduct a deliberate scan, searching for numbers that feel subtly wrong. This focused effort activates regions that control intentional eye movement and attention.

    Smart Techniques to Spot the Inverted “500” Faster

    Succeeding within seven seconds is less about eyesight and more about strategy. Random scanning wastes time. A structured approach improves accuracy and speed:

    • Break the image into sections. Mentally divide the grid into rows or quadrants to reduce overwhelm.
    • Scan in order. Move left to right, like reading text, instead of jumping around.
    • Focus on the “5.” The inverted version shows an unusual backward curve that subtly disrupts the pattern.
    • Use slight defocus. Softening your gaze can cause uniform numbers to blend, making the odd one feel out of rhythm.
    • Stay relaxed. Calm focus keeps your visual field wide, improving anomaly detection.

    When approached patiently, many people notice the inverted number near the lower-right area of the grid. Once spotted, it suddenly seems obvious, highlighting how strongly expectation influences perception.

    What Your Performance Says About Your Perception

    Finding the inverted “500” quickly suggests strong selective attention and efficient visual discrimination. These abilities are linked to fast pattern recognition and solid visual working memory—skills valued in fields that require spotting irregularities within complex visuals.

    Research also shows that such puzzles activate top-down cognitive control, allowing the brain to override automatic assumptions. Regular exposure to challenges like this can enhance cognitive flexibility and support long-term visual processing strength.

    On the other hand, struggling with the puzzle does not signal weak eyesight or intelligence. Some individuals naturally process visuals globally, focusing on overall structure rather than fine details. This approach often supports creative thinking and strategic reasoning.

    Why Optical Illusions Matter Beyond Entertainment

    Optical illusions are more than simple distractions. They demonstrate how perception and cognition interact, proving that vision is an active interpretation, not a passive recording of reality.

    In recent years, these challenges have regained popularity as quick mental exercises. They offer short bursts of engagement while sharpening focus, patience, and pattern recognition—skills increasingly valuable in a world full of visual noise.

    Ultimately, the inverted “500” challenge reminds us that seeing is as much about questioning assumptions as it is about looking. A familiar pattern can hide unexpected truths, and with just a few seconds of mindful attention, your brain may uncover far more than you expect.

    So the next time a grid of identical “500”s appears on your screen, pause before scrolling past. You may be surprised by what seven seconds of focused observation can reveal.

  • Goodbye Hair Dye for Grey Hair: The Conditioner Mix Helping Natural Colour Return Without Salon Treatments

    Goodbye Hair Dye for Grey Hair: The Conditioner Mix Helping Natural Colour Return Without Salon Treatments

    For years, covering grey hair meant choosing between strong chemical dyes or unreliable natural fixes. Recently, a simple change to everyday conditioner using an ingredient often found near the coffee jar has gained attention. This method focuses on soft blending rather than dramatic colour shifts, appealing to people who want healthier-looking hair without exposing ageing strands or sensitive scalps to aggressive chemical treatments.

    Why Many People Are Moving Away From Chemical Dyes for Grey Hair

    Grey hair develops when pigment-producing cells in the hair follicles slow down and eventually stop creating melanin. While age is a key factor, stress, genetics, smoking, nutritional gaps, and certain medical conditions also play a role. What begins as a few silver strands gradually spreads across the scalp. Permanent and semi-permanent dyes remain popular because they offer quick coverage. However, repeated colouring relies on powerful chemical reactions that can irritate sensitive or ageing scalps.

    Hair lacking pigment is often drier, weaker, and less flexible. Frequent dyeing can leave it rough, prone to breakage, and lacking shine. Even formulas marketed as gentle or ammonia-free still alter the hair’s structure. While these products may suit thicker hair in earlier years, they can feel too harsh on finer, fragile strands over time. Natural options like henna or indigo attract interest, but their results vary widely and are difficult to reverse.

    The Cocoa Conditioner Method Gaining Attention

    This is where unsweetened cocoa powder enters the routine. The method uses plain cocoa intended for baking, not sweetened drink mixes. Cocoa contains natural pigments and plant compounds that lightly stain the hair’s surface without damaging its protective outer layer. Unlike permanent dye, cocoa acts as a gentle colour filter, giving grey strands a soft brown tint while conditioning the hair.

    Cocoa includes flavonoids and tannin-like compounds that attach to the outer layer of hair. On grey or light hair, repeated use creates a gradual darkening effect. On darker hair, it adds warmth and depth rather than changing the colour. It also offers antioxidant benefits, smoothing properties, and a mild balancing effect on the scalp when mixed with conditioner.

    How to Mix Cocoa Powder Into Conditioner Correctly

    The technique shared across beauty communities is simple and low-cost. Use it on freshly washed, towel-dried hair once or twice a week. Place a generous amount of your regular conditioner into a clean bowl. Silicone-light or silicone-free conditioners help the pigment adhere more evenly. Add two to four tablespoons of unsweetened cocoa powder, adjusting for hair length and thickness.

    Stir slowly until a smooth, lump-free paste forms. Section the hair and apply evenly, focusing on visible grey areas such as the temples, part line, and crown. Comb through with a wide-tooth comb and leave the mixture on for about 20 minutes, or up to 30 minutes for more resistant white hair. Rinse thoroughly with lukewarm water, gently massaging the scalp to remove residue. Results appear gradually, softening contrast rather than fully replacing salon colour.

    Who This Grey-Blending Method Suits Best

    Cocoa-infused conditioner works best for people with scattered grey strands rather than completely white hair. It suits blondes and light brunettes where greys stand out sharply. Those with sensitive scalps who struggle with chemical dyes often find this option milder. The method appeals to anyone seeking a natural-looking transition instead of a bold change.

    For very dark hair, cocoa will not fully hide grey roots, but it can soften the contrast between new growth and coloured lengths. The finish resembles a tinted gloss rather than solid dye, making it suitable for people exploring grey blending without long-term commitment.

    Expected Results Based on Hair Type

    • Mostly white or grey, fine hair: Soft beige-brown tone with improved shine and smoothness
    • Salt-and-pepper brown hair: Greys blend more evenly, creating a balanced overall colour
    • Dark brown or black hair with few greys: Subtle warmth with minimal visible colour change

    How Cocoa Works With Grey Hair Structure

    Grey hair often feels coarse because its protective outer layer lifts more easily than pigmented hair. This makes it prone to frizz and tangling. Conditioner helps smooth this layer, improving slip and manageability. When cocoa is added, its fine particles remain on the surface instead of penetrating deep into the shaft.

    This surface-level action explains why colour builds slowly and fades gradually, avoiding harsh regrowth lines. Cocoa forms a lightly tinted coating that adds colour while leaving the inner structure largely unchanged. Over time, this gentle approach can noticeably improve softness, movement, and manageability in ageing or dry hair.

    Comparing Cocoa With Other Grey Hair Solutions

    Cocoa is part of a wider range of grey-blending options. Herbal rinses like coffee or black tea offer temporary staining but may dry the hair with frequent use. Tinted conditioners and professional salon treatments provide more predictable results at a higher cost. Cocoa stands out for being affordable, accessible, and conditioning.

    Its main limitation is variability. Results depend on hair texture and porosity, and excessive use without thorough rinsing can dull the hair. Even so, many people find cocoa easy to incorporate into their routine without drastic changes or long-term commitment.

    Daily Care Habits That Support Healthy Greying Hair

    Maintaining grey hair involves more than colour blending. Dermatologists note that stress, smoking, sun exposure, and diets low in antioxidants influence pigment loss. People who use cocoa treatments often adopt gentler habits, such as reducing heat styling, spacing out washes, and using nourishing masks.

    Some colourists suggest cocoa-based treatments between salon visits to refresh tone without extra chemical processing. Others view it as a helpful transition for clients gradually embracing natural grey growth. Overall, the cocoa trend reflects a shift toward soft, reversible care methods that work with hair’s changing biology rather than fighting it.

  • I’m a personal trainer who works with seniors — build lower body and core strength with these exercises you can do on your bed

    I’m a personal trainer who works with seniors — build lower body and core strength with these exercises you can do on your bed

    With over 15 years of experience as a certified personal trainer, I’ve worked with older adults at many different fitness levels. A common concern I hear is the fear of starting an exercise routine due to limited mobility, especially when movements involve getting down on the floor.

    Some of my most effective exercises for the hips, glutes, and core are performed lying down. However, that doesn’t mean the floor is your only option. While I often used a sturdy massage table with gym clients, your bed can be just as effective for these movements.

    If rolling out a mat and lowering yourself to the floor isn’t comfortable or practical, these four bed-based lower body and core exercises are a great alternative. Although firm surfaces are generally ideal, you can still gain real strength benefits using a supportive mattress.

    Before You Begin

    Always check with your doctor before starting a new fitness routine. If you’re new to regular exercise, working with a qualified personal trainer can help ensure proper form and safety.

    No equipment is required for this routine. As your strength improves, you may choose to add resistance bands or light dumbbells for progression.

    Complete each movement for 1–3 sets of 10–15 repetitions. Beginners should start with fewer reps and gradually increase as strength and endurance improve.

    Exercise Instructions

    1. Glute Bridge

    • Lie on your back with knees bent.
    • Engage your core muscles.
    • Squeeze your glutes and lift your hips upward.
    • Hold briefly at the top.
    • Lower with control and repeat.

    2. Heel Slides

    • Lie on your back with legs extended.
    • Activate your core.
    • Slide your left heel toward your hips, bending the knee.
    • Return the heel to the starting position.
    • Repeat on the right side, alternating evenly.

    3. Side-Lying Leg Lifts

    • Lie on your left side with your head supported.
    • Engage your core and keep hips stacked.
    • Align the right leg directly over the left.
    • Lift the right leg slowly, squeezing the hip.
    • Lower with control, then switch sides.

    4. Supine Marches

    • Lie on your back with knees bent.
    • Brace your core.
    • Lift the right foot, drawing the knee toward your chest.
    • Lower gently, then repeat on the left side.
    • Alternate sides for the full set.

    Key Benefits of These Exercises

    This routine strengthens essential muscles in the core and lower body, including the transverse abdominis, glute maximus, glute medius, glute minimus, hamstrings, and hip abductors. As we age, these muscles play a vital role in balance, stability, and lower-back protection.

    While these exercises are traditionally performed on the floor, doing them on a bed makes them more accessible and joint-friendly. They are low-impact, gentler than movements like squats or sit-ups, and can be safely modified or progressed with guidance from a fitness professional.

  • Better Blood Sugar Results: Study Finds 2 Exercises That Beat Swimming and Pilates for Control

    Better Blood Sugar Results: Study Finds 2 Exercises That Beat Swimming and Pilates for Control

    More than 35 million Americans live with type 2 diabetes, and for years, doctors have highlighted regular exercise as an effective way to help manage blood sugar. New research has now explored which types of exercise are most effective, with results pointing to yoga and walking as stand-out options.

    How the Study Was Conducted

    The research, published in the Cureus Journal of Medical Science, followed 20 adults with type 2 diabetes. Participants were split into four groups: one practiced yoga, one focused on walking, one combined yoga and walking, and a control group made no changes to their routine. All participants used oral blood sugar–lowering medication, while those taking insulin were not included.

    What Researchers Measured

    Over a three-month period, participants completed their assigned activities. Researchers monitored fasting blood sugar, post-meal blood sugar, HbA1c levels—which reflect average blood sugar over time—and overall quality of life.

    Key Findings From the Results

    The study found that participants in both the yoga and walking groups experienced significant reductions in fasting blood sugar. Those practicing yoga also showed improvements in blood sugar levels after meals. While all active groups saw gradual improvements in HbA1c, the group combining yoga and walking achieved the strongest overall blood sugar control.

    The researchers noted that the combination group showed the most substantial improvements in managing blood sugar, along with noticeable gains in quality of life.

    (Image credit: Shutterstock)

    What These Results Mean

    As a small pilot study, the findings highlight promising trends but require confirmation through larger-scale research. Still, previous studies have consistently linked both yoga and walking to lower blood sugar levels. Whether someone has type 2 diabetes or not, regular movement remains a valuable tool for blood sugar management.

    It’s important to note that exercise does not replace medication for those who need it. Anyone living with diabetes should consult their doctor before making changes to their routine.

    Additional Factors That Support Blood Sugar Health

    Alongside exercise, maintaining a healthy weight, following a balanced diet, and managing stress can all contribute to better blood sugar control.