Blog

  • Spot the Differences Challenge: Find 3 Hidden Changes Quickly and Test Your Visual Focus

    Spot the Differences Challenge: Find 3 Hidden Changes Quickly and Test Your Visual Focus

    Spot the differences puzzles have become one of the most popular brain challenges for people of all ages. Children flip through puzzle books while adults scroll on their phones during breaks. These visual games provide a good balance of relaxation & mental exercise. The concept appears straightforward at first. Two almost identical images appear side by side & challenge you to find what does not match. However the difficulty increases quickly once you begin searching. These puzzles appeal to people because they engage the brain without creating stress. No complicated rules exist and no special knowledge is needed. You only need focus and patience along with sharp observation skills. Each puzzle rewards careful attention and teaches the mind to slow down and notice small details while questioning what seems obvious at first glance.

    Why Spot the Differences Puzzles Are So Popular Today

    One major reason these puzzles are trending is their easy accessibility. They can be enjoyed anywhere and at any time. Whether they appear in newspapers, on social media, or inside mobile apps, they fit perfectly into short breaks. In a world filled with endless scrolling and constant distractions, these puzzles encourage people to slow down and focus.

    Another reason behind their popularity is the sense of satisfaction they provide. Finding a hidden difference creates a small feeling of success. This reward motivates players to continue and challenge themselves further. Over time, many people notice an improvement in their observation skills, making each new puzzle feel more approachable.

    How These Puzzles Train the Brain

    Spot the differences puzzles offer more than simple entertainment. They actively engage important cognitive skills. When comparing two images, the brain relies on visual memory, attention to detail, and pattern recognition. Players must look beyond obvious features and analyze small elements that are often ignored.

    These puzzles also improve concentration. Instead of scanning randomly, successful solvers learn to observe methodically. This focused approach often transfers into daily life, helping people notice details more clearly and maintain mental engagement for longer periods.

    What Makes Finding 3 Differences Challenging

    Many spot the differences puzzles limit changes to just three, but that does not make them easy. The differences are usually subtle and placed in areas the eye naturally overlooks. Background objects, decorations, or small parts of a character are common hiding spots.

    The brain also creates obstacles. Once it assumes two images are the same, it stops checking carefully. This shortcut is useful in everyday life but works against puzzle solvers. Learning to overcome this habit is essential for solving these challenges quickly.

    Smart Strategies to Spot Differences Faster

    One effective strategy is to divide the image into sections. Start from the top left corner and scan across slowly before moving downward. This structured method helps ensure no area is skipped.

    Another useful approach is focusing on edges and minor details. Background elements like plants, animals, or small shapes often hide differences. Carefully comparing colors, shapes, and positions can reveal changes that are easy to miss at first glance.

    The Underwater Scene Puzzle Explained

    In this spot the differences puzzle, the setting is underwater and features a boy surrounded by sea life. At first glance, both images appear identical, with matching colors and objects throughout the scene. However, three subtle differences separate the two pictures.

    The first difference appears near the boy and involves a fish swimming close to him. In one image, the fish’s tail looks slightly different. Its shape or position has been changed in the right image, making this detail easy to miss unless you carefully study moving elements.

    The second difference is located on the right side of the boy where a plant appears. In the right image, the plant’s shape or position does not match the one in the left image. Because plants sit in the background, many people overlook them during a quick scan.

    The third and final difference is found in the bottom left corner. In the left image, a starfish is clearly visible on the ocean floor. In the right image, the starfish is completely missing. Once noticed, the absence becomes obvious, but it blends naturally into the scene at first.

    Why Background Details Matter the Most

    This puzzle highlights a key lesson about spot the differences challenges. The most noticeable elements are often exactly the same. The real changes tend to hide in the background. Small creatures, plants, and decorative objects are ideal places to disguise differences because the brain considers them less important.

    Training yourself to carefully examine these areas can greatly improve your success rate in future puzzles.

    Why These Puzzles Are Great for All Ages

    Spot the differences puzzles are suitable for both children and adults. For kids, they help develop visual awareness and concentration. For adults, they provide a relaxing mental break while keeping the brain active. Unlike competitive games, these puzzles allow players to work at their own pace.

    They also encourage mindfulness. Fully focusing on a single task, even briefly, can reduce stress and improve overall mental clarity.

    Final Thoughts on Spot the Differences Puzzles

    Spot the differences puzzles show that simple challenges can offer strong mental benefits. The underwater scene puzzle, with its altered fish tail, changed plant, and missing starfish, demonstrates how easily small details can be overlooked.

    Whether you solve these puzzles quickly or take your time, each attempt sharpens observation skills. Continuing with similar challenges can be both enjoyable and rewarding. Every puzzle solved is a small win for the mind and a reminder that careful observation truly matters.

  • Lower-Ab Exercise Breakthrough Trainers Say Works Better Than Crunches

    Lower-Ab Exercise Breakthrough Trainers Say Works Better Than Crunches

    The first time you really notice your lower abs is rarely at the gym. It usually happens in a dressing room under harsh lighting when you pull at your waistband & see that soft curve sitting just below your belly button. Trainers call it the lower abdominal region. Most people have different names for it. That small stubborn area doesn’t seem to respond no matter how many crunches you do or how many core workouts you try or how long you hold planks. It just stays there. This is where a very specific lower ab exercise comes into play. American trainers now quietly believe it targets the lower abs more effectively than all those traditional crunches you’ve been doing for years.

    The Moment Traditional Crunches Quietly Lost Their Throne

    In many modern American gyms, something subtle has changed. You don’t hear dramatic debates or see signs banning old exercises. Instead, you notice what’s missing. The classic crunch, once a staple of every ab routine, is slowly fading from serious training programs. In its place, trainers are guiding clients toward a movement that looks smaller, calmer, and almost understated: the reverse crunch. In bright studios filled with mats and quiet focus, people lie on their backs, knees bent and floating, moving with control rather than force. There’s no neck pulling, no frantic repetitions—just a gentle pelvic curl that speaks directly to the core.

    Why Trainers Are Choosing Control Over Chaos

    The reverse crunch shifts the story of ab training. Traditional crunches mainly flex the upper portion of the rectus abdominis, drawing the ribs toward the pelvis. The reverse crunch flips that idea. Instead of lifting the chest, you move the pelvis toward the ribs. The muscle is the same, but the emphasis changes. Trainers often hear clients say they want to “feel it down there,” pointing to the lower belly. This controlled pelvic movement finally gives that area a clear job to do, without dragging the neck or straining the lower back.

    How Gravity Changes Everything for Your Lower Abs

    One reason the reverse crunch feels so precise is the way it works with gravity. In a traditional crunch, gravity loads the upper abs first, and the hip flexors often jump in to help. In a reverse crunch, your legs and hips become the resistance. The lower portion of your abs has to initiate the movement, curling the tailbone slightly off the floor. The motion is small but intense. Your shoulders stay relaxed, your neck rests, and the work happens deep in the core, almost quietly.

    The Trainer-Approved Reverse Crunch Technique

    Lie on your back with your arms by your sides and shoulders relaxed. Bring your hips and knees to about 90 degrees, shins parallel to the floor. Lightly anchor your lower back into the mat. As you exhale, draw your knees slightly toward your chest and curl your tailbone off the floor, lifting your hips just an inch or two. Pause briefly at the top, then slowly lower your spine back down, one vertebra at a time. The goal isn’t height—it’s control. Fewer perfect reps beat dozens of rushed ones.

    Where the Reverse Crunch Fits Among Lower Ab Exercises

    Gyms are full of movements that promise lower-ab strength: leg raises, flutter kicks, hanging knee tucks. Many look impressive but are hard to perform well. They often shift the workload to the hip flexors or strain the lower back. Trainers notice that the reverse crunch stands out because it’s easier to do correctly. The spine stays supported, the range of motion is small, and the focus remains where it should be—on the abs controlling the pelvis.

    Ingredient Used Primary Benefit Ideal For
    Amla Powder Softens strong red tones into cooler auburn and boosts hair body Anyone aiming to reduce orange hues and achieve a balanced brown-red shade
    Indigo Powder Transforms henna color into deep brown or near-black tones Gray coverage seekers or those wanting dark brunette results
    Cassia (Neutral Henna) Enhances shine with a light golden glow and little color deposit Blonde or light hair types looking for warmth and gloss
    Black Tea / Coffee Adds subtle depth and richness to overall hair tone Medium to dark hair needing a deeper, fuller color finish
    Chamomile Tea Naturally brightens with soft golden warmth Light hair shades wanting a gentle sun-lit effect
    Aloe Vera Gel Improves moisture retention and smooth paste consistency Dry, curly, or fragile hair needing added hydration
    Essential Oils (Lavender, Rosemary) Enhances fragrance and may calm or stimulate the scalp Those sensitive to henna scent or focused on scalp comfort

    Building a Lower Ab Ritual Instead of a Punishment

    There’s a growing shift away from crushing ab workouts toward building consistent, mindful routines. The reverse crunch fits perfectly into this approach. Performed a few times a week, it becomes a quiet check-in with your core. Over time, you can slow the tempo, add pauses, or increase sets. Progress doesn’t move in a straight line, and that’s normal. The strength builds gradually, through repetition and attention, not extremes.

    A Simple Lower Ab Session You Can Repeat Anywhere

    A short session might include dead bugs to teach bracing, reverse crunches as the main focus, a modified side plank for balance, and a gentle stretch at the end. Ten to fifteen minutes is enough. No equipment, no spectacle—just steady work that reinforces connection through your center.

    Common Mistakes That Reduce the Effect

    Swinging the legs instead of curling the pelvis is the most common issue. Momentum replaces muscle, and the lower abs miss their chance to work. Lifting the head and neck adds unnecessary tension. Arching the lower back on the way down shuts the abs off too early. Speed and high reps often dilute the movement. Trainers cue slow, internal control—imagining the belly drawing inward as the pelvis tilts.

    How to Adjust Difficulty Without Losing Focus

    To make the reverse crunch easier, shorten the lever by keeping knees closer to the chest and limit the range of motion. To make it harder, add pauses at the top, slow the lowering phase, or extend the legs slightly. In every variation, the intention stays the same: a smooth, deliberate pelvic curl led by the lower abs.

    The Quiet Confidence of a Strong Lower Core

    Over time, the benefits show up beyond the mat. Lifting, running, balancing—all begin to feel more stable. The lower abs don’t shout for attention; they simply support and protect. Visible definition depends on many factors, but strength and control are always worthwhile. Trainers continue to favor the reverse crunch because it delivers without drama. It teaches movement from the center outward and replaces old crunch marathons with something smarter, safer, and more sustainable.

    Closing Thought

    Next time you train your core, consider skipping the rush of endless crunches. Lie back, breathe, and let the floor support you. Bring your knees up, exhale, and gently curl your tailbone toward your ribs. Listen closely. Your lower abs have been waiting for this conversation.

  • Optical Illusion Challenge: Can You Spot the Number 3 Camouflaged Among S in 5 Seconds?

    Optical Illusion Challenge: Can You Spot the Number 3 Camouflaged Among S in 5 Seconds?

    Optical illusion challenges have become a popular way to test observation skills and mental sharpness, and this latest visual puzzle is no exception. In this challenge, readers are asked to spot the number 3 cleverly camouflaged among multiple letter S shapes within just five seconds. Such illusions are designed to confuse the brain by blending similar patterns, pushing the eyes and mind to work together. In Australia, these brain teasers are widely shared on social media for entertainment and cognitive exercise, appealing to people of all ages who enjoy quick, engaging mental tests.

    Optical Illusion Test Explained for Australians

    This optical illusion test challenges Australians to separate numbers from letters under time pressure. At first glance, the repeated S shapes appear uniform, tricking the brain into assuming there is no variation. However, the hidden number 3 is subtly different in curves and angles, making it difficult to detect quickly. Such puzzles rely on pattern recognition and visual filtering, skills the human brain uses daily. Across Australia, teachers and psychologists often recommend optical illusion tests as fun tools to improve focus, attention to detail, and cognitive flexibility, especially when completed within a strict time limit.

    Spot the Hidden Number 3 Across Australia in Seconds

    For people across Australia, spotting the hidden number 3 within five seconds can feel surprisingly challenging. The illusion works by overwhelming the eyes with similar shapes, forcing the brain to slow down and reassess what it sees. If you find the number quickly, it suggests strong visual discrimination skills. If not, it simply means your brain needs more time to break the pattern. These challenges are not about intelligence alone; they also reflect mood, stress levels, and how visually alert someone feels at that moment.

    Challenge Detail Information
    Hidden Element Number 3
    Camouflage Pattern Letter S shapes
    Time Limit 5 seconds
    Skill Tested Visual perception and focus
    Popularity Widely shared in Australia

    Visual Brain Teasers and Focus Skills in Australia

    Visual brain teasers like this optical illusion are more than simple games for people living in Australia. They help train the mind to slow down, observe carefully, and avoid assumptions. By regularly engaging with such puzzles, individuals can improve concentration and mental agility over time. Many Australians enjoy these challenges during breaks or as family-friendly activities, as they spark discussion and friendly competition. Whether solved quickly or slowly, the real benefit lies in exercising the brain in an enjoyable, low-pressure way.

    Why Optical Illusions Fascinate Australian Viewers

    Optical illusions fascinate Australian viewers because they reveal how perception can differ from reality. The brain often takes shortcuts to process information faster, and illusions expose these shortcuts. When similar shapes like S letters surround a number, the mind groups them together, hiding the odd one out. This experience encourages curiosity and self-awareness about how we see the world. In Australia, such puzzles are commonly used in classrooms, online quizzes, and wellness content to promote mindful observation and critical thinking.

    Frequently Asked Questions (FAQs)

    1. Is this optical illusion suitable for all ages in Australia?

    Yes, it is safe, fun, and suitable for children, adults, and seniors alike.

    2. What does spotting the number 3 quickly indicate?

    It suggests strong visual focus and quick pattern recognition at that moment.

    3. Can practicing optical illusions improve concentration?

    Regular practice can help improve attention to detail and visual awareness.

    4. Why is the number 3 hard to see among S shapes?

    The similar curves confuse the brain, making the number blend into the pattern.

  • Remove Coffee and Tea Stains From Dentures or Retainers Using Vinegar or Efferdent

    Remove Coffee and Tea Stains From Dentures or Retainers Using Vinegar or Efferdent

    The first time you see it you barely think twice about it. It looks like a faint amber shadow spreading along the edge of your denture or retainer. You rinse it off and brush it and forget about it. A week passes and it comes back. This time it looks darker and more obvious. Your morning coffee and afternoon tea and maybe that glass of red wine at night all add up. That appliance that used to be clear or pearly white now looks like an old coffee mug you have used for years. Something you never paid attention to before now bothers you every time you look at it.

    The Quiet Embarrassment of a Stained Smile

    Most people avoid this topic entirely. They will talk about whitening strips or charcoal toothpaste without hesitation but bringing up stained dentures or a yellowed retainer makes the conversation stop. You might catch yourself hiding your smile or turning away when you take out your retainer at night. There is something uncomfortable about showing an object that spends half its time in your mouth & the other half sitting in water next to your bed. If you use dentures or partials or a clear retainer you understand they are more than just medical equipment. They affect how you look when you interact with others.

    When they begin showing traces of every coffee you have drunk recently it can feel like a personal failure even though it really is not. The reality is that this problem usually comes from normal daily life. A hot drink on a chilly morning. A mug you hold during a lengthy phone call. Coffee you drink while driving to work. The stains develop gradually and steadily until one day you notice your reflection and realize something that used to be transparent now looks discolored & you wonder if this is permanent.

    Why Coffee and Tea Love Your Dentures So Much

    Coffee & tea are excellent at leaving stains because of their chemical makeup. Both drinks contain high amounts of tannins. These are natural plant compounds that give beverages their bitter taste and complex flavor. Tannins also stick very easily to different surfaces & particularly to anything with a rough texture at the microscopic level. Acrylic dentures and clear retainers might look smooth to the naked eye but they actually have countless tiny ridges and grooves when viewed under magnification. These small imperfections become perfect spots for pigments to settle in. Every time you drink coffee or tea you leave behind a thin layer of residue that is almost invisible. A single cup does not cause much damage. However when you drink these beverages repeatedly over weeks and months the pigments start to accumulate and bond together. This buildup gradually forms a visible film that darkens over time.

    Regular brushing often fails to remove these stains because it tends to polish the surface rather than lift away the bonded pigments. Think of it like a path that forms in the woods from people walking the same route over & over. One person walking through leaves no trace. But after hundreds of people take the same steps a clear trail appears. Coffee and tea work in a similar way by creating a persistent stain that becomes harder to remove as time passes.

    The Two Simple Soaks: Efferdent and Vinegar

    Some solutions work quietly, without drama or clever marketing. Efferdent tablets and plain white vinegar fall into this category. They don’t promise miracles. They simply work — gently, consistently, and without damaging your appliance.

    Why Efferdent Works So Well

    Drop an Efferdent tablet into water and it starts fizzing right away. The bubbling action releases cleaning agents & oxidizers that break down protein buildup and stains on your denture or retainer. The bubbles get into spots that are hard to reach with a toothbrush. They work around clasps and under wires and along curved areas. Rather than scrubbing every small space by hand you can let the chemical reaction handle the cleaning and loosen stains from hard-to-reach places.

    Why Vinegar Deserves a Place Too

    White distilled vinegar offers a unique advantage through its gentle acidic properties. When you mix it with water it breaks down mineral buildup from hard water & loosens fresh stains before they set in permanently.

    The process happens gradually and quietly without any bubbles or dramatic effects. Using diluted vinegar for regular soaking works particularly well for routine upkeep if you drink coffee and tea every day. While it cannot substitute for dedicated cleaning products it serves as an effective supplementary option.

    Turning Cleaning Into a Small Ritual

    Instead of seeing cleaning as a task you have to do think of it as part of your nighttime routine. Get a clean glass and fill it with warm water but not hot water. Put your denture or retainer in the glass carefully. The sound is quiet and gentle like you are putting away something valuable before bed. When you use Efferdent the tablet creates bubbles that move around your appliance while you do other things. When you use vinegar the liquid stays calm & clear while it cleans.

    Both methods work while you sleep. When you come back in the morning rinse it well under cool water. If your dentist told you to do so then brush it lightly with a soft brush made for dentures. The surface should feel smooth again because it is clean but not damaged.

    Efferdent vs Vinegar: A Simple Guide

    Efferdent: Best for deeper stains and regular cleaning. Suitable for daily or frequent use as directed. Always use warm water and rinse well.

    Vinegar: Best for early stains and mineral buildup. Use diluted 1:1 with water, soaking for 15–30 minutes once or twice weekly. Rinse thoroughly to remove taste.

    The Gentle Art of Not Overdoing It

    Once stains begin to fade, it’s tempting to push harder — hotter water, longer soaks, stronger solutions. This often causes more harm than good. Dentures and retainers aren’t enamel. Heat can warp them. Abrasives can scratch them. Harsh chemicals can weaken materials.

    The most effective care is consistent, not aggressive. A short soak, done regularly, protects both appearance and fit. Think maintenance, not rescue missions.

    Listening to Your Mouth

    Pay attention to how your mouth feels after you clean your appliance. If you notice soreness or irritation or if the fit seems different these are important signs. Taking care of your appliance should make your mouth feel fresh and comfortable rather than causing any discomfort. When something does not feel right you should talk to your dentist or orthodontist.

    Each appliance uses specific materials and getting advice tailored to your situation makes a real difference.

    Living Well Between Sips

    You can enjoy your coffee or tea without worrying about your smile. Cleaning your dentures or retainer is just part of daily life. The things you enjoy during the day can be balanced with simple care in the evening. Stains will come back because that is normal. But you now understand they do not need to be permanent.

    When you use gentle cleaning methods and take care of your dentures or retainer regularly they will stay clear and comfortable while supporting your everyday activities.

  • 55 Timeless White Dresses Perfect for a New Years Eve Island Getaway

    55 Timeless White Dresses Perfect for a New Years Eve Island Getaway

    A white dress holds a special place in fashion as a symbol of easy elegance that works for any season or event. When summer arrives it becomes an essential piece that looks fresh & relaxed at the pool or during evening walks. But this versatile garment does more than just summer duty. With some simple styling changes it transforms into a professional outfit perfect for the office. The white dress adapts to your needs like a fashion chameleon. During work hours you can pair it with a fitted blazer & pointed shoes from stores like Zara or Mango. For evening plans you can dress it down with sandals & a woven bag from brands like Jacquemus or Totême. Success comes from choosing the right details. Pick tailored styles for professional settings and flowing shapes for casual weekends.

    Your accessories can either dress up or dress down the entire look. Stores like H&M offer simple designs while Bershka provides more playful options and Massimo Dutti creates classic pieces. This means you can find a white dress that matches your style and fits your budget. Current trends feature uneven hemlines & puffy sleeves along with flattering midi lengths. Whether you choose expensive designer pieces or budget-friendly options the white dress continues to be a foundation of simple and stylish dressing.

    The white dress is more than a passing fashion moment. It represents classic style that can be worn in countless ways. Moving from outdoor summer settings to climate-controlled workplaces becomes effortless when you know how to adjust your accessories. Replace a straw hat with a structured belt and switch sandals for polished loafers. Change relaxed beach hair into a neat low bun & the transformation is complete. Retailers like Mango and Zara stock clean and professional versions while brands such as Totême & Jacquemus create pieces worth investing in that work equally well for casual weekends and formal business settings. The key lies in mixing different shapes and fabrics. A dress with full sleeves looks modern when paired with simple jewelry.

    A fitted straight-cut style becomes more interesting with layered necklaces or a bold cuff bracelet. Even the refined designs from Massimo Dutti or the fun shorter styles from Bershka can look completely different with the right jacket & shoes. Whether you prefer affordable linen options from H&M or the artistic silhouettes from luxury designers the white dress continues to prove itself valuable year after year.

  • 16 Yoga Poses That Gently Loosen Tight Hips and Reduce Stiffness

    16 Yoga Poses That Gently Loosen Tight Hips and Reduce Stiffness

    Yoga Poses to Loosen Tight Hips Many people struggle with tight hips. This happens because of sitting too long or not moving enough or having weak muscles. When your hips are tight you might feel pain in your lower back and find it hard to move freely. Yoga offers a great way to fix this problem. It helps release tension and makes your hips more flexible while bringing your body back into balance. This guide shows you 16 yoga poses that work well for loosening tight hips & reducing stiffness.

    Why Hip Mobility Matters for Daily Comfort and Long-Term Joint Health

    Yoga Poses to Loosen Tight Hips Many people have tight hips from sitting too much or not moving enough or from weak muscles. Tight hips can cause lower back pain and make it hard to move easily. Yoga is a good way to solve this problem because it releases tension and increases hip flexibility while bringing your body back into balance. This guide presents 16 yoga poses that help loosen tight hips and reduce stiffness. These poses work for beginners and experienced practitioners alike. The poses target different hip areas. Some stretch the front of your hips and others work on the sides or back.

    Regular practice will make your hips feel more open and comfortable. Your range of motion will get better and everyday activities may become easier. You don’t need special equipment for these poses. Just find a quiet space where you can move freely. A yoga mat is helpful but not necessary. Start slowly and pay attention to your body. Never force yourself into pain. The goal is to feel a gentle stretch that slowly releases tightness over time. Hold each pose long enough to let your muscles relax. Deep breathing while holding each position helps your body release tension naturally. Consistent practice builds flexibility and strength in your hips. This supports better posture & movement in daily life.

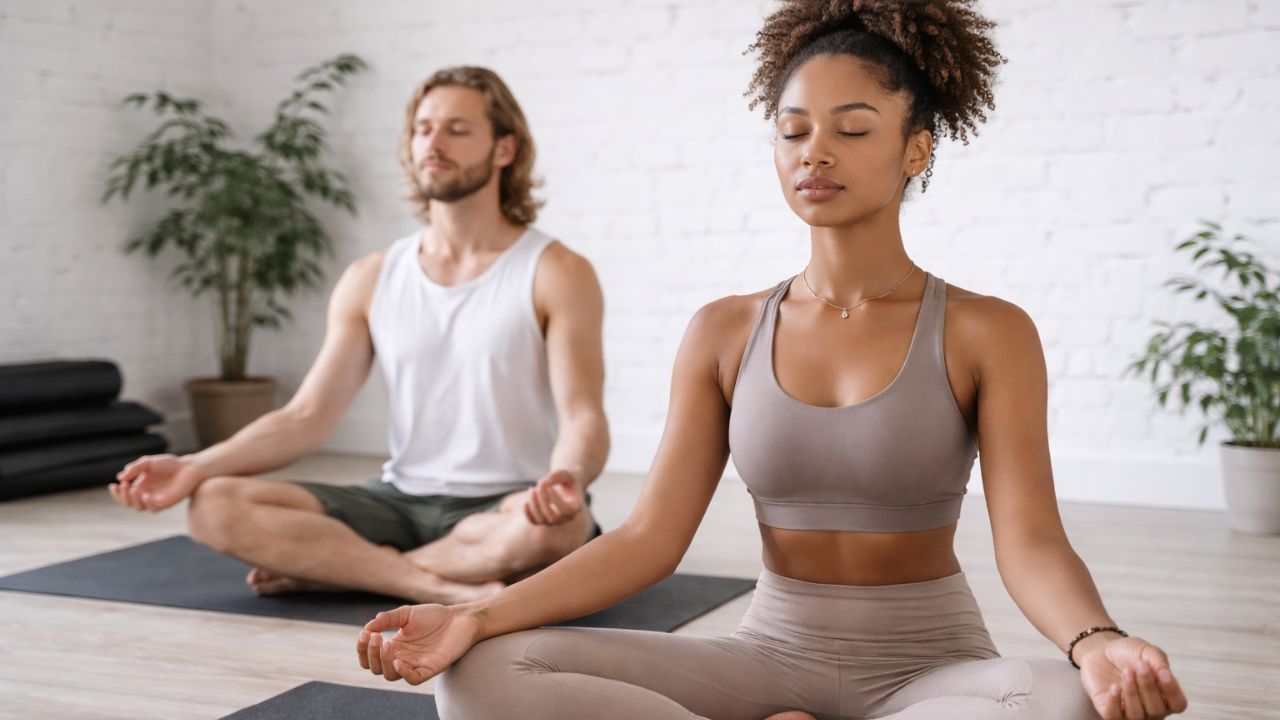
    Practicing Hip-Opening Yoga Safely: Alignment, Breath, and Awareness

    Before starting consider the following safety tips: Begin with a gentle warm up using light movement. Avoid forcing the stretch and only go until you feel mild tension rather than pain. Use props such as yoga blocks or straps or cushions if you need them. Focus on deep and steady breathing to help relax your muscles. Hold each pose for 20 to 60 seconds based on your comfort level. Consult a doctor if you have hip or knee or lower back injuries.

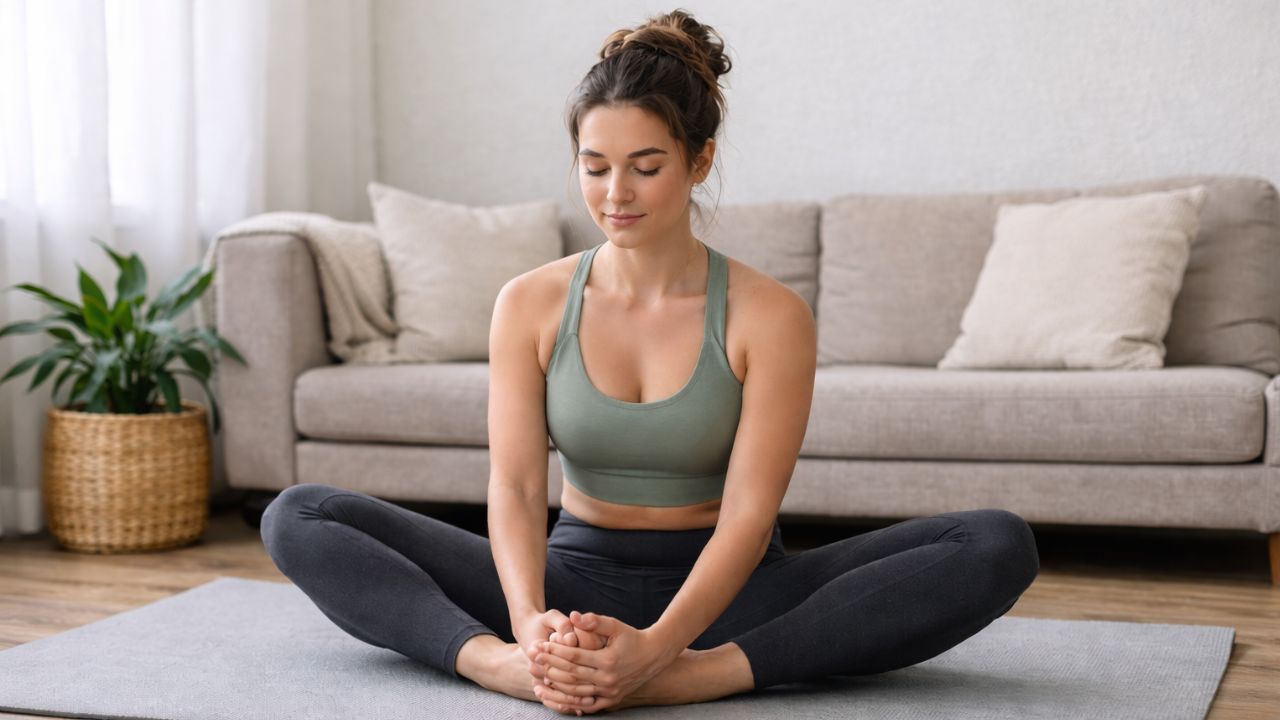
    1. Butterfly Pose (Baddha Konasana): A Gentle Inner-Thigh and Hip Release

    Butterfly Pose Instructions and Benefits Start by sitting down & bringing the bottoms of your feet together so they touch. Let your knees drop naturally toward the floor on each side. Use your hands to hold onto your feet and slowly pull your heels closer to your body. Make sure to sit up straight with a long spine and take a deep breath in. When you breathe out lean forward slowly if you want to feel more stretch in your muscles. This pose helps open up the muscles on the inside of your thighs and in your groin area. It makes your hips more flexible & helps blood flow better through your lower body. The pose also has a calming effect on your mind and helps release physical tension you might be holding in your body.

    2. Pigeon Pose (Eka Pada Rajakapotasana): Deep External Hip Opener for Stiff Hips

    Pigeon Pose Instructions Start by getting into a plank position or downward dog pose. Move your right knee forward and place it on the ground behind your hands. Your left leg should stretch straight out behind you. Make sure your hips are facing forward and slowly lean your upper body down over your front leg.What This Pose Does For You This stretch works deep into the muscles that rotate your hips and targets your glute muscles. It helps release tightness in your lower back area. Regular practice will improve how well you can move during exercises like squats and lunges.

    3. Lizard Pose (Utthan Pristhasana): Targeting Hip Flexors and Groin Tension

    How to Practice Start from a low lunge position and place both hands on the floor inside your front foot. If you can reach the mat comfortably lower your elbows down. Make sure your back leg stays extended behind you while keeping your hips positioned low to the ground. Benefits This pose stretches the hip flexors and groin area effectively. It strengthens your thigh muscles and engages your core. The position also prepares your body for more advanced hip-opening poses.

    4. Garland Pose (Malasana): Restoring Natural Hip Squat Mobility

    Stand with your feet positioned a bit wider than your hips & lower yourself into a squat. Place your hands together in front of your chest. Use your elbows to gently push against the inside of your knees to create more space in your hips.

    What It Does for You-This position helps stretch the muscles in your groin area and along your inner thighs. It builds strength in your lower back and leg muscles. The pose also helps you develop better balance and supports good posture throughout your daily activities.

    5. Cow Face Pose (Gomukhasana): Unlocking Tight Outer Hips and Glutes

    Position – Sit down & stack your knees with your right knee positioned directly over your left knee. Reach one arm behind your back while bringing the other arm over your shoulder to join your hands together. Maintain an upright spine & lift your chest throughout the pose.

    Benefits – This position stretches the outer areas of your hips and thighs while also working your shoulders. It improves your overall flexibility & helps release tightness in the muscles that rotate your hips.

    6. Low Lunge with Side Stretch: Expanding the Front Hips Gently

    From a lunge position bring your back knee down to rest on the mat. Lift both arms up above your head and carefully lean your upper body to one side. Make sure your hips stay facing forward and keep your chest open throughout the movement. This stretch works the hip flexors and the muscles along the side of your body. It helps open up the chest and shoulders while encouraging better posture. The position allows you to target multiple areas at once & can help reduce tightness from sitting or standing for long periods.

    7. Happy Baby Pose (Ananda Balasana): Relaxing the Lower Back and Hip Joints

    Low Lunge Side Stretch Start in a lunge position and lower your back knee to the mat. Raise both arms overhead & gently lean your upper body to one side. Keep your hips pointing forward and maintain an open chest during the entire stretch. This exercise targets the hip flexors and the lateral muscles running along your torso. It opens the chest and shoulders while promoting improved posture. The position effectively addresses multiple muscle groups simultaneously and helps relieve stiffness that develops from prolonged sitting or standing.

    8. Cross-Legged Forward Fold: Soothing Hips Through Controlled Flexion

    Position –  Sit on the floor and spread your legs wide apart to form a V shape. Bend forward from your hips while keeping your back straight & long. Rest your hands on the floor in front of you or hold onto your feet or ankles if you can reach them. *

    Benefits – This pose stretches the muscles along your inner thighs and the backs of your legs. It also opens up your hip joints & helps you become more flexible when sitting. The forward bending motion has a calming effect on your nervous system and can help you feel more relaxed. Regular practice makes it easier to sit comfortably in various floor positions.

    9. Fire Log Pose (Agnistambhasana): Stacking the Hips for Deep Release

    Stacked Shin Position Place one shin directly on top of the other shin. Make sure your feet stay flexed and your knees align over your ankles. If it feels comfortable you can fold your upper body forward in a gentle motion. What This Does For You This position works the deep muscles that rotate your hips. It opens up your glute muscles and the outer areas of your hips. The stretch helps reduce stiffness in your lower back.

    10. Thread the Needle Pose: Soft Hip Rotation Without Knee Strain

    Thread the Needle Stretch

    How to Do It – Lie flat on your back and bend both knees while keeping your feet planted on the floor. Take your right ankle and place it across your left thigh. Reach your hands through the gap between your legs and gently pull your left thigh closer to your chest.

    What It Does for You – This stretch targets your glute muscles and the piriformis muscle deep in your hip. It helps reduce tension along the sciatic nerve that can cause pain down your leg. Regular practice makes your hips more flexible and mobile which helps you sit comfortably & walk with better ease.

    11. Frog Pose (Mandukasana): Opening the Inner Groin with Awareness

    Frog Pose Instructions Start by getting down on your hands and knees. Move your knees apart from each other while making sure your ankles stay lined up with your knees. Slowly bring your hips down closer to the floor & point your toes outward.

    What This Pose Does For You This position creates a strong stretch in your groin and hip areas. It helps make your leg muscles more flexible over time. The pose also builds strength in the muscles along your inner thighs.

    12. Reclined Pigeon Pose: A Supported Hip Opener for Beginners

    Lie flat on your back and cross your right ankle over your left thigh. Hold the back of your left thigh with both hands and gently pull it toward your chest. Keep your movements slow and controlled. This stretch targets your glutes & the outer part of your hips including the piriformis muscle. It helps reduce tightness in your lower back & works well as a cooldown after exercise. The position allows your hip muscles to relax while improving flexibility in areas that often get tight from sitting or physical activity.

    13. Side-Lying Leg Stretch: Improving Hip Range Without Pressure

    Lie on your back and place your right ankle on top of your left thigh. Use both hands to hold the back of your left thigh and pull it slowly toward your chest. Move gently and stay in control. This stretch works your glutes and the outer hip area including the piriformis muscle. It loosens tightness in your lower back and makes a good cooldown after you exercise. The position lets your hip muscles relax and increases flexibility in spots that get tight from sitting or working out.

    14. Camel Pose with Hip Focus: Lengthening the Front Body and Hip Flexors

    Camel Pose Instructions Start by kneeling on your mat with your knees positioned about hip-width apart. Place your hands firmly on your heels and slowly begin to lean your upper body backward. Make sure your thighs stay straight up & down throughout the movement. # What This Pose Does For You This position provides an excellent stretch for your hip flexors and the front of your thighs while also lengthening your spine. It helps open up your chest area and releases tension in your shoulders. Regular practice can boost blood flow throughout your body and help you maintain better posture in your daily activities.

    15. Standing Figure Four Stretch: Functional Hip Mobility for Everyday Movement

    Standing Figure Four Stretch Stand with your feet positioned at hip-width distance from each other. Take your right ankle & place it across your left thigh. Lower your hips backward a little while maintaining an upright spine. You can use a wall or chair for support if you need help staying balanced.

     Benefits This stretch opens up your glutes and the outer areas of your hips. It helps improve your balance and stability. You can do this stretch quickly in almost any location.

    16. Supine Bound Angle Pose: Restful Hip Opening for Deep Relaxation

    Reclining Butterfly Pose Lie flat on your back and bring the soles of your feet together. Let your knees fall open to each side. You can rest your arms down by your sides or stretch them overhead. Take slow deep breaths and allow your body to sink into the stretch.

    Benefits This pose gently stretches the inner thighs and opens up the hip area. It helps reduce stress & releases tension from your body. The position encourages relaxation while promoting better blood circulation throughout your system.

    Making Hip-Opening Yoga a Sustainable Part of Your Weekly Routine

    Staying consistent matters most when you want lasting results. Practice your routine three to five times each week & hold each pose for twenty to sixty seconds. Deep breathing helps release tension in your muscles while you stretch. Adding some light cardio or mobility work alongside your flexibility training creates better overall results. Props can help you maintain correct form & prevent unnecessary strain on your body. You can see real improvements in how you move and feel with just ten to fifteen minutes of daily hip flexibility work. Regular practice leads to better mobility and posture while reducing discomfort in your daily activities.

  • Top 10 Yoga Poses to Relieve Hip Stiffness and Restore Natural Mobility

    Top 10 Yoga Poses to Relieve Hip Stiffness and Restore Natural Mobility

    Hip stiffness happens often because of sitting too long, not moving enough, feeling stressed or exercising hard. When your hips are tight they reduce how well you can move and change your posture. Over time this can cause pain in your lower back or knees. Yoga works really well to open your hips in a gentle way and get blood flowing better while bringing back normal movement. These ten yoga poses help release tightness & make your hips flexible so they can move freely again.

    Butterfly Pose – Inner Thighs Open Karne Ka Sabse Aasan Yoga Aasan

    Butterfly Pose stretches the inner thighs & hip joints in a gentle way. When you sit upright and let your knees fall toward the floor it helps release the stiffness that builds up from sitting too long. Breathing slowly while holding this position lets your hips relax naturally instead of forcing them to open.

    Low Lunge Pose – Tight Hips Ko Deep Stretch Dene Wali Powerful Position

    Low Lunge works well for stretching tight hip flexors that tend to get shorter from sitting for long periods. When you lower your hips forward & keep your spine straight you help restore balance between your hips and lower back. This position also helps you move better when you walk or run.

    Pigeon Pose – Hip Joint Stiffness Kam Karne Ka Proven Yoga Pose

    Pigeon Pose stretches the outer hips and glutes deeply. This pose works well for releasing tension and stiffness that builds up in the hip joint. When you practice it with focus it improves flexibility and helps calm your nervous system.

    Garland Pose – Daily Hip Mobility Improve Karne Ka Natural Squat Aasan

    Garland Pose involves a deep squat that opens your hips and builds leg strength. Many people lose the ability to squat comfortably because they sit in chairs all day. When you hold this position regularly it helps your hips move better and keeps your joints healthy. Seated Spinal Twist works on your hips while making your spine more flexible. The twisting motion releases tightness around your hip area & gets blood flowing to your lower body. This makes it easier to move smoothly throughout the day. Frog Pose stretches the inner thighs and groin area effectively. When you practice it slowly and use props for support you can release deep hip tension without hurting yourself. This pose works well for building flexibility and getting rid of stiffness that has built up over time.

    Seated Spinal Twist – Hip Aur Lower Spine Ko Ek Saath Relax Karne Wala Pose

    Seated Spinal Twist gently mobilizes the hips and improves spinal flexibility. The twisting motion helps release tension in the hip area and boosts circulation to the lower body. This supports smoother movement throughout your daily activities. Frog Pose is a powerful hip opener that stretches the inner thighs and groin area. When you practice this pose slowly & use proper support you can achieve deep hip release without causing strain. This pose is ideal for improving flexibility and reducing chronic stiffness in the hip region.

    Bridge Pose – Hip Flexors Activate Karne Aur Pelvic Strength Badhane Ka Aasan

    Bridge Pose stretches the front of your hips & makes your glutes and lower back stronger at the same time. When these muscles work together they help keep your pelvis stable and reduce the stiffness that comes from sitting too long. This pose also helps you stand straighter and keeps your hips properly aligned.

    Happy Baby Pose – Hip Tension Release Karne Ka Sabse Comforting Yoga Move

    Happy Baby Pose opens the hips in a gentle way while it helps your lower back relax. When you rock slowly from side to side you massage the hip joints and let go of built-up tension. This pose feels particularly calming when you practice it after spending a long day on your feet or sitting at a desk.

    Reclining Bound Angle Pose – Deep Hip Relaxation Ke Liye Best Restorative Pose

    This gentle position lets your hips open naturally while your whole body rests. Placing pillows or blocks under your knees makes it easy and helpful for easing tightness without any strain.

    Standing Wide-Leg Forward Fold – Hip Flexibility Aur Blood Flow Boost Karne Ka Aasan

    Standing Wide-Leg Forward Fold This pose stretches the inner thighs and hamstrings while creating space in the hips. It takes pressure off the spine and promotes better blood flow throughout the body. The movement helps your hip joints regain their natural range of motion and flexibility. Regular practice can reduce stiffness and tension in the lower body while calming the nervous system.

  • 7 Yoga Poses: Build a Stronger Core and Improve Daily Posture

    7 Yoga Poses: Build a Stronger Core and Improve Daily Posture

    A strong core and good posture work together naturally. When your core muscles lack strength your body starts to slump forward. This creates unnecessary pressure on your spine, shoulders and neck. Yoga provides an effective method to build core strength while teaching you how to align your body correctly and become more aware of how you move. Rather than rushing through quick workouts yoga develops strength steadily and fixes posture problems at their source. The following seven yoga poses work particularly well for building a stronger core and helping you maintain better posture throughout your day.

    Mountain Pose (Tadasana): The Foundation of Upright Posture and Core Awareness

    Mountain Pose serves as the foundation for developing good posture. When you stand tall with your feet firmly planted and your spine properly aligned you activate the deep core muscles that provide support to your body. This pose helps you become aware of how your head should sit above your shoulders and how your hips and feet should align beneath them. Regular practice of Mountain Pose can improve your posture throughout daily life by building healthy alignment habits that extend beyond your yoga mat.

    Plank Pose: Activating Deep Core Muscles for Everyday Stability

    Plank Pose stands out as one of the best exercises for building core strength. When you hold your body in a straight line you activate your abdominal muscles along with your shoulders and legs. The most important thing is keeping correct alignment without letting your hips drop down or stick up too high. When you hold Plank Pose for several steady breaths you develop endurance and make the muscles around your spine stronger.

    Boat Pose (Navasana): Building Abdominal Strength and Spinal Control

    Boat Pose works the core muscles & especially the deep abdominal layer that supports your posture. You sit on the mat & lift your legs while keeping your spine long. This challenges your balance and builds strength. If you are a beginner you can bend your knees or keep your toes on the floor for extra support. When you practice Boat Pose regularly it improves your stability and helps you stop slouching.

    Bridge Pose (Setu Bandhasana): Strengthening the Back Body for Better Alignment

    Bridge Pose builds strength in your lower back, glutes and core muscles while stretching your chest & shoulders. When you lie on your back and lift your hips upward you create spinal extension that helps reverse the damage from sitting too long. Activating your core muscles during the movement keeps your spine stable and lets you develop strength without risking injury.

    Warrior Three (Virabhadrasana III): Balancing Core Power with Postural Precision

    Bridge Pose strengthens your lower back along with your glutes and core muscles. At the same time it stretches your chest & shoulders. The exercise involves lying on your back and lifting your hips upward. This creates spinal extension that counteracts the negative effects of prolonged sitting. Your core muscles activate during the movement to keep your spine stable. This allows you to build strength safely without increasing your risk of injury.

    Locust Pose (Salabhasana): Supporting the Spine and Countering Slouched Sitting

    Locust Pose strengthens the muscles that run along your spine and helps you maintain good posture. You lie face down on your stomach and lift both your chest & legs off the ground at the same time. This movement activates your back muscles & core simultaneously. The pose works against the effects of slouching that many people experience during their daily activities. It builds the specific strength you need to sit upright at your desk and stand tall when you walk around. Regular practice of this pose creates a stronger back body that supports your spine throughout the entire day. The lifting action engages multiple muscle groups that often become weak from sitting too much or hunching over phones and computers. This makes Locust Pose particularly valuable for anyone who spends long hours in positions that round the shoulders forward and curve the upper back.

    Side Plank Pose (Vasisthasana): Enhancing Oblique Strength and Lateral Stability

    Side Plank Pose works the oblique muscles that help keep your spine stable. You hold your body up on one arm while lying on your side to build strength and balance. If you are new to this pose you can make it easier by putting your bottom knee on the mat. This exercise strengthens the sides of your core which helps you maintain good posture and prevents muscle imbalances.

    How These Yoga Poses Support Natural Posture Throughout the Day

    These poses strengthen the entire core from front to back. When your core muscles are balanced they support your spine properly and prevent slouching or excessive arching. Yoga teaches you to pay attention to how your body is positioned so you can notice bad posture habits & fix them without forcing anything. Focusing on your breathing while doing these poses makes them work better. When you breathe slowly and steadily your muscles engage correctly without getting tense. After practicing regularly your body starts holding better posture on its own without you having to think about it.

    Safety Tips to Practice Core-Focused Yoga Without Strain

    Regular practice matters most when you want to build core strength and fix your posture. Doing these poses three to four times each week will bring clear results. Pay attention to doing them correctly instead of worrying about how long you hold them. Take your time with each position. Props like blocks or a wall can help you maintain proper form & avoid unnecessary stress on your body. Pay attention to what your body tells you & take breaks when you need them. This approach keeps you safe from injury and helps you improve at a steady pace.

    Why Yoga Builds Core Strength More Effectively Than Conventional Workouts

    Yoga builds core strength through practical movements rather than targeting individual muscles. It teaches your muscles to function as a unit while supporting how you move & hold yourself upright. This method creates strength that helps with everyday tasks while reducing pain and boosting self-assurance. When you practice these seven yoga poses on a regular basis you can create a more powerful core while standing taller and feeling more balanced in your body. Making small steady efforts produces long-term improvements that benefit your physical health and general wellness.

  • Proven Yoga Benefits: 5 Practical Ways Yoga Improves Physical and Mental Health

    Proven Yoga Benefits: 5 Practical Ways Yoga Improves Physical and Mental Health

    Five Real Benefits of Yoga That Actually Work Yoga has been around for thousands of years because it delivers actual results. People keep coming back to it because they notice genuine improvements in how they feel and function. These benefits are not just marketing claims or wishful thinking. They come from regular practice by ordinary people who fit yoga into their normal schedules without trying to be perfect about it.

    How Yoga Gently Relieves Everyday Aches and Restores Body Flexibility

    One of the main benefits people talk about with yoga is how it helps with everyday body pain. Those who do yoga often find they have less discomfort in their lower back, neck, shoulders & hips. This happens because yoga increases blood circulation, stretches muscles that are tight and builds up weaker muscles that support the body. Yoga does not provide instant results but works slowly over time. When you practice every day simple movements like bending, sitting and standing become easier. Eventually the stiffness that comes from sitting too long or having bad posture starts to fade away.

    Using Yoga to Stay Calm and Focused During Real-Life Stress Moments

    Yoga works well as a way to manage stress in daily life. The combination of controlled breathing and gentle movement helps calm your nervous system & allows your body to enter a relaxed state. People who practice yoga regularly often find themselves reacting more calmly when faced with traffic jams or workplace demands or emotionally charged situations. The goal is not to eliminate stress completely but to develop better ways of dealing with it when it appears. When you practice yoga consistently your body learns to recover more quickly after stressful events happen. This leads to more stable moods and clearer thinking as you move through your day.

    Why Regular Yoga Boosts Daily Energy Without Draining the Body

    Yoga tends to boost your energy instead of wearing you out like hard exercise does. Most people say they feel more awake & refreshed when they finish a yoga session. The practice works by mixing movement with rest while helping you breathe better. When your body gets oxygen more efficiently it maintains stable energy all day long. As you continue practicing you will probably need less coffee and won’t have those sudden drops in energy. This steady feeling of vitality is why so many people keep doing yoga for years.

    How Yoga Naturally Supports Deeper, More Restful Sleep Patterns

    Better sleep is something many yoga practitioners notice within just a few weeks of regular practice. Yoga works by releasing built-up muscle tension & quieting the mind before you go to bed. When you do gentle stretches and focus on your breathing, your body receives clear signals that it’s time to wind down & rest. This makes falling asleep much easier & helps you sleep more deeply through the night. Interestingly, even practicing yoga in the morning can help you sleep better at night because it reduces your overall stress levels throughout the day. When your sleep consistently improves, you’ll notice benefits like sharper focus a better mood, and faster physical recovery during your waking hours.

    Building Strong Body Awareness and Healthier Lifestyle Habits Through Yoga

    Yoga transforms the way people connect with their bodies. When you practice regularly you develop a better understanding of your posture & breathing patterns along with recognizing your physical boundaries. This heightened awareness naturally guides you toward making healthier decisions throughout your day without feeling pressured or limited. You find yourself maintaining better posture and moving with more intention while taking rest breaks when your body signals the need. The practice also cultivates patience and dedication that tends to influence other areas of life including how you approach meals and manage your time and care for yourself. These gradual shifts in behavior represent the typical lasting effects that emerge from maintaining a yoga practice over time.

    The Science and Consistency Behind Yoga’s Long-Term Physical and Mental Benefits

    Yoga works because it targets several body systems simultaneously. The stretching increases your flexibility while strength-based poses provide support for your joints. Controlled breathing helps calm your nervous system and the mindful awareness sharpens your mental focus. When these elements work together they produce real changes that you can notice in your everyday activities. The most important factor is maintaining a regular practice. The people who gain the most from yoga are not the ones who execute every pose flawlessly but rather those who practice consistently in a manner that suits their daily routine and personal circumstances.

    Simple Ways to Start Experiencing These Yoga Benefits in Your Own Routine

    You do not need long sessions to feel real results. Ten to twenty minutes of daily yoga is enough when done consistently. Focus on simple poses like cat cow and forward fold along with downward dog and gentle lunges and seated twists. End with slow breathing or relaxation. Yoga should feel supportive and not exhausting. If a pose causes sharp pain it should be modified or skipped.

    Making Yoga a Practical, Sustainable Practice for Everyday Life

    Yoga delivers the best results when you make it a regular part of your routine. You can practice at home without needing much room & you should keep your goals realistic. Your body will feel different from one day to the next. Sometimes you will feel energized and other times you might feel tired. This variation is completely normal. The key is to practice regularly even if you only have a few minutes available. Five main benefits of yoga have been confirmed through the real experiences of people who practice it consistently rather than through marketing hype. These benefits include less physical pain & better management of stress along with more stable energy levels throughout the day. People also report sleeping better at night & developing healthier lifestyle choices overall. These advantages explain why yoga continues to be such an effective method for maintaining both physical health and mental wellness over the long term.

  • 8 Beginner Yoga Exercises at Home to Build Confidence and Mobility

    8 Beginner Yoga Exercises at Home to Build Confidence and Mobility

    Starting yoga at home is one of the simplest ways to boost your health without any pressure or expense. Many beginners worry about their flexibility or balance or whether they are doing the poses correctly but yoga is not about being perfect. It is about moving with care and paying attention to what your body tells you while gradually building strength. When you practice regularly even just a few minutes each day you will notice better posture and more energy along with a calmer mind. These eight yoga exercises are easy to learn and safe to do which makes them ideal for beginners who want to practice at home.

    Mountain Pose to Build Posture and Body Awareness

    Mountain Pose works well as a starting position for people new to yoga. Stand up straight and place your feet together while keeping your arms loose at your sides. Let your shoulders stay relaxed & natural. Pay attention to how you breathe & notice how your weight distributes equally across both feet. This position helps develop better posture and balance while making you more aware of your body. People who are just beginning often have poor posture from spending too much time sitting down. Practicing this pose helps correct that alignment problem and trains your body to stand properly again.

    Child’s Pose for Comfort, Safety, and Relaxation

    Child Pose offers deep comfort & relaxation during yoga practice. Start by kneeling on the floor and sitting back so your bottom rests on your heels. Slowly fold your upper body forward until your forehead touches the mat. Let your arms rest naturally beside your body or extend them forward on the floor. This position creates a gentle stretch through your back and opens up your hips and shoulders. New practitioners find this pose especially helpful because they can move into it whenever they need a break. If you feel tired or stressed during your yoga session you can always return to Child Pose to rest and recover. The position allows your body to release tension while your breathing becomes slower & deeper. Many yoga teachers recommend this pose as a safe resting position between more challenging exercises.

    Cat–Cow Flow to Improve Spine Flexibility

    This gentle movement helps warm up the spine & reduces stiffness. Begin by positioning yourself on your hands & knees. As you breathe in slowly arch your back while lifting your head upward. As you breathe out round your spine and bring your chin down toward your chest. This flowing motion increases flexibility and decreases tension in the back. It works particularly well for people who are just starting out and those who spend long hours sitting at a desk.

    Downward-Facing Dog for Full-Body Mobility

    Downward Facing Dog might seem difficult when you first try it but regular practice makes it more manageable. Start on your hands and knees and then lift your hips up to create an upside-down V shape with your body. You can keep a slight bend in your knees if that feels better. The position stretches your spine and legs & shoulders while also making your arms stronger. When you are starting out you should concentrate on making your spine longer instead of trying to push your heels all the way to the floor.

    Cobra Pose to Strengthen the Lower Back

    Cobra Pose strengthens the lower back and opens the chest area. Start by lying face down on your stomach & position your palms directly under your shoulders. Slowly lift your chest upward while making sure your hips stay pressed against the floor. This position increases spinal flexibility and reduces the negative impact of sitting for extended periods. If you are new to this pose you should not lift your upper body too high. Instead concentrate on finding a comfortable position that feels natural for your body.

    Tree Pose to Improve Balance and Focus

    Tree Pose helps you develop better balance and sharper concentration. You start by standing on one foot while positioning the sole of your other foot against either your calf or inner thigh. Then bring both hands together and hold them at your chest. If you are just starting out you can keep your toes touching the floor to give yourself extra support. When you work on your balance regularly you will notice improvements in both your confidence and your ability to focus mentally.

    Seated Forward Bend for Gentle Muscle Release

    Tree Pose helps you develop better balance and sharper concentration. You start by standing on one foot while positioning the sole of your other foot against either your calf or inner thigh. Then you bring both hands together and hold them at your chest. If you are just starting out you can keep your toes touching the floor to give yourself extra support. When you work on your balance regularly you will notice improvements in both your confidence & your ability to focus mentally.

    Corpse Pose for Deep Rest and Recovery

    Corpse Pose gets ignored by many people but beginners really need it. You lie down flat on your back with your arms loose at your sides and close your eyes. Pay attention to breathing slowly and naturally. This position helps your body take in all the good things from your practice and makes stress go away. Just five minutes of lying like this can make your mind feel fresh again.

    Why Yoga at Home Helps Beginners Progress Faster

    Practicing yoga at home gives beginners a relaxed space to learn without feeling stressed. Nobody is watching and there is no need to hurry through poses. Modern wellness habits focus on easy movement & mental calmness along with regular practice. Yoga fits perfectly with these goals. When people practice at home they can move forward safely and work at a speed that feels right for them. Starting a home yoga routine means beginners can repeat poses until they feel comfortable. They can pause videos or take breaks whenever their body needs rest. This freedom helps build confidence over time. Many people find that practicing in their own space removes the anxiety of being in a group class.

    Essential Tips for Beginners Starting Yoga at Home

    Start with brief practice sessions & slowly extend them over time. Choose clothing that allows easy movement and avoid practicing after heavy meals. Pay attention to your breath instead of pushing yourself into deep stretches. Regular practice is more valuable than long sessions. Beginner yoga should feel approachable and encouraging. These eight basic yoga exercises are straightforward to learn and can be safely done at home while helping you develop a solid foundation. Through steady practice & patience yoga can transform into a lasting routine that benefits your physical and mental health.