Blog

  • Skip weights and try this 10-move bodyweight workout to strengthen your core in 10 minutes

    Skip weights and try this 10-move bodyweight workout to strengthen your core in 10 minutes

    One of the biggest challenges with ab workouts is how quickly the muscles fatigue. It often takes just a few minutes before each move starts to feel intensely demanding.

    That same challenge is also a major advantage. Because your core tires quickly, you can complete a highly effective abs workout in a short amount of time, without needing any equipment.

    This 10-minute abs routine from fitness trainer Maddie Lymburner, better known as MadFit on YouTube, is designed to target your abs and obliques. It can be done anywhere you have enough room to lie down.

    What You’ll Need Before You Start

    The workout requires no equipment at all. Since every exercise is performed on the floor, using one of the best yoga mats can make the session more comfortable, especially on hard surfaces.

    Inside MadFit’s 10-Minute Abs Workout

    The routine includes 10 different exercises. Each move is performed for 45 seconds, followed by a 15-second rest before moving on.

    All exercises are done in a lying position, so there’s no need to flip over for planks. It’s also a no-repeat workout, meaning each exercise is completed only once during the session.

    Lymburner completes the workout alongside you and offers clear form cues and guidance. Keeping her visible and audible during the workout is helpful, especially during the rest periods when she previews the next movement.

    How to Adjust the Pace

    If possible, aim to match Lymburner’s tempo. She maintains a steady rhythm that helps you control each movement while still completing plenty of reps during every work interval.

    If the pace feels too challenging or you need extra recovery, you can extend the rest periods. Options include adjusting the structure to 40 seconds of work and 20 seconds of rest, or 30 seconds on and 30 seconds off for beginners.

    This is a demanding workout, but it’s also easy to scale based on your fitness level, making it suitable for a wide range of abilities.

    Muscles Worked During the Session

    The workout combines crunches for the upper abs, leg raises for the lower abs, and rotational movements that place extra emphasis on the obliques.

    While it doesn’t focus as heavily on deep core stabilizers as routines built around static holds like planks, it still engages the entire core and supports strength gains that carry over into other workouts.

    What to Try Next

    Once you feel confident with this session and want to progress further, a 15-minute Pilates abs workout can be a great next step, especially for deep core engagement.

    If you’re looking for a different approach or find that sit-ups strain your back, the Pilates ball crunch can be a useful alternative to include in future workouts.

  • Daily Home Yoga: 4 Simple Exercises for Everyday Practice

    Daily Home Yoga: 4 Simple Exercises for Everyday Practice

    Six Yoga Poses to Build a Strong Core A strong core is the foundation of a healthy body. It improves your posture and supports your spine while enhancing your overall strength and balance. When most people think about core exercises they immediately picture crunches and planks. But yoga offers numerous poses that strengthen your core while simultaneously improving flexibility and mental focus. These six yoga poses will help you develop a stronger core regardless of whether you are a regular practitioner or a complete beginner.

    Boat Pose (Navasana): A Powerful Core Builder

    Boat Pose is a highly effective yoga posture for strengthening the core. It engages the abdominal muscles, hip flexors, and lower back while helping develop balance and overall stability.

    How to Perform Boat Pose

    – Sit comfortably on the mat with your knees bent and feet placed flat on the floor.

    – Lean back slightly while keeping your spine long, then lift your feet off the mat so your knees form a 90-degree angle.

    – Straighten your legs so they are parallel to the floor, or keep a gentle bend in the knees if needed.

    – Lift your arms to shoulder height, extending them forward with palms facing inward.

    – Hold the position for 30 seconds to 1 minute while keeping your core firmly engaged.

    Benefits of Boat Pose

    – Builds strength in the abdominal muscles, hip flexors, and lower back

    – Enhances balance and supports better posture

    – Aids digestion and encourages healthy circulation

    This pose activates multiple core muscles at once, helping create a strong base for more advanced yoga postures.

    Plank Pose (Phalakasana): Full-Core Strength and Endurance

    Plank Pose is a foundational posture that strengthens the core while also engaging the shoulders, arms, and legs. It challenges the entire body and builds both strength and stamina.

    How to Perform Plank Pose

    – Begin in a tabletop position with wrists aligned under shoulders and knees under hips.

    – Step both feet back, forming a straight line from your head through your heels.

    – Engage your core muscles, press firmly through your palms, and keep your hips level.

    – Maintain a neutral neck position with your gaze slightly forward.

    – Hold the pose for 30 seconds to 1 minute with steady core engagement.

    Benefits of Plank Pose

    – Strengthens the abdominals, back muscles, and obliques

    – Improves shoulder stability and wrist strength

    – Builds endurance and total-body strength

    – This pose is one of the most effective ways to develop a strong, stable core while enhancing overall body control.

    Side Plank (Vasisthasana): Targeting the Obliques

    Side Plank is a dynamic variation that places greater emphasis on the obliques and deep core muscles. It also challenges balance and coordination.

    How to Perform Side Plank

    – Start in a standard plank position.

    – Shift your weight onto one hand and rotate your body to face sideways.

    – Stack your feet and lift your top arm upward toward the ceiling.

    – Keep your body aligned in a straight line from head to heels.

    – Hold for 20 to 30 seconds on each side, then switch.

    Benefits of Side Plank

    – Engages the obliques and deep core muscles

    – Improves balance and body coordination

    – Strengthens wrists, arms, and shoulders

    – Side Plank delivers full-body toning while focusing strongly on core stability.

    Dolphin Pose (Ardha Pincha Mayurasana): Core and Shoulder Stability

    Dolphin Pose is a strengthening inversion that emphasizes the core, shoulders, and arms while promoting proper spinal alignment.

    How to Perform Dolphin Pose

    – Begin on all fours and lower your forearms to the mat, elbows under shoulders.

    – Tuck your toes and lift your hips upward, creating an inverted V shape.

    – Keep your legs active without locking the knees.

    – Gently press your heels toward the floor.

    – Hold for 30 seconds to 1 minute while breathing deeply.

    Benefits of Dolphin Pose

    – Strengthens the core, shoulders, and arms

    – Increases flexibility in the back, hamstrings, and calves

    – Encourages proper posture and spinal alignment

    – This pose builds upper-body strength while engaging the core without placing pressure on the lower back.

    Wheel Pose (Chakrasana): Advanced Core and Back Strength

    Wheel Pose is a deep backbend that requires strong core engagement. It opens the chest and spine while strengthening the abdominal muscles and hips.

    How to Perform Wheel Pose

    – Lie on your back with knees bent and feet flat on the floor.

    – Place your hands beside your head with fingers pointing toward your shoulders.

    – Press through your hands and feet to lift your hips and chest.

    – Straighten your arms and legs as your head gently drops back.

    – Hold the pose for 10 to 20 seconds with steady breathing.

    Benefits of Wheel Pose

    – Strengthens the core, including abdominal and lower back muscles

    – Improves flexibility in the spine, chest, and hips

    – Opens the chest and stimulates the heart

    – This challenging posture builds deep strength while enhancing flexibility in the upper body.

    Bow Pose (Dhanurasana): Full-Core and Back Engagement

    Bow Pose is a strong backbend that activates the core, back, and legs while opening the chest and improving balance.

    How to Perform Bow Pose

    – Lie on your stomach with knees bent and feet hip-width apart.

    – Reach back and hold your ankles, keeping knees aligned with hips.

    – On an inhale, lift your chest and legs off the floor.

    – Draw your ankles toward your glutes as you arch your back.

    – Hold for 20 to 30 seconds with controlled breathing.

    Benefits of Bow Pose

    – Strengthens the core, back, and leg muscles

    – Improves flexibility in the spine, chest, and hip flexors

    – Supports better posture and balance

    – This pose strengthens the entire core and back, supporting long-term spinal health and stability.

  • 6 Easy Yoga Poses You Can Do Anytime to Feel Calm and Relaxed

    6 Easy Yoga Poses You Can Do Anytime to Feel Calm and Relaxed

    Rewritten Text Life moves quickly & your body often shows that rush through tight muscles, quick breathing and too much mental activity. Yoga for calm and peace does not mean forcing your body into difficult positions. It means slowing things down so your nervous system can settle. Even a short session of gentle movement can reduce anxiety, calm busy thoughts and restore a sense of balance. These six simple yoga poses work well because they have a soothing effect on both mind and body. They are straightforward easy to access & good for people just starting out. You do not need to be flexible or strong to experience their benefits. All you need is slow breathing & a willingness to take a break.

    Why Calming Yoga Works So Fast

    Stress triggers the body’s natural alert system. Your heart rate rises, muscles tighten, and breathing becomes shallow. Gentle yoga works in the opposite way. Slow movements, longer holds, and controlled breathing send signals of safety to the brain. This allows the nervous system to shift into a relaxed mode where rest and recovery can occur. With regular practice, calming yoga can support better sleep, improved mood, smoother digestion, and stronger emotional balance.

    Child’s Pose

    Child’s Pose is one of the most comforting yoga positions. It softly releases tension from the lower back, shoulders, and neck while helping the mind settle.

    How to do it:
    Kneel on the floor and lower your hips toward your heels. Fold your upper body forward and rest your forehead on the mat or a cushion. Your arms may extend forward or relax alongside your body.

    Calming benefit:
    Encourages slow breathing into the back of the body and helps ease mental stress.

    Hold for:
    1 to 2 minutes with gentle, steady breaths.

    Seated Forward Bend

    This pose has a grounding and reflective quality. Folding forward helps draw attention inward, naturally calming the nervous system.

    How to do it:
    Sit with your legs stretched out in front of you. Inhale to lift and lengthen your spine. Exhale as you hinge forward from the hips. Slightly bend the knees if your hamstrings feel tight.

    Calming benefit:
    Releases tension in the lower back and legs while quieting racing thoughts.

    Hold for:
    60 to 90 seconds.

    Cat Cow Pose

    Cat Cow is a smooth, flowing movement that connects breath with motion. It is ideal for reducing stiffness and easing the mind.

    How to do it:
    Begin on your hands and knees. Inhale as you lift the chest and let the belly soften. Exhale as you round the spine and gently drop the chin. Move slowly with your breath.

    Calming benefit:
    The steady rhythm relaxes the spine and improves breath awareness, helping lower stress.

    Practice for:
    About 1 minute at an easy pace.

    Legs Up the Wall

    This restorative pose is deeply soothing and especially helpful for tired bodies.

    How to do it:
    Sit close to a wall, then gently lie back and lift your legs upward so they rest against the wall. Place your arms comfortably by your sides with palms facing up.

    Calming benefit:
    Slows the heart rate, supports circulation, and helps reduce feelings of anxiety.

    Hold for:
    2 to 3 minutes, or longer if it feels comfortable.

    Supine Spinal Twist

    This gentle twist relaxes the spine and supports internal balance, creating a sense of ease.

    How to do it:
    Lie on your back and draw one knee toward your chest. Guide it across your body while extending the opposite arm outward. Keep both shoulders relaxed.

    Calming benefit:
    Releases lower back tension and helps clear mental clutter.

    Hold for:
    45 seconds to 1 minute on each side.

    Corpse Pose

    Corpse Pose may appear simple, but it is one of the most effective poses for deep relaxation.

    How to do it:
    Lie flat on your back. Allow your feet to fall open and your arms to rest naturally by your sides. Close your eyes and let the body fully relax.

    Calming benefit:
    Supports complete physical and mental rest, allowing the nervous system to reset.

    Stay for:
    3 to 5 minutes with natural breathing.

    How to Practice These Poses for Deeper Calm

    You can move through all six poses in one relaxing session or choose a few when time is short. Keep your breathing slow and even, inhaling through the nose and exhaling fully. Soft lighting or gentle music can enhance the experience. It is best to avoid practicing right after a heavy meal.

    Simple 10-Minute Calm Routine

    Child’s Pose
    Cat Cow
    Seated Forward Bend
    Supine Spinal Twist (both sides)
    Legs Up the Wall
    Corpse Pose

    Tips to Stay Calm Beyond the Mat

    Yoga becomes more powerful when combined with mindful daily habits. Take a few deep breaths during stressful moments. Reduce screen use before bedtime. Drink enough water and aim for consistent sleep. Even practicing one calming pose during a busy day can help restore balance.

    Who Should Be Careful

    If you have recent injuries, knee discomfort, or spinal issues, use props for support and move gently. Never force a position. Pregnant individuals should seek professional guidance and modify twists or forward bends as needed.

    Final Thought

    Calm and peace are not distant goals. They already live within you. These gentle yoga poses simply help you reconnect with that inner stillness. If you’d like, a short morning or bedtime routine can be created using these poses to fit your daily schedule.

  • Anywhere Yoga Relief: 5 Poses for Stress Reduction Anytime

    Anywhere Yoga Relief: 5 Poses for Stress Reduction Anytime

    Stress can influence your daily life in many ways, but yoga provides a gentle and natural way to restore calm. Whether you are at home, at work, or traveling, these five yoga poses can help release the tension that builds up during the day. They are easy to practice, require very little space, and fit seamlessly into even the busiest schedules.

    1. Child’s Pose (Balasana): A Calming Resting Posture

    Child’s Pose is one of the most relaxing and grounding positions in yoga. It gently stretches the back, shoulders, and neck while encouraging deep rest. This pose is ideal whenever you feel mentally or physically overwhelmed.

    How to do it:

    • Kneel on the floor and sit back on your heels.
    • Slowly lower your torso toward the ground.
    • Extend your arms forward or rest them alongside your body.
    • Place your forehead on the floor and breathe deeply.
    • Remain in the pose for 1–3 minutes, allowing your body to soften.

    Benefits: This pose helps soothe the nervous system, ease anxiety, and improve circulation while gently stretching the body.

    2. Standing Forward Bend (Uttanasana): Let Go of Upper-Body Tension

    Standing Forward Bend is effective for releasing tightness in the back, neck, and shoulders. It promotes grounding and relaxation, making it especially helpful during stressful moments.

    How to do it:

    • Stand with your feet hip-width apart.
    • Hinge at your hips and fold forward slowly.
    • Allow your head to relax toward the floor.
    • Keep your knees slightly bent if needed.
    • Let your arms hang freely or hold opposite elbows.
    • Breathe steadily and relax with each exhale.

    Benefits: This pose calms the mind while easing tightness in the lower back and hamstrings, creating a feeling of release.

    3. Seated Forward Bend (Paschimottanasana): Stretch and Breathe Mindfully

    The Seated Forward Bend is a gentle stretch that supports mental calm and physical relaxation. It is especially beneficial for those who sit for long periods, as it targets areas where stress often accumulates.

    How to do it:

    • Sit on the floor with your legs extended in front of you.
    • Inhale to lengthen your spine.
    • Exhale and fold forward slowly from the hips.
    • Reach for your feet, ankles, or shins.
    • Keep your spine long and your neck relaxed.
    • Breathe deeply into your abdomen.

    Benefits: This pose stretches the spine and hamstrings while encouraging mindfulness and mental clarity.

    4. Legs Up the Wall (Viparita Karani): Gentle Inversion for Relaxation

    Legs Up the Wall is a restorative pose that supports circulation and deep relaxation. It is ideal after a long day and can be practiced easily with access to a wall.

    How to do it:

    • Sit beside a wall and gently lie down on your back.
    • Swing your legs up so they rest against the wall.
    • Keep your hips close to the wall.
    • Rest your arms at your sides with palms facing up.
    • Close your eyes and breathe slowly.

    Benefits: This pose reduces leg fatigue, eases lower back discomfort, and calms the nervous system.

    5. Corpse Pose (Savasana): Full-Body Relaxation

    Though it appears simple, Corpse Pose is one of the most effective poses for relieving stress. It allows the body and mind to fully relax and reset.

    How to do it:

    • Lie flat on your back with your arms resting by your sides.
    • Turn your palms upward and close your eyes.
    • Take slow, deep breaths.
    • Gradually release tension from your body, starting at your toes and moving upward.
    • Remain still for 5–10 minutes.

    Benefits: Savasana promotes deep relaxation, supports mindfulness, and helps lower stress hormone levels.

    Making Yoga Part of Your Daily Life

    Yoga does not require lengthy sessions or special equipment. Whether you are taking a short break at work or preparing for sleep, these five poses can be practiced anywhere to help reduce stress and support overall well-being.

    Consistency is key when using yoga for stress relief. By setting aside a little time each day for these simple poses, you may begin to feel more balanced, grounded, and calm, regardless of where your day takes you.

  • 15-Minute Yoga Routine: Simple Movements That Sustain Energy Throughout the Day

    15-Minute Yoga Routine: Simple Movements That Sustain Energy Throughout the Day

    Yoga offers an excellent method to increase your energy and sharpen your focus while improving your general health. A brief yoga session works perfectly when you need a fast & practical way to feel alert and energized at the start of your day. You can activate your body & boost circulation in only 15 minutes while getting ready for a productive day. This straightforward & active yoga routine aims to get your body moving & stretch important muscle groups while building a feeling of energy. This sequence will make you feel energized & prepared for your day regardless of whether you are just starting yoga or have been practicing for years.

    Child’s Pose (Balasana)

    Start your yoga routine with Child’s Pose to relax the mind and gently stretch the lower back, hips, and thighs. Kneel on the floor with your knees comfortably apart and your big toes touching. Slowly fold your torso forward, allowing your chest to rest between your thighs. Extend your arms forward or place them alongside your body. Let your forehead settle on the mat and take slow, deep breaths. This grounding posture helps release built-up tension and creates a calm mental space, preparing your body and focus for the poses that follow.

    Downward-Facing Dog (Adho Mukha Svanasana)

    From Child’s Pose, shift into Downward-Facing Dog to awaken and energize the entire body. Begin on all fours with your hands under your shoulders and knees beneath your hips. Curl your toes under and lift your hips upward, forming an inverted V shape. Press your palms firmly into the mat, lengthen your spine, and gently work your heels toward the floor. Hold this pose for 30 seconds to one minute while breathing steadily. This posture stretches the hamstrings, calves, shoulders, and spine, boosting circulation and overall energy.

    Cat-Cow Stretch (Marjaryasana–Bitilasana)

    Transition into the Cat-Cow Stretch to mobilize the spine and ease tension in the neck and shoulders. Return to a tabletop position with neutral alignment. As you inhale, drop your belly, lift your chest, and look slightly upward for Cow Pose. As you exhale, round your back, draw your chin toward your chest, and press the floor away for Cat Pose. Continue moving fluidly between these two positions for about 30 seconds. This gentle flow improves spinal flexibility, relieves stiffness, and encourages healthy energy movement.

    Low Lunge (Anjaneyasana)

    Low Lunge provides a deep stretch for the hips, thighs, and legs while opening the chest. From tabletop, step your right foot forward between your hands, aligning your knee over your ankle. Lower your left knee to the mat and sink your hips slightly forward. Raise your arms overhead and lengthen through your fingertips. Hold the pose for 30 seconds to one minute, then switch sides. This posture is especially helpful for releasing tight hips and reactivating the lower body after extended sitting.

    Warrior II (Virabhadrasana II)

    Move into Warrior II to build strength, stability, and stamina. Stand with your feet wide apart and turn your right foot outward while keeping the left foot slightly angled inward. Bend your right knee so it aligns above your ankle, keeping your left leg straight and strong. Extend your arms parallel to the floor and gaze over your right fingertips. Hold for 30 seconds before changing sides. Warrior II strengthens the legs, opens the hips, and sharpens focus, helping to boost confidence and vitality.

    Tree Pose (Vrksasana)

    Tree Pose challenges balance while cultivating concentration and inner calm. Stand upright with your weight evenly distributed. Shift your weight onto your left foot and place your right foot on the inner calf or thigh, avoiding the knee. Bring your palms together at your chest or raise your arms overhead. Hold for 30 seconds, breathing steadily and focusing your gaze on a fixed point. Switch sides afterward. This posture strengthens the legs and core while improving balance, mental clarity, and body awareness.

     Seated Forward Fold (Paschimottanasana)

    Slow the pace with Seated Forward Fold, a soothing stretch for the back and legs. Sit on the mat with your legs extended straight in front of you. Inhale to lengthen your spine, then exhale as you hinge forward from the hips, reaching toward your feet or shins. Keep your spine long rather than rounded. Hold the pose for 30 seconds to one minute while breathing calmly. This posture stretches the hamstrings and lower back, encouraging relaxation and releasing residual tension.

    Shoulder Bridge Pose (Setu Bandhasana)

    Conclude your routine with Shoulder Bridge Pose to strengthen the lower body and open the chest. Lie on your back with your knees bent and feet planted hip-width apart. Press your feet into the mat and lift your hips upward, forming a gentle arch through the spine. Keep your arms relaxed at your sides with palms pressing down. Hold for 30 seconds to one minute, then slowly lower your hips. This pose activates the glutes, supports the spine, and promotes healthy circulation to re-energize the body.

  • Core Strength Yoga: 6 Poses That Build Stability and Control

    Core Strength Yoga: 6 Poses That Build Stability and Control

    A strong core forms the base of a healthy body. It helps improve your posture & supports your spine while boosting your overall strength and balance. Most people think of crunches and planks when they consider core exercises. However yoga provides many poses that strengthen your core and also increase flexibility and mental focus along with stability. These six yoga poses will help you develop a stronger core whether you practice yoga regularly or just started.

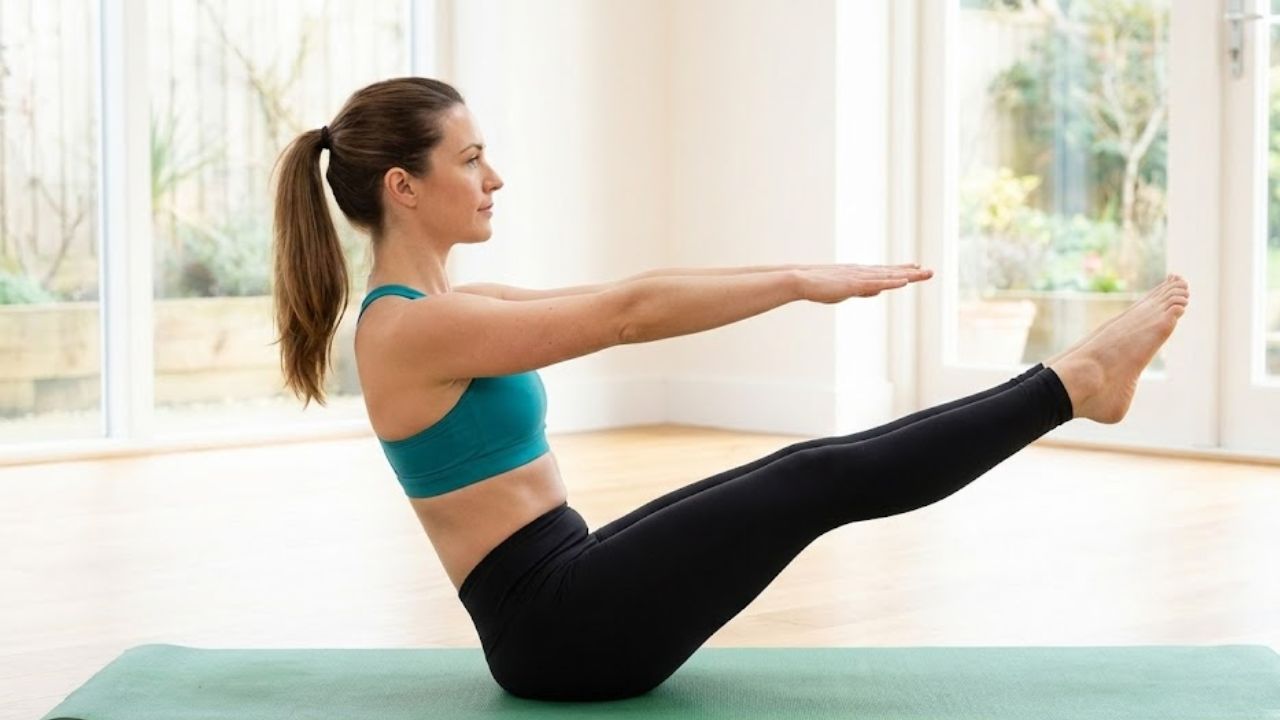
    Boat Pose (Navasana): A Core-Strength Power Move

    Boat Pose is one of the most effective yoga postures for activating and strengthening the core. It primarily targets the abdominal muscles while also engaging the hip flexors and lower back, making it ideal for improving overall stability and control.

    How to Practice Boat Pose

    – Sit on the mat with your knees bent and feet resting flat on the floor.

    – Lean your torso back slightly while keeping your spine tall and your chest lifted.

    – Lift your feet off the ground, bringing your knees to a 90-degree angle.

    – Straighten your legs so they are parallel to the floor, bending the knees slightly if needed.

    – Extend your arms forward at shoulder height with palms facing each other.

    – Hold the pose for 30 seconds to 1 minute, keeping your core engaged for balance.

    Benefits of Boat Pose

    – Builds strength in the abdominal muscles, hip flexors, and lower back

    – Enhances balance and posture

    – Supports digestion and promotes healthy circulation

    – Boat Pose engages multiple core muscles at once, helping create a strong foundation for more advanced yoga poses.

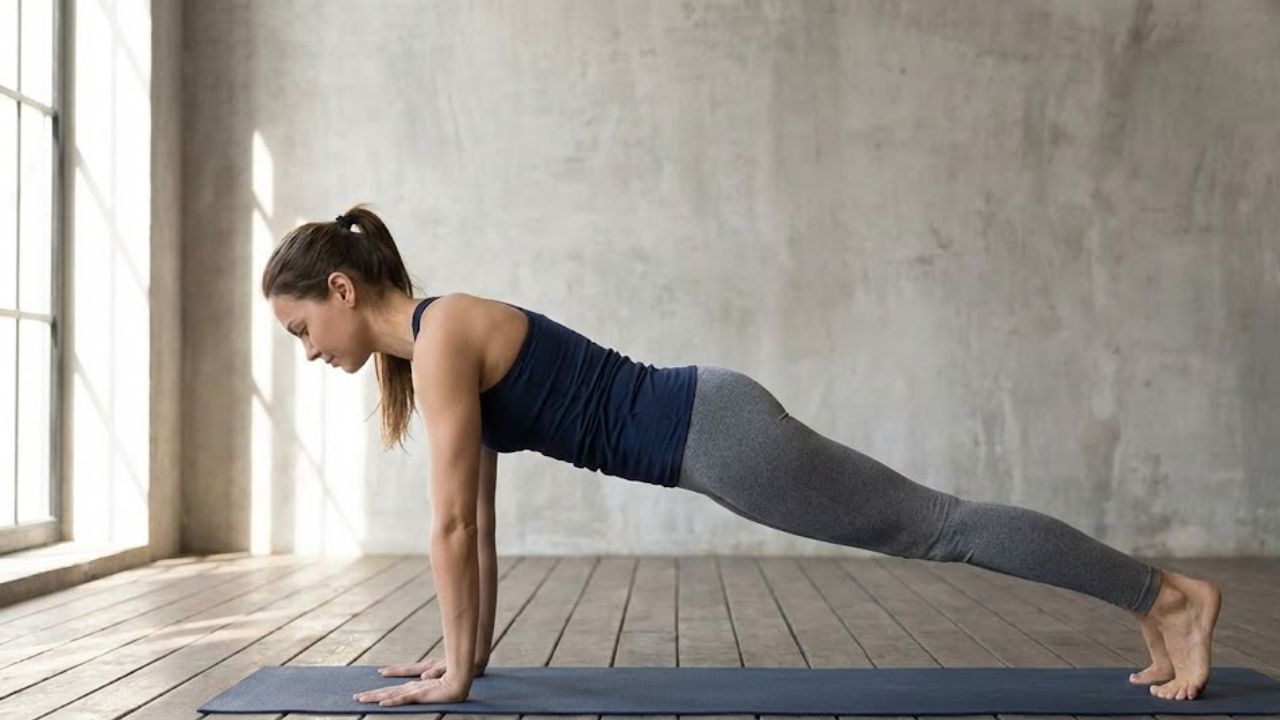
    Plank Pose (Phalakasana): Full-Body Core Strength

    Plank Pose is a foundational posture known for strengthening the core while also activating the shoulders, arms, and legs. Though simple in appearance, it challenges the entire body and builds lasting endurance.

    How to Practice Plank Pose

    – Begin in a tabletop position with wrists under shoulders and knees under hips.

    – Step both feet back, aligning your body in a straight line from head to heels.

    – Engage your core and press firmly through your palms.

    – Keep your hips level and your neck neutral, gazing slightly forward.

    – Hold for 30 seconds to 1 minute while maintaining steady engagement.

    Benefits of Plank Pose

    – Strengthens the entire core, including abs, back, and obliques

    – Improves wrist strength and shoulder stability

    – Boosts overall stamina and endurance

    – Plank Pose is highly effective for developing both strength and stability across the whole body.

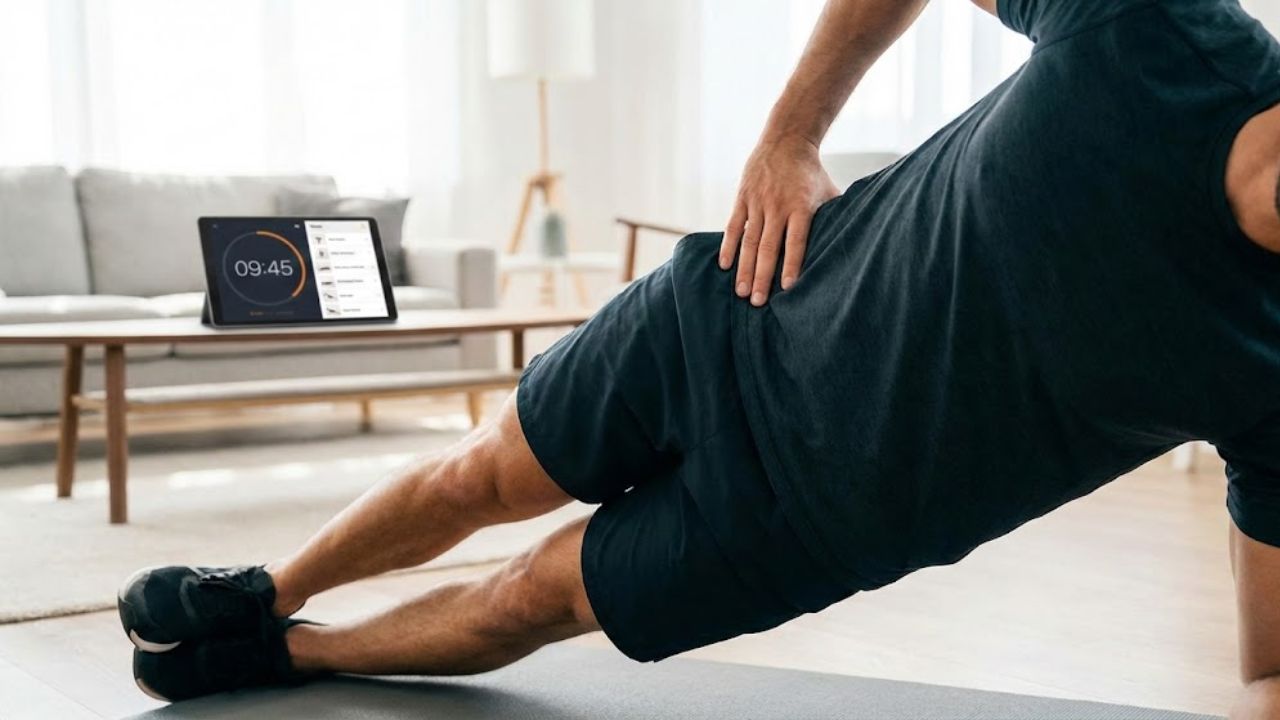
    Side Plank (Vasisthasana): Oblique-Focused Stability

    Side Plank is a powerful variation that places greater emphasis on the obliques and deep core muscles. It also improves balance and coordination while strengthening the upper body.

    How to Practice Side Plank

    – Start in a standard plank position.

    – Shift your weight onto one hand and rotate your body to the side.

    – Stack your feet and lift your top arm toward the ceiling.

    – Maintain a straight line from head to heels and engage your core.

    – Hold for 20 to 30 seconds, then switch sides.

    Benefits of Side Plank

    – Targets the obliques and deep core muscles

    – Enhances balance and body coordination

    – Strengthens the arms, shoulders, and wrists

    – Side Plank strengthens the core while also toning the arms and legs, offering full-body engagement.

    Dolphin Pose (Ardha Pincha Mayurasana): Upper-Body Core Control

    Dolphin Pose is a strong alternative to Downward-Facing Dog that emphasizes the shoulders, arms, and core. It encourages proper spinal alignment while building strength and flexibility.

    How to Practice Dolphin Pose

    – Begin on all fours with forearms on the mat and elbows under shoulders.

    – Tuck your toes and lift your hips upward into an inverted V shape.

    – Keep your legs straight without locking the knees.

    – Press your heels gently toward the floor.

    – Hold for 30 seconds to 1 minute, focusing on steady breathing.

    Benefits of Dolphin Pose

    – Strengthens the core, arms, and shoulders

    – Improves flexibility in the spine, hamstrings, and calves

    – Supports better posture and spinal alignment

    – Dolphin Pose builds upper-body strength while keeping the core actively engaged.

    Wheel Pose (Chakrasana): Advanced Core Engagement

    Wheel Pose is a deep backbend that demands strong core activation. It stretches the spine and chest while strengthening the abdominal muscles and hips.

    How to Practice Wheel Pose

    – Lie on your back with knees bent and feet flat, hip-width apart.

    – Place your hands beside your head with fingers pointing toward your shoulders.

    – Press into your hands and feet to lift your hips and chest.

    – Straighten your arms and legs, allowing your head to relax back.

    – Hold for 10 to 20 seconds while breathing steadily.

    Benefits of Wheel Pose

    – Strengthens the core and lower back

    – Increases flexibility in the spine, hips, and chest

    – Opens the chest and energizes the body

    – Wheel Pose offers an intense challenge that builds core strength and enhances upper-body flexibility.

    Bow Pose (Dhanurasana): Full-Core Activation

    Bow Pose is a dynamic backbend that strengthens the core, back, and legs. It opens the chest while requiring strong engagement to maintain balance.

    How to Practice Bow Pose

    – Lie face down with knees bent and feet hip-width apart.

    – Reach back and hold your ankles, keeping knees aligned with hips.

    – On an inhale, lift your chest and legs off the floor.

    – Pull gently through the ankles to deepen the arch.

    – Hold for 20 to 30 seconds with steady breathing.

    Benefits of Bow Pose

    – Strengthens the core, back, and legs

    – Improves flexibility in the chest, spine, and hip flexors

    – Supports better posture and balance

    – Bow Pose activates the entire core while building strength in the back, helping support healthy posture.

  • Apply Aloe Vera Gel Every Night and See What Happens to Your Skin in Just 7 Days (Dermatologists Shocked)

    Apply Aloe Vera Gel Every Night and See What Happens to Your Skin in Just 7 Days (Dermatologists Shocked)

    Aloe vera gel has long been trusted as a natural skin healer, and in India it is commonly used in home remedies and daily skincare routines. What surprises many people is how quickly visible changes can appear when it is applied consistently at night. Within just seven days, the skin often begins to look calmer, clearer, and more refreshed. Dermatologists frequently point out that aloe vera works best when the skin is in repair mode during sleep, making nightly use especially effective for Indian weather conditions and lifestyle stress.

    Using Aloe Vera Gel at Night for Faster Skin Repair

    Applying aloe vera gel before bedtime allows the skin to absorb its nutrients without interference from sun exposure or pollution. During the night, the skin focuses on renewal, and aloe supports this process with its natural enzymes and vitamins. Many users notice overnight hydration boost, calmer skin feel, and reduced redness signs within a few days. The gel forms a light, breathable layer that does not clog pores, making it suitable even for humid Indian nights. With regular use, it can also encourage smoother texture development and help tired skin look healthier by morning.

    What Happens to Your Skin After 7 Days of Aloe Vera Use

    After a full week, the cumulative effects become more noticeable. Skin often appears more balanced, with fewer dry patches and less irritation. People dealing with mild acne or sun stress frequently report visible glow improvement, softer skin surface, and better moisture balance. Aloe vera’s soothing nature supports the skin barrier, which can lead to less frequent breakouts over time. While results vary by skin type, consistent nightly application helps create a steady routine that encourages healthier-looking skin without harsh chemicals.

    Why Dermatologists Recommend Aloe Vera for Daily Skincare

    Dermatologists often appreciate aloe vera because it is simple, affordable, and generally well tolerated. Its lightweight texture suits oily, dry, and combination skin types commonly seen across India. Experts highlight benefits such as gentle natural soothing, non greasy hydration, and supportive skin healing. Aloe also pairs well with minimal skincare routines, reducing the risk of overloading the skin. When used daily at night, it can promote long term skin comfort while maintaining a natural, healthy appearance.

    Summary or Analysis

    Using aloe vera gel every night is less about instant miracles and more about consistent care. Over seven days, the skin is given time to respond to hydration, soothing, and repair support. Many people experience noticeable skin freshness, improved comfort levels, and steady tone appearance with regular use. For Indian climates, where heat and pollution can stress the skin, aloe offers a simple nightly ritual that fits easily into daily life. When applied correctly, it becomes a reliable step toward healthier-looking skin.

    Day Observed Skin Change Common Feeling
    Day 1 Immediate hydration Cool and soothing
    Day 3 Reduced dryness Softer texture
    Day 5 Calmer appearance Less irritation
    Day 7 Healthy glow Refreshed skin

    Frequently Asked Questions (FAQs)

    1. Can aloe vera gel be used every night?

    Yes, pure aloe vera gel is gentle enough for nightly use on most skin types.

    2. Is aloe vera suitable for oily skin?

    Yes, it is lightweight and non-greasy, making it suitable for oily skin.

    3. Should aloe vera gel be washed off in the morning?

    Yes, rinse your face in the morning as part of your regular cleansing routine.

    4. How long does it take to see results?

    Many people notice visible improvements within seven days of consistent use.

  • Exfoliation Mistake Revealed: The Common Habit That Weakens Skin Instead of Smoothing It

    Exfoliation Mistake Revealed: The Common Habit That Weakens Skin Instead of Smoothing It

    You grab your usual exfoliating scrub that smells like vacation and has small grains you can feel on your skin. You rub it in circles on your cheeks and spend extra time on your nose and chin because you think it will help your pores. Then you rinse and expect your skin to look perfect like the product claims. But your face feels tight & almost squeaky clean. It looks smooth for a moment but then turns a bit red & strangely shiny. Your makeup sticks to dry spots that appeared out of nowhere. So the next night you do it again and scrub even harder because you want to remove the rough texture & dull appearance and small bumps. This is when something that feels good starts causing problems without you realizing it.

    The exfoliation habit that backfires

    The common habit that weakens skin instead of smoothing it is exfoliating too often & too hard with the wrong tools. Most people think they are just scrubbing until their skin feels clean or using a peeling toner every night because social media promised them glowing skin. What seems like good skincare is actually slowly damaging your skin’s protective barrier. The damage does not appear immediately. It shows up as increased sensitivity and tightness after washing your face. You might notice redness that does not go away or have a shiny forehead with a flaky nose at the same time. The more you try to make your skin smooth this way the rougher it can actually become. A young woman visits a dermatology clinic in London on a Tuesday. She wears carefully applied makeup that does not quite hide her red skin. She tells the doctor her skin feels textured & dirty. She exfoliates every night with a grainy scrub and uses a peel mask twice a week plus a glow toner she bought online. Her phone contains many screenshots of influencers with perfect skin and before-and-after photos & lists of acids she should try.

    Her own results look different. Her skin stings when she washes it and her foundation separates on her cheeks. She gets small breakouts in new places. She cannot understand why her skin feels worse when she works so hard on it. She is not alone in this problem. A study in the UK found more irritation reactions linked to overusing acids & scrubs in people under 35. The routine looks like proper skincare but the skin experiences it as damage. To understand why this happens you should think about your skin like a building structure instead of something that needs deep cleaning. Your outer skin layer called the stratum corneum works like a brick wall.

    It has flat dead cells as bricks held together by fats as mortar. This wall protects your skin by keeping moisture inside and keeping out irritants and pollution and germs. Exfoliation should gently remove a few loose bricks from the surface. Over-exfoliation tears at the mortar and removes too many bricks at once. Physical scrubs with sharp particles create tiny tears you cannot see but can feel as roughness & stinging. Using strong acids or peel pads every day makes the barrier thinner & leaves nerves and blood vessels more exposed.

    How to exfoliate without wrecking your skin

    The solution is not to stop exfoliating completely but to treat it like caffeine. It is powerful & useful but can cause problems if you overdo it. The best approach is to move away from scrubbing until your skin feels smooth and instead focus on minimal & gentle exfoliation. For most people with normal skin this means exfoliating one to three times per week instead of every night. Replace rough scrubs with gentler alternatives like enzyme powders or lactic acid toners with low concentrations or chemical exfoliants made for sensitive skin. Let the product do the work rather than applying pressure with your hands. Use your fingertips lightly as if you are spreading cream on a balloon rather than scrubbing a pan. A slight tingling sensation for a few seconds can be normal but burning or itching is a warning sign. Many dermatologists share a simple rule. If your foundation clings to dry patches the answer is more moisture rather than more exfoliation. This means combining any exfoliation with something soothing and nourishing like a fragrance-free moisturizer with ceramides or glycerin or panthenol or squalane. Healthy skin does not come from stripping away layers but from maintaining a strong and hydrated barrier.

    One woman I spoke to who was 29 thought her weekly self-care routine should include a hot shower followed by a salt body scrub and a face scrub and a clay mask and then an AHA peel. Her legs burned after shaving and her cheeks turned red in cold weather & every product labeled for sensitive skin still caused stinging. When she stopped all exfoliation for three weeks and only used gentle cleansing & a thick cream people started asking what she had done to look so rested. Sometimes the most effective routine is the one that feels surprisingly simple. Let’s be honest. Nobody actually does this every day despite what perfect routines on social media suggest. Most of us rush through our routine or overuse one product to compensate for skipping another and then blame our skin when it reacts badly. Skin follows a logic that does not match our desire for instant results.

    Skin renews itself roughly every 28 days and this happens faster when you are younger and slower as you age. When you exfoliate aggressively every night you are not helping this natural cycle but interrupting it. The cells do not have enough time to mature properly before they are removed which is why the surface can start to look shiny and thin and almost plastic-like. Barrier damage is not always obvious. It can show up as a persistent feeling that everything tingles now or that your cheeks react to the same moisturizer you have used for years or that the sun feels harsher on your face than it used to. Over time repeated inflammation can make redness more permanent & trigger flare-ups of rosacea or eczema & leave the skin less resilient overall. The habit that feels like taking control of your skin by scrubbing and peeling and chasing that perfect result actually removes the one thing you need for long-term healthy skin. That thing is a calm & functional barrier that does not react every time you touch it.

    The gentle routine that actually smooths

    A good exfoliation routine begins with doing less. Start by keeping only one exfoliating product in your bathroom at a time. Don’t use a scrub and a peel and a glow toner all together. Choose just one option:

    either a gentle chemical exfoliant like lactic acid at 5-10% concentration or polyhydroxy acids or a mild BHA. You could also use a very soft scrub with smooth rounded particles but only occasionally. Apply your chosen exfoliant at night on clean dry skin. Use it only two or three nights each week.

    Afterward apply a simple moisturizer without fragrance or strong active ingredients. Just use something that supports your skin barrier. On the nights when you don’t exfoliate keep everything simple. Just cleanse your face and add hydration. You might use a serum with niacinamide or hyaluronic acid & then apply your cream. Your skin needs consistency more than it needs complicated steps. What you avoid after exfoliating matters just as much as what you do. Don’t use hot water or facial cleansing brushes right after.

    Don’t apply vitamin C or retinoids in the same routine unless your skin already handles them well and a professional has advised you to do so. Think of your newly exfoliated skin as more sensitive than usual. It still has protection but it feels everything more intensely. If you notice your skin feels tight in the morning or looks redder than normal or has that overly clean feeling then treat it carefully. Stop all exfoliation for at least one week. Use only gentle products like milk or gel cleansers and thick cream. Apply SPF 30 or higher every morning.

    This simple break often improves your skin texture better than more exfoliating would. There’s also an emotional side to exfoliating. Many people feel their skin needs to be fixed or scrubbed into smoothness. On difficult days scrubbing extra hard around your nose might feel like taking control. On better days being gentle with your skin can feel strangely vulnerable.

    A new way to think about “smooth” skin

    Once you understand what over-exfoliation looks like you notice it constantly. You see the shiny tight cheeks on a coworker who uses daily peel pads. You notice the friend whose forehead stays slightly pink all the time. You hear the influencer mention that their skin hurts after applying their fifth product. It feels oddly reassuring to realize your skin isn’t damaged but simply exhausted. A barrier that has been stripped too frequently can heal if you allow it proper time and treatment. This often means stopping your most exciting products and switching to boring ones like basic cleansers & thick moisturizers and daily sunscreen. It might also mean questioning why being harsh with your skin sometimes feels more normal than being gentle. Gentleness doesn’t stand out among crowded bathroom shelves. It means skipping a scrub when your face feels sensitive. It means using three products instead of eight. It means resisting that new acid toner even when you want to try it. When you make those choices you aren’t being careless about skincare. You’re doing something your skin cannot do alone by telling it that constant fighting isn’t necessary.

    Point Clé Détail Intérêt pour le Lecteur
    Le vrai problème Exfoliation excessive ou trop agressive affaiblit la barrière cutanée Comprendre pourquoi la peau devient rouge, sensible, brillante ou granuleuse
    La bonne fréquence Limiter l’exfoliation à 1–3 fois par semaine avec des produits doux Réduire les irritations tout en conservant une peau lisse et confortable
    Le réflexe gagnant Associer chaque exfoliation à une hydratation riche et apaisante Retrouver un teint uniforme sans fragiliser la peau à long terme
  • Rose Water and Ice Cube Face Hack That Women Worldwide Are Using for Glass Skin Naturally

    Rose Water and Ice Cube Face Hack That Women Worldwide Are Using for Glass Skin Naturally

    In India, natural skincare hacks are gaining massive attention as women look for simple, affordable ways to achieve glowing, healthy skin at home. One trend that has quietly gone viral is the rose water and ice cube face hack, often credited for delivering a smooth, glass-like finish without expensive products. This method blends traditional beauty wisdom with modern skincare needs, making it popular across age groups. Easy to follow and gentle on the skin, it fits perfectly into daily routines, especially in warm and humid Indian weather conditions.

    Rose Water and Ice Cube Face Hack for Glass Skin

    This rose water and ice cube face hack works by combining hydration with cold therapy to refresh tired skin. Rose water is known for its soothing nature, while ice helps tighten pores instantly. Together, they create a quick ritual that promotes instant skin cooling, supports natural pore tightening, enhances surface glow effect, and improves fresh face feel. When used consistently, many women notice smoother texture and reduced dullness. The hack is especially useful in India’s climate, where sweat and pollution can make skin look tired by midday.

    How Rose Water Ice Improves Skin Texture Naturally

    Using frozen rose water cubes on the face may help calm irritation and balance oil production over time. The cold temperature boosts circulation, while rose water supports gentle toning. This combination encourages blood flow boost, promotes oil balance support, offers mild redness relief, and gives hydrated skin look. Many users prefer this method because it avoids harsh chemicals and fits well into minimalist skincare routines. With regular use, skin can appear firmer, clearer, and more refreshed.

    Why Women Prefer This Rose Water Ice Skin Routine

    Women worldwide are drawn to this routine because it is affordable, quick, and adaptable to different skin types. In India, it’s especially popular due to easy access to rose water. The ritual helps with daily skin refresh, supports makeup prep base, encourages cooling face massage, and delivers natural glow habit. Whether used in the morning or evening, it feels relaxing and adds a moment of self-care without disrupting busy schedules.

    Summary and Skin Care Analysis

    The rose water and ice cube hack stands out as a practical example of how simple ingredients can deliver visible skincare benefits. While results vary, consistent use may improve skin appearance and comfort. This method supports gentle skincare choice, builds daily consistency habit, enhances skin comfort level, and reinforces natural beauty focus. For those seeking glass-like skin without heavy products, this routine offers a refreshing, low-risk option worth trying.

    Aspect Details
    Main Ingredients Pure rose water and clean ice cubes
    Best Time to Use Morning or evening
    Suitable Skin Types Normal, oily, combination
    Primary Benefit Cooling, toning, glow enhancement
    Frequency Once daily or 3–4 times weekly

    Frequently Asked Questions (FAQs)

    1. Can I use this hack daily?

    Yes, it can be used daily if your skin tolerates cold well.

    2. Is this suitable for sensitive skin?

    Sensitive skin users should test briefly and avoid prolonged ice contact.

    3. How long should I rub the ice cube?

    Gently massage for 30–60 seconds only.

    4. Can I apply moisturizer after this?

    Yes, moisturizing after helps lock in hydration.

  • Phone Rescue Method: Proven Rice Technique for Water-Damaged Devices Backed by UK Experts

    Phone Rescue Method: Proven Rice Technique for Water-Damaged Devices Backed by UK Experts

    The first thing that hits you is the sound. Not the soft, harmless splash you’d expect near water, but a heavier, sharper plunk that instantly signals trouble. It’s the sound of your phone betraying gravity—slipping from your fingers, sliding out of a pocket, or tipping off a sink edge into a sink, tub, puddle, drink, or, in the worst-case scenario, the toilet. Time doesn’t stretch like it does in movies. There’s just a frozen heartbeat where you stare, followed by a surge of panic as your hand dives after it.

    The moment the noise stops

    The moment the noise stops everything feels unnaturally still. You pull the phone out, dripping wet. Water trails down your fingers, seeps into your sleeve, and dots the floor below. The screen might still glow faintly, maybe flicker once, teasing you with hope. You press the buttons, swipe the glass, murmur a quiet, pleading “come on.” For a second, it responds—then stutters, fades, and finally goes black.

    In that tight space between hope and dread, instinct takes over. You hold the phone close, as if squeezing it might force the water back out. Maybe you blow into the charging port. Maybe you shake it, gently at first, then harder. You tap the power button again and again, convinced that persistence alone might bring it back.

    And almost on cue, a familiar thought appears—either in your own head or from someone just outside the room. The same advice that’s been passed around for years, spoken with absolute confidence:

    “Put it in rice.”

    There’s something oddly comforting about the suggestion. Your sleek, expensive piece of technology saved not by tools or technicians, but by a bowl of dry grains from the kitchen. You picture the rice doing its quiet work overnight, each grain patiently pulling moisture from the phone’s hidden corners, restoring it by morning as if nothing ever happened.