Blog

  • 7 Bedtime Yoga Poses That Relax the Body and Promote Deep Sleep

    7 Bedtime Yoga Poses That Relax the Body and Promote Deep Sleep

    Getting quality sleep has become a growing concern for many people in India, especially with busy schedules, late-night screen time, and rising stress levels. Gentle bedtime yoga offers a simple, natural way to calm the nervous system and prepare the body for rest. By focusing on slow movements, mindful breathing, and supported poses, bedtime yoga helps release physical tension and quiet mental chatter. Practiced consistently, these poses can create a soothing pre-sleep ritual that supports deeper, more restorative sleep without relying on medication.

    Bedtime yoga poses that gently release daily tension

    After a long day, the body often holds stress in the hips, lower back, and shoulders. Bedtime yoga poses are designed to unwind these areas without demanding effort or flexibility. Movements are slow and intentional, encouraging muscle tension release while signaling the brain that it is safe to relax. Poses like child’s pose, seated forward folds, and gentle twists support joint comfort and reduce restlessness. This calming approach helps improve body awareness, allowing you to notice tight areas and soften them gradually. Over time, this practice can become a trusted way to transition from activity to rest with evening calm.

    Relaxing bedtime yoga sequences for calming the mind

    Sleep problems are often linked to an overactive mind rather than physical discomfort alone. Relaxing bedtime yoga emphasizes breath-led movement to settle racing thoughts. Slow stretches paired with deep breathing activate the parasympathetic nervous system, promoting mental quiet. Poses such as legs-up-the-wall or gentle supine stretches encourage breath awareness and help reduce anxiety before bed. As the nervous system settles, many people notice stress reduction and a smoother transition into sleep. Practicing these sequences regularly can support emotional balance, making it easier to let go of the day.

    Gentle bedtime yoga practices that support deep sleep

    Gentle bedtime yoga focuses less on flexibility and more on creating a sense of safety and ease. Supported poses held for longer periods allow the body to fully relax, encouraging deep relaxation. Using cushions or blankets can enhance sleep readiness by minimizing strain and promoting comfort. These practices help regulate nervous system balance, which is essential for falling and staying asleep. Over time, consistent practice may improve sleep quality, helping you wake up feeling more refreshed and energized the next morning.

    Why bedtime yoga works as a nightly sleep ritual

    Bedtime yoga works best when approached as a calming ritual rather than a workout. Repeating the same gentle poses each night trains the body and mind to associate movement with rest. This consistency supports healthy sleep habits and reduces resistance to winding down. By slowing the breath and softening the muscles, yoga helps shift focus inward, encouraging mindful relaxation. Over time, this practice can strengthen nighttime routine cues and promote natural sleep onset, making it easier to fall asleep without effort.

    Yoga Pose Main Benefit Recommended Hold
    Child’s Pose Relaxes back and hips 1–2 minutes
    Seated Forward Fold Calms nervous system 1 minute
    Legs-Up-The-Wall Reduces fatigue 2–3 minutes
    Supine Twist Releases spinal tension 1 minute each side
    Corpse Pose Promotes full relaxation 3–5 minutes
  • Psychologists Identify 9 Common Phrases Self-Centered People Use Without Realizing Their Impact

    Psychologists Identify 9 Common Phrases Self-Centered People Use Without Realizing Their Impact

    You start sharing a story about a long, exhausting week. Before you reach the middle, he jumps in with, “That reminds me of when I…” Without warning, the attention shifts. Your stress, your tiredness, even your small win at work fade into the background. People laugh at his story, nod along, and your moment disappears like steam from a coffee cup.

    On the walk home, you replay the exchange, trying to name the strange emptiness you feel. No one was openly rude. No insult was thrown. Yet somehow, you were reduced to a supporting role in your own experience. There’s a pattern hiding in the language itself. Once you notice it, it becomes impossible to ignore.

    9 Everyday Phrases Self-Centered People Use Without Realizing

    Self-centered people rarely label themselves that way. They often show up as engaging coworkers, witty friends, or capable leaders. The discomfort builds slowly. Over time, you notice how nearly every conversation curves back toward them. Their words quietly pull focus to their feelings, their opinions, their struggles.

    Most of the time, the behavior isn’t intentional. Many learned early that being heard meant speaking first, loudest, or longest. To survive, they filled silence with “I,” “me,” and “my.” Eventually, these habits harden into familiar phrases that sound harmless—until you hear how often they erase others.

    Listen carefully and you’ll catch the pattern: versions of “enough about you, let’s talk about me,” softened by polite wording. Lines like “Anyway, here’s what I think,” “I already knew that,” or “You’re overreacting” subtly tilt the emotional balance of the room. Nothing dramatic happens. Instead, your voice is slowly downgraded to a footnote.

    “I’m Just Being Honest”

    This phrase often follows a sharp comment about your choices, appearance, or relationship. It sounds virtuous, as if honesty excuses the lack of care. You open up, and the response is a blunt judgment wrapped in moral language. Honesty becomes a shield, not a bridge.

    Imagine a coworker nervously sharing their first major presentation. They ask for feedback. You offer a small, thoughtful suggestion. They brush it aside and reply, “Well, I’m just being honest—your part was confusing too.” There’s no curiosity, no effort to help. The focus swings back to their reaction, framed as truth.

    Beneath this phrase is the belief that their perception sets the standard. Over time, you may find yourself censoring what you share, knowing that vulnerability will likely be met with “honesty” that wounds more than it helps.

    “I Already Knew That”

    At first glance, this line seems harmless. In practice, it often shuts down connection. You share a new idea, an article, or a realization that mattered to you. Instantly, they flatten the moment by claiming prior knowledge. What could have been shared excitement becomes a quiet comparison.

    Picture sending a friend an article about burnout because it finally put words to your own exhaustion. You hope for understanding. Instead, the reply is, “Yeah, I already knew that—it’s everywhere.” No question. No concern. Just a signal that the information, and by extension your insight, isn’t special.

    This phrase reveals a need to stay ahead. It competes instead of connects. The meaning the information holds for you is ignored, leaving you feeling smaller and less inclined to share again.

    “You’re Overreacting”

    This sentence carries weight. It appears when you try to express hurt, discomfort, or a boundary. Instead of curiosity—“What made you feel that way?”—your emotion is dismissed as excessive. The conversation ends before it can begin.

    Imagine telling a partner, “It bothered me when you joked about me in front of your friends.” The reply comes fast: “You’re overreacting. It was just a joke.” Your experience is reframed as a mistake. Their intention outweighs your reality.

    Often, this phrase protects self-image. Acknowledging your feelings would require facing their impact. So the logic flips: instead of “I hurt you”, it becomes “You feel too much.” Over time, this can make you doubt your own emotional instincts.

    How to Recognize These Phrases Without Losing Yourself

    Hearing these patterns in real time is like adjusting a lens. Nothing changes outwardly, but the details sharpen. Start by noticing frequency. How often do you hear “I’m just being honest,” “You’re too sensitive,” or “Here’s what you should do”? Awareness always comes first.

    When one of these lines appears, pause internally. Translate it for yourself. “You’re overreacting” can mean “I don’t want to deal with this feeling.” “I already knew that” can mean “I need to feel ahead.” This private reframing reduces the power of the words.

    Respond from your own ground. Simple statements work: “It may seem small to you, but it matters to me.” Or, “I wasn’t checking what you knew—I was sharing why this affected me.” You’re not arguing. You’re placing your experience back where it belongs.

    Observing Patterns and Choosing What to Keep

    Sometimes, the most effective response is observation. When someone says, “I’m just being honest,” you might reply, “Honesty works best when it’s kind,” and watch what happens next. Do they soften, or do they double down? Over time, patterns reveal themselves.

    It’s also uncomfortable to notice how common these phrases are. Family dinners, meetings, group chats—they show up everywhere. On honest reflection, you may hear yourself using them too. Stress, fear, and habit push people into ego-protective shortcuts.

    The real shift comes from choosing differently. You replace dismissal with curiosity, defensiveness with care. You invest more energy in people who ask how you are and less in those who never do. You’re not fixing anyone. You’re protecting the part of you that deserves space, respect, and to be fully heard.

    Élément essentiel Description reformulée Bénéfice pour le lecteur
    Détecter les formulations clés Reconnaître neuf phrases courantes utilisées par les personnes très centrées sur elles-mêmes Comprendre pourquoi certaines discussions provoquent fatigue et malaise
    Décoder le message implicite Aller au-delà des mots prononcés pour identifier le besoin émotionnel sous-jacent Prendre de la distance émotionnelle sans porter une culpabilité inutile
    Changer sa manière de répondre Employer des réponses brèves qui ramènent la discussion à votre propre vécu Préserver ses limites personnelles sans déclencher de conflit
  • Heating Experts Say the Old 19 Degree Rule No Longer Works for Winter Comfort

    Heating Experts Say the Old 19 Degree Rule No Longer Works for Winter Comfort

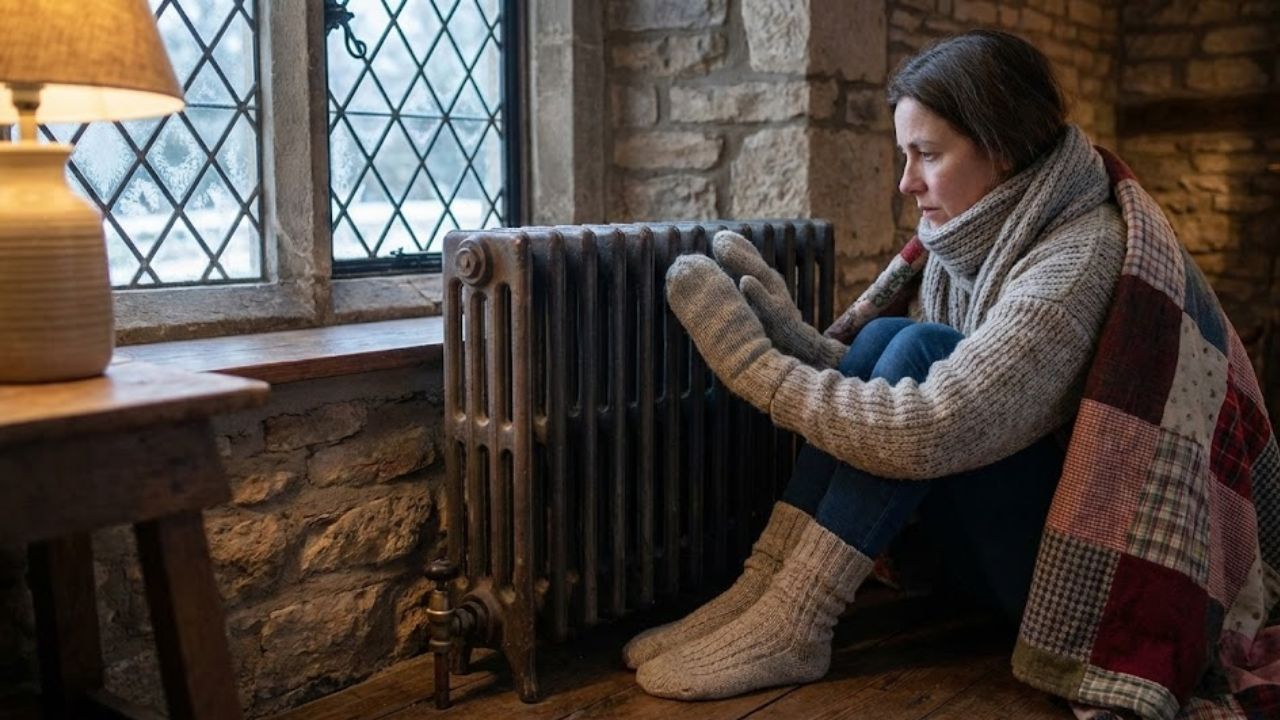
    You check the thermostat and it reads 19 degrees Celsius. This is the temperature you have been told to maintain for years as a responsible citizen. The number has become fixed in everyone’s mind because of energy bills & environmental concerns & all those energy-saving campaigns. But your feet feel cold. Your teenager walks around the house wearing a hoodie. Your elderly mother is visiting for the weekend and she wraps a blanket around her legs while insisting that she feels fine. You begin to question whether 19 degrees Celsius is actually a perfect temperature for everyone or just an outdated guideline that people follow without questioning it. You are not alone in having these doubts. This winter across Europe doctors and building engineers and public health experts are quietly revising their recommendations. The new recommended temperature is different from what you might expect.

    The 19°C Rule Meets Today’s Reality

    For decades, 19°C has been repeated as the ideal indoor temperature — comfortable enough for daily life, yet low enough to limit emissions. It sounded like a sensible middle ground. However, the research behind this number dates back to a very different era. Homes were built differently, daily routines involved more movement, and demographics were not the same as they are today.

    Modern houses are often better insulated but also far more airtight. At the same time, people sit longer at desks, work on screens, and spend evenings largely inactive. An aging population, including many with circulatory or respiratory conditions, often struggles at lower indoor temperatures. What once felt acceptable in the 1980s can now feel uncomfortably cold in 2025.

    Energy poverty has also become widespread. Many households remain at 17–18°C not out of environmental concern, but out of fear of rising bills. As researchers revisited the evidence, a critical question emerged: are people under-heating their homes and paying the price with their health?

    Recent UK surveys revealed that winter thermostat settings tell a different story. The average living room temperature sits closer to 21–22°C, even among people who are aware of the 19°C guidance. Real-world behaviour quietly exceeds the old benchmark.

    Public health data reinforces this shift. Hospital admissions for respiratory illnesses, cardiovascular problems, and mental health issues rise during cold periods — not only during extreme cold, but in homes kept below roughly 20–21°C for extended times. The World Health Organization advises that healthy adults should avoid living in homes below 18°C, while vulnerable individuals often need around 20–21°C to stay safe.

    Taking both comfort and efficiency into account, many energy specialists now converge on a new balance point: around 20–21°C in main living spaces. It is neither excessive nor austere — a practical, human-centered temperature rather than a rigid slogan.

    A New Target: 20–21°C, But Not for Every Room

    The updated guidance does not promote a single number for the entire home. Instead, experts increasingly recommend zoned heating. In simple terms, this means warming the rooms you actively use and allowing others to remain cooler.

    For living rooms and work-from-home areas, many professionals suggest 20–21°C as a reasonable and healthy range. Bedrooms can remain cooler, often around 17–19°C, which many people find beneficial for sleep. Kitchens, hallways, and transitional spaces can sit somewhere in between, or even lower if they are only used briefly.

    This approach creates a layered home: a warm core for daily living and cooler outer spaces. Achieving this usually involves thermostatic radiator valves or smart thermostats that allow room-by-room control. A guest room that is rarely used can comfortably stay at 16–17°C, provided dampness is avoided.

    Specialists also emphasize a detail often missing from public messaging: perceived temperature. Cold walls, drafts near the floor, or icy surfaces can make 20°C air feel far colder. The thermostat reading is only part of the equation; comfort depends on the entire building envelope.

    When campaigns cling to a single sacred number, they overlook differences in bodies, lifestyles, and buildings. Updated advice reflects this complexity: slightly warmer temperatures where people live, combined with smarter controls and improved insulation to prevent wasted heat.

    Heating Smarter at 20–21°C Without Skyrocketing Costs

    The hesitation to raise a thermostat from 19°C to 20–21°C is understandable. Energy bills already feel heavy, and each extra degree can seem expensive. Yet heating engineers highlight a counterintuitive reality.

    Maintaining a stable temperature at 20–21°C can be more efficient than repeatedly letting a home cool down and then reheating it. Boilers and heat pumps perform best when they operate steadily rather than cycling on and off.

    Many professionals now recommend a “low and slow” approach. Set living areas to around 20–21°C during occupied hours, while reducing the boiler’s flow temperature to approximately 50–60°C instead of 70–80°C. Radiators run longer at lower intensity, improving overall system efficiency.

    Smart thermostats can support this strategy when used thoughtfully. A gentle overnight setback — for example, lowering living spaces to 18–19°C — avoids the energy spike caused by reheating a house from very low temperatures in the morning.

    There is also a psychological barrier: guilt. Many people feel uneasy setting temperatures above 19°C, fearing they are acting irresponsibly. Yet those same individuals often increase the heat on particularly cold evenings and feel conflicted afterward.

    Health experts are clear that living long-term in a cold home is not a virtue. For children, older adults, and people with asthma or heart conditions, persistent chill carries real risks. Chronic cold can lead to illness, missed work, and greater strain on healthcare systems.

    Meaningful energy savings are often found elsewhere: sealing drafts, insulating lofts, upgrading windows, bleeding radiators, and closing shutters at night. Simple measures, such as adding foam tape to leaky frames, can deliver more benefit than obsessing over half a degree.

    At the policy level, energy specialists increasingly frame the goal in clear terms: a healthy indoor climate for everyone. The aim is to keep people within a safe comfort band — typically 20–22°C in occupied rooms — while reducing waste through better buildings rather than enforced discomfort.

    • Recommended range: Around 20–21°C in main living areas for most adults
    • Lower where safe: Cooler bedrooms and unused rooms kept above 16°C to prevent damp
    • Real savings: Focus on insulation, draft-proofing, and stable heating patterns

    Rethinking Comfort, One Degree at a Time

    The 19°C rule still appears everywhere — in old pamphlets, half-remembered advice, and everyday conversations. Over time, it has become more of a cultural reflex than an evidence-based standard.

    Experts now present a more nuanced and humane picture. The message is not to ignore environmental concerns, but to stop treating 19°C as a moral ceiling. Instead, the focus shifts to zones, habits, and building quality.

    Many people recognize the familiar winter scene: guests lingering in their coats, hosts pretending not to notice, and a shared sense of quiet discomfort. Updated guidance offers a subtle permission to adjust the dial slightly and concentrate efforts where they matter most.

    Some households will remain comfortable at 19°C, whether due to preference, budget constraints, or habit. Others will settle closer to 21°C and notice immediate relief. The real change lies in moving away from a single “correct” number toward a flexible range shaped by health, home design, and daily life.

    Heating is not only about energy units; it reflects how people live, rest, and age. Recognizing the value of comfort — balanced with efficiency and better infrastructure — marks a quiet but meaningful shift. The 19°C rule belongs to another time. Today’s task is to find a healthy, sustainable temperature that works for your life.

    Point clé Détail Intérêt pour le lecteur
    La “nouvelle” température cible Environ **20–21 °C** dans les pièces de vie pour la plupart des adultes, un peu moins dans les chambres Savoir à quel niveau régler concrètement son chauffage sans culpabiliser
    Fin du dogme des 19 °C partout On passe à un chauffage par zones, adapté à l’usage réel de chaque pièce Gagner en confort tout en gardant un contrôle sur la facture énergétique
    Priorité à la santé et à l’enveloppe du bâtiment Limiter les logements trop froids, agir sur l’isolation, les fuites d’air et la régulation fine Protéger les plus fragiles, réduire les risques respiratoires et cardiaques, mieux investir chaque euro
  • Body Detox Yoga: 8 Powerful Poses to Cleanse Your System and Improve Digestion Naturally

    Body Detox Yoga: 8 Powerful Poses to Cleanse Your System and Improve Digestion Naturally

    Detoxifying the body goes beyond dietary cleanses—it also involves allowing the body to release accumulated toxins, ease stress, and improve circulation. Yoga supports this process by combining mindful breathing, controlled movement, and targeted poses that activate the body’s natural cleansing systems. Specific postures help stimulate digestion, encourage lymphatic drainage, boost blood flow, and release stored tension from muscles. Below are eight effective yoga poses that support full-body detoxification and enhance overall wellness.

    1. Downward Dog (Adho Mukha Svanasana)

    Downward Dog is a foundational posture that stretches the entire body while activating circulation and lymph flow. Start on your hands and knees, then lift your hips upward, straightening your legs as your body forms an inverted “V.” Press your heels gently toward the floor and hold for 30 seconds to 1 minute, maintaining slow, deep breathing.

    This pose activates the digestive organs, improves blood circulation, and supports lymphatic movement. The full-body stretch helps release built-up tension and assists in flushing toxins from muscles and tissues.

    2. Twisted Chair Pose (Parivrtta Utkatasana)

    Twisted Chair Pose enhances detoxification by combining a deep squat with a spinal twist. Begin in Chair Pose, bending your knees and shifting your hips back. Bring your palms together at chest level, twist your torso to the right, and place your left elbow against your right knee. Hold for 30 seconds before switching sides.

    This twisting motion stimulates digestion, massages internal organs, and promotes toxin release. It also improves spinal flexibility while strengthening the legs and core.

    3. Cobra Pose (Bhujangasana)

    Cobra Pose is a gentle backbend that opens the chest and activates the abdominal organs. Lie face down with legs extended and palms placed under your shoulders. Press into your hands to lift your chest, keeping elbows slightly bent. Hold for 20–30 seconds before lowering.

    This posture increases blood flow to the abdominal area, supporting the movement of waste and toxins. It also stretches the spine and enhances back flexibility.

    4. Revolved Triangle Pose (Parivrtta Trikonasana)

    Revolved Triangle Pose is a deep standing twist that supports detoxification through improved digestion and circulation. Stand with legs wide, turn one foot outward, hinge at the hips, and place one hand on the floor or a block beside your foot. Twist your torso and extend the opposite arm upward. Hold for 30 seconds on each side.

    This pose massages digestive organs, enhances circulation, and aids toxin release. It also stretches the hamstrings, hips, and spine, helping restore energy.

    5. Seated Forward Fold (Paschimottanasana)

    Seated Forward Fold promotes relaxation while supporting digestive health. Sit with legs extended, inhale to lengthen the spine, then exhale and fold forward from the hips, reaching toward your feet. Hold for 30 seconds to 1 minute, breathing steadily.

    This forward bend stimulates the liver and kidneys, helping the body eliminate waste. It also calms the mind, reduces stress, and improves hamstring and spinal flexibility.

    6. Plow Pose (Halasana)

    Plow Pose is an inversion that enhances detoxification by increasing blood flow to the abdomen. Lie on your back, lift your legs overhead, and lower them toward the floor behind your head while keeping them straight. Support your back if needed and hold for 20–30 seconds.

    This pose activates the abdominal organs, improves digestion, and supports toxin removal through enhanced circulation. It also stretches the spine, shoulders, and hamstrings.

    7. Cat-Cow Pose (Marjaryasana–Bitilasana)

    Cat-Cow Pose is a flowing sequence that mobilizes the spine and stimulates digestion. Begin on all fours, inhale as you drop the belly and lift the chest, then exhale as you round the spine and tuck the chin. Continue for 1–2 minutes.

    This gentle movement massages internal organs, supports lymphatic flow, and boosts circulation. It also releases tension from the neck, spine, and back.

    8. Legs Up the Wall (Viparita Karani)

    Legs Up the Wall is a restorative pose that encourages relaxation and detoxification. Sit beside a wall, lie back, and extend your legs vertically against the wall while resting your arms by your sides. Remain here for 5–10 minutes.

    This pose aids blood return to the heart, supports lymphatic drainage, reduces swelling in the legs, and calms the nervous system, making it ideal for stress relief.

    Key Benefits of Detoxing Through Yoga

    • Improved Digestion: Poses stimulate digestive organs and support waste elimination.
    • Lymphatic Support: Movement encourages lymph flow, essential for toxin removal.
    • Stress Relief: Yoga calms the nervous system, aiding natural detox processes.
    • Enhanced Circulation: Increased blood flow nourishes organs and oxygenates tissues.

    Closing Thoughts on Yoga for Detoxification

    Yoga is an effective practice for supporting detoxification, digestive health, and overall well-being. Regularly practicing these eight poses can strengthen the body’s natural cleansing systems and promote a sense of balance and vitality. Focusing on slow, steady breathing during each posture helps encourage relaxation and toxin release. With consistent practice, yoga supports both physical and mental clarity while enhancing the body’s ability to cleanse itself naturally.

  • Leg Strength Yoga: 7 Powerful Poses to Build Strong, Stable and Toned Lower Body

    Leg Strength Yoga: 7 Powerful Poses to Build Strong, Stable and Toned Lower Body

    Strong, well-toned legs play a vital role in overall health, balance, and everyday movement. Yoga provides a low-impact yet highly effective approach to developing leg strength, flexibility, and endurance while supporting full-body wellness. By activating both major muscle groups and smaller stabilizing muscles, yoga helps build powerful, resilient legs that enhance daily activities and fitness performance. Below are the seven best yoga poses designed to strengthen your legs while improving stability and control.

    1. Warrior I Pose (Virabhadrasana I)

    Warrior I is a classic standing posture that focuses on strengthening the legs, hips, and core. It activates the quadriceps, hamstrings, calves, and glutes while encouraging flexibility in the hips and groin. To practice, step one foot back and bend the front knee to a 90-degree angle, keeping the knee aligned over the ankle. Raise your arms overhead with palms facing inward. Hold the posture for 30 seconds to one minute before changing sides. This pose enhances balance, stability, and muscular endurance while building both physical strength and mental focus.

    2. Chair Pose (Utkatasana)

    Chair Pose is highly effective for developing strength in the thighs, hamstrings, and glutes. Begin standing tall, then bend your knees as though sitting back into an invisible chair. Extend your arms overhead with palms facing each other while keeping your chest lifted. Ensure your knees remain behind your toes and engage your core for support. Hold for 30 seconds to one minute. This pose intensely engages the lower body, helping to improve leg strength, endurance, and stamina with consistent practice.

    3. Warrior II Pose (Virabhadrasana II)

    Warrior II is a strong grounding posture that builds power in the quadriceps, calves, and glutes. Step your feet wide apart, bend the front knee to a right angle, and keep the back leg straight. Extend your arms out to the sides at shoulder height, palms facing down, and turn your gaze over the front hand. Hold for 30 seconds to one minute, then switch sides. This pose improves lower-body strength, balance, concentration, and endurance while reinforcing stability through the legs.

    4. Crescent Lunge Pose (Anjaneyasana)

    Crescent Lunge is a dynamic posture that strengthens the quadriceps, hamstrings, and glutes while stretching the hip flexors. Step one foot forward into a deep lunge, bending the front knee to 90 degrees and lifting the back heel off the floor. Reach your arms overhead and keep your hips facing forward. Hold for 30 seconds to one minute before switching sides. This pose supports leg strength, stability, and flexibility, making it ideal for improving overall lower-body endurance.

    5. Bridge Pose (Setu Bandhasana)

    Bridge Pose strengthens the legs, glutes, and lower back while gently opening the front of the body. Lie on your back with knees bent and feet flat on the floor, hip-width apart. Press into your feet to lift your hips upward, engaging the core and glutes. Keep your arms alongside your body or clasp your hands beneath you. Hold for 30 seconds to one minute. This pose enhances lower-body strength, hip flexibility, and spinal alignment, contributing to balanced leg endurance.

    6. Revolved Chair Pose (Parivrtta Utkatasana)

    Revolved Chair Pose builds on traditional Chair Pose by adding a twist that strengthens the legs and core while mobilizing the spine. From Chair Pose, bring your palms together at chest level and rotate your torso to one side, hooking the opposite elbow outside the knee. Keep your thighs active and your chest lifted. Hold for 30 seconds, then repeat on the other side. This variation intensifies engagement in the quadriceps and glutes while enhancing balance and coordination.

    7. Locust Pose (Salabhasana)

    Locust Pose targets the back of the body, including the legs, glutes, and lower back, while supporting stamina and strength. Lie face down with arms by your sides and palms facing down. Lift your chest and legs off the mat, engaging your thighs and glutes as you lengthen through the toes. Hold for 30 seconds to one minute. This pose promotes muscle endurance, spinal strength, and lower-body stability while opening the chest.

    Helpful Tips for Building Leg Strength Through Yoga

    • Practice consistently by performing these poses three to four times each week.
    • Actively engage leg muscles in every posture, even during gentle stretches.
    • Gradually extend hold times as strength and endurance improve.
    • Maintain steady breathing to support focus, energy, and pose duration.

    Final Takeaway

    Yoga offers a powerful and balanced method for developing leg strength, endurance, and flexibility while enhancing overall movement quality. Regularly practicing these seven leg-strengthening yoga poses supports daily activities and athletic performance. By staying consistent, engaging your muscles, and focusing on breath control, yoga can help you build strong, stable, and well-toned legs while promoting total-body wellness.

  • Brain Teaser Puzzle Challenges You to Spot 3 Differences in the Fox Images Fast

    Brain Teaser Puzzle Challenges You to Spot 3 Differences in the Fox Images Fast

    Brain teaser puzzles have become a popular way to sharpen observation skills while having fun, and this fox-themed challenge is no exception. In India, such visual puzzles are widely shared across social media as quick mental workouts that fit easily into busy routines. The goal is simple yet tricky: spot three subtle differences between two nearly identical fox images as fast as possible. This activity tests attention to detail, focus, and visual memory, making it enjoyable for all age groups while also offering a light cognitive exercise.

    Fox image brain teaser that tests observation

    This fox image brain teaser invites you to look beyond the obvious and focus on tiny visual clues that are easy to miss. At first glance, both images appear the same, but small changes are cleverly hidden. You may notice shifts in color shades, missing elements, or altered shapes that challenge your visual scanning skills. These puzzles are designed to improve attention to detail while keeping the experience playful. The limited time factor adds excitement, pushing your brain to process information faster without feeling overwhelmed.

    Spot the difference fox puzzle challenge explained

    The spot the difference fox puzzle challenge works by engaging your brain in active comparison mode. Instead of passively viewing the images, you constantly switch your gaze between them to catch inconsistencies. This back-and-forth movement strengthens focus control habits and encourages logical thinking. Many players find that practicing such puzzles enhances pattern recognition ability over time. The fox theme adds charm, making the task feel less like a test and more like a fun break from routine mental tasks.

    Fast fox brain teaser puzzle for sharp eyes

    This fast fox brain teaser puzzle is ideal for people who enjoy quick mental challenges that deliver instant satisfaction. The time pressure creates a sense of urgency, activating rapid thinking response and improving visual memory recall. Even if you miss a difference at first, revisiting the image helps train your mind to slow down and observe carefully. Regularly solving such puzzles can support daily brain stimulation, making them a simple yet effective way to stay mentally alert.

    Why fox difference puzzles keep the brain engaged

    Fox difference puzzles keep the brain engaged because they combine fun visuals with meaningful mental effort. The challenge lies not in complexity but in subtle detail spotting, which activates multiple cognitive processes at once. As you search for differences, your brain practices selective attention skills and improves visual comparison speed. Over time, this can help with everyday tasks that require careful observation. The playful nature of animal-themed puzzles also boosts mental engagement levels, making learning feel effortless.

    Feature Description
    Puzzle Type Spot the difference
    Main Focus Visual observation
    Difficulty Level Moderate
    Time Limit Short duration
    Skill Benefit Improved attention

    Frequently Asked Questions (FAQs)

    1. What is the goal of this fox brain teaser?

    The goal is to quickly identify three differences between two similar fox images.

    2. Are such puzzles suitable for all ages?

    Yes, they are generally suitable for both children and adults.

    3. Do brain teasers really improve focus?

    Regular practice can help enhance attention and observation skills.

    4. How long should one spend on this puzzle?

    Most people try to solve it within a few seconds for the best challenge.

  • Spot the Difference Challenge Find 3 Changes in the Family Image in 10 Seconds

    Spot the Difference Challenge Find 3 Changes in the Family Image in 10 Seconds

    Spot the difference puzzles have become a popular way to relax while quietly testing the brain, and this family image challenge is a perfect example. In the United States, these visual games are often shared by families, teachers, and social media communities looking for quick, screen-friendly mental activities. The goal sounds simple: find three changes in just ten seconds. Yet the ticking clock adds excitement and pressure, making even familiar scenes feel tricky. This type of challenge blends fun with focus, encouraging players of all ages to slow down, look carefully, and enjoy a quick mental workout.

    Spot the Difference Family Image Challenge Explained

    This spot the difference family image challenge looks easy at first glance, but it quickly pushes your limits. Our brains tend to assume scenes with people feel familiar, which is why small changes slip past unnoticed. When the timer starts, your eyes must scan faces, clothing, and background details without overthinking. This exercise improves visual attention by forcing you to notice tiny shifts. Because it features a warm household scene, the family puzzle feels relatable and engaging. Adding time pressure turns a calm picture into an exciting race, making the challenge surprisingly intense and rewarding once you succeed.

    Find 3 Changes Fast in This Spot the Difference Puzzle

    Finding three changes in ten seconds requires strategy more than speed. Instead of staring randomly, it helps to scan the image in sections, comparing one area at a time. Many players miss clues because they focus only on faces and forget background objects. This approach strengthens spotting changes as a skill you can reuse in other puzzles. The joy comes from uncovering hidden differences that were always there. Over time, repeated practice builds sharp focus, helping your brain stay calm and organized even when the countdown is running.

    Why Family Spot the Difference Games Boost Thinking Skills

    Family-themed spot the difference games are more than casual fun. They quietly train the brain to process information faster and more accurately. When you compare two similar images, you rely on brain training techniques without realizing it. Your mind learns to map scenes, improving pattern recognition across different visuals. Because these puzzles are short, they fit easily into daily routines and still support mental agility. Whether played alone or together, they encourage patience, attention to detail, and confidence in your own observation skills.

    How This Spot the Difference Challenge Improves Daily Awareness

    Beyond entertainment, this challenge carries benefits into everyday life. Regularly practicing visual puzzles sharpens everyday observation, making it easier to notice small details others overlook. The short time limit encourages quick thinking without panic, a useful skill in busy environments. Most importantly, it remains a fun challenge rather than a chore, which keeps people coming back. Over time, these small moments of play can improve focus, patience, and confidence, proving that simple games can have lasting mental value.

    Aspect Description Benefit
    Time Limit 10 seconds Encourages fast thinking
    Image Theme Family scene Feels relatable and engaging
    Number of Changes Three differences Balanced difficulty level
    Skill Used Visual comparison Improves attention to detail
    Ideal Audience All age groups Easy to play together

    Frequently Asked Questions (FAQs)

    1. How many differences do I need to find?

    You need to spot three differences between the two family images.

    2. Is there really a 10-second limit?

    Yes, the challenge is designed to be completed within ten seconds.

    3. Are these puzzles suitable for children?

    Yes, they are safe, simple, and enjoyable for kids and adults.

    4. Do spot the difference games actually help the brain?

    Regular play can improve focus, observation, and visual memory.

  • Yoga Poses Improve Flexibility Boost Mobility and Make Daily Movement Feel Easier

    Yoga Poses Improve Flexibility Boost Mobility and Make Daily Movement Feel Easier

    Flexibility and mobility play an essential role in daily movement. They help reduce the risk of injuries and support long-term joint health as the body ages. Habits such as prolonged sitting and constant stress often cause muscles to become tight and stiff over time. Yoga provides a gentle yet effective way to restore flexibility while improving mobility, balance, and overall body control.

    Unlike basic stretching, yoga works the muscles, joints, and connective tissues together. With regular practice, these poses help the body move more freely and comfortably. Practicing the following yoga poses consistently can bring noticeable improvements in flexibility and mobility.

    Essential Yoga Poses to Improve Flexibility and Mobility

    Downward Facing Dog

    Downward Facing Dog stretches the spine, shoulders, hamstrings, calves, and ankles while improving shoulder mobility and building arm strength. Begin on your hands and knees, then lift your hips upward as you gently press your heels toward the floor. Keep your spine long and allow your neck to relax. This pose promotes full-body flexibility and helps release stiffness caused by long hours of sitting.

    Cat Cow Pose

    Cat Cow Pose supports spinal mobility and flexibility while gently warming up the back. Start on your hands and knees. Inhale as you arch your spine and lift your chest, then exhale as you round your back and bring your chin toward your chest. Flow smoothly between these movements to improve spinal flexibility and coordination.

    Standing Forward Fold

    Standing Forward Fold deeply stretches the hamstrings and calves while engaging the hips and lower back. Stand comfortably, then hinge forward from the hips and allow your upper body to hang naturally. Let your head relax without tension. Slightly bend your knees if needed. This pose gradually increases posterior body flexibility and encourages healthy circulation, helping release daily tension.

    Low Lunge

    Low Lunge targets the hips, hip flexors, and thighs to improve lower-body flexibility. Step one foot forward into a lunge and gently lower the back knee to the floor. Shift your hips forward slightly and lift your chest. This pose is especially helpful for those who spend long hours sitting.

    Butterfly Pose

    Butterfly Pose stretches the inner thighs, hips, and lower back. Sit upright and bring the soles of your feet together, allowing your knees to drop naturally. You may gently move the knees or hinge forward from the hips for a deeper stretch. This pose supports hip flexibility and smooth joint movement.

    Cobra Pose

    Cobra Pose opens the chest and shoulders while stretching the spine and strengthening the lower back. Lie face down with your hands placed beneath your shoulders. Press lightly into your palms to lift your chest, keeping the elbows slightly bent. Relax your shoulders away from your ears. This pose counteracts poor posture and helps restore spinal mobility.

    Seated Forward Bend

    Seated Forward Bend enhances spinal flexibility while stretching the hamstrings and hips. Sit with your legs extended, inhale to lengthen the spine, then hinge forward from the hips without rounding the back. This pose promotes calm breathing and delivers a deep, steady stretch.

    Pigeon Pose

    Pigeon Pose is highly effective for improving hip mobility and flexibility. From a forward fold or downward dog, bring one knee forward and extend the opposite leg back. Lower your hips toward the mat and breathe deeply. This pose releases deep hip tension and supports smoother lower-body movement.

    Triangle Pose

    Triangle Pose stretches the legs, hips, spine, and chest while improving balance and joint mobility. Stand with your feet wide apart, reach one hand toward your front leg, and extend the opposite arm upward. This pose builds strength and flexibility simultaneously.

    Garland Pose

    Garland Pose improves flexibility in the ankles, hips, and lower back. Stand with feet slightly wider than hip-width, squat down, and bring your hands together at your chest. Keep the spine long. This pose encourages natural movement and supports joint health.

    Bridge Pose

    Bridge Pose stretches the hips, chest, and spine while strengthening the back and legs. Lie on your back with knees bent and feet hip-width apart. Press through your feet to lift your hips. This pose reduces lower-body stiffness and enhances spinal flexibility.

    Child’s Pose

    Child’s Pose offers a gentle stretch for the spine, hips, and shoulders. Sit back on your heels and fold forward, extending your arms or resting them by your sides. This pose increases overall flexibility while helping the body release built-up tension.

    Tips for Practicing Yoga Safely

    Improving flexibility and mobility requires consistent practice rather than force. Move slowly through each pose and maintain steady breathing. Avoid pushing into discomfort or pain. Always warm up before deeper stretches and use props such as blocks or cushions when needed. Practicing these poses three to five times per week, or even briefly each day, can lead to noticeable improvements in how easily your body moves.

  • Functional Workouts Build Real World Strength Beyond Muscle Size Alone

    Functional Workouts Build Real World Strength Beyond Muscle Size Alone

    At a certain point in your training, you realize that the goal isn’t about hitting a specific number on a scale or looking at a reflection in the mirror. You’re training to feel strong and capable in everyday life: climbing stairs with ease, lifting a suitcase effortlessly, or regaining your balance without a second thought. This is where athletic gymnastics shines. It’s a methodical, structured approach to building strength that benefits your life outside the gym. By following this training style, you’ll achieve strength in a sustainable and steady way.

    Strength Beyond Just Muscles

    Athletic gymnastics is more than just a muscle-building activity. It’s a form of strength training that emphasizes whole-body control, balance, and functional power. Unlike traditional weightlifting where the focus is on lifting maximum loads, athletic gymnastics prioritizes smooth execution, stable postures, and manageable resistance. The result is a body that feels agile and responsive, rather than stiff or overworked. This approach makes it accessible to individuals of all ages and fitness levels, especially when combined with light mobility exercises for the joints and spine.

    Developing Functional Strength for Everyday Activities

    The workouts in athletic gymnastics emphasize proper posture, coordination, and movement that is gentle on the joints. The goal is to train your body to perform everyday activities with ease, whether it’s carrying groceries, playing with your kids, rearranging furniture, or maintaining comfort throughout a long day of activity. The result is functional strength that enhances your lifestyle, rather than restricting it.

    Core Components of Athletic Gymnastics Training

    Athletic gymnastics integrates several types of exercises to create a well-rounded strength-building system. This combination allows for adjustable intensity without compromising on control and technique.

    • Bodyweight exercises: Movements like push-ups, holds, and other strength poses using your body’s own weight. These are usually done for 8–15 repetitions or 10–30 seconds per hold to develop foundational strength and stability.
    • Gymnastic apparatus work: Using bars, parallel bars, and rings to enhance coordination and body awareness. These exercises are deliberate and controlled, focusing on avoiding unnecessary momentum.
    • Light equipment and accessories: Resistance bands and medicine balls are used to improve endurance, coordination, and reaction time. These tools are often used for solo or partner drills to introduce variety.
    • Free weights: Moderate use of dumbbells, kettlebells, and barbells to build steady strength and muscular endurance, rather than focusing on maximum lifts.
    • Partner and group drills: Working with others adds resistance and helps improve balance, building practical strength through shared movement.
    • Machines: Used at a controlled pace, machines help target specific areas for strength, especially when focusing on stability and precise load management.

    As strength becomes a skill rather than just a score, your training becomes more engaging and sustainable.

    Training Frequency and Session Duration

    For beginners, a practical training schedule includes 2–3 sessions per week, each lasting 20–30 minutes. As your body adapts, you can extend your sessions to 45–60 minutes and increase frequency. The key is to ensure your final repetition is challenging yet controlled, with proper technique and no strain.

    General fitness guidelines align well with athletic gymnastics: strength training for all major muscle groups at least two times per week, with around 150–300 minutes of moderate aerobic activity or a mix of higher-intensity cardio. Athletic gymnastics fits perfectly into the strength portion of these recommendations.

    Sample Weekly Training Plan

    Experience Level Recommended Weekly Training Structure
    Beginner Train 2–3 days per week, 20–30 minutes per session. Focus on full-body workouts, performing 1–2 sets per exercise to build strength and correct technique.
    Intermediate / Advanced Train 3–4 days per week, 45–60 minutes per session. Include full-body or split routines, performing 2–4 sets per exercise while allowing 48 hours of recovery between intense sessions for the same muscle groups.

    Personally, I consider the “last clean rep” as my safety rule. If my form begins to slip, I stop the set, even if I feel like I can push further.

    Recovery, Sleep, and Nutrition: Key to Progress

    Muscle-building benefits are only realized when recovery is given the proper attention. Most adults perform best with at least seven hours of sleep per night, with many people thriving on 7–9 hours. Quality sleep supports coordination, energy, and motivation.

    Between sessions, muscles and connective tissues need time to recover. Therefore, it’s recommended to leave about 48 hours between demanding sessions for the same muscle groups. Light activities such as walking or gentle stretching on rest days help maintain mobility without leading to fatigue.

    For nutrition, simplicity works well. Most active individuals benefit from 1.4–2.0 grams of protein per kilogram of body weight per day, spread across meals. This typically means 20–40 grams of protein per meal. When combined with proper hydration and balanced meals, this supports consistent training.

    • Aim for 7–9 hours of consistent sleep each night.
    • Alternate harder and lighter training days to protect your joints and tendons.
    • Include a source of protein in each meal.
    • Incorporate light movement or stretching on rest days to aid recovery.

    In my experience, treating recovery as part of training, rather than as downtime, improves progress. By planning for sleep, nutrition, and gentle movement just like workouts, both gym performance and everyday comfort improve together.

    How Athletic Gymnastics Supports Daily Life

    Athletic gymnastics does more than build visible strength. A well-structured exercise program can improve balance and movement efficiency, potentially reducing the risk of slips and falls, particularly as we age. When the entire body works together smoothly, you’ll feel more stable on stairs, more confident on uneven surfaces, and less fatigued from everyday tasks.

    Ultimately, this approach aims to develop a body you can count on: stable joints, reliable grip strength, and calm breathing under effort. With regular functional strength work, sensible resistance training, and a focus on movement quality, training becomes a form of self-care. This strength carries over into daily life, long after leaving the gym.

  • Visual Challenge in 9 Seconds Spot All 3 Differences in the Boy Skiing Image

    Visual Challenge in 9 Seconds Spot All 3 Differences in the Boy Skiing Image

    If you enjoy optical puzzles, this challenge is made for you. Spot the Difference puzzles are fun to solve and beneficial for the brain. They demand focus and strong observation skills. In today’s challenge, a cheerful boy is skiing down a snowy mountain. Your task is to find three small differences between two nearly identical images within just 9 seconds.

    The 9-Second Visual Challenge

    At first glance, both images seem identical. A bright sun shines over snow-covered slopes as a skier smoothly glides downhill. However, when you look more carefully, subtle but important differences begin to appear. The real challenge is spotting all of them before time runs out. Let’s jump into this engaging brain teaser and test how sharp your eyes really are.

    Related reading: A centenarian reveals daily habits behind her long life and independence.

    Why Spot the Difference Puzzles Are So Engaging

    Spot the Difference games have stayed popular for years because they combine entertainment with real mental benefits. These puzzles offer a simple yet effective way to exercise the brain and strengthen thinking skills. Many people enjoy them as a relaxing activity that also helps keep the mind alert.

    Related reading: A turmeric and milk face pack quietly used for natural glow before events.

    Here are some key reasons these puzzles continue to attract players:

    • Improved focus and attention: Carefully examining small details trains the brain to concentrate better, a skill that often carries over into daily activities.
    • Stronger memory ability: Remembering visual elements and small changes helps enhance how the brain stores and recalls visual information.
    • Sharper visual awareness: Regular practice improves the ability to quickly notice patterns, shapes, and fine details in everyday life.
    • Stress relief and relaxation: Solving visual puzzles provides a calming mental break, helping the mind feel refreshed.

    Inside the 9-Second Skiing Boy Challenge

    Now for the main puzzle. This challenge features a happy boy skiing through a winter landscape. He wears a bright orange helmet, ski goggles, and a colorful outfit that stands out against the white snow and clear blue sky.

    In the background, snow-covered trees and a shining sun complete the scene. While both images look the same at first, there are three hidden differences. Your goal is to identify them all in under 9 seconds. It may sound easy, but looks can be deceiving.

    Smart Techniques to Spot Differences Faster

    Before revealing the solution, here are some helpful strategies to improve your performance in difference puzzles:

    • Scan both images quickly: Start with a general overview to understand the layout before focusing on details.
    • Check symmetry: Differences are often placed in balanced or mirrored areas, making side-by-side comparison effective.
    • Watch small details closely: Minor changes in shapes, lines, or object features are easy to miss without careful attention.
    • Use time-based challenges: Short time limits train the brain to process visual information more quickly.
    • Practice regularly: Consistent exposure improves visual memory and attention over time.

    Related reading: Mixing kiwi peels with vinegar and why experts are talking about it.

    The Three Differences Revealed

    Here is a clear explanation of the three hidden changes in the skiing boy images:

    The Missing Sun Ray

    The first difference is found in the sun. In the left image, several rays extend outward. In the right image, one sun ray is missing. This subtle change becomes noticeable once you focus on the sun’s edges.

    The Skier’s Scarf

    The second difference appears on the skier’s scarf. In the left image, the scarf looks longer and more flowing. In the right image, it is shorter with a slightly different shape. This detail is easy to overlook without close inspection.

    The Ski Pole Tip

    The final difference involves the ski pole. In the left image, the pole tip is missing a small detail. In the right image, that detail is clearly visible. Although minor, it completes the set of differences.

    Ways to Improve Your Visual Detection Skills

    Even if you successfully spotted all the differences, continued practice can sharpen your abilities further. Here are a few simple methods to improve:

    • Try puzzles with varying difficulty: More challenging images train the eyes to detect finer details.
    • Divide images into sections: Checking corners, edges, and then the center makes scanning easier.
    • Practice often: Regular effort improves both speed and accuracy over time.
    • Stay calm and patient: Some differences are intentionally subtle, so a relaxed approach helps.

    With steady practice and patience, spotting visual differences will gradually become quicker and more effortless.