Blog

  • Sciatica Relief Yoga: A Doctor-Guided Routine to Reduce Nerve Pain Naturally

    Sciatica Relief Yoga: A Doctor-Guided Routine to Reduce Nerve Pain Naturally

    If you have ever experienced a sharp, electric-like pain traveling from your lower back down to your toes, you know how limiting it can be. This condition is known as sciatica. It occurs when the sciatic nerve becomes compressed or irritated. While many people rely on medication, an increasing number of physicians now point patients toward movement-based recovery. A doctor recommended yoga routine for permanent sciatica pain relief can play a powerful role in restoring comfort and mobility.

    Below, we explore how yoga supports nerve healing and share a safe, structured routine designed to promote long-term relief.

    How Sciatica Works and Why Yoga Helps

    The sciatic nerve is the longest nerve in the body, running from the lower spine through the hips and down each leg. When a slipped disc or tight muscle presses against it, symptoms such as burning pain, tingling sensations, or numbness may appear.

    Doctors often recommend yoga because it supports recovery in two key ways:

    Spinal decompression that creates space between the vertebrae

    Muscle rebalancing that stretches tight areas like the piriformis muscle

    Important note: Always consult your doctor before starting any new exercise routine. If you feel sharp or worsening pain during a pose, stop immediately.

    The Yoga Routine: 7 Gentle Poses for Ongoing Relief

    This routine emphasizes gentle stretching and proper spinal alignment. Move slowly through each posture and use steady breathing to encourage muscle release.

    1. Reclined Pigeon Pose (Sucirandhrasana)

    Often considered the cornerstone of a doctor recommended yoga routine for permanent sciatica pain relief, this pose targets the piriformis without stressing the lower back.

    How to do it: Lie on your back with knees bent and feet grounded. Cross your right ankle over your left thigh and gently draw the left thigh toward your chest.

    Why it helps: It opens the hips and releases deep muscles that commonly compress the sciatic nerve. Hold for one minute per side.

    2. Pelvic Tilts

    Sciatica often causes the lower back to feel stiff or locked. Pelvic tilts restore gentle motion to the spine’s base.

    How to do it: Lying on your back, inhale to slightly arch the lower back, then exhale as you press it gently into the floor.

    Why it helps: This movement improves blood circulation to spinal discs, supporting faster healing.

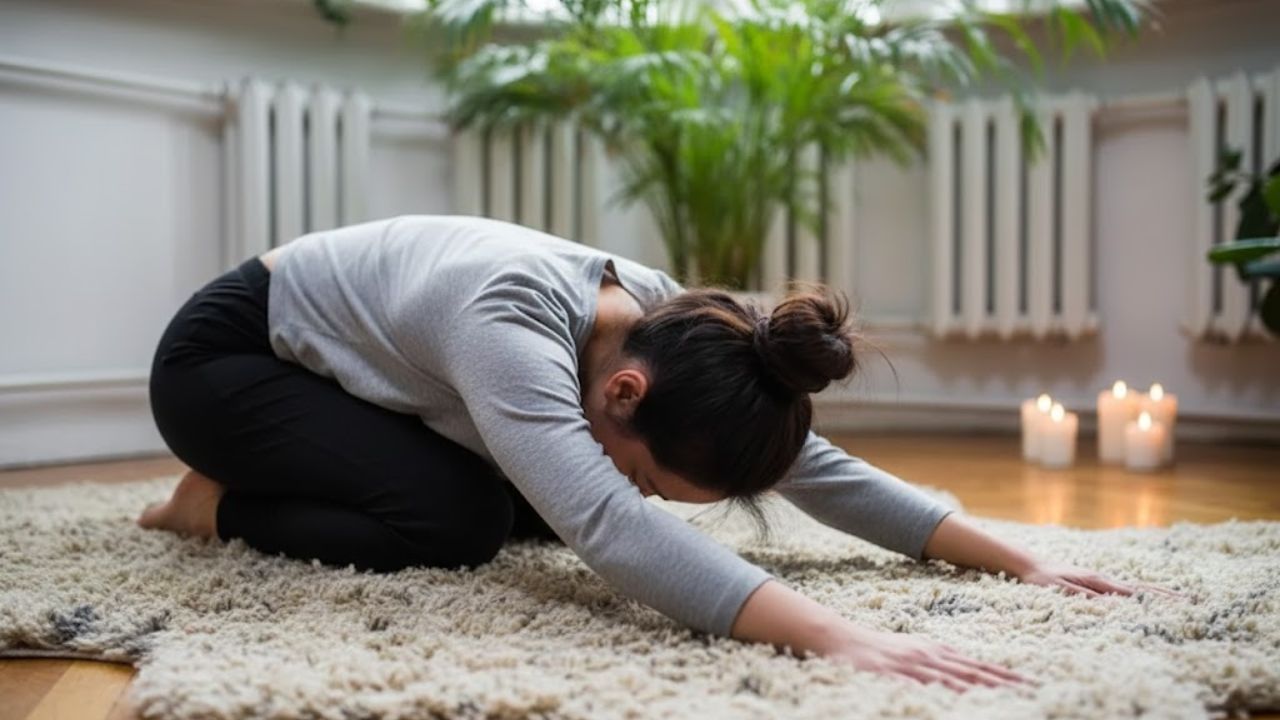
    3. Child’s Pose (Balasana)

    This calming posture naturally lengthens the spine and is especially soothing when discomfort feels heavy.

    How to do it: Kneel, bring big toes together, sit back on your heels, and fold forward with your forehead resting on the mat.

    Why it helps: It creates a mild traction effect, reducing pressure on the irritated nerve.

    4. Sphinx Pose (Salamba Bhujangasana)

    In cases where sciatica is linked to a bulging disc, gentle back extension can be beneficial.

    How to do it: Lie on your stomach and prop yourself up on your forearms, elbows under shoulders, gaze forward.

    Why it helps: This controlled spinal extension encourages disc material to move away from the nerve.

    5. Bird-Dog Pose

    As pain decreases, rebuilding strength becomes essential to prevent recurrence.

    How to do it: From all fours, extend your right arm forward and left leg back. Hold for five seconds, then switch.

    Why it helps: It improves spinal stability, reducing future nerve compression.

    6. Legs-Up-The-Wall (Viparita Karani)

    This deeply restorative pose allows the nervous system to fully settle.

    How to do it: Sit close to a wall, lie back, and extend your legs upward against the wall while breathing slowly.

    Why it helps: It supports inflammation reduction and calms pain signals in the brain.

    7. Supported Bridge Pose

    Using support under the hips helps realign the pelvis without strain.

    How to do it: Lie on your back with knees bent, lift the hips, and place a block or firm pillow under the tailbone.

    Why it helps: It gently stretches tight hip flexors that often contribute to spinal misalignment.

    Daily Habits That Support Long-Term Relief

    For lasting results, a doctor recommended yoga routine for permanent sciatica pain relief should be paired with healthy daily habits:

    • Avoid prolonged sitting by standing every 30 minutes
    • Stay well hydrated to keep spinal discs healthy
    • Use ice first during flare-ups, then heat to relax muscles
    • Practice consistently at least three times weekly

    When Medical Attention Is Necessary

    Although yoga can be highly effective, seek immediate medical care if you experience:

    • Sudden leg weakness
    • Numbness in the groin area
    • Severe pain that disrupts sleep

    Final Reflection

    Sciatica can feel overwhelming, but it does not have to control your life. By following a doctor recommended yoga routine for permanent sciatica pain relief, you address the root of the problem rather than masking symptoms. Yoga supports healing from within, helping you rebuild strength, restore alignment, and protect your spine for the long term.

  • Immunity Support Yoga: 6 Effective Poses to Boost Natural Defences and Overall Wellness

    Immunity Support Yoga: 6 Effective Poses to Boost Natural Defences and Overall Wellness

    A strong immune system helps you stay healthy through seasonal shifts, demanding work schedules, and everyday stress. A blend of movement, conscious breathing, and relaxation supports immune health naturally. Yoga combines all three. It enhances circulation, activates internal organs, lowers stress hormones, and promotes a balanced nervous system. When practiced consistently, targeted yoga poses help the body resist infections and recover faster from illness. Below are six effective yoga poses that support immune function, along with clear guidance, benefits, and simple tips you can apply today.

    Yoga supports immunity by improving blood circulation, stimulating the lymphatic system, and reducing cortisol levels. Blood delivers white blood cells and nutrients throughout the body, and improved flow helps cells function efficiently. The lymphatic system removes waste but relies on movement rather than a pump. Yoga’s gentle motions and compressions encourage lymph flow. At the same time, mindful breathing lowers cortisol, reducing inflammation and strengthening immune response.

    Bridge Pose

    Bridge Pose is a mild backbend that opens the chest, activates the thyroid gland, and promotes healthy circulation. The thyroid plays an important role in hormone balance and immune regulation. When it functions optimally, both energy levels and immune response remain more stable.

    Lie on your back with knees bent and feet flat on the floor. Keep your feet hip-width apart and arms resting by your sides. Press your feet and arms into the ground as you lift your hips upward. Keep your thighs and inner feet parallel. Hold for 30 seconds to one minute with steady nasal breathing, then lower down slowly.

    This pose relaxes the chest and lungs, encouraging deeper breathing. Increased oxygen intake supports white blood cell production. Bridge Pose also stimulates digestion, helping the body absorb nutrients essential for immune health.

    Camel Pose

    Camel Pose opens the front of the body and stimulates the thymus gland, which sits behind the breastbone. The thymus is responsible for maturing T cells, which help identify and eliminate infected cells.

    Begin kneeling with your knees hip-width apart. Place your hands on your lower back or reach toward your heels. Lift your chest upward while keeping hips aligned over your knees. Gently allow your head to drop back if comfortable. Breathe slowly and hold for 20 to 40 seconds, then return upright with control.

    This posture increases lung capacity, supporting lymph movement and oxygen flow. As the chest expands, breathing becomes deeper and more efficient, helping the body respond better to stress and illness.

    Legs Up the Wall (Viparita Karani)

    Legs Up the Wall is a restorative inversion that aids lymphatic drainage and improves circulation. It requires no strength or flexibility and gently delivers immune benefits. The pose sends fresh blood toward the upper body while easing leg fatigue.

    Sit close to a wall with one hip beside it. Swing your legs up so they rest vertically against the wall. Relax your back and place your arms at your sides with palms facing up. Close your eyes and breathe slowly for five to ten minutes, releasing tension from the shoulders and jaw.

    This inversion helps clear waste from tissues by improving lymph flow. When lymph circulates freely, immune cells move efficiently. The pose also calms the nervous system, lowering stress hormones that can weaken immunity.

    Cobra Pose

    Cobra Pose strengthens the back, opens the chest, and stimulates the heart and lungs. This gentle backbend supports deeper breathing and improved airflow, allowing for better oxygen exchange that benefits immune function.

    Lie on your stomach with legs extended. Place your palms beneath your shoulders. Inhale and lift your chest while keeping the lower ribs grounded. Draw your shoulders away from your ears. Hold for 20 to 30 seconds with smooth breathing, then lower down gently.

    This pose also tones the abdominal area, supporting digestion. Efficient digestion improves nutrient absorption and strengthens gut health. Since much of the immune system resides in the gut, a healthy digestive system supports stronger defenses.

    Downward Facing Dog

    Downward Facing Dog stretches the entire body while increasing circulation. When the heart moves above the head, fresh blood flows toward the upper body and brain, enhancing oxygen delivery and immune cell activity.

    Start on hands and knees. Spread your fingers wide and press firmly into the mat. Lift your hips up and back, forming an inverted V shape. Let your heels reach toward the floor and relax your head between your arms. Breathe deeply for 30 seconds to one minute, then return to neutral.

    This pose lengthens the spine and opens the shoulders, relieving tension caused by prolonged sitting. Reduced tension leads to lower stress levels, which improves sleep quality and supports immune health.

    Seated Forward Fold

    Seated Forward Fold is a soothing posture that encourages relaxation and lowers cortisol. Persistently high cortisol weakens immune response and increases inflammation. This pose helps the nervous system shift into rest-and-repair mode.

    Sit with legs extended in front of you. Inhale to lengthen your spine, then exhale and hinge forward from the hips, reaching toward your feet. Keep the spine long rather than rounded. Hold for 30 to 60 seconds with natural breathing, then release slowly.

    Forward folds gently massage internal organs and calm the nervous system. They encourage slow, deep breathing that aids detoxification and hormonal balance. A relaxed body can direct more energy toward immune function.

    Practicing for Maximum Immune Support

    For best results, practice these immune-supporting yoga poses three to five times per week. Begin with Downward Facing Dog to warm up, followed by Cobra or Camel Pose to open the chest. Continue with Bridge Pose, then finish with Legs Up the Wall and Seated Forward Fold for deep relaxation. Spend five to ten minutes on each pose, adjusting based on your schedule.

    Support your practice with proper hydration and balanced nutrition. Foods rich in antioxidants, vitamins C and D, zinc, and probiotics help maintain immune strength. Quality sleep and regular movement outside yoga, such as walking or cycling, also enhance circulation and lymph flow.

    Mindful breathing is equally important. Diaphragmatic breathing activates the vagus nerve, calming the body. Slow nasal inhales and long exhales signal safety to the nervous system, lowering stress hormones and allowing energy to support immune processes.

    Your immune system responds to daily habits. Yoga provides a gentle, practical way to support it. These six poses work with the body’s natural systems to improve circulation, reduce stress, and encourage restorative states that promote healing. Begin gradually and build consistency. As your body and mind strengthen, your immune system responds accordingly.

  • Top Short Hairstyles for Chubby Faces That Instantly Balance Features and Slim Appearance

    Top Short Hairstyles for Chubby Faces That Instantly Balance Features and Slim Appearance

    The simple answer is yes. Many people assume that short hairstyles for chubby faces make facial width more noticeable, but in reality, the right cut often does the opposite.

    A well-chosen style can shape round features, create the illusion of length, and draw attention to your eyes and cheekbones. Success comes down to the right mix of balance, texture, and angles.

    How AI Helps Identify Face Shapes Accurately

    Before settling on any haircut, it is important to identify your true face shape. What looks round may actually be oval with fuller cheeks.

    The AI Face Analyzer uses advanced algorithms to map facial landmarks within seconds. Users can identify their face shape by following these steps:

    • Select a photo or enable the live camera
    • Allow the AI to scan your face
    • View your face shape results instantly

    Pixie Cuts That Add Height and Texture

    Pixie cuts are often avoided by people with fuller faces, yet they can be surprisingly slimming. The key is building volume at the crown.

    1. The Spiky Pixie

    Extra height on top visually elongates the face, helping to counter roundness.

    2. The Side-Swept Pixie

    Asymmetry works wonders. A deep side part breaks facial symmetry and reduces width.

    3. The Undercut Pixie

    Short, tight sides with a longer top form a strong vertical line that slims the face.

    4. Textured Layers

    Choppy layers prevent a bulky appearance and add a modern, lightweight feel.

    5. The Long Pixie (Mixie)

    Slightly longer pieces near the ears soften the jawline while keeping the style short.

    These short hairstyles for fat women and plus-size faces work by drawing attention upward rather than outward.

    Bob Haircuts That Slim and Shape

    If a pixie feels too bold, the bob offers a classic alternative. Still, the right structure is essential for round faces.

    6. The A-Line Bob

    Shorter at the back and longer in front, this angled cut visually slices through cheek fullness.

    7. The Asymmetrical Bob

    Uneven lengths create a diagonal focus that distracts from facial width.

    8. The Chin-Length Bob

    This style must include texture. Soft waves prevent the chin-length cut from widening the face.

    9. The Shaggy Bob

    Loose, messy layers add movement and keep hair from clinging to the cheeks.

    10. The French Bob

    Cut at lip level, this bold style highlights cheekbones when styled with gentle waves.

    11. The Lob (Long Bob)

    A short lob falling just below the chin helps lengthen the neck and balance facial proportions.

    These cuts clearly show that round faces do suit short hair with the right approach.

    Bangs That Frame and Sculpt the Face

    Bangs can completely transform a short haircut, making them essential for many short hairstyles with bangs for round faces.

    12. Curtain Bangs

    They open the face while softening a wider forehead, creating a diamond-like balance.

    13. Side-Swept Bangs

    The angled line helps break the circular symmetry of a round face.

    14. Wispy Bangs

    Light, airy strands add softness without boxing in the face.

    15. Piecey Fringe

    Separated sections allow the forehead to show, adding vertical emphasis.

    16. Micro Bangs

    Sitting high on the forehead, these create the illusion of extra facial length.

    17. Textured Fringe

    A more defined version of wispy bangs, ideal for short, thick hair.

    18. The Deep Side Part

    Though not a cut, this styling trick delivers the same slimming effect as side bangs.

    19. Face-Framing Tendrils

    Leaving longer strands near the ears subtly conceals cheek width.

    20. The Faux Hawk Effect

    Styling bangs upward and back adds maximum height, one of the strongest slimming techniques.

    Comparing AI Tools and Traditional Inspiration

    Finding the right hairstyle becomes easier with helpful tools. Below is a review of three popular resources.

    1. Haircut Filter

    Overview: This tool uses the AI Hairstyle Generator API to deliver realistic previews.

    • Virtual haircut try-ons
    • Hair texture detection
    • Hair color experimentation

    Verdict: It effectively turns imagination into realistic visualization.

    2. Face Analyzer

    Overview: This tool focuses on accurate facial analysis before styling.

    • Identifies round and chubby face shapes
    • Provides detailed facial insights

    Verdict: An ideal starting point that supports informed styling decisions.

    3. Pinterest

    Overview: A large collection of user-submitted hairstyle images.

    Pros: Offers extensive inspiration and real-life examples of short hairstyles for overweight women.

    Cons: Images are static and cannot be customized to individual face shapes.

    Transforming the Salon Experience With AI

    For salons and haircare brands, the AI Hairstyle Generator acts as a powerful conversion tool. Integrating Haircut Filter APIs allows clients to preview styles before committing.

    Additional features such as AI Hair Type Detection and the AI Hair Volume Generator ensure results match natural hair characteristics.

    Using AI in consultations positions brands as inclusive, innovative, and responsive to diverse beauty needs.

  • As Tech Titans Signal Smartphone Decline Apple’s CEO Takes a Sharply Different Stance

    As Tech Titans Signal Smartphone Decline Apple’s CEO Takes a Sharply Different Stance

    Out of public view, a subtle debate is unfolding about the future of personal technology. The question is no longer whether change is coming, but whether the smartphone will fade away entirely or gradually evolve into something new.

    Big Tech’s fixation on what comes after the smartphone

    For over two decades, the smartphone has acted as a central control tool for everyday life. It replaced cameras, maps, music players and even wallets. Now, leading voices in technology argue that its dominance may be temporary, with future devices moving closer to the body or even becoming part of it.

    Elon Musk, Bill Gates and Mark Zuckerberg share a common belief: a glass rectangle will not define personal computing forever. They point to brain interfaces, smart skin and face-mounted displays as the successors to the iPhone era. While their timelines and strategies differ, all see today’s smartphone as a phase rather than an endpoint.

    In their view, the phone is not the final destination, but a bridge to more intimate forms of technology.

    Standing apart from this outlook, Tim Cook offers a different perspective. The Apple CEO accepts that change is inevitable, but frames it as coexistence rather than replacement. He argues that the smartphone still has room to grow and will remain the core of a broader device ecosystem.

    Emerging visions of a “post-phone” world

    Elon Musk and direct brain-based control

    Elon Musk imagines a future that does not rely on screens at all. Through his neurotechnology company Neuralink, he supports the idea of operating digital systems directly with the brain. Current trials focus on patients with motor impairments, allowing them to move cursors or type using neural signals alone.

    Musk extends this medical application into a broader vision. He describes a world where people browse, communicate and interact with software through thought alone, without reaching for any device.

    Within this narrative, the smartphone appears inefficient. If the brain can issue commands instantly, tapping on glass feels unnecessary.

    However, this path raises serious ethical and regulatory challenges. Implantable devices involve surgery, ongoing monitoring and strict safeguards for sensitive data. Even if proven safe in medical contexts, expanding them to healthy users would require social and regulatory acceptance that may take years to achieve.

    Bill Gates and the promise of smart tattoos

    Bill Gates focuses on the skin rather than the brain. He has highlighted the potential of electronic tattoos: thin, flexible patches or tattoo-like designs embedded with nanosensors. These could collect health data, verify identity or support short-range communication.

    In a post-smartphone scenario, such tattoos might store digital credentials, replace key cards or serve as subtle notification tools. A simple tap or gesture on the wrist could approve a payment or accept a call through nearby devices like earbuds or wearable displays.

    This approach builds on existing research in electronic skin and bio-compatible circuits. Yet turning these concepts into everyday communication tools depends on advances in battery life, comfort and privacy protection. Permanent devices that expose health or location data remain a major concern.

    Mark Zuckerberg’s focus on face-worn computing

    Mark Zuckerberg positions augmented reality as the most likely successor to the smartphone. Through Meta, he invests heavily in lightweight AR glasses that overlay digital information onto the real world.

    In this vision, people rarely reach into their pockets. Messages, navigation prompts, translations and video calls appear directly in front of the eyes. Interaction happens through subtle hand movements, voice commands or compact controllers.

    Zuckerberg’s core idea is simple: the future “phone” sits on your face, not in your hand.

    While early headsets remain bulky and limited, the direction is clear. Meta, Apple, Samsung and others are racing to reduce size, improve displays and make AR glasses resemble everyday eyewear. Social acceptance will be critical, as concerns about cameras on faces persist, echoing reactions to Google Glass years ago.

    Tim Cook’s alternative: evolution through coexistence

    An iPhone-led ecosystem rather than a sudden break

    Tim Cook’s position may sound cautious, but it aligns with Apple’s long-term strategy. The company does not view future devices as rivals fighting to replace the iPhone. Instead, the smartphone acts as a central hub around which other products revolve.

    This approach is already visible. Apple Watch handles quick interactions and health tracking. AirPods manage audio and voice input. Headsets deliver immersive and augmented experiences. Yet the iPhone still anchors accounts, apps, payments and connectivity.

    Cook’s philosophy is to let new interfaces grow alongside the smartphone, gradually integrating them rather than forcing abrupt change.

    Apple adds artificial intelligence, spatial computing and advanced sensors incrementally. Instead of dramatic shifts, it layers improvements year after year, from enhanced camera processing and on-device AI to LiDAR scanning and emergency satellite communication.

    Why Apple resists declaring the smartphone obsolete

    The iPhone remains Apple’s main revenue driver and supports its services ecosystem. Beyond finances, Cook points to user behaviour. Billions rely on phones as their primary computer, storing personal photos, financial apps, work tools and health information. Replacing them overnight with implants or glasses would undermine trust.

    The smartphone also offers a familiar interaction model. Taps, swipes and home screens reduce friction when new features appear, such as AR navigation or AI-powered photo editing.

    Cook often emphasises privacy and on-device processing as reasons to evolve the phone rather than abandon it. A handset can act as a secure personal controller in less secure environments, keeping permissions in one place instead of scattering them across multiple devices.

    Three futures, one user experience

    Different routes toward the same goal

    Despite their differences, Musk, Gates, Zuckerberg and Cook pursue the same objective: faster and more natural interaction with digital systems. Their disagreement lies in form and timing.

    • Musk aims for direct brain connections that bypass physical interfaces.
    • Gates envisions smart skin combining health, identity and connectivity.
    • Zuckerberg promotes AR glasses that merge digital content with reality.
    • Cook supports a layered ecosystem anchored by the smartphone.

    For users, the outcome will likely blend these ideas. AR glasses already pair with phones. Wearable patches track health data and sync with apps. Voice assistants in earbuds handle tasks while phones remain in pockets or bags.

    The coming decade may resemble a multi-device era rather than a world without smartphones.

    Opportunities, risks and the transition phase

    This shift could bring clear benefits, including lighter devices, more intuitive interfaces and improved health monitoring. A commuter might use AR glasses for navigation, a wearable for payments and a phone for longer messages or work.

    At the same time, risks are significant. Brain interfaces raise ethical and medical issues. Smart tattoos and AR glasses introduce new privacy concerns. Constant, invisible alerts could increase distraction, while managing multiple devices may overwhelm users already facing digital fatigue.

    Regulation will lag behind innovation. Governments must address data ownership, biometric tracking and mental health impacts. These debates already exist around smartphones and social media and will intensify as technology moves closer to the body.

    What the next decade of personal technology may look like

    For now, the smartphone remains central to personal computing. Sales growth may slow in some regions, but usage continues to expand. Phones serve as IDs, payment tools, boarding passes and remote work devices. Any new interface must integrate with this reality.

    A more likely path involves gradual layering. AR glasses become smaller and more affordable before replacing anything. Wearable patches focus on medical use before broader communication roles. AI agents run on phones before extending to other devices as hardware improves.

    Consumers do not need to wait for radical inventions to prepare. Understanding how a phone functions as a hub, including data syncing and privacy controls, will matter when future wearables request access to the same information.

    For companies, the debate between replacement and coexistence shapes investment decisions. Betting solely on a sudden post-smartphone world risks misreading user habits and regulatory timelines. A more resilient approach treats the phone as one node among many.

    The contrast between Musk’s disruptive vision and Cook’s gradual evolution reflects two philosophies of change. The technologies people carry, wear or integrate into their bodies over the coming years will reveal which approach aligns more closely with how technology fits into everyday life.

  • Weight Loss Yoga: 5 Proven Moves That Boost Fat Burn, Metabolism and Body Balance

    Weight Loss Yoga: 5 Proven Moves That Boost Fat Burn, Metabolism and Body Balance

    Yoga is often associated with gentle stretches or quiet meditation, but when practiced with purpose and controlled breathing, certain poses can actively support weight loss, improve metabolism, and encourage fat burning. Unlike fast-paced workouts or gym-based routines, yoga blends strength, balance, and sustained movement. This combination helps develop lean muscle, elevate the heart rate, and continue energy use even hours after practice. The five yoga poses below are practical, effective, and suitable for both beginners and experienced practitioners. They can be practiced in short sessions or easily added to your daily routine.

    Yoga supports weight loss by activating large muscle groups and improving overall circulation. It also helps lower stress hormone levels, which are linked to fat storage around the abdomen. With consistent practice, the body becomes more efficient at using energy, while mental focus improves, encouraging healthier food and lifestyle choices. The following poses are selected for their ability to engage multiple muscles, gently raise the heart rate, and build endurance without excessive strain.

    Warrior I Pose for Strength and Calorie Use

    Warrior I is a classic standing posture that strengthens the legs, core, and arms. Holding this pose with steady breathing increases heart rate while the muscles work continuously to maintain balance. Over time, this effort helps build lean muscle, which supports a higher resting metabolic rate.

    Begin by standing with your feet wide apart. Turn the right foot outward and angle the left foot slightly inward. Bend the right knee until it aligns over the ankle. Raise both arms overhead with fingers reaching upward. Press firmly through the feet and lengthen the spine. Hold for 30 to 60 seconds while breathing smoothly, then switch sides.

    This pose activates the quadriceps, glutes, and shoulders. Strong legs and a stable core help the body burn calories even at rest. Warrior I also opens the chest and lungs, supporting deeper breathing and improved oxygen use.

    Chair Pose to Activate the Core

    Chair Pose is a powerful posture for fat burning because it engages the core, thighs, and glutes at the same time. The body works continuously to stay lifted and stable, increasing energy use in muscles that are essential for everyday movement.

    Stand with feet together or slightly apart. Inhale and lift the arms overhead. As you exhale, bend the knees as if sitting back into a chair. Keep the spine long and the weight grounded in the heels. Extend the arms upward without raising the shoulders. Hold the pose for 30 to 45 seconds with steady breathing.

    This posture builds lower body strength, which contributes to increased calorie burn even after practice ends. Holding muscles under tension improves endurance and gradually shifts body composition toward lean tissue.

    Sun Salutation Flow for Full-Body Activation

    Sun Salutation is a flowing sequence that synchronizes breath with movement. Repeating this series raises the heart rate, warms the body, and activates nearly every major muscle group, supporting fat loss and stamina.

    Start standing tall at the front of your mat. Inhale and sweep the arms overhead. Exhale into a forward fold. Inhale to lift halfway with a flat back, then exhale to step or jump back into plank. Lower down and rise into Cobra or Upward Facing Dog, then exhale into Downward Facing Dog. Hold briefly before stepping forward, lifting halfway, and returning to standing. Repeat the sequence five to ten times.

    Practiced continuously with rhythmic breathing, Sun Salutation boosts metabolic activity and keeps the body moving. The blend of forward folds, backbends, and plank positions improves strength, flexibility, and efficient energy use.

    Boat Pose for Core Strength and Energy Use

    Boat Pose is a focused core-strengthening posture. A strong core supports better posture, balance, and overall movement, all of which play a role in active weight loss. This pose directly targets the abdominal muscles responsible for stabilizing the body.

    Sit with knees bent and feet flat on the floor. Lean back slightly and lift the feet so the shins are parallel to the ground. Extend the arms forward alongside the legs. If stable, straighten the legs to form a V shape with the body. Hold for 20 to 40 seconds while breathing deeply.

    This posture challenges the entire midsection and helps tone muscles essential for daily activity. An efficient core allows the body to perform movement more effectively and increases overall energy use.

    Triangle Pose to Improve Balance and Metabolism

    Triangle Pose activates the legs, hips, and core while opening the chest and shoulders. As a strong standing posture, it enhances balance and coordination. This full-body engagement gently elevates the heart rate and supports calorie burning.

    Stand with feet wide apart. Turn the right foot outward and the left foot slightly inward. Inhale and reach the right arm forward, then lower it toward the ankle. Extend the left arm upward and keep the chest open, gazing toward the raised hand. Hold for 30 to 60 seconds, then switch sides.

    Triangle Pose supports digestive function and stimulates internal organs, aiding metabolic processes. It also lengthens the spine and stretches the sides of the body, improving flexibility and range of motion.

    Practicing These Yoga Poses for Effective Results

    Consistency plays a key role in seeing results. Aim to practice these five yoga poses three to five times each week. They can be combined into a single 20 to 30 minute session or spread throughout the day. Begin with a brief warm-up, such as gentle stretching or light movement for three to five minutes. Finish with relaxation in Corpse Pose, lying on your back with eyes closed and palms facing upward.

    Combining yoga with mindful eating and proper hydration supports progress. Regular practice increases body awareness, often leading to better food choices and balanced eating habits that align with weight loss goals.

    Tracking your sessions can be helpful. Pay attention to how you feel after practice, how your energy changes, and how your clothes fit. While visible weight changes may take time, improvements in strength, stamina, and mood often appear sooner.

    Helpful Lifestyle Habits to Support Weight Loss

    While yoga can support weight loss on its own, pairing it with healthy daily habits enhances results. Increase daily movement through walking, stair climbing, or light cardio. Prioritize quality sleep, as poor rest disrupts hormones that influence hunger and fat storage. Include protein-rich foods and vegetables to support muscle recovery and steady energy.

    Stress management is also important. The calming breathing techniques used in yoga reduce stress hormones that promote fat storage, especially around the midsection. A relaxed nervous system allows the body to shift toward releasing stored fat.

    Weight loss is a gradual process. These five yoga poses offer a sustainable and supportive approach to that journey. With regular practice, mindful breathing, and consistent movement, the body responds with improved strength and overall wellness.

  • Full-Body Stretch Yoga: 4 Essential Daily Poses to Unlock Flexibility and Release Stiffness

    Full-Body Stretch Yoga: 4 Essential Daily Poses to Unlock Flexibility and Release Stiffness

    Full-body stretching is one of the most effective ways to increase flexibility, ease muscle tightness, improve posture, and support overall physical well-being. Whether you spend long hours at a desk, stay active with walking or sports, or simply want your body to feel more open throughout the day, a regular stretching practice can create noticeable benefits. Yoga provides a well-rounded approach because each posture is coordinated with breath. When breathing is steady and mindful, muscles release more deeply, joints move with greater ease, and the nervous system settles into a calm, relaxed state.

    Stretching is not only about reaching farther or bending deeper. It focuses on enhancing the range of motion in both muscles and joints across the entire body. When muscles remain flexible and joints move freely, posture naturally improves, movement feels smoother, and the risk of discomfort or strain is reduced. The four yoga poses below are selected for their ability to stretch key muscle groups from head to toe. Together, they engage the spine, hips, shoulders, legs, and core, supporting better flexibility and healthier movement patterns in everyday life.

    Downward Facing Dog Stretch

    Downward Facing Dog is a fundamental yoga posture that lengthens the hamstrings, calves, spine, and shoulders. At the same time, it builds strength in the arms and upper body as weight is supported through the hands. This pose gently stretches the entire back side of the body while easing tension that often develops from extended periods of sitting or standing.

    To begin, come onto your hands and knees. Spread your fingers wide and press evenly through your palms. Tuck your toes and lift your hips upward and back, forming an inverted V shape with your body. Keep your feet about hip-width apart and guide your heels toward the floor, allowing them to stay lifted if needed. Let your head and neck relax fully, and take slow, deep breaths through your nose. Hold the posture for thirty seconds to one minute.

    This pose helps create space along the spine while stretching the backs of the legs. If the shoulders feel restricted, slightly bend the knees and focus on lengthening from the hips down through the heels. Over time, Downward Facing Dog also encourages improved circulation in the arms and shoulders, supporting long-term upper body mobility.

    Pigeon Pose for Hip Release

    Pigeon Pose is a highly effective stretch for the hips, glutes, and lower back. When hip muscles are tight, they can disrupt pelvic and spinal alignment, often leading to discomfort in the lower back or knees. Gently opening the hips supports smoother movement during daily activities such as walking, running, and bending.

    Start in a tabletop position. Bring your right knee forward and place it behind your right wrist, then slide your right foot toward your left hip. Extend your left leg straight back with the top of the foot resting on the floor. Square your hips toward the front of your mat. Inhale to lengthen your spine, then exhale as you walk your hands forward and lower your torso over the front leg. Rest your forehead on the mat or a block for support. Breathe calmly for one to two minutes, then repeat on the other side.

    This pose reaches deep muscles in the hips that commonly tighten due to prolonged sitting or repetitive movement. As the hips release, the lower back also experiences gentle relief. Regular practice of Pigeon Pose supports improved posture, reduced back tension, and greater hip flexibility.

    Cat Cow Spinal Flow

    Cat Cow Flow is a gentle yet effective sequence that stretches the spine, neck, and torso. It promotes mobility between the vertebrae and encourages healthy circulation in the spinal muscles. This flowing movement is ideal as a warm-up before deeper stretches or as a simple practice on its own.

    Begin on your hands and knees, aligning your wrists under your shoulders and knees under your hips. As you inhale, drop your belly toward the floor, lift your chest and tailbone, and gaze slightly forward for Cow Pose. On the exhale, round your spine upward, draw your chin toward your chest, and tuck your tailbone into Cat Pose. Continue moving smoothly with your breath for ten to twenty rounds.

    This flowing motion helps keep the spine supple while easing stiffness in the back and neck. It also gently engages the abdominal muscles and opens the chest. Practicing Cat Cow regularly, especially in the morning, can reduce stiffness from sleep and support freer movement throughout the day.

    Standing Forward Fold Stretch

    Standing Forward Fold deeply stretches the hamstrings, calves, and lower back while promoting a calming effect on the nervous system. Because the head rests below the heart, this posture encourages circulation throughout the body and supports mental clarity and relaxation.

    Stand upright with your feet hip-width apart. Inhale and lift your arms overhead. As you exhale, hinge at the hips and fold forward. Allow your arms to hang freely or hold opposite elbows. Keep a gentle bend in your knees if the backs of your legs feel tight. Release your head and neck completely and breathe evenly through your nose. Remain in the posture for thirty seconds to one minute.

    This pose helps ease built-up tension along the back of the legs and lower spine. Tight hamstrings often result from long periods of sitting or limited movement, and Standing Forward Fold gently counteracts this pattern by lengthening the entire back line of the body. Deep breathing here also encourages rib expansion, supporting a relaxed and open breath.

    How to Combine These Poses into a Routine

    These four postures together create a balanced full-body stretching routine. They can be practiced whenever the body feels tight or restricted. For a complete sequence, begin with Cat Cow Flow to warm up the spine and torso. Transition into Downward Facing Dog to lengthen the back and legs. Follow with Pigeon Pose on both sides to release the hips and lower back. Conclude with Standing Forward Fold to stretch the hamstrings and calm the nervous system.

    Practicing this sequence three to five times per week can be effective. Even a short session of ten to fifteen minutes may lead to noticeable improvements in flexibility and reduced muscle tension within a few weeks. With consistency, range of motion gradually increases and everyday movements feel easier and more natural.

    Breathing plays a vital role in every stretch. Inhale deeply through the nose, allowing the belly and chest to expand. Exhale slowly, letting the body soften further into each pose. Steady breathing helps lower stress levels and encourages muscles to relax fully. Over time, regular stretching supports not only flexibility but also improved posture, balance, and overall physical comfort.

    Consistent stretching helps reduce the risk of injury by keeping muscles and joints prepared for movement. Yoga emphasizes mindful awareness, which enhances the benefits of stretching. Always listen to your body and avoid pushing into sharp pain. Gentle discomfort during release is normal, but intense pain is a signal to ease off.

    These four yoga poses provide an effective approach to full-body stretching and fit easily into daily routines. Whether you are new to yoga or returning after time away, this sequence supports flexibility, ease of movement, and physical balance. Practicing with intention allows the body to respond positively to gentle, consistent stretching.

  • Optical Illusion Challenge: Spot the Inverted 86 and 82 Hidden Within 8 Seconds

    Optical Illusion Challenge: Spot the Inverted 86 and 82 Hidden Within 8 Seconds

    Do you trust your eyesight as much as you think you do? Optical illusion challenges are one of the most effective ways to test focus, attention, and visual awareness in just a few seconds. What appears obvious at first often becomes surprisingly misleading once the brain starts relying on patterns rather than individual details.

    This rapid visual test pushes you to locate two hidden numbers inside a densely packed grid. Buried among rows of identical 86s are one inverted 86 and a cleverly disguised 82. You have only eight seconds to find both. The ticking clock adds pressure, which is exactly what makes this challenge so compelling.

    Understanding the 8-Second Optical Illusion Challenge

    At first glance, the image looks simple. The grid is completely filled with the number 86, repeated neatly from edge to edge. The consistent spacing, shape, and color create a strong sense of uniformity. Your eyes quickly accept that everything looks identical.

    That assumption is precisely where the illusion takes hold. Hidden within the repeated pattern are two subtle irregularities. One 86 is flipped upside down, while another entry is not an 86 at all. It is an 82, positioned carefully to blend in with its surroundings.

    This challenge is not about speed. It is about breaking free from automatic perception. Once your brain switches to pattern mode, it stops checking details, allowing the illusion to succeed.

    Timer Running: Can You Spot Both Numbers Fast Enough?

    As soon as the timer begins, perception changes. Eight seconds feels manageable until your eyes start gliding over rows of repeated shapes. Some people scan methodically, while others focus on curves and number edges.

    Midway through, uncertainty often sets in. Did something look different near the right side? Was there an odd shape toward the bottom? By the final second, most viewers are either convinced they succeeded or completely unsure.

    This pressure-filled experience is what makes optical illusion challenges so addictive. Even those who miss the answer usually feel compelled to try again.

    Why the Inverted 86 and Hidden 82 Are Difficult to Detect

    The real difficulty comes from how the brain handles repetition. When the same object appears repeatedly, the brain groups them together and stops examining each one closely. This speeds up everyday perception but creates blind spots in puzzles like this.

    The inverted 86 still resembles a normal 86 at a quick glance. The flipped curves are subtle, allowing the brain to auto-correct the image. The 82 is even more deceptive because parts of its shape resemble the 86, especially when viewed quickly.

    Your eyes may pass directly over both numbers without triggering recognition. The visual information is present, but your brain does not flag it as important.

    The Correct Locations Revealed

    If you struggled to identify both numbers, you are not alone. The inverted 86 appears on the right side of the grid. Its flipped orientation slightly alters the flow of the digits, but without guidance it blends seamlessly into the pattern.

    The hidden 82 is located in the lower-left section of the image. The change from a 6 to a 2 is subtle enough that the brain often overlooks it, especially when surrounded by dozens of similar figures. Once the numbers are highlighted, the illusion immediately loses its effect.

    This instant shift from confusion to clarity is one of the most satisfying aspects of visual puzzles.

    What This Optical Illusion Shows About Visual Attention

    Challenges like this reveal how attention behaves under time pressure. When rushed, the brain leans heavily on expectations. If you expect to see only 86s, your perception adjusts to reinforce that belief.

    This is why optical illusions are often used in focus and attention training. They demonstrate how easily assumptions influence perception and how detail awareness can fade. Repeated practice can help strengthen patience and visual precision.

    Why Eye Test Puzzles Keep Spreading Online

    Visual brain teasers fit perfectly into modern scrolling habits. They are quick to understand, easy to attempt, and rewarding to solve. An eight-second challenge fits effortlessly into social feeds and conversations.

    There is also a strong competitive element. People enjoy comparing results and testing friends. Did you find both numbers instantly, or did you need the reveal? That simple comparison drives shares, comments, and repeated engagement.

    Accessibility adds to their appeal. Anyone can participate, regardless of age or background. All it takes is a screen and a willingness to look carefully.

    Final Thoughts on the 8-Second Visual Challenge

    Whether you identified both the inverted 86 and the hidden 82 within the time limit or needed the solution, this illusion delivered a quick mental workout. It tested focus, challenged assumptions, and proved that visual perception is not always as reliable as it seems.

  • Optical Illusion Challenge: Find the Inverted 86 Before 7 Seconds Run Out

    Optical Illusion Challenge: Find the Inverted 86 Before 7 Seconds Run Out

    Optical illusions have a sneaky way of making even the most confident viewers question their own sight. What appears clear at first often turns out to be a subtle trick built on repetition and symmetry. That is exactly why visual brain teasers like this continue to dominate social feeds and spark endless discussion.

    This challenge appears simple, yet it pushes your attention span to the limit. Hidden inside a grid filled with identical numbers, one 86 has been flipped in a quiet, almost invisible way. Your goal is to locate that inverted 86 in just seven seconds, relying only on your natural observation skills.

    The 7-Second Inverted 86 Challenge, Clearly Explained

    At first glance, the puzzle feels effortless. You are presented with a clean grid packed entirely with the number 86, repeated in neat, uniform rows. The spacing is even, the colors match, and nothing seems out of place. Your brain quickly decides the pattern is predictable.

    That sense of predictability is exactly where the trick lies. Tucked among the repeated numbers is one inverted version. The flip is subtle enough that your eyes often glide past it without noticing. This challenge is not about raw intelligence. It tests focus, patience, and your ability to resist rushing through familiar patterns.

    Once the clock starts, most people scan the grid line by line. Others search for tiny changes in curves or angles. Both approaches can work, but the pressure of a seven-second limit often causes even experienced puzzle solvers to second-guess themselves.

    Why Your Brain Has Trouble With This Puzzle

    The human brain is designed for efficiency. It looks for shortcuts to process information quickly. When it encounters repeated shapes, it groups them together and assumes they are the same. This mental process, known as pattern completion, helps us manage daily information without overload.

    In this illusion, that same efficiency becomes a weakness. Because each number looks nearly identical, your brain stops checking them individually. It assumes uniformity and moves on. The inverted 86 blends into the background because your mind expects consistency.

    This is why many people miss the answer, even after multiple attempts. The illusion is not hiding the number itself. It is hiding the difference.

    Timer On: Can You Beat the Seven-Second Clock?

    Picture the grid in front of you as the countdown begins. Seven seconds pass quickly, especially when your eyes are flooded with repetition. As each second ticks away, the pressure increases.

    Around five seconds in, doubt often sets in. By the final moment, the brain is either confident or completely overwhelmed. That tension is part of what makes the challenge so compelling. Whether you succeed or fail, it usually leaves you wanting another attempt.

    The Reveal: Where the Inverted 86 Was Hidden

    If you did not catch it immediately, you are not alone. The inverted 86 is typically located toward the right side of the grid. Its orientation is flipped just enough to appear normal at a glance, yet clearly wrong when examined closely.

    Once the difference is pointed out, it suddenly feels obvious. That moment of realization is what makes optical illusions so satisfying. You instantly notice what your brain ignored before, and it becomes impossible to unsee.

    This reveal shows how perception works. Your eyes collect the information, but your brain decides what deserves attention. In puzzles like this, that decision leads straight into the illusion.

    Why Optical Illusions Like This Spread So Fast Online

    Visual challenges thrive online because they are quick, engaging, and easy to share. A puzzle that takes only seven seconds fits perfectly into modern scrolling habits. There is no setup and no long explanation required.

    There is also a strong social element. People enjoy testing friends, comparing outcomes, and claiming bragging rights. Phrases suggesting that only sharp observers can solve the puzzle spark curiosity and friendly competition. Even those who miss the answer often feel compelled to comment or try again.

    Another reason for their popularity is accessibility. Anyone can participate, regardless of age or background. All it takes is a screen and a willingness to look carefully.

    What This Illusion Reveals About Focus and Attention

    Challenges like the inverted 86 offer more than simple entertainment. They provide a brief snapshot of your focus at that moment. Distractions, fatigue, and stress can all influence how well you perform.

    Spotting the inverted number quickly suggests strong attention to detail and effective visual scanning. Taking longer does not indicate anything negative. It simply shows how easily the brain relies on assumptions when faced with repetition.

    Engaging with visual puzzles regularly can help sharpen observation skills. Over time, you may notice yourself slowing down and catching details you once overlooked.

    Final Thoughts: Did You Spot the Inverted 86?

    Whether you solved the puzzle instantly or needed the reveal, this illusion gave your brain a short but meaningful workout. It tested your perception, challenged your patience, and reminded you that appearances can be misleading.

    Optical illusions continue to evolve, with fresh variations appearing all the time. If this challenge held your attention, the next one may be even more engaging. Be honest with yourself. Did you beat the seven-second limit, or did the illusion win this round? Either way, your eyes just learned something new.

  • Winter Nail Trends Reveal These Polish Shades Dominating Salons This Season

    Winter Nail Trends Reveal These Polish Shades Dominating Salons This Season

    Royal purples and ruby reds are just a glimpse of the rich palette embraced by True Winter nail lovers. Even fans of neutral manicures will find no shortage of options this season. Cool-toned shades dominate, with more variations of crisp white and cool gray than expected—much like snow shimmering before it melts. Deep burgundies, including cranberry, berry, and merlot tones, also stand out. World champion nail artist and beauty educator Valeriia Telemaniuk shared with Byrdie that winter sparks a return to timeless nail styles, including French manicures, elegant grays, blues, and deep reds in both bold and softened finishes.

    Top 11 Nail Polish Colors Trending This Winter

    Chocolate Ganache

    Brown-toned nails are evolving into a richer winter favorite: ganache brown. Nail artist and educator Sofiia Mazur describes this shade as a deep, indulgent brown reminiscent of melted dark chocolate. Similar to tones like Red Iguana’s Ganache gel or Dazzle Dry’s Fringe, this color feels warm, luxurious, and refined. Ganache nails project understated confidence and pair seamlessly with gold jewelry, neutral outfits, or minimalist black looks, making them effortlessly versatile.

    Muted Berry

    Deep, grounded hues are gaining momentum this season. Juanita Huber-Millet, founder and creative director of Townhouse Salons, notes a growing preference for espresso browns, soft mauves, and muted berry shades. These tones deliver warmth and sophistication while remaining subtle enough for daily wear. Muted berry colors, in particular, offer a polished alternative to brighter reds, adding depth without overwhelming the overall look.

    Light Ocean Blue

    Soft ocean blues with a pearlescent finish are emerging as a winter favorite. Nail expert Amy Ling Lin describes these shades as calming, luminous, and uplifting. Options like Sundays Studio’s L09 bring a refreshing contrast to winter’s darker palette. The gentle pearl sheen reflects light beautifully, creating a subtle glow that feels airy, serene, and modern.

    Cool Gray

    Cool gray is becoming a standout neutral for winter. According to OPI Global Ambassador Coca Michelle, this shade is both chic and sophisticated, complementing seasonal wardrobes with ease. Cool gray also highlights jewelry beautifully, especially when mixing metals. Polishes such as OPI’s Peace of Mined, Case of Glamnesia, and Suzi Talks with Her Hands offer refined, versatile finishes ideal for colder months.

    Deep Navy

    Deep navy is seen as the perfect post-holiday reset shade. Calm and classic, it transitions smoothly from winter into the New Year. Easy to wear, this color suits both formal occasions and everyday office styles. Recommended options include OPI Nail Lacquer shades like Less is Norse, Havin’ a Candy Ol’ Time, and Suzi & the Arctic Fox, all delivering rich, wearable navy tones.

    The Barely-There Neutrals

    Winter often inspires a desire for simplicity, reflected in the rise of barely-there nail shades. Soft milky hues, cool neutrals, and gentle pastels are trending, according to Huber-Millet. Colors such as Coconut Milk, Glazed Marshmallow, and Milkshake from Townhouse’s Flawless Collection feel clean and restorative. For subtle pink neutrals, adding French tips—either crisp white or softer modern versions—creates a timeless, polished finish.

    Warm, Deep Red

    A warm, deep red remains a winter staple. Amy Ling Lin describes this shade as chic, cozy, and quietly powerful. It brings instant warmth during colder days while maintaining a polished, festive feel. This color moves effortlessly from everyday wear to special occasions, offering elegance without heaviness.

    Earthy Metallics

    Earth-inspired metallics are set to shine this winter. Sofiia Mazur highlights tones like bronze, clay gold, and olive chrome, often paired with matte or stone-textured finishes. These shades reflect light softly, creating a refined glow that feels elevated yet understated. Influenced by runway trends such as Balmain’s fall collection, earthy metallics work beautifully as full nail looks or subtle accent details.

    Black Cherry

    Black cherry nails deliver understated drama by blending deep darkness with a touch of red warmth. Mazur explains that this balance keeps the shade elegant and wearable. Long embraced by fashion icons, black cherry complements both evening attire and casual outfits like oversized blazers or vintage denim, making it a reliable winter favorite.

    Crisp White

    Crisp white polish is enjoying a strong winter resurgence. Following Pantone’s Cloud Dancer announcement, pure white shades such as Mineral Fusion Ice Breaker are in high demand. This clean, modern color mirrors snowy landscapes and frosty mornings. Once seen mainly as a summer choice, white now plays a key role in winter minimalism.

    Gray-Lavender

    Gray-lavender blends cool gray with a soft hint of purple, making it especially fitting for winter. Telemaniuk notes that shorter days and cooler atmospheres draw clients toward muted shades like this. Elegant, versatile, and modern, gray-lavender offers a minimalist yet chic option perfectly suited for the colder season.

  • Beginner Friendly Yoga Poses Build Comfort Confidence and Gentle Body Awareness

    Beginner Friendly Yoga Poses Build Comfort Confidence and Gentle Body Awareness

    Beginning yoga for the first time can feel overwhelming, especially when social media highlights advanced poses and intense flows. In reality, yoga is meant to be approachable, flexible, and inclusive. New practitioners benefit most from gentle poses that focus on breathing, awareness, and proper alignment. These five beginner-friendly yoga poses are ideal for improving flexibility, easing stress, and creating a strong foundation without pressure.

    Why Simple Yoga Poses Are Ideal for Beginners

    When starting yoga, your body needs time to adjust to mindful movement. Simple poses allow you to focus on posture and breath control rather than struggling with balance or strength. These basic movements help keep joints mobile, reduce muscle tightness, and promote a calmer mind. Practicing foundational poses regularly also lowers the risk of injury and builds confidence, making steady progress feel natural and comfortable.

    Mountain Pose: Build Balance, Alignment, and Awareness

    Mountain Pose is often introduced first because it forms the base for many standing postures. Stand with your feet hip-width apart and arms relaxed at your sides. Spread your weight evenly across both feet while gently engaging your legs and core. Lift your chest, lengthen your spine, and soften your shoulders. Take slow, deep breaths. This pose enhances posture, balance, and body awareness, helping beginners recognize correct alignment.

    Cat-Cow Pose: Gently Mobilize and Warm the Spine

    Cat-Cow Pose is a smooth, flowing movement that helps warm up the spine and release tension. Begin on your hands and knees with wrists under shoulders and knees under hips. Inhale as you arch your back and lift your chest, gazing slightly upward. Exhale as you round your spine and tuck your chin toward your chest. Move slowly with your breath for several rounds. This pose improves spinal flexibility and reduces stiffness, making it an excellent warm-up.

    Child’s Pose: Relax, Restore, and Reset

    Child’s Pose is a deeply calming posture that allows the body to rest and recover. Kneel on the floor, bring your big toes together, and sit back on your heels. Extend your arms forward and gently lower your forehead toward the mat. You may use a cushion under your hips or head for added comfort. This pose softly stretches the back and hips while soothing the nervous system. Beginners can return to this pose whenever they need rest during practice.

    Seated Forward Bend: Gently Stretch the Back and Legs

    Seated Forward Bend is a simple stretch that supports flexibility in the back and legs. Sit on the floor with your legs extended straight ahead. Inhale to lengthen your spine, then exhale as you hinge forward from your hips. Reach toward your shins or ankles without forcing the movement. Keep your neck relaxed and maintain steady breathing. This pose helps release lower back tension and encourages relaxation, especially for those who sit for long periods.

    Bridge Pose: Strengthen the Back and Open the Chest

    Bridge Pose is a gentle backbend that builds strength in the legs and back while opening the chest. Lie on your back with knees bent and feet flat on the floor, hip-width apart. Press into your feet and slowly lift your hips. Keep your arms alongside your body and gently roll your shoulders underneath. Hold for a few breaths before lowering down with control. This pose supports spinal strength and better posture, helping beginners feel comfortable with backbends.

    Helpful Tips for New Yoga Practitioners

    As a beginner, it is important to listen to your body and move at a pace that feels right. Focus on slow, steady breathing in every pose. Avoid forcing movements or comparing yourself to others. Using a non-slip mat and comfortable clothing can improve your experience. Practicing yoga for just ten to fifteen minutes daily can lead to noticeable improvements in flexibility, relaxation, and overall mood.

    Creating a Simple Yoga Sequence for Beginners

    You can practice these five poses in an easy sequence, starting with Mountain Pose and finishing with Child’s Pose. Hold each posture for five to ten breaths and transition slowly between poses. Over time, you may notice increased strength, flexibility, and calmness. As confidence grows, you can explore longer sessions or additional poses. Yoga is a personal journey, and by beginning with these simple yoga poses, beginners can develop a safe, steady, and rewarding practice.