Blog

  • After 70 It’s Not Walking or the Gym This Movement Pattern Improves Healthspan Most Effectively

    After 70 It’s Not Walking or the Gym This Movement Pattern Improves Healthspan Most Effectively

    A gentle thump, followed by a scrape, then quiet. I assumed someone had dropped something heavy. Ten minutes later, it happened again. Thud. Scrape. Pause. Curiosity took over. Upstairs, I found my neighbour Anne, 78, on her living room carpet, caught halfway between kneeling and standing, laughing as she steadied herself.

    “I’m practising getting off the floor,” she said, slightly breathless, cheeks flushed. “My physio says if I lose this, I lose everything.” She wasn’t speed-walking or lifting weights. She wore a wool jumper, moving carefully between floor and standing, like a child relearning balance — except with a pension card and a bus pass.

    That moment stayed with me. Because once you hear the idea that after 70, the movement that truly matters is getting down and back up again, the world looks different. And it raises an uneasy question: what if the real measure of healthspan isn’t steps or gym sessions, but whether we still feel safe trusting the floor?

    When fitness quietly changes meaning

    For most of life, fitness is judged by visible markers: pace, muscle tone, gym habits. After 70, those measures start to blur. I’ve met men who can hike miles yet hesitate stepping off a low curb. I’ve seen women who swim weekly panic at the thought of sitting cross-legged on the carpet with grandchildren.

    It’s rarely discussed openly, but everyone notices. The way Grandad grips furniture just to sit. The way Mum avoids low seating. The way an aunt jokes, “Don’t make me sit on the floor — I’ll never get up,” while fear slips through the laughter. It’s not only joints failing; it’s confidence slowly draining away.

    Somewhere around the seventh decade, fitness shifts from what you can push or endure to what you can recover from. A stumble on the pavement. A misjudged step in the kitchen. The gym still helps, walking still matters, but this is different. This is about getting yourself back to safety without needing rescuers.

    The invisible ability almost no one trains

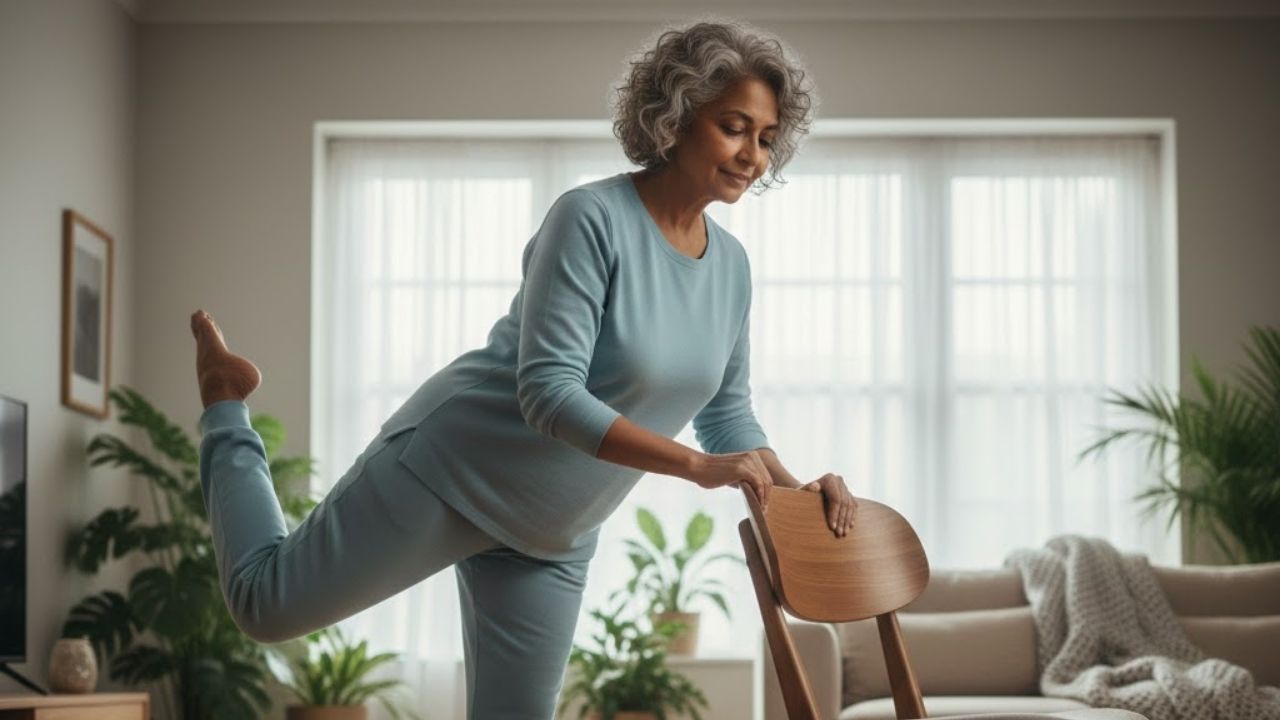
    We train strength, stamina, even balance. But few people deliberately practise what geriatric physiotherapists call floor confidence: lowering down, rolling, kneeling, pushing, and standing up in different ways. It sounds basic until you realise how many adults freeze at the idea.

    The harsh reality is that after 70, the greatest threat isn’t skipping workouts — it’s falling. Not the fall itself, but what follows. Can you roll, crawl, improvise, and push yourself up? Or do you lie still, cold seeping in, waiting to be found? That gap between falling and rising often separates independence from long-term care.

    We’ve all felt it while watching an older relative lower themselves to the floor, breath held, every movement tense. The rug suddenly feels dangerous. The room becomes a hazard. And beneath it all is a quiet thought: one day, this could be me.

    The simple pattern that predicts healthspan

    Some doctors quietly use what’s known as the sit-to-rise test. You start standing, sit on the floor, then stand back up using as little support as possible. It’s imperfect, but in seconds it reveals how balance, strength, coordination, and confidence are ageing together.

    In Brazil, researchers followed thousands of people using this test and found a striking pattern: those who struggled most tended to die earlier in the years that followed. Not because the test was magical, but because it reflected real life. If standing up from the floor is a battle, recovering after a bathroom slip will be too.

    This movement matters because it isn’t one action — it’s a chain. Ankles flex, hips hinge, knees bend, the spine rotates, hands search for support, and the brain rapidly maps escape routes. The entire system is being asked, can we still organise ourselves under pressure?

    Unglamorous, but deeply valuable

    No one posts videos of “floor practice day.” A long walk looks wholesome. A gym selfie looks impressive. A 76-year-old rolling carefully on a mat just looks ordinary. Yet ordinary is what keeps people living independently.

    I once shadowed a community physiotherapist on home visits. She met a man in his early 80s, a former PE teacher, who apologised for not being “fit” anymore. He proudly recalled squash tournaments — until she asked him to lie on the carpet and stand back up. His hands shook. His expression changed. He remembered falling in his garden and waiting hours to be found.

    He could still walk into town and climb stairs. But that single pattern — down and back up — had disappeared. With it went a huge part of his sense of safety. That loss often goes unnoticed until it’s too late.

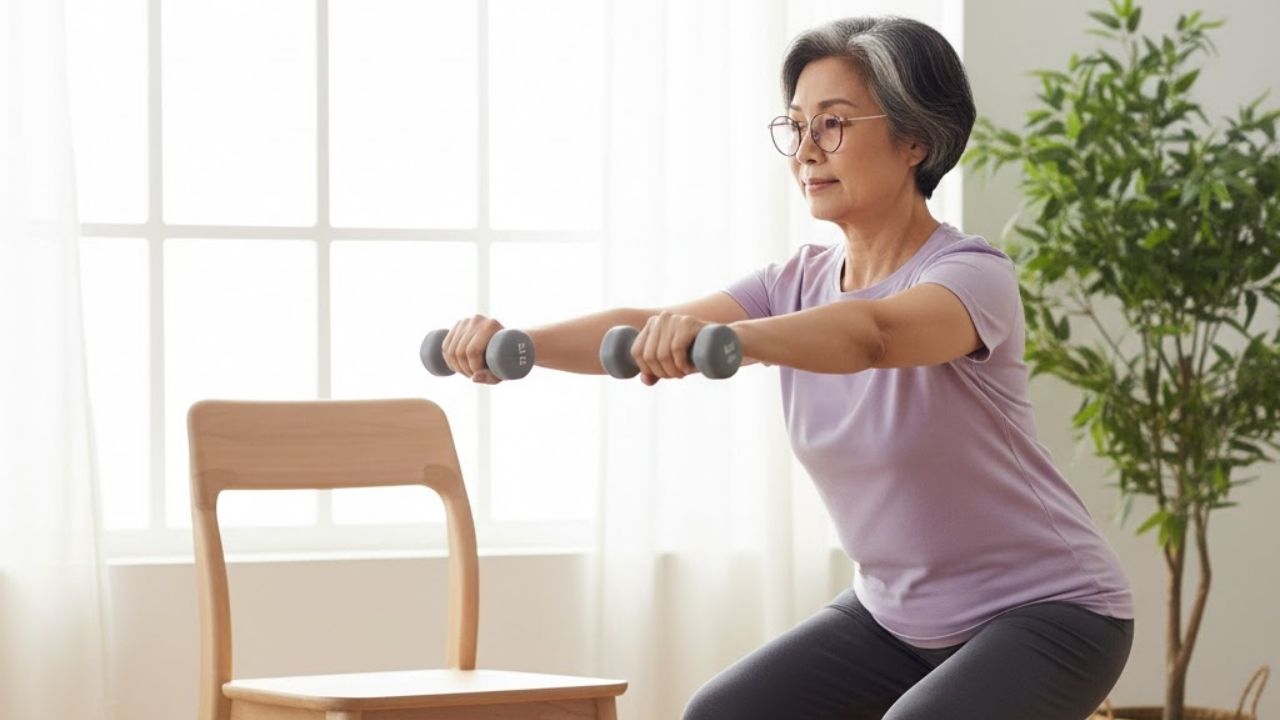
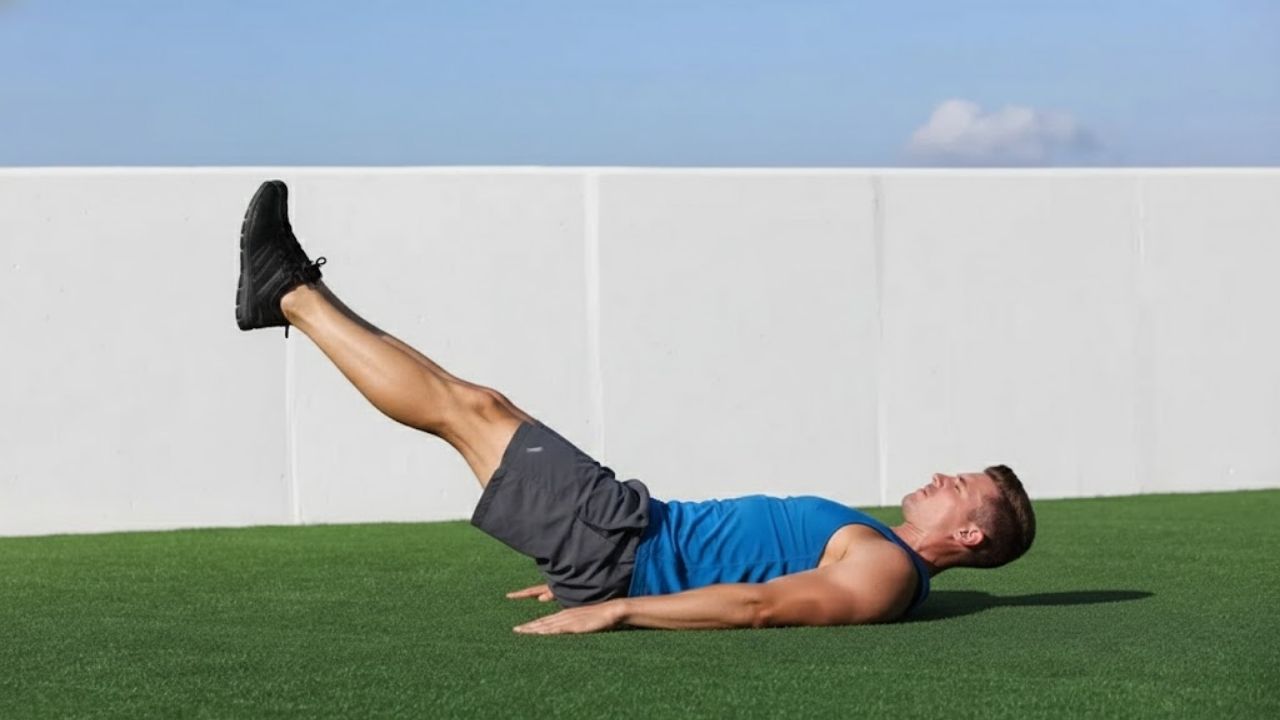
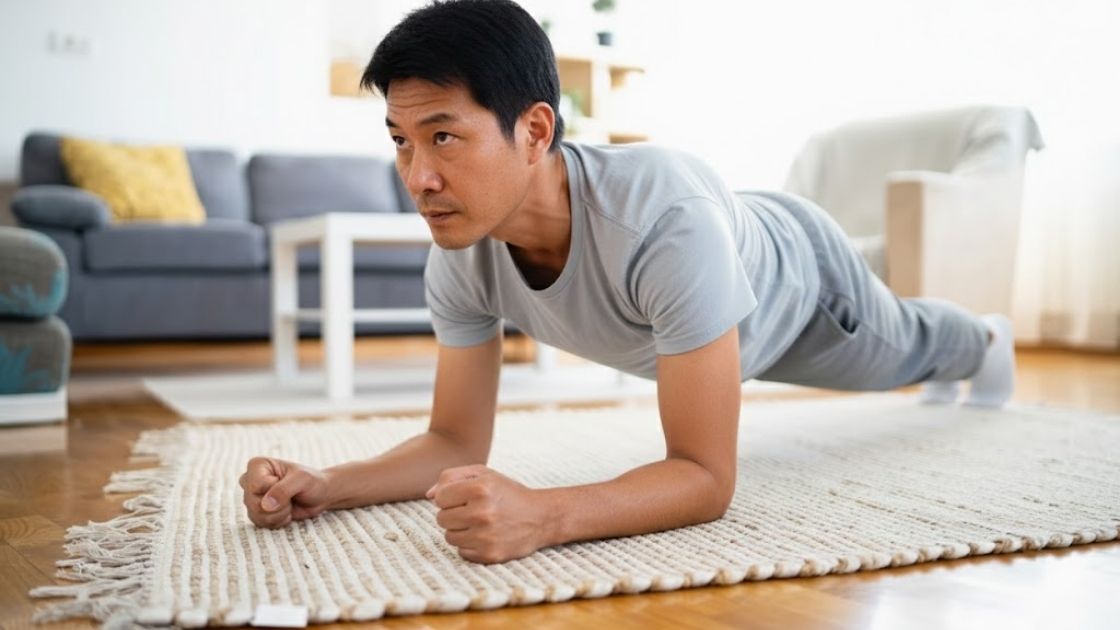
    Why walking and the gym aren’t enough after 70

    Walking is excellent. The gym can be too. But both share a blind spot: they’re upright, predictable, and controlled. Life isn’t. Later life especially brings wet tiles, uneven soil, dim lighting, and unexpected obstacles.

    Many exercise classes for older adults avoid the floor entirely. Trainers worry people won’t get back up. Participants fear getting stuck. Slowly, the floor becomes forbidden territory.

    The irony is painful. By avoiding the floor to stay safe, we ensure that when it inevitably arrives, the body has no idea how to respond. Muscles that haven’t knelt in years don’t suddenly cooperate during a fall.

    The overlooked movements that protect independence

    After 70, the movements that protect healthspan are subtle. Rotating without fear. Lowering smoothly. Moving from lying to rolling to kneeling to standing without panic flooding the system.

    These patterns won’t sculpt calves or spike heart rate. They offer something quieter and more powerful: options. If you trip, you can soften the fall. If you land on the floor, your body recognises the situation and finds a way back up.

    There’s a quiet dignity in knowing your body still works with you, even when gravity intervenes.

    How floor confidence reshapes everyday life

    Think of floor confidence as learning a second movement language. Standing and walking is one. Being on the floor is another. Children are fluent in both. Adults often forget the second — until ageing makes it essential.

    I’ve seen the change when people relearn it. A 72-year-old woman in a small class practised sitting on a mat and standing with chair support. Afterward, she trembled — not from effort, but emotion. “I thought I’d never do that again,” she said. That single skill reopened everyday moments: playing with her granddaughter, reaching under the bed, cleaning low shelves.

    This doesn’t require youth or intensity. It requires patience, support, and acceptance of clumsiness. The rewards are practical and profound: safer showers, easier toilets, less fear of falling, and the relief of managing daily life independently.

    The confidence no one can fake

    People with floor confidence move differently at home. Their steps are looser. Their hips stay mobile. There’s an unspoken backup plan. If something unexpected happens, panic doesn’t take over.

    Family members notice too. One woman told me she stopped pushing her father to move house after watching him calmly lower himself to fix a cable, then stand back up unaided. Nothing dramatic. Just quiet competence. That kind of confidence delays life-altering decisions.

    What this looks like in real life

    No one follows a perfect daily routine. What works is consistency in small moments. Two minutes while the kettle boils. A few repetitions during TV ads. Tiny habits layered into the day.

    You might practise standing from a chair without using your hands. Another time, lower one knee onto a cushion, then the other, using furniture for balance. Another day, roll from your back to sitting, then kneeling, then standing with support.

    You’re not chasing elegance. You’re reminding your body: we still know this. Some days will feel awkward. Others surprisingly easy. The victory is continuing to practise the one skill no one else can do for you.

    Fear, pain, and giving yourself permission

    Older bodies carry history — surgeries, arthritis, past falls. Fear of the floor is often rational. That’s why learning safely matters more than bravery. Physiotherapists would much rather guide you at home than see you injured later.

    Pain changes the pattern, but doesn’t remove it. Higher surfaces, extra cushions, modified movements still teach the same skill. The pattern adapts to the person, not the other way around.

    And if you’re far from 70, this still applies. Practising now is an investment. Every easy stand from the floor today is a deposit for a future moment when your body will need it.

    Learning to trust the floor again

    Anne jokes now that she’s “still negotiating with the carpet.” I’ve watched her progress from shaky, two-handed pushes to steadier stands. She complains constantly — but also says she feels less fragile in her own home. That’s a powerful outcome, even if it never appears on a poster.

    We talk about lifespan and healthspan, but rarely describe what healthspan looks like on a quiet weekday when glasses slide under the sofa. After 70, it’s the difference between retrieving them yourself or waiting for help. One chips away at independence. The other protects it.

    Walking and the gym still matter. They keep the engine running. But the movement that truly upgrades healthspan is humbler: your relationship with the floor. Your ability to go down, adapt, and rise again — under your own control, on your own terms.

  • This Is the One Exercise Everyone Over 65 Should Prioritise According to a Certified Trainer

    This Is the One Exercise Everyone Over 65 Should Prioritise According to a Certified Trainer

    I’ve spent 15 years as a certified personal trainer, working closely with many older adults. One of the very first movements I introduce to clients aged 65 and above is the chair squat.

    This simple exercise helps build strength in the legs, hips, and core, while also supporting better balance and coordination. It’s easy to adjust, making it suitable for beginners and adaptable as strength improves.

    Who Can Do Chair Squats?

    If you have a chair nearby, you can perform chair squats too. They are safe and effective for beginners of all ages, not just seniors.

    Before starting any new exercise routine, it’s important to check with your healthcare provider, especially if you have existing medical conditions.

    What You’ll Need

    You won’t need any special equipment beyond a sturdy chair. Depending on your mobility or injury history, you may also benefit from a clear wall or a second chair for added stability.

    Recommended Reps and Progression

    If you’re new to chair squats, start with 1 set of 5 repetitions. As your strength improves, gradually increase to 12 reps per set. From there, build up slowly until you can comfortably complete 3 sets of 10–12 reps.

    How to Perform a Chair Squat

    • Stand with your feet hip-width apart, positioning a chair directly behind you.
    • Lift your arms forward until they reach shoulder height.
    • Push your hips back and bend your knees, slowly lowering yourself toward the chair.
    • Lightly tap your hips on the seat, then press through your feet to return to standing.
    • Repeat for your chosen number of repetitions.

    Trainer Tips for Better Form

    • Initiate the movement from your hips, not your knees.
    • Imagine pushing your hips back as if you’re closing a car door behind you.
    • If you’re just starting out, feel free to sit fully on the chair before standing again.
    • Use a wall or a second chair in front of you for extra balance support if needed.
    • Once the movement feels easy, increase difficulty by holding a dumbbell, using a lower chair, or removing the chair altogether.

    Benefits of Chair Squats

    Like traditional bodyweight squats, chair squats strengthen key lower-body muscles such as the quadriceps, hamstrings, glutes, and hip muscles. The chair limits range of motion and acts as a safety guide, reducing the risk of poor form or injury.

    This movement also supports everyday functional strength, making daily tasks like standing up from a couch, getting out of a car, or rising from the toilet much easier.

    In addition, chair squats can help enhance balance, bone density, and overall confidence, making them an accessible and effective form of resistance training for nearly all ability levels.

  • This Optical Illusion Tests Your Vision as You Search for the Inverted 500 in 7 Seconds

    This Optical Illusion Tests Your Vision as You Search for the Inverted 500 in 7 Seconds

    From time to time, a visual brain teaser captures the internet’s attention, surprising people with how easily their eyes overlook something obvious. The newest challenge poses a deceptively simple task: find the inverted “500” hidden among dozens of perfectly upright ones—all within seven seconds. It sounds effortless, until your eyes actually meet the image.

    At first glance, the picture shows neat rows of blue “500”s set against a gentle background. Each number appears identical, blending into a uniform pattern. Yet hidden somewhere in this orderly grid is one upside-down “500”. Although its rotation noticeably changes its shape, your brain instinctively assumes sameness, turning a basic search into a true test of perception and speed.

    Why This Inverted “500” Challenge Feels Surprisingly Difficult

    The difficulty stems from a mental shortcut known as perceptual grouping. The human brain is designed to process information efficiently by clustering similar elements together. When faced with repeated numbers, your visual system stops inspecting each one individually and assumes they are all the same.

    While this habit is useful in everyday life, it works against you in puzzles like this. When flipped, the digits in “500” lose their familiar balance. The “5” takes on an awkward reversed curve, and the zeros subtly shift alignment. However, because every number shares the same color, size, and font, your attention must rely purely on orientation—one of the hardest differences to detect quickly.

    The seven-second limit intensifies the challenge. Under pressure, your eyes jump rapidly across the image. These fast movements, known as saccades, actually reduce accuracy, as the brain lacks enough time to stabilize and properly analyze each shape.

    The Science That Makes This Illusion Work

    This puzzle offers a clear window into how human vision and attention truly function. Studies in neuroscience show that identifying rotated objects requires more complex processing than recognizing basic shapes.

    Early visual regions of the brain automatically register simple features like lines, curves, and color contrast. However, deciding whether something is upright or inverted engages higher-level areas responsible for spatial awareness and feature integration.

    This challenge aligns with Feature Integration Theory, which explains why some differences instantly stand out while others do not. Obvious traits like color changes are detected immediately. In contrast, differences involving a combination of shape and rotation require focused, step-by-step attention.

    As a result, the inverted “500” does not visually “pop out.” Instead, your brain must conduct a deliberate scan, searching for numbers that feel subtly wrong. This focused effort activates regions that control intentional eye movement and attention.

    Smart Techniques to Spot the Inverted “500” Faster

    Succeeding within seven seconds is less about eyesight and more about strategy. Random scanning wastes time. A structured approach improves accuracy and speed:

    • Break the image into sections. Mentally divide the grid into rows or quadrants to reduce overwhelm.
    • Scan in order. Move left to right, like reading text, instead of jumping around.
    • Focus on the “5.” The inverted version shows an unusual backward curve that subtly disrupts the pattern.
    • Use slight defocus. Softening your gaze can cause uniform numbers to blend, making the odd one feel out of rhythm.
    • Stay relaxed. Calm focus keeps your visual field wide, improving anomaly detection.

    When approached patiently, many people notice the inverted number near the lower-right area of the grid. Once spotted, it suddenly seems obvious, highlighting how strongly expectation influences perception.

    What Your Performance Says About Your Perception

    Finding the inverted “500” quickly suggests strong selective attention and efficient visual discrimination. These abilities are linked to fast pattern recognition and solid visual working memory—skills valued in fields that require spotting irregularities within complex visuals.

    Research also shows that such puzzles activate top-down cognitive control, allowing the brain to override automatic assumptions. Regular exposure to challenges like this can enhance cognitive flexibility and support long-term visual processing strength.

    On the other hand, struggling with the puzzle does not signal weak eyesight or intelligence. Some individuals naturally process visuals globally, focusing on overall structure rather than fine details. This approach often supports creative thinking and strategic reasoning.

    Why Optical Illusions Matter Beyond Entertainment

    Optical illusions are more than simple distractions. They demonstrate how perception and cognition interact, proving that vision is an active interpretation, not a passive recording of reality.

    In recent years, these challenges have regained popularity as quick mental exercises. They offer short bursts of engagement while sharpening focus, patience, and pattern recognition—skills increasingly valuable in a world full of visual noise.

    Ultimately, the inverted “500” challenge reminds us that seeing is as much about questioning assumptions as it is about looking. A familiar pattern can hide unexpected truths, and with just a few seconds of mindful attention, your brain may uncover far more than you expect.

    So the next time a grid of identical “500”s appears on your screen, pause before scrolling past. You may be surprised by what seven seconds of focused observation can reveal.

  • Only Sharp Eyes Can Find the Inverted 15 Hidden Among Inverted 18s in Just 7 Seconds

    Only Sharp Eyes Can Find the Inverted 15 Hidden Among Inverted 18s in Just 7 Seconds

    Optical illusion IQ challenges have become a favorite way to test the brain online. They appear simple and entertaining, yet they often leave people doubting their observation skills. This challenge raises the difficulty by turning the numbers upside down. Your goal is to identify one inverted 15 hidden among multiple inverted 18s, all within seven seconds. At first glance, every number looks identical, which is exactly what makes this illusion so effective.

    This task goes beyond eyesight. It examines focus, attention, and mental processing when familiar patterns are distorted. Below, we break down why this illusion works, how the brain responds, and what spotting the inverted 15 reveals about perception.

    Why Inverted Number Illusions Confuse the Brain

    The brain depends heavily on pattern recognition. When it encounters repeating shapes, it quickly categorizes them as the same to conserve effort. While this shortcut is helpful in daily life, it becomes a weakness in optical illusion challenges.

    In this puzzle, all numbers are inverted, adding an extra layer of difficulty. Once the brain adjusts to the repeated inverted 18s, it stops examining each digit carefully. The inverted 15 blends into the grid because the brain assumes everything follows the same pattern.

    How the Seven-Second Limit Impacts Visual Thinking

    Seven seconds may sound manageable, but once a timer starts, it passes quickly. Under time pressure, the brain shifts from careful inspection to rapid visual scanning.

    Instead of analyzing each number, the eyes move quickly across the image, expecting the difference to stand out. Because the visual difference between an inverted 15 and an inverted 18 is subtle, nothing immediately draws attention. The time limit pushes the brain to rely on assumptions instead of deliberate observation.

    Why the Inverted 15 Is So Difficult to Detect

    This illusion works because the digits share similar shapes when flipped. The number 8 has two loops, while the number 5 lacks the lower loop. Under pressure, the brain often notices the overall shape rather than checking for missing details.

    The brain also processes numbers as complete units instead of separate digits. Once it identifies the pattern as inverted 18, it automatically fills in the rest. This automatic completion allows the inverted 15 to remain hidden in plain sight.

    How the Brain Handles Repetitive Visual Patterns

    Visual perception operates in layers. Early processing detects basic lines and curves, while higher levels handle recognition and meaning. When a pattern repeats, the brain minimizes effort by grouping elements together.

    In a grid filled with nearly identical inverted numbers, identifying the odd one requires serial attention, checking items one by one. This process is slower and more mentally demanding, especially when attention is divided by a countdown.

    Best Strategies for Solving This Optical Illusion

    Random scanning is rarely effective. A structured approach improves success. Mentally divide the image into rows or columns and scan methodically, similar to reading text.

    Another helpful technique is to focus on a specific visual feature instead of the entire number. In this case, look for the missing lower loop rather than reading the digits. This approach helps bypass the brain’s pattern shortcut.

    Remaining calm is also important. Stress narrows attention and increases the likelihood of missing subtle differences.

    Exact Placement of the Inverted 15

    According to the solution, the inverted 15 is located near the right side of the image. This positioning is intentional. Many people begin scanning from the left and gradually lose focus as they move across the grid.

    By placing the anomaly slightly off-center, the puzzle takes advantage of common scanning habits, increasing the chances it will be overlooked within the seven-second limit.

    What Finding the Inverted 15 Reveals About Your Mind

    Spotting the inverted 15 quickly indicates strong attention to detail and the ability to stay focused under pressure. These skills are valuable in areas that demand precision, such as analysis, design, technical work, and problem solving.

    It also reflects cognitive flexibility, the ability to override automatic assumptions and reassess visual information. This mental control supports effective decision making.

    Failing to spot the answer does not suggest low intelligence. It simply shows that the brain favored efficiency over precision, which is completely normal.

    Do Optical Illusion IQ Tests Strengthen Mental Sharpness?

    Regular exposure to visual challenges can help improve observation skills and attention control. Over time, the brain becomes better at slowing down and questioning familiar patterns.

    Although these puzzles are not scientific IQ measures, studies on cognitive engagement suggest that activities involving focused attention and visual discrimination support ongoing mental agility.

    Why These Optical Illusions Go Viral Online

    Their appeal lies in instant engagement. The rules are simple, the goal is clear, and the time commitment is minimal. Anyone can participate, but not everyone succeeds, which fuels curiosity and friendly competition.

    People enjoy sharing results, challenging friends, and testing themselves repeatedly. This social interaction keeps optical illusion IQ tests popular across platforms.

    Ways to Get Better at Visual Brain Challenges

    Consistent practice makes a clear difference. Solving a variety of number and pattern puzzles regularly helps sharpen both speed and accuracy.

    Gradually shortening time limits can further train focus. Proper sleep, reduced screen fatigue, and sustained attention also matter. A well-rested brain is far more effective at detecting subtle visual differences.

    Finding the inverted 15 among inverted 18s in seven seconds may seem simple, but it highlights how perception is shaped by habit, pressure, and expectation. Whether you spotted it instantly or needed the solution, the challenge serves as a reminder that true observation requires more than just looking.

  • I Didn’t Realise My Core Was Weak Until Pilates Flutter Kicks Exposed Everything Quickly

    I Didn’t Realise My Core Was Weak Until Pilates Flutter Kicks Exposed Everything Quickly

    I never thought Pilates would be my thing. Yet over time, weekly classes helped me fall in love with building strength, improving mobility, and refining how my body moves. Alongside CrossFit, yoga, and my work as a personal trainer, I’ve developed what I consider a solid core.

    While I don’t have visible six-pack abs, a strong midsection does far more than create definition. It supports posture, improves spinal stability, and helps with injury prevention, allowing you to move safely and efficiently at any age. That’s something well supported by existing research.

    One exercise that regularly appears in Pilates caught my attention recently: flutter kicks. It’s a move I’ve used with clients for years and one that features across many core workouts. Curious about its impact, I committed to doing flutter kicks every day for a week to see what would change — and what wouldn’t.

    Understanding Flutter Kicks

    The flutter kicks exercise is performed by lying on your back, lifting your shoulders slightly off the floor, and hovering your legs just above the ground while alternating them up and down. Although commonly used in both mat and reformer Pilates, this movement is more modern and not part of the original Joseph Pilates sequences.

    Despite the leg motion, the exercise should be driven by your core. Momentum should never take over, even though the movement can look fast. You may also hear flutter kicks referred to as scissor kicks, but the goal remains the same: controlled movement powered by your midsection.

    How to Perform Flutter Kicks Correctly

    • Lie flat on your back with your legs extended.
    • Place your hands by your sides or slide them under your upper glutes for lower-back support.
    • Draw your belly in toward your spine and gently tilt your pelvis.
    • Lift your legs to hover above the mat, point your toes, and raise your shoulders slightly while engaging your core.
    • Alternate your legs in a controlled fluttering motion.
    • Bend your knees softly if the movement strains your hips or lower back.

    Focus on control and rhythm rather than speed. If lifting your upper body feels too demanding, keep your head and neck supported on the mat. Avoid arching your lower back, as this shifts work away from your core and increases strain on the lumbar spine.

    Doing Flutter Kicks Daily for a Week: What I Noticed

    Flutter kicks maintain constant tension through the core, encouraging deeper muscle activation and building endurance in the hips and torso over time. After practicing them daily for a week, the experience highlighted an important distinction between ab muscles and the core.

    The abs, or rectus abdominis, are just one part of a wider system that includes the obliques, transverse abdominis, erector spinae, multifidus, pelvic floor, diaphragm, hip flexors, and glute muscles. Training the entire core rather than focusing solely on abs supports functional strength, posture, and pain reduction.

    My Core Endurance Was Tested

    Despite considering myself strong, flutter kicks proved challenging. Keeping both legs and shoulders elevated demands continuous core engagement, increasing time under tension. While CrossFit helped build power and maximal strength, Pilates revealed gaps in my endurance.

    Lifting heavy weights didn’t translate to sustaining 10 rounds of 45 seconds of flutter kicks with short rest periods. The controlled nature of the movement exposed how different training styles develop different physical qualities.

    The Movement Required Full Focus

    Executing flutter kicks correctly involved managing multiple elements at once. I had to keep my shoulder blades lifted, maintain abdominal compression, and prevent my lower back from arching. At the same time, my legs needed controlled movement while my hips stayed stable.

    Midway through, I realized I was holding my breath. Proper breathing is essential for core engagement, especially since the diaphragm is part of the core system. Shallow breathing and poor posture are closely linked, making breath control a key part of the exercise.

    My Back Benefited From the Change

    Unlike sit-ups, crunches, or Russian twists, flutter kicks keep your back supported against the floor, avoiding repeated spinal flexion and extension. While this doesn’t automatically make the exercise suitable for everyone with back pain, my spine certainly appreciated the difference.

    Including anti-flexion, anti-extension, and anti-rotation movements helps train stability and tension control. Flutter kicks offered a refreshing alternative, and I didn’t miss traditional sit-ups once they were out of my routine.

  • Exercise Alone Won’t Build Muscle or Burn Fat These 3 Nutrition Lessons Changed My Results

    Exercise Alone Won’t Build Muscle or Burn Fat These 3 Nutrition Lessons Changed My Results

    A few years back, I took part in a structured 10-week body transformation guided by an experienced professional. The sessions were demanding, the learning curve was sharp, and the results—at least to me—were genuinely impressive.

    In just over 70 days, I managed to gain 7kg of lean muscle, only to lose it again within a few short weeks. That experience taught me not only what works for my body, but also what doesn’t—and how difficult it is to create lasting physical change.

    More than anything, it highlighted a crucial truth: the effectiveness of any workout plan is largely determined by what happens in the kitchen. With that in mind, here are three nutrition principles I believe will best support your fitness goals in 2026.

    1. Identify Your Daily Calorie Baseline

    Whether you’re beginning a new Pilates routine or training for a parkrun, increasing your activity level will naturally raise your nutritional requirements. Understanding how many calories you typically consume is essential to deciding whether your intake needs to go up or down.

    As a general guideline, a calorie surplus is necessary if your main objective is muscle gain. On the other hand, weight loss requires a calorie deficit.

    When I first started focusing on muscle growth, I realised I was consuming barely 2,500 calories per day. To support daily hour-long gym sessions and build muscle, I had to double my intake.

    2. Track Calories Without Letting Them Take Over

    Monitoring calories can be an effective way to stay aligned with your long-term fitness goals, particularly if you’re aiming to significantly change your body composition.

    However, it’s easy to become overly focused on numbers if you track everything continuously.

    My preferred method is to log calories once on a typical workday and once on a typical rest day, such as a weekend. This approach provides a clear picture of how intake varies across the week.

    Revisit this process at regular intervals—weekly or monthly—and adjust as needed, especially if your training intensity increases or decreases.

    3. Build Habits That Are Realistically Sustainable

    One of the biggest missteps I made during my transformation was trying to completely overhaul my diet and training within just ten weeks.

    This meant forcing in workouts and calories at an unsustainable pace, filling my days with late-night training sessions, heavy dinners, and unappealing midnight meals.

    If I were to start again, I’d move more gradually, giving both my body and daily routine time to adapt.

    If your goal is muscle gain or weight loss, aim to adjust your daily calorie intake by no more than 5–10% initially. This makes the process feel far more manageable.

    If progress slows, you can make another small 5–10% adjustment. Allow your body time to respond, and approach change with patience rather than urgency.

  • Hot Pilates: What to Wear for Comfort Support and Performance When the Studio Heat Rises

    Hot Pilates: What to Wear for Comfort Support and Performance When the Studio Heat Rises

    Much like many of today’s breakout fitness movements, hot pilates owes its rapid rise to TikTok. While practising yoga in heated studios has long been part of the wellness mainstream, it is only within the past few years that heated pilates has firmly established itself across the UK fitness scene.

    Purpose-built studios are now emerging nationwide, from Yours to Good Good Studio, while premium gym brands have broadened their class timetables to include this high-heat, low-impact workout. Names such as Third Space and Heartcore have embraced the trend, bringing infrared pilates into their regular programming.

    Pilates is widely recognised as a low-impact discipline that strengthens the core, enhances flexibility and tones the body. Introducing heat intensifies these benefits, as warmer muscles feel looser, more responsive and deeply engaged, while also helping to reduce injury risk. The elevated temperature additionally supports improved circulation throughout the session.

    With studios typically heated to 35°C to 40°C, mat-based classes quickly become demanding, making carefully chosen, sweat-ready clothing essential. Selecting heat-appropriate activewear can make all the difference inside an infrared room. “You want pieces that are lightweight, breathable and able to handle heat and sweat while still allowing you to move freely,” says Georgia Christie, head of operations at hot sculpt studio Yours.

    Christie recommends focusing on seamless, sweat-wicking fabrics, explaining that they stretch comfortably, allow airflow and dry quickly, making them ideal for infrared workouts where the intensity builds fast. She favours the Adanola collection, particularly the Impact Seamless set. “The fabric is soft, stretchy and supportive without feeling heavy, which is perfect for high-sweat sessions,” she notes. Christie also highlights their durability, an important factor when garments require frequent washing. She adds that the coffee bean shade is both on-trend and universally flattering, while its deeper tone helps conceal sweat, allowing you to move with confidence as the heat rises.

    Drawing on expert advice and personal experience in the infrared studio — now a weekly New Year’s commitment — this guide outlines exactly what to wear to hot pilates. Expect practical, performance-led pieces designed to keep you composed through roll-ups, roll-overs and hundreds in heatwave-level conditions.

    What To Wear For Hot Pilates: A Vogue-Inspired Guide

    Supportive Sports Bra

    Although pilates is traditionally low impact, the heat can make the class feel far more intense. For this reason, opting for a medium-support sports bra is recommended. Christie advises choosing a style that provides stability “while still allowing freedom through the upper body,” ensuring comfort during flowing movements and sustained holds.

    Breathable Shorts

    “For infrared workouts, I recommend shorts over leggings,” says Christie. Leggings can retain excess heat, whereas shorts help regulate body temperature and allow greater freedom, particularly during dynamic and standing sequences. If you are heading out into colder conditions post-class, she suggests layering with the On Studio Flared Tights, praising their flattering fit, comfort and lifestyle-friendly design that transitions seamlessly beyond the studio.

    Lightweight Pilates Top

    Some participants choose to skip a top altogether to minimise layers in the heat. However, for those who prefer added coverage, Christie recommends a lightweight, breathable top. She notes that keeping the underarm area exposed is key, as it allows the body to regulate heat more effectively during intense sections of the class.

    Essential Grip Socks

    Most studios require the use of grip socks for safety and hygiene reasons. While some may prefer practising barefoot, these specialised socks enhance stability on the mat and help prevent slipping, especially once perspiration builds, ensuring consistent control throughout the session.

  • 9 Often Ignored Exercises Every Runner Needs for Speed Strength and Long Term Injury Resistance

    9 Often Ignored Exercises Every Runner Needs for Speed Strength and Long Term Injury Resistance

    Many runners accept—sometimes reluctantly—that strength training is an essential part of a complete training plan. According to running coach Britany Williams, this applies regardless of your pace, fitness level, or experience. Strength work plays a key role in reducing the risk of muscle imbalances and injuries.

    As Williams explains, building and maintaining muscle helps improve running mechanics while supporting long-term mobility and health. However, adding weights to an already busy running schedule can feel daunting, especially when it’s unclear which exercises are most effective. While staples like squats and lunges are well known, the often-overlooked movements below deserve a place in your routine.

    1. Bent-Knee Calf Raise with Forward Lean

    This exercise targets the soleus muscle, a key calf muscle responsible for forward propulsion during running. Physiotherapist and running coach Anh Bui notes that most calf strains in distance runners affect the soleus rather than the larger gastrocnemius.

    How to do it: Stand facing a wall with your hands at shoulder height and arms straight. Walk your feet back so your body leans forward from the ankles, keeping your spine neutral. Lift one leg and bend the standing knee to about 90 degrees. Staying in this bent-knee position, rise onto your toes, pause, then lower back down. Complete two to three sets of eight to 12 reps per side.

    When to do it: Best performed before a run or immediately after finishing.

    2. Weighted Plank Pull-Through

    This variation of the plank builds deep core strength through anti-rotational movement. By resisting torso rotation, the exercise activates the obliques and stabilising core muscles, making it more challenging than a standard plank.

    How to do it: Begin in a plank with a dumbbell or kettlebell placed beside your torso. With your body in a straight line, use one hand to drag the weight across to the opposite side, then return your hand to the floor. Alternate sides. Perform two to three sets of six to 10 reps per side.

    When to do it: Ideal within a full strength session or as a core finisher after an easy run.

    3. Step-Down Exercise

    The step-down is an effective single-leg movement that closely mirrors the running stride. Personal trainer Emily Abarquez explains that this exercise improves unilateral strength more efficiently than traditional lunges or split squats.

    How to do it: Stand on a bench on one foot, with the opposite leg haanging off. Slowly bend the standing knee to lower yourself down, keeping the shin vertical. Lower until your hips align with your knee, then press through your heel to stand back up. Complete two to three sets of eight to 15 reps per leg.

    When to do it: Best scheduled on non-running days, ideally before a full rest day.

    4. Hip Thrust

    A progression from the glute bridge, the hip thrust strengthens the glutes, the largest muscles in the lower body. Strong glutes help runners generate speed and power while placing less stress on the knees than squats or lunges.

    How to do it: Sit with your upper back against a bench and feet flat on the floor. Place dumbbells on your hips if adding resistance. Drive through your heels to lift your hips until your body forms a straight line from knees to chest. Lower slowly. Perform three to four sets of 10 to 12 reps.

    When to do it: Include once or twice weekly as part of a dedicated strength workout.

    5. Lateral Step-Up with Overhead Press

    This total-body movement improves strength, coordination, and balance. Running coach Andres Padilla recommends starting with a lower platform and gradually progressing to higher steps.

    How to do it: Stand sideways next to a step, holding a dumbbell at shoulder height. Step onto the platform laterally and press the weight overhead while raising the opposite knee. Lower with control. Perform three sets of 15 to 20 reps on each side.

    When to do it: Add to regular strength sessions two to three times per week.

    6. Lateral Band Walk

    Lateral band walks strengthen the glutes and hips, areas critical for injury prevention in runners. This exercise addresses lateral stability, which is often neglected in forward-focused training.

    How to do it: Place a resistance band around your ankles and stand with feet hip-width apart. Take five to seven steps to one side, then return in the opposite direction. Repeat the sequence five times for two to three rounds.

    When to do it: Suitable for light training days or casual sessions at home, but avoid the night before intense workouts or long runs.

    7. Hamstring Curl with Sliders

    This movement strengthens the hamstrings, glutes, and core using body weight as resistance, making it both accessible and effective.

    How to do it: Lie on your back with your heels on sliders or a smooth surface. Lift your hips slightly and draw your heels toward your glutes, raising your hips higher as you curl. Extend your legs back out with control. Perform two sets of 10 reps.

    When to do it: Can be trained frequently and works well on harder running days, alternating with single-leg variations.

    8. Inchworm Plank

    The inchworm plank strengthens the core and glutes while stretching the posterior chain. A stable upper body supports balance and efficient form, especially at faster running speeds.

    How to do it: Stand with feet hip-width apart, hinge forward to place hands on the floor, and walk them out into a plank. Pause, then walk your hands back and stand up. Complete five to 10 reps or continue for 30 to 60 seconds.

    When to do it: Ideal as part of an active warm-up before strength or high-intensity sessions.

    9. Banded Side Plank Clamshell

    This compound exercise targets the glutes, abs, obliques, and hip flexors, helping address strength imbalances and improve hip stability for runners.

    How to do it: With a resistance band above your knees, lie on your side in a side plank position. Lift your hips, then open and close your top knee while keeping your hips elevated. Perform two sets of 10 reps per side.

    When to do it: Effective as a pre-run warm-up, prehab exercise on easy days, or a focused core and glute workout on harder training days.

  • This Standing Abs Workout Strengthens Your Core Completely Before the Kettle Finishes Boiling

    This Standing Abs Workout Strengthens Your Core Completely Before the Kettle Finishes Boiling

    This standing abs workout is designed for busy people in the United States who want a stronger core without dropping to the floor or carving out extra time. The idea is simple: while your kettle heats up, you move through a short, focused sequence that fires up your entire midsection. Standing movements feel more natural, are easier on the back, and still deliver results. In just a few minutes, you can activate key muscles, improve balance, and set a healthy tone for the rest of your day.

    Why a Standing Abs Workout Saves Time and Still Builds Core Strength

    A standing abs workout works because it recruits multiple muscle groups at once, rather than isolating one area. When you twist, lift, and stabilize upright, your body has to engage the core to stay balanced. This approach supports functional core strength, making everyday movements easier and safer. It also improves posture awareness daily, since you’re training your abs in the same position you stand and walk. Many people enjoy the low impact approach, especially if floor exercises feel uncomfortable. Best of all, it fits into short daily routines and encourages consistent movement habits without feeling like a full workout commitment.

    How This Standing Core Routine Activates Your Abs Fast

    The secret behind this routine is continuous tension and controlled motion. Instead of rushing through reps, you focus on slow, deliberate movements that keep your abs switched on. Exercises like standing knee lifts, cross-body punches, and torso rotations create constant muscle engagement from start to finish. Because you’re upright, your body demands natural balance control, which pulls in deep core muscles often missed on the mat. Many people notice quick muscle activation within seconds, paired with improved mind body focus. Over time, this leads to better core coordination and a stronger, more responsive midsection.

    Who Should Try This Standing Abs Workout at Home

    This workout suits almost anyone, from beginners to experienced exercisers. If you’re short on time, it’s ideal for busy morning schedules or quick breaks during the day. People easing back into fitness appreciate the joint friendly movements, since there’s no pressure on wrists or the lower back. It’s also great for those who prefer no equipment needed routines they can do anywhere. Even seasoned athletes use it for active core warmups or quick resets. With consistency, many report noticeable core endurance without long gym sessions.

    Final Thoughts on a Fast Standing Core Routine

    What makes this standing abs workout stand out is how realistic it feels for everyday life. You don’t need special gear, extra space, or a long block of time—just a few focused minutes. By turning idle moments into movement, you build healthy daily habits that support long-term fitness. The routine encourages upright body awareness, helping you carry strength into daily tasks. Over weeks, the payoff is stronger supportive muscles, better overall stability, and a sense of progress that feels achievable. Sometimes, the simplest workouts are the ones that actually stick.

    Exercise Type Main Focus Time Needed Skill Level
    Standing Knee Lifts Lower Abs 30 seconds Beginner
    Torso Twists Obliques 45 seconds Beginner
    Cross-Body Punches Full Core 30 seconds Intermediate
    Standing Crunch Holds Deep Core 20 seconds All Levels

    Frequently Asked Questions (FAQs)

    1. Can beginners do this standing abs workout?

    Yes, the movements are simple and can be done at a comfortable pace.

    2. How often should I try this routine?

    You can safely do it daily since it’s short and low impact.

    3. Will this replace longer core workouts?

    It complements longer sessions but works well for maintenance on busy days.

    4. Do I need any equipment?

    No equipment is required—just enough space to stand and move.

  • Challenge Your Brain: Spot 3 Differences in the Cat Driving a Scooty Image in 15 Seconds

    Challenge Your Brain: Spot 3 Differences in the Cat Driving a Scooty Image in 15 Seconds

    Visual challenges offer an enjoyable method to evaluate your observation abilities, and this particular puzzle includes a time limit to increase the difficulty. The optical illusion presents two images of a cat riding a scooter and your task is to identify three differences between them within just 15 seconds. When you first look at the pictures they appear nearly the same, but subtle changes are concealed throughout that might go unnoticed without careful attention.

    What Makes This Optical Illusion So Captivating?

    This puzzle immediately stands out thanks to its light-hearted concept. A cat riding a scooty draws instant attention and makes the challenge feel fun instead of intimidating. The cheerful illustration keeps viewers engaged, but that same sense of comfort can make people less alert.

    Optical illusions are most effective when the scene feels familiar or entertaining. When the brain feels relaxed, it assumes everything is normal, making it easier to overlook subtle changes. This challenge relies precisely on that reaction.

    How Spot-the-Difference Puzzles Fool the Mind

    The human brain naturally prefers mental shortcuts. When two images appear almost identical, the brain quickly decides they are the same and stops examining every small detail. While this habit saves energy in daily life, it often leads to errors in visual puzzles.

    In this challenge, the cat, the scooty, and most background elements remain unchanged. Because the main subject looks consistent, the brain skips over tiny variations, which is exactly where the differences are hidden.

    The Impact of the 15-Second Time Limit

    Introducing a 15-second countdown turns a simple comparison into a true focus test. Under pressure, people often rush and scan the image without a clear pattern. This hurried approach lowers accuracy and increases the chance of missing details.

    The timer forces players to balance speed and concentration. Those who succeed usually stay calm and scan the image methodically rather than jumping randomly between elements.

    Best Areas to Check First

    A smart strategy is to break the image into sections. Begin with the main subject, then examine the vehicle, and finally review the background. Differences are often placed in areas that people naturally ignore.

    In this puzzle, key changes appear on the cat itself, the scooty, and parts of the surrounding scene. Paying close attention to these areas improves the chances of spotting every difference.

    How Optical Illusions Sharpen Observation Skills

    Challenges like this are more than just entertainment. They help train the brain to notice fine details and resist automatic assumptions. Over time, visual puzzles can strengthen focus and visual memory.

    These abilities are useful in everyday situations. From detecting small changes around you to maintaining concentration at work or school, observation-based puzzles subtly enhance mental sharpness.

    Clear Breakdown of the Solution

    If finding all three differences within the time limit was difficult, here is a simple explanation. The first difference is on the cat’s face. In one image, the cat’s nose is black, while in the other, it turns pink. This slight color change is easy to miss when attention stays on the overall character.

    The second difference appears on the scooty. The headlight is yellow in the left image but changes to white in the right image. Because the headlight is not the main focal point, this detail is often overlooked.

    The third difference is found in the background. On the right side of the image, a bird sits on top of a lamp post in one picture but is missing in the other. This subtle change tests how carefully the entire scene is scanned.

    Why This Puzzle Is More Challenging Than It Seems

    Each difference blends naturally into the illustration. The color change, object detail, and background element all feel realistic and believable. Nothing appears obviously wrong, which makes the differences harder to detect.

    The playful artwork distracts the brain and encourages surface-level viewing. Only slow, intentional observation reveals what has been altered.

    Why Timed Visual Challenges Gain So Much Attention

    Timed puzzles are popular because they combine entertainment with competition. The countdown adds excitement and makes success feel more satisfying.

    These challenges are quick to complete and easy to share, making them ideal for online platforms. Many people enjoy testing themselves and comparing results with friends or family.

    Advantages of Solving Visual Puzzles Often

    Regular practice with visual challenges can improve focus, patience, and analytical thinking. The brain learns to slow down and observe instead of making quick assumptions.

    They also offer a healthy mental break. These puzzles engage the mind without requiring long periods of attention, making them perfect for short breaks or learning environments.

    Final Thoughts on the Cat Riding a Scooty Puzzle

    Spotting three differences in a cheerful image within 15 seconds is harder than it sounds. This optical illusion shows how easily the brain can be misled by familiar and enjoyable visuals.

    If you found all three differences before time ran out, your observation skills are strong. If not, that is completely normal. Each attempt trains the brain to look more carefully and notice details others might miss. Optical illusion puzzles like this provide a fun and effective way to keep the mind active while enjoying the challenge.