Category: News

  • Fragrance Collection Upgrades That Feel Fresh and Modern in 2026

    Fragrance Collection Upgrades That Feel Fresh and Modern in 2026

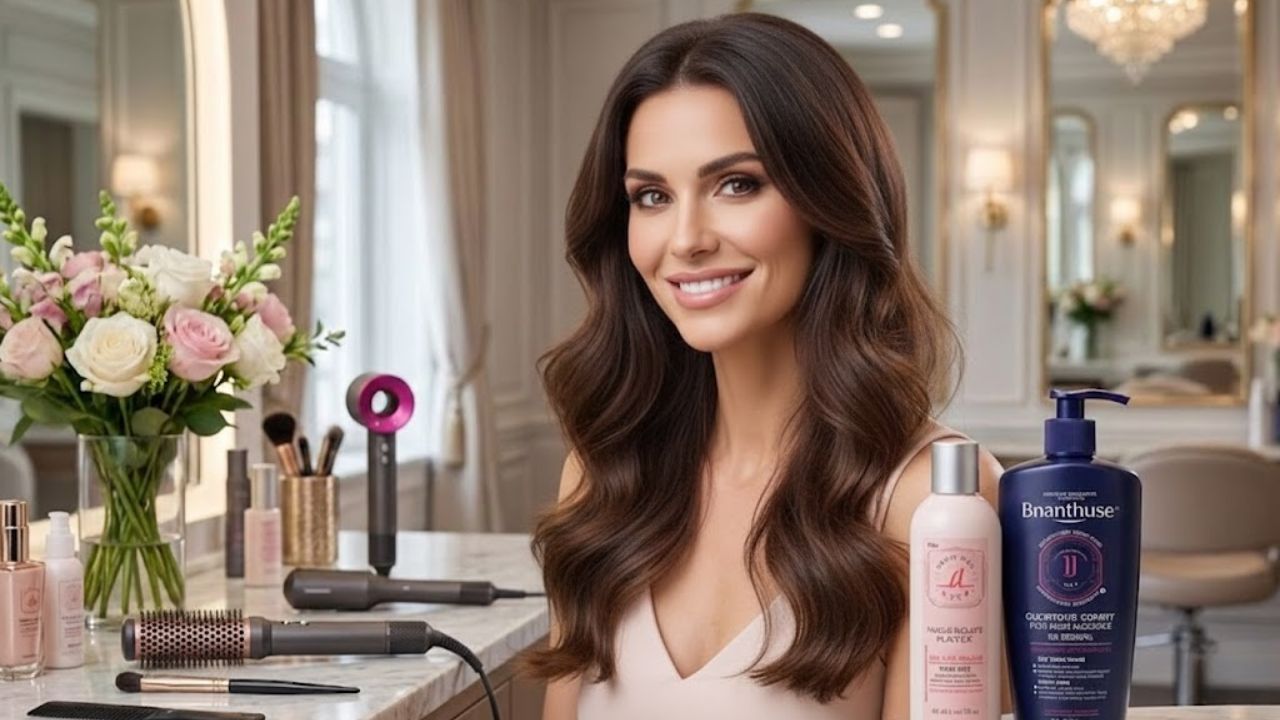
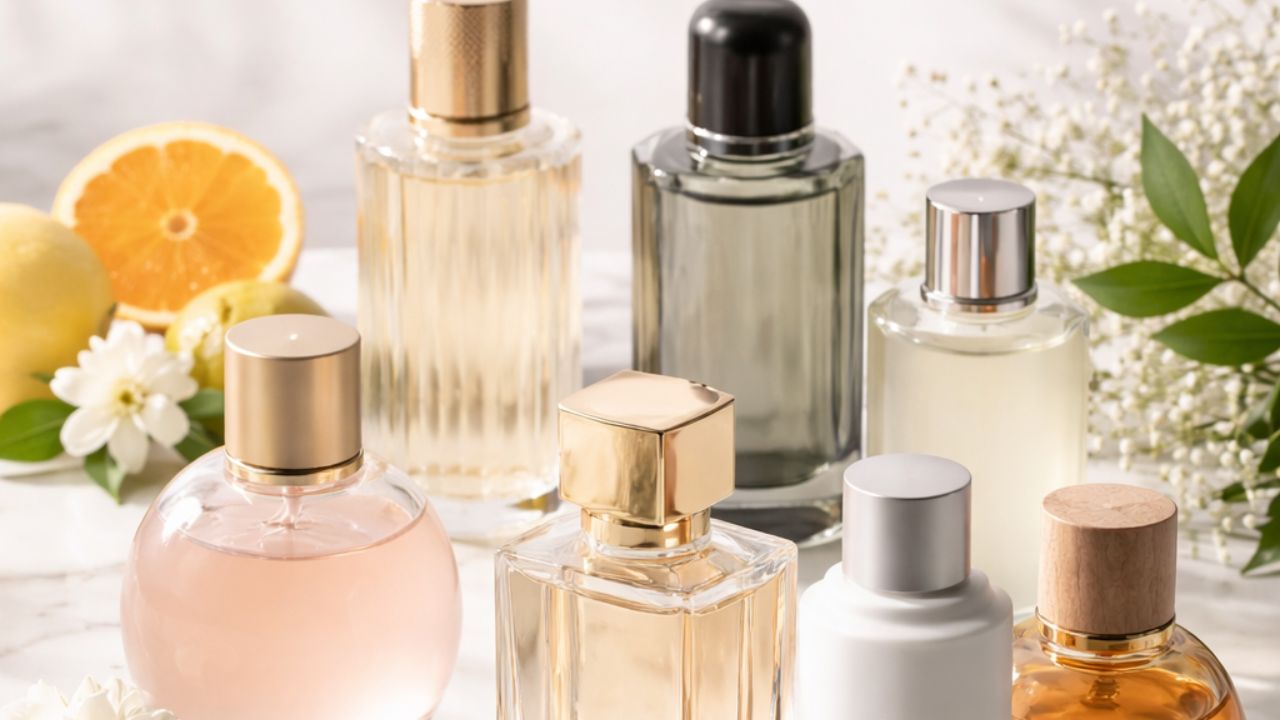
    A fragrance collection is deeply personal. It is shaped by scents that recall meaningful memories, perfumes that effortlessly complement what we wear, and modern scent mists that add versatility. A well-curated fragrance wardrobe becomes an essential expression of individuality.

    Refreshing your scent lineup is not about endlessly buying new bottles. Instead, it involves understanding layering techniques, choosing the right concentration for your lifestyle — where a cologne may suit you better than an eau de toilette — and making more sustainable choices that stand the test of time.

    To help refine this approach, Vogue consulted four expert perfumers to share their guidance on elevating a fragrance wardrobe in 2026.

    Three Expert Tips for Building a Fragrance Wardrobe

    “The purpose of fragrance is to create a reaction,” says Aurélien Guichard, the perfumer behind Burberry Her. “If a scent doesn’t spark comments or curiosity, it isn’t fulfilling its role.” While direct, his point is simple: a great fragrance should be noticed. It should also reflect your mood and harmonise with how you dress.

    Identify Your Fragrance Formula

    Guichard explains that a strong fragrance wardrobe is built around three core principles:

    • Being noticed
    • Smelling distinctive
    • Choosing scents that reflect your personality

    Treat It Like Your Clothing Collection

    Building a scent wardrobe mirrors the way we build our clothing wardrobes. There is no single correct method, but having a framework can simplify the process.

    “Some people gravitate toward a uniform style — I mostly wear black,” Guichard explains. “For them, a smaller fragrance rotation makes sense.” Others enjoy a bold, expressive approach and prefer experimenting with unexpected scent combinations.

    The key, he stresses, is freedom and enjoyment. Fragrance should add something positive to daily life, not create pressure or uncertainty.

    Emma South, fragrance and lifestyle expert at Jo Malone London, suggests beginning with your most versatile scent. Identifying the notes that immediately appeal to you can guide future choices.

    Choosing Scents by Season

    For fragrance house Ffern, scent wardrobes are closely tied to nature’s cycles. “As seasons shift, so do light, air, and even how our skin responds,” explains Elodie Durande, the brand’s perfumer. Wearing different fragrances throughout the year allows you to align with these natural changes.

    How to Begin Collecting Fragrances

    Guichard recommends starting with scents that trigger emotions or memories. “That’s how a truly personal fragrance library begins,” he says.

    Durande advises beginners to take a seasonal approach by identifying which notes they naturally gravitate toward. If spring resonates with you, citrus-based scents paired with fresh green notes may feel instinctive. For colder months, she notes that woody, spicy fragrances and resins provide warmth and comfort.

    For those drawn to sweeter profiles, gourmand fragrances are an accessible starting point. Heather Forcari, global education director at Sol de Janeiro, highlights notes such as vanilla, caramel, and pistachio as playful yet comforting options.

    Refreshing and Refining an Existing Collection

    For established fragrance wardrobes, South suggests a four-step method: reflect, rotate, edit, and add. Begin by assessing which scents lift your mood or transport you emotionally, then ensure your essentials are covered.

    She recommends using your clothing staples as a reference point. “Do you have a signature winter fragrance, like a dependable coat?” she asks. You might also look for a scent equivalent to a summer dress or a crisp white shirt.

    When it comes to decluttering, South is more forgiving with fragrance than fashion. “If a scent no longer fits, move it to the back rather than discarding it,” she says. Because scent memories differ from visual ones, keeping older fragrances can create a meaningful archive of personal moments.

    Durande encourages intentional selection rather than accumulation. “Choose fragrances that connect you to the present season,” she says, citing Ffern’s Winter 26 scent, inspired by a storm on the Isle of Skye. Notes like oakmoss and violet leaf evoke dark waters and moonlit reflections, creating a scent that feels both authentic and romantic.

    Guichard also urges reflection before making changes. “Clothes only look right when worn with confidence — fragrance works the same way,” he explains. Without clarity in personal style, results will always feel incomplete.

    Understanding Fragrance Layering

    Not every scent benefits from layering, Guichard notes. “Allow the fragrance to blend with your skin first,” he advises. Fragrance doesn’t need to be worn the same way every day, so experimentation should feel natural rather than forced.

    South agrees that layering can be simple. “It might be as easy as misting one fragrance over another,” she says, or building layers through scented body washes and moisturising creams.

    When combining two colognes, placement and intensity matter. “You might apply a fresh, luminous scent around the décolletage, while reserving deeper notes like jasmine or tuberose for hems and outerwear,” she explains. This creates a subtle yet memorable trail.

  • Best Shampoos for Fine Hair in 2026 Add Volume Without Weighing Strands Down

    Best Shampoos for Fine Hair in 2026 Add Volume Without Weighing Strands Down

    If your hair often looks flat or lacks bounce, your shampoo could be part of the issue — or the solution. Fine hair has a smaller strand diameter, which makes it more fragile and easier to weigh down. Even minimal residue or an unsuitable formula, especially those high in silicones, oils, or rich conditioning agents, can cling to strands and collapse volume. The result is hair that appears limp and lifeless. Confusion between fine hair, thin hair, and thinning hair further complicates the process of choosing the right shampoo.

    Best Shampoos for Fine Hair in 2026

    Fine hair describes strand thickness, while thin hair refers to low density, and thinning hair indicates ongoing hair loss. This distinction is important because shampoos for fine hair focus on lightweight cleansing and volume, whereas formulas for thinning hair often prioritize scalp health and follicle support. Experts emphasize that a balanced scalp is essential, as inflammation, flakes, or buildup can cause fine strands to clump together and appear even sparser. A gentle, thickening shampoo that maintains scalp balance is one of the most effective ways to help hair look fuller.

    How the Top Shampoos Were Selected

    To determine the best shampoos for fine hair, over 30 highly rated formulas were tested alongside expert recommendations and dermatological research. Each product was reviewed for ingredient quality, scalp compatibility, cleansing strength, and volumizing results to identify options that genuinely support delicate strands.

    Lightweight Volumizing Shampoos That Lift Fine Hair

    For hair that loses volume easily, Living Proof Full Shampoo consistently delivers noticeable lift from the first wash. Its residue-free formula cleans effectively without heaviness, using advanced polymers instead of traditional silicones to keep strands separated. This creates the appearance of thicker, fuller hair as it dries. With regular use, hair feels bouncier and stays fresh longer. While skipping conditioner may leave ends slightly dry, its sulfate-free, silicone-free, and paraben-free formula remains gentle enough for frequent use.

    Best Shampoos for Fine Hair With Oily Roots

    Fine hair paired with an oily scalp needs a formula that cleans deeply without stripping volume. Kérastase Spécifique Bain Divalent achieves this by purifying the scalp while protecting mid-lengths. Ingredients like vitamin B6 and salicylic acid help control oil and prevent buildup. Preserving the scalp barrier is key, as over-cleansing can trigger excess oil production. While it contains traditional sulfates and may feel strong on very sensitive scalps, it helps fine hair stay cleaner and lighter for longer.

    Shampoos That Target Dandruff and Scalp Buildup

    Dandruff and buildup can make fine hair look thinner by weighing down roots and irritating the scalp. Nizoral Anti-Dandruff Shampoo uses 1 percent ketoconazole to address the yeast commonly linked to dandruff and inflammation. Supporting the scalp’s microbial balance reduces irritation and allows hair to appear healthier at the roots. Because ketoconazole can be drying with frequent use, dermatologists recommend using it two to three times weekly, alternating with a gentle shampoo.

    Color-Safe Shampoos for Fine, Treated Hair

    Color-treated fine hair requires a delicate balance, as many color-safe formulas feel heavy. This sulfate-free shampoo cleans effectively while preserving color vibrancy and scalp comfort. Its lightweight lather removes buildup without stripping moisture, helping minimize dryness and oxidative stress. Users with oily roots and dry ends report improved manageability, shine, and style longevity. While volume enhancement is subtle, the formula excels at maintaining overall balance.

    Gentle Shampoos for Sensitive Scalps and Fine Hair

    Scalp irritation can make fine hair appear even sparser. Studies show that as hair density decreases, the scalp becomes more visible and sensitive. Vanicream Shampoo features a minimalist formula free from dyes, fragrance, lanolin, and common irritants. While it does not provide dramatic volume, it supports a healthy scalp foundation through gentle cleansing, making it suitable for daily use.

    Everyday Thickening Shampoos That Add Body

    OUAI Fine Hair Shampoo is well known for delivering lightweight volume without stiffness. Polymers and humectants subtly expand strands, increasing body while maintaining shine and movement. This balance improves styling ease and fullness. Those who use heavy leave-in products may need to adjust their routine to preserve root lift.

    Affordable Volumizing Shampoos for Fine Hair

    OGX Thick & Full + Biotin & Collagen Shampoo stands out for its accessible price and visible volumizing effect. Many users notice lighter roots and better style hold with regular use. The formula includes light silicones for smoothness, which may build up over time. Alternating with a clarifying shampoo helps maintain volume.

    Protein-Infused Shampoos for a Fuller Appearance

    Virtue Full Shampoo contains Alpha Keratin 60ku, a bio-identical protein designed to reinforce and plump fine strands. Rather than masking flatness, it focuses on lifting at the roots and removing excess oil. While its higher price may limit long-term use for some, it offers a balanced approach to cleansing and strand support.

    Professional Volumizing Shampoos With Salon Results

    Redken Volume Injection Shampoo uses a Bodifying Complex with Filloxane to deliver noticeable lift and fullness. It enhances root volume while maintaining smoothness and manageability. Due to its sulfates and silicone polymers, it may not suit very sensitive scalps and can require occasional clarification.

    Shampoos for Early Thinning and Reduced Density

    Nioxin System 1 Shampoo is formulated for fine hair showing early signs of thinning. It removes buildup that can clog follicles while creating a refreshed scalp environment. Users describe a cooling cleanse that leaves hair feeling lighter over time. Best results are achieved when used as part of the complete system.

    Clarifying Shampoos to Remove Buildup From Fine Hair

    Periodic clarification helps restore lift by removing residue that weighs fine hair down. Redken Hair Cleansing Cream Shampoo provides a deep cleanse using exfoliating ingredients like salicylic acid. Used about once per week, it leaves hair lighter and more responsive to styling, though overuse may cause dryness.

    How the Best Shampoos for Fine Hair Were Tested

    Testing combined hands-on use with ingredient analysis and medical research. More than 30 shampoos from salon, drugstore, and dermatologist-recommended brands were assessed for cleansing power, scalp balance, hydration, and lasting volume. Expert input ensured each recommendation aligned with established dermatological guidance.

    What Dermatologists Recommend for Fine Hair

    Dermatologists advise choosing shampoos that cleanse effectively without heaviness. Lightweight formulas that avoid heavy silicones, excess oils, and parabens help prevent flatness. Ingredients that support scalp health are preferred, while overly moisturizing formulas are typically discouraged for fine hair.

    Can Shampoos Regrow Hair?

    Some shampoos with ingredients like ketoconazole, caffeine, or botanical extracts may modestly reduce shedding or support density, but their effects are limited. Shampoos cannot regrow hair on their own. They can, however, help maintain a healthier scalp environment that supports existing hair.

    Thickening vs. Volumizing Shampoos: Key Differences

    Thickening shampoos temporarily increase strand diameter, making hair feel denser. Volumizing shampoos focus on lifting roots and improving movement. Both enhance the appearance of fine hair, but they work through different mechanisms.

    Understanding Fine Hair, Thin Hair, and Thinning Hair

    • Fine hair: Small strand diameter
    • Thin hair: Low overall density
    • Thinning hair: Active hair loss over time

    These differences matter when selecting a shampoo. Fine hair benefits from lightweight volumizing formulas, while thinning hair also requires scalp-supportive ingredients.

    Should Sulfates and Silicones Be Avoided?

    Heavy silicones, waxes, and oils can weigh fine hair down and accelerate greasiness. While sulfates are effective cleansers, they may be too harsh for some scalps. Sulfate-free options are often gentler, especially for color-treated or sensitive scalps. Silicones are not inherently harmful, but buildup-prone varieties can flatten fine hair. The best choice depends on ingredient type, concentration, and individual hair needs.

  • Burgundy Mascara Emerges as a Standout Beauty Trend for 2026

    Burgundy Mascara Emerges as a Standout Beauty Trend for 2026

    We’re only halfway through January, yet a standout beauty trend for 2026 is already clear. Almost overnight, burgundy mascara has appeared across shelves at Ulta, Sephora, and neighborhood drugstores. According to professional makeup artist Catrina Breitweiser, who has more than 20 years of experience, clients are increasingly choosing it as they lean toward softer, more natural glam looks. Beauty brands have quickly followed suit, releasing a wave of burgundy and deep berry mascaras.

    Since I was already searching for an alternative to black mascara, I decided to give the trend a try. Here’s how it went—and why it might be worth experimenting with yourself.

    Why I Chose Burgundy Mascara

    With blonde hair, light blue eyes, and fair skin, I had often heard that black mascara could feel too harsh for my features. The long-standing advice within the beauty world suggested that brown mascara was a better match. Still, from my first experiments with eye makeup in high school, black mascara was all I ever used—it was simply the default.

    Years later, I felt ready for something different. I initially planned to switch to brown, but then the idea of burgundy mascara caught my attention. It felt fresh and unexpected—less like a rule I was following and more like a choice I genuinely wanted to make.

    Breitweiser echoes this appeal, noting that burgundy mascara flatters green, hazel, and brown eyes by adding warmth and depth without harshness. She also points out that it works well for fair to medium skin tones, mature clients, and anyone seeking definition without the intensity of jet black.

    My First-Hand Experience

    I decided to try Too Faced Better Than Sex Mascara in Burgundy. Given the product’s loyal following, I trusted the formula. My only concern—beyond typical mascara issues like smudging or flaking—was whether the reddish tone might make my eyes look irritated.

    Fortunately, that worry disappeared quickly. From the first application, I was impressed by the thick, buildable wand, which made layering effortless. The formula also delivered true burgundy pigment, rather than black with a faint red undertone.

    After applying it, I noticed two immediate reactions. First, satisfaction—the shade enhanced my eyes without overpowering them. Second, a brief moment of doubt, wondering if the color leaned too red. I decided to test it by wearing it all day. By the end of the day, no one had commented on my appearance, which confirmed my suspicions in the best way.

    Wearing It Everywhere

    I continued wearing the mascara everywhere—from a wellness retreat in Panama to everyday life back home in Iowa. Within weeks, I was completely sold. I found myself recommending it to friends, coworkers, and family members, even convincing my mom to pick one up during an Ulta visit.

    The Final Verdict

    After nearly two months of regular use, I’ve formed a clear opinion. Burgundy mascara is an excellent option for those with light to medium features who feel overwhelmed by black lashes. It creates a sense of soft glam and understated luxury that aligns perfectly with current beauty trends.

    The only caveat is that if your eyes are prone to redness or irritation, the burgundy tone may accentuate it rather than conceal it. Overall, choosing burgundy mascara comes down to personal preference, but it’s absolutely worth trying if you’re curious about stepping beyond traditional black.

  • Six 1990s Heels Making a Stylish Comeback in 2026

    Six 1990s Heels Making a Stylish Comeback in 2026

    When we think about the most iconic heel trends of that bold, fashion-forward decade, many immediately picture the classic kitten heel. But the era offered far more variety, spanning distinct silhouettes and moods—from understated minimalism to striking maximalism. The ’90s delivered unforgettable designs from fashion heavyweights like Chanel’s two-tone pumps, Miu Miu’s geometric loafers, and Prada’s Mary Janes. Today, these nostalgic shapes are re-emerging with a modern twist, making them feel fresh, relevant, and essential once again.

    Although the spring 2026 runways showcased experimental designs—think Proenza Schouler’s bow heels, Bottega Veneta’s sculptural clogs, and Balenciaga’s edgy ballerinas—it was undeniably the ’90s-inspired heels that dominated. Their appeal lies in their effortless elegance, ability to add subtle interest, and versatility. These styles elevate a simple jeans-and-tee outfit just as easily as they enhance the allure of a mini dress. It’s no surprise they were beloved by the era’s top supermodels.

    While hunting for authentic vintage pieces remains a great option, many modern brands are offering updated interpretations of these iconic designs. Below are the six standout ’90s heel trends defining the season.

    Six ’90s Heel Trends Leading 2026 Fashion

    Two-Tone Pumps

    Two-tone heels are firmly back in the spotlight, thanks in large part to renewed interest sparked by Matthieu Blazy. Chanel cemented this style in fashion history during its spring 1992 collection, when Linda Evangelista opened the show in a refined black-and-white pair. Decades later, these pumps remain timeless. Choose classic pointed or triangular toe shapes and style them with tailored suits, structured dresses, or update the look with straight-leg denim.

    Pointed Heeled Mary Janes

    Mary Janes often get labeled as youthful, but the ’90s proved they can be elegant and feminine. Prada’s sharp-toed and wedge versions transformed the silhouette into something polished and chic. A favorite of Christy Turlington, this style still graces the streets of Milan and Rome. Their refined structure pairs beautifully with shift dresses and midi skirts, transitioning seamlessly from day to night.

    Heeled Colorful Loafers

    Nostalgia remains a driving force in footwear, though designers are adding bold updates. Gucci recently revived its iconic ’90s loafers—famously worn by Helena Christensen in 1995—featuring square toes, chunky heels, and jewel-toned hues. The modern versions push proportions further with elevated platforms, making them ideal for adding drama to mini dresses, micro shorts, flared trousers, and short skirts.

    Heeled Mules

    If one shoe truly defines the ’90s, it’s the heeled mule. This minimalist sandal became a staple thanks to supermodels like Kate Moss and Cindy Crawford. Its enduring popularity comes from its versatility and clean design, making it just as relevant now as it was then.

    Square-Toe Pumps

    Square-toe heels are impossible to overlook. Known for their sharp lines and subtle masculine edge, this silhouette has been reimagined by brands like Miu Miu, Prada, and Alexander McQueen. Style icons such as Kendall Jenner, Rosalía, and Daisy Edgar-Jones frequently wear them with tailored trousers or classic denim for a polished yet relaxed look.

    Transparent Heels

    No discussion of ’90s footwear is complete without transparent heels. Both controversial and iconic, they captured a specific minimalist aesthetic that dominated until the early 2000s. Chado Ralph Rucci’s spring 1999 collection featured a bold version with exposed toes and a clear block heel. Today, designers like Vetements and Maison Margiela are bringing this sensual, statement-making style back into focus.

  • Natural Lip Plumping Remedies Increase Volume Without Tingling or Irritation

    Natural Lip Plumping Remedies Increase Volume Without Tingling or Irritation

    The first thing that stands out is the dryness in the air. On mornings like this, the mirror feels unforgiving. As you lean in closer, your lips appear paler, thinner, and less defined than usual. You press them together, try a quick pout, and your thoughts drift to familiar fixes like another lip plumper or a glossy balm promising instant results. After scrolling online long enough, even costly needle-based treatments can start to seem tempting.

    Yet beneath that moment of concern, another instinct quietly takes over. Instead of booking a clinic appointment, you find yourself drawn toward your kitchen. This choice reflects a belief in gentle, steady care rather than quick inflation for a photo. True natural lip plumping begins in these everyday moments, away from harsh lights and instant promises.

    Why Lips Lose Fullness and How Nature Supports Soft Volume

    Lips lose their fullness largely due to dehydration, aging, and environmental stress. Unlike other skin areas, lips lack oil glands, making them especially prone to dryness and fine lines. When moisture drops and circulation slows, lips naturally look flatter and duller.

    Nature offers simple ways to restore a healthier appearance. Through hydration, gentle stimulation, and regular care, lips can regain softness and a subtle fullness that looks natural rather than forced.

    Gentle Exfoliation and Massage to Wake Up Circulation

    Think of your lips like soil after a long dry spell. Before anything can thrive, the surface needs refreshing. Exfoliation removes dead skin, while massage increases blood flow, helping lips look naturally fuller. Since lip skin is thin and delicate, buildup happens quickly, making exfoliation especially helpful.

    Simple Homemade Lip Scrub

    You likely already have everything you need at home:

    • 1 teaspoon fine sugar
    • 1/2 teaspoon honey
    • 1/2 teaspoon olive or coconut oil

    Mix into a smooth paste. Apply to damp lips and massage gently in small circles for 30 to 60 seconds. Sugar lifts away dead skin, honey draws in moisture, and oil adds protection. Rinse with lukewarm water and pat dry. Lips immediately look smoother, rosier, and more defined.

    A Daily Lip Massage Ritual

    Improved circulation plays a key role in natural fullness. Try this calming routine once daily, preferably before bed:

    • Apply a small drop of almond, jojoba, or olive oil to clean lips.
    • Using your ring finger, gently press and release along the lip edges.
    • Massage the entire lip surface in slow circular motions for 30 to 60 seconds.
    • Finish by lightly tapping your lips for another 15 to 20 seconds.

    This practice encourages a healthier, slightly fuller appearance over time without harsh tingling or swelling. It becomes a quiet nightly habit focused on care rather than correction.

    From Kitchen Staples to Lips: Natural Plumpers That Truly Help

    Your pantry holds ingredients used for centuries to support skin health. When applied carefully, they enhance hydration, circulation, and texture, giving thin lips a fuller look.

    Honey: A Natural Moisture Magnet

    Honey draws moisture from the air and locks it into the skin. Applied to lips, it softens roughness, enhances natural color, and improves smoothness. At night, spread a thin layer of raw honey on your lips and leave it for 10 to 15 minutes or overnight if possible. Rinse gently in the morning and apply balm. Over time, lips appear less deflated and deeply hydrated.

    Cinnamon and Ginger: Gentle Warming Boosters

    These spices create mild warmth that stimulates blood flow when used sparingly.

    Easy Cinnamon Lip Mask:

    • 1/2 teaspoon honey
    • 1/4 teaspoon olive or coconut oil
    • A very small pinch of ground cinnamon

    Apply a thin layer and leave on for 3 to 5 minutes. Mild warmth is normal, but rinse immediately if burning occurs. Used correctly, lips appear slightly flushed and fuller. Ginger works similarly, but moderation is essential.

    Aloe Vera: Calm, Heal, and Hydrate

    Pure aloe vera gel soothes irritation, supports healing, and deeply hydrates. Healthier skin reflects light better, making lips look naturally plumper. Apply a thin layer and let it absorb or leave on for 10 to 15 minutes before sealing with balm. It is especially helpful after wind exposure or frequent matte lipstick use.

    Daily Lip Care Habits That Make a Visible Difference

    Natural plumping works best through consistent daily habits, much like caring for a houseplant. Regular attention produces better results than occasional effort.

    Hydration Starts From Within

    No balm can compensate for dehydration. When the body lacks water, lips become dry and appear thinner quickly. Drinking water steadily throughout the day helps maintain natural lip fullness. Water-rich foods like cucumbers, oranges, melons, berries, and lettuce also support hydration at the cellular level.

    A Simple Morning and Night Routine

    • Morning: Rinse lips with cool water, pat dry, and apply a light balm with shea butter, beeswax, or natural oils. Use SPF lip balm before sun exposure.
    • Night: Remove lip makeup gently. Massage almond, jojoba, or coconut oil into lips, then apply a thicker balm to seal moisture overnight.

    This uncomplicated routine helps lips stay soft, smooth, and naturally full over time.

    Habits That Quietly Reduce Lip Fullness

    Certain everyday behaviors slowly work against natural plumpness. Chronic dehydration, excessive licking, harsh products, and sun exposure all contribute to thinner, drier lips. Awareness and small adjustments help preserve softness and volume.

    Quick Reference: Natural Lip Plumping Remedies

    This simple guide makes it easy to choose the right option when scanning your kitchen or bathroom shelf.

    • Sugar, Honey, Oil Scrub: Removes dead skin and boosts circulation, best used 1–2 times weekly.
    • Pure Honey Mask: Provides deep moisture and shine, suitable 3–4 times weekly.
    • Cinnamon or Ginger Mask: Encourages circulation, use sparingly once or twice weekly.
    • Aloe Vera Gel: Soothes and hydrates, safe for daily use.
    • Oil-Based Lip Massage: Improves circulation and softness with consistent nightly use.

    Why Patience Creates the Best Results

    Natural lip plumping does not deliver instant transformations. Changes happen gradually and quietly until one day your lips simply look smoother and healthier. Fine lines soften, and color appears more natural rather than sitting on the surface.

    This approach requires patience and commitment. It means mixing honey and oil while tea brews, staying hydrated, and choosing gentle products. In a world driven by fast beauty fixes, there is something grounding about letting lips improve through steady care. Over weeks and months, the gentlest methods often create the most lasting results. Your lips don’t need dramatic size to look beautiful. With mindful routines, they can become softer, fuller, and more vibrant using what you already have at home.

  • The Fairy Bob Emerges as the Soft Reset Hair Trend Set to Define 2026

    The Fairy Bob Emerges as the Soft Reset Hair Trend Set to Define 2026

    The fairy bob is quietly stepping into the spotlight as the defining hair trend of 2026, offering a softer, more romantic alternative to sharp, high-maintenance cuts. In India, where beauty trends often balance global inspiration with everyday practicality, this look feels especially timely. Think airy layers, gentle movement, and a finish that looks polished without trying too hard. As more people lean into low-effort beauty and personal reinvention, the fairy bob represents a fresh start—one that feels light, wearable, and perfectly in tune with modern lifestyles.

    The fairy bob hair trend redefining soft beauty

    At its core, the fairy bob is about embracing ease while still feeling intentional. Unlike blunt bobs or edgy chops, this style focuses on feathered ends, natural movement, and a soft silhouette that frames the face gently. Stylists describe it as romantic but not fussy, making it ideal for people who want a visible change without dramatic upkeep. The cut often incorporates light layering to add dimension and avoid heaviness, especially in humid Indian climates. What really sets it apart is its versatility—it can look whimsical one day and understated the next, depending on how it’s styled.

    Why the fairy bob cut feels like a 2026 reset

    Hair trends often reflect emotional shifts, and the fairy bob aligns perfectly with the desire for calm and renewal. After years of bold experiments, many are gravitating toward gentle transformations that feel grounding. This cut supports low-effort styling, which appeals to busy routines without sacrificing style. It also complements face-framing softness, helping wearers feel refreshed rather than dramatically different. For 2026, the fairy bob signals intentional simplicity—a look that says you’re evolving, not starting from scratch, and doing so on your own terms.

    How to style the fairy bob for everyday wear

    Styling the fairy bob is refreshingly uncomplicated, which is part of its charm. A quick blow-dry with a round brush can enhance airy texture, while air-drying works beautifully for a more relaxed finish. Many stylists recommend soft wave styling using minimal heat to keep the look effortless. The cut shines with natural shine focus, so lightweight serums or oils go a long way. Whether paired with middle parts or subtle fringes, the fairy bob adapts easily, making daily versatility one of its strongest advantages.

    Why the fairy bob is more than just a haircut

    The fairy bob isn’t just another seasonal trend—it represents a mindset shift. In 2026, beauty is moving toward choices that feel emotionally supportive as well as visually appealing. This cut encourages personal comfort, allowing individuals to feel like themselves rather than chasing extremes. It aligns with modern femininity that values softness without weakness and polish without pressure. For many, choosing this style becomes a form of quiet confidence, signaling growth and balance. Ultimately, the fairy bob captures the idea that change doesn’t have to be loud to be meaningful.

    Feature Fairy Bob Classic Bob
    Overall Finish Soft and airy Sharp and structured
    Maintenance Level Low to moderate Moderate to high
    Styling Flexibility Very versatile More fixed shape
    Best For Everyday wear Statement looks

    Frequently Asked Questions (FAQs)

    1. What exactly is a fairy bob?

    It’s a soft, layered bob designed to look light, romantic, and easy to maintain.

    2. Is the fairy bob suitable for Indian hair types?

    Yes, it works well with straight, wavy, and slightly curly textures common in India.

    3. Does the fairy bob require daily styling?

    No, it’s designed to look good with minimal effort and simple styling.

    4. Will the fairy bob still be trendy beyond 2026?

    Its timeless softness suggests it will age well beyond short-lived trend cycles.

  • Goodbye Hair Dye for Grey Hair: The Simple Conditioner Add In That Revives Natural Colour Gradually

    Goodbye Hair Dye for Grey Hair: The Simple Conditioner Add In That Revives Natural Colour Gradually

    For years, covering grey hair meant choosing between strong chemical dyes and inconsistent natural remedies. Now, a simple addition to your regular conditioner—using something you probably keep next to your coffee—is gaining popularity among those seeking a softer, natural way to darken hair.

    Why People Are Moving Away From Chemical Hair Dyes

    Grey hair appears when pigment-producing cells in hair follicles slow down or stop creating melanin. While aging is the most common factor, stress, genetics, smoking, nutritional deficiencies, and certain medical conditions can also play a role. The result is familiar: silver strands appear and gradually spread across the scalp.

    Most people initially opt for permanent or semi-permanent dyes for quick results. However, each session comes with downsides: harsh chemical formulas, long processing times, and ingredients that can irritate aging hair or sensitive scalps.

    Hair without pigment tends to be drier, more fragile, and less flexible. Regular coloring can make it rougher and more prone to breakage. Frequent dyeing strips moisture, damages the cuticle, and can leave white hair looking flat rather than shiny. Even so-called ammonia-free or gentle dyes rely on oxidative reactions that alter hair structure—fine for thick hair at 25, but harsh on delicate strands at 50. Plant-based options like henna and indigo offer alternatives but can produce unpredictable results, often leaving colors too warm or dull and difficult to correct professionally.

    The Cocoa Conditioner Hack Everyone’s Talking About

    This is where unsweetened cocoa powder comes in—not the sugary kind, but plain baking cocoa. Rich in natural pigments and plant compounds, it lightly stains hair without harming the protective outer layer. Cocoa acts like a gentle filter, adding a subtle brownish tint to grey hair while also nourishing it.

    Cocoa contains flavonoids and tannin-like molecules that attach to the hair surface. On light or grey hair, this creates a soft darkening effect that builds with repeated use. On darker hair, it adds depth and warmth rather than dramatically changing the color. Additional benefits include antioxidants to protect hair from environmental stress, natural softening agents for manageability, and mild astringent properties that help balance scalp oil.

    How to Properly Mix Cocoa Into Your Conditioner

    The method spreading across beauty forums is simple and cost-effective. You only need a bowl and a spoon. Use this routine on freshly washed, towel-dried hair, starting once or twice a week:

    • Place a generous amount of your regular conditioner in a clean bowl. For best results, choose a silicone-light or silicone-free formula.
    • Add 2–4 tablespoons of unsweetened cocoa powder, adjusting for hair length and thickness.
    • Stir until you have a smooth, chocolate-brown paste with no lumps.
    • Section hair with clips and apply, focusing on grey areas at the temples, parting, and crown.
    • Comb through with a wide-tooth comb to distribute evenly from roots to ends.
    • Leave on for 20 minutes; for resistant white hair, extend to 30 minutes.
    • Rinse thoroughly with lukewarm water, massaging the scalp to remove residue.

    Most users notice a soft shift from bright white to a cooler, smoky brown after the first application. The effect deepens over time, blurring contrast and creating a subtle halo rather than a full color change. This helps grey roots appear less stark between salon visits.

    Who Benefits From Cocoa-Enhanced Conditioner—and Who Should Be Cautious

    This method works best for those with scattered grey hairs rather than fully white hair. It suits blondes or light brunettes whose grey strands stand out and anyone with a sensitive scalp seeking a gentler option. Those preferring gradual change over dramatic transformation will appreciate it. For very dark hair, cocoa will not fully conceal grey roots but can soften transitions between new growth and previously colored hair, creating a tinted gloss effect.

    Expected Results by Hair Type

    • Mostly white or grey, fine hair: Soft beige-brown tone, hair appears glossier and smoother.
    • Salt-and-pepper brown hair: Grey strands blend, creating a softer, even shade.
    • Dark brown or black hair with limited greys: Subtle warm undertone shift.

    How Cocoa Works on the Hair Shaft

    Grey hair is rougher because its outer layer lifts more easily, causing frizz and tangles. Conditioner smooths this layer, allowing hairs to glide past each other. Cocoa particles settle on the hair surface, gradually building color over multiple applications without penetrating deeply like permanent dyes. This provides gentle protection and color without altering the hair’s internal structure, improving texture and manageability for aging hair.

    Cocoa Compared With Other Grey Hair Solutions

    Cocoa fits among options like herbal rinses, tinted conditioners, or professional grey blending treatments. It is affordable, easy to find, and conditions hair while adding subtle color. Drawbacks include variable results depending on hair shade and the need for thorough rinsing to avoid dullness.

    Daily Care Tips to Keep Grey Hair Healthy

    Effective grey hair care extends beyond cocoa treatments. Stress, smoking, sun exposure, and low-antioxidant diets accelerate silver hair. Cocoa users often adopt gentler routines: UV-protective sprays, less heat styling, extended washing intervals, and nourishing masks rich in proteins and lipids. Some colorists recommend homemade masks after salon visits to refresh tone without further chemical exposure. Cocoa offers a gradual, reversible approach that complements these healthy habits, bridging the gap between professional coloring and natural grey transition.

  • 6 Best Eye Shadow Primers for Long Lasting and Vibrant Makeup

    6 Best Eye Shadow Primers for Long Lasting and Vibrant Makeup

    compensation from retailers or from purchases of products through these links. The best eye shadow primers can determine whether your makeup stays perfect or disappears before lunch. A single application helps your eye shadow show more vibrant color & blend more smoothly without creasing or fading. Consider it as preparing your eyelids for makeup application. Modern formulas do more than keep color in place. They smooth out texture & balance skin tone while providing benefits like moisture or shine control. If you have fine lines near your eyes or want your shimmer to look brighter and last through the day the right primer makes a difference. Continue reading for recommendations from Allure editors and makeup artists that show great eye makeup begins with what you apply before the shadow.

    Editor’s Picks: Eye Shadow Primers That Truly Perform

    Why it’s worth it: The Urban Decay Eye Primer Potion has been a favorite among editors and makeup artists for years. The reason is simple according to Miami-based makeup artist Natalie Dresher who previously spoke to Allure. It makes eye shadow last longer without gathering in fine lines or feeling too heavy on the skin. The formula is lightweight with an almost serum-like texture that spreads smoothly without any buildup or uneven patches. The texture is slightly tacky but not overly sticky which helps keep eye shadow in place throughout the day. The Original shade is a sheer translucent beige while Eden offers a matte beige finish and Sin provides a pale champagne shimmer. There is also an anti-aging version designed for mature skin that includes plumping peptides & brown algae. This primer works well for just about anyone looking to improve their eye makeup wear.

    Best Overall Performance: Urban Decay Primer That Locks Color All Day

    Why it’s worth it: Milk’s Hydro Grip Eye Primer is completely invisible and works like double-sided tape for eye shadow without settling into fine lines. Pittsburgh makeup artist Patty Bell explains that it has a thinner formula that makes it easy to blend on the delicate eyelid area. It will lock your eye makeup into place for eight hours and contains hyaluronic acid to add moisture & create a blurred effect on the lid. The primer is also made with blue agave for great grip and includes niacinamide and aloe for extra hydration. Bell even recommends using it under the eyes to help prevent concealer from creasing. This product truly serves multiple purposes.

    Ideal for Mature Lids: Milk Hydro Grip for Smooth, Crease-Free Wear

    Why it’s worth it: This Nyx Professional Makeup Ultimate Shadow & Liner Primer is one of Bell’s top picks & delivers quality that exceeds its affordable price. The formula feels light on your skin and spreads easily within seconds so anyone can apply it without trouble. You can choose from four natural-looking shades that work so well you could wear them alone as cream eyeshadow. These shades help hide visible veins & uneven skin tone while creating a smooth surface on your eyelids. The primer contains vitamin E which keeps your eyelids moisturized throughout the day and prevents that unpleasant dry and flaky appearance.

    Top Budget-Friendly Choice: NYX Primer That Delivers Pro Results

    Why it’s worth it: Nars’ Pro-Prime Smudge Proof Eyeshadow Base is a behind-the-scenes product that improves every eye look. The sheer formula vanishes on contact and creates a light layer that you barely notice. New York City makeup artist Nick Barose told Allure that he loves how it grips without feeling heavy or interfering with any shadow he applies on top. He added that it has been his favorite for decades because it just lets the color shine. The formula contains rice extract and sea whip extract that help hydrate and protect the delicate eye area. It wears more like skin care than traditional makeup and does not cause dryness. This primer quietly does all the work if you want longer wear and cleaner blending with shadow that truly pops.

    Perfect for Dry Eyelids: NARS Base That Prevents Flaking and Fading

    Why it’s worth it: If you own a Too Faced palette then you probably need the brand’s Shadow Insurance Eye Primer to make those eyeshadows perform better. The formula contains oil-absorbing silica that reduces shine and keeps your eyelids smooth throughout the day. The silky texture has no color & works with any skin tone while creating a base that helps eyeshadow stick properly. This means you get brighter colors that blend more easily & stay on longer. The waterproof formula resists fading and smudging even when it’s humid or raining outside. The brand claims it lasts 24 hours but we found it worked well for 12-hour days which is still impressive.

    Go-To for Oily Lids: Too Faced Primer with 24-Hour Oil Control

    Why it’s worth it: The Laura Mercier Eye Basics Primer comes in two shades and works great for evening out skin tone on your eyelids. The light blue version helps hide purple and pink tones that show up as redness or visible veins. The peach version brightens dull skin and makes it look more awake. After you put it on your eyelids look smooth and even. It also helps your eyeshadow stay in place all day whether you use powder or cream formulas. This primer also takes care of your skin while you wear it. It has aloe to calm & add moisture. Lanolin acid keeps that moisture locked in. Safflower seed oil feeds your skin with nutrients but feels lightweight and comfortable.

  • 9 Moisturizers That Repair Flaky Winter Skin Overnight According to Beauty Editors

    9 Moisturizers That Repair Flaky Winter Skin Overnight According to Beauty Editors

    Winter can be especially harsh on skin in India, where fluctuating temperatures, dry indoor air, and pollution often lead to tight, flaky patches by morning. That’s why beauty editors consistently recommend rich overnight moisturizers designed to restore comfort while you sleep. These formulas work when skin is most receptive, helping replenish moisture, strengthen the barrier, and smooth rough texture by sunrise. Choosing the right winter moisturizer isn’t just about thickness—it’s about ingredients and how well they support overnight repair for visibly healthier-looking skin.

    Overnight Moisturizers for Repairing Flaky Winter Skin

    When winter dryness strikes, overnight moisturizers become essential because they deliver intensive care during the skin’s natural renewal cycle. Editors often look for formulas that provide deep hydration, seal in moisture, and support skin barrier repair without feeling heavy. Ingredients like ceramides and nourishing oils help calm irritation, while occlusives prevent further water loss. The goal is waking up to soft supple skin rather than tightness or flakes. Used consistently, these products can improve texture, reduce redness, and restore comfort, making them a winter staple for anyone dealing with overnight dryness.

    Why Beauty Editors Trust Winter Skin Repair Moisturizers

    Beauty editors test products across climates and skin types, so their winter moisturizer picks focus on reliability and results. They favor creams that offer overnight moisture boost while remaining suitable for daily use. Many of these formulas balance rich emollients with humectants to draw in hydration and keep it locked in. Editors also value textures that absorb well, leaving non greasy feel on the skin and pillow. Over time, these trusted moisturizers help reduce flaking, improve elasticity, and support long lasting comfort even during the coldest nights.

    Choosing the Best Moisturizer for Flaky Winter Skin

    Selecting the right winter moisturizer depends on your skin’s specific needs. Those with very dry skin may benefit from creams that provide intensive night care, while sensitive types should look for soothing, fragrance-free options. Editors often suggest focusing on products that strengthen the barrier and improve resilience, leading to visible skin recovery by morning. Consistent nighttime use helps restore balance and reduces the appearance of flakes. A well-chosen moisturizer doesn’t just hydrate—it supports healthy skin renewal throughout the winter season.

    How Overnight Moisturizers Transform Winter Skin

    Overnight moisturizers work differently from daytime creams because they’re designed for extended wear and deeper repair. While you sleep, skin focuses on regeneration, making it the ideal time for richer formulas to deliver nutrients and hydration. Editors highlight that regular use can lead to improved skin texture, fewer dry patches, and a smoother look overall. These products also help minimize moisture loss caused by heaters and cold air. With consistent application, you’ll notice morning skin softness and better resilience, proving that overnight care plays a key role in winter skincare routines.

    Moisturizer Type Best For Key Benefit
    Ceramide Cream Very dry skin Barrier strengthening
    Shea Butter Moisturizer Flaky patches Intense nourishment
    Gel-Cream Hybrid Combination skin Lightweight hydration
    Overnight Sleeping Mask Severely dry skin Deep overnight repair

    Frequently Asked Questions (FAQs)

    1. Can overnight moisturizers really fix flaky winter skin?

    They help repair and hydrate skin while you sleep, reducing flakes by morning.

    2. Should oily skin use overnight moisturizers in winter?

    Yes, lightweight formulas can prevent dehydration without clogging pores.

    3. How often should winter moisturizers be used?

    Most beauty editors recommend nightly use for best results.

    4. Are overnight creams different from regular night creams?

    Overnight creams are usually richer and designed for longer-lasting repair.

  • Salon-Style Eyebrows at Home: 7 Simple Steps for Perfect Coloring and Definition

    Salon-Style Eyebrows at Home: 7 Simple Steps for Perfect Coloring and Definition

    Waking up with full and well-shaped brows without needing a pencil feels like the perfect beauty shortcut. When you tint your eyebrows correctly at home the color can last between 3 & 6 weeks. The important part is being careful & controlled so your brows look natural and enhance your face instead of looking too dark or messy. This guide will show you how to tint your eyebrows safely and neatly at home without making a mess in your bathroom.

    Why At-Home Brow Tinting Is Worth Considering

    Tinting your brows at home goes beyond convenience or avoiding salon trips. One tint kit typically provides enough product for multiple uses while a professional appointment covers only a single session. When you do it yourself you decide how dark the color should be and how soft the front appears & what the final shape looks like. The color in the hair usually lasts between 3 and 6 weeks and the subtle stain on your skin fades after 5 to 7 days. This creates a gradual fade instead of an abrupt change.

    The flexibility is another benefit. You can modify the shade or adjust the timing whenever your hair color changes or your makeup preferences shift with the seasons. Having control over this small detail often makes your entire face appear more refined and put-together even when you skip makeup.

    How Long Brow Tint Actually Lasts

    The staying power of your brow tint depends on skin type, daily habits, and product use. Hair holds pigment far longer than skin, which is why brows gradually soften instead of vanishing all at once.

    Factor What You’ll Usually See
    Dry or normal skin with gentle cleansing Defined color for 3–6 weeks; skin stain fades in about a week
    Oily skin, frequent swimming, or strong sun exposure Noticeable fading after 2–3 weeks
    Heavy oils, balms, or exfoliants near brows Color fades faster, especially from the skin

    Treat freshly tinted brows kindly—less heat, less rubbing, and fewer harsh cleansers—and the color will reward you by lasting longer.

    What You’ll Need Before You Start

    You do not need professional equipment but having the right basics helps you get even color and safer results: Brow-specific tint or gel without ammonia Developer or oxidant that the brand recommends Glass or plastic mixing cup and spatula Angled or precision brow brush Cotton pads & cotton swabs Thick cream or petroleum jelly to protect your skin Gloves & a clean spoolie Micellar water or gentle toner A timer or phone stopwatch Safety is important. Never use regular hair dye on your brows. Some dyes can cause serious eye injuries and ingredients like PPD (p-phenylenediamine) are known to trigger allergic reactions especially on delicate facial skin.

    Why Patch Testing Is Non-Negotiable

    Before using any tint you should apply a small amount of the mixed product behind your ear or on the inside of your elbow. Leave that area uncovered for 48 to 72 hours. If you notice redness or itching or swelling or blistering then the dye is not safe for you to use. This simple step helps you avoid uncomfortable and visible reactions near your eyes.

    Seven Steps to Natural, Salon-Style Brows at Home

    Shape Your Brows a Day in Advance

    Tweeze the stray hairs that clearly sit above your eyebrows & below them and in the space between both brows. Do not make the main eyebrow shape thinner when you tweeze. Use a pencil to lightly draw the outline of the eyebrow shape you want to achieve. Then clean the entire area using micellar water and carefully wipe away any extra oil from the skin so the tint will go on smoothly & evenly across your brows.

    Shield the Surrounding Skin

    Apply a thin layer of thick cream or petroleum jelly along the penciled outline you created. Make sure to keep it off the actual brow hairs. This protective barrier stops unwanted staining from occurring and helps you achieve cleaner and sharper edges.

    Mix the Tint Smoothly

    Mix about 0.5 to 0.75 inch of tint with developer following the instructions on the package. Most products use equal parts of each ingredient. Stir the mixture until it becomes smooth and creamy with no lumps remaining. Pick a color that is one or two shades darker than your natural eyebrow color. Avoid selecting a shade that looks too dark compared to your hair color.

    Apply Where Brows Are Fullest

    Start at the inside part of your eyebrow closest to your nose. Make small strokes that go in the same direction as your eyebrow hairs grow and make sure each hair is completely covered. Continue moving toward the outer end of your eyebrow but use a little less product as you go. If you have light colored hairs or gray hairs make sure they are completely covered so your eyebrows look even and not patchy.

    Process Carefully and Watch the Clock

    Set your timer based on what the brand recommends. This is usually somewhere between 7 and 15 minutes. When you reach the 3 to 5 minute point you should take a clean spoolie brush and gently comb through the inner part of your eyebrow. This helps soften the front area and prevents your brows from looking too blocky or harsh.

    Remove Gently and Condition

    Set your timer according to the brand’s recommended time which typically falls between 7 and 15 minutes. After 3 to 5 minutes have passed you need to take a clean spoolie brush and carefully comb through the inner section of your eyebrow. This step helps create a softer appearance at the front and stops your brows from looking overly blocky or severe.

    Check in Natural Light and Begin Aftercare

    Let the color set for roughly one hour before you examine the symmetry in natural daylight. Small differences between the two brows are completely normal & you can easily balance them out using makeup. Make sure to keep your brows dry during the first twenty-four hours after the procedure. You should also stay away from any oil-based products & avoid exfoliating the surrounding area for several days following your appointment.

    Common Brow Tinting Mistakes to Avoid

    Common Tinting Mistakes to Avoid Ignoring the patch test can cause unwanted irritation on your skin. Choosing a shade that is too dark or warm often creates a harsh appearance that looks fake. When removing tint you should use gentle wiping motions because scrubbing causes skin irritation and damages hair follicles. Failing to follow proper aftercare means your tint will fade quickly due to exposure to heat and sunlight or using strong cleansing products.

    A Small Change That Makes a Big Difference

    A good brow tint makes a real difference in how you look. Your skin appears more refreshed and your eyes become more noticeable. Even when you wear no makeup your face looks put together. When you prepare properly and use safe products and take care of your brows afterward you can tint them at home and enjoy weeks of easy definition. After you discover the right method for your brows you will realize it becomes an essential beauty routine that you cannot imagine living without.