Category: News

  • Homemade Eyebrow Gel Using Aloe and Cocoa Keeps Brows Shaped Flexible and Naturally Defined

    Homemade Eyebrow Gel Using Aloe and Cocoa Keeps Brows Shaped Flexible and Naturally Defined

    The radiator began its familiar metallic ticking, the small signal that heat was on its way. Outside, the wind slid through bare branches and gently rattled the window frames, quietly announcing that colder days had settled in. Indoors, the room was warm enough, yet the air felt dry and weightless. Your throat felt irritated, your hands tight and uncomfortable, and your nose hovered on the edge of a sneeze.

    Somewhere in your memory—perhaps from an older relative or something read online—you recalled a suggestion about placing a glass of water near a radiator. The idea seemed oddly simple, almost like folklore. Still, as the evening wore on and the dryness deepened, you filled a glass to the brim and set it beside the heater. As the water slowly warmed, a quiet shift began. It was subtle, nearly invisible, but winter often reveals its truths this way.

    The Quiet Science Behind a Simple Glass of Water

    At first, the thought that a single glass of water could make a room feel more comfortable—without adding heat—seems unlikely. Water doesn’t generate warmth or act as a hidden heat source. The effect is more delicate. It’s not about raising the temperature, but about helping your body experience the warmth that already exists in the room.

    Why Heated Rooms Can Still Feel Uncomfortable

    When a radiator runs, it doesn’t only increase temperature—it also reduces moisture in the air. This dryness often appears as scratchy skin, static in clothing, or mild irritation in the throat and nose. What’s less obvious is how low humidity affects the way warmth is felt.

    Your body constantly exchanges heat with its environment. In dry air, moisture evaporates more quickly from your skin and with each breath you take. This evaporation draws heat away, creating a gentle cooling sensation. Even if the thermostat shows a comfortable number, your body may not register the room as truly warm.

    How a Glass of Water Supports Comfort Indoors

    This is where the glass of water quietly helps. Placed near a heat source, it absorbs warmth and gradually releases moisture into the air through evaporation. The increase in humidity is modest, but often enough to reduce moisture loss from your skin and airways. The temperature remains unchanged, yet the space begins to feel softer and more balanced.

    Aloe Vera as a Gentle Base for Brow Shaping

    Aloe vera has long been used as a soothing skin remedy, well before it appeared in modern packaging. Pure aloe gel feels cool, light, and smooth, offering slip without stiffness. When applied to eyebrows, it acts as a subtle styling aid that holds hairs in place without making them feel rigid.

    In a homemade brow gel, aloe serves as the foundation. Its natural texture provides light to medium hold, keeping brows neat while still flexible. A clean, additive-free gel also supports hydration, turning a daily routine into a moment of care rather than a rushed cosmetic step.

    Cocoa Powder for Soft, Natural Brow Color

    Cocoa powder brings warmth and depth with its naturally rich brown tone. It works especially well for light to medium-dark brows, blending seamlessly with existing hair. When mixed with aloe, it creates a soft, stain-like finish instead of a sharp or painted effect.

    This approach allows for easy adjustment. A small amount offers gentle definition, while adding slightly more deepens the shade. The result looks natural and even, avoiding harsh lines. Using a familiar kitchen ingredient adds a sense of comfort while shaping the face in a subtle way.

    Creating a Simple Brow Gel Routine

    Preparing your own brow gel becomes a calm, hands-on process. Clean jars, a spoon, and a spoolie brush are all you need. The act feels slow and intentional, turning a simple task into a quiet ritual.

    The basic formula uses just aloe vera gel and cocoa powder. Optional additions—such as a drop of jojoba oil for smoother texture or a pinch of coffee or charcoal for deeper tones—can be explored later. The strength of this recipe lies in its deliberate simplicity.

    Mixing the Gel Gently

    Place two teaspoons of aloe vera gel into a clean jar. Add about a quarter teaspoon of cocoa powder, stirring slowly to remove any clumps. As you mix, the clear gel will gradually transform into a smooth, earthy brown.

    Test the color on the back of your hand and let it dry briefly. Adjust the balance as needed—more cocoa for depth, more aloe for softness. The finished texture should be creamy and spreadable, thick enough to coat a brush without dripping. Seal the jar and allow it to rest for an hour so the mixture settles evenly.

    Applying the Gel With Care

    Using a homemade brow gel encourages a more mindful routine. Start with clean, dry brows. Lightly dip a spoolie into the product and remove any excess. Brush through the brows using short, feathered strokes that follow the natural direction of hair growth.

    Begin at the inner brow and move outward, focusing on shaping rather than filling heavily. For extra definition, let the first layer dry before adding another, concentrating on sparse areas. An angled brush can help create hair-like strokes if needed. The final look remains soft, flexible, and natural.

    When Simple Choices Feel Meaningful

    Making something at home carries quiet meaning. It reduces waste, limits unnecessary ingredients, and reconnects you with the process of creating. Each refill of a small jar replaces another disposable tube, and each use reinforces the idea that beauty doesn’t require complexity.

    Natural solutions aren’t universal, and paying attention to your skin is essential. Patch testing and adjusting the formula are part of the process. Still, there is value in slowing down, mixing something by hand, and shaping your brows with intention. In that small moment—brush in hand, cocoa-scented gel nearby—you’re reminded that care can be gentle, practical, and personal.

  • This 72-year-old trainer recommends 4 seated exercises for mobility and flexibility

    This 72-year-old trainer recommends 4 seated exercises for mobility and flexibility

    Moving with ease is something many people don’t think twice about in their younger years. However, as time goes on, preserving mobility and strength becomes vital for maintaining independence, confidence, and overall quality of life.

    This is something 72-year-old certified personal trainer Mitch Kahn understands deeply. The creator of Forever Fit With Mitch, Kahn designs workouts specifically for older adults, focusing on improving balance, strength, flexibility, and self-assurance.

    Why Mitch Kahn Recommends Chair Workouts

    One form of exercise Kahn strongly advocates is chair-based workouts. Explaining his approach, he says that chair exercises are highly effective at building real strength, coordination, and confidence. To help people get started, Kahn has shared four seated exercises he believes every older adult can benefit from. All you need is a stable, comfortable chair and, optionally, one of the best resistance bands.

    As always, if you are new to exercise or returning after a break, it’s important to check with your doctor first and move at a pace that feels right for you.

    The Four Chair-Based Moves Explained

    Created by Kahn, these four seated exercises are suitable for beginners and seniors alike. The routine targets full-body strength, coordination, and functional fitness, helping you feel steadier and more capable during everyday activities.

    You can watch Kahn demonstrate the exercises in his video, or read on for a breakdown of each move, including benefits and focus areas:

    • Cross-body punches: This bodyweight movement supports core rotation and helps improve overall coordination.
    • Seated leg press (with or without a band): Designed to strengthen the legs and lower body, this exercise supports daily movements like walking and climbing stairs. Kahn shows both banded and unweighted versions, recommending beginners start without resistance.
    • Overhead arm circles: Modern habits, such as long periods of sitting or looking down at phones, can affect posture. This movement helps increase flexibility, improve alignment, and enhance shoulder strength.
    • Seated row with side taps: This multi-tasking move works the arms, legs, and core together, supporting upper-body strength, posture correction, and better coordination.

    Kahn suggests completing 12 repetitions of each exercise, taking a short rest, and repeating the full circuit three times.

    The Benefits of Chair-Based Workouts

    Chair workouts, like this four-move routine, offer an accessible way for beginners and older adults to build strength, flexibility, and balance. They are especially useful for those who find floor exercises challenging.

    For instance, chair yoga provides a welcoming introduction to mind-body movement, while seated strength routines allow people to continue improving posture and muscle strength without getting down on the ground—all while enjoying that important endorphin boost.

    These exercises also support functional fitness, which refers to the strength needed for everyday tasks such as using the stairs, getting in and out of bed, or sitting down and standing up.

    Research supports this approach. A 2021 study published in the International Journal of Environmental Research and Public Health found that chair-based exercises are not only effective but should be encouraged as simple, easy-to-implement activities to help older adults maintain and develop strength.

    About the Author

    Becks is a lifestyle journalist covering wellness and home products, from mattresses to weighted blankets and cooling comforters. She regularly tests products for Tom’s Guide, evaluating how well they perform and offering guidance on which types of sleepers they are best suited for.

  • You can build muscle with kettlebells using this 3-move routine beginners learn first

    You can build muscle with kettlebells using this 3-move routine beginners learn first

    I don’t set the rules, but no matter how many complex strength routines circulate online, the fundamentals always come out on top: functional movement, progressive overload, and consistent training—along with a protein-rich diet to support recovery and muscle growth.

    As long as your muscles are challenged regularly and with enough intensity, you can build strength from head to toe. While this kettlebell workout isn’t designed to cover every training need on its own, it is highly effective and will help you develop a stronger, more powerful, and more resilient body over time.

    As a trainer who has relied on kettlebells more than any other piece of gym equipment in recent years, they remain my go-to tool. They’re versatile, demanding, and engaging, and they can quickly turn a moderate exercise into a serious challenge—especially when movements like snatches are involved.

    A Simple Three-Move Kettlebell Workout

    Below is a straightforward three-exercise kettlebell routine designed to build strength, power, and endurance.

    Staggered Stance Kettlebell Deadlift

    Deadlifts target the posterior chain, strengthening muscles along the back of the body such as the glutes, hamstrings, and lower back. The hip hinge also engages the hip flexors while reinforcing core stability. This movement is highly functional, as it mirrors everyday lifting patterns and helps make them safer.

    Using a staggered stance increases the demand on balance and stability, while placing extra emphasis on the hamstrings and glutes of the lead leg. Keep a slight bend in the rear leg, maintain a neutral, flat spine, lower the kettlebells toward the floor, then drive through the hips to stand tall.

    Kettlebell Gorilla Row

    The gorilla row primarily works the upper back and biceps as you pull the weights upward. The wide stance and hip hinge also place added stress on the hips and hamstrings, making it more demanding than a traditional row.

    Maintain a steady knee bend and keep your feet firmly planted to create a strong base. Pull your elbow toward your back pocket and pause briefly, squeezing the shoulder blades together. You can perform the movement one side at a time for unilateral focus or row both kettlebells together to increase overall intensity.

    Kettlebell Squat Clean and Press

    The press challenges the shoulders, triceps, and upper chest through a vertical overhead push. The clean portion of the movement ties everything together, emphasizing coordinated, full-body effort using a controlled technique.

    This exercise relies on total-body engagement. As you drive upward, the hips, legs, and core—particularly the abdominals, obliques, and spinal muscles—work together to stabilize and transfer force. The movement also targets the traps, lats, deltoids, and arms, helping develop explosive strength and efficient load transfer.

    Workout Structure

    This routine follows an EMOM format (Every Minute On the Minute) for a total of 7 rounds, lasting 21 minutes.

    • Minute 1: 6–8 staggered stance deadlifts per leg
    • Minute 2: 12 gorilla rows (6 per side or 12 together)
    • Minute 3: 6–8 clean and presses per arm

    The repetition ranges are guidelines. Adjust as needed based on your ability, and rest for the remainder of each minute before moving to the next exercise. Ideally, aim to leave 10–15 seconds of rest per minute. Beginners may benefit from 15–20 seconds, while more advanced exercisers can target closer to 10 seconds.

  • Get Softer Lips This Winter With These 8 Top Rated Scrubs and Treatments

    Get Softer Lips This Winter With These 8 Top Rated Scrubs and Treatments

    Winter weather can be tough on lips, especially in India where cold air, low humidity, and indoor heating work together to cause dryness and cracking. That’s why switching to targeted lip scrubs and treatments during the colder months can make a visible difference. From gently exfoliating away flakes to sealing in long-lasting moisture, the right products help restore softness and comfort. This guide explores how top-rated scrubs and treatments support healthier lips, making winter care simple, effective, and easy to maintain even with busy daily routines.

    Why Winter Lip Scrubs Matter for Softer Lips

    Using a lip scrub in winter is not just about smoothness; it’s about keeping lips healthy when conditions are harsh. Gentle exfoliation removes dead skin that can block moisture from penetrating, allowing treatments to work better. Many top-rated scrubs are formulated to polish without irritation, making them suitable for regular use. When applied correctly, scrubs help prevent cracking and uneven texture, supporting gentle exfoliation, smooth lip texture, and better moisture absorption. For best results, choose formulas with nourishing oils or sugars that melt into the lips, offering comfort during cold while preparing them for balms and masks.

    Top Winter Lip Treatments for Deep Hydration

    After exfoliation, winter lip treatments step in to repair and protect. These products often include occlusive and hydrating ingredients that lock in moisture for hours, even overnight. In colder months, consistency matters more than quantity, so applying treatments daily can significantly reduce dryness. Well-reviewed options focus on intense moisture care, overnight lip repair, and long-lasting softness without feeling heavy. Many treatments are designed to shield lips from wind exposure, making them ideal for outdoor commutes. Over time, this routine supports healthy lip barrier and visibly plumper-looking lips.

    How to Choose the Best Lip Scrubs and Treatments

    With so many options available, selecting the right scrub or treatment depends on your lip concerns. Sensitive lips benefit from mild exfoliants, while extremely dry lips need richer formulas. Look for products that balance care and performance, offering non-irritating formulas, daily winter use, and skin-friendly ingredients. Texture also plays a role; creamy scrubs and balm-like treatments are easier to use consistently. Paying attention to reviews can help identify products that deliver visible softness results and fit seamlessly into your winter routine.

    Winter Lip Care Summary and Takeaways

    Achieving softer lips in winter comes down to pairing the right scrub with a reliable treatment. Exfoliation clears the way, while hydration restores comfort and prevents further damage. In India’s winter climate, maintaining this balance ensures lips stay supple despite changing temperatures. A simple routine focused on consistent lip care, seasonal protection needs, and hydration-first approach can transform dry lips into a smoother, healthier pout. With the right products, winter lip care becomes effortless and rewarding.

    Product Type Main Benefit Best Time to Use
    Lip Scrub Removes dead skin 2–3 times weekly
    Hydrating Balm Daily moisture Daytime
    Overnight Mask Deep repair Before bed
    Nourishing Treatment Barrier protection Morning and night

    Frequently Asked Questions (FAQs)

    1. How often should I use a lip scrub in winter?

    Most people benefit from using a gentle lip scrub two to three times a week.

    2. Can lip treatments replace regular lip balm?

    Lip treatments complement balms by offering deeper repair, especially overnight.

    3. Are winter lip scrubs safe for sensitive lips?

    Yes, as long as you choose mild, non-abrasive formulas designed for sensitivity.

    4. When will I see results from a winter lip care routine?

    With consistent use, most people notice softer lips within one to two weeks.

  • Fix Scratches on Glass Cooktops Quickly at Home Without Replacement

    Fix Scratches on Glass Cooktops Quickly at Home Without Replacement

    The first time you notice it your heart sinks. That shiny black glass cooktop you used to love now has a pale jagged scratch running across it. Perhaps it appeared when you moved a heavy pot too quickly or when a tiny grain of salt got stuck under a pan. The scratch is small but every time you enter the kitchen you spot it immediately. When you touch the surface you can feel the rough edge. You begin to worry that the damage is permanent and wonder if you need to replace the entire cooktop or simply accept the flaw.

    Why Scratches Appear on Glass Cooktops (Even With Careful Use)

    Glass cooktops look smooth, modern, and almost unbreakable—like a dark, glossy surface that can handle daily cooking without trouble. In reality, the glass is more sensitive than it appears. Tiny abrasions can form even when you’re careful. Sliding a heavy pot, a grain of salt trapped under cookware, or a cast-iron pan with a rough base can all quietly mark the surface. Often, the scratch isn’t noticed right away. It shows up later while cleaning, bringing that familiar mix of irritation and regret. The important thing to know is that many of these scratches are not permanent and can often be reduced with gentle care.

    Understanding the Scratch: How Serious Is It?

    Before trying to fix anything, it helps to understand what kind of scratch you’re dealing with. Look at the cooktop under bright light and from different angles. If the scratch appears only at certain angles and your fingernail doesn’t catch on it, it’s likely a light surface mark. These are usually the easiest to improve. If your nail catches slightly, the scratch may still be manageable. Deep grooves that clearly catch your nail are more serious and can’t be fully removed at home. Thinking of scratches in levels—light haze, visible lines, and deep grooves—helps you choose the right approach and set realistic expectations.

    Preparing the Right Tools: Gentle, Not Aggressive

    Start by cleaning the cooktop thoroughly so no grease or debris interferes with the repair. Use a soft cloth and a cooktop-safe cleaner, then dry the surface completely. For polishing, choose mild options only. Baking soda paste, non-gel toothpaste, ceramic cooktop cream, or a glass polishing compound are all suitable for light to medium scratches. These products work by gently smoothing the surface rather than grinding it down. Always use a soft microfiber cloth and avoid harsh sponges, steel wool, or anything gritty that could add new scratches.

    At-Home Methods That Can Reduce Scratches

    Begin by testing your chosen method on a small, hidden area. If the finish remains clear, move on to the scratch. For light scratches, apply baking soda paste or toothpaste and rub gently in small circles. Wipe clean, check progress, and repeat if needed. For more visible scratches, ceramic cooktop cream or glass polishing compound often works better. Apply with light pressure and patience, letting the product do the work. Deep scratches won’t disappear, but careful polishing can soften their appearance and make them far less noticeable.

    Finishing the Surface After Polishing

    Once the scratch looks improved, clean the area again to remove residue. Many people like to finish with a cooktop cleaner that leaves a light protective shine. Buff gently with a dry microfiber cloth until the surface reflects evenly. The scratch may still exist faintly, but it usually fades into the background rather than standing out.

    Method Used Most Effective For Main Advantages Possible Drawbacks
    Baking Soda Paste Minor surface marks and dull patches Low cost, easily available at home, gentle on glass Not effective for deep or clearly visible scratches
    Non-Gel Toothpaste Light but noticeable scratches Simple application, mild abrasive helps polish glass Needs repeated attempts for visible results
    Cooktop Polishing Cream Light to moderate scratch damage Specifically made for glass cooktops, restores shine safely More expensive than basic household options
    Glass Polishing Compound Multiple or stubborn scratch marks Stronger polishing power, better visible improvement Requires careful use to prevent surface damage

    How to Prevent Future Scratches on Your Cooktop

    Prevention is mostly about changing small habits. Lift cookware instead of sliding it. Wipe the bottoms of pots and pans before placing them on the glass. Clean spills—especially sugar or salt—before cooking again. Avoid storing heavy or rough cookware directly on the cooktop. If you use protective mats or covers, make sure they are designed specifically for glass cooktops and safe for heat.

    When Repair Isn’t Enough and Replacement Is Safer

    If a scratch looks more like a crack, spreads over time, or feels deeply gouged, it’s best to stop and seek professional advice. Structural damage can affect how the glass handles heat and may become a safety issue. However, most everyday scratches are cosmetic and don’t require replacement. With gentle methods and patience, you can restore much of the cooktop’s smooth appearance and continue using it with confidence.

    Final Thoughts on Caring for a Glass Cooktop

    A glass cooktop is both practical and reflective, showing signs of daily cooking life over time. Scratches don’t always mean failure or neglect—they’re often just part of regular use. Learning how to soften or reduce them helps keep your kitchen looking calm and cared for. More importantly, it builds confidence in maintaining your appliance without panic, allowing you to focus on cooking rather than worrying about every small mark.

  • Simple Balance Drills That Improve Stability as You Get Older

    Simple Balance Drills That Improve Stability as You Get Older

    The first time you notice your balance has changed it usually happens without warning. It’s a subtle shift. You might reach for something on a high shelf and feel your body sway in an unfamiliar way. You might step down from a curb and find your foot pausing instead of moving forward smoothly. Or you might realize that standing on one leg to put on pants has become difficult when it used to be automatic. Between your daily routines and the passing years your sense of balance began to fade without you really noticing.

    The Subtle Art of Staying Upright

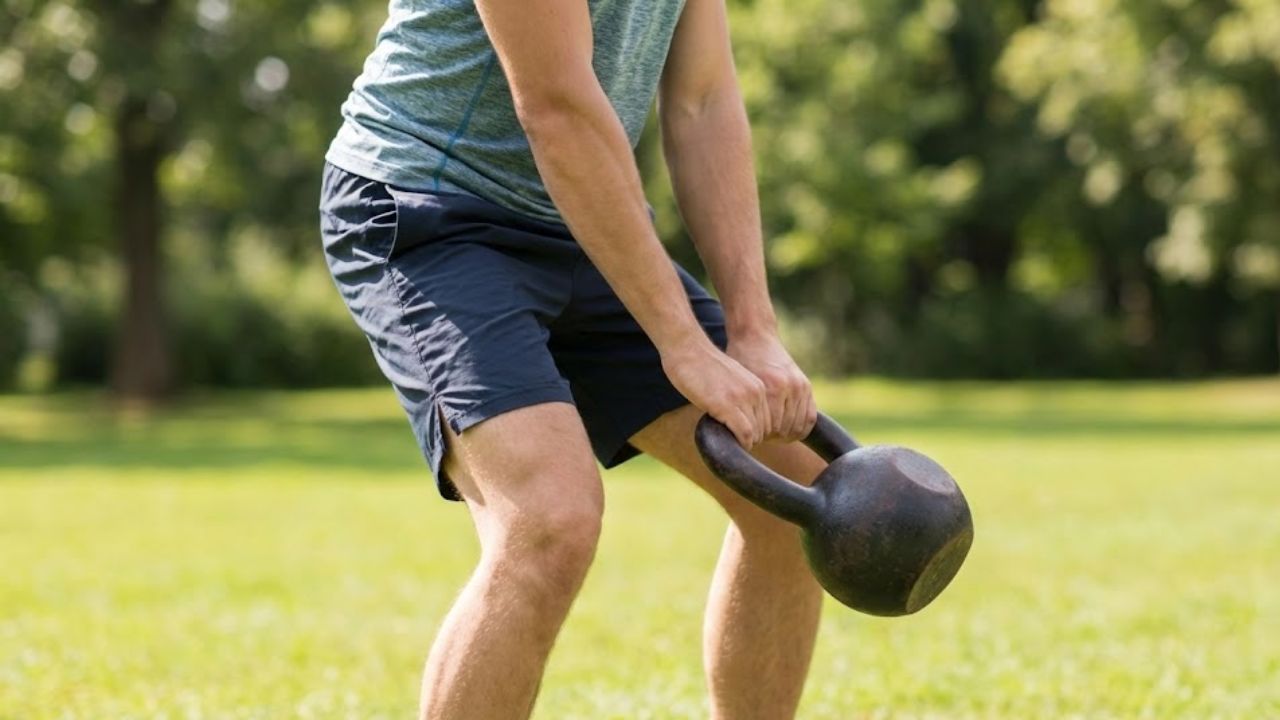
    Balance is one of those invisible skills like breathing or blinking that we rarely think about until something goes wrong. Yet it works constantly in the background with tiny muscles in your feet adjusting to uneven ground and joints communicating with your brain while your inner ear tracks how your body tilts and sways. This silent coordination changes as we get older. Muscle fibers become thinner. Reaction times get slower. Vision becomes less sharp around the edges. The inner ear that acts as our natural level and compass can lose some of its precision. None of this means you are fragile but it does mean your body is being more direct about what it needs. Sometimes it simply asks for a little help. The encouraging part is that balance can be improved at any age. Your nervous system remains adaptable and your muscles still respond to training. You don’t need expensive gym equipment or complex routines to help your body regain its steadiness. What you need is simple & regular practice along with some curiosity and a willingness to feel a bit unsteady on purpose. Imagine yourself standing with bare feet on the floor and your toes spreading out like roots while you breathe calmly as your body learns to organize itself with more grace. The exercises that follow are not flashy or impressive. Nobody will share videos of you doing them online. But they could make the difference between catching yourself when you stumble and falling to the ground. They might help you move through your daily life with quiet and renewed confidence as you take each careful step.

    Awakening Your Feet: The Foundation of Balance

    Balance starts in a place you might not expect. It does not begin with your mind or your goals. It begins at the point where your body connects with the ground beneath you. Your feet are remarkably sensitive structures filled with countless nerves that send constant signals to your brain. These signals tell you about the texture of the surface under you and how your weight shifts from side to side. They also inform you about whether the ground is flat or uneven. Modern life has changed how our feet work. When you wear rigid shoes that limit natural movement your feet lose some of their ability to sense the world. When you spend most of your day sitting at a desk or on a couch those important signals become weaker. The connection between your feet and your brain starts to fade. Your nervous system receives less information about balance and position. Over time this makes it harder for your body to maintain stability & respond quickly to changes in your environment.

    Drill 1: The Four Corners Stand

    Take off your shoes and stand with your feet positioned about hip-width apart. Allow your toes to spread naturally. You can do this on kitchen tiles or a wood floor or even a rug. Think of each foot as having four corners: the ball beneath your big toe & the ball beneath your little toe along with the two sides of your heel. Gently shift your weight until all four corners press equally into the ground. You might notice at first that you favor the outer edges or lean more into your toes than your heels. Let your weight move slowly in a circle by going forward and then right and then back and then left. This creates a slow wobbly ring around those four corners. After that you can gradually bring your weight back to the center. Hold this balanced position for 20 to 30 seconds at a time & rest when you need to. Breathe as though the air is reaching down to your feet. This exercise is not just about muscles but about reestablishing the connection between your feet & your brain.

    Drill 2: Heel-to-Toe Rocking

    Stay barefoot and stand next to a counter or solid chair that you can hold for balance. Position your feet directly under your hips. Gently shift your weight forward until your heels start to lift slightly off the ground. Then shift back until your toes relax & your heels press down firmly. Take your time with each movement. Keep the motion small & controlled because the goal is not to lose balance but to discover how far you can lean in each direction. Notice how your ankles make tiny adjustments and how the muscles in your calves & shins work together. Pay attention to when your toes grip the floor and when they let go. Do this rocking motion 10 to 15 times slowly. Think of this exercise as warming up a skill that has not been used much lately. These basic exercises work better than you might expect. When your feet can properly feel the floor beneath them your entire body moves more efficiently & with less strain.

    Standing Still, Feeling Everything

    Stillness is never truly still. When you stand completely motionless your body makes countless small adjustments similar to a boat floating on calm water. Getting better at balance begins with recognizing this subtle activity.

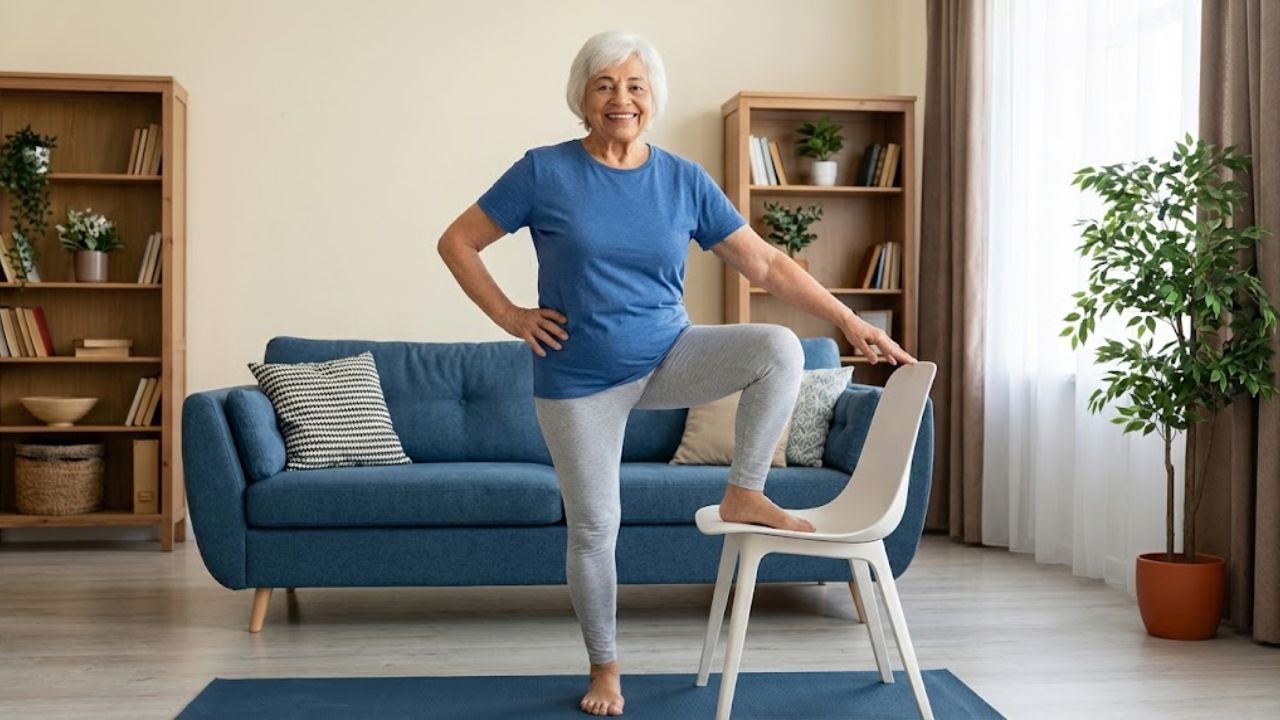
    Drill 3: Single-Leg Support (With Training Wheels)

    Find a counter, table, or the back of a sturdy chair. Stand tall with your feet hip-width apart. Lightly rest one hand on your support. Shift your weight onto your left foot, then slowly lift your right foot a few inches off the ground, bending the knee so the toes hover. You are not aiming to balance like a flamingo; the goal is to feel supported, alert, and steady.

    Spread the toes of your standing foot. Gently engage your belly as if bracing for a soft poke. Fix your gaze on something still in front of you—a mark on the wall or a cupboard handle works well. Begin with 10–15 seconds on each leg. If your ankle trembles or your muscles quiver, that is a good sign; it means your body is learning.

    As this becomes easier, reduce how much you rely on your support. Progress may look like using only fingertip contact, then hovering your hand just above the surface, ready if needed. Over time, you may find yourself standing for 30 seconds on each leg, breathing calmly, your body making subtle, steady adjustments.

    Drill 4: The Soft-Standing Challenge

    Once single-leg standing feels familiar, add a gentle variation by softening your knees. Many people lock their knees without noticing, turning their legs into rigid pillars that respond poorly to change. Instead, stand on both feet with your knees slightly bent, as if you were about to sit down and then changed your mind.

    Now lift one foot just an inch or two off the floor. Notice how the softly bent knee on your standing leg allows more flexibility. It may feel less elegant than a straight-legged pose, but it is more honest and far safer when life surprises you with a slippery surface or sudden turn.

    Practice 3–5 rounds on each side, holding for 10–20 seconds at a time. Let your arms float out for balance if needed. This small bend is often the difference between being rigid and being ready.

    Walking the Line: Turning Everyday Steps into Training

    Walking is a series of controlled falls, one foot catching you again and again. As we age, that control can feel less reliable. Instead of moving automatically from task to task, you can turn a few steps into intentional practice, creating a quiet training ground woven into daily life.

    Drill 5: Tightrope Walk (With Safety Nets)

    Find a clear stretch of floor such as a hallway, living room path, or kitchen walkway. If you feel unsteady, stay near a wall or countertop so you can reach out if needed.

    Imagine a thin line painted on the floor. Place the heel of one foot directly in front of the toes of the other, as if walking on that imaginary line. Take one slow step, then another. Let your arms extend slightly to the sides. Keep your gaze forward rather than down; this trains your vision and inner ear to work together.

    Take 8–10 steps along your invisible line, then walk back normally. If it feels too wobbly, widen your steps. Over time, you may notice your feet aligning more naturally and your steps growing more confident.

    Drill 6: Backward and Sideways Steps

    Life rarely moves in perfect straight lines. You step back from the fridge, move sideways past a table, or dodge someone moving quickly. Training these directions prepares your balance for real-world demands.

    For sideways stepping, stand tall with your feet together. Lightly hold a wall or counter if needed. Step your right foot to the side, then bring your left foot to meet it. Take 8–10 steps in one direction, then return, noticing how your hips and thighs work differently.

    For backward stepping, keep the movement small. Step back gently with your right foot, then bring your left foot to meet it. Keep your gaze forward, occasionally checking your path. Focus on control rather than speed.

    Upper Body, Inner Calm: Using Breath and Posture

    Balance involves more than feet and legs. The way you hold your spine, ribs, and head plays a major role. When shoulders round or the head juts forward, your center of gravity shifts, making it harder to stay upright.

    Drill 7: The Tall String

    Stand or sit with your feet flat on the floor. Imagine a gentle string lifting you from the crown of your head. Let your chin soften slightly as your head rises upward.

    Roll your shoulders up, back, and down, keeping them relaxed. Feel your ribcage stacking over your pelvis. Take three slow breaths, inhaling through your nose as your ribs expand, and exhaling through your mouth as if fogging a window.

    Holding this tall posture while breathing trains your postural muscles without strain and helps calm your nervous system, which supports steadier balance.

    Drill 8: Head Turns with a Steady Body

    Stand with your feet hip-width apart, lightly holding a chair or counter if needed. Fix your gaze on a steady point. Slowly turn your head to look over your right shoulder, return to center, then look over your left shoulder.

    Complete 5–8 turns each way. This movement helps your eyes and inner ear coordinate with your body, preparing you for everyday situations like crossing a street or scanning a room.

    Weaving Practice into a Real Life

    Balance practice does not require a special schedule or gym clothes. It can blend into ordinary moments throughout your day.

    Stand on one leg while brushing your teeth, keeping your hand near the sink. Hold a single-leg stance at the counter while waiting for the kettle. Rock heel to toe while washing dishes. Use pauses in your day to notice where your weight is and whether you can breathe without tension.

    Consistency matters more than intensity. Think of these moments as small daily deposits into your balance savings account.

    Quick Reference Summary

    Drill What It Trains How Often
    Four Corners Stand Foot awareness, weight distribution Daily, 30–60 seconds
    Heel-to-Toe Rocking Ankle control, forward–back balance 3–4 times per week, 10–15 rocks
    Single-Leg Support One-leg stability, core engagement Daily, 10–30 seconds each leg
    Tightrope Walk Gait control, coordination 3–5 passes, 3 times per week
    Tall String + Head Turns Posture, eye–inner ear coordination Daily, 1–2 minutes

    Listening to Your Edges, Honoring Your Pace

    There is a difference between helpful challenge and unnecessary risk. Gentle wobbling is fine; sharp pain is not. Effort is welcome; panic is not. The aim is to invite your body to remember its abilities, not to force it.

    If you have a history of falls, dizziness, joint replacements, or complex medical conditions, consider reviewing these drills with a healthcare professional or physical therapist. Using support or progressing slowly is a sign of wisdom, not weakness.

    Progress often arrives quietly. One day you may realize you have been standing on one leg longer than before, breathing steadily, feeling grounded. Age moves forward, but you are not only a passenger. Each mindful step is a vote for your future mobility, stability, and independence.

  • Simple Morning Hydration Routine That Supports Better Skin and Daily Energy

    Simple Morning Hydration Routine That Supports Better Skin and Daily Energy

    The first sip catches you off guard. You’re up earlier than usual & the morning light looks pale and uncertain through the window. Your thoughts feel cloudy and slow. You haven’t reached for your phone or glanced at the clock. You’re just standing in the kitchen without shoes on and lifting a glass of water to your mouth. Something feels different though. This isn’t the quick mindless swallow you usually take before rushing to make coffee. This time you drink slowly and the cool water seems to wake something in you. Your body responds to it the way dry earth soaks up rain after weeks without it.

    The Quiet Science of That First Glass

    Most of us wake up already dehydrated. During the night your body has been working without pause. It breathes and repairs skin & regulates temperature and processes what you ate the day before. All of this requires water. When morning comes you sit up in bed slightly depleted like a plant that has gone too long without water. You might not feel obviously thirsty. Instead you notice something less obvious. Your skin looks dull and needs extra makeup or moisturizer to appear healthy.

    There is a heaviness behind your eyes. Your thinking feels slow and sticky where even simple decisions take effort. Mild dehydration rarely makes itself obvious but it affects almost everything you do. Now imagine that for just four minutes each morning you replace what the night took from you. No supplements are needed. No expensive powders are required. No complicated recipes are involved. Just a simple deliberate water ritual that wakes up your cells and gives your skin an advantage & lifts your energy before your day begins. This is the hydrating four-minute morning water routine. It is a small practice that makes your body feel like someone finally remembered to turn on the lights.

    The Four Minute Routine: A Small Ritual With Big Ripples

    Most of us wake up already dehydrated. During the night your body has been working without pause. It breathes & repairs skin & regulates temperature and processes what you ate the day before. All of this requires water. When morning comes you sit up in bed slightly depleted like a plant that has gone too long without water.

    Minute 1: The Wake-Up Glass

    Before you reach for coffee or tea or check your emails drink your first glass of water at room temperature. Pour yourself about 250 to 300 ml. The water should not be cold or hot. Just neutral. Room temperature water enters your body smoothly without causing any shock. Your stomach stays calm instead of contracting & your system can absorb the water easily instead of resisting it. You can stand by the window or step onto your balcony if you have one.

    Keep your feet flat on the ground and let your shoulders hang loose. Take a breath. Drink the water slowly & with focus. Notice the water touching your tongue & moving down your throat until it reaches your stomach. This first glass accomplishes something surprisingly basic yet important. It ends the long period without water that your cells experienced during the night. They have been waiting for this moment.

    Minute 2: Add Minerals, Add Glow

    Your second minute focuses on enhancing your water with simple additions. Regular water works well but adding a small amount of minerals can make it more effective for energy and skin health. In your second glass of water (another 200 to 250 ml) you can add one or two of these options based on what you have available and what suits your body: A small pinch of quality sea salt or Himalayan salt (just enough to barely notice the taste) A squeeze of fresh lemon for vitamin C and mild acidity Or a small amount of coconut water if you want something slightly sweet and naturally high in potassium Mix it and take a moment to look at the glass.

    This is more than just water now. It becomes a solution your cells can recognize & use more quickly. The light stream of electrolytes helps your body retain hydration instead of passing it through too fast. Your skin cells respond particularly well to this. When cells are properly hydrated they become fuller and smoother and maintain a stronger protective barrier. As you drink this second glass imagine it reaching the small neglected areas of your body that felt empty twenty minutes earlier.

    Minute 3: Skin-First Sips

    The third minute is not about drinking more water but about paying attention. You can pour a little more water if you want or just keep sipping your mineral water from the second minute. Think of this as your skin minute. While you drink run your fingertips gently across your face. Pay attention to how your skin feels on your cheeks and forehead and that spot under your eyes that shows every late night and every glass of water you skipped. You are not being critical but simply observing.

    Picture this water creating a healthy glow by tomorrow morning. Drinking water will not change your skin in ten minutes. But if you do it regularly it will change how your skin works over time. It affects how your skin heals after breakouts and how it handles dry winter air or air conditioning and how fast it bounces back from sun exposure and stress and lack of sleep. During this minute the water also helps your circulation. As water moves through your body it supports your blood volume and helps blood flow better. Better circulation means nutrients reach where they need to go and waste products leave your body faster. Your skin is often the first place where you can see these changes happening.

    Minute 4: Breath, Posture, and a Promise

    The third minute is not about drinking more water but about paying attention. You can pour a little more water if you want or just keep sipping your mineral water from the second minute. Think of this as your skin minute. While you drink run your fingertips gently across your face. Pay attention to how your skin feels on your cheeks and forehead and that spot under your eyes that shows every late night and every glass of water you skipped. You are not being critical but simply observing. Picture this water creating a healthy glow by tomorrow morning. Drinking water will not change your skin in ten minutes.

    But if you do it regularly it will change how your skin works over time. It affects how your skin heals after breakouts and how it handles dry winter air or air conditioning and how fast it bounces back from sun exposure and stress and lack of sleep. During this minute the water also helps your circulation. As water moves through your body it supports your blood volume and helps blood flow better. Better circulation means nutrients reach where they need to go & waste products leave your body faster. Your skin is often the first place where you can see these changes happening.

    How This Tiny Routine Shows Up on Your Skin

    Your skin connects directly to the rest of your body. It functions as a living organ that reflects your internal health. When you feed it properly from the inside your skin begins to act differently. It becomes less reactive & more stable and forgiving. This simple four-minute morning water habit can create visible changes in your face & body as time passes: Smoother texture happens because hydrated skin cells absorb water and expand slightly. This creates an even surface. Fine lines around your eyes and mouth that come from dehydration often become less visible. Stronger barrier function develops when skin stays hydrated.

    Your skin holds onto its natural oils better and blocks out irritants more effectively. Random dry spots may disappear and your moisturizer seems to work more efficiently. Better bounce occurs when cells fill with water. Your skin feels firmer when you touch it and looks less dull or thin. The tired appearance after a poor night of sleep fades faster because your skin has what it needs. Calmer feelings about your appearance emerge over time. When you notice your skin gradually looking brighter or see redness decreasing or watch texture improving slowly your feelings about your reflection improve as well. These changes happen quietly like a plant that gets proper light and regular water. Nothing changes dramatically in one day. Everything changes across many days.

    Energy: The Invisible Upgrade

    We often think slow mornings happen because we didn’t sleep enough or need more coffee. We forget about hydration but it plays a major role in how alert we feel. Blood contains mostly water. Your brain does too. Even a slight decrease in hydration makes you feel heavier and slower and more irritable. When you start your day by drinking water on purpose you restore the fluid your body uses to move oxygen around and deliver nutrients and activate neurons & control temperature. Three common changes many people see after doing this for a few weeks include the following. Mornings feel more consistent.

    You don’t crash an hour after your first coffee anymore. Instead you experience a steadier energy level. Hydration reduces the extreme ups and downs. Your focus improves. Mild dehydration makes thinking feel difficult. Sometimes that afternoon slump happens simply because your brain needs water instead of more caffeine. You crave less food. Thirst and hunger send similar messages to your body. When you stay underhydrated for a long time you might grab snacks or sugar when your cells actually need water. You won’t transform into someone who loves mornings. But things feel clearer. The mental fog reduces. You handle your day with more stability like your internal systems finally learned to recharge correctly.

    Making It Your Own: Personalizing the Four Minutes

    We often think slow mornings happen because we didn’t sleep enough or need more coffee. We forget about hydration but it plays a major role in how alert we feel. Blood contains mostly water and your brain does too. Even

    Adjusting the Amount

    If drinking two large glasses seems overwhelming you can begin with smaller portions of 150 to 200 ml each and gradually increase the amount over time. The purpose is not to push yourself into discomfort or force down water. Instead you want to focus on steady and gentle hydration that feels natural to your body.

    Temperature Tweaks

    Warm water works well if you have a sensitive stomach or live somewhere cold. The warmth feels gentle and helps your digestive system wake up slowly. Cool water is better in hot weather & can make you feel more alert. Just avoid drinking very cold water right after waking up because it might make your stomach or throat feel uncomfortable.

    Flavor Without Fuss

    Warm water is a good choice if your stomach is easily upset or if you live in a cold climate. The warmth is soothing and helps your digestive system start working gradually. Cool water works better when the weather is hot and can help you feel more awake. However you should not drink very cold water immediately after waking up because it can cause discomfort in your stomach or throat.

    Habit Hooks

    Attach your four-minute ritual to something you already do every day. You might do it right after you make your bed or while the kettle boils for coffee or tea. Another option is to practice it just before your skincare routine. Over time the sequence becomes automatic. You wake up and drink water & breathe and begin your day.

    Seeing It in Practice: A Simple Comparison

    To understand how this can play out in a real day, imagine two versions of your morning—one with the ritual, one without:

    Without a Morning Water Habit With a Four-Minute Morning Water Habit
    You wake up feeling heavy and unfocused, immediately scrolling your phone
    and relying on coffee to feel alert.
    You wake up and head straight to the kitchen, drinking your first glass of
    water before checking your phone or having caffeine.
    Your skin appears tired and flat, so makeup is used to cover dullness rather
    than enhance natural features.
    Your skin gradually looks fresher and more balanced, allowing makeup to be
    lighter and more effortless.
    Energy rises quickly after coffee but drops sharply by mid-morning, leaving
    you feeling drained.
    Energy builds more steadily, with water helping your body respond better to
    caffeine later.
    By afternoon, focus fades, cravings increase, and productivity becomes harder
    to maintain.
    Afternoon focus feels more stable, with fewer cravings and clearer, calmer
    decision-making.

    Patience, Not Perfection

    Water rituals will not replace the basics like sleep, food, stress management and exercise but they help those systems function more effectively. When your body has enough water your skin repairs itself faster. Your muscles bounce back better after workouts. Your brain handles stressful situations with less panic. We live in a world that pushes extreme solutions like elaborate skincare systems, brutal workout programs and complex health tricks.

    This four-minute practice stands out because it is so straightforward. That simplicity is what makes it work. It fits into your daily routine without forcing you to change everything else. You do not need fancy equipment or tracking software. All you need is a drinking glass, access to clean water & four minutes that you protect from other demands. When you skip a day you have not ruined anything. You simply start again the following morning. On hectic days you might only drink one large glass instead of two. That still matters. Your body tracks patterns over many weeks and months rather than judging individual days.

    At some point you will look at yourself in harsh bathroom lighting & notice something different. Your skin appears more alive even when you feel tired. Your eyes seem clearer and less clouded. You might think back to that first morning when you drank water right after waking up and decided to treat yourself like something that deserves care and nourishment instead of just something that needs to keep running. The glass sits there waiting each morning. Four minutes of your time. Two glasses of water. A brief personal ritual that declares one thing: before anyone else needs anything from me I will take care of this one essential need for myself.

  • Yoga Teachers Share Three Standing Poses to Improve Balance in Older Adults

    Yoga Teachers Share Three Standing Poses to Improve Balance in Older Adults

    How confident do you feel climbing a flight of stairs? Do you move step by step, or stride upward without a second thought? Balance is something most people take for granted—until it starts to slip.

    Your sense of balance often goes unnoticed, yet it’s a skill everyone benefits from developing, regardless of age or fitness level.

    Balance isn’t just physical, it’s an attitude of attention, inner steadiness and calm,” says YogaGo yoga teacher Amanda York.

    She explains that the mind–body connection plays a crucial role, as the body naturally follows where the mind is focused.

    When the mind scatters, the body wobbles. When attention settles, the body follows,” she says.

    Factors such as joint instability, injury, or limited mobility can affect balance, but so can a lack of practice, confidence, and mental focus.

    “In my 15 years of teaching yoga, I’ve noticed balance poses are especially appealing to more mature students, largely due to aging bones and natural muscle loss,” York explains.

    “But truly, balance poses benefit everyone. No matter your age, sex, or ability, balance work builds strength, stability, and confidence that carry over into everyday life.”

    Standing balance poses strengthen the legs, hips, core, and back while also offering psychological benefits.

    “By focusing on standing balance, you become more aware of your posture and center of gravity,” York says.

    With regular practice, these poses help strengthen muscles, train the core to engage effectively, and support both yoga practice and daily functional movement.

    Three Standing Balance Poses to Practice

    Here are three balance poses York recommends to improve stability, focus, and confidence.

    1. Tree Pose

    Hold: Five breaths

    York selected this pose to develop foundational stability and a strong sense of grounding.

    “Tree pose teaches you how to stand firmly on one leg while maintaining ease and steadiness,” she says.

    How to do it:

    • Stand tall with your feet together, distributing weight evenly.
    • Shift your weight onto one foot.
    • Place the sole of your other foot on your inner thigh, calf, or ankle, avoiding the knee joint.
    • Fix your gaze on a steady point ahead.
    • Bring your palms together at your chest or extend them overhead.
    • Press your standing foot into the floor, engage your core, and breathe steadily.
    • Hold for five breaths, then release slowly and repeat on the other side.

    Expert tips:

    • Externally rotate the lifted thigh from the hip.
    • Keep a slight bend in the standing knee if needed.
    • Practice near a wall for extra support.

    2. Warrior III

    Hold: Five breaths

    This pose builds core strength, focus, and full-body coordination.

    “Building on the grounding of tree pose, warrior III challenges balance as the body extends in opposite directions,” York explains.

    How to do it:

    • Begin standing and step one foot back into a high lunge.
    • Shift your weight into your front foot and look down for balance.
    • Hinge forward from the hips, lifting your back leg straight behind you.
    • Extend your arms forward, forming a straight line from fingertips to heel.
    • Engage your core and breathe deeply for five breaths.
    • Lower with control and repeat on the opposite side.

    Expert tips:

    • Keep your hands on your hips if balance feels challenging.
    • Lift the back leg only as high as feels stable.

    3. Half Moon Pose

    Hold: Five breaths

    This pose enhances lower-body strength, torso openness, and overall body awareness.

    “Half moon builds on warrior III by adding rotation, openness, and confidence,” says York.

    How to do it:

    • From standing, step your right foot forward and turn your left foot 90 degrees outward.
    • Hinge at the hips and shift your weight onto your right leg.
    • Lower your torso and place your right hand on the floor or a block.
    • Lift your back leg until it’s parallel to the floor.
    • Rotate your torso to the right and extend your left arm upward.
    • Gaze downward for stability, to the side for challenge, or upward for intensity.
    • Hold for five breaths, then release slowly and repeat on the other side.

    Expert tips:

    • Use a block under your supporting hand.
    • Maintain a slight bend in the standing leg.
    • Flex the lifted foot to help stabilize the hips.
  • Natural Sunscreen Properties Discovered in Hot Springs Bacteria

    Natural Sunscreen Properties Discovered in Hot Springs Bacteria

    Scientists have uncovered an exciting breakthrough in skin protection by studying bacteria that thrive in extreme environments. Researchers exploring geothermal pools found that certain microbes naturally produce compounds capable of blocking harmful ultraviolet radiation. This discovery has drawn strong interest in the United States, where demand for safer and more sustainable skincare solutions continues to grow. By learning how these heat-loving bacteria protect themselves, scientists hope to develop new sunscreen ingredients that are both effective and environmentally responsible, offering a promising alternative to traditional chemical-based sun protection.

    Natural sunscreen properties found in hot springs bacteria

    Bacteria living in hot springs survive under intense sunlight and high temperatures, conditions that would damage most life forms. To cope, they produce UV absorbing compounds that act like a built-in sunscreen, protecting their cells from radiation. These microbes have evolved extreme heat survival strategies over thousands of years, making their protective systems remarkably efficient. Scientists believe this natural microbial shield could inspire new ways to protect human skin. Unlike synthetic filters, these biological compounds break down naturally, which could reduce environmental harm while still offering strong sun defense.

    How hot springs bacteria create natural sunscreen effects

    Researchers discovered that these bacteria generate bioactive pigments that reflect or absorb UV rays before damage occurs. Early experiments show promising DNA damage reduction when these compounds are applied in controlled settings. This has sparked interest in eco friendly skincare solutions that rely on biology rather than harsh chemicals. However, scientists stress that the process is still in the laboratory testing phase, with careful evaluation needed to confirm stability, effectiveness, and safety for everyday human use.

    Future potential of bacteria-based natural sunscreen solutions

    The discovery opens doors for commercial sunscreen development using naturally derived ingredients. Before reaching consumers, products must pass strict regulatory safety checks to ensure they are safe for all skin types. Scientists are also exploring scalable fermentation methods to produce these compounds in large quantities without harming natural hot spring ecosystems. If successful, this approach could reshape the sunscreen industry by offering high protection with a lower environmental footprint.

    Summary and scientific outlook

    This research highlights how nature can guide future skin protection strategies in surprising ways. By blending microbiology with skincare science, experts see opportunities for sustainable biotech innovation that benefits both people and the planet. While challenges remain, the long term research impact could be significant, potentially leading to safer sunscreens and a deeper understanding of how life adapts to extreme environments.

    Aspect Details
    Source Hot springs bacteria
    Main Benefit Natural UV protection
    Environmental Impact Lower chemical pollution
    Development Stage Research and testing
    Future Use Skincare and sunscreen products

    Frequently Asked Questions (FAQs)

    1. What makes hot springs bacteria special?

    They survive extreme heat and sunlight by producing natural UV-protective compounds.

    2. Can this replace current sunscreens?

    Not yet, but it may complement or improve future sunscreen formulations.

    3. Is this safe for human skin?

    Safety studies are ongoing and required before consumer use.

    4. Why is this discovery important?

    It offers a sustainable and potentially safer approach to sun protection.

  • Nine Conditioners That Balance Oily Hair According to Celebrity Stylists

    Nine Conditioners That Balance Oily Hair According to Celebrity Stylists

    Finding the right conditioner for oily hair can feel frustrating, especially when most formulas seem to weigh strands down instead of balancing them. In the United States, celebrity stylists often emphasize that oily scalps still need conditioning, just with smarter product choices. The key is using lightweight, oil-controlling formulas that hydrate the ends without overwhelming the roots. From salon favorites to stylist-approved formulas, these conditioners are designed to restore balance, improve texture, and keep hair looking fresh for longer without sacrificing softness or shine.

    Best conditioners for oily hair recommended by stylists

    Celebrity stylists agree that the best conditioners for oily hair focus on balance rather than stripping moisture completely. Many of these products use ingredients that gently hydrate while supporting scalp oil control and reducing heaviness. Lightweight textures are essential, as they help avoid buildup and maintain root freshness throughout the day. Stylists also look for formulas that improve manageability and enhance natural hair movement. When used correctly, these conditioners can leave hair soft, smooth, and noticeably lighter, making them ideal for people who struggle with greasy roots but dry or frizzy ends.

    How oily hair conditioners maintain healthy balance

    Conditioners designed for oily hair work by supporting the scalp’s natural ecosystem instead of fighting it. According to professionals, these formulas often include clarifying botanicals that promote oil regulation support while still delivering hydration where it’s needed most. The goal is to prevent overproduction of oil caused by dryness, which helps maintain longer clean feel between washes. Celebrity stylists also note that balanced conditioners improve strand elasticity and reduce flatness, allowing hair to look fuller without feeling coated or sticky.

    Choosing the right conditioner for oily scalp needs

    Selecting the right conditioner depends on understanding your hair’s specific concerns. Stylists recommend applying conditioner mainly to mid-lengths and ends to protect scalp moisture balance. Look for labels that mention volumizing or purifying benefits, as these often enhance lightweight hydration without clogging pores. The right product can also improve styling results by supporting daily hair manageability. With consistent use, a well-matched conditioner can transform oily hair into something that feels cleaner, healthier, and easier to style.

    Expert summary on balancing oily hair

    Celebrity stylists consistently highlight that oily hair doesn’t need harsh solutions, but thoughtful care. The best conditioners combine gentle cleansing support with hydration to encourage healthy scalp harmony. Over time, this approach helps reduce excess oil while improving shine and texture. Stylists also stress the importance of proper application techniques and product rotation to avoid buildup. When paired with the right shampoo, these conditioners support consistent hair freshness and deliver results that feel salon-worthy without overcomplicating your routine.

    Conditioner Type Main Benefit Hair Texture Suitability
    Lightweight Volumizing Reduces flatness Fine to medium
    Clarifying Conditioner Controls excess oil Oily scalp
    Botanical-Based Balances moisture All hair types
    Protein-Infused Strengthens strands Weak or limp hair

    Frequently Asked Questions (FAQs)

    1. Can people with oily hair use conditioner daily?

    Yes, daily use is fine if the conditioner is lightweight and applied mainly to the ends.

    2. Do conditioners make oily hair worse?

    No, the right formula actually helps balance oil production when used correctly.

    3. Should conditioner touch the scalp for oily hair?

    Stylists recommend keeping conditioner off the scalp to avoid buildup.

    4. Are salon conditioners better for oily hair?

    Salon formulas often use refined ingredients, but many drugstore options work just as well.