Category: News

  • 10 Yoga Moves: Easy Practices You Can Do Even on the Busiest Days

    10 Yoga Moves: Easy Practices You Can Do Even on the Busiest Days

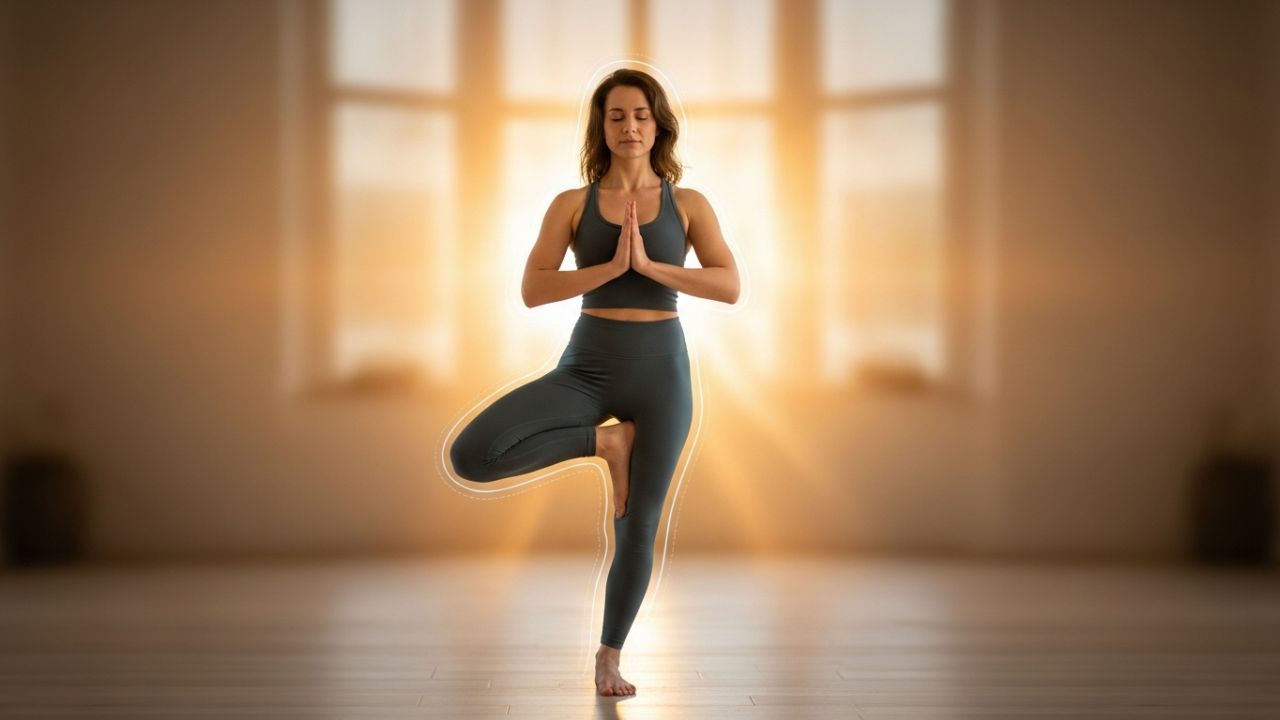
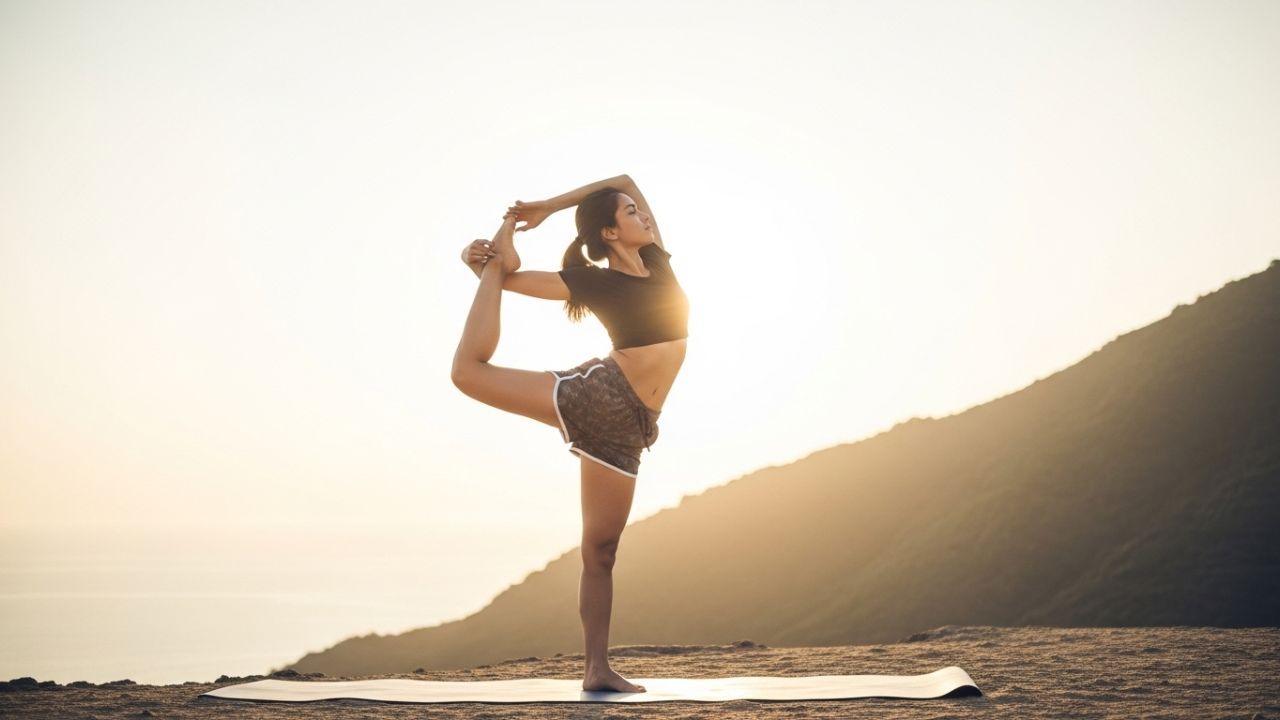
    Simple Yoga Moves for Busy Days Life moves quickly. Work deadlines & family responsibilities combined with endless screen time often drain your energy before the day finishes. When this happens exercise usually gets pushed aside first. I believed for years that yoga required long sessions and complete silence. This mindset prevented me from practicing when my schedule got packed. Eventually I discovered that yoga adapts to any schedule. A few deliberate movements can ease tension in your body & clear your mind while restoring balance in just minutes. These yoga poses are straightforward and practical enough to do almost anywhere. You can try them at home or in your office or during a quick break. No special gear is required. Simply move with intention and focus on your breathing while staying aware of the present moment.

    Why Short Yoga Sessions Still Matter

    Short yoga sessions might look too brief to matter but they deliver results because yoga links movement with breathing. Even quick stretches boost blood circulation and loosen tight muscles while settling your nervous system. When stress decreases your concentration gets better and your energy becomes steadier. You don’t need to work up a sweat or strain yourself. The important things are staying consistent and paying attention. Regular short yoga practice teaches your body to unwind more naturally. This gradually lessens everyday stress and mental tiredness. These brief periods of movement create genuine improvements over time.

    Neck Rolls to Release Built Up Stress

    Neck tension often builds up during hectic days when you stare at screens for long periods. Neck rolls offer an easy method to ease this tightness. Position yourself upright while sitting or standing & let your shoulders drop naturally. Gently lower your head toward one shoulder & then move it forward while making a smooth circular motion. Make sure you move slowly without rushing. This exercise loosens the tight muscles in your neck and upper back area. It increases blood circulation to your head and can help reduce headaches & mental cloudiness. Spending just one or two minutes on this movement can provide fast relief.

    Shoulder Shrugs for Upper Body Relaxation

    Stress tends to build up in the shoulders without you realizing it. Shoulder shrugs provide a quick way to release this tension. Raise your shoulders toward your ears as you breathe in. Pause briefly and then let them drop as you breathe out. Do this movement multiple times. This basic exercise helps relax your upper body & makes your posture better. It works particularly well after spending many hours sitting or working at a keyboard. You might find that your breathing becomes deeper after doing this a few times.

    Seated Forward Fold to Slow the Mind

    A seated forward fold helps you feel calm & centered. You can sit on a chair or on the floor with your feet flat and stable. Bend forward slowly from your hips & allow your head and arms to hang loosely. There is no need to push yourself into the stretch. Simply let gravity pull you down gently as you maintain steady breathing. This position lengthens your spine and lower back while telling your nervous system to relax. It works well when your mind feels overwhelmed. Holding this pose for just a brief time can reduce mental chatter and bring relief.

    Cat Cow Stretch for Spine Mobility

    Cat Cow is a simple yoga movement that helps keep your spine healthy. Begin by getting on your hands and knees on the floor. When you breathe in, let your back curve downward while lifting your chest and head up. When you breathe out, do the opposite by rounding your back upward and letting your head drop down. Make sure to move at a slow pace that matches your breathing rhythm. This exercise makes your spine more flexible and helps reduce the tightness that builds up from sitting for long hours. It also helps you focus on your breathing pattern which brings better mental focus and a sense of calmness to your mind.

    Standing Side Stretch for a Quick Energy Boost

    Standing Side Stretches for Quick Relief Standing side stretches work well when your body feels stiff or you’re running low on energy. Start by standing upright with both feet firmly planted on the ground. Lift one arm straight up above your head and slowly bend your body toward the opposite side. Stay in this position for several breaths before repeating the movement on the other side. This stretching exercise creates space along the sides of your torso and makes it easier to breathe more deeply. The movement helps loosen tightness that builds up in your rib cage and shoulder area. Most people notice a small increase in their energy levels after performing this basic stretch.

    Chair Pose to Wake Up the Body

    Chair Pose develops strength rapidly & requires minimal time. Position your feet at hip width distance. Lower yourself by bending your knees as though sitting down into a chair. Maintain an upright chest while extending your arms upward or keeping them beside your body. The pose engages major muscle groups & boosts blood flow throughout your body. It revitalizes you during moments of fatigue. Maintaining the position through several controlled breaths enhances your alertness.

    Downward Facing Dog for Full Body Reset

    Downward Facing Dog stretches your whole body at once. Put your hands on the ground and raise your hips up to make an upside-down V shape. Push your palms down and extend your spine. This position helps blood flow better and makes you less tired. It stretches your legs & back and shoulders all together. Staying in this pose even for a short time can make your body feel more energized.

    Standing Forward Fold to Ease Mental Pressure

    Standing Forward Fold Standing forward fold offers both calming effects and physical release. Start from a standing position & bend forward at your hips. Allow your head and arms to hang down freely toward the floor. You can bend your knees a little bit if you need to make the pose more comfortable. This yoga pose works to relax your nervous system while releasing built-up tension throughout your back and legs. The position becomes especially helpful during stressful moments in your day when you need to take a break & reset your mind and body.

    Seated Twist for Focus and Comfort

    Seated twists work well without being complicated. Sit up straight and slowly turn your upper body to one side while keeping your back extended. Stay in that position for several breaths before turning to the other side. These twisting movements refresh your spine and help your digestive system function better. They can also sharpen your concentration by reducing body tension. You can easily do this exercise during quick breaks throughout your day.

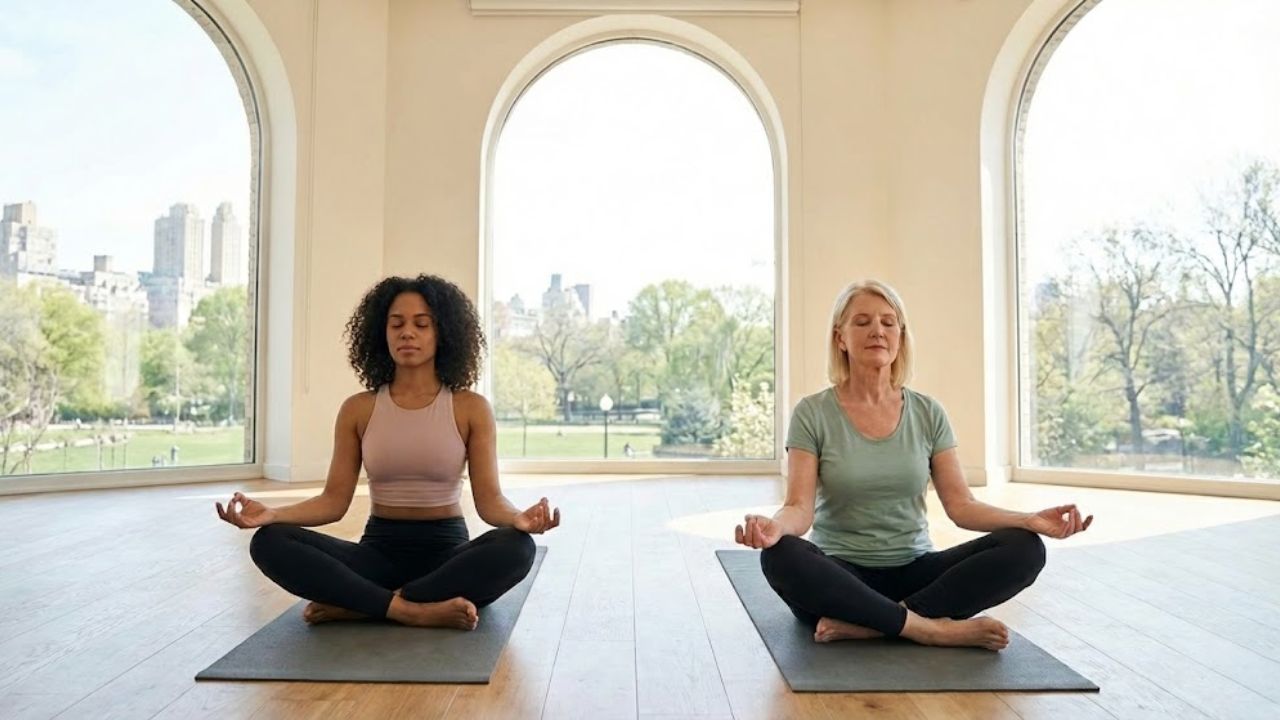
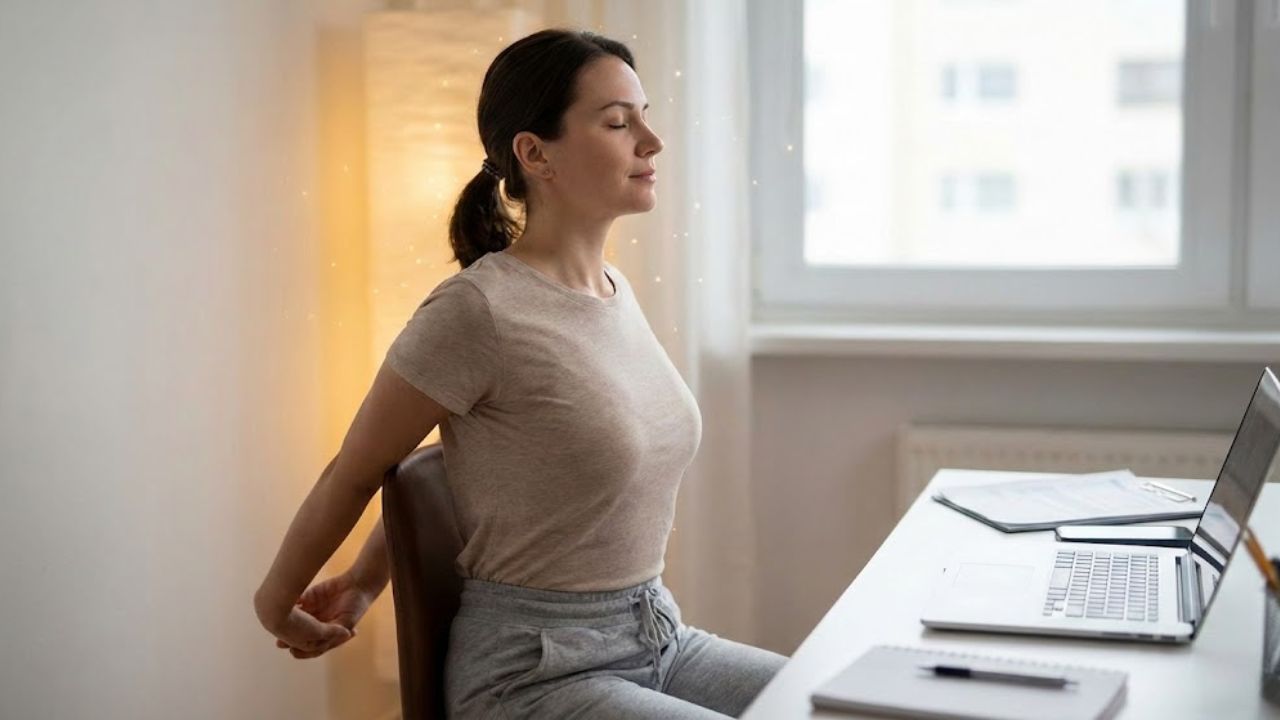
    Deep Breathing to Close the Practice

    End your session with focused breathing exercises. Find a comfortable seated position and breathe in slowly using your nose. Let the air out completely in a gentle manner. Pay attention to how your breath moves in and out. Breathing forms the foundation of yoga practice. Taking just sixty seconds to breathe with awareness can reduce mental stress and sharpen your thinking. This practice helps you feel balanced & grounded when you resume your daily activities.

  • 6 Yoga Poses: Relieve Stress and Restore Energy Naturally

    6 Yoga Poses: Relieve Stress and Restore Energy Naturally

    In our busy modern lives stress affects almost everyone. Work demands and personal challenges along with outside pressures can drain both your body and mind. Yoga provides a powerful solution to fight stress & bring back your energy. The practice combines purposeful movements with controlled breathing to settle your nervous system and release built-up tension while refreshing your mental & physical state. This article presents six yoga poses that target stress relief & help restore your natural energy levels.

    Child’s Pose (Balasana)

    Child’s Pose is a deeply calming and restorative yoga posture that allows the body to slow down and reset. It gently stretches the spine, hips, and thighs while encouraging the mind to relax and let go of daily stress.

    How to do it: Begin by kneeling on the floor with your big toes touching and your knees slightly apart. Sit back onto your heels and slowly fold forward, resting your forehead on the mat. Stretch your arms out in front of you or relax them alongside your body. Take slow, deep breaths and consciously release tension with every exhale.

    Benefits: This pose helps ease tightness in the lower back, hips, and shoulders. It promotes emotional calm and is especially effective for reducing stress and anxiety.

    Cat-Cow Pose (Marjaryasana–Bitilasana)

    Cat-Cow Pose is a gentle flowing movement that increases spinal flexibility and releases stiffness in the back and neck. It also helps improve circulation and energize the body.

    How to do it: Start in a tabletop position with your hands under your shoulders and knees under your hips. As you inhale, drop your belly, lift your chest, and tilt your head upward (Cow Pose). As you exhale, round your spine, draw your chin toward your chest, and tuck your tailbone (Cat Pose). Continue flowing smoothly with your breath.

    Benefits: This pose relieves tension in the spine and neck while gently stimulating the nervous system. It helps improve focus and prepares the body for deeper movement.

    Downward-Facing Dog (Adho Mukha Svanasana)

    Downward-Facing Dog is a full-body pose that stretches and strengthens multiple muscle groups at once. It is both grounding and energizing, making it ideal for relieving built-up tension.

    How to do it: Begin in a tabletop position. Tuck your toes under and lift your hips upward, forming an inverted V-shape. Press your palms firmly into the mat, lengthen your spine, and gently press your heels toward the floor. Hold the pose for several steady breaths.

    Benefits: This posture stretches the hamstrings, calves, shoulders, and spine while strengthening the arms and legs. It boosts circulation and helps reduce mental fatigue.

    Legs Up the Wall (Viparita Karani)

    Legs Up the Wall is a restorative pose that encourages deep relaxation and helps calm the nervous system. It is especially beneficial after a long or stressful day.

    How to do it: Sit sideways next to a wall, then gently swing your legs up as you lie back on the floor. Rest your arms comfortably by your sides with palms facing upward. Close your eyes and breathe slowly. Stay in this position for five to ten minutes.

    Benefits: This pose helps relieve swelling and tension in the legs, hips, and lower back. It promotes relaxation, reduces fatigue, and supports better circulation.

     Seated Forward Fold (Paschimottanasana)

    The Seated Forward Fold is a calming stretch that targets the hamstrings, spine, and lower back. It encourages introspection and helps quiet the mind.

    How to do it: Sit on the floor with your legs extended straight ahead. Inhale to lengthen your spine, then exhale as you hinge forward from the hips. Reach for your feet, ankles, or shins without straining. Hold the pose while breathing steadily.

    Benefits: This pose gently stretches the back and legs while calming the nervous system. It is effective for easing stress and promoting mental clarity.

    Corpse Pose (Savasana)

    Savasana is the final resting pose in yoga and allows the body to absorb the full benefits of the practice. It encourages complete physical and mental relaxation.

    How to do it: Lie flat on your back with your legs comfortably apart and arms resting by your sides, palms facing up. Close your eyes and take slow, deep breaths. Gradually relax every part of your body from head to toe. Remain here for five to ten minutes.

    Benefits: Savasana reduces stress, calms the mind, and restores energy. It supports nervous system balance and leaves you feeling refreshed and centered.

    Additional Tips for Using Yoga to Relieve Stress

    Focus on Your Breath

    Slow, deep breathing plays a vital role in stress relief. By focusing on your breath, you activate the body’s natural relaxation response and enhance the calming effects of each pose.

    Stay Present

    Mindfulness is key in yoga practice. Paying attention to physical sensations and staying present in each pose helps quiet mental chatter and improve concentration.

    Create a Relaxing Environment

    A calm and soothing environment can enhance your yoga experience. Soft lighting, gentle music, or subtle aromas can help your body and mind relax more deeply.

    Consistency Is Key

    Practicing yoga regularly, even for a few minutes each day, can significantly reduce stress over time. Consistency builds both physical resilience and emotional balance.

    Conclusion: Find Calm and Restore Energy Through Yoga

    Yoga is a powerful tool for reducing stress, restoring energy, and improving overall well-being. Poses like Child’s Pose, Cat-Cow, Downward-Facing Dog, Legs Up the Wall, Seated Forward Fold, and Savasana help release tension and promote relaxation. By making these poses part of your daily routine, you can cultivate calm, improve flexibility, and maintain a balanced, peaceful state of mind.

  • Rose Care Made Easy: Fertilize Roses Naturally Using Everyday Banana Peels

    Rose Care Made Easy: Fertilize Roses Naturally Using Everyday Banana Peels

    The first time I buried a banana peel under a struggling rose I did it with hesitant hope. The bush was tired with yellow leaves and small blooms that faded quickly. I had heard the rumor that banana peels could help roses thrive & on a quiet morning I decided to test it myself. I bent down while the air was still cool & dug a shallow trench in the damp earth. The peel was soft & faintly sweet as I tucked it beneath the soil. It felt almost too simple. But nature loves simple things. Over the next weeks that tired rose taught me how powerful kitchen scraps can be when we let them return to the ground.

    The Quiet Alchemy of a Banana Peel

    If you watch a banana peel for a while you can see it stop being fruit. It changes from bright yellow to spotted brown to a dark sunken black. It curls and softens & eventually melts into the soil where it joins the microbes and fungi and tiny creatures that live underground. Roses benefit from what banana peels turn into. That simple scrap contains nutrients that roses need including potassium along with phosphorus & calcium and magnesium and other minerals. When you put a peel in the soil you give the plant a slow steady source of food instead of the quick burst that synthetic fertilizers deliver. Potassium helps roses move water through their systems and build strong stems and resist disease and produce brighter blooms. Phosphorus supports healthy roots and more flowers. Calcium and magnesium keep leaves strong & green. The peel works quietly in the background & keeps feeding the plant without being noticed. There is something satisfying about this process. The banana from your breakfast becomes part of your garden. Instead of going into the trash it helps create the next round of blooms on your roses. Sustainability becomes less like a chore and more like a connection between you and your food and your flowers.

    Why Roses Respond When You Feed Them This Way

    Walk up to a rose bush that’s been fed with care and you sense the change immediately. The leaves appear firmer, more intentional. Buds form in greater numbers, lined neatly along the stems, full of quiet promise.Most commercial rose fertilizers focus on fast results. They push quick growth, but often leave behind salt buildup, overly soft foliage, and soil that becomes dependent on constant feeding. Banana peels work differently. They don’t shock the plant — they support the soil.As a peel breaks down, it first feeds soil life. Bacteria, fungi, and earthworms process it slowly, turning it into nutrients roses can actually absorb. Instead of a chemical hit, the peel becomes a mini ecosystem that improves soil structure, moisture balance, and root resilience.

    Simple Ways to Use Banana Peels for Roses

    You don’t need special tools or perfect timing. Just a few consistent habits can turn kitchen scraps into steady nourishment for your roses.

    1. Burying Fresh Peels Near the Roots

    This classic method has survived generations for a reason.

    – Eat the banana and save the peel.

    – Cut it into small pieces so it decomposes faster.

    – Dig a shallow trench 5–10 cm deep around the drip line.

    – Place the pieces inside, cover with soil, and water well.

    – Over the following weeks, the peel slowly releases nutrients directly into the rose’s rooting zone.

    2. Banana Peel Compost Pockets

    For poor or compacted soil, compost pockets act like underground boosters.

    – Dig a hole 15–20 cm away from the main stem.

    – Add chopped peels, optionally mixed with dry leaves or coffee grounds.

    – Cover with soil and water thoroughly.

    – These pockets attract earthworms and gradually turn into rich, crumbly soil that roots naturally grow toward.

    3. Dry and Grind: A Homemade Rose Booster

    Drying peels creates a cleaner, longer-lasting option.

    – Dry peels in sunlight or a low oven until fully crisp.

    – Grind into flakes or powder.

    – Store in an airtight container.

    Sprinkle lightly around the base of roses and mix into the topsoil. This method releases nutrients faster and reduces pest risk.

    4. Banana Peel Tea

    For a gentle liquid feed, banana peel tea offers a mild boost.

    – Soak 2–3 chopped peels in water for 24–48 hours.

    – Strain out solids.

    – Water roses at the base only.

    – Used every few weeks, this tea becomes part of a low-stress feeding routine.

    5. Adding Peels to Regular Compost

    In compost, banana peels blend beautifully with other materials.

    – Chop peels into smaller pieces.

    – Layer with browns like dry leaves or paper.

    – Apply finished compost once or twice a year.

    This approach strengthens overall soil health, not just the roses.

    How Much, How Often, and When to Feed

    Balance matters. Too little shows no effect; too much invites problems.

    – Active growth (spring–early autumn): 1–2 peels per mature bush every 2–4 weeks.

    – Young or potted roses: Half a peel once a month.

    – Dormant season: Pause direct feeding; compost instead.

    Common Mistakes and How to Avoid Them

    Pests: Never leave peels on the soil surface. Always bury or dry them.

    Odor: Chop peels and space applications. Compost excess scraps.

    Nutrient balance: Banana peels supply potassium, not enough nitrogen. Pair with compost or manure.

    Disease concerns: Use only healthy fruit waste and avoid wet surface application.

    Turning Feeding Into a Garden Ritual

    This practice becomes less about fertilizing and more about connection. A quiet moment, a small action, repeated over time. Each peel tucked into the soil strengthens the partnership between you and the garden.Over weeks, roses respond with deeper color, sturdier canes, and more reliable blooms. The change is gradual, but unmistakable.

    From Kitchen Waste to Living Flowers

    A banana peel has no interest in being thrown away. It wants to return, to soften, to become part of something alive. When you feed roses this way, you close a loop — turning everyday waste into petals, fragrance, and growth.The next time you peel a banana, pause. Picture it beneath the soil, slowly transforming into the bloom you’ll admire weeks later. Then let the garden finish the story.

  • 6 Morning Yoga Routines That Help You Start the Day Feeling Energized

    6 Morning Yoga Routines That Help You Start the Day Feeling Energized

    How you start your morning usually determines how the rest of your day goes. Hitting the snooze button multiple times or checking your phone right after waking up can make you feel tired before your day even begins. A brief morning yoga practice can transform this habit entirely. Morning yoga energizes your body & clears your mind while increasing your energy levels naturally. These six straightforward yoga sequences will help you feel awake and prepared for whatever comes your way.

    Gentle Wake-Up Flow for Tight and Sluggish Mornings

    while you stand or sit. Then do some easy stretches such as rolling your neck and circling your shoulders and bending to each side. After that try the Cat Cow Pose to warm your spine and get your blood moving. The purpose here is not to push yourself hard but to wake your body up slowly. It helps your joints move better & gets rid of that stiff feeling you have in the morning. If you do this flow for five to seven minutes it can make getting up much easier.

    Sun Salutation Flow to Energise the Entire Body

    Sun Salutations offer an excellent method to energize your whole body quickly. The routine blends forward bends with lunges and planks & gentle backbends in a continuous flow. Breathing in rhythm with your movements boosts oxygen levels & stimulates your nervous system. Doing three to five rounds of Sun Salutations each morning creates warmth in your body and enhances circulation while engaging your main muscle groups. This practice works well for anyone seeking a fast yet effective energy lift before heading to work or starting daily activities.

    Core Activation Flow for Sharper Focus and Alertness

    A tired mind usually results from a weak core. This practice centers on light core activation to develop inner strength and better posture. Start with Mountain Pose and then transition into Plank Pose followed by easy Boat Pose modifications and standing balance positions. Engaging the core early each day enhances stability & sharpens mental concentration. This practice makes you feel more grounded & self-assured which proves particularly valuable during hectic or challenging mornings. Just ten minutes of focused core exercises can boost alertness considerably.

    Standing Balance Flow to Build Focus and Stability

    This routine relies on standing poses to develop balance and coordination while sharpening mental focus. Begin with Mountain Pose and then transition into Tree Pose before moving through Warrior Two and Warrior Three. Maintaining these positions demands concentration and helps eliminate mental cloudiness. Standing poses engage the leg muscles and boost blood flow throughout the body to create a sensation that feels both stable and energized. This sequence works particularly well during mornings when your thoughts feel disorganized or when concentration seems difficult. Working on balance poses early in the day teaches your mind to maintain awareness and presence as you move through your daily activities.

    Stretch-and-Lengthen Flow Ideal for Desk-Based Days

    If you spend most of your day sitting down, this routine works really well for you. It helps open up your hips, chest and shoulders while making your spine longer. Try poses like Low Lunge, Downward Facing Dog, Seated Forward Bend and some easy twists. This routine makes your posture better and stops your body from getting stiff as the day goes on. Stretching when you wake up keeps your body flexible & cuts down on the aches that come from sitting too long. It also helps you breathe more deeply which keeps your energy levels steady throughout the day.

    Breath-Focused Morning Flow for Calm, Steady Energy

    Not all energy needs to feel intense. This routine creates calm alertness instead of physical stimulation. Start with slow breathing & then move through gentle poses like Seated Side Stretch Standing Forward Bend and easy backbends. Focusing on your breath helps regulate your nervous system & reduces morning anxiety. This routine works well for people who feel rushed or stressed early in the day. Calm energy leads to better decisions and steady productivity.

    How Long a Morning Yoga Routine Really Needs to Be

    A morning yoga routine does not have to be long to work well. Just ten to fifteen minutes can make a real difference in how you feel and how much energy you have. Doing it regularly is more important than doing it for a long time. When you practice every day for even a short period your body & mind learn to wake up more smoothly. When you have more time in the morning you can practice for twenty or thirty minutes to get even better results. On days when you are busy a few simple stretches and some deep breathing still help.

    Simple Tips to Get the Most Out of Morning Yoga

    Practice when your stomach is empty or you have eaten only a light meal. Put on comfortable clothes & find a quiet spot with natural light if you can. Take your time with each pose instead of hurrying through them. Start with slow movements and make them more intense once your body feels warmer. Breathe through your nose and match your movements to your breathing to boost your energy naturally. Finish your session by sitting still for a short time to create a positive mood for the rest of your day.

    Why Morning Yoga Is So Effective for Daily Energy

    Morning yoga is effective because it combines movement with breathing and mindfulness right when you wake up. It gets your blood flowing and sharpens your mental clarity while loosening up muscles that became tight during the night. Unlike heavy exercise that drains your energy, yoga wakes up your body without wearing it out. When you make these six morning yoga routines part of your daily habit you’ll notice that you feel more alert and centered as each day begins. Starting your morning in a peaceful and energized state typically results in getting more done throughout the day while feeling better emotionally and maintaining healthier patterns overall.

  • Essential Oil Dusting Spray for Blinds That Keeps Dust Away Longer

    Essential Oil Dusting Spray for Blinds That Keeps Dust Away Longer

    The dust on your blinds seems to appear overnight. It settles in a soft gray layer that looks almost deliberate. You open the slats to let morning light in and notice that faint film catching the sunlight. You wipe it away with a cloth or spray some cleaner and promise yourself you’ll stay on top of it. But within a week or sometimes even the next day it returns. What if you could prevent the dust from settling there instead of constantly cleaning it away?

    When Dust Took Over: The Moment I Knew My Blinds Needed a Smarter Fix

    It started on one of those days when the whole house felt like it needed a reset. You know the kind where you open windows and play music quietly in the background with a simple plan to make things feel lighter. I walked from room to room with a microfiber cloth and a chemical cleaner that was too strong and left my throat tight and my fingers slightly raw. When I reached the blinds that were thin and sun-faded but still hanging on I noticed the same problem I always noticed. No matter how carefully I dusted the dust kept coming back faster than it should. It didn’t just sit there either. It floated in the air and caught the sunlight in a way that made me think about how cleaning might not be enough. Maybe I needed to change how the surface and the dust interacted with each other in the first place. The idea stayed with me for a while. What if there were a way to clean the blinds and also make them less attractive to dust particles? Not with harsh chemicals but in a gentler way that worked over time. That’s where essential oils and a simple dusting spray came in. One that doesn’t just wipe dust away but helps it stay away a little longer.

    Why Dust Clings So Easily: The Invisible Forces at Work on Your Blinds

    Dust is more complex than most people realize. It consists of skin cells fabric fibers, pollen, pet dander, soot hair and various other particles that float through the air. Blinds collect dust easily because they have flat surfaces, narrow edges and materials that attract particles through static electricity. Standard cleaning products remove dust but often leave residues that attract more dust. Some sprays dry with a sticky texture while others create a film that holds onto new particles. You clean the blinds & they look good, but then dust accumulates again quickly. An essential oil dusting spray functions differently when properly formulated. Plant-based oils in the correct proportions can create a smooth finish with mild anti-static properties. This makes dust less likely to stick without leaving blinds greasy or heavy. The goal is to discourage dust from settling rather than coating the surface. Certain essential oils have antimicrobial properties that help surfaces stay fresher. This matters especially in rooms with open windows or where pollen enters regularly. The scent is an added benefit since the blinds release a pleasant aroma when you adjust them to let in light.

    From Frustration to Formula: Crafting a Smarter, Longer-Lasting Dust Shield

    Dust is more complicated than most people think. It includes skin cells & fabric fibers along with pollen and pet dander and soot and hair and many other particles that move through the air. Blinds gather dust easily because they have flat surfaces and narrow edges and materials that pull in particles through static electricity. Regular cleaning products get rid of dust but usually leave residues that pull in more dust. Some sprays dry with a sticky feel while others make a film that grabs new particles. You clean the blinds and they look good but then dust builds up again fast. An essential oil dusting spray works differently when made the right way. Plant-based oils in the right amounts can make a smooth finish with light anti-static qualities. This makes dust less likely to stick without making blinds greasy or heavy. The point is to stop dust from settling rather than coating the surface. Some essential oils have antimicrobial qualities that help surfaces stay fresher. This matters especially in rooms with open windows or where pollen comes in often. The scent is an extra benefit since the blinds give off a pleasant smell when you adjust them to let in light.

    Ingredient Purpose in the Spray Finish & Sensory Effect
    Distilled Water Acts as the main liquid base, ensuring all ingredients blend smoothly and spread evenly. Gives a fresh, weightless feel with no sticky or cloudy residue after wiping.
    White Vinegar or Vodka (Optional) Helps break down mild dirt, encourages quicker drying, and minimises streaking. Any sharp scent disappears fast, allowing the natural aroma to shine through.
    Plant-Based Soap or Alcohol (Very Small Amount) Allows oils to mix properly with water, preventing separation or uneven spraying. Virtually scent-free when used sparingly, keeping the blend clean-smelling.
    Light Carrier Oil (Fractionated Coconut or Jojoba) Creates a thin conditioning layer that helps reduce static and slows dust build-up. Leaves a smooth, refined finish—soft to the touch, never greasy or shiny.
    Essential Oils Add gentle antimicrobial support while refreshing surfaces and discouraging dust. Provides a natural, calming fragrance that makes cleaning more enjoyable.

     Some essential oils offer benefits beyond their pleasant scent. Citrus oils such as lemon or orange can effectively break down oily kitchen residue. Eucalyptus tea tree, and rosemary provide freshness and are particularly useful in stuffy spaces. Lavender and cedarwood create a soothing atmosphere that works well in bedrooms. When mixed properly, these oils create a subtle background presence similar to the fresh air that flows through a pine forest after rainfall.

    The Simple Ritual That Changes Everything: How to Mix and Apply the Spray

    There is something satisfying about turning your kitchen counter into a small apothecary. The bottles and swirling droplets of oil and the faint steam of hot water for rinsing feel less like housework & more like craft. The result is a simple homemade dusting spray that makes blinds not just cleaner but calmer as if they have been reset to neutral. Here is a straightforward way to mix a bottle that is gentle and effective and made for those stubborn blinds:

    1. Choose your vessel. Pick a clean glass or high-quality plastic spray bottle ideally in the 8 to 16 oz range. A fine-mist nozzle is your best friend here because it helps avoid soaking the blinds.

    2. Start with the base. Fill most of the bottle with distilled water and leave room for the other ingredients. Distilled water helps prevent mineral spots and keeps the mixture clearer longer.

    3. Add your cleaner-support. If your blinds are in a kitchen or dust-prone area add a tablespoon or two of white vinegar or plain vodka for an 8 to 12 oz bottle. This helps with mild grease & encourages streak-free drying. For very delicate woods or finishes you can skip this step and rely on the oils and gentle wiping instead.

    4. Include a tiny bit of disperser. A few drops of mild unscented castile soap or a teaspoon of high-proof alcohol helps the essential oils blend through the water rather than floating on top. It is a small but important detail because even distribution means consistent results across each slat.

    5. Add your whisper of oil. This is the part that helps dust stay away longer. Add about 1 teaspoon of a light non-greasy carrier oil such as fractionated coconut or jojoba for a mid-sized bottle. That small amount is enough to lend a soft dust-discouraging finish without making the surface oily.

    6. Blend your essential oils. Aim for around 10 to 20 drops of essential oil total in an 8 to 12 oz bottle. You might try lemon and lavender for a bright soft-clean blend or orange and cedarwood for a warm grounded citrus-wood aroma or eucalyptus and rosemary for a crisp fresh air feeling. Always err on the side of fewer drops to start because you can adjust the strength next time. Too much oil does not mean more effectiveness but just risks being heavy.

    7. Shake and test & listen. Shake gently before each use. Before spraying an entire window test on a small hidden section of your blinds especially if they are natural wood or painted or unusually delicate. Note how they look and feel when dry. Surfaces should feel clean & not slick. Now the actual ritual of dusting changes. Instead of blasting every slat you lightly mist a microfiber cloth and never drench it and run it lovingly along each blind. The cloth lifts the dust & the spray leaves behind its light invisible veil and the room carries a subtle new edge of calm.

    Fewer Wipe-Downs, Cleaner Air: What Long-Lasting Dust Control Really Feels Like

    The first sign that this blend works is not dramatic. There is no obvious signal telling you the blinds stay clean longer. Instead you notice it during quiet moments between chores. A week goes by. You pull the string to angle the slats and watch the light move across them. You notice something different. They are still mostly clear with no powdery buildup or sticky film. The thin layer of carrier oil reduces static & gives dust less grip. Essential oils make the surface less attractive to airborne particles. Vinegar or alcohol helps prevent the light grime that makes dust stick more stubbornly. Is it a forcefield? No. Dust will always be part of life because it comes from everything that lives & moves and sheds. But with a good essential oil dusting spray the time between cleanings gets longer. Instead of cleaning weekly you might wipe them every two or three weeks. The difference is not just in the cleanliness but in how you feel about it. You feel less like you are losing a battle and more like you have made peace with your home. There is also a sensory change. Each time sunlight comes through the blinds the faint scent from the essential oils rises slightly. The room does not smell like cleaner anymore. It smells like lemon in a kitchen garden or cedar in a warm cabin or lavender in a field you wish you could visit more often.

    Making It a Habit, Not a Hassle: Folding This Spray into Everyday Home Care

    When you add this dusting spray to your routine it stops feeling like a chore and becomes something different. You begin to see blinds as something you care for rather than something you dread cleaning. Once a month you move through each room with your bottle and cloth and instead of hurrying you pay attention to small things like how afternoon light comes through or how the cloth slides along each slat. You can choose different scents for different rooms based on what you want to feel there. A calming lavender and cedar mix works well for bedroom blinds that you see before sleep & when you wake up. A fresh lemon and rosemary blend suits the kitchen where sunlight hits the counters and coffee steam rises. Maybe something woody and deep for the living room where you read & relax at the end of the day. After a few weeks you notice something small but meaningful. You dust less often but your home feels better maintained. You have moved from constantly fighting dust to creating surfaces that naturally resist it. The blinds that you used to ignore have become part of how you care for your home in a way that includes both function and feeling. There is something quietly powerful about this approach in a world full of quick fixes & strong chemicals. You take control of the process by mixing your own solutions and trusting simple plant-based ingredients. The essential oil dusting spray does not make big claims or promise perfect results. It simply extends the time between cleanings and makes the task more pleasant while leaving behind a room that feels like a place you actually want to spend time in rather than just another task on your list.

  • A Natural Kitchen Drain Cleaning Method That Plumbers Commonly Recommend

    A Natural Kitchen Drain Cleaning Method That Plumbers Commonly Recommend

    The first zucchini appeared the way summer storms arrive in the Top End. It came suddenly & almost rudely all at once. One day the plant was just a clump of leaves & the next it had become a tangle of glossy green hiding fruit like secret torpedoes underneath. Sarah found it early in the morning while she was barefoot on the still-cool tiles with a cup of tea in her hand. She brushed past the flyscreen into the morning air that was thick with the smell of wet soil and frangipani. She had not gone outside to harvest anything. She had stepped out as she did most days now simply to check that life was still moving forward in the garden.

    When Your Kitchen Sink Finally Pushes Back

    In 2020 many Australians realized that supermarket shelves were not as reliable as they had always appeared. There were no dramatic scenes or riots but there was a strange and unsettling feeling when people saw empty flour shelves and missing rice and produce sections that looked bare in the middle of the afternoon. Problems with freight & floods and fires and global disruptions all contributed to this situation. Whatever caused it the result was clear. Food which had always been a basic part of modern life suddenly seemed less certain. For many people this was the first real indication that Australia’s food security might not be as strong as everyone had assumed. This was surprising for a wealthy nation that exports food to other countries.

    Our supermarket supply chains cover vast distances and depend on affordable fuel and predictable weather and efficient logistics systems. When the climate becomes unpredictable with fires and floods and droughts these supply chains become much more vulnerable. People across the country began to respond in their own way. Seed packets quickly sold out. Old compost bins were brought out from storage behind sheds. Balconies were turned into small gardens. In townhouses & on rural properties and in outer suburbs where lawns had been the main feature people like Sarah started asking themselves an important question. What if food did not need to travel a thousand kilometers to reach our plates?

    The Simple Science Behind a Chemical-Free Drain Clear

    Home food production will not replace the large commercial farms or major horticultural operations in Australia. However in a country already facing severe climate challenges it could become an important part of a stronger and more reliable food system. The reasons are both practical and personal. When you walk through neighborhoods where people are growing their own food you notice the changes quickly. The air carries different scents like fresh basil & tomato plants along with the earthy smell of compost. You can hear garden tools being used and water running through hoses while neighbors talk to each other about their gardens. People use raised beds and various containers including foam boxes from stores & old bathtubs to grow their food. This represents a new approach to food security that is personal and local and follows the natural seasons. Growing food at home reduces reliance on long supply chains that can fail when highways flood or fuel becomes scarce or global trade problems occur.

    It gives households more control over their food supply. Even a small garden can help when food prices spike suddenly. When lettuce costs ten dollars after storms destroy major growing areas the family harvesting salad from their backyard saves money & avoids the financial impact that would otherwise affect their weekly budget. There is something meaningful about learning to grow food from soil and sunlight. It transforms food from an abstract commodity into something connected to seasons and time & physical experience. A tomato becomes more than just a product on a store shelf. It becomes the scent on your hands after touching the plant & the anticipation of watching it ripen and the daily decision about when it will be ready to pick.

    Getting Started: The First Hands-On Moment

    Critics often dismiss backyard gardening as symbolic or a lifestyle choice for people with time and good soil. But backyard gardens and balcony plantings across a city add up quietly like raindrops filling a dam. A single pot of herbs means no last-minute drive for parsley. A few square metres of leafy greens can slash the weekly produce bill. In times of disruption those savings & that access can mean the difference between anxiety and calm capability. Consider how quickly food costs can creep up when climate disasters wipe out crops in key regions. Extreme rain in Queensland or heatwaves in Victoria or smoke-tainted fruit in New South Wales create shocks that ripple through the system. A home food patch does not make you immune but it blunts the blow. It also diversifies what you eat. Instead of being limited to whatever the supply chain can reliably deliver you experiment with resilient crops that suit local conditions. You might grow sweet potatoes that handle heat well or leafy Asian greens that thrive in small spaces.

    Heat Therapy: How Hot Water Reboots a Sluggish Drain

    Australians garden on a continent of extremes and that reality shapes what resilience means in the backyard. It is not about lush endlessly watered lawns from a bygone era. It is about clever design and hardy plants and community knowledge and a kind of pragmatic beauty. A garden that can survive heatwaves and unexpected downpours and water restrictions and neglect during busy weeks. On a scorching December afternoon in western Sydney the asphalt radiates heat like a grill. But step through Mia’s side gate and the air changes. Shade cloth casts a soft green light over raised beds. Mulch lies thick & springy underfoot. The air is warmer than you would like but cooler than the street. It is held by gentle evaporation from densely planted foliage.

    A child’s paddling pool now converted into a water garden reflects slivers of sky between floating water chestnuts. Between the corn and the chillies you can hear the quiet hum of bees. Her garden is a patchwork of microclimates. There are sun traps for winter tomatoes and shaded corners for summer greens and windbreaks of pigeon pea and cassava. It did not appear overnight. It grew out of questions asked during the long anxious weeks of bushfire smoke. What will still be alive here if the power goes out? What food could we still access if the supermarket trucks cannot get through?

    The Fizzy Reaction That Loosens Hidden Buildup

    Now comes the part that feels like a school science experiment and smells a bit like salad dressing. You measure out about half a cup of baking soda and shake it into the drain opening. Some of it sits on the metal surface like pale sand while some slips into the darkness and finds the wet edges of the clog below. Then you pour in about a cup of plain white vinegar. The reaction starts right away with a soft fizzing sound. It sounds like tiny voices talking all at once. Foam rises up in the drain opening and then falls back down & rises again like something breathing. You watch as it sinks deeper into places you cannot see. What happens is simple chemistry. A base called baking soda meets a mild acid called vinegar & this releases carbon dioxide in tiny bubbles.

    aBut inside your sink it does more than just bubble. It gently scrubs at the buildup of soap and fat and food particles that coat your pipes. Ray laughs and says that people expect something dramatic but what you really want is that quiet fizz because it means the mixture is getting into places you could never reach with a brush. After the fizzing starts to slow down you need to wait. Fifteen to thirty minutes works best. During that time the mixture creeps along the inner walls of the pipe and reacts with the gunk to soften it & thin it out and break it away from the metal it sticks to.

    Sealing the Deal With a Clean, Fast Rinse

    When the waiting ends, the final step completes the process. You boil another kettle of water. The kitchen fills with that familiar low rumble again. Then you pour the hot water down the drain in one steady stream. This is when gravity & heat work together. The loosened buildup starts sliding down and breaking apart as it melts at the edges. You might hear a different sound in the pipes now—a deeper and more hollow gurgling that signals water flowing freely again. Sometimes the sink drains perfectly right away. The water from the tap swirls down quickly without any hesitation. Other times you need to repeat the process once or twice especially with older plumbing or stubborn clogs. You approach it calmly rather than getting frustrated, much like you would patiently tend to a plant struggling to grow in hard ground.

    Why Many Plumbers Still Favour This Old-School Method

    It might seem strange that professionals who make their living from serious drain problems would recommend such a simple method. But many do, particularly those who have spent countless afternoons replacing plastic pipes damaged by harsh chemicals or clearing clogs that got worse from congealed sludge. Ray explains it like a naturalist would describe a balanced ecosystem: the goal is cooperation rather than domination. “Your house is a living system” he says. “Your pipes expand and contract with temperature. They build up films inside over time. If you keep blasting them with caustic stuff you’re not fixing the system but weakening it.”

    The baking soda and vinegar method doesn’t chew through solid masses of plastic or break down inorganic debris. That’s not what it does. Instead it works well on the organic everyday layers that build up: grease from roasting pans tiny crumbs, soap scum coffee oils and microscopic food fibers. The boiling water softens the fats while the reaction between baking soda and vinegar helps dislodge them and the final flush sweeps everything away. It’s like the difference between a forest cleared by wildfire and one maintained carefully with controlled burns and respectful pruning. One leaves a scar while the other maintains health. There are limits of course. If your child has sent a spoon or small toy down the drain, no amount of vinegar will make it disappear. If tree roots have grown into outdoor drainage lines, this gentle approach becomes only a small kindness before you call in the professionals. But for the everyday slow drain or the kitchen that suddenly starts backing up after a season of heavy cooking, this method is often not just good enough but exactly what’s needed.

    Turning Drain Care Into a Regular Home Habit

    Something changes inside you when a clogged drain stops feeling like a disaster and becomes more like a signal from your home that something needs attention. Using baking soda and vinegar creates a different kind of experience. It makes you slow down and actually pay attention instead of just dumping something in and walking away. While the mixture fizzes in the drain you might start noticing things in your kitchen that normally escape your attention. Maybe there’s a small chip in the sink or some spilled salt by the stove or a basil leaf stuck under the faucet.

    The whole thing stops being just about fixing a problem and becomes more like taking care of a space that matters to you. When you finally pour the hot water down and watch it flow smoothly through the drain there’s a genuine sense of accomplishment. You handled the situation without adding harsh substances to your home. You used the same basic ingredients you might use for cooking or cleaning furniture. Nothing bright and toxic or covered in warning labels. We live in a time when people often think power means using the strongest and fastest solution available. Choosing a gentler method that actually works feels like a small act of resistance against that mindset.

    Natural Cleaning vs Store-Bought Drain Solutions

    Understanding Natural Methods Among Drain Cleaning Options To figure out where natural cleaning methods fit in with other choices you need to look at them together. Every approach works in its own way but some are harder on your plumbing system and worse for the environment than others.

    Cleaning Method How the Method Works Most Suitable For Limitations & Risks
    Baking Soda, Vinegar & Hot Water A mild chemical reaction combined with heat helps loosen grease, soap residue, and organic buildup inside pipes. Minor blockages, slow-moving drains, and routine preventative cleaning. May require multiple attempts and won’t clear solid objects or serious pipe obstructions.
    Chemical Drain Cleaners Uses powerful corrosive substances to break down clogs quickly. Short-term emergency situations when natural methods don’t work. Can corrode pipes, damage septic systems, and release toxic fumes if misused.
    Plunger Creates suction and pressure to loosen clogs close to the drain opening. Surface-level or recently formed blockages. Improper technique may force debris further into the plumbing.
    Drain Snake or Auger A flexible metal tool that physically breaks apart or pulls out clogs deeper in the pipe. Stubborn clogs located beyond the immediate drain area. Needs careful handling and may scratch or damage pipes if used incorrectly.
    Professional Plumbing Service Experts use advanced tools and inspections to identify and resolve complex drainage problems. Recurring issues, severe blockages, or hidden pipe damage. More expensive and usually considered after DIY options fail.

    Early Warning Signs Your Drain Is Asking for Attention

    If you spend time in a kitchen you begin to see patterns. The sink rarely clogs suddenly just like a forest rarely falls in one storm without years of hidden damage. There are warning signs & learning to spot them can prevent the late-night stress of a completely blocked drain. The first sign is a small pause when you pull the plug after washing dishes. The water seems to hesitate before it drains away. Then there is the sound of a soft gurgling instead of a smooth quiet flow. Sometimes there is a slight smell especially when it is warm outside. A sour or stale odor rises from the drain even when the sink appears clean.

    These are the times when the natural method becomes more than just a solution but part of regular maintenance. Once a month or more often if you use a lot of cooking oils you can follow the same steps. Start with a flush of hot water then add the baking soda and vinegar mixture and finish with boiling water. Ray says it is like brushing your teeth instead of waiting until you need major dental work. Gentle regular maintenance prevents problems from becoming serious issues. Just as important is adjusting small habits. Scrape plates into the trash or compost bin instead of the sink. Wipe greasy pans with a paper towel before washing them. Use a fine mesh strainer over your drain. These small actions combined with the natural method create a system of care for your plumbing.

    Knowing When DIY Stops Working and a Pro Is Needed

    There is a certain courage in recognizing when a problem has gone beyond what you can fix at home. A homeowner can learn to spot when a clogged kitchen sink means something more serious is happening in the plumbing system. If your sink backs up often even after you try natural cleaning methods or if you hear gurgling sounds in other drains when you use the kitchen faucet or if water rises in one sink while draining another then these are not just minor issues. They are signals that something further down in your plumbing needs attention. In these situations Ray says the best thing to do is stop trying different solutions & call a professional. Sometimes the problem goes beyond what baking soda and vinegar can fix.

    It might be collapsed pipes or tree roots growing into the lines or joints that have shifted or years of grease buildup that has hardened into a solid mass. Ray explains that the natural cleaning method works well for regular maintenance but if nothing is improving then you need someone who understands the plumbing system at a deeper level. Even after a major repair most plumbers will recommend going back to gentle cleaning methods once everything works properly again. The point is not to avoid professional help entirely but to need it less often and to prevent emergencies that are always more stressful & costly than regular simple maintenance.

  • Safety and Effectiveness of Modern Non-Invasive Aesthetic Treatments

    Safety and Effectiveness of Modern Non-Invasive Aesthetic Treatments

    Safety and Effectiveness Treatments – Modern non-invasive aesthetic treatments have become increasingly popular as people seek safer ways to enhance their appearance without surgery. In Australia, these procedures are widely chosen for improving skin tone, reducing fat, and supporting overall facial and body rejuvenation with minimal downtime. Backed by advancing medical technology and stricter regulatory oversight, non-invasive aesthetics focus on gradual, natural-looking results rather than drastic changes. This article explores the safety and effectiveness of these treatments, helping Australian individuals understand how they work, who they suit best, and what realistic outcomes can be expected.

    Safety of Non-Invasive Aesthetic Treatments in Australia

    The safety of non-invasive aesthetic treatments across Australia is strongly influenced by medical regulations, practitioner training, and approved technology. Most procedures, such as laser therapy, radiofrequency skin tightening, and injectable treatments, are designed to work on surface layers or targeted tissues without surgical incisions. Australian clinics are required to follow strict health guidelines, reducing risks such as infection or long-term complications. When performed by qualified professionals, these treatments typically involve mild and temporary side effects like redness or swelling. For Australian citizens, choosing licensed clinics and undergoing proper consultations plays a key role in ensuring both safety and confidence throughout the treatment process.

    Effectiveness of Modern Aesthetic Procedures for Australians

    The effectiveness of modern aesthetic procedures for Australians depends on individual goals, skin type, and consistency of treatment. Non-invasive options are especially effective for mild to moderate concerns, including fine lines, uneven skin texture, and localized fat deposits. Rather than delivering instant dramatic changes, these treatments work gradually by stimulating collagen production or breaking down fat cells over time. Many people across Australia appreciate this subtle approach, as it supports natural-looking results. While outcomes vary, clinical studies and patient feedback consistently show visible improvements when treatments are performed correctly and supported by healthy lifestyle habits.

    Treatment Type Main Purpose Downtime Suitability
    Laser Skin Therapy Improve tone and texture Minimal Most skin types
    Radiofrequency Skin tightening None Mild skin laxity
    Injectable Treatments Wrinkle reduction Low Facial rejuvenation
    Fat Reduction Therapy Body contouring None Localized fat areas

    Benefits of Non-Surgical Aesthetic Solutions Across Australia

    Non-surgical aesthetic solutions across Australia offer several benefits that appeal to busy lifestyles. One of the main advantages is minimal recovery time, allowing individuals to return to daily activities quickly. These treatments are also generally more affordable than surgical options and carry fewer medical risks. For people living throughout Australia, accessibility has improved, with advanced clinics available in both major cities and regional areas. Additionally, treatments can be customized, making it easier to address specific concerns while maintaining natural facial expressions and body proportions.

    Choosing the Right Non-Invasive Treatment for Australian Patients

    Choosing the right non-invasive treatment is an important step for Australian patients seeking safe and effective results. A professional consultation helps assess skin condition, health history, and realistic expectations. Practitioners in Australia often recommend a tailored treatment plan rather than a single session, as gradual improvement leads to better long-term outcomes. Patients are encouraged to ask about technology used, practitioner experience, and aftercare requirements. Making informed decisions ensures that non-invasive aesthetic treatments align with personal goals while maintaining safety and satisfaction.

    Frequently Asked Questions (FAQs)

    1. Are non-invasive aesthetic treatments safe in Australia?

    Yes, when performed by qualified professionals in licensed Australian clinics, these treatments are considered safe.

    2. How long do results from non-invasive treatments last?

    Results vary by treatment type but typically last several months, with maintenance sessions recommended.

    3. Do these treatments require recovery time?

    Most non-invasive procedures involve little to no downtime, allowing normal activities the same day.

    4. Who is a good candidate for non-invasive aesthetics?

    Individuals with mild to moderate cosmetic concerns and realistic expectations are usually suitable candidates.

  • Upper-Body Relief Yoga: 6 Moves to Ease Neck, Shoulder and Back Tension

    Upper-Body Relief Yoga: 6 Moves to Ease Neck, Shoulder and Back Tension

    Simple Yoga Stretches to Ease Tension from Desk Work Sitting at a desk for hours along with daily commuting and stress typically causes the same problems: a stiff neck and shoulders plus back pain. When your body feels pressure it naturally tenses up. Your jaw gets tight & your shoulders rise while your breathing becomes shallow. This protective response can eventually lead to chronic stiffness. The positive side is that you don’t need a hard workout to improve how you feel. A brief set of easy yoga stretches can loosen your spine and relax tense muscles while helping your nervous system calm down. The six movements described below work well for beginners & only need a mat or carpet. They help especially if you sit most of the day or use a laptop or notice your upper back feels heavy by evening. Take your time with each stretch and avoid any painful positions. Pay attention to your breathing because if you cannot breathe easily you should reduce the intensity.

    How to Practice This Upper-Body Relief Yoga Flow in Just 8–12 Minutes

    You can complete all six stretches in sequence or choose the ones that target your specific problem areas. A practical approach is to hold each pose for 45 to 60 seconds while breathing slowly through your nose. If your muscles feel especially tight, try two shorter sessions instead of forcing one extended hold. For breathing guidance inhale for a count of four and exhale for a count of six. Extended exhales help your body release tension, which becomes particularly important when stress rather than physical exertion causes your muscles to tighten.

    Forward Fold Reset: Release Tight Back Muscles and Calm the Nervous System

    Forward Fold offers a quick method to relax your body after prolonged sitting. This position stretches your spine and releases tension in the muscles that extend from your neck down to the backs of your legs. The pose naturally promotes relaxation by directing your focus inward and encouraging slower breathing patterns. Instructions for the pose: Position your feet so they align with your hips Bend your knees substantially and hinge forward at your hip joints Allow your head & arms to dangle freely while keeping your neck loose Maintain this position for 55 to 88 deep breaths before standing up gradually Safety modification: maintain bent knees throughout the entire stretch if you experience any discomfort in your lower back area. The primary objective is achieving muscular release rather than achieving perfectly straight legs.

    Cat–Cow Flow: Restore Spine Flexibility and Improve Daily Posture

    Cat-Cow is one of the best reset movements for the spine. It gently alternates between rounding and arching to lubricate spinal joints and wake up core support. This helps relieve the stiff locked feeling that comes from staying still too long. How to do it: Get on all fours with wrists under shoulders and knees under hips. Inhale into Cow by opening your chest & softening your belly. Exhale into Cat by rounding your spine & drawing your belly in gently. Repeat 8 to 12 rounds at a slow even pace. Why it works: the breath-led rhythm reduces stress while the spine moves through a healthy range. This is especially helpful for the mid-back which often becomes rigid from desk posture.

    Child’s Pose Pause: Let Neck, Shoulders and Mind Fully Unwind

    Child’s Pose appears basic but offers real benefits for creating physical comfort. This position stretches the lower back & hips while relieving tension in the shoulders and neck. Most people find their breathing naturally deepens in this pose without conscious effort & this allows the whole body to relax. How to perform it: Start by kneeling and then fold your body forward until your forehead moves toward the mat. You can keep your knees close together if you want a more intense stretch in your back or separate them wider for additional comfort. Your arms can extend forward or rest along the sides of your body. Hold this position for 45 to 90 seconds. Helpful tip: If your hips cannot comfortably reach your heels then try placing a folded towel or cushion between your calves and thighs for support.

    Seated Side Stretch: Open Ribs, Loosen Shoulders and Improve Breathing

    Tension tends to build up along the sides of your ribcage and beneath your shoulder blades when you slouch or hold your breath during focused tasks. A seated side stretch opens up the ribs and lengthens the waist while making breathing feel easier right away. How to do it: Sit upright on a chair or on the floor. Lift your right arm overhead and gently lean to the left. Keep both sitting bones pressed down and avoid leaning forward. Breathe into the right side of your ribs for four to six breaths and then repeat on the other side. Why it helps: Opening up the ribs takes pressure off your neck and shoulders because your upper body no longer needs to compensate for a collapsed chest.

    Cobra Pose Lift: Open the Chest and Strengthen the Upper Back Safely

    Cobra pose helps fix the hunched position you get from looking at screens and sitting in cars. It stretches your chest and builds up the muscles that hold your upper spine in place. This matters a lot if your shoulders naturally curve forward. Here’s how you do it: Start by lying face down with your hands placed underneath your shoulders. Breathe in and raise your chest up a little bit while keeping your elbows slightly bent. Pull your shoulder blades down toward your lower back and keep your neck stretched out long. Stay in this position for 15 to 30 seconds and do this 2 times. The key is to keep the movement gentle. Only lift yourself as high as feels comfortable for your lower back. A smaller Cobra pose done correctly works better than pushing yourself too high and straining your body.

    Gentle Twists: Ease Deep-Seated Tension in the Upper and Mid-Back

    Twists create a sensation of wringing out tension from your lower back hips, and glutes. They help your spine rotate in ways that most people rarely experience during their normal day. How to do it (supine twist): Lie flat on your back with your knees bent. Let both knees fall to the right side while keeping your shoulders pressed down against the floor. Stretch your arms out to the sides and take slow breaths for 45 to 60 seconds. Then repeat on the other side. Why it’s a good finisher: twists have a calming effect on your nervous system so they work well before sleep or after a stressful day at work.

    Daily Micro-Habits That Help These Yoga Stretches Work More Effectively

    Yoga works best when you combine it with small posture improvements throughout your day. To get lasting results outside your practice sessions, focus on these habits: Drop your shoulders down whenever you catch them rising up toward your ears. Stand up and move around for sixty seconds after every 45 to 60 minutes of sitting. Exhale slowly when you start feeling tense. Position your screens at eye level so your neck stays comfortable. Let me know if your biggest problem is a tight neck, knots in your upper back or stiffness in your lower back. I can create a ten-minute routine from these six exercises with specific timing & simpler options for beginners.

  • 6 Yoga Poses for Stress Relief: Calm the Mind and Relax the Body

    6 Yoga Poses for Stress Relief: Calm the Mind and Relax the Body

    6 Yoga Poses to Help You Relax and Reduce Stress Stress does not always announce itself clearly. Sometimes it appears as tense shoulders or quick shallow breaths. You might notice your mind racing or feel constantly on edge. Yoga provides a natural way to release this tension without forcing yourself to relax. The secret is selecting poses that slow your body down & promote steady breathing. These six yoga poses work to calm your nervous system & loosen areas where tension builds up while helping your mind become quieter. You do not need to be flexible or own special equipment. Long practice sessions are not required either. All you need is a quiet space and comfortable clothes. A few minutes of focused attention will do. Move through each pose slowly and breathe through your nose.

    How Yoga Eases Daily Stress and Clears Mental Clutter

    Understanding How Yoga Reduces Stress Stress triggers your body’s alert system and causes your muscles to tense up while your breathing becomes faster. Gentle yoga helps move your body into a calmer state by releasing muscle tension & encouraging deeper breathing. When you combine movement with controlled breathing your heart rate decreases and your mind starts to settle. Regular practice trains you to handle stressful situations with greater clarity rather than reacting with physical tension.

    Mountain Pose (Tadasana) – Stand Tall, Feel Grounded

    Mountain Pose appears straightforward but it effectively grounds scattered energy. Position your feet hip width apart with your arms hanging naturally at your sides. Balance your weight equally across both feet. Extend upward through the top of your head while maintaining relaxed shoulders. For stress relief focus on how your feet connect with the floor. Complete five slow breaths by inhaling for four counts & exhaling for six counts. This position creates a sense of stability when your thoughts feel chaotic.

    Standing Forward Fold (Uttanasana) – Release Tension from Head to Toe

    This pose helps release tension from your spine neck and shoulders. Start from Mountain Pose & bend forward at your hips while letting your upper body hang down. Keep your knees slightly bent to protect your lower back. Allow your head to relax completely and let your arms hang freely or hold opposite elbows. The gentle inversion helps calm your mind. Hold this position for one to two minutes while breathing slowly. If your mind feels busy, picture your thoughts flowing down toward the floor each time you breathe out.

    Cat-Cow Flow (Marjaryasana & Bitilasana) – Soothe Your Spine, Free Your Mind

    Cat Cow is excellent for releasing stress that builds up in your spine. Get down on your hands and knees in a tabletop position. When you breathe in drop your belly down toward the floor & lift your chest up. When you breathe out round your spine upward and tuck your chin toward your chest. Move through these positions slowly while staying connected to your breathing. For stress relief repeat this sequence eight to ten times. The flowing movement massages your nervous system and helps you link your breath with your body’s movement. This connection becomes especially important when you are going through stressful times.

    Seated Forward Fold (Paschimottanasana) – Stretch Deep, Let Go of Worries

    Sit on the floor & stretch your legs out in front of you. Take a breath in to make your spine longer then bend forward slowly from your hips. Keep your back straight and place your hands wherever they feel natural. You can put a folded blanket under your hips to make the position more comfortable. This pose helps you focus inward. Stay in this position for one to three minutes and breathe in a steady rhythm. Don’t worry about touching your toes. Being comfortable is more important than how far you can bend.

    Reclining Twist (Supta Matsyendrasana) – Unwind Your Back and Restore Balance

    Lie down on your back & pull your knees up toward your chest. Let both knees fall to one side while you stretch your arms out to the sides. If it feels good you can turn your head to look the opposite way from your knees. This twist position helps let go of tension that builds up in your lower back & belly area. Hold this position for one to two minutes on each side. Each time you breathe out try to picture your shoulders sinking down and relaxing into the mat beneath you.

    Legs Up the Wall (Viparita Karani) – Relax, Recharge, and Calm Your Nervous System

    This restorative pose brings deep calm after long or demanding days. Sit next to a wall and gently swing your legs upward as you lie back. Place a pillow under your hips if you need extra support. Rest your arms in a comfortable position and close your eyes. Stay in this pose for five to ten minutes to help regulate circulation and signal your body that it is safe to relax. Slow breathing through your nose makes the calming effect even stronger.

    Quick Yoga Sequence for Hectic Days – Restore Calm in Minutes

    You can practice all six poses in about fifteen minutes. Start with Mountain Pose and then move into Forward Fold before doing Cat Cow. After that you can follow with Seated Forward Fold and Reclining Twist before you finish with Legs Up the Wall. If time is limited you should choose just three poses and focus on longer breathing instead.

    Breathing Techniques to Amplify Relaxation and Inner Peace

    Breathing Techniques for Relaxation Breathing matters just as much as getting the yoga poses right. A simple method is to breathe in through your nose while counting to four & then breathe out while counting to six. When you exhale for a longer time than you inhale your body gets the signal that it can relax and let go of tension. Your mind will probably drift away while you practice this breathing pattern. That happens to everyone and it is completely normal. When you notice your thoughts wandering just guide your focus back to your breathing. Do this in a kind way without criticizing yourself for losing concentration. The goal is not to have perfect focus but to keep returning to the breath each time you notice your attention has shifted elsewhere. This breathing technique works because it activates your parasympathetic nervous system which controls your rest and digest functions. The extended exhale is particularly effective at triggering this relaxation response in your body. You can use this method during yoga practice or anytime you need to calm down during your day.

    Building a Daily Stress-Relief Yoga Habit for Lasting Calm

    Yoga delivers the best results when you practice it regularly even if your sessions are brief. Pick a consistent time like early morning or evening & maintain realistic expectations. Your mind might settle down fast on some days while on other days it could take more time. This variation is completely normal. As time passes these poses teach your body to handle stress calmly instead of building up tension. Through steady practice and patience these six yoga poses can turn into a dependable method for quieting your thoughts and loosening up your muscles while bringing balance to your daily routine.

  • 7 Yoga Moves: Gentle Practices That Help the Body Feel Lighter and More Relaxed

    7 Yoga Moves: Gentle Practices That Help the Body Feel Lighter and More Relaxed

    Feeling heavy in your body does not always mean you have gained weight. It might be stiffness or swelling from sitting too long. It could be stress that settles in your shoulders or slow digestion. Poor sleep can cause it too. Sometimes you just feel stuck after a busy week. The good news is that you do not need a hard workout to feel lighter. A short yoga routine can help. When you focus on breathing and gentle twisting and opening tight spots your body can feel freer quite fast. Here are seven yoga moves that work well for most adults. They are especially helpful if you sit for long hours or feel bloated often or wake up feeling stiff.

    Understanding the Lightness: What “Feeling Lighter” Truly Means for Your Body

    Most people say “lighter” means less tension and easier breathing along with better posture and smoother digestion and a calmer nervous system. Yoga helps with all of this through two basic ideas. First it improves blood flow and movement in areas that get squeezed all day like your hips & spine and ankles and chest. Second it teaches slow & steady breathing which lowers stress signals that make your body feel tight and swollen. When stress drops your shoulders relax and your jaw loosens & even your stomach feels less tight.

    Maximizing Benefits: How to Practice This Routine for Best Results

    Follow these exercises in the sequence provided. Maintain steady and relaxed breathing throughout. Try breathing in through your nose for four counts and breathing out for six counts. The extended exhale encourages your body to enter a more relaxed state. Plan to spend between 12 and 18 minutes on the complete routine. You can practice this sequence in the morning to loosen up tight muscles or in the evening to unwind after your workday. If you experience issues with your knees or spine or have blood pressure problems then move carefully and do not push yourself into deep twisting positions.

     Cat-Cow Flow: Liberate Your Spine and Soothe Your Breath

    Cat-Cow Pose Begin by positioning yourself on all fours. Your wrists should align directly beneath your shoulders and your knees should sit directly under your hips. As you breathe in allow your belly to sink down gently while lifting your chest upward and directing your gaze forward. As you breathe out, curve your spine upward while tucking your tailbone under and allowing your head to hang down naturally. Continue this movement pattern for 8 to 10 complete cycles at a slow and steady pace. **Benefits:** This exercise activates the entire spine and enhances the mobility of your ribcage. It also promotes easier breathing. People often experience a sensation of heaviness when their upper back becomes tight and their chest feels restricted. This simple movement helps release tension in these areas quickly & safely.

    Standing Forward Fold: Release Tension from Your Back and Hamstrings

    Stand with your feet about hip-width apart & bend your knees slightly. Fold your body forward and allow your head to drop naturally. Place your hands wherever they comfortably reach on your shins or ankles or let them rest on the floor. Hold this position for 6 to 8 breaths. Why it helps: This forward fold releases tightness through the back of your body and targets your hamstrings and lower back muscles. The position also helps quiet your thoughts. If you have a sensitive neck then tuck your chin just a bit and avoid forcing your head downward. Tip: For an immediate feeling of lightness try swaying gently from side to side while keeping your jaw loose and relaxed.

    Low Lunge: Unlock Hips Stiffened by Sitting All Day

    Step your right foot forward & place it between your hands while lowering your left knee to the mat. Make sure your front knee stays directly above your ankle. Raise your chest upward and rest both hands on your front thigh. Hold this position for 5 to 7 breaths before switching to the other side. Why it helps: When you sit for long periods your hip flexors become shortened and your legs can feel heavy and stiff. The Low Lunge position opens up the front area of your hip and helps improve both your walking stride and your posture. Once your hips become more open you will notice that walking feels much easier and your lower back typically feels less pressure. Make it safer: If your front knee experiences any stress then move your foot a bit more forward. Place a folded towel underneath your back knee for extra cushioning.

    Supine Twist: Ease Digestive Discomfort and Calm Your Nervous System

    Lie flat on your back and pull your knees toward your chest. Let both knees fall to your right side while your shoulders stay pressed against the floor. Stretch your arms out to form a T shape. Hold this position for 6 to 10 breaths and then repeat on the other side. Why it helps: Gentle twists feel good when your stomach is bloated or your waist and back feel tight. The real benefit comes from calming your nervous system. A slow twist signals to your body that it can relax and that simple shift can make you feel much lighter. Tip: Keep the twist gentle. Focus on breathing easily rather than twisting as far as you can.

    Legs Up the Wall: Reduce Leg Fatigue and Swelling Instantly

    Position yourself near a wall & lift your legs upward while lying on your back. You can place your hips directly against the wall or leave a small gap depending on what feels better. Hold this position for 2 to 5 minutes while breathing at a relaxed pace. Why it helps: This pose offers one of the fastest ways to refresh tired legs after standing for long periods or traveling. It improves blood flow and eliminates the heavy sensation that many people experience by evening. Make it cozy: Add a small pillow beneath your head or fold a blanket under your hips for extra comfort.

    Bridge Pose: Energize Your Body Gently Without Strain

    Lie on your back & bend your knees while keeping your feet flat on the floor about hip-width apart. Push down through your feet and raise your hips up. Make sure your ribs stay relaxed & don’t stick out. Stay in this position for 5 breaths & then lower yourself down slowly. Do this 2 to 4 times. Why it helps: The bridge exercise works your glute muscles and stretches the front side of your body. Opening up your chest and making your hips stronger leads to better posture and makes your body feel more upright. This exercise builds strength in a gentle way that won’t leave you feeling tired. Tip: Push down equally through both feet. If you feel any pinching in your lower back then don’t lift your hips as high & try to lengthen your tailbone instead.

    Child’s Pose with Mindful Breathing: End Feeling Light, Clear, and Centered

    Get down on your knees & bring your big toes together while spreading your knees a little bit apart. Lower yourself back toward your heels and reach your arms out in front of you. Put your forehead down on the mat and breathe slowly eight to twelve times. Why it helps: This pose lets your body take in all the good effects from your practice. Child’s Pose calms your mind and loosens up your belly and shoulders. Most people find they can breathe more deeply in this position than they could when they first started. Quick option: If your knees hurt you can keep them closer together and put a pillow under your chest for support.

    Tiny Daily Tweaks: Lifestyle Habits That Amplify Your Yoga Practice

    If you want that light body feeling to last then add two simple habits. First take a short walk after meals when possible even for 8 to 10 minutes. Second drink water steadily through the day instead of suddenly at night. These sound basic but they support digestion and reduce that heavy sluggish feeling that builds up from dehydration and long sitting.

    A Beginner-Friendly Weekly Yoga Plan You Can Actually Stick To

    Practice this routine four days each week. On your rest days you only need to do two exercises: Cat-Cow for one minute and Legs Up the Wall for three minutes. Staying consistent matters more than pushing yourself too hard. Most people feel less stiff in the morning after just one week. They also notice their hips move more easily and they have fewer days when their body feels heavy. I can write another version if you want. One option focuses on reducing belly bloating and improving digestion. Another option targets heavy legs and swelling for people who stand throughout their workday.