Category: News

  • 7 Minute Hip Mobility Routine That Loosens Tight Hips and Reduces Long Term Stiffness

    7 Minute Hip Mobility Routine That Loosens Tight Hips and Reduces Long Term Stiffness

    My hips have always been tight but they feel worse this time of year. I work long hours at my desk & the stiffness builds up quickly. I take shorter steps when I walk and feel twinges when I run. Standing up after sitting too long brings that familiar ache. I know mobility work helps but it has to fit my schedule. When I’m busy I stick with routines under 10 minutes because they’re easier to do consistently. That’s why I tried a seven-minute hip mobility routine from Lindsey Bomgren who is a NASM-certified personal trainer. She posts as @nourishmovelove & promised the routine would loosen tight hips fast without equipment or taking much time. I did it regularly for three weeks and noticed three important things that changed how my hips feel every day.

    Lindsey’s hip mobility routine includes seven exercises that each last one minute. Lindsey mentions in the video that you can pause at any point and spend extra time on exercises that feel especially useful. The routine features these exercises: 90/90 internal rotation knee drops and 90/90 pigeon pose and 90/90 rear knee and heel lifts and tabletop hip circles and frog rocks & v-sit leg lifts and cossack squats. This routine works well because it moves your hips through many different positions and patterns in a short time. The sequence works on both internal & external hip rotation. These movements often get ignored but they matter for comfortable walking and running & sitting. Exercises like the 90/90 variations reach deep into the hip capsule. The frog rocks and tabletop hip circles help improve your range of motion in multiple directions. The routine balances mobility work with strength training. The V-sit leg lifts and Cossack squats do more than just stretch your hips. They make your muscles control those extended positions and this helps your mobility improvements last longer. Here are three changes I have noticed since trying this routine.

    My hips felt looser without forcing deep stretches

    What caught me off guard was how fast my hips loosened up without that unpleasant feeling of forcing a stretch. The routine shifts between positions slowly & uses movements like 90/90 poses & hip circles that helped my flexibility improve in a way that seemed easy and not harsh. After the first week I could tell that regular activities like getting up from my chair or taking longer steps while walking felt smoother. Three weeks in I realized that stiff locked feeling I normally get after sitting all day had gotten much better and that felt like a real achievement.

    It improved my hip mobility in more ways than one

    This routine went beyond simple flexibility work. Movements like V-sit leg lifts and Cossack squats worked my hips through various ranges while requiring my muscles to stay active as I shifted into deeper positions. This meant I was building control rather than just stretching. During the three weeks I saw clear progress in exercises involving internal and external rotation which had always felt very restricted for me. My hips no longer felt temporarily loose for just an hour after the routine before tightening up again. Instead they began to feel more balanced and supported all day long.

    The short length made it easy to stay consistent

    Seven minutes might not seem like a lot of time but that is precisely why this routine was so effective. When my days were busy it felt doable instead of something I could skip. I managed to fit it in during work breaks or even before going to sleep at times when I would normally convince myself not to exercise at all. The regular practice made the most significant impact. Rather than completing longer mobility workouts occasionally I maintained this routine almost daily & the combined results after three weeks were much more apparent than I had anticipated.

    My verdict

    After three weeks this routine has become a regular part of my mobility practice. The length makes it easy to stick with while still being complete enough to create real results. This is especially true if you sit for most of the day. If you want a new method to loosen up tight hips this is an easy & accessible routine that deserves your attention.

  • 10 Chic Winter Outfits to Wear Starting January 5

    10 Chic Winter Outfits to Wear Starting January 5

    My New Year’s resolution is simple: In 2026 I will dress rich and elegant and above all chic. I want 365 days of effortlessly cool outfits with unforgettable coats & coveted kitten heels and spectacular silhouettes. And to prove I’m serious I’ve already begun preparations. For the past few weeks I’ve looked through Instagram for chic winter outfits & consulted my fellow Who What Wear editors on the 2026 fashion must-haves & observed the latest trends of the NYC style set. Spoiler: High V-neck sweaters and short faux-fur jackets and elegant leather gloves will soon be everywhere if they haven’t already appeared. So if your New Year’s resolution looks anything like mine then pay close attention. From London to Oslo here are 10 chic winter outfits to wear in 2026. You’ll find plenty of faux-fur trimmings and oversize totes like the Coach Soft Empire Carryall Bag 40 and straight-leg jeans inspired by the 90s & cool knee-high boots and elegant winter coats. Let’s make 2026 the most fashionable year yet.

    Get the Look: Oversize Black Leather Jacket with Wide-Leg Trousers and Faux-Fur Scarf To recreate this outfit you will need an oversize black leather jacket paired with wide-leg trousers.

    Trust me when I say that a faux-fur scarf is the key to looking wealthy. This simple accessory can transform your entire appearance and make you seem more affluent than you might actually be.

    Zara Has Mastered the Affordable Faux-Leather Jacket Zara has become exceptionally skilled at creating faux-leather jackets that don’t break the bank.

    Banana Republic Has Perfected the Wide-Leg Trouser Wide-leg trousers have become a wardrobe essential in recent years. They offer comfort and style in equal measure.

    I loved the Mylie Ballet flat in brown suede so naturally I would love it in classic black too.

    Get the Look: Black balloon pants with short-sleeve sweater and long leather gloves plus woven tote and sunglasses This outfit combines several key pieces to create a polished & modern appearance. The foundation starts with black balloon pants that offer both comfort and style through their relaxed silhouette.

  • Boiling lemon peel, cinnamon and ginger: why people recommend it and what it’s really for

    Boiling lemon peel, cinnamon and ginger: why people recommend it and what it’s really for

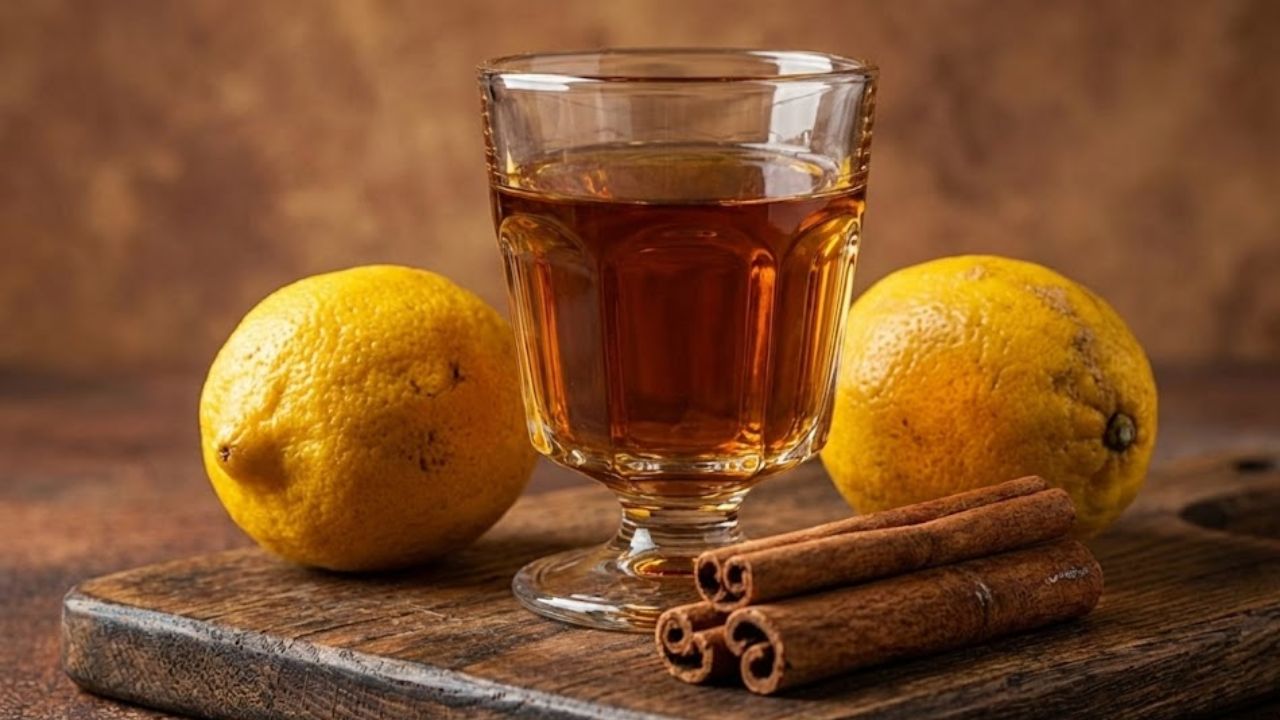
    No teabags or coffee here. Just some lemon peels with a broken cinnamon stick and fresh ginger slices floating in hot water. The smell was sharp and warm with a spicy edge that somehow felt like winter and summer mixed together. My friend told me this basic drink had changed her life completely. She said it reduced her bloating and helped her sleep better while cutting down her nighttime cravings. I stared at the rising steam and realized I had seen this exact moment countless times on social media. The kitchens were different and the hands were different but the ritual stayed the same. People were doing more than making a drink. They were searching for something specific. They wanted a shortcut or maybe just a sign that the next day would feel easier than this one. So what are we really trying to solve by boiling lemon peel with cinnamon and ginger?

    Why This Simple Pot Has Suddenly Taken Over Social Feeds

    The first thing you notice when you simmer lemon peel, cinnamon, and ginger isn’t the flavour. It’s the aroma. That bright citrus mixed with warm spice drifts through rooms, slips under doors, and briefly turns a small flat into something that feels like a wellness escape. On TikTok and Instagram, it photographs beautifully and smells even better, which is why it keeps reappearing as a symbol of a fresh start in liquid form.

    Beneath the cosy visuals, something more basic is at play. It’s the comfort of doing one small, tangible thing for your body when everything else feels vague or overwhelming. No gym memberships, no complicated gadgets to clean. Just a saucepan, running water, and a lemon that might otherwise be thrown away. On a random Tuesday night when life feels heavy, that simplicity matters.

    Scroll through the comments on any viral “detox drink” video and the claims repeat endlessly. “I lost 4 kg in a month.” “My blood sugar finally feels normal.” “No more bloating.” Someone shares side-by-side belly photos next to a steaming mug, and the recipe spreads again. Even knowing how social media exaggerates, people pause and wonder if it might help a little.

    One nutritionist I spoke to scoffed at the word “detox” but admitted she drinks a version of this brew most winter days. Not for miracles, but for warmth, hydration, and as a calmer alternative to sugary drinks. That quieter truth sits behind the hype: many people are simply replacing soda with spiced water and giving it a more dramatic name.

    When two fizzy drinks a day are swapped for this, the body does notice, even if it’s far from the magic potion promised online.

    Strip away the hype and the ingredients make sense. Lemon peel contains aromatic oils and a compound called hesperidin, often studied for circulation and potential anti-inflammatory effects. Ginger is widely used for digestive comfort and nausea. Cinnamon has been researched for its possible role in blood sugar balance. No drink can flush toxins, because your liver and kidneys already handle that work continuously. What this blend can offer are small, realistic benefits: more fluids, less sugar, gentle digestive support, and a ritual that sometimes replaces late-night snacking.

    Science doesn’t back the grand promises, but it doesn’t dismiss these modest gains either. That uncertain middle ground is exactly where this simmering pot belongs.

    How to Make This Drink Fit Into Real Life

    The method is straightforward. Fill a small pot with about a litre of water. Add the peel of one unwaxed lemon, one cinnamon stick, and four to six thin slices of fresh ginger. Bring it to a boil, then reduce the heat and let it simmer gently for 10 to 15 minutes. Turn off the heat and allow it to sit briefly so the flavours deepen.

    Taste before pouring. If the ginger feels too sharp, dilute with a bit more water. For sweetness, a teaspoon of honey stirred in once the drink has cooled slightly works better than sugar. Some people add a squeeze of fresh lemon juice at the end for extra brightness, but the lemon peel is the real star.

    Drink it warm and slowly, as if you’re not rushing anywhere.

    In theory, it could be a morning and evening habit. In reality, that rarely happens. Soyons honnêtes : almost no one manages it every day. Work overruns, kids wake early, and the pot stays unwashed. That’s fine. The aim isn’t perfection, but repeating it often enough for your body to sense a pattern.

    If your stomach is sensitive, use less ginger and shorten the simmering time so the drink stays gentle. Anyone on blood-thinning medication, dealing with reflux, or managing blood sugar concerns should consult a professional before making it a twice-daily habit. Large amounts of cinnamon can irritate the liver, so more isn’t better.

    Think of this drink as support, not a solution. It works best alongside decent sleep, regular movement, and food that isn’t always ultra-processed.

    As one GP put it, people often want a potion, but what they really need is a habit they can live with. If boiling lemon peel, cinnamon, and ginger leads someone to drink more water and skip one donut, it’s hard to argue against it.

    Small details can subtly improve the experience. Organic or unwaxed lemons matter when you’re using the peel, since residues collect there. Fresh ginger offers a smoother flavour and lets you control the heat slice by slice. Cinnamon sticks infuse slowly and evenly, unlike ground cinnamon, which can make the drink gritty.

    • Use peel, not slices, to keep the flavour aromatic rather than overly sour.
    • Simmer gently; a hard boil can make the brew bitter.
    • Store leftovers in the fridge for up to 24 hours and reheat softly instead of starting again.

    These tweaks don’t make the drink miraculous. They simply make it enjoyable enough that you’ll actually drink it.

    What People Are Truly Seeking in This Simple Brew

    On paper, the blend sounds appealing: vitamin-rich peel, circulation-friendly spice, and a root long associated with easing nausea. But its real appeal is emotional. Standing over a steaming pot on a cold evening feels grounding, a brief step away from endless scrolling and back into your own space. On warmer days, chilled and served over ice, it becomes a grown-up version of lemonade without the sugar crash.

    Most people know a single drink won’t undo years of exhaustion or ultra-processed meals. Still, there’s something quietly meaningful about using peels that might otherwise be discarded. It signals a move from neglect to self-care, even if the rest of your habits are still catching up. On a small scale, it’s a way of reclaiming a sense of control.

    On a broader level, it reflects how badly people want simple rules in an overwhelming health landscape. One pot, three ingredients, and a promise that sounds almost believable.

    There’s also a social element. Friends swap recipes, ask if others have tried the lemon peel drink, and compare notes on sleep, digestion, and cravings. It becomes a shared experiment, a way to talk about bodies and fatigue without turning it into complaint. For some, it replaces late-night snacking. Others drink it before meals to slow down and eat more intentionally. Some just enjoy the smell and ignore the weight-loss talk entirely.

    At its core, this little pot on the stove reminds us that change doesn’t always arrive in capsules or glossy packaging. Sometimes it starts with what’s already on the counter.

    We’ve all reached the end of a day feeling mentally and physically heavy without a clear reason. This drink won’t fix burnout, broken systems, or complicated lives. It can, however, mark the line between “today was too much” and “I’m going to be gentle with myself for ten minutes.” In a world obsessed with optimisation, that slowness feels almost radical.

    That may be why people recommend this blend so earnestly. Not because it’s a miracle detox, but because it invites you to slow down. To heat water, peel a lemon, snap a cinnamon stick by hand. To notice the quiet proof, rising in steam, that you can still care for yourself, even on a tired Tuesday.

    Stack enough of those Tuesdays together, and the ritual becomes more than a trend. It turns into a soft, ongoing conversation with your body, spoken in steam and spice.

    Point clé Détail Intérêt pour le lecteur
    Rituel plutôt que remède miracle La boisson ne “détoxifie” pas, elle crée une habitude douce et répétable Réduit la pression de chercher la potion parfaite, remet le focus sur les gestes réalistes
    Ingrédients complémentaires Écorce de citron (huiles aromatiques), gingembre (digestion), cannelle (sensation de chaleur, soutien possible de la glycémie) Aide à comprendre ce que cette boisson peut vraiment apporter, sans promesses exagérées
    Usage ancré dans le quotidien Facile à préparer, se conserve 24 h, remplace des boissons sucrées Permet de l’intégrer à sa routine sans charge mentale ni dépenses importantes
  • Affordable Ways to Remove Limescale and Rust—How to Make Your Bathroom Shine

    Affordable Ways to Remove Limescale and Rust—How to Make Your Bathroom Shine

    Even with frequent cleaning, a bathroom can still feel slightly dull because mineral residue and orange staining often cling to fixtures, tiles, and glass. The upside is that restoring brightness doesn’t require specialized cleaners. Using a few everyday pantry items, you can effectively address hard water stains, cloudy buildup, and rust marks with a method that’s simple and repeatable. Success comes not from scrubbing harder, but from choosing the right ingredient, allowing it time to work, and following a routine that helps prevent new deposits from forming.

    Why mineral buildup and rust appear so quickly

    The stubborn white film seen on bathroom surfaces is usually caused by limescale, which forms when minerals remain after water evaporates. Showerheads, taps, and tile edges are especially vulnerable because repeated wetting and drying creates layers over time, leaving surfaces cloudy. Rust stains develop where water sits on metal or where worn finishes allow moisture to linger. As these issues remain untreated, they bond more tightly to surface textures, turning what could be a quick wipe into a tougher task. Short, regular cleanups help stop light residue from becoming hardened buildup.

    Everyday pantry items that get the job done

    Three common household ingredients are effective because each targets a different type of residue. Vinegar and lemon juice contain acids that break down mineral deposits responsible for cloudy film. Baking soda provides gentle abrasion, lifting grime without harsh scratching. Table salt, when used sparingly, adds extra scrubbing power for small, stubborn areas. The key is patience—these solutions work best when left on the surface long enough to loosen buildup before wiping. Allowing a mixture to sit for 15–30 minutes is often more effective than applying extra pressure.

    Four simple ways to remove buildup and reduce its return

    Vinegar treatment for cloudy fixtures and glass

    Pour plain white vinegar into a spray bottle and apply it to areas showing mineral haze, such as faucets, shower doors, and tiles near the tub edge. Let it sit for 15–20 minutes, then wipe with a soft cloth or non-scratch sponge and rinse thoroughly. For heavier buildup, mix vinegar with a small amount of baking soda to create a paste, apply it only where needed, wait briefly, and wipe gently. This method helps restore shine, especially on chrome surfaces.

    Lemon juice and salt for rust discoloration

    Apply fresh lemon juice directly to rust-stained areas and leave it for about 30 minutes. The citric acid loosens the discoloration, making it easier to remove with a soft sponge or brush. For tougher marks, sprinkle a small amount of table salt onto the area before adding lemon juice. The salt provides mild abrasion without deep scratching. Rinse well afterward to prevent residue from drying on the surface.

    Baking soda paste for persistent residue

    Combine baking soda with a small amount of water to form a thick paste. Apply it to areas where buildup or discoloration remains and let it sit for around 15 minutes. Gently rub in circular motions using a damp sponge, then rinse thoroughly. Baking soda’s mild abrasive quality helps lift residue while remaining kinder to surfaces than many gritty cleaners. If needed, repeat the process instead of increasing scrubbing force.

    Preventing new deposits with a quick daily habit

    To slow the return of limescale, remove water before it dries. Quickly wiping glass, faucets, and sink edges with a dry microfiber cloth after showering reduces mineral residue over time. Periodically removing and rinsing the faucet aerator also helps prevent internal mineral buildup that can restrict water flow. Together, these simple habits keep surfaces clearer and reduce the need for frequent deep cleaning.

  • 10-Minute Yoga Flow: Improve Flexibility With a Quick Routine

    10-Minute Yoga Flow: Improve Flexibility With a Quick Routine

    Building flexibility doesn’t require long workouts or extended studio sessions. A short, focused yoga flow can effectively improve flexibility and expand your range of motion. This 10-minute yoga routine is suitable for both beginners and experienced practitioners. It focuses on opening the body, supporting better posture, and easing stiffness caused by long periods of sitting or standing. Whether you are short on time or looking to add gentle movement to your morning or evening routine, this quick flow helps you feel more open, relaxed, and refreshed.

    1. Cat-Cow Pose (Marjaryasana-Bitilasana): Gentle Spine Warm-Up

    Begin your practice with Cat-Cow Pose, a smooth sequence that warms the spine and encourages spinal mobility. This movement helps awaken the body and prepares you for deeper stretches.

    How to do it:

    • Come into a tabletop position with your wrists under your shoulders and knees under your hips.
    • Inhale, dropping your belly while lifting your chest and tailbone upward.
    • Exhale, rounding your back, tucking your chin, and drawing your navel inward.
    • Continue flowing between these movements for one minute, matching each motion with your breath.

    Benefits: This pose gently mobilizes the spine while easing tension in the neck, shoulders, and back, helping improve overall torso flexibility.

    2. Downward-Facing Dog (Adho Mukha Svanasana): Full-Body Lengthener

    Move into Downward-Facing Dog to stretch the back of the body, including the legs and spine. This foundational pose is known for releasing built-up tension and supporting full-body flexibility.

    How to do it:

    • From tabletop, lift your hips up and back to form an inverted V shape.
    • Press your palms firmly into the floor with fingers spread wide.
    • Engage your legs and gently press your heels toward the ground.
    • Let your head relax between your arms and hold for one minute with slow, steady breaths.

    Benefits: This pose stretches the hamstrings, calves, and spine while helping lengthen muscles and improve flexibility in the lower body.b

    3. Low Lunge (Anjaneyasana): Hip and Thigh Opener

    Low Lunge focuses on the hip flexors and quadriceps, areas that often become tight from extended sitting or standing. It supports improved mobility in the hips and legs.

    How to do it:

    • From Downward-Facing Dog, step your right foot forward between your hands.
    • Lower your left knee to the floor and extend the left leg back.
    • Lift your chest and reach your arms overhead while keeping your core engaged.
    • Hold for 30 seconds, then repeat on the other side.

    Benefits: This stretch releases tension in the hip flexors and quadriceps, helping improve flexibility throughout the lower body.

    4. Seated Forward Fold (Paschimottanasana): Hamstring Stretch

    Seated Forward Fold is an effective pose for deepening hamstring flexibility while gently lengthening the spine.

    How to do it:

    • Sit with your legs extended straight in front of you and feet flexed.
    • Inhale to lengthen your spine.
    • Exhale and hinge forward from the hips, reaching toward your feet or shins.
    • Keep your spine long and hold for one minute while breathing deeply.

    Benefits: This pose improves hamstring flexibility, stretches the spine, and helps relieve lower back tension.

    5. Butterfly Pose (Baddha Konasana): Inner Thigh and Hip Stretch

    Butterfly Pose gently opens the hips and inner thighs, making it ideal for releasing tightness in the lower body.

    How to do it:

    • Sit upright and bring the soles of your feet together.
    • Hold your feet and allow your knees to relax toward the floor.
    • Optionally, lean forward slightly to deepen the stretch.
    • Hold for 30 seconds to one minute while breathing comfortably.

    Benefits: This pose improves hip mobility, increases inner thigh flexibility, and reduces tension in the groin area.

    6. Pigeon Pose (Eka Pada Rajakapotasana): Deep Hip Release

    Pigeon Pose offers an intense stretch for the hips and glutes, making it especially useful for improving hip flexibility.

    How to do it:

    • Start in tabletop and slide your right knee forward behind your right wrist.
    • Extend your left leg straight back.
    • Lower your hips toward the floor, keeping them squared.
    • Stay upright or fold forward and hold for one minute on each side.

    Benefits: This pose deeply stretches the hips, glutes, and lower back, helping release stored tension and improve hip mobility.

    7. Supine Spinal Twist (Supta Matsyendrasana): Spine Relaxation

    End your flow with a gentle spinal twist to release remaining tension and support spinal flexibility.

    How to do it:

    • Lie on your back with knees bent and feet on the floor.
    • Extend your arms out to the sides with palms facing down.
    • Drop both knees to the right while keeping your shoulders grounded.
    • Hold for 30 seconds, then switch sides.

    Benefits: This twist enhances spinal flexibility, stretches the lower back, and helps improve overall torso mobility.

    Conclusion

    This 10-minute yoga flow offers a simple and effective way to enhance flexibility at any experience level. Through gentle movements and mindful breathing, it helps release tension, stretch key muscle groups, and improve range of motion. Adding this routine to your daily schedule supports long-term flexibility and keeps your body mobile. Whether practiced in the morning or before sleep, these poses encourage easier movement and a more relaxed body throughout the day.

  • Metabolism Boost Yoga: 7 Poses to Activate Energy and Fat Burn

    Metabolism Boost Yoga: 7 Poses to Activate Energy and Fat Burn

    Yoga is widely known for improving flexibility and relaxation, but it also plays a valuable role in supporting a healthy metabolism. Metabolism affects how your body manages weight, energy levels, and overall wellness. Certain yoga poses work by engaging the core, improving blood flow, and stimulating the digestive system, all of which help the body function more efficiently. Below are seven effective yoga poses that can help activate your metabolism and support long-term vitality.

    1. Downward-Facing Dog (Adho Mukha Svanasana): Refresh and Energize the Body

    Downward-Facing Dog is a classic full-body pose that builds strength while improving circulation. By activating major muscle groups and encouraging steady breathing, this posture helps increase oxygen flow and supports metabolic activity.

    How to do it:

    • Begin on all fours with wrists under shoulders and knees under hips.
    • Lift your hips upward, forming an inverted V shape.
    • Press your palms firmly into the mat and keep feet hip-width apart.
    • Let your heels gently move toward the floor.
    • Hold for 30 seconds to 1 minute while breathing deeply.

    Benefits: Stretches the body, improves circulation, and encourages steady energy flow that supports metabolic function.

    2. Sun Salutations (Surya Namaskar): Dynamic Movement for Total Activation

    Sun Salutations combine breath and motion in a flowing sequence that engages the entire body. This continuous movement builds heat, supports digestion, and helps regulate metabolic processes.

    How to do it:

    • Stand tall with feet together and arms relaxed.
    • Inhale and raise arms overhead, then exhale into a forward fold.
    • Lift halfway on an inhale, then step back into plank on an exhale.
    • Lower down and transition into Cobra or Upward-Facing Dog.
    • Move into Downward-Facing Dog and continue the sequence.

    Benefits: Increases heart rate, improves circulation, and supports digestion, helping boost overall metabolic efficiency.

    3. Warrior II (Virabhadrasana II): Build Strength and Core Engagement

    Warrior II is a grounding posture that strengthens the legs, hips, and core. By holding the pose and breathing deeply, the body uses more energy while stimulating digestive activity.

    How to do it:

    • Stand with feet wide apart and arms extended at shoulder height.
    • Turn your right foot outward and slightly angle the left foot inward.
    • Bend the right knee until it aligns over the ankle.
    • Gaze forward and hold for 30 seconds to 1 minute.
    • Switch sides and repeat.

    Benefits: Enhances stamina, strengthens muscles, and supports digestion, contributing to improved metabolic activity.

    4. Boat Pose (Navasana): Strengthen the Core and Digestive Area

    Boat Pose strongly engages the abdominal muscles, helping stimulate digestion and support metabolic balance. Maintaining balance in this pose encourages deeper muscle activation.

    How to do it:

    • Sit on the floor with knees bent and feet flat.
    • Lean back slightly and lift your feet so shins are parallel to the floor.
    • Extend arms forward and straighten legs if comfortable.
    • Hold for about 30 seconds before slowly releasing.

    Benefits: Builds core strength, supports digestive function, and improves balance.

    5. Cobra Pose (Bhujangasana): Support Digestion Through Gentle Backbending

    Cobra Pose gently stretches the abdominal area while opening the chest. This posture helps activate digestive organs and encourages healthy blood flow to the stomach area.

    How to do it:

    • Lie face down with hands under shoulders.
    • Inhale and press into your palms to lift chest and head.
    • Keep elbows close to the body and shoulders relaxed.
    • Hold for 15 to 30 seconds with steady breathing.

    Benefits: Stimulates digestion, increases spinal flexibility, and supports metabolic balance.

    6. Bridge Pose (Setu Bandhasana): Engage the Lower Body and Energy Systems

    Bridge Pose activates the glutes, hips, and legs while encouraging circulation throughout the body. This posture also supports glands involved in metabolic regulation.

    How to do it:

    • Lie on your back with knees bent and feet hip-width apart.
    • Press feet into the floor and lift hips upward.
    • Interlace fingers beneath your body if comfortable.
    • Hold for 30 seconds to 1 minute before lowering down.

    Benefits: Strengthens the lower body, improves circulation, and supports digestive and metabolic processes.

    7. Twisted Chair Pose (Parivrtta Utkatasana): Encourage Detox and Core Activation

    Twisted Chair Pose combines strength and rotation to activate the core and digestive organs. The twisting motion supports circulation and helps the body work more efficiently.

    How to do it:

    • Stand tall with feet together.
    • Bend knees as if sitting back into a chair.
    • Bring palms together and twist the torso to one side.
    • Hold for 30 seconds, then switch sides.

    Benefits: Strengthens the core, supports digestion, and promotes circulation.

    Conclusion

    Adding these seven yoga poses to your routine can help support metabolism, improve energy levels, and encourage healthy digestion. Each posture engages important muscle groups while promoting circulation and efficient bodily function. With consistent practice, these poses can easily fit into any time of day and contribute to better metabolic health and overall well-being.

  • Spot 3 Differences in the Family Vacation Image in 8 Seconds

    Spot 3 Differences in the Family Vacation Image in 8 Seconds

    Get ready to test your observation skills with this thrilling “Spot the Difference” puzzle. You’ll be challenged to find three subtle differences between two nearly identical images showing a family enjoying a vacation. With only 8 seconds on the clock, every second counts. Don’t let the similar visuals fool you—tiny details have been carefully changed, and your task is to spot them before time runs out.

    The Challenge: Test Your Visual Perception

    The main goal of Spot the Difference puzzles is to train your brain to notice small details that are easy to miss. These puzzles are not just entertaining; they are powerful exercises that help sharpen focus, attention, and cognitive awareness. The changes may appear minor, but they are intentionally designed to push your visual perception to the next level. In this challenge, you’ll compare two vacation images. At first glance, the scene looks perfect—a happy family enjoying time together. However, once you look closely, you’ll uncover hidden changes. With limited time available, quick thinking and sharp observation are essential.

    Why “Spot the Difference” Puzzles Are Beneficial

    These puzzles offer much more than simple entertainment. Here are some key brain-boosting benefits:

    Improved Focus and Attention to Detail: You must concentrate fully to succeed. Regular practice helps train your mind to notice fine details while ignoring distractions—an essential life skill.

    Faster Cognitive Processing: The time limit pushes your brain to process visual information quickly, improving reaction time, decision-making, and problem-solving abilities.

    Enhanced Visual Processing Skills: Repeated comparison of images strengthens your visual system, making it easier to recognize faces, read accurately, and notice small details in everyday life.

    Better Memory and Recognition: These puzzles engage short-term memory as you recall what you’ve already seen, helping improve pattern recognition over time.

    A Fun Brain Workout: Beyond the mental benefits, these challenges are enjoyable. Spotting a difference just in time delivers a rewarding sense of achievement.

    The Family Vacation Image: Where Are the Differences?

    Now it’s time to break down the puzzle. You’re given just 8 seconds to identify three differences in a family vacation photo. Although the images appear identical, small changes have been made. Here’s what to look for:

    Difference 1: The Sky – An Extra Cloud

    In the right image, there is an additional cloud floating in the sky that does not appear in the left image. Because clouds blend naturally into the background, this difference can be tricky to notice at first.

    Difference 2: The Woman’s Jacket

    Look closely at the woman’s jacket. In the right image, an extra button or small symbol appears on her collar. This detail is missing from the left image, making it a subtle but important difference.

    Difference 3: The Little Girl’s Hair

    The final difference is found in the little girl’s hair. In the right image, she is wearing a small hair clip, while the left image shows no clip at all. This tiny change completes the set of three differences.

    Tips to Help You Spot the Differences Faster

    If you couldn’t find all the differences within the time limit, don’t worry. These puzzles take practice. Use the following tips to improve your skills:

    Focus on Key Areas

    Instead of scanning the entire image randomly, concentrate on areas where changes often occur, such as clothing, accessories, faces, and background elements.

    Break the Image into Sections

    Divide the image mentally into smaller sections and inspect each part carefully. This method makes comparison easier and more efficient under time pressure.

    Start with the Obvious Details

    Begin by checking larger or more noticeable elements like the background or clothing. Obvious changes often stand out first and can save valuable time.

    Stay Calm and Focused

    Rushing can cause you to miss details. Staying calm allows your eyes to work more effectively. If you don’t succeed on the first try, repeat the challenge practice leads to improvement.

    Conclusion: Challenge Your Eyes and Mind

    The Spot the Difference puzzle is a simple yet powerful way to sharpen your mind. Whether you’re racing against the clock or just enjoying a mental workout, these puzzles help strengthen memory, focus, and visual speed. Did you manage to spot all three differences? If not, don’t be discouraged. Keep practicing, and you’ll notice your skills improving with each challenge. Whenever you’re looking for a fun way to boost your brainpower, dive into another Spot the Difference puzzle and test how fast your eyes can work.

  • 6 Essential Yoga Poses for a Total-Body Workout: Strength, Balance and Full-Body Control

    6 Essential Yoga Poses for a Total-Body Workout: Strength, Balance and Full-Body Control

    Yoga is commonly associated with stretching and relaxation, but it is also a powerful way to train the entire body. When practiced mindfully, yoga builds strength, balance, and endurance while improving flexibility and focus. No matter your experience level, adding these six essential yoga poses to your routine can deliver a complete full-body workout that activates major muscle groups and supports overall fitness.

    Each of these poses blends strength, mobility, and stability, making them ideal for a balanced yoga practice. Together, they target the core, arms, legs, and back while enhancing circulation, posture, and mental clarity. Practicing them consistently helps develop both physical strength and inner awareness.

    1. Downward-Facing Dog (Adho Mukha Svanasana)

    Downward-Facing Dog is a foundational yoga pose that stretches the entire body while building strength in the arms, shoulders, legs, and core. As an inversion, it also encourages blood flow toward the head, promoting alertness and renewed energy.

    How to practice Downward-Facing Dog:

    – Begin on all fours with wrists aligned under shoulders and knees under hips.

    – Curl your toes under and lift your hips upward, forming an inverted “V” shape.

    – Straighten your legs as much as comfortable and gently press your heels toward the floor.

    – Maintain steady breathing and hold for 30 seconds to 1 minute.

    This pose lengthens the hamstrings, calves, and spine while strengthening the upper body and core, making it an ideal posture to warm up and energize the body.

    2. Warrior II (Virabhadrasana II)

    Warrior II is a strong standing pose that builds power in the legs and hips while improving balance and stamina. It also increases flexibility in the groin and opens the chest and shoulders.

    How to practice Warrior II:

    – Stand with feet wide apart, roughly 3 to 4 feet.

    – Turn your right foot outward and bend your right knee so it stacks over the ankle.

    – Stretch your arms out at shoulder height, palms facing down, and look over your right fingertips.

    – Hold for 30 seconds to 1 minute, then repeat on the opposite side.

    This pose strengthens the thighs, hips, and core while boosting endurance and stability, making it essential for a full-body routine.

    3. Plank Pose (Phalakasana)

    Plank Pose is a core-focused posture that builds strength in the arms, shoulders, and abdominal muscles while improving overall body control and endurance.

    How to practice Plank Pose:

    – Start on hands and knees, then step your feet back until your body forms a straight line.

    – Keep hands directly beneath shoulders and engage your core muscles.

    – Hold the position for 20–30 seconds or longer while breathing evenly.

    Plank activates the core, arms, shoulders, and legs simultaneously, making it one of the most effective poses for developing total-body strength.

    4. Chair Pose (Utkatasana)

    Chair Pose is a dynamic posture that targets the legs, glutes, and core while challenging balance and posture. It mimics the action of sitting, which deeply engages the lower body.

    How to practice Chair Pose:

    – Stand tall with feet hip-width apart.

    – Bend your knees and sink your hips back as if sitting in a chair.

    – Raise your arms overhead, keeping the chest lifted and core engaged.

    – Hold for 30 seconds to 1 minute with steady breathing.

    This pose strengthens the quadriceps, glutes, calves, and core while enhancing balance and endurance.

    5. Cobra Pose (Bhujangasana)

    Cobra Pose is a gentle backbend that strengthens the spine and lower back while opening the chest and shoulders. It is especially beneficial for counteracting long hours of sitting.

    How to practice Cobra Pose:

    – Lie face down with legs extended and feet pressing into the mat.

    – Place hands under shoulders and gently lift the chest using the back muscles.

    – Keep elbows slightly bent and focus on lengthening the spine.

    – Hold for 20–30 seconds, then slowly release.

    Cobra Pose improves spinal mobility, strengthens the back, and promotes better posture and breathing.

    6. Bridge Pose (Setu Bandhasana)

    Bridge Pose is a supportive backbend that strengthens the glutes, hamstrings, and lower back while opening the chest and shoulders. It also helps relieve tension in the spine.

    How to practice Bridge Pose:

    – Lie on your back with knees bent and feet flat on the floor, hip-width apart.

    – Press into your feet and lift your hips upward, engaging glutes and core.

    – Keep arms alongside the body with palms down.

    – Hold for 30 seconds to 1 minute with relaxed breathing.

    Bridge Pose supports spinal health, strengthens the lower body, and improves flexibility in the chest and hips.

  • Plank Hold Duration Changes With Age and Most Workout Guides Get It Wrong

    Plank Hold Duration Changes With Age and Most Workout Guides Get It Wrong

    The floor feels cool beneath your forearms. Your toes press firmly into the mat, your legs stay engaged, and your breathing finds a steady rhythm. Somewhere between the tightness in your core and the focus in your mind, a familiar question surfaces: how long should this position be held? Ten seconds? Thirty? A couple of minutes that feel endless?

    Planks are often treated as a simple exercise with a universal standard, but they are actually a dynamic exchange between your body and gravity. What feels effortless at 18 can feel demanding at 48, or require extra care at 68. At every stage of life, the core remains your foundation. It is the internal support system that stabilizes the spine, protects the back, and allows smooth, confident movement.

    So what is the ideal plank duration for building core strength without drifting into strain, pain, or ego-driven effort? The answer begins with understanding your body as it is right now.

    Understanding Proper Plank Hold Timing

    The Silent Work Happening in Your Core

    Many workouts make themselves known through sound—footsteps pounding, weights clanging, sharp exhales filling the air. Planks are quieter. You align your body into one long line: shoulders stacked over elbows or wrists, heels reaching back, head resting neutrally between them. From the outside, nothing appears to move.

    Inside, however, a coordinated effort is underway. Deep stabilizing muscles activate together. The transverse abdominis wraps the midsection like a supportive brace. The multifidus provides subtle spinal stability. The diaphragm links breath to movement, while the pelvic floor offers steady support from below. These muscles respond best to controlled, precise effort, not intensity or drama.

    This is why quality and consistency matter more than raw duration. A shaky, collapsing one-minute plank offers less benefit—and more risk—than a controlled twenty-second hold with calm breathing and solid alignment. Time still matters, but only until form begins to fade.

    Why Longer Planks Aren’t Always Better

    Fitness culture often celebrates extremes: two-minute holds, five-minute challenges, and viral clips of bodies shaking through sheer willpower. Over time, longer planks became equated with better results.

    The reality is more subtle. Beyond a certain point, extending a plank primarily builds tolerance to discomfort rather than meaningful strength. Research and experienced coaching consistently show that shorter, high-quality holds performed multiple times deliver greater benefits for core strength and spinal health than occasional endurance-based attempts.

    Long planks are not automatically harmful, but their effectiveness tapers off while the risk of fatigue-related misalignment increases. As years pass, the focus naturally shifts from endurance at all costs to supportive, efficient strength.

    How Age and Gravity Influence Plank Duration

    As time moves on, the body’s internal calculations change. Recovery slows slightly, tissues become less forgiving, and balance and coordination require more attention. A plank that once felt automatic may now feel deliberate—and that is simply biology at work.

    Rather than following a single rule, it helps to work within flexible time ranges. The ideal hold ends just before form begins to break down. Below are realistic guidelines for healthy adults without major injuries or medical limitations.

    • Teens (13–19): 20–40 seconds, 2–4 sets, 2–4 days per week
    • 20s–30s: 30–60 seconds, 2–4 sets, 3–5 days per week
    • 40s: 20–45 seconds, 2–4 sets, 3–4 days per week
    • 50s: 15–40 seconds, 2–3 sets, 2–4 days per week
    • 60s–70s and beyond: 10–30 seconds, 2–3 sets, 2–4 days per week

    These ranges are reference points, not rules. Being above or below them is perfectly acceptable. What matters is how strong, stable, and controlled each second feels.

    Your 20s and 30s: Strength Meets Opportunity

    In your 20s and 30s, recovery tends to be fast and tissues resilient. Strength often develops quickly, making longer plank holds feel achievable. With proper alignment, thirty to sixty seconds can be a productive range.

    The main risk during this phase isn’t weakness—it’s overlooking small breakdowns. Hips may dip, shoulders may creep upward, or the lower back may quietly signal strain. Dividing your effort into several shorter, well-executed holds often produces better results than one long, exhausting attempt.

    Your 40s: Strength With Attentiveness

    By your 40s, the body provides clearer feedback. Old injuries may resurface, stiffness can appear faster, and recovery demands more care. Strength remains, but it asks for respect.

    For many, the most effective plank duration now falls between twenty and forty-five seconds, repeated across multiple sets. Some days allow longer holds, while others call for stopping sooner. The emphasis shifts toward long-term sustainability and daily comfort.

    Your 50s, 60s, and Beyond: Smart, Supportive Strength

    Later decades reshape the definition of strength. Muscle mass may gradually decline, balance can shift, and recovery may take longer, yet adaptation remains possible. Planks continue to offer value, even when modified.

    Shorter holds of ten to thirty seconds performed with excellent alignment can be highly effective. Knee planks or incline planks are not lesser versions—they are strategic adjustments. Each controlled second supports posture, stability, and confidence in movement.

    Recognizing the Right Moment to Stop

    Your body clearly signals when a plank shifts from helpful to risky. Common signs include the lower back sagging or aching, shoulders lifting toward the ears, breath being held, or facial tension taking over.

    Stopping at the first sign of form loss isn’t failure—it is skilled training. Over time, this approach teaches efficiency and control rather than collapse.

    Making Planks a Sustainable Habit

    Planks don’t need to be dramatic to be effective. They can fit easily into daily routines: a brief hold before breakfast, another after work, and one more before bed. These small, consistent efforts accumulate into meaningful strength.

    The real reward isn’t a record-breaking hold. It’s the quiet confidence of standing taller, moving with ease, and supporting your body through everyday life. Hold only as long as your form stays honest. Rest. Repeat. That’s where lasting core strength is built.

  • 15 Beginner-Friendly Yoga Sequences: Simple Flows to Start Your Practice Safely

    15 Beginner-Friendly Yoga Sequences: Simple Flows to Start Your Practice Safely

    Starting yoga might seem difficult when you look at complicated poses on the internet but yoga for beginners should be easy and pleasant. Good sequences teach you how to understand your body & how to breathe and balance without pushing yourself too hard. These beginner yoga sequences help reduce stiffness and increase flexibility while building your confidence gradually. Each sequence uses basic movements that connect smoothly. You do not need any special gear or previous knowledge. A yoga mat and some quiet time are all you need to start.

    Gentle Morning Activation Flow

    This sequence helps release stiffness after sleep. Start with Child’s Pose & then move into Cat Cow. Next do Downward Facing Dog and finish with a gentle Standing Forward Fold. It wakes up the spine & prepares the body for the day.

    Easy Full-Body Stretch for Beginners

    Designed for stiff and overworked muscles, this sequence features Seated Forward Bend, Butterfly Pose, and Supine Spinal Twist. It gently releases tension, soothes the body, and enhances flexibility without placing strain or discomfort.

    Foundational Sun Salutation for New Yogis

    A gentle Sun Salutation helps develop coordination and strength. The sequence includes Mountain Pose followed by Forward Fold & then Half Lift. Next you step back to your knees and move into Cobra Pose before finishing with Downward Facing Dog. This practice teaches fundamental transitions in a safe way.

    Calming Yoga Flow to Release Stress

    This gentle sequence helps decrease stress in your body. Begin by sitting in a comfortable cross-legged position and focus on your breathing. Move into Child’s Pose by kneeling and folding forward with your arms extended. Next perform a Seated Side Stretch to release tension in your torso. End the practice by lying on your back with your legs resting vertically against a wall. This routine calms your thoughts and soothes your nervous system.

    Beginner Lower Body Mobility Routine

    This sequence focuses on opening the hips and strengthening the legs. It includes poses such as Low Lunge, Half Split, Garland Pose, and Reclined Figure Four. Together, these movements help loosen tight muscles, improve joint flexibility, and support smoother, more comfortable motion in daily activities.

    Simple Upper Body Opening Sequence

    Great for people who work at desks this sequence features Neck Rolls along with Shoulder Rolls and also Thread the Needle and Puppy Pose. The routine helps release tension and stiffness that builds up in your shoulders and neck and upper back area.

    Beginner Balance and Stability Flow

    Balance gets better when you practice it regularly. You can start by doing Tree Pose while standing next to a wall for extra support. Then move on to Warrior One and finish with Standing Side Stretch. Doing these poses in order helps you become more stable and improves your ability to concentrate.

    Safe Back Strengthening Yoga Sequence

    This gentle strengthening flow features Sphinx Pose, Cobra Pose, and Bridge Pose. It is designed to support spinal health while encouraging better posture, all without placing unnecessary stress on the body.

    Relaxing Evening Yoga Wind-Down

    This bedtime routine works well right before you go to sleep. The sequence features four main poses that include Seated Forward Fold Supine Twist, Happy Baby, and Savasana. These movements help your body wind down after a long day. They also get your mind ready for a restful night of sleep. The combination of these poses creates a calming effect that makes it easier to fall asleep naturally.

    Slow Full-Body Flow for First-Timers

    This gentle sequence brings together Downward Dog along with Low Lunge and Warrior Two before finishing with a Seated Stretch. The practice offers complete body movement through an easy and measured approach.

    Joint-Friendly Mobility Yoga Practice

    This sequence focuses on maintaining joint health through gentle, controlled movements. It includes wrist circles and ankle rolls to improve circulation, along with slow, supported squats that help keep the hips and knees flexible. The Cat–Cow movement encourages spinal mobility while easing stiffness in the back and neck. Practiced regularly, this sequence supports long-term mobility, reduces joint discomfort, and helps the body move more comfortably in everyday activities.

    Breath-Led Movement Flow for Beginners

    Connect basic movements to your breathing pattern. Breathe in when you raise your arms and breathe out when you bend forward. Practice with Mountain Pose along with Side Stretch and Forward Fold. This method helps you become more aware of your breath.

    Gentle Core Awareness Yoga Routine

    This routine helps you develop core strength in a gentle way. You can do Seated Knee Lifts along with Modified Plank on knees & Supine Leg Raises. The exercises make your muscles stronger without putting stress on your body.

    Beginner Chair Yoga for All Levels

    Perfect for beginners or individuals with limited mobility. A chair can be used for poses like Seated Twist, Seated Forward Fold, and Gentle Leg Extensions. This approach ensures yoga remains safe, comfortable, and accessible for everyone.

    Restorative Yoga for Deep Relaxation

    This sequence centers on rest & recovery. Start with a supported Child’s Pose where you can place cushions under your torso for comfort. Move into Reclined Bound Angle Pose by lying on your back with the soles of your feet together and knees falling open to the sides. Finish with Guided Relaxation where you lie flat and focus on releasing tension throughout your body. This practice allows your muscles to repair themselves and restores your energy levels for daily activities.

    Essential Beginner Yoga Tips for Safety

    Moving Through Your Practice Take your time with each movement and pay attention to what your body tells you. Do not push yourself into any position that feels uncomfortable. Keep your breathing steady and natural throughout the practice. Feel free to use cushions or blocks to support yourself when needed. Regular practice is more important than how hard you push yourself. Even a short ten-minute session each day can make a real difference.

    Yoga is not about doing everything perfectly. It focuses on becoming more aware of your body and mind while building patience & making gradual improvements. You can do each sequence by itself or put several together based on how much energy you have that day.