Category: News

  • Rose Water and Ice Cube Face Hack Women Are Using Worldwide for Clear Glass Skin Naturally

    Rose Water and Ice Cube Face Hack Women Are Using Worldwide for Clear Glass Skin Naturally

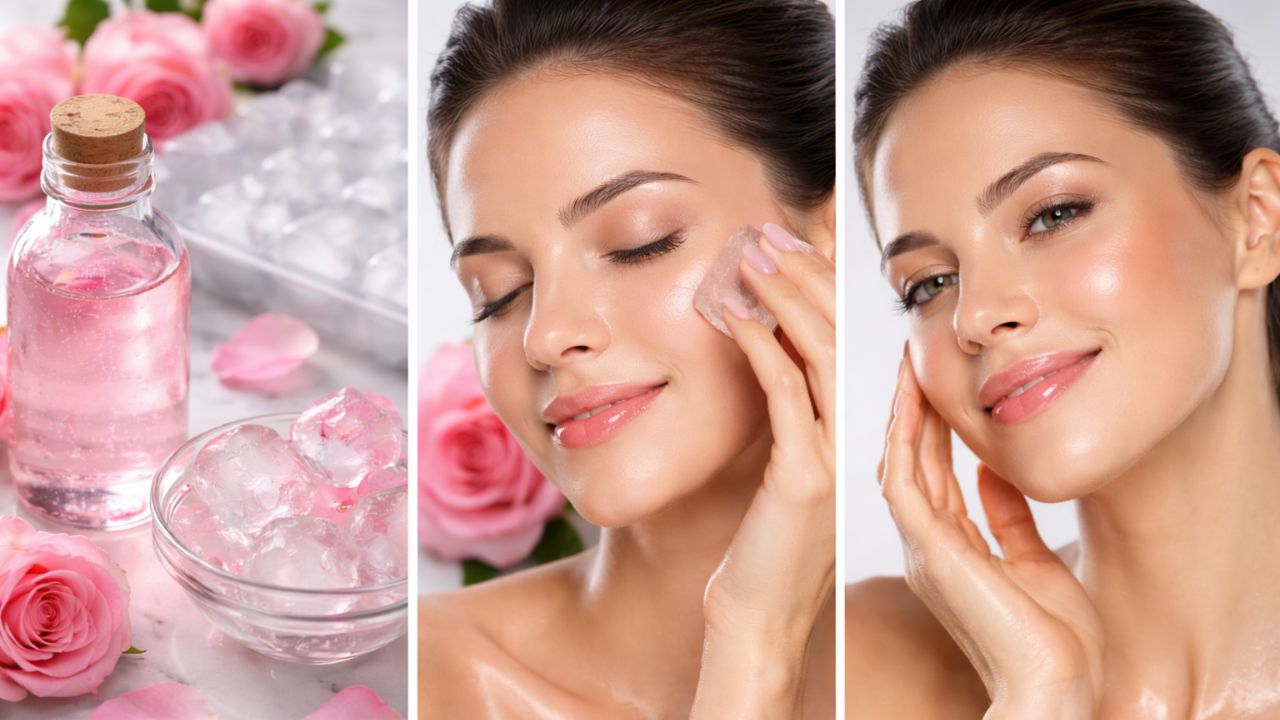
    In India, natural skincare solutions are rapidly gaining popularity as women search for easy, budget-friendly ways to maintain healthy, glowing skin at home. One method that has quietly gained attention is the rose water and ice cube face hack, often associated with achieving a smooth, glass-like skin finish without relying on costly products. Rooted in traditional beauty practices yet suited to modern routines, this approach appeals to various age groups. Its simplicity and gentle nature make it especially suitable for hot and humid Indian weather.

    Rose Water and Ice Cube Hack for Glass-Like Skin

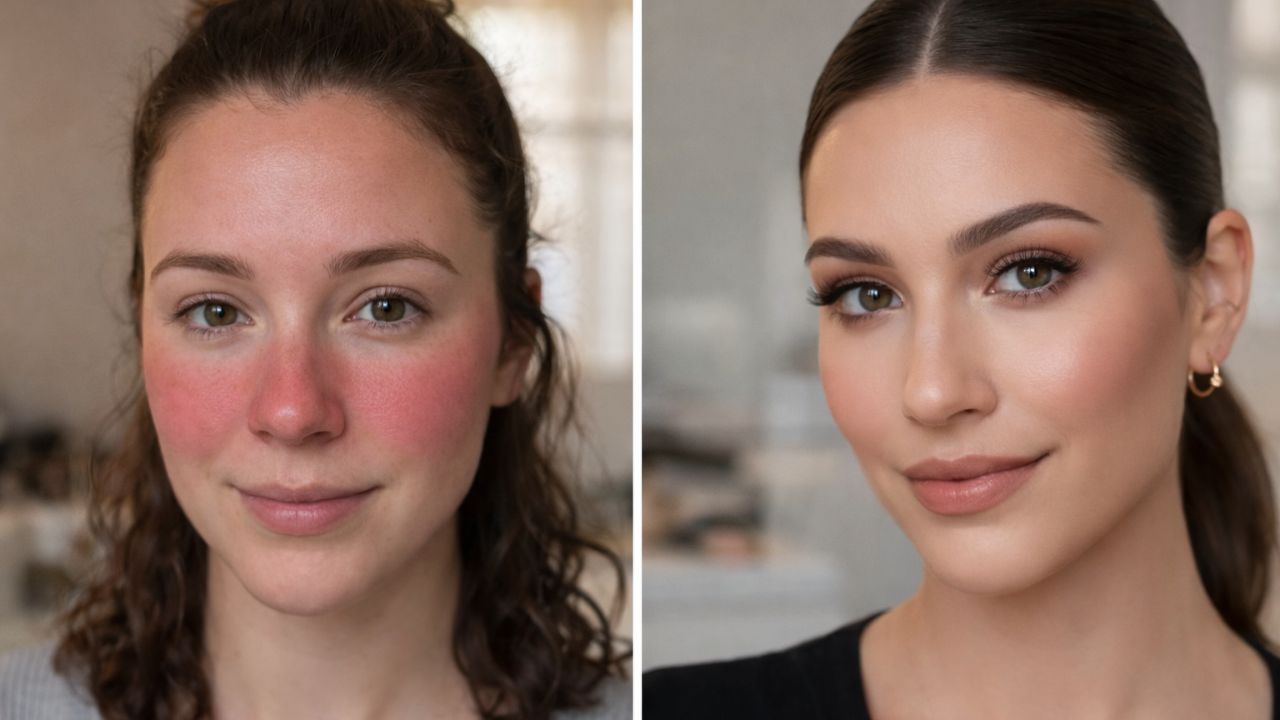
    The rose water and ice cube face hack works by blending hydration with cold therapy to revive tired-looking skin. Rose water is widely known for its calming and soothing properties, while ice helps with instant pore tightening. Together, they offer a quick ritual that promotes skin cooling, supports natural pore tightening, enhances surface glow, and improves the overall fresh-face feel. With consistent use, many women report a smoother skin texture and reduced dullness. This hack is particularly helpful in India, where heat, sweat, and pollution often leave skin looking fatigued.

    How Frozen Rose Water Helps Improve Skin Texture

    Applying frozen rose water cubes to the face may help calm irritation and support oil balance over time. The cold temperature encourages a circulation boost, while rose water provides gentle toning support. This combination promotes improved blood flow, offers mild redness relief, supports oil control, and gives a hydrated skin appearance. Many users favor this approach because it avoids harsh chemicals and aligns well with minimalist skincare routines. With regular use, skin may appear firmer, clearer, and more refreshed.

    Why Women Choose This Rose Water Ice Routine

    Women across different regions prefer this routine because it is affordable, quick, and adaptable to multiple skin types. In India, its popularity is driven by the easy availability of rose water. The routine supports daily skin refreshment, works as a makeup prep base, encourages a cooling facial massage, and builds a natural glow habit. Whether practiced in the morning or evening, it offers a relaxing self-care moment without interrupting busy daily schedules.

    Summary and Skincare Overview

    The rose water and ice cube skincare hack stands as a clear example of how simple ingredients can provide visible skin benefits. Although results may vary, consistent use can help improve skin comfort and overall appearance. This routine supports a gentle skincare approach, encourages daily consistency, enhances skin comfort levels, and reinforces a natural beauty focus. For those seeking glass-like skin without heavy products, it offers a refreshing and low-risk option.

    Key Routine Details

    • Main Ingredients: Pure rose water and clean ice cubes
    • Best Time to Use: Morning or evening
    • Suitable Skin Types: Normal, oily, combination
    • Primary Benefit: Cooling, toning, glow enhancement
    • Recommended Frequency: Once daily or 3–4 times weekly

    Frequently Asked Questions

    • Can this hack be used daily? Yes, it can be used daily if your skin tolerates cold well.
    • Is it suitable for sensitive skin? Those with sensitive skin should test briefly and avoid prolonged ice contact.
    • How long should the ice cube be applied? Gently massage for 30–60 seconds only.
    • Can moisturizer be applied afterward? Yes, applying moisturizer afterward helps lock in hydration.
  • Facial Balance Tip Reveals How Misplaced Blush Near the Nose Can Disrupt Natural Face Harmony

    Facial Balance Tip Reveals How Misplaced Blush Near the Nose Can Disrupt Natural Face Harmony

    From a distance, the girl in the café appeared flawless. Her eyebrows were neatly shaped, eyeliner sharp, and lips softly glossy. But as she moved closer to the window, something felt unbalanced. A heavy stripe of blush sat too close to her nose, as if her cheeks were flushed from climbing stairs. The makeup itself was high quality, yet the placement was off. This is a familiar sight on social media and in everyday life. When blush sits too near the center of the face, features can look compressed. It may seem fine in a bathroom mirror, but daylight or cameras quickly expose the imbalance. A shift of just a couple of centimeters separates a fresh look from a crowded one. This isn’t about preference—it’s simple facial geometry.

    How Blush Too Close to the Nose Disrupts Facial Proportions

    When blush is applied too near the nose, it subtly alters how the face is perceived. Instead of enhancing structure, the color pulls attention inward, making the face appear narrower and more tense. The central area becomes dominant, while the eyes and cheekbones lose focus. Rather than lifting the complexion, this placement draws everything toward the middle. The outer cheeks can look dull, and overall dimension fades. Blush near the nostrils may also amplify natural redness, creating a tired appearance instead of a healthy glow. From a distance, the effect can feel puffy or crowded rather than soft. Under bright office lighting or casual selfies, this imbalance becomes even clearer.

    In photos, especially those taken on phones, blush placed near the nose often blends with existing redness. Cameras heighten contrast, turning a gentle flush into a solid patch of color. Makeup artists working in television often warn about a “danger zone” around the nose, where excess pigment can make the face appear smaller and fatigued under strong lights. This is why red carpet looks consistently place blush higher and farther outward.

    The explanation is straightforward. The face is a combination of vertical and horizontal lines, not a flat surface. Blush placement influences how these lines are read. When color sits too close to the nose, the vertical line from forehead to chin appears shorter and compressed, shifting the overall balance.

    Blush Placement Techniques That Lift and Shape the Face

    Start with a clear visual guide. Imagine a vertical line dropping from the center of your eye—this marks the inner limit for blush. Color should not cross this line toward the nose. Instead, place blush on the part of the cheek that naturally lifts when you give a soft smile. Only a slight movement is needed. Apply the product there and blend outward toward the top of the ear in a gentle, curved motion. Work in light layers, as it is easier to build color than to correct placement that drifts inward. If unsure, leave a small strip of bare skin between the nose and where the blush begins.

    Many people apply blush too far inward because advice about the apples of the cheeks is taken too literally. When rushed, the brush lands near the nostrils and becomes habit. On round faces, this can make cheeks look fuller instead of lifted. On angular faces, it can make the center appear harsh and pull focus away from the cheekbones. On textured skin, blush near the nose often settles into pores and fine lines. That moment of catching your reflection later and looking flushed or tired is usually about placement, not quantity. Shifting the color slightly outward can change how your face appears in photos throughout the day.

    A Quick Checklist to Keep Blush in the Right Zone

    • Leave at least one finger’s width of bare skin between the nose and blush
    • Angle the brush upward instead of sweeping straight across
    • Tap off excess product before applying
    • Blend more on the outer edge than the inner edge
    • Step back and check your face from arm’s length

    Simple visual cues like the center-of-eye line and the one-finger gap are often more useful than complex contour rules. They work with both affordable cream sticks and high-end powders, even on rushed mornings.

    Understanding Facial Balance Beyond Makeup Trends

    There is no single correct way to apply blush. Placement depends on the effect you want. Bringing color slightly toward the nose can create a youthful, cold-weather flush on certain faces. But when pushed too far, this look stops feeling intentional and begins to appear unbalanced. Every face is different, and preferences vary. Some enjoy a bold, central blush inspired by Korean beauty styles, while others prefer a soft wash placed high on the cheekbone that acts like a natural filter. The key is understanding how placement shifts attention and making conscious choices rather than relying on habit.

    A useful exercise is to compare two placements. Apply blush on one side as you normally would, closer to the nose. On the other side, place it slightly higher and farther outward toward the temple. Step back and take a photo in natural daylight. Notice which side makes your eyes stand out more and which allows your nose to blend naturally instead of becoming the focal point. This isn’t about fixing features—it’s about seeing how color placement guides attention. Blush near the nose may seem minor, but it has a visible impact. Understanding this gives you control over what people notice first, without hiding anything.

  • Optical Illusion Test: Can You Spot 37 and 81 Among 31 in 5 Seconds?

    Optical Illusion Test: Can You Spot 37 and 81 Among 31 in 5 Seconds?

    Optical illusions have interested people for hundreds of years & they give us a fun way to challenge our minds & improve how well we notice things. These illusions fool our brains by creating pictures that look different from what is actually there or trick our senses in surprising ways. It might be shapes that look like they are moving or numbers that seem to change position. These puzzles show us how complicated human perception really is. Today we have a new challenge that will test how well you can focus visually and mentally.

    How Optical Illusions Work and Why They Fascinate Us

    An optical illusion is a visual experience where the brain interprets what the eyes see in a way that differs from reality. This happens because the brain processes visual information based on patterns, contrast, depth, and prior experience. As a result, certain shapes, numbers, or objects may appear distorted, hidden, or misleading, even though they are clearly present. Optical illusions can be simple designs or complex visual puzzles that play with light, color, and perception.

    The real charm of optical illusions lies in how they challenge both visual awareness and mental processing. They are entertaining, but they also stimulate focus, creativity, and quick thinking. Many illusions are designed to test how well we can detect small differences under pressure, encouraging the brain to stay alert while filtering out distractions.

    The Puzzle Explained: Finding 37 and 81 Among Repeating 31s

    In this visual challenge, you are presented with a grid packed with the number 31, arranged in an orderly pattern. Hidden within this grid are two different numbers: 37 and 81. The goal is to identify both of them in just five seconds.

    At first glance, the task appears straightforward since the grid seems uniform. However, optical illusions thrive on subtle variations. The numbers 37 and 81 are carefully disguised among the repeated 31s, making them difficult to detect instantly. This challenge tests how well your eyes and brain can work together when time is limited.

    Why a Time Limit Makes Optical Illusions Harder

    The five-second limit adds an extra layer of difficulty to the illusion. When time is restricted, the brain relies on rapid visual scanning rather than slow analysis. Humans are naturally good at recognizing patterns, but urgency forces us to stay focused and avoid hesitation.

    Research in cognitive science suggests that time-based visual challenges can improve attention span, decision-making speed, and visual recognition skills. Regular exposure to these puzzles helps train the brain to process information faster, which can be useful in everyday situations that require quick observation.

    Solution Breakdown: Locations of the Hidden Numbers

    Once the challenge is complete, the illusion becomes easier to understand. Both hidden numbers are placed strategically within the grid to blend in with the surrounding 31s.

    The number 81 is located near the upper center area of the image, slightly offset to the left. Its positioning makes it difficult to notice immediately because it aligns closely with the surrounding pattern.

    The number 37 appears toward the lower-right section of the grid. Like the 81, it is cleverly masked by the repetition of 31s, requiring careful attention to spot the difference.

    Together, these placements force viewers to question their perception and look beyond surface-level patterns, which is the core purpose of this illusion.

    What Optical Illusions Reveal About Visual and Cognitive Skills

    Optical illusions are more than simple distractions. They offer insight into how the brain interprets visual data and adapts to complex environments. When solving these puzzles, the brain actively scans for inconsistencies, sharpening focus and analytical thinking.

    Studies have shown that engaging with visual challenges can strengthen memory, concentration, and problem-solving abilities. Even if the hidden elements are not immediately found, the mental effort involved still provides valuable cognitive exercise.

    Tips to Get Better at Optical Illusion Challenges

    If this puzzle felt difficult, that’s completely normal. Optical illusions are designed to stretch perception skills. With regular practice, spotting hidden details becomes easier over time.

    – Practice consistently to train your brain to recognize visual patterns faster.

    – Stay calm during timed challenges to avoid missing small details.

    – Improve peripheral vision to notice elements outside the center of focus.

    – Try different illusion types to strengthen various cognitive skills.

    By challenging your brain regularly, you can enhance both your visual perception and mental agility, making future optical illusions easier and more enjoyable.

  • Naturally Boost Eyebrow and Eyelash Growth at Home Using Simple Daily Oil Rituals for Fuller Results

    Naturally Boost Eyebrow and Eyelash Growth at Home Using Simple Daily Oil Rituals for Fuller Results

    You rarely notice your eyebrows thinning all at once. It happens quietly under the bathroom light as you lean closer to the mirror with a cotton pad. A few hairs near the tail seem shorter than they used to be. The arch that once looked strong now appears uneven. It could be ageing, years of overplucking, stress, or dry indoor air. Whatever the cause, your face feels subtly altered, as if something essential around your eyes has faded. Soon, you begin noticing every eyelash left behind in the sink after removing mascara.

    The Quiet Power of Everyday Kitchen Oils

    Before investing in expensive serums or decoding complex ingredient lists, it helps to pause and look at what is already at home. In many UK kitchens, familiar oils sit unnoticed in cupboards and on counters — olive oil by the stove, coconut oil near the kettle, or a small bottle of castor oil tucked away. While they lack luxury packaging, these oils offer steady nourishment built on patience and routine. Brows and lashes are delicate hairs, and this kind of gentle, consistent care can support visible improvement over time.

    Why Brows and Lashes Matter on a Personal Level

    Eyebrows and eyelashes often carry emotional weight. Many women remember years of heavy makeup trends, overplucking, or hormonal shifts that altered natural growth. When brows thin or lashes weaken, the face can look tired or unfamiliar, subtly changing self-recognition. Choosing a natural care routine feels calmer and more aligned with a slower, mindful lifestyle. Oils do not promise instant results, but with regular use, they gently support the body’s natural hair growth cycle.

    Common Oils That Help Support Hair Strength

    Certain everyday oils are widely used for maintaining hair condition. Castor oil is often mentioned first due to its thick texture, which helps it cling to fine hairs and reduce breakage. Coconut oil helps counter dryness caused by frequent mascara use, while olive oil offers mild conditioning for brows. Lighter choices such as almond oil or argan oil suit sensitive skin and absorb quickly. These oils do not force growth but help protect, strengthen, and maintain healthier conditions.

    • Castor Oil — Dense with a slightly tacky feel; high in ricinoleic acid, helping lock in moisture, strengthen hair fibres, and minimise lash and brow breakage.
    • Coconut Oil (Regular or Fractionated) — Light to medium texture that melts on contact; penetrates the hair shaft to reduce protein loss and improve softness and shine.
    • Olive Oil — Medium weight and mildly heavy; rich in antioxidants that support the skin barrier around hair roots and improve flexibility.
    • Sweet Almond Oil — Smooth and silky with good absorption; gentle enough for sensitive eye areas while nourishing fine hairs.
    • Argan Oil — Lightweight and non-greasy; rich in vitamin E and essential fatty acids that support smoothness, strength, and resilience.

    Turning Night-Time Care Into a Calming Ritual

    Consistency matters most, especially when routines feel easy to maintain. Start with clean, makeup-free eyes and freshly washed hands. Choose one oil or a simple blend, apply a small amount to the brows using a clean spoolie, and lightly coat the upper lashes with care. Gently blot away excess oil to avoid irritation. Repeating this each night over several weeks helps turn it into a relaxing evening habit rather than another chore.

    Staying Aware of Eye and Skin Sensitivity

    The eye area is delicate, making attentiveness essential. Always patch test a new oil and begin with very small amounts. If irritation occurs, switch to a lighter option. Avoid getting oil into the eyes, and rinse gently if it happens. Anyone with existing eye conditions or ongoing treatments should consult a pharmacist or GP. Results develop slowly, so focus on reduced shedding and gradual fullness instead of quick changes.

    Daily Habits That Encourage Healthier Growth

    Oils work best alongside supportive daily habits. Limiting waterproof mascara, removing makeup gently, and eating a balanced diet rich in protein, healthy fats, and minerals all support hair health. Managing stress and being mindful of hormonal balance also play a role. Think of oils as external care, while nutrition, rest, and lifestyle form the foundation beneath.

    Creating a Simple Oil Blend at Home

    Once comfortable, preparing a small custom blend can keep routines simple. Combining castor oil for thickness, almond oil for softness, and argan oil for light nourishment works well. Store the blend in a clean bottle, label it with the date, and use it within a few months. This keeps ingredients familiar, transparent, and easy to trust.

    Tracking Progress Without Pressure

    Observing change gently helps avoid unnecessary stress. Taking a makeup-free photo every few weeks under the same lighting can reveal subtle progress over time. Fuller lines, fewer gaps, and stronger lashes often appear gradually. Missing a few nights does not undo progress — simply return to the routine. The aim is not perfection, but steady, quiet care for what you already have.

  • Bad News for Gardeners: Rainwater Use Restrictions Expanded – €135 Penalty Applies to Gardeners From January 15, 2026

    Bad News for Gardeners: Rainwater Use Restrictions Expanded – €135 Penalty Applies to Gardeners From January 15, 2026

    Walk through any neighbourhood after a downpour and you will see them everywhere. Green plastic water tanks sit beside houses. Old wine barrels are tucked beneath downspouts. Homemade containers connect to gutters with whatever piping people could find. On one rainy afternoon while water rushed through the gutters an email arrived with bad news. It described new rules for private rainwater collection with fines of up to €135 starting 15 January 2026. The attached image showed a basic plastic rain barrel leaning against a garden wall that looked identical to the ones in almost every backyard. Outside the mood among gardeners felt worried. Many people have been collecting rainwater for years. It became a normal habit. They did it to help the environment. They did it because plants need water. Now those same barrels could make them break the law. What was once simple & normal now exists in a confusing legal grey area. And the deadline is approaching quickly.

    When a Simple Rain Barrel Turns Into a Legal Concern

    For years, rain barrels were seen as a smart and responsible way to conserve water. In recent times, however, they have quietly entered a zone of regulatory uncertainty. Since 15 January 2026, gardeners in certain areas may face a €135 fine if they collect and use rainwater through a system that has not been declared or approved where local regulations apply.

    This change is not because rainwater has suddenly become unsafe. Instead, authorities are increasing oversight of how water is stored, reused, and redirected, particularly when it may interact with public drainage systems or groundwater. What once seemed like a harmless eco-friendly habit is now tied to formal administrative rules.

    A Gardener’s Experience With Unexpected Rules

    Claire, 52, knows this situation well. She has tended the small garden behind her terraced house for over fifteen years. During the 2019 drought, she installed a 500-litre rainwater tank, happy to stop wasting roof runoff. She uses the water to irrigate plants, clean gardening tools, and occasionally fill a small pool for her grandchildren.

    Only recently did she learn, through her local newsletter, that her setup — directly linked to a downpipe without a sewer overflow — should have been declared months earlier.

    “So I could be fined €135 for watering a few geraniums?” she asked at city hall. The response was calm but clear. If inspectors observe a non-compliant installation, a fine is possible. Across the region, municipalities are sending reminders, sharing images of non-compliant systems, and holding information sessions. The message is unmistakable: ignoring the rule will not make it disappear.

    Why Authorities Are Paying Closer Attention to Rainwater Systems

    The logic behind these measures is fairly straightforward. Local authorities are responsible for flood prevention, drinking water protection, and monitoring what enters public pipes. An uncovered barrel can become a mosquito breeding site, a source of contamination, or a safety risk for children.

    By requiring declarations or authorisations, officials gain better visibility into how water flows across private properties. In principle, this supports public health and infrastructure safety. In practice, it can feel like regulation extending deep into private gardens.

    How to Continue Using Rainwater and Avoid a €135 Fine

    The first step is simple, even if it feels inconvenient. Visit your municipal website and search for terms like “rainwater reuse” or “rainwater authorisation”. Rules differ widely by location. Some municipalities only require paperwork if rainwater is connected to indoor uses such as toilets or washing machines. Others regulate even outdoor tanks above specific capacities.

    Take a few minutes to determine whether your system must be declared, adjusted, or disconnected. A short call to the technical or urban planning department can often resolve questions quickly.

    Next, examine your installation closely. Does it have a secure lid? A proper overflow connected to an approved drain? A filter at the gutter? Making small corrections now can help avoid uncomfortable conversations later.

    Most gardeners never intended to break any rules. Many purchased a tank during a sale, followed advice from a neighbour, or assembled a simple system themselves. Regulations often arrived later, buried in long documents that few people read carefully.

    There is a noticeable gap between everyday practices and how regulations are written. Open barrels, unstable tanks, roof runoff spilling onto neighbouring land, or DIY indoor connections without backflow protection are common. Soyons honnêtes: almost no one follows every technical requirement perfectly.

    As one water policy specialist explained, “We are not trying to punish people for saving water. The goal is to prevent contamination, flooding, and improper connections. The €135 fine exists, but it is intended as a last resort. Declarations are preferred over penalties.”

    – Understand local rules — check whether outdoor use is exempt or must be declared.

    – Secure your system — ensure a lid, filter, stable base, and proper overflow.

    – Separate networks — never connect rainwater directly to drinking water lines.

    With a little attention, a rain barrel can move from being a questionable installation to a model of responsible gardening.

    What the €135 Fine Reveals About Our Changing Relationship With Water

    Beyond the fine itself lies a broader shift. Water is no longer treated as a background resource. It is increasingly managed, planned, and regulated. After repeated summer restrictions, many households adopted water-saving habits naturally.

    Discovering that these habits can now be regulated or penalised can feel unsettling. Socially, it may lead to neighbour disputes, complaints, or online debates about “suspicious” rain tanks. Politically, it revives an old question: who owns the rain that falls on private roofs?

    There is also a quieter digital aspect. Fines rarely appear randomly. They often follow inspections, complaints, or targeted checks in areas with high non-compliance. Some municipalities already compare satellite images, aerial photos, and permit records to identify undeclared systems.

    What feels hidden in a backyard may exist as a data point on a municipal map. For gardeners, this creates a delicate balance between acting responsibly for the environment and feeling monitored for it.

    As 15 January 2026 approaches, the remaining question is whether authorities will favour dialogue over punishment while so many people continue to quietly fill watering cans whenever the rain falls.

  • Sparse Brows Get a Fuller Defined Appearance Using Easy Brow Lamination Techniques

    Sparse Brows Get a Fuller Defined Appearance Using Easy Brow Lamination Techniques

    The first time you notice your eyebrows thinning it feels significant. You spot it in the bathroom mirror under harsh morning light or in a photograph where your eyes seem less striking. The outer edges appear sparse & the arch disappears from certain angles. No pencil truly fixes it. That moment makes you consider getting a professional brow lamination like everyone else does. But then you imagine booking the appointment and paying the fee and making the drive and inhaling those chemical fumes. You close the browser and wash your face & decide there must be a better option.

    The Art of Gently Shaping Your Brows at Home

    There is a quiet sense of ease that comes from settling in at your bathroom counter during a calm evening. With soft music playing and the room at rest, you begin to notice how a little patience can noticeably enhance your brows. There are no harsh salon lights or forced conversations—just you, a mirror, and a small brush. At-home brow lamination may sound complex, but it is actually a simple, soothing routine. You guide your natural brow hairs into a more flattering direction so they appear fuller and better defined. You are not drawing or creating anything new, only refining what already exists. Although words like solutions, activators, and neutralizers may sound technical, the process itself is gentle: soften, shape, set, and nourish. Once learned, it becomes a relaxing ritual you can return to every few weeks.

    Preparing Your Space: A Calm Pre-Lamination Ritual

    Before starting, take a moment to set up your space. Clear a small area on your counter and wipe away any water marks or clutter. Place your tools in the order you will use them. This small act of preparation helps create a sense of control and calm before you begin.

    Most at-home brow lamination routines rely on just a handful of basic tools. Some people choose ready-made kits, while others prefer gentler alternatives suitable for the delicate eye area. No matter which option you choose, always use minimal product and select the mildest formulas available. Standing in front of the mirror with everything prepared, the process feels less like a beauty treatment and more like a personal moment of self-care.

    Product Purpose What It Does Recommended Usage Tips
    Gentle Facial Cleanser Removes dirt, excess oil, and makeup without irritation Opt for a soap-free and fragrance-free cleanser, especially for sensitive or delicate skin types
    Brow Spoolie Brush Helps shape, lift, and evenly distribute brow hairs A clean mascara wand works well as an affordable and effective alternative
    Brow Lamination Solution Softens brow hairs, making them easier to reshape and set Always perform a patch test at least 24 hours prior to application to avoid reactions
    Setting or Fixing Solution Secures brows in place after styling Use a light, even layer to prevent stiffness or drooping
    Nourishing Oil or Serum Hydrates and strengthens brow hairs and surrounding skin Apply castor oil or a lightweight serum nightly for long-lasting nourishment

    Moving Slowly: Enjoying the Brow Transformation

    Your first at-home brow lamination should never feel rushed. Move slowly and notice each sensation—the cool touch of water, the light pressure of the spoolie as it passes through your brows. This experience is not only about the final look, but also about creating a few peaceful minutes in your day.

    Begin With Clean Brows

    Brow hairs often hold onto sunscreen, makeup, oils, and moisturizers. Start by cleansing the area with a gentle, fragrance-free cleanser. Rinse with lukewarm water and pat dry using a soft towel. A cotton pad can help ensure no residue remains. Clean brows allow each hair to lift and move independently, making shaping much easier.

    Understand Your Natural Brow Pattern

    Before applying any product, take time to observe your brows. Using a clean spoolie, brush the hairs upward and watch how they naturally fall. Some hairs will lift easily, while others may grow sideways or lie flat. Notice any thinner spots or uneven arches. This awareness allows you to work with your natural growth, creating a result that feels effortless and balanced.

    Gently Softening the Brow Hairs

    Using a micro brush or cotton swab, apply a small amount of your lifting or lamination solution directly to the brow hairs, avoiding the skin. This step softens the hair structure, making it easier to reshape. Comb through with a spoolie, brushing upward and slightly outward. Let the product sit only for the recommended time, usually a few minutes. For finer brows, always choose the shorter timing to prevent over-processing.

    Shaping With a Light Hand

    Once the hairs are softened, take a clean spoolie and guide them into place. Brush the inner brows upward to create a fuller appearance, then angle the arch and tail gently toward the temples. Each stroke should help frame your face naturally. Perfect symmetry is not the goal—brows are meant to complement each other, not match exactly. Focus on enhancing your own shape rather than following a trend.

    Locking the Shape in Place

    After removing the lifting solution as directed, apply a small amount of setting or neutralizing product to secure the hairs in their new position. Comb through once more and lightly press any stubborn hairs into place for a few seconds. Once the setting time is complete, remove excess product. Your brows will look fuller, more lifted, and defined, while still appearing natural.

    The First Days After Lamination: Letting Brows Settle

    Freshly laminated brows can feel unfamiliar at first, much like a new haircut. Give yourself a day or two to adjust. For the first 24 hours, avoid water, steam, saunas, and heavy creams around the brow area. As natural oils return, the hairs will soften and relax. By the second or third day, your brows will feel more comfortable, and a quick brush with a clean spoolie is usually enough to keep them neat.

    Nourishing Brows for Ongoing Health

    Think of your brows as something that benefits from regular care. After cleansing your face each evening, apply a small amount of nourishing oil or brow serum. Castor oil or a lightweight serum works well. Gently massage it in the direction of hair growth to condition the hairs and support healthy follicles. Avoid excessive tweezing—only remove stray hairs and allow the rest to grow for a fuller look.

    Creating a Brow Routine That Fits You

    With time, you will naturally develop a brow routine that suits your needs. Some people laminate every six to eight weeks as part of their self-care schedule, while others rely on gentler methods paired with regular brushing and oil application. Pay attention to how your brows respond. When they begin to lose shape or fall flat, it may be time to repeat the process and restore their polished appearance.

  • 15-Minute Yoga Workout: Full-Body Strength and Flexibility Without Equipment

    15-Minute Yoga Workout: Full-Body Strength and Flexibility Without Equipment

    A full-body transformation does not require brutal workouts or complex programs. Yoga creates visible changes through small daily practices because it targets multiple systems simultaneously. It builds strength while improving mobility & posture. It enhances breathing patterns and helps regulate stress levels. Dedicating just 15 minutes each day can make your body feel stronger and more flexible. Your mind will feel calmer and more stable. You do not need a gym membership or expensive equipment. This routine fits into busy schedules easily.

    What Real “Transformation” Means With Just 15 Minutes of Daily Yoga

    A realistic transformation from short daily yoga typically appears in three areas. First you stand taller and move with less stiffness because your spine and hips stop compensating for tight shoulders or weak glutes. Second you develop functional strength especially through the core, thighs and upper back because many poses demand steady controlled holds. Third your energy & mood get better because slow nasal breathing tells the nervous system to shift away from stress mode. Yoga will not replace every type of training but it can change how your body feels & performs. Many people see better sleep fewer aches from sitting and improved body confidence within a few weeks of regular practice.

    A Powerful 15-Minute Full-Body Yoga Flow That Builds Strength and Flexibility

    Move through the sequence below with calm nasal breathing. Aim for steady effort and not maximum stretch. If anything feels sharp or painful then back off or skip that pose.

    Centering and breath (1 minute) Stand in Mountain Pose. Feet hip-width apart with shoulders relaxed and chin level. Inhale for 4 counts and exhale for 6. This longer exhale helps the body settle and improves focus for the rest of the session.

    Cat-Cow warm-up (1 minute) Come to all fours. Inhale to arch the back (Cow) and exhale to round the spine (Cat). Keep the movement smooth and controlled. This warms the spine & prepares your shoulders and hips for weight-bearing poses.

    Downward-Facing Dog (1 minute) Lift hips up and back into an inverted V shape. Bend knees slightly if hamstrings are tight. Press the floor away & lengthen the spine. This pose wakes up the posterior chain which includes calves and hamstrings & glutes while strengthening shoulders.

    Low Lunge with twist (2 minutes total) Step your right foot forward between your hands and drop your left knee down. Lift your chest and reach arms overhead or keep hands on thigh. Add a gentle twist toward the front knee if comfortable. Switch sides after 1 minute. This sequence opens hip flexors that get tight from sitting while building stability through legs and core.

    Plank (45 seconds)  From Downward Dog shift forward into Plank. Keep shoulders stacked over wrists & body in one line. If needed then drop knees down. Plank strengthens the deep core and trains full-body tension in a safe & controlled way.

    Cobra (45 seconds)  Lower to your belly and press up into Cobra with elbows slightly bent. Lift chest without crunching into the lower back. This strengthens spinal muscles and counters rounded posture from screens.

    Chair Pose (1 minute) Stand up and sit back as if into a chair. Keep knees tracking over toes with chest lifted and weight in heels. Chair Pose builds leg strength quickly & teaches the hips and core to support your spine.

    Warrior II (2 minutes total)  Step feet wide & turn one foot out then bend into the front knee and extend arms. Hold 1 minute per side. Warrior II is a full-body posture where legs work hard and core stabilizes & shoulders open and your gaze trains focus.

    Bridge Pose (1 minute) Lie on your back with knees bent and feet grounded. Lift hips and interlace hands if comfortable. Bridge strengthens glutes and hamstrings while opening the chest which is excellent for people who sit long hours.

    Supine twist and Child’s Pose (3 minutes total) Do a gentle spinal twist on each side for about 45 seconds and then finish in Child’s Pose for 1 to 1.5 minutes. This downshifts the nervous system & helps your body absorb the work.

    How This Short Yoga Routine Activates the Entire Body — Even for Beginners

    The real key is not about attempting moare difficult positions but rather maintaining your focus. During each pose you should follow three basic steps: push against the floor extend your spine upward & keep your breathing even. This approach develops both strength and flexibility at a natural pace. Try these simple modifications if you need them: If your hamstrings feel tight then bend your knees during Downward Dog while keeping your back extended If your wrists are sensitive then make fists for Plank position or drop down to your forearms If your knees hurt in lunges then put a folded towel beneath your back knee If your lower back feels tight in Cobra then keep your elbows bent and do not lift as high

    How Often You Should Practice a 15-Minute Yoga Workout to See Visible Results

    For visible and felt change consistency matters more than intensity. Do this routine four to six days a week. If you are short on time doing it three days weekly still helps but progress will be slower. If you want a simple progression follow these steps. Week one should focus on reducing holds by ten to fifteen seconds and prioritizing form. Week two involves adding time back & deepening breathing control. During weeks three and four you can increase Plank and Warrior II holds by fifteen to thirty seconds.

    Essential Safety Tips to Follow Before Starting a Daily 15-Minute Yoga Practice

    Do not push yourself into stretches too hard particularly when you first wake up or if your body feels cold. When you practice yoga it should require solid effort while your breathing stays smooth and comfortable. If you recently got injured or deal with high blood pressure that is not under control or experience constant back pain, talk to a qualified professional before starting and make sure to adjust the poses as needed.

  • Dry Cracked Heels Heal Faster Using Simple Kitchen Ingredients Than Many Store Bought Treatments

    Dry Cracked Heels Heal Faster Using Simple Kitchen Ingredients Than Many Store Bought Treatments

    The first signs of cracked heels usually show up without much warning. Thin pale lines start to form across the heel and look like dried mud. At first they don’t seem like a big deal and are easy to overlook. You might think they happened from walking around the house without shoes or from wearing your favorite sandals too often. But before long stepping out of bed starts to feel different. The floor feels rougher and there’s a slight stinging sensation while the skin feels tight. When the cracks get deeper they can become painful and might even snag on your socks. That’s when it hits you that your feet need some attention. Dry cracked heels usually develop gradually and most people only notice them once they start to hurt. Every step reminds you that your feet needed care well before the pain started. They carry you through long days and busy schedules. The good news is that fixing them doesn’t require expensive products or complex routines. Many effective remedies are probably already in your kitchen in familiar containers. This is about taking care of your heels and making the end of your day more relaxing. Basic ingredients like oil & honey and milk and salt can slowly soften rough skin & help cracks heal on their own.

    The Subtle Signals Your Heels Are Giving You

    Your heels endure far more pressure than most people realize. With every step, they absorb impact—whether you spend hours standing still or stay constantly on the move. Because heels are often covered and difficult to examine closely, they’re easy to ignore. You might notice rough or dry skin during a shower and plan to deal with it later, only for it to slip your mind. Over time, your skin reflects how it’s been treated.

    Dry, cracked heels are usually a sign of ongoing pressure, friction, and insufficient moisture. Walking barefoot on hard surfaces or wearing footwear with thin soles or open backs often worsens the issue. Environmental conditions also contribute. Hot showers, cold temperatures, and indoor heating pull moisture from the skin. Heel skin is naturally thick to protect you, but when it becomes overly dry, it loses flexibility. Instead of moving smoothly, it begins to split, and those cracks can grow deeper and painful.

    The good news is that your skin is always trying to heal itself. With the right combination of hydration, gentle care, and protection, improvement can happen sooner than you might expect.

    Transforming Your Kitchen Into a Simple Healing Space

    Your kitchen holds more than cooking essentials—it also contains everyday items that support heel care. Olive oil and coconut oil provide deep moisture for rough skin. Honey helps attract and retain hydration while soothing irritation. Milk and yogurt naturally soften flaky areas, and when sugar or salt is mixed with oil, it creates a mild exfoliant to remove dead skin.

    Using familiar ingredients feels comforting because you already trust them. There’s no need to study complex labels or buy specialty products. Knowing how each item works allows you to use them with purpose and confidence.

    – Olive Oil / Coconut Oil: Deep hydration and softening; ideal for night massages or as a scrub base

    – Honey: Locks in moisture and calms irritation; perfect for healing masks

    – Milk / Yogurt: Softens dead skin through natural lactic acid; effective in soaks or packs

    – Sugar / Salt: Gently exfoliates rough layers; best used after soaking

    – Banana / Avocado: Supplies vitamins and healthy fats; works well as a nourishing mask

    A Relaxing Evening Routine for Smoother Heels

    Think of this routine as a quiet moment of care at the end of your day. The space is calm, and you spend just fifteen minutes focusing on your feet.

    Warm Milk and Salt Foot Soak

    Fill a basin with warm water that feels comfortable, not hot. Add half a cup of milk, one or two tablespoons of salt, and a small amount of olive oil. Soak your feet for 10 to 15 minutes. The warmth relaxes the skin, milk softens dryness, and oil begins restoring moisture.

    Gentle Exfoliation for Rough Patches

    Mix sugar or fine salt with olive oil or coconut oil until it forms a thick paste. Massage it gently onto your heels using slow, circular motions, concentrating on rough areas. Avoid harsh scrubbing, as gentle care is more effective for sensitive skin. Rinse with warm water once finished.

    Honey and Yogurt Hydration Mask

    Combine one tablespoon of honey with one tablespoon of thick yogurt and add a few drops of oil. Apply generously to cracked areas and leave it on for 10 to 15 minutes. This mask deeply hydrates and soothes the skin. Rinse gently and pat dry with a towel.

    Overnight Oil Treatment for Deep Restoration

    Before going to bed, warm a small amount of olive oil or coconut oil and massage it into your heels for several minutes. Put on clean cotton socks to help lock in moisture overnight. By morning, your heels often feel softer, smoother, and less sensitive.

    Easy Daily Habits to Maintain Soft Heels

    Once your heels recover, keeping them smooth becomes much easier with a few consistent habits. Apply moisturizer after showers, avoid very hot water, rotate your footwear, and stay hydrated throughout the day. At the first sign of dryness, address it promptly. These small steps help prevent deeper cracks from returning.

    Knowing When Extra Care Is Necessary

    If heel cracks become deep, begin bleeding, or don’t improve with regular home care, professional guidance may be needed. Certain underlying conditions can slow healing, and a doctor or podiatrist can recommend appropriate treatment. While home remedies work well for many people, medical advice ensures safe and effective recovery.

    Most cracked heels are simply the result of dryness that needs steady care. With warmth, moisture, patience, and common household ingredients, your feet can return to a comfortable, well-cared-for state—ready to support you every day.

  • Posture Improvement Yoga: 5 Poses That Support Alignment and Spinal Health

    Posture Improvement Yoga: 5 Poses That Support Alignment and Spinal Health

    Proper posture plays a vital role in overall health, yet many people struggle with it due to long hours of sitting, daily habits, and muscle imbalances. Yoga provides a well-rounded solution by improving strength, flexibility, and body alignment. Practicing targeted yoga poses can help restore balance, support spinal health, and reduce the strain caused by modern lifestyles. These five carefully chosen poses focus on building awareness, reinforcing alignment, and creating a strong foundation for lasting posture improvement.

    1. Mountain Pose (Tadasana): The Foundation of Alignment

    Although it looks simple, Mountain Pose forms the basis of healthy posture. This standing position trains the body to align correctly, activate the core, and maintain balance. Practicing it regularly builds awareness of how the body should feel when properly stacked, helping reinforce upright posture habits throughout the day.

    How to Practice

    • Stand with feet together or slightly apart for comfort.
    • Distribute weight evenly, lifting the arches and spreading the toes.
    • Engage the thighs and gently draw the abdomen inward.
    • Lengthen the spine by lifting through the crown of the head.
    • Roll shoulders back and down, opening the chest.
    • Breathe deeply while maintaining tall body alignment.

    Key Benefits

    • Builds awareness of body alignment.
    • Strengthens legs, core, and back muscles.
    • Supports a confident upright stance.

    2. Cat-Cow Flow (Marjaryasana–Bitilasana): Spinal Mobility Booster

    Cat-Cow is a gentle flowing sequence that promotes spinal flexibility and reduces built-up tension. Moving between extension and flexion helps activate the muscles that support posture while encouraging proper spinal movement. This pose is especially useful for those experiencing stiffness from prolonged sitting.

    How to Practice

    • Begin on all fours with wrists under shoulders and knees under hips.
    • Inhale, drop the belly, lift the chest, and tilt the pelvis upward.
    • Exhale, round the spine, tuck the chin, and draw the tailbone under.
    • Flow smoothly for 5–10 breaths with controlled spinal movement.

    Key Benefits

    • Enhances spinal mobility.
    • Strengthens muscles supporting the back and neck.
    • Releases tension in shoulders and lower back.

    3. Cobra Pose (Bhujangasana): Opening the Front Body

    Cobra Pose is a gentle backbend that strengthens the lower back while opening the chest and shoulders. It helps reverse the effects of rounded posture caused by sitting or device use. Regular practice encourages a taller stance and improves upper-body alignment.

    How to Practice

    • Lie face down with legs extended and tops of feet pressing into the mat.
    • Place hands beneath shoulders, elbows bent close to the body.
    • Press into palms and lift the chest while keeping elbows slightly bent.
    • Engage back muscles without compressing the lower spine.
    • Hold for 15–30 seconds with steady breathing.

    Key Benefits

    • Strengthens the lower back.
    • Opens the chest and shoulders.
    • Supports improved spinal posture.

    4. Chest Opener Stretch: Releasing Upper-Body Tightness

    Tight chest and shoulder muscles are common due to desk work and device use. This chest-opening stretch helps counteract that tightness by expanding the front of the body and encouraging open posture alignment. It also eases upper-back and neck tension linked to poor posture.

    How to Practice

    • Sit or stand tall with the spine straight.
    • Interlace fingers behind the back and straighten the arms.
    • Lift the arms gently while drawing shoulder blades together.
    • Keep the neck aligned as the chest opens.
    • Hold for 20–30 seconds with deep relaxed breaths.

    Key Benefits

    • Stretches chest and shoulders.
    • Reduces neck and upper-back tension.
    • Encourages a lifted chest position.

    5. Bridge Pose (Setu Bandhasana): Strengthening Postural Support

    Bridge Pose strengthens the lower back, glutes, and legs while opening the chest and shoulders. Acting as a counterpose to slouching, it creates space in the front body and reinforces spinal support muscles, making it highly effective for posture improvement.

    How to Practice

    • Lie on your back with knees bent and feet hip-width apart.
    • Press feet into the mat and engage glutes to lift hips upward.
    • Keep shoulders grounded, arms alongside the body or interlaced.
    • Lift the chest toward the chin without compressing the neck.
    • Hold for 20–30 seconds, then lower slowly.

    Key Benefits

    • Strengthens glutes and hamstrings.
    • Opens the front of the body.
    • Improves overall spinal alignment.

    How Yoga Supports Better Posture

    Improving posture with yoga involves strengthening supportive muscles while stretching areas that become tight from daily habits. Prolonged sitting often leads to rounded shoulders, stiff hips, and weakened back muscles. These poses work together to correct imbalances, restore alignment, and enhance body awareness. By targeting both strength and flexibility, yoga helps retrain the body for healthier posture patterns.

    Building Better Posture Through Consistent Practice

    Adding these five yoga poses to your daily routine can gradually transform your posture. With consistent practice, you can strengthen the back, core, and shoulders while easing tightness in the chest and hips. Over time, this leads to improved alignment, reduced discomfort, and greater confidence in everyday movement. Regular yoga practice fosters long-term posture habits that support a more balanced and upright body.

  • Winter Laundry Mistakes Stop Dust Mites Unless You Wash Bedding at This Temperature

    Winter Laundry Mistakes Stop Dust Mites Unless You Wash Bedding at This Temperature

    Outside, your breath turns white. Inside, the radiator clicks softly and the duvet feels thick, heavy, and reassuring. You shake the pillowcase and a faint mist of dust catches the pale winter light. What you can’t see are the dust mites — microscopic guests thriving in warm bedding just as happily as you are.

    You scroll on your phone, half-buried under the covers, half irritated by the sneezing that woke you last night. Hot wash? Cold wash? Wool cycle? Care labels suggest one thing, allergy forums argue another. You want better sleep and clearer breathing without shrinking your favourite cover or dulling its colour. Hidden in the small numbers on the dial is a quiet solution — a setting that changes everything.

    The Overlooked Winter Dust Mite Problem

    Dust mites are usually blamed on summer heat and humidity. Winter feels fresher, with crisp air and sealed windows. Yet this is exactly when mites flourish inside your bed. Central heating dries the room enough for comfort, but not enough to disturb them.

    Your mattress and duvet become a permanent spa — warm, protected, and full of skin flakes. You pile on blankets and pull the duvet close to your face. They get ideal conditions. You get itchy eyes and a blocked nose at 3 a.m.

    The real shift doesn’t come from washing more often or turning everything scorching hot. It comes from washing at the right temperature, consistently. In winter, that temperature is lower than many expect, yet far more effective over time. There’s a narrow range that disrupts mites and allergens while keeping fabrics safe.

    One British allergy charity tracked how people actually wash their bedding. The results were telling: plenty of good intentions, very few high-temperature washes. Most people admitted they used the same 30°C mixed cycle all year. The gap between recommendations and reality was wide.

    Imagine a couple in a small flat, drying laundry on radiators while frost hangs outside. They share one duvet, several pillows, and a washing machine with a 90°C cotton program they never touch. They wake up congested, blame the building or the neighbour’s cat. Meanwhile, dust mites quietly thrive.

    When they switch to a steady 60°C wash for sheets and pillowcases, things slowly change. Fabrics stay intact, colours hold, and morning congestion eases. Not overnight — just a noticeable improvement over weeks. The right winter temperature achieves what endless low-temperature washes never could.

    Why Temperature Matters More Than You Think

    Dust mites don’t respond to heat in a simple on-off way. Studies show they begin to struggle in the mid-50s °C range, and a proper 60°C cycle can significantly reduce mites and allergens in fabrics. You don’t need to boil your sheets to make a real difference.

    Extreme heat, like 90°C, is harsh on textiles. Fibres weaken, colours fade, elastic wears out. At the other end, the popular 30°C eco habit is gentle on fabric and energy bills, but far too forgiving for mites. That’s why 60°C sits in the winter sweet spot.

    Pair a solid 60°C cycle with good detergent and enough mechanical action, and you cross the threshold where mites and allergenic proteins drop. Keep this up through winter, and you control the population instead of chasing it with occasional drastic washes.

    A Winter Wash Routine That Actually Works

    For most cotton bedding, the temperature that does the quiet heavy lifting in winter is 60°C. Not a half-hearted 40°C, not a scorched-earth 90°C. A straightforward 60°C cotton cycle, run weekly or every ten days for sheets and pillowcases, changes the whole balance.

    This range is warm enough to disrupt mites yet gentle enough for modern linens when labels allow it. Duvet covers, fitted sheets, and cotton pillowcases handle 60°C well if the drum isn’t overloaded. Think maintenance, not punishment.

    Duvets and pillows need more care. Some synthetic fillings tolerate 60°C, others don’t, and many feather options prefer 40°C. When hot washing isn’t possible, combining 60°C covers with thorough drying — either high heat or very dry winter air — helps significantly.

    Soyons honnêtes : personne ne fait ça tous les jours. Cold weather makes bed-changing feel like a workout. That’s why a realistic rhythm matters more than perfect habits.

    A sensible winter goal is washing pillowcases at 60°C weekly, and full sheets and duvet covers every one to two weeks. This keeps fabrics healthy while preventing mite levels from rebounding. If your machine has an allergy or hygiene 60°C program, it often helps by holding the temperature longer.

    The biggest mistake isn’t skipping a wash — it’s running everything at 30–40°C on quick cycles and expecting relief. The right temperature, used less often, works better than the wrong temperature used constantly.

    “Once we stopped being afraid of 60°C and used it only for bedding, my son’s night coughing dropped from daily to occasional,” says Anna, 36, living in a small London flat. “Our sheets still look fine. What really changed was how we sleep.”

    Small Laundry Choices, Big Winter Comfort

    There’s a hidden worry behind many laundry decisions: ruining expensive linen or that perfectly soft cotton set. The reality is that 60°C isn’t a fabric killer. Overloading, harsh detergents, and wild temperature swings do far more damage.

    Winter is a good time to simplify. One reliable detergent, minimal bleach, a consistent 60°C routine for bedding, and slightly gentler spin speeds when labels suggest it. Fabrics age better with steady care instead of extremes.

    That dull, less-soft feeling after a wash usually comes from aggressive heat or too much product, not from a balanced 60°C cycle. Protecting fabric isn’t about avoiding warmth — it’s about consistency.

    Seeing 60°C as a targeted tool rather than a punishment changes everything. You’re not boiling laundry “just in case.” You’re choosing a temperature that delivers cleaner air, calmer sleep, and longer-lasting bedding.

    Some people add an extra rinse to reduce detergent residue that can irritate skin. Others use allergen-proof covers and relax about wash frequency. The technical steps matter, but the emotional relief of knowing you’ve done enough matters too.

    Winter nights stay long and heavy. But knowing a simple 60°C routine tips the balance quietly in your favour carries its own power. No gadgets. No miracle sprays. Just a washing machine dial that finally makes sense.

    Key Winter Washing Takeaways

    • Optimal winter temperature: 60°C for cotton sheets and pillowcases to reduce dust mites without damaging fabric
    • Realistic routine: Weekly pillowcases, sheets every 1–2 weeks for easier breathing at night
    • Fabric care balance: Avoid extreme 90°C cycles and harsh products to extend bedding lifespan