Category: ewgt

  • Restore Shine to Dirty Tiles and Grout Using Fast Natural Cleaning Methods That Actually Work

    Restore Shine to Dirty Tiles and Grout Using Fast Natural Cleaning Methods That Actually Work

    The tiles beneath your feet carry more history than they first reveal. Over time, they quietly absorb wet footprints, muddy paw marks, hurried breakfast spills, and the fine dust that settles after long days. One afternoon, you glance down and realize the floor that once felt bright now looks tired. The grout lines, previously clean and pale, have turned into dark outlines that drain the room of life. When you trace a finger along the grout, it leaves behind a faint gray streak. It’s not a serious issue, yet it subtly makes your home feel less welcoming. The idea of harsh chemical cleaners, rubber gloves, and strong fumes feels almost as exhausting as the grime itself. Thankfully, it doesn’t have to be that way. With a few natural ingredients and a little effort, you can restore that lost brightness without much trouble.

    The First Moment the Dullness Shows

    It usually begins with a change in light. The afternoon sun stretches across the kitchen floor and suddenly every streak and speck stands out. Areas that once reflected light now appear muted, and the grout lines seem darker, almost as if they’re absorbing brightness instead of reflecting it. You kneel down for a closer look. Near the stove, a faint ring marks an old sauce spill. By the doorway, a gritty trail hints at shoes worn in during a rainy afternoon. You hadn’t noticed the gradual buildup, only the slow loss of shine and the subtle way a room can start to feel flat. The urge to scrub everything clean comes instantly, then hesitation follows. Memories of strong chemical smells return—eyes stinging, throat scratching, and that sharp, artificial scent lingering in the air. You’d rather open the windows, stay comfortable, and reach for something gentler mixed right on your kitchen counter.

    The Subtle Strength of Simple Natural Cleaners

    Natural cleaning solutions can be just as effective as commercial products when used correctly. The secret lies in pairing the right ingredients with warm water, a soft brush, and a bit of patience. Most of these items are already in your home, tucked away in a pantry or under the sink. Their effectiveness comes from how they interact with dirt and grime. While they may work more slowly than harsh chemicals, they clean thoroughly without releasing toxic fumes or leaving residue behind. This makes them safer for families and pets while still keeping your home fresh and clean.

    Baking Soda: Gentle Grit That Works With You

    Baking soda feels soft and powdery to the touch, almost silky when rubbed between your fingers, yet it carries a mild grit. On tile and grout, it acts as a gentle abrasive. It has enough texture to lift away dirt and grime without damaging the surface beneath. Instead of wearing materials down, it carefully loosens and removes the buildup.

    Vinegar: A Sharp and Effective Reviver

    Vinegar’s sharp scent is unmistakable the moment the bottle opens. Mixed with warm water, it cuts through soap scum, water spots, and daily buildup that dulls tile surfaces. It works especially well on ceramic and porcelain tiles that have developed a cloudy layer. When vinegar meets baking soda on grout, a fizzing reaction occurs. Tiny bubbles form and break apart, drawing dirt out of tight spaces. It may look like magic, but it’s simply everyday chemistry working efficiently.

    Lemon, Soap, and Salt: Helpful Additions

    For a cleaning routine that leaves the room smelling fresh, lemon juice plays an important role. Its bright citrus scent fills the space while natural acids help break down stains and mineral buildup. Rubbing a cut lemon along tile edges leaves both a clean surface and a refreshing aroma. Adding castile soap or a mild dish soap allows the solution to spread evenly and tackles greasy spots with ease. For stubborn marks, a pinch of fine salt adds extra scrubbing power, gently wearing away traces left behind by daily use.

    A Simple Natural Routine to Restore Shine

    Imagine open windows, soft daylight, a basin of warm water on the counter, and a small collection of ingredients ready nearby. Restoring tile doesn’t have to feel like a chore. It can feel more like caring for a surface that has quietly supported you for years.

    Step 1: Clear the Space, Sweep Slowly

    Start by clearing the floor. Slide chairs back, lift rugs, and move small baskets aside. As the area opens up, every tile and grout line becomes visible. Sweep with slow, steady strokes, listening to the soft sound of bristles gathering dust and crumbs. Once sweeping is done, the room already feels lighter and more orderly.

    Step 2: Prepare a Simple Daily Tile Solution

    • Warm water: 2 liters (about 8 cups) to dissolve dirt and spread the cleaner evenly
    • White vinegar: 1/2 cup to cut residue and restore shine
    • Liquid castile or mild dish soap: 1–2 teaspoons to lift grease and everyday grime
    • Optional essential oil: 3–5 drops for a soft, pleasant scent

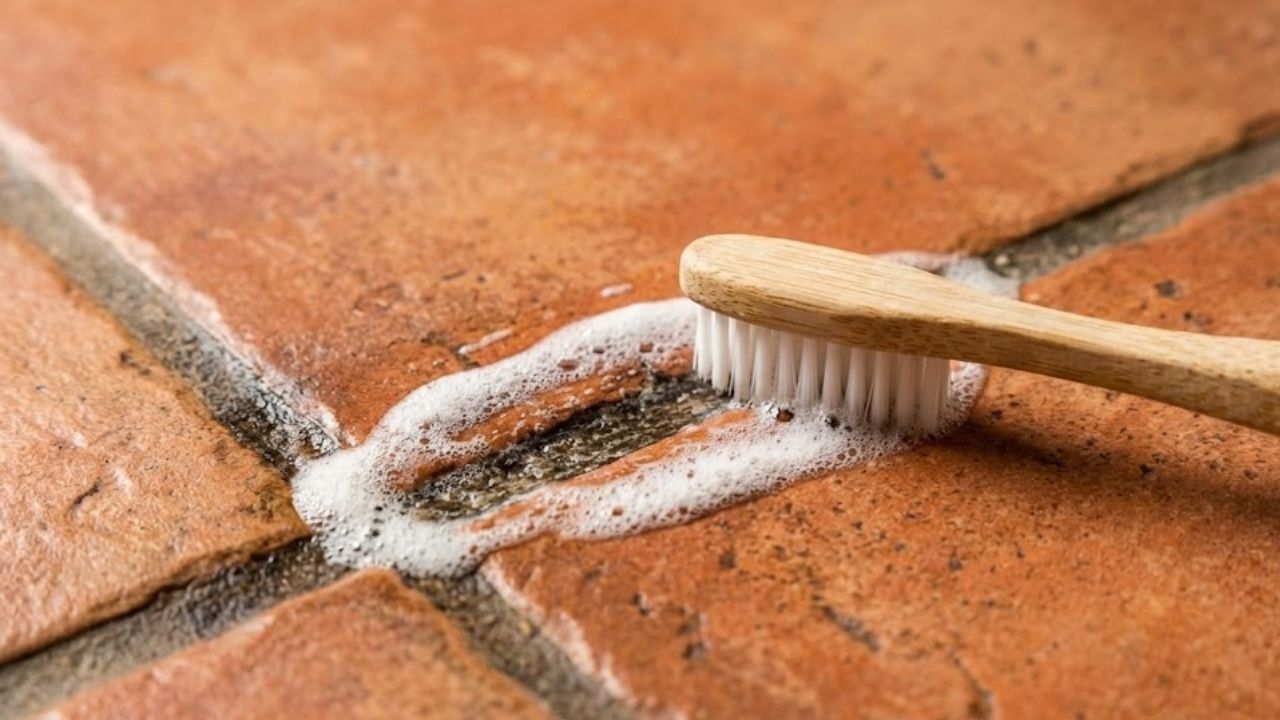
    Step 3: Targeted Grout Refresh with Baking Soda and Vinegar

    Fast cleaning doesn’t need to be harsh. Quick, natural methods can deliver visible results in a single afternoon without leaving your home smelling like chemicals. The key is knowing what your tiles need and what they can’t tolerate. Many assume strong products are the only option, but gentle solutions often work just as well.

    Choosing the Right Method for Your Tile Type

    Not all tiles respond the same way to cleaning, and proper care helps preserve their appearance. Ceramic and porcelain tiles are easy to maintain and tolerate vinegar solutions, baking soda paste, or mild soap. Natural stone tiles such as marble, slate, travertine, and limestone require extra caution. Acidic cleaners like vinegar or lemon can damage these surfaces and leave dull marks. For stone, stick to warm water with a small amount of pH-neutral soap and use microfiber cloths or mops. Glazed tiles have a protective coating, while unglazed tiles are more porous and need gentler scrubbing. When in doubt, always test a cleaning method on a hidden spot first.

    Maintaining Shine Through Gentle Habits

    Once tiles gleam and grout looks fresh again, the entire room feels transformed. Light reflects more easily, and colors appear clearer. This isn’t just about cleanliness—it’s about how a bright floor changes the mood of a space, making it feel larger and more inviting.

    Easy Daily and Weekly Care

    Keeping floors clean doesn’t require constant deep scrubbing. Place doormats on both sides of entryways to stop dirt before it spreads. Sweep or dry mop regularly to prevent dust from settling into grout lines. Wipe spills immediately to avoid stains, and mop lightly once a week with warm water and mild soap. Reserve vinegar for times when buildup appears. Opening windows while cleaning helps floors dry faster and keeps the space comfortable.

    A Gentle Finish: Hand Buffing

    The final step brings quiet satisfaction. Once the floor has mostly air-dried, glide a clean, dry microfiber cloth or flat mop across the tiles. This removes lingering moisture and faint streaks. The surface shifts from simply clean to softly glowing. Light stretches across several tiles, reflecting chair legs or plant pots in subtle outlines. Small details like these quietly transform how the room feels.

    When Cleaning Becomes a Connection With Your Home

    Restoring shine to tiles and grout goes beyond appearance. It reconnects you with the surfaces that support everyday life. Kneeling, scrubbing, and rinsing bring back memories of meals, moves, and muddy seasons. Natural methods fit seamlessly into that story—no harsh fumes, no irritation, just warm water, grainy baking soda, bright citrus, and the smooth glide of vinegar across ceramic. The air stays breathable, your skin remains comfortable, and pets move freely. In just an hour or two, the change is clear. The room feels lighter, your mood lifts, and the floor reflects sunlight once again. You didn’t just clean a floor—you gave your home its light back.

  • Grow Thicker Eyebrows and Eyelashes Naturally Using Everyday Household Oils With Consistent Use

    Grow Thicker Eyebrows and Eyelashes Naturally Using Everyday Household Oils With Consistent Use

    You rarely notice eyebrow thinning in a sudden or dramatic way. It happens gradually and quietly, usually under bright bathroom lighting while removing makeup. A few hairs near the tail seem shorter. The once-defined arch looks uneven. It could be linked to ageing, years of overplucking in the early 2000s, or even stress and dry indoor air. Whatever the reason, your face starts to feel subtly different, as if something around the eyes has faded. Soon, you find yourself watching every lash that lands in the sink while washing off mascara at night.

    The Gentle Strength of Everyday Oils

    Before spending money on expensive serums or analysing long ingredient lists, it helps to notice what is already within reach. In many UK homes, simple oils sit quietly on shelves—olive oil by the stove, coconut oil in the kitchen, or a small bottle of castor oil stored away. These oils lack luxury branding, but they offer something steadier: nourishment, patience, and consistency. Since brows and lashes are made up of fine hairs, this kind of gentle care can support noticeable improvements over time.

    Why Brows and Lashes Feel So Personal

    Eyebrows and eyelashes often hold emotional significance. Many women remember phases of heavy makeup, excessive tweezing, or hormonal shifts that affected hair growth. When brows thin or lashes weaken, the face can appear tired or unfamiliar, changing how you see yourself. A natural approach feels kinder and more aligned with a slower, more mindful way of living. Oils do not offer instant results, but with steady use, they support what your body naturally aims to restore.

    Household Oils That Help Support Hair Health

    Castor oil is widely discussed because of its thick texture, which helps it stay on fine hairs and reduce breakage. Coconut oil suits dryness caused by regular mascara use, while olive oil gently conditions eyebrow hairs. Lighter oils such as almond or argan absorb more easily and suit sensitive skin. These oils do not force growth; instead, they protect and strengthen hair, helping create healthier conditions for brows and lashes.

    • Castor Oil – Dense and slightly tacky, rich in ricinoleic acid, helps lock in moisture and strengthen hair fibres.
    • Coconut Oil – Light to medium texture, melts on contact, penetrates the hair shaft and reduces protein loss.
    • Olive Oil – Medium weight, antioxidant-rich, supports the skin barrier around hair roots.
    • Sweet Almond Oil – Smooth and gentle, absorbs well and suits sensitive eye areas.
    • Argan Oil – Lightweight and non-greasy, high in vitamin E and fatty acids for resilience.

    Building a Calm Evening Care Habit

    Consistency makes the difference, and the easiest routines fit naturally into your evenings. Begin with clean, makeup-free eyes and washed hands. Select one oil or a simple blend, apply a small amount to brows using a clean spoolie, and lightly coat the upper lashes with care. Gently blot away any excess. Repeating this nightly over several weeks turns the routine into a soothing ritual rather than a task.

    Listening to Your Skin and Eye Area

    The skin around the eyes is delicate, so paying attention to how it reacts is important. Always patch test new oils and begin with very small amounts. If irritation appears, switch to a lighter option. Avoid getting oil directly into the eyes, and rinse gently if it happens. Anyone with existing eye conditions or treatments should consult a pharmacist or GP. Progress is subtle, so focus on reduced shedding and gentle fullness rather than fast results.

    Daily Habits That Support Better Growth

    Oils are most effective when combined with supportive habits. Reducing the use of waterproof mascara, removing makeup gently, and eating a balanced diet with enough protein, healthy fats, and minerals all play a role. Managing stress and hormonal balance also influences hair health. Oils provide external care, while nutrition, rest, and lifestyle form the foundation underneath.

    Blending Your Own Simple Oil Mix

    Once familiar with the routine, creating a small custom blend at home is easy. Combining castor oil for thickness, almond oil for softness, and argan oil for light nourishment works well. Store the blend in a clean bottle, label it with the date, and use it within a few months. This keeps your routine simple, transparent, and personal.

    Observing Progress Without Pressure

    Tracking changes gently helps prevent overthinking. Taking a makeup-free photo every few weeks in the same lighting can reveal subtle shifts. Fuller brows, fewer gaps, and stronger lashes usually develop gradually. Missing an occasional night does not undo progress—simply return to the routine when you can. The goal is not perfection, but consistent, quiet care for what you already have.

  • Blush Placement Technique: The Small Change That Visually Reshapes Facial Features After 30

    Blush Placement Technique: The Small Change That Visually Reshapes Facial Features After 30

    The woman staring back from the bathroom mirror looks almost the same as she did at 25—but not exactly. Her cheeks sit a little lower now. The soft fullness that once lifted when she smiled blends more smoothly into her jawline. She reaches for her trusted blush brush and follows the routine she has always known: smile, apply color to the apples of her cheeks. Then she pauses. Instead of looking fresh, her face appears slightly droopy. The shadows beneath her eyes seem deeper, and the center of her face looks heavier. She wipes the blush away and tries again, this time placing it a bit higher. Instantly, her cheekbones look sharper. Her face appears lifted, and her eyes seem more alert. It’s the same blush and the same person, yet her face looks entirely different. The product didn’t change—only where it was applied.

    Why Classic Blush Techniques Start Failing After 30

    There’s a strange phase in life when your makeup routine quietly stops working. It doesn’t happen overnight. You just notice that the techniques you’ve relied on for years no longer give the same result. Blush is often the first sign. Applied low and round, it can make a 32-year-old look tired by afternoon. The shade that once brightened the apples of the cheeks now drifts closer to the soft lines around the nose and mouth, settling rather than shaping. At this point, placement matters more than the product itself.

    A makeup artist in London once said she could estimate someone’s age simply by watching how they apply blush. Younger people naturally place it at the center of the cheeks, like a simple illustration. Many people over 30 continue doing this even as their face subtly changes. She recalled working with two sisters, aged 28 and 38, who shared similar skin tones and used the same products. On the younger sister, blush on the apples made her entire face glow. On the older sister, the same placement emphasized faint hollows under the eyes. When the artist moved the blush higher toward the temples on the 38-year-old, she suddenly looked well-rested. The color redirected attention to her eyes and cheekbones instead of the center of her face.

    The reason is simple. After 30, your bone structure stays the same, but facial fat gradually shifts downward. Muscle memory still guides your hand to where the fullness used to be, so color ends up placed in an area that’s beginning to drop. Blush applied there can make the face appear heavier. Move it slightly upward and outward, and the effect reverses. You’re not changing your features—just changing where the eye is drawn first. That’s why even a small touch of pink can make such a difference.

    A Modern Blush Placement That Instantly Lifts the Face

    The Simple Technique That Works Best After 30

    The makeup method gaining attention right now is surprisingly simple. Instead of smiling while applying blush, keep your face relaxed and look straight ahead. Imagine a diagonal line running from the top of your ear to the side of your nostril. Apply blush along the upper half of that line, closer to the ear than the nose. Shape it into a soft, slanted C that curves toward the outer corner of your eye. Blend the color upward into the temples, not downward toward the center of the face. Let it fade gently near the hairline, like watercolor spreading on paper.

    For most people over 30, this placement immediately reveals cheekbones they may have forgotten. One extra adjustment makes an even bigger difference: leave a clean gap under the eyes. About a finger’s width of bare skin between the under-eye area and the blush helps prevent color from settling into fine lines or emphasizing dark circles. For a natural flush, you can lightly tap a hint of blush on the bridge of the nose, but keep the main color high and toward the outer face.

    Many people worry about looking overdone as they age, and the concern is valid. Too much color placed too low can create an unflattering flushed look. This is why placement outweighs quantity. Start with less product than you think you need. Press it on gently instead of sweeping it across the skin. Build the color in thin layers rather than one heavy stripe. Cream blushes often suit mature skin better because they blend seamlessly instead of sitting on the surface.

    Real life isn’t a professional makeup tutorial. Most mornings are rushed, with one hand holding a brush and the other checking a phone. So remember one easy rule: higher and further back. That single guideline can make a visible difference. On tired days, a slightly higher blush placement can make your face look more awake, reflecting how you still feel inside.

    Key Points to Keep in Mind

    • Think diagonal, not circular when applying blush.
    • Keep the strongest color away from the nose and mouth.
    • Blend upward into the temples to create a lifted effect.
    • Choose cream or liquid formulas if powders settle into texture.
    • Revisit your blush placement every few years as your face naturally changes.

    How Blush Becomes a Quiet Confidence Reset Over Time

    There’s something quietly powerful about changing how you apply a product you’ve used for 15 years. It’s an acknowledgment that your face has evolved—and a decision to work with it rather than against it. A single diagonal sweep becomes a small negotiation with time. Friends often talk about looking tired or not quite like themselves, but it’s rarely a dramatic change. More often, it’s how light and shadow now move across the face.

    Adjust the placement of color, and you change where the light appears to land. It’s almost philosophical. The way you map your blush subtly influences the story your face tells before you say a word. We’ve all caught our reflection unexpectedly and felt surprised. Remapping blush doesn’t erase that moment, but it softens it. The right placement quietly says you’re still there. It doesn’t pretend you’re 22—it simply highlights the structure and expression you’ve earned.

    This small adjustment is also easy to share. Once you see the difference, it’s hard not to show someone else. Many people demonstrate it by applying blush the old way on one cheek and the new way on the other. The contrast usually speaks for itself. Over time, blush becomes less about following trends and more about understanding your own facial structure. There’s no universal diagram, just a guiding idea: color that moves upward suggests energy and youth, while color that settles in the center often reads as fatigue. That may be why this technique keeps resurfacing. It doesn’t require new products—just moving what you already own a few millimeters higher.

  • Knife Sharpening at Home: The Expert Technique That Brings Back Razor Edges Without Risk

    Knife Sharpening at Home: The Expert Technique That Brings Back Razor Edges Without Risk

    The first time I opened a bottle of store-bought cleaner after a long hike in the woods the smell hit me hard. It was artificial lemon mixed with chemical sharpness. My eyes stung and my throat tightened. The quiet moss-covered trail I had left an hour before suddenly felt like it belonged to another world. Out there water moved through soil & stone & was filtered by roots over time. In here under harsh lights surrounded by plastic bottles everything felt manufactured. I remember thinking about why my home had to smell like a laboratory just to be considered clean.

    The Day You Notice Your Home Is an Ecosystem

    Once you see it, it becomes impossible to ignore. The bright blue liquid swirling down the sink does not vanish—it travels through pipes, treatment systems, rivers, and eventually oceans already under strain. The fine mist from glass cleaner lingers in sunlit air, becoming a chemical haze you quietly inhale. The recycling bin fills with rigid plastic bottles that once held something strong enough to make your head spin. We often speak about the environment as if it exists somewhere distant—a forest, a shoreline, the Arctic—but the truth is simpler and closer. You are already living inside an active ecosystem. Your home is not sealed. Air moves freely, dust rides on socks and wind, and water enters and exits carrying traces of everything added to it.

    The Quiet Power of What Lives Under Your Sink

    The products tucked beneath the sink influence far more than the surfaces they touch. They shape the small daily environment you breathe and move through. There is something quietly transformative about opening a cupboard and seeing not neon bottles of unknown solutions, but a handful of familiar items: baking soda, vinegar, a simple bar of soap, a lemon, maybe a tiny vial of essential oil. These are ingredients your great-grandparents would recognize. When used thoughtfully, they make a home smell like a place where people cook, read, rest, and open windows—not like a showroom built on artificial shine.

    The Hidden Potential of Everyday Kitchen Staples

    Your kitchen already holds everything needed for effective cleaning. The shift comes from realizing that ordinary ingredients can be surprisingly powerful. Baking soda feels soft and fine between your fingers. White vinegar’s sharp scent clears the air as it cuts through grime. A lemon’s waxy skin leaves a faint stickiness after slicing. Olive oil pours slowly, heavy and smooth. Used correctly, these simple items can replace many commercial cleaners without sacrificing results.

    Simple Cleaning Recipes That Fit Real Life

    These methods work because they adapt to what you already have. There’s no need for special tools or stressful measurements. A bit of common sense and curiosity is enough. The recipes are forgiving—small adjustments won’t ruin them. Missing an ingredient often means swapping in something similar. The goal is not perfection, but solutions that fit easily into everyday routines.

    Everyday All-Purpose Surface Spray

    This is the cleaner you’ll reach for most—ideal for kitchen counters, door handles, light switches, and unexpected sticky spots.

    Mix equal parts white vinegar and water in a clean spray bottle. If you enjoy a mild scent, add a few drops of essential oil such as lemon, lavender, or tea tree, then shake gently.

    Spray onto hard surfaces and wipe with a cloth. Avoid natural stone like marble or granite, as vinegar can cause damage. The vinegar scent fades quickly, eventually becoming a familiar signal of cleanliness rather than harshness.

    Soft Scrub for Sinks, Tubs, and Stovetops

    This scrub works well on surfaces that look tired—bathtub rings, dull sinks, or residue around burners—cleaning thoroughly without scratching.

    Combine half a cup of baking soda with enough water to form a thick paste. For added grease-cutting ability, mix in a tablespoon of castile or plain liquid soap.

    Apply with a damp sponge or cloth, scrub gently, then rinse well. Stainless steel and enamel regain a natural, honest shine—clean without looking overpolished.

    Clear Glass and Mirror Cleaner

    This mixture focuses on clarity rather than scent, leaving glass nearly invisible when light hits it correctly.

    Mix equal parts white vinegar and water. For extra streak-free results, especially on mirrors, add one teaspoon of rubbing alcohol per cup of solution.

    Spray lightly and wipe with a lint-free cloth or old cotton T-shirt. The surface reflects space and light, not artificial fragrance.

    Natural Wood Conditioning Polish

    This blend is designed for wood that shows signs of use—coffee rings, softened armrests, or shelves needing more than dusting.

    Combine two parts olive oil with one part lemon juice or white vinegar in a small container. Shake before each use.

    Apply a small amount with a soft cloth, following the grain. Buff gently. The wood looks cared for, not disguised.

    Deodorizing Powder for Carpets and Mattresses

    For soft surfaces cleaned less often, this mixture removes odors quietly instead of masking them.

    Mix one cup of baking soda with 10–15 drops of essential oil if desired, stirring until evenly scented.

    Sprinkle lightly, let sit for 15–30 minutes, then vacuum thoroughly. What remains is simply the absence of unpleasant smells.

    Eco-Friendly Cleaning Basics at a Glance

    • Baking soda: scrubbing and deodorizing sinks, tubs, ovens, and refrigerators
    • White vinegar: degreasing and removing limescale; avoid natural stone
    • Castile or plain soap: base for dishes, floors, and general cleaning
    • Lemon or citrus: deodorizing and light bleaching with care
    • Salt: added abrasion for pans, boards, and drains
    • Essential oils: light scent and mild antimicrobial support when used sparingly

    Cleaning as Care, Not Combat

    Replacing harsh cleaners with pantry-based alternatives changes the feel of cleaning itself. It becomes intentional rather than aggressive, closer to cooking or tending plants. As you wipe surfaces, details appear—fingerprints on doorframes, smudges at child height, signs of real living. Cleaning shifts from erasing life to preparing space for what comes next.

    Safety, Balance, and Practical Boundaries

    Natural cleaning still requires attention. Ingredients cannot always be mixed freely, and not every situation suits homemade solutions. Never combine vinegar with bleach, as this creates toxic chlorine gas. Use caution on sensitive surfaces and label all mixtures clearly, especially around children or pets. Some situations—serious mold or illness-related disinfection—still call for commercial products. Thoughtful cleaning is about gentler defaults, not rigid rules.

    From Your Sink to the Wider World

    Everything used during cleaning continues its journey beyond your home. Water carries residues through pipes, treatment plants, and back into nature. Some substances linger; others break down easily. Simple ingredients like soap, vinegar, and baking soda are familiar to natural systems and easier for microorganisms to process.

    The benefits are immediate too—cleaner indoor air, gentler contact with skin, and less plastic waste. Over time, the space under the sink grows calmer: fewer bottles, more refillable containers, and a sense of order. Cleaning becomes a quiet partnership between your home and the world beyond it, guided by care instead of control.

  • Why Mixing Aloe Vera, Honey, and Turmeric Is Called the Ultimate Home Beauty Remedy

    Why Mixing Aloe Vera, Honey, and Turmeric Is Called the Ultimate Home Beauty Remedy

    Across India, home beauty remedies are gaining renewed attention as people look for natural ways to care for their skin without harsh chemicals. One blend that keeps trending is the mix of aloe vera, honey, and turmeric, often described as the ultimate home beauty remedy. Rooted in traditional practices and modern self-care habits, this combination is praised for addressing common skin concerns gently. From dullness to uneven texture, many believe this simple mix delivers visible results using ingredients already found in Indian kitchens.

    Why Aloe Vera, Honey, and Turmeric Work Together for Skin

    The real magic of this remedy lies in how the ingredients complement each other when combined. Aloe vera provides deep skin hydration, helping calm dryness and irritation, while honey acts as a natural moisture seal that keeps the skin soft and supple. Turmeric adds its well-known anti-inflammatory support, which many people rely on to soothe troubled skin. Together, the blend creates a balanced skin barrier that feels gentle yet effective. This synergy is why the mixture is often seen as more powerful than using each ingredient alone, especially for everyday skin care routines.

    How This Natural Beauty Remedy Supports Clearer Skin

    People often turn to this mix when dealing with uneven tone or occasional breakouts. Aloe vera helps maintain cooling skin relief, which can be especially comforting in warmer Indian climates. Honey contributes mild antibacterial care, supporting cleaner-looking skin without stripping natural oils. Turmeric is valued for promoting visible brightness boost over time when used consistently. The combination works gently, encouraging healthy skin renewal rather than forcing quick changes, making it suitable for those who prefer slow, natural improvements.

    Using the Aloe, Honey, and Turmeric Mix Safely at Home

    Applying this remedy correctly matters just as much as the ingredients themselves. Always start with a clean face to allow better ingredient absorption. Using small amounts helps avoid temporary yellow stains from turmeric, a common concern. Many users apply the mask briefly to enjoy short contact benefits without irritation. Following up with a gentle rinse supports skin comfort afterward. With mindful use, this routine fits easily into weekly self-care without overwhelming the skin.

    Summary and Practical Takeaway

    The popularity of aloe vera, honey, and turmeric as a home beauty remedy is not just about tradition but also about simplicity. This blend offers ingredient harmony effect that feels approachable for everyday care. It encourages consistent natural routines rather than quick fixes, which many find more sustainable. While results vary, users often appreciate the gentle skin approach and the comfort of familiar ingredients. When used thoughtfully, this mix reflects how old practices still hold value in modern beauty habits.

    Ingredient Primary Skin Benefit Common Use
    Aloe Vera Soothing hydration Calming base
    Honey Moisture retention Natural binder
    Turmeric Skin clarity support Active booster
    Combined Mix Balanced nourishment Weekly face mask

    Frequently Asked Questions (FAQs)

    1. Is this remedy suitable for all skin types?

    Most people can use it, but a patch test is always recommended.

    2. How often should the mix be applied?

    Using it once or twice a week is generally considered sufficient.

    3. Can turmeric stain the skin permanently?

    No, any yellow tint is temporary and washes off easily.

    4. Should fresh aloe vera be used?

    Fresh aloe vera gel is preferred, but pure store-bought gel also works.

  • Girls Apply Sandalwood Powder and Rose Water for Bright Skin — Traditional Beauty Hack

    Girls Apply Sandalwood Powder and Rose Water for Bright Skin — Traditional Beauty Hack

    Across India, traditional beauty rituals continue to shape everyday skincare choices, especially among young women seeking natural glow without harsh products. One such timeless practice involves applying sandalwood powder mixed with rose water, a combination trusted for generations. This simple remedy fits easily into modern routines while staying rooted in cultural wisdom. Known for its calming and skin-enhancing qualities, the mixture is often used before festivals, weddings, or daily self-care moments. As clean beauty gains attention, this age-old approach feels more relevant than ever.

    Sandalwood powder and rose water for glowing skin

    Sandalwood powder blended with rose water is valued for how gently it works on the skin while delivering visible brightness. Many girls prefer this mix because it feels cooling and soothing after long days outdoors. The natural texture helps cleanse pores and leaves the face looking refreshed. Regular use is often linked with natural skin glow, cooling face mask, gentle herbal care, and daily beauty ritual. What makes it appealing is its simplicity—no complex steps, just two trusted ingredients working together to support healthier-looking skin.

    Traditional beauty hack using sandalwood and rose water

    This traditional beauty hack has survived generations because it adapts well to different skin needs. Grandmothers often recommended it for special occasions, while today’s users apply it as part of weekly self-care. The mix is especially popular during warmer months when skin feels tired or dull. Its reputation comes from ancient skincare wisdom, calming herbal blend, home beauty remedy, and simple face care. Instead of masking the skin, it supports a clean, balanced appearance that feels authentic rather than artificial.

    Why girls apply sandalwood powder for bright skin

    Girls often turn to sandalwood powder and rose water because the results feel gradual yet dependable. Unlike instant cosmetic fixes, this approach focuses on consistency and care. The mild fragrance also adds a relaxing touch, making the routine feel enjoyable rather than forced. Many users associate it with even skin tone, refreshing face pack, traditional glow method, and natural self-care. Over time, the habit becomes less about quick beauty and more about nurturing skin with patience and balance.

    Understanding the lasting appeal of this natural skincare practice

    The lasting popularity of sandalwood powder and rose water lies in how effortlessly it fits into everyday life. It does not demand expensive products or complicated techniques, making it accessible to many households. This routine reflects a mindset where beauty is connected to care and tradition rather than trends. Its appeal is often described through heritage beauty practice, skin-friendly routine, minimal ingredient care, and timeless skincare habit. In a fast-changing beauty world, such practices continue to feel grounded and reassuring.

    Ingredient Primary Benefit Best For
    Sandalwood Powder Brightening and cooling Dull or tired skin
    Rose Water Hydration and freshness All skin types
    Combined Paste Balanced skin feel Weekly face pack
    Regular Use Improved appearance Long-term care

    Frequently Asked Questions (FAQs)

    1. How often can this face pack be used?

    It is commonly used one to two times a week for gentle care.

    2. Is this suitable for sensitive skin?

    Many people with sensitive skin use it, but a patch test is advised.

    3. Can it be used by teenagers?

    Yes, it is often chosen as a mild option for young skin.

    4. Does it replace regular skincare products?

    No, it works best as a supportive addition to basic skincare.

  • Optical Illusion Challenge: Can You Find 594 Hidden Among 564s?

    Optical Illusion Challenge: Can You Find 594 Hidden Among 564s?

    Optical illusions offer a fun way to test your brain and improve how well you think. We have an 8-second challenge for you that will check how sharp your vision really is. In this puzzle you need to find the number 594 hidden in a grid full of 564s. This sounds simple but the number blends in with all the repeated patterns around it. Only people with very sharp eyes will find it in time. This illusion checks how well you notice details and recognize patterns. It also tests how fast you can focus on something specific. The challenge is tricky because your eyes naturally want to see the repeated numbers as one big group instead of looking at each number separately. When you scan the grid your brain tries to process everything at once which makes the hidden number easy to miss. Taking on puzzles like this one helps train your mind to spot small differences quickly. It strengthens the connection between what you see and how your brain understands it. These exercises can improve your concentration and make you better at finding important information when you need it. The time limit adds pressure that makes your brain work faster and more efficiently.

    Understanding the Puzzle: Can You Spot 594 in Just 8 Seconds?

    This optical illusion challenge is simple in concept but tricky in execution. You’re presented with a grid filled with repeating numbers and given only 8 seconds to find the number 594. At first glance, the image appears packed with identical numbers—mostly 564—which makes spotting any difference surprisingly difficult. Hidden within this uniform pattern is a single instance of 594, cleverly camouflaged among the others.

    The key distinction lies in the middle digit. While most numbers display a 6, the target number replaces it with a 9. Because the surrounding numbers look nearly identical, your eyes are naturally drawn to the repetition rather than the subtle variation.

    Why This Optical Illusion Feels So Difficult

    The difficulty comes from repetitive visual patterns. When the brain encounters repeated shapes or numbers, it relies on pattern recognition to process information quickly. While this helps us navigate everyday tasks efficiently, it also causes the brain to overlook minor inconsistencies.

    In this illusion, your attention locks onto the repeating 564 pattern, making it harder to notice the single altered digit. The added pressure of the 8-second time limit increases the challenge, requiring sharper focus and faster visual processing.

    Mental Advantages of Solving Optical Illusion Puzzles

    Beyond entertainment, optical illusions provide meaningful cognitive benefits. Regularly engaging with puzzles like this can strengthen mental skills and improve how your brain handles visual information.

    Strengthening Attention to Detail

    Finding the hidden number demands careful observation. By training yourself to spot tiny visual differences, you enhance your ability to notice details that might otherwise be missed. This skill translates well into daily tasks at work, school, and home.

    Enhancing Pattern Recognition Skills

    Pattern recognition allows the brain to process visuals efficiently. These challenges help refine that ability by teaching you to identify both consistent patterns and small deviations. This skill is valuable in areas such as design, analysis, and problem-solving.

    Increasing Cognitive Processing Speed

    The short time frame pushes your brain to work faster. Solving time-based puzzles can improve reaction time and mental agility, which are useful in fast-paced environments where quick decisions matter.

    Developing Visual-Spatial Awareness

    Visual-spatial intelligence involves understanding how objects relate to one another in space. Optical illusions improve this ability by encouraging your brain to detect positional and visual differences within complex layouts.

    Improving Focus and Concentration

    Successfully completing this challenge requires blocking out distractions and maintaining focus. Practicing optical illusions regularly can help build sustained concentration, benefiting both personal and professional tasks.

    The Answer Revealed: Where to Find 594

    If you haven’t spotted it yet, here’s the solution. The number 594 stands out only by its middle digit. Instead of a 6, it contains a 9, setting it apart from the surrounding 564s.

    By scanning each number individually rather than viewing the grid as a whole, the difference becomes clearer. The hidden 594 is located in the middle-right area of the image. Once found, it becomes obvious how easily repetition can trick the brain.

    Practical Tips to Spot Differences Faster

    If this illusion felt challenging, that’s completely normal. With the right approach and regular practice, your observation skills can improve.

    Focus on one element at a time instead of scanning the entire pattern.

    – Break the repetition by examining each number individually.

    – Practice similar puzzles to train faster visual detection.

    – Stay calm under pressure to avoid missing subtle details.

    Final Thoughts

    Optical illusion challenges like this one are a powerful way to engage and sharpen the mind. They test visual perception, attention to detail, and mental speed while remaining fun and accessible. The “Spot 594” puzzle highlights how easily repetition can mislead the brain—and how focused attention can overcome it. The more you practice, the better your ability to detect subtle differences will become.

  • Optical Illusion Brain Challenge: Can You Spot YET Among VET in 7 Seconds?

    Optical Illusion Brain Challenge: Can You Spot YET Among VET in 7 Seconds?

    Optical illusions have interested people for a very long time because they show us how complex our perception really is. They demonstrate how our brain processes what we see and sometimes tricks us into perceiving things that are not actually present. These visual puzzles provide entertainment while also helping us improve our thinking skills. The challenge presented here uses an optical illusion to test how well you can concentrate and notice small differences. Your goal is straightforward: locate the word “Yet” hidden within a collection of “Vet” words in just 7 seconds. While this might sound simple at first the subtle nature of the task makes it harder than most people anticipate. Understanding why this optical illusion proves so challenging and how it activates our mental processes reveals interesting aspects of human cognition.

    The Fascinating World of Optical Illusions

    Optical illusions are visual experiences that cause the brain to see something that doesn’t fully align with reality. They happen when the mind interprets shapes, colors, light, and angles in a way that slightly alters the true image. These illusions can appear in many forms, including images that seem to move, objects that change depending on perspective, or hidden details that are not immediately noticeable.

    What makes optical illusions so compelling is how they challenge everyday perception. They expose the brain’s reliance on familiar visual patterns to make sense of the world. When those patterns are disrupted, the brain can momentarily misjudge what it’s seeing, leading to surprising and intriguing results.

    Understanding the Puzzle: Finding “Yet” Among “Vet”

    In this visual challenge, the goal is to locate the word “Yet” hidden within a grid filled almost entirely with the word “Vet”. At first glance, the arrangement appears uniform, with each word blending seamlessly into the next. The hidden word is difficult to detect because it differs by only one letter.

    The distinction lies in a single character: the letter “Y” replaces the “V”. Because this variation is subtle and placed strategically within the grid, it’s easy for the eyes to glide past it. The brain quickly recognizes the repeated word pattern, making the odd one out harder to notice, especially with the added 7-second time limit increasing pressure.

    Why the Brain Struggles With This Optical Illusion

    The challenge works because the human brain is designed to process familiar patterns rapidly. Once the mind identifies a repeating word like “Vet,” it tends to assume consistency and stops examining each instance carefully. This efficiency is useful in daily life but becomes a disadvantage in puzzles like this one.

    Under time constraints, the brain is even more likely to overlook minor differences. The visual similarity between “V” and “Y” further complicates detection. This illusion forces the mind to slow down and become more deliberate, highlighting how easily perception can be influenced by expectations.

    How Optical Illusions Strengthen Focus and Mental Flexibility

    Beyond entertainment, optical illusions provide meaningful cognitive benefits. They encourage deeper concentration and train the brain to avoid making assumptions based on first impressions. By requiring closer inspection, these challenges help sharpen attention to detail.

    Regular exposure to optical illusions can enhance visual scanning, pattern recognition, and problem-solving skills. These abilities are essential in everyday activities such as reading, analyzing information, and navigating complex environments. Over time, practicing such puzzles can improve mental agility and accuracy.

    Where the Hidden Word “Yet” Appears

    If the word proved difficult to spot, the solution reveals its clever placement. The word “Yet” is located in the eighth row from the top and the third column from the left. Once the letter “Y” is noticed, the difference becomes obvious.

    This illusion highlights how small visual changes can significantly impact perception. It demonstrates the importance of balancing pattern recognition with careful observation, reminding us that details matter even when they seem insignificant at first glance.

    Why Optical Illusions Are Powerful Brain Exercises

    Optical illusions are more than simple puzzles; they offer valuable insight into how the brain processes visual information. By challenging perception and encouraging closer analysis, they support improvements in focus, concentration, and problem-solving ability.

    Whether used as a mental workout or a source of enjoyment, optical illusions provide an engaging way to keep the mind sharp. With continued practice, spotting subtle differences becomes easier, strengthening cognitive skills that carry over into everyday life.

  • Optical Illusion Vision Test: Find the Word STOP Hidden Among SHOP in 6 Seconds

    Optical Illusion Vision Test: Find the Word STOP Hidden Among SHOP in 6 Seconds

    Optical illusions are more than just pictures that trick your eyes. They challenge your brain and test how well you notice details and process what you see. This eye test is a perfect example. The task looks simple but it has a twist that makes it harder than expected. You need to find the word “Stop” hidden among many “Shopwords in just 6 seconds. Can you do it fast enough to prove your observation skills are strong? This optical illusion works because the words “Shop” and “Stop” look very similar. They differ by only one letter. When many “Shop” words appear close together your brain tends to skim over them without checking each one carefully. Your mind creates patterns to understand what it sees and fills in gaps based on what it expects. That is why your brain might miss the single “Stop” hidden among all the “Shop” words. If you want to know how your brain handles information in moments like this then this challenge is a fun way to find out. Quick visual puzzles do more than test your eyesight. They train your brain to focus when under pressure and help you scan faster and compare visual patterns better. When you try this eye test it feels like racing against time. But that race also gives your brain a workout that strengthens your thinking and improves concentration.

    Why This Eye Test Is So Challenging

    At first look, the image appears repetitive and predictable. When the eyes encounter repeating patterns, the brain quickly shifts into an energy-saving mode. Instead of examining every detail, it starts anticipating repetition. In this puzzle, the word “Shop” appears again and again in a grid, encouraging the mind to assume all entries are identical. This automatic assumption makes it easy to overlook the single word that breaks the pattern, even when it is right in front of you.

    Three key factors work together to make this test especially difficult:

    – Visual similarity: The words are nearly identical. The small structural difference between the letters “p” and “t” is subtle, especially in peripheral vision, making the odd word hard to detect.

    – Pattern expectation: Once the brain recognizes a pattern, it scans faster instead of verifying each item, which increases the chance of missing a small anomaly.

    – Time pressure: With only six seconds, the brain relies more on assumptions than careful inspection, reducing accuracy.

    Combined, these elements turn a simple-looking puzzle into a true attention test. It feels nearly impossible until focus replaces speed.

    Smarter Ways to Spot the Hidden Word

    Because time is limited, how you scan matters. Instead of letting your eyes bounce across the image, use a structured scanning approach. Focus on one small section at a time and examine it carefully before moving on. This method prevents your brain from skipping details and filling in gaps automatically.

    Another effective strategy is to stop reading words as wholes. Instead, inspect each letter individually. In a grid full of identical words, a single altered letter becomes easier to notice when you slow your focus. This technique makes the changed character stand out more clearly.

    Staying calm also improves performance. Time pressure often causes rushed eye movements and frustration. Taking one slow breath before starting can steady your attention and improve clarity, even within a few seconds.

    How Visual Challenges Benefit the Brain

    These types of visual puzzles offer more than quick entertainment. They actively train several cognitive skills. By searching for tiny differences, you strengthen attention to detail, a skill useful in everyday tasks.

    They also improve visual scanning efficiency, teaching your eyes to move methodically while still covering an entire scene. Breaking repeated patterns sharpens pattern recognition skills, which are valuable when reviewing data, reading closely, or noticing changes in familiar environments.

    Working under a time limit enhances processing speed, encouraging faster information handling without losing accuracy. These benefits extend to activities like reading, driving, problem-solving, and decision-making.

    Where the Hidden Word Appears

    After attempting the six-second challenge, the solution reveals itself. The word “Stop” is located near the bottom-left area of the grid. Although this is an area the eyes often scan early, the similarity between words and the time constraint make it easy to miss.

    The difference becomes clear once attention is focused. Instead of ending with a “p”, the word ends with a “t”, subtly altering the final letter’s shape. In solution images, this word is typically marked with a glowing circle to highlight its exact position.

    Spotting it within the time limit delivers a strong sense of satisfaction. It confirms that your visual focus and mental processing are working together effectively.

    Practice and Strengthen Your Observation Skills

    If you enjoyed this challenge, repeating similar puzzles can further sharpen your skills. Different layouts, letters, and time limits push your brain in new ways. Turning it into a friendly competition with others can make the experience even more engaging.

    Optical illusions highlight how the brain relies on shortcuts. They reveal what those shortcuts miss and encourage more mindful observation. The next time you face a crowded pattern or complex visual scene, remember this puzzle. A small difference can hide in plain sight, waiting for a careful eye to notice it.

  • Optical Illusion Eye Test: Spot the Number 982 Within 7 Seconds

    Optical Illusion Eye Test: Spot the Number 982 Within 7 Seconds

    Are you ready for a challenge that will test your eyesight & mental sharpness? The Optical Illusion 7 Seconds Challenge is here to push the boundaries of your visual perception. In this exciting puzzle you have just 7 seconds to find the hidden number 982 that is cleverly concealed among many numbers and patterns. It sounds easy but don’t be fooled because this test is designed to trick your eyes and challenge your brain while pushing your observation skills to the limit.

    The Visual Puzzle: Can You Detect the Hidden 982?

    This optical illusion challenge has one clear mission: locate the number 982 concealed inside a busy pattern filled with numbers that look almost identical—992. At first sight, everything blends together, making it hard for your eyes to separate one number from another. But somewhere within this visual maze, 982 is carefully hidden. The twist is the time limit—you have only 7 seconds to find it. This test pushes your ability to filter distractions, sharpen focus, and react quickly under pressure.

    How Optical Illusions Trick the Brain

    Optical illusions are not just entertaining—they reveal how the brain interprets visual information. These puzzles work by manipulating perception, causing the mind to misread shapes, numbers, or patterns. In this challenge, the repeated use of 992 creates visual uniformity, making the different number difficult to detect. Since the brain naturally groups similar visuals together, it may ignore the subtle variation, even when it is directly in view.

    The Power of a 7-Second Time Limit

    The countdown is what makes this challenge especially exciting. With just 7 seconds on the clock, your brain is forced to process information faster and more efficiently. This sense of urgency increases concentration and pushes your visual reaction speed. Under time pressure, the brain can actually become more alert, making this challenge a valuable exercise for improving focus and quick decision-making.

    Where the Number 982 Is Hidden

    If you are struggling to find the answer, staying calm is essential. The number 982 is positioned near the top-right area of the image. While it blends in with the surrounding numbers, a close look reveals the difference. The digits read 9, then 8, then 2, unlike the repeated 992 pattern. Once your eyes catch this slight variation, the illusion suddenly becomes much clearer.

    Why Optical Illusions Benefit Mental Performance

    Solving visual puzzles like this one offers more than just fun. These challenges help strengthen the brain in several important ways by encouraging active observation and mental engagement.

    Sharper Focus and Better Attention

    Searching for subtle differences trains the brain to concentrate deeply. This improves attention to detail, a skill that carries over into daily tasks such as reading, working, and problem-solving.

    Stronger Pattern Recognition

    Optical illusions enhance your ability to recognize patterns and spot irregularities. Developing this skill supports logical thinking and visual awareness in many real-world situations.

    Faster Mental Processing

    By requiring quick visual analysis, these puzzles boost cognitive flexibility. This helps the brain adapt faster and respond more efficiently when faced with new information.

    Long-Term Brain Stimulation

    Regularly engaging with visual challenges keeps the brain active and stimulated. Even short sessions can support overall brain health and help maintain mental sharpness over time.

    Tips to Get Better at Optical Illusion Challenges

    If you want to improve your performance in challenges like the 7-second puzzle, a few simple techniques can make a big difference.

    – Practice often to train your brain to process visuals faster.

    – Scan the image systematically, section by section, instead of viewing it all at once.

    – Stay calm under time pressure to avoid overlooking details.

    – Look for disruptions in patterns, as hidden elements often break visual consistency.

    Final Thoughts: Can You Beat the 7-Second Challenge?

    The Optical Illusion 7 Seconds Challenge is an engaging way to test visual sharpness, concentration, and mental speed. While finding the hidden 982 can feel difficult at first, the process strengthens observation skills and cognitive agility. Whether you are challenging yourself or simply enjoying a quick brain workout, puzzles like this offer a fun and rewarding way to push your limits.