Author: admin

  • People Are Mixing Kiwi Peels With Vinegar for a Reason Few Expect

    People Are Mixing Kiwi Peels With Vinegar for a Reason Few Expect

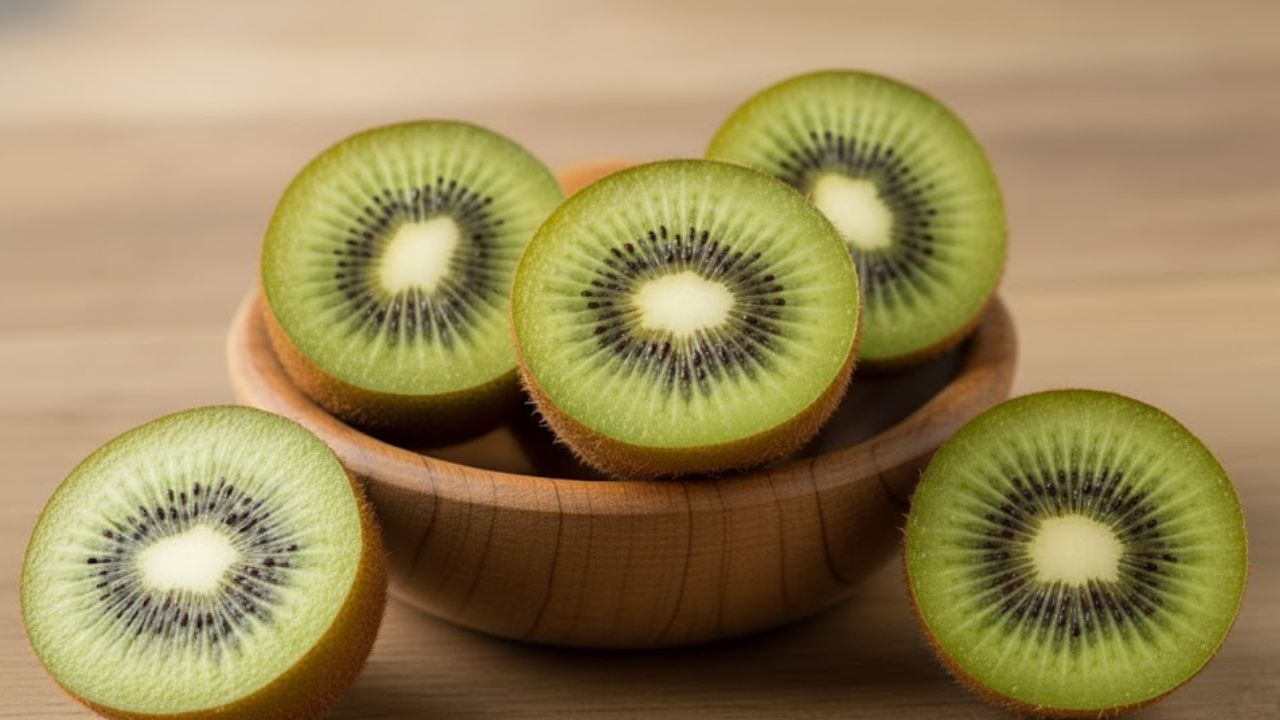
    The kitchen carried a sharp note of vinegar, quiet and still. On the counter sat a small glass bowl holding something most of us discard without pause: twisted strips of kiwi peel, bright green against a cloudy liquid. A nutritionist friend hovered over it like a miniature experiment. She stirred, waited, then smiled. “This is the part nobody mentions,” she said. “The real value often hides in what we throw away.

    I had always peeled kiwis straight into the bin, moving on without thinking. The fuzzy skin, the sticky fingers, the next task waiting. Watching those scraps soak that day felt strangely defiant. Using what’s usually wasted. Turning leftovers into something quietly useful.

    “Mix kiwi peels with vinegar,” she said, “and you don’t just make a jar. You send a signal.

    Why Kiwi Peels and Vinegar Are Suddenly Gaining Attention

    The first surprise comes fast. Once kiwi peels meet vinegar, the clear liquid shifts colour within minutes, becoming a soft green-gold, almost like a pale herbal infusion. It looks alive. On the surface, it’s just scraps in a jar. Underneath, a dense mix of polyphenols, vitamin C, enzymes and minerals slowly migrates from peel to liquid.

    Some dietitians describe it as a micro-dose of concentrated plant defence. Others stay cautious but curious. To them, the ritual sits between science and symbolism: a way to transform everyday waste into a small, caring habit. It doesn’t shout “superfood.” It works quietly, almost invisibly.

    One food scientist joked that kiwi peel is “the neighbour nobody invites, even though they’re the most useful.” Lab tests often show the peel carrying higher antioxidant levels than the flesh itself. Vinegar becomes the carrier. It doesn’t just preserve; it extracts and delivers those compounds in a form the gut can actually use.

    In a small pilot project at a university lab in New Zealand, researchers compared vinegar infusions made from different fruit scraps. Kiwi peel ranked unexpectedly high, especially after steeping for more than a week. The samples showed a stronger ability to neutralise free radicals than plain vinegar. No miracle. Just a modest lift in defensive capacity.

    There’s also a human angle. A chef in Lyon told me that during periods of rising prices, clients suddenly paid closer attention to ideas that stretched food value. She began adding fruit-peel infusions to drinks and dressings. The kiwi-vinegar version became a favourite, used in salads, sparkling water and grilled vegetables. Not for show, she said, but because it finally felt like using the whole fruit with respect.

    The logic is disarmingly simple. Plants concentrate many protective compounds in their skins: pigments, fibres and bitter molecules. We strip that layer away in seconds. Vinegar, one of the oldest preservatives, acts as a gentle solvent with a long culinary history. Put them together and a low-tech extraction happens on your counter.

    From a nutritional perspective, experts usually point to three threads. First, the potential increase in antioxidants and plant compounds that support daily repair. Second, traces of fibre and prebiotic material clinging to the peel, which may gently support gut microbes. Third, the behavioural shift: people who adopt rituals like this often waste less, cook more and pay closer attention to what they consume. That side effect may be the real headline.

    • Using scraps creatively can change how you value everyday food.
    • Simple kitchen habits often ripple into broader lifestyle choices.
    • Small actions can quietly reshape long-term routines.

    How to Make a Kiwi Peel and Vinegar Infusion at Home

    The method itself is almost absurdly simple. Peel two or three ripe kiwis, but instead of tossing the skins, rinse them briefly under cool water. Pat them dry and slice them thinner if you want more surface area. Place the peels in a clean glass jar and cover them with a mild vinegar such as apple cider, rice, or white wine vinegar.

    Leave a small gap at the top, seal the jar and give it a gentle shake. Then you wait. Most specialists suggest five to fourteen days in a cool, dark place. A daily swirl helps the process. When the scent turns fruit-sharp and the colour deepens, strain out the peels and store the flavoured vinegar in a clean bottle. A splash on salad or a spoonful diluted in water is enough.

    This is where intention meets reality. It’s easy to imagine saving every peel, labelling jars and tracking dates. Soyons honnêtes : almost nobody does this perfectly. Routines slip back in. That’s why many nutrition coaches advise starting small, perhaps with one jar a week after a relaxed weekend breakfast.

    Most mistakes come from rushing. Overfilling the jar, using an aggressively harsh vinegar, or leaving it in direct sunlight can ruin the balance. The gentler the approach, the more pleasant and usable the result.

    The other common error is expecting magic. A kiwi peel infusion will not cancel out poor sleep, heavy smoking or an ultra-proces

  • Skip sit-ups and use this 8-move workout to build stronger abs more effectively

    Skip sit-ups and use this 8-move workout to build stronger abs more effectively

    Many people in India still rely on endless sit-ups to train their core, but modern fitness research shows there are smarter ways to build strong abs. This 8-move workout focuses on controlled movements, full-core engagement, and better muscle activation without stressing the neck or lower back. By skipping traditional sit-ups, you can improve stability, posture, and overall strength more efficiently. Whether you work out at home or in a gym, this approach suits busy lifestyles and supports long-term fitness goals with less strain and more balanced results.

    Why skipping sit-ups builds stronger abs more efficiently

    Sit-ups often rely on momentum and hip flexors, which can limit true core engagement. An 8-move workout shifts the focus to movements that train the abs as stabilisers rather than simple flexors. Exercises like planks, dead bugs, and controlled leg movements activate deeper muscles, improving spinal support and balance. This approach encourages core muscle control, promotes joint-friendly training, and reduces the risk of overuse injuries. By emphasising quality over quantity, you develop functional strength gains that translate into better posture and daily movement. Over time, these exercises also support lower back safety while helping you feel stronger and more confident.

    How the 8-move abs workout targets the full core

    This workout is designed to challenge the front, sides, and deep layers of the core in one session. Instead of isolating one area, each move encourages coordinated effort across multiple muscle groups. Rotational and anti-rotation exercises improve stability, while slow tempos increase time under tension. The result is deep core activation that traditional sit-ups rarely achieve. You also benefit from balanced muscle engagement, which supports athletic performance and everyday tasks. Because the routine uses bodyweight and simple positions, it fits easily into home workouts and promotes consistent training habits without the need for equipment.

    Making this sit-up-free abs routine part of your week

    Consistency matters more than intensity when building lasting core strength. This 8-move workout can be done three to four times a week, taking less than 20 minutes per session. Start with manageable hold times or repetitions and gradually progress as control improves. The variety keeps workouts engaging and supports progressive core overload without burnout. Many people notice improved posture awareness within weeks, along with better movement confidence. By avoiding repetitive sit-ups, you protect your spine and create sustainable fitness progress that fits long-term health goals.

    Summary and practical takeaways

    Skipping sit-ups does not mean skipping core training; it means training smarter. This 8-move workout encourages controlled movement, stability, and full-core involvement rather than high-rep strain. Over time, these exercises support everyday movement strength, reduce discomfort, and improve overall body control. For people aiming for visible abs or better functional fitness, the key lies in patience and proper technique. When paired with regular activity and balanced nutrition, this approach delivers long-term core resilience while keeping workouts safe, effective, and enjoyable.

    Workout Element Primary Benefit
    Plank Variations Improves core stability
    Dead Bug Enhances coordination
    Leg Raises Targets lower abs
    Bird Dog Supports spinal control
    Side Plank Strengthens obliques

    Frequently Asked Questions (FAQs)

    1. Is this workout suitable for beginners?

    Yes, movements can be scaled with shorter holds and fewer repetitions.

    2. How often should I do this 8-move abs workout?

    Three to four sessions per week work well for most people.

    3. Do I need equipment to skip sit-ups?

    No, the routine uses bodyweight and simple floor exercises.

    4. Will this help reduce back strain?

    Yes, controlled core exercises generally place less stress on the spine.

  • Hanging This Near the Shower Stops Damp Smells Before They Start

    Hanging This Near the Shower Stops Damp Smells Before They Start

    Not filthy, just unmistakably bathroom air. You open the window, wave your hand through the room, maybe spray something labeled “fresh cotton” that quickly turns into a sharp chemical cloud. Ten minutes later, the air still feels thick and stale.

    It’s oddly familiar: you spend a short time under hot water, yet the room stays damp for hours. Corners grow darker, paint near the ceiling begins to peel, and silicone seams slowly turn black. Over time, it starts to feel normal, like a door that squeaks or traffic noise you stop noticing.

    Then one day, in someone else’s bathroom, you spot a small, unremarkable object hanging quietly near the shower. No device, no filter, just a simple bag. Their bathroom feels dry, almost crisp. A quiet, low-effort trick is doing all the work.

    Why your bathroom remains damp long after every shower

    Step into a compact bathroom after a hot shower and the air seems to cling to your skin. Steam lingers near the ceiling, droplets settle on tiles, and the mirror looks permanently frosted. This isn’t just uncomfortable. Trapped moisture slowly alters the room.

    Paint begins to curl, grout lines darken, and doors subtly warp. Eventually, small black marks appear in corners and along silicone joints. You clean them away, only for them to return. The bathroom becomes a space you constantly maintain yet never fully trust. The air rarely feels truly fresh.

    In many homes, especially apartments, the issue isn’t poor hygiene. The room simply cannot breathe. Ventilation fans are weak or too loud to run for long. Windows open onto cold courtyards or noisy streets. As a result, moisture lingers, hiding in towels, bath mats, and the tiny pores of walls.

    During winter in a northern city, researchers measured humidity levels in a typical family bathroom. With a hot shower and the door closed, relative humidity rose from 50% to over 90% in just six minutes. An hour later, it still hovered above 70%, even after partial ventilation.

    One homeowner in a 1970s building described it as “living with a permanent cloud in the bathroom.” Monthly mold scrubbing, constant airing, and changing cleaning products made little difference. The stains always returned, darker than before. The fan rattled loudly, so no one wanted to leave it running.

    When she finally hung a moisture-absorbing bag near the shower head, the change felt almost suspicious. No noise, no installation. Just a steady reduction in that heavy, sticky air. Towels dried faster, mirrors cleared sooner, and the bag slowly collected water that would otherwise have stayed in the room.

    Moisture behaves like a stubborn guest. Once in the air, it slips into soft surfaces such as curtains, bath mats, and even toilet paper. Fans and open windows mostly shift humid air around. Unless the water leaves the room or is captured, it settles again. Hanging an absorber near the shower turns invisible steam into visible liquid you can remove.

    • Centenarian shares daily habits behind mental resilience and long life
    • Add two drops to your mop bucket for a long-lasting fresh scent
    • The taxi method that keeps car interiors fresh without air fresheners
    • The overlooked truth about an inexpensive fish staple
    • Experts warn seven modern parenting trends linked to rising unhappiness
    • The longest solar eclipse of the century already has a scheduled date
    • How incorrect rug placement increases household dust
    • School district adopts a four-day week, sparking parent backlash

    Hanging it by the shower: how this simple solution works

    The idea is almost disappointingly straightforward. You hang a moisture absorber where steam is most concentrated, near or slightly above the shower. No drilling or tools are needed, just a hook or adhesive hanger and a bag filled with hygroscopic crystals such as calcium chloride.

    As you shower, steam rises and spreads. The crystals attract water molecules from the air and bind them, slowly forming liquid brine that collects at the bottom of the bag. Instead of settling on ceilings and corners, a portion of that humidity is trapped and removed.

    The changes show up in small, practical ways. Mirrors clear faster, bath mats lose their constant chill, and the faint stale smell after a hot shower fades. The bathroom starts to feel like a normal room again. Over weeks, the bag fills, faster in small or windowless spaces. Once full, it is emptied or replaced.

    Setting it up takes less than a minute. The ideal spot might be a corner of the shower rail, a waterproof adhesive hook, or the back of a shower door that swings inward. The key is placing it in the path of rising steam, not directly under running water.

    Many people pair this with small habits such as spreading the shower curtain open or hanging towels fully unfolded. These actions improve air circulation and make the absorber more effective. Doing this most days, even without perfect consistency, noticeably changes how the room feels.

    The emotional benefit is subtle. Later in the day, the bathroom air feels neutral rather than sour. Concerns about ceiling mold fade into the background. It removes one quiet irritation from daily life.

    “I thought it was a gimmick at first,” says Emma, who lives in a small flat with a barely functioning fan. “After two weeks, the bag was half full of water. That was the same moisture that used to sit in my walls.”

    Simple checks to improve results

    • Hang the absorber at least a hand-width below the ceiling to allow airflow.
    • Keep it away from direct splashes so the crystals do not dilute too quickly.
    • Use short bursts of ventilation after longer showers.
    • Replace the bag once the crystals have fully liquefied.

    Some people feel disappointed when the bag is placed too low or hidden behind a curtain where steam rarely passes. Small adjustments matter. Moving it slightly higher or closer to where steam gathers can make the bathroom feel drier within days. It follows the natural movement of moisture.

    Living with a drier bathroom, one small hook at a time

    After a few weeks, most people stop noticing the bag. That’s when the real change has occurred. The bathroom no longer demands attention each time you enter. There’s no instinctive glance at ceiling corners or mental note about scrubbing grout.

    Some households experiment by adding a second bag behind the door or under the sink where pipes sweat in summer. Others settle on one well-placed absorber and a minor routine change, such as leaving the door ajar after showers. Families often notice towels staying fresher longer, as less moisture lingers in fabrics.

    At its core, it’s about reclaiming a small space meant for comfort. A hot shower after a long day feels better when the room greets you with light, clean air. Paint lasts longer, silicone stays clearer, and maintenance effort drops. A single hanging bag won’t renovate a bathroom, but it changes how the space is experienced.

    Readers often share quiet before-and-after moments. Fewer arguments about leaving the fan on. Less mold between tenant visits. Reduced musty smells in crowded apartments. Each story points to the same outcome: a simple habit easing a persistent problem.

    You don’t need to make a point of it. You hang the bag once. One morning, the mirror clears a little faster. Then you notice the water collected inside and realize how much moisture used to linger in the air. One hook, one bag, and a little less dampness shaping daily life.

    • Place an absorber near the shower: Hang it where steam concentrates, without direct water contact.
    • Monitor the filling level: Replace or empty the bag once crystals liquefy.
    • Combine with small habits: Brief ventilation, open curtains, and unfolded towels improve results.
  • Homemade Eyebrow Gel Using Aloe and Cocoa Creates Soft Natural Hold

    Homemade Eyebrow Gel Using Aloe and Cocoa Creates Soft Natural Hold

    The radiator clicked to life with its familiar metallic rhythm, a sound that usually promised comfort. Outside, wind slid through bare branches, tapping the windows as if warning that colder days were settling in. Indoors, the room was warm, yet the air felt thin and dry. Your throat felt scratchy, your hands felt tight, and your nose hovered on the edge of a sneeze.

    That was when a memory surfaced—something once mentioned by an older relative or read somewhere online—about placing a glass of water near a radiator to make a room feel warmer. It sounded unlikely, almost like an old superstition. Still, as the evening stretched on and the dryness became more noticeable, you filled a glass and set it beside the heat source. Slowly, quietly, something began to shift, the way winter often reveals its effects without announcement.

    The Subtle Science Behind a Glass of Water

    The idea that a simple glass of water could improve comfort without raising heating costs seems almost too gentle to be true. Water doesn’t create heat, and it certainly isn’t acting as a hidden heater. The change happens elsewhere. It’s not about generating warmth, but about helping your body feel the warmth already present.

    When a radiator runs, it warms the room while also pulling moisture from the air. At first, this dryness is easy to overlook. It shows up as dry skin, a scratchy throat, static in clothing, or small shocks from metal surfaces. What’s less obvious is how this lack of moisture quietly alters the way your body experiences temperature.

    Why Dry Air Makes Warm Rooms Feel Cooler

    Your body constantly exchanges heat with its surroundings. In very dry air, moisture evaporates more quickly from your skin and from every breath you release. This evaporation draws heat away from your body, creating a subtle cooling effect—even when the room itself is warm. The radiator may be working exactly as intended, but your body doesn’t fully agree.

    Placing a glass of water near the heat allows it to warm gradually and release moisture through gentle evaporation. Even a small increase in humidity can reduce moisture loss from your skin and lungs. The temperature remains the same, yet the air feels softer, warmer, and more comfortable.

    Aloe Vera as a Gentle Brow Base

    Aloe vera has soothed skin for centuries, long before it became a packaged cosmetic. In its pure form, the gel feels cool, light, and non-sticky. On eyebrows, it works quietly, offering control without stiffness.

    In a homemade brow gel, aloe serves as the base. Its natural texture provides light-to-medium hold, keeping brow hairs in place while allowing them to move naturally. When using a high-quality gel with minimal additives, it also adds a touch of hydration, turning styling into care.

    Cocoa Powder for Natural Definition

    Cocoa powder adds depth and warmth through its natural pigment. Its soft brown tone blends well with light to medium-dark brows, creating definition without harsh edges. When mixed with aloe, it produces a subtle, stain-like effect rather than a bold, painted finish.

    The amount controls the result. A small pinch offers gentle enhancement, while a little more deepens the shade. The color merges smoothly with natural brows, avoiding sharp lines. Using a familiar kitchen ingredient to frame the face brings a quiet sense of balance between beauty and simplicity.

    Preparing Your Simple Brow Gel Setup

    Making brow gel at home feels more like a calm routine than a cosmetic task. A clean jar, a small spoon, and a spoolie brush are all that’s needed. The process is unhurried and hands-on, inviting focus rather than rush.

    At its simplest, the formula uses only aloe vera gel and cocoa powder. Optional additions, such as a drop of jojoba oil for smoothness or a pinch of coffee or charcoal for deeper color, can be included later. The appeal lies in its simplicity—just two ingredients combined with care.

    • Pure aloe vera gel (2 teaspoons): Acts as the base, offering natural hold, smooth application, and moisture.
    • Unsweetened cocoa powder (¼–½ teaspoon): Provides soft, natural color to enhance brows.
    • Small clean glass jar: Used for mixing and storing the finished gel safely.
    • Spoolie or angled brow brush: Helps apply and shape the gel evenly.
    • Mini spoon or mixing stick: Used to blend ingredients smoothly.

    Mixing the Gel Slowly and Evenly

    Spoon the aloe vera gel into a clean jar. Sprinkle in the cocoa powder and stir gently, pressing out any clumps as you go. The clear gel gradually turns into a smooth, earthy brown.

    Test the shade on the back of your hand and allow it to dry briefly. Adjust by adding more cocoa for depth or more aloe for softness. The finished texture should be creamy and light, thick enough to cling to a brush without feeling heavy. Once mixed, close the jar and let it rest for about an hour so the blend settles evenly.

    Applying the Gel with a Light Touch

    Begin with clean, dry brows. Dip a spoolie lightly into the gel and remove any excess. Brush through the brows using short, gentle strokes that follow the natural direction of hair growth.

    Start at the inner brow and move outward, shaping rather than drawing. For added definition, allow the first layer to dry before applying another, focusing on sparse areas. An angled brush can help mimic individual hairs if needed. The finish stays soft and flexible, never stiff.

    Choosing Simplicity in Daily Care

    Creating a product at home carries quiet intention. It reduces waste, limits unnecessary ingredients, and brings awareness back to the act of making. Each refill of a small jar replaces a disposable tube, and each application reinforces that beauty doesn’t need to be complicated.

    Natural solutions are personal, and paying attention to your skin is essential. Patch testing and small adjustments are part of the process. Still, there is value in slowing down, mixing something by hand, and shaping your brows with care rather than haste.

    In that brief moment—brush in hand, cocoa-scented gel nearby—it becomes clear that beauty can be gentle, practical, and deeply personal. Sometimes, it begins with the simplest things.

  • Everyday Household Oils That Help Grow Thicker Brows and Longer Lashes Over Time Naturally

    Everyday Household Oils That Help Grow Thicker Brows and Longer Lashes Over Time Naturally

    Eyebrow thinning rarely happens all at once. It emerges slowly, often under the bathroom light as you lean closer with a cotton pad in hand. A few hairs near the tail seem shorter, and the once-defined arch appears uneven. Factors like age, years of overplucking, stress, or dry indoor air can all contribute. Regardless of the cause, this change can make your face feel unfamiliar, as if something essential around your eyes has diminished. Soon, every fallen lash during nightly makeup removal draws your attention.

    The Subtle Power of Everyday Oils

    Before investing in expensive serums or complex formulations, consider what you already have at home. In many UK households, simple oils like olive oil, coconut oil, or castor oil sit quietly on shelves. These oils may lack luxury branding, but with patience and consistency, they provide gentle nourishment for delicate brow and lash hairs, supporting healthier growth over time.

    Why Eyebrows and Lashes Matter Emotionally

    Eyebrows and eyelashes often carry emotional significance. Many women recall periods of heavy makeup, overplucking trends, or hormonal shifts that impacted hair growth. When brows thin or lashes weaken, the face can appear tired or unfamiliar, subtly affecting self-image. Opting for a natural approach feels gentler and aligns with a slower, mindful lifestyle. While oils don’t promise immediate results, regular use helps the body’s natural processes work more effectively.

    Household Oils That Support Hair Health

    Several common oils offer supportive properties for brows and lashes:

    • Castor Oil: Thick and slightly sticky, rich in ricinoleic acid, locks in moisture, strengthens hair fibres, and reduces breakage.
    • Coconut Oil: Light to medium texture, melts on contact, penetrates the hair shaft, reduces protein loss, and softens hairs.
    • Olive Oil: Medium weight, antioxidant-rich, supports the skin barrier around roots, and improves flexibility.
    • Sweet Almond Oil: Smooth and silky, absorbs easily, gentle for sensitive eye areas while nourishing fine hairs.
    • Argan Oil: Lightweight, non-greasy, high in vitamin E and essential fatty acids, improves strength and resilience.

    Building a Calm Evening Routine

    Consistency is key. The most effective routines integrate naturally into your evening. Begin with clean, makeup-free eyes and freshly washed hands. Choose one oil or a simple blend, apply a small amount to the brows using a clean spoolie, and lightly coat the upper lashes. Gently blot any excess oil to avoid irritation. Following this nightly for several weeks transforms the process into a soothing ritual rather than a task.

    Respecting Sensitive Eye Skin

    The skin around the eyes is delicate, so awareness is essential. Always perform a patch test with new oils and start with minimal amounts. If irritation occurs, switch to a lighter oil. Avoid getting oil in the eyes, and rinse gently if it happens. Those with existing eye conditions or ongoing treatments should consult a pharmacist or GP. Progress is gradual; focus on reduced shedding and subtle fullness instead of rapid results.

    Daily Habits That Encourage Healthier Hair Growth

    Oils work best when combined with supportive habits. Reducing waterproof mascara use, gentle makeup removal, and a balanced diet rich in protein, healthy fats, and minerals all contribute to healthier hairs. Managing stress and paying attention to hormonal balance also affect growth. Oils provide external care, while nutrition, rest, and lifestyle form the foundation underneath.

    Creating a Simple Personalized Oil Blend

    Once comfortable, blending oils at home is straightforward. A combination of castor oil for thickness, almond oil for softness, and argan oil for light nourishment works well. Store in a clean container, label with the date, and use within a few months. This personalized approach keeps your routine clear, reliable, and made from ingredients you know and trust.

  • A personal trainer for seniors recommends these 4 seated exercises for core strength

    A personal trainer for seniors recommends these 4 seated exercises for core strength

    I work with many clients aged 65 and older, and some of them find it difficult or uncomfortable to get down onto a yoga mat for traditional floor-based core exercises. That doesn’t mean we avoid core work altogether. Ab training is still essential, even when movements need to be adapted.

    Building a strong core matters at every stage of life, but it becomes especially important for seniors. Core muscles such as the transverse abdominis and internal obliques support breathing, posture, and balance—areas that are often a priority for older adults who want to stay active and independent.

    When I’m working with someone who has mobility limitations, I rely on these four seated exercises as part of their core-strengthening routine. Even if you’re comfortable exercising on the floor, adding these movements can introduce variety and a new challenge to your abdominal workouts.

    How to Perform These Seated Core Exercises

    This workout requires no equipment other than a sturdy chair.

    Before beginning any new exercise routine, it’s important to check with your medical team. I also recommend working with a certified personal trainer, especially if you’re new to exercise. They can help refine your form and suggest modifications or alternatives when needed.

    Complete each exercise for 1–3 sets of 10–15 repetitions. If you’re just getting started, begin with fewer reps and sets, then gradually increase as your strength and confidence improve.

    1. Seated Torso Twist

    • Sit on the edge of a chair with your feet flat on the floor.
    • Maintain a neutral spine and engage your core.
    • Cross your arms, placing your hands on your shoulders.
    • Rotate your torso to the right while staying tall.
    • Return to the center, then twist to the left.
    • Alternate sides for 10–15 reps per side.

    2. Seated Knee Lifts

    • Sit upright on the edge of a chair with your feet grounded.
    • Engage your core muscles and keep your spine tall.
    • Slowly lift your right foot, keeping the knee bent.
    • Lower it back to the floor with control.
    • Repeat on the left side.
    • Continue alternating for 10–15 reps per side.

    3. Seated Side Bends

    • Sit on the edge of a chair with your feet flat.
    • Engage your core and maintain a neutral spine.
    • Place both hands behind your head.
    • Lower your left elbow toward the floor, contracting the left side of your torso.
    • Return to the center, then repeat on the right side.
    • Alternate sides for 10–15 reps per side.

    4. Seated Bicycles

    • Sit tall on the edge of a chair with your core engaged.
    • Place both hands behind your head.
    • Lift your right foot and rotate your torso so your left elbow moves toward your right knee.
    • Return to the starting position.
    • Repeat on the opposite side.
    • Alternate for 10–15 reps per side.

    If reaching your elbow to your knee feels challenging, work within a smaller, comfortable range of motion.

    Benefits of Seated Core Exercises

    This seated workout targets key core muscles, including the rectus abdominis, internal and external obliques, and the transverse abdominis. Together, these muscles help stabilize the body, support internal organs, assist with vital bodily functions, and maintain proper posture.

    Many traditional core exercises require lying on the floor, which may not be suitable for individuals with mobility concerns or certain injuries. Because these movements are performed while seated, they are accessible to a wide range of fitness levels and can be safely adjusted or progressed with guidance from a qualified personal trainer or physical therapist.

  • Natural Henna Hair Dye Recipes for Safe, Vibrant and Long-Lasting Results

    Natural Henna Hair Dye Recipes for Safe, Vibrant and Long-Lasting Results

    The first time I used henna to dye my hair the kitchen smelled like an old pharmacy. The air was filled with the smell of wet dirt and dried leaves that felt warm & strangely nice like someone had soaked soil in hot water. A ceramic bowl sat on the counter filled with deep green paste that looked thick and shiny like melted chocolate mixed with plant matter. I stopped for a second with the spoon hanging over the bowl & thought about whether this muddy mix could really work as well as the shiny boxes of hair dye at the drugstore. Then I put the brush in the paste and separated my hair and spread it through my strands. The henna felt cool and thick like a face mask on my scalp and this natural hair color started to stain my hands and my hair and later changed how I thought about beauty.

    Why Henna Still Feels Like Magic in a Chemical World

    Walking through a modern hair dye aisle often feels overwhelming—sharp chemical smells, bold promises, and warning labels tucked into tiny print. To achieve a perfect shade, many people accept ammonia, peroxide, and synthetic formulas as a normal trade-off. Henna offers a completely different experience. Derived from the Lawsonia inermis plant, henna has been used for thousands of years to stain hair, skin, and fabric naturally. When mixed with warm liquid, its lawsone pigment releases slowly, binding gently to keratin. Instead of stripping hair, henna wraps each strand in a translucent layer of color, leaving hair stronger, glossier, and visibly healthier. The scent is earthy and real—more like leaves and tea than perfume—turning hair coloring into a grounding ritual rather than a rushed cosmetic chore.

    Choosing Pure and Honestly Labeled Henna

    The quality of henna matters more than anything else. True henna should be pure, body-art-quality powder without metallic salts or synthetic dyes. Many negative experiences come from so-called compound hennas that contain hidden chemicals. Good henna feels soft and finely sifted, smells grassy and fresh, and never sparkles or smells artificial. Freshness is crucial, as henna loses staining power over time. Reading labels carefully and sourcing responsibly becomes part of the process. You’re not just buying color—you’re choosing a plant grown under sun and soil, harvested and ground with care. When henna is respected as a living material, the results on your hair are noticeably richer and more reliable.

    Building a Simple Henna Toolkit

    Henna doesn’t require expensive tools. A glass, ceramic, or stainless-steel bowl, a spoon, gloves, an applicator brush, plastic wrap, and an old towel are enough. Avoid reactive metals, and always protect your hands and clothes. More important than tools is patience. Henna works slowly, releasing dye over hours instead of minutes. Compared to instant chemical dyes, henna feels more like cooking a slow meal than using fast food—intentional, unhurried, and far more rewarding in the end.

    Classic Henna Recipe for Copper Tones

    The simplest recipe creates warm copper shades. Mix pure henna powder with strong warm tea until it reaches a yogurt-like consistency. Optional lemon juice or apple cider vinegar can help dye release if your scalp tolerates mild acidity. Let the mixture rest for 4–8 hours until the color deepens. Apply evenly to clean hair, wrap, and leave for 2–4 hours. After rinsing, the color may appear bright orange at first, but it will oxidize over several days into a more natural copper or auburn, depending on your base hair color.

    Creating Auburn and Brown Shades Naturally

    Henna can be softened or deepened by combining it with other plant powders. Mixing henna with amla reduces brightness and adds cooler auburn tones while supporting hair texture. For brown or chocolate shades, a two-step process works best: first apply henna for a red base, then follow with indigo to deepen the shade. This method offers better control and more predictable results, especially on light to medium hair, producing colors ranging from chestnut to near black.

    Ingredient Used Primary Benefit Ideal For
    Amla Powder Softens strong red tones into cooler auburn and boosts hair body Anyone aiming to reduce orange hues and achieve a balanced brown-red shade
    Indigo Powder Transforms henna color into deep brown or near-black tones Gray coverage seekers or those wanting dark brunette results
    Cassia (Neutral Henna) Enhances shine with a light golden glow and little color deposit Blonde or light hair types looking for warmth and gloss
    Black Tea / Coffee Adds subtle depth and richness to overall hair tone Medium to dark hair needing a deeper, fuller color finish
    Chamomile Tea Naturally brightens with soft golden warmth Light hair shades wanting a gentle sun-lit effect
    Aloe Vera Gel Improves moisture retention and smooth paste consistency Dry, curly, or fragile hair needing added hydration
    Essential Oils (Lavender, Rosemary) Enhances fragrance and may calm or stimulate the scalp Those sensitive to henna scent or focused on scalp comfort

    Henna Gloss for Subtle Color and Shine

    If you prefer a gentle effect, a henna gloss is ideal. Mix a small amount of henna paste with a silicone-free conditioner and apply it like a hair mask. Leave it on for 45–90 minutes before rinsing. This method adds soft highlights, warmth, and noticeable shine without a dramatic color shift. It’s a perfect way to experiment with henna before committing fully.

    Finding Your Ideal Shade Through Layering

    Henna builds color gradually. Each application adds depth, gloss, and richness. Lighter hair turns golden-copper, medium hair becomes chestnut or auburn, and dark hair reveals subtle red tones in sunlight. Gray strands transform into warm highlights rather than disappearing completely. Because henna fades slowly, starting gently is wise. You can always deepen the shade with future applications while maintaining hair health.

    Safety, Patch Tests, and Hair History

    Even natural dyes require care. Always perform a patch test to check for sensitivity. Apply a small amount to skin, rinse, and observe for 24–48 hours. Be cautious if your hair has a history of chemical dyes, especially those with metallic salts. Pure henna is generally safe, but poor-quality products can cause unexpected reactions. Protect your hairline with oil, ventilate the room, and allow adequate processing time without rushing.

    Aftercare and Long-Term Results

    Rinsing henna is a slow process, but warm water and patience help remove the paste completely. Many people avoid shampoo for the first 24 hours to let the color settle. Over several days, the shade deepens and stabilizes. With gentle cleansing and minimal sulfates, henna color lasts well. Regular root touch-ups or occasional gloss treatments keep the color consistent while maintaining hair strength and shine.

    The Quiet Power of Plant-Based Hair Color

    Henna doesn’t fight your natural hair—it works with it. Grays become highlights, natural variations become part of the beauty. Choosing henna is a quiet rebellion against harsh chemicals and rushed beauty standards. It invites patience, earthiness, and connection. The result isn’t a salon-perfect uniform shade but a living color shaped by time, light, and nature—one that feels deeply personal and grounded.

  • The Best Boots for Different Leg Shapes and Style Preferences According to a French Fashion Editor

    The Best Boots for Different Leg Shapes and Style Preferences According to a French Fashion Editor

    This is a practical, experience-led guide to choosing boots based on different silhouettes—calves, height, proportions—and understanding why certain styles work better than others. It’s not about rigid body-type formulas, but about balance, comfort, and real-life dressing, shaped by years of fittings, styling sessions, and trial and error.

    Boots are often discussed purely through an aesthetic lens—trends, shaft heights, or what supposedly lengthens or slims a silhouette. Far less attention is given to what actually happens once you put them on: how you move, how you stand, how you feel, and how comfortable you are with what the mirror reflects.

    After years of trying boots on myself and fitting them on countless others across endlessly varied silhouettes, I’ve reached one clear conclusion: there is no universal boot style. There are only boots that work—or don’t—depending on proportions, habits, and which parts of your body you enjoy highlighting or prefer to keep understated.

    What follows are reference points and observations, not rules.

    Boot Choices for Slim, Streamlined Legs

    With slim legs, the challenge is rarely a lack of options—it’s excess volume. Boots that are too wide can create a floating effect, visually swallowing the leg rather than supporting it.

    Fitted yet structured boots in leather that holds its shape tend to work best. Sleek, tall boots with a modest heel or a solid block heel support the leg without weakening its line. Even chunky, army-inspired boots—often assumed to be too heavy—can look striking on streamlined legs when the contrast feels intentional. Adding thick knee-high socks, tights, or bare skin ensures the boots read as a deliberate styling choice rather than an afterthought.

    I’m particularly drawn to architectural, chunky boots with substantial heels. They add weight and presence, grounding the silhouette and creating a strong, fashion-forward sense of density. However, I avoid pairing them with dresses or skirts. The contrast is often too abrupt and can visually shorten the figure, especially when the hemline sits at or just above the knee.

    Where these boots truly excel is with trousers—straight-leg pants, slightly long jeans, or softly breaking hems. In these combinations, the chunky heel does exactly what it should: it structures the outfit, adds substance, and grounds the silhouette without disrupting balance.

    Boots for Legs with Strength and Presence

    I prefer to think in terms of strength and presence rather than framing fuller legs as a challenge. Certain boots simply need to be inhabited rather than fought.

    The most common misstep is choosing boots that are too narrow, compressing the calf and creating both visual and physical tension. Instead, straight or slightly flared shafts, rigid leather, and clean lines work far better. Heights that reach the knee or extend above it tend to feel the most balanced.

    Biker boots are a natural fit here. Their wider construction accommodates volume rather than resisting it, offering comfort, confidence, and a sense of authority. Over-the-knee boots also belong in this category. Thigh-high styles benefit from density and substance, working best when they aren’t trying to “fix” anything.

    I favor non-stretch versions, worn simply with a straight-cut dress or a long coat, without any exaggerated attempt at sensuality. The result feels grounded, confident, and unforced.

    How Petite Women Can Choose the Right Boots

    For petite silhouettes, everything hinges on visual continuity. The height of the boot matters less than how seamlessly it integrates into the overall outfit.

    Mid-height, stable heels are especially effective, particularly when the boots closely match the color of the trousers or tights. This tonal alignment naturally elongates the figure without effort.

    Pointed-toe ankle boots are another reliable option. In contrast, sharp color breaks or very tall, flat boots paired with skirts that hit directly at the knee often shorten the silhouette and disrupt flow.

    For Those Who Prefer Not to Show Their Knees

    This preference is far more common than it’s given credit for. Many women simply feel uncomfortable showing their knees, and that choice is entirely valid. In these cases, tall boots offer an elegant solution.

    Paired with skirts or dresses, they allow for leg exposure while keeping the knee covered. Suede or shearling-lined boots, particularly in beige or natural shades, are especially effective. They shift attention toward texture, material, and tone rather than focusing on a specific body area.

    The goal isn’t concealment—it’s redirecting the eye.

    Flat Boots for All-Day Wear and Comfort

    This is a practical reality for many people and is too often framed as a compromise. When heels aren’t an option, flat boots are not a downgrade. In many cases, they’re the stronger choice.

    My top pick here is riding boots. They offer understated elegance, clean lines, and leather that improves with age. They provide structure without aggression and can be worn for hours without discomfort, all while carrying an entire outfit effortlessly.

    I also appreciate reimagined rain boots. Worn with short dresses or skirts—almost in contrast to their original purpose—they become unexpectedly chic. On rainy days, they work just as well with slightly cropped trousers that hit at the ankle. Once again, it’s about proportion and ease.

    Then there are cowboy boots, which I wear often—either layered over trousers for a sharp finish or tucked neatly underneath. It’s a bold choice, but when it works, it feels confident, personal, and unapologetic. It’s the kind of styling detail that doesn’t aim to please everyone, and that’s precisely why it succeeds.

  • Here’s How Long You Should Hold a Plank at Every Age According to Fitness Experts

    Here’s How Long You Should Hold a Plank at Every Age According to Fitness Experts

    Plank duration can vary widely, and fitness professionals agree that age plays a key role. The plank is a classic strength exercise performed by balancing on your forearms and toes while keeping your body straight, much like a wooden board.

    This simple movement delivers multiple health benefits, including better core strength, improved posture, and positive effects on mental wellbeing. One of its biggest advantages is accessibility, as planks can be done at home without any gym equipment.

    According to Guinness World Records, the longest plank ever recorded lasted nine hours, 38 minutes, and 47 seconds, achieved by Czech therapist and lecturer Josef Šálek. While impressive, most people will find holding a plank for even short periods challenging.

    Here’s a general guide to recommended plank times based on age.

    Plank Goals for Ages 20–39

    If you’re in your twenties or thirties, aiming for 45 to 60 seconds is considered a strong benchmark. Personal trainer Joseph Webb explains that holding a plank for this duration reflects solid core endurance and stability.

    He also notes that the goal isn’t to chase a specific number, but rather to develop functional core strength that supports everyday movement and activities outside the gym.

    Plank Expectations for Ages 40–59

    For individuals in their forties and fifties, typical plank times may reduce to around 30 to 45 seconds. Webb shares that consistently holding a plank within this range, while maintaining proper form, demonstrates very good trunk stability.

    Reaching 60 seconds at this stage is often seen as a sign of excellent core control and overall strength for this age group.

    Plank Recommendations for Ages 60 and Above

    For those aged sixty and older, a target of 15 to 30 seconds is generally advised. Building up to a 30-second hold is considered an excellent indicator of functional core strength later in life.

    Key Benefits of Doing Planks Regularly

    Back protection is one of the main advantages of planking. A strong core helps support the spine during daily movements such as lifting children or bending forward during household tasks, according to exercise physiologist Katie Lawton.

    Planks also enhance flexibility. Health experts note that the plank position stretches the hamstrings and foot arches, making it both a strengthening and stretching exercise.

    Developing core strength through planks can reduce the risk of exercise-related injuries. A stable core helps maintain proper spinal alignment during movements like squats and deadlifts, improving overall performance.

    There are also mental health benefits. Regular exercise, including planking, can boost confidence and motivation as you notice improvements in strength and endurance.

    Finally, planks support better posture. By strengthening isometric core muscles, planks help prevent hunching while standing or sitting for extended periods.

  • No Touch-Ups Needed These Affordable Drugstore Lip Stains Stay Put All Day Without Fading

    No Touch-Ups Needed These Affordable Drugstore Lip Stains Stay Put All Day Without Fading

    Long-lasting lip color is a must for busy routines, and in the United States, affordable beauty products are becoming smarter than ever. Drugstore lip stains now promise all-day wear without constant touch-ups, making them ideal for workdays, travel, and social plans. These formulas focus on comfort, color payoff, and durability while staying budget-friendly. From lightweight tints to bold pigments, many options rival high-end brands. This guide breaks down how these affordable lip stains work, why they last, and what makes them a reliable choice for everyday makeup lovers.

    Affordable Drugstore Lip Stains That Last All Day

    Drugstore lip stains have evolved to deliver impressive staying power without the heavy feel of traditional lipsticks. Many use advanced pigments that bond gently to the lips, creating long-wear color that resists fading. Users appreciate the budget-friendly beauty factor, especially when performance rivals luxury brands. These stains often dry down quickly, helping avoid smudging during meals or drinks. With transfer-resistant finish and lightweight comfort feel, they suit everyday wear. The growing range of shades also means there’s something for minimal looks and bold statements alike.

    Why No-Touch-Up Lip Stains Are So Popular

    The appeal of no-touch-up lip stains lies in their practicality. Once applied, many formulas lock in pigment, offering fade-proof formula that stays consistent for hours. This makes them ideal for long workdays or events where reapplying isn’t convenient. Consumers also value the mask-friendly wear and reduced mess compared to creamy lip products. Thanks to quick-dry pigments and natural tint look, lips appear fresh without feeling overdone. Popularity has surged as shoppers look for reliable makeup that fits fast-paced lifestyles.

    Choosing the Best Drugstore Lip Stain for You

    Selecting the right lip stain depends on comfort, shade, and finish. Some people prefer sheer stains for an everyday glow, while others want richer tones with buildable color payoff. Checking ingredients can help avoid dryness and support hydrating stain blends that feel soft on lips. Many top options offer all-day staying power without cracking or flaking. It’s also smart to test applicators, as precise tips help achieve clean edge application. The right choice balances durability with a comfortable, natural feel.

    Summary and Practical Takeaways

    Affordable drugstore lip stains prove that lasting color doesn’t have to come with a high price tag. With improved formulations, shoppers can enjoy reliable daily wear and consistent color throughout the day. These products cater to modern needs by combining convenience with style. Whether you prefer subtle tones or vibrant hues, the market offers wide shade variety and dependable results. Ultimately, choosing a stain that matches your routine ensures effortless makeup days without constant mirror checks.

    Feature What to Expect
    Wear Time Up to 8–12 hours
    Finish Matte to natural tint
    Price Range Affordable drugstore pricing
    Comfort Level Lightweight and non-sticky
    Best For Daily wear and long events

    Frequently Asked Questions (FAQs)

    1. Do drugstore lip stains really last all day?

    Many formulas are designed to hold color for most of the day with minimal fading.

    2. Are lip stains drying on the lips?

    Modern stains often include moisturizing ingredients to maintain comfort.

    3. Can lip stains be worn under lip balm?

    Yes, applying balm after the stain sets can add shine without reducing wear.

    4. Are drugstore lip stains suitable for sensitive lips?

    Most are gentle, but checking ingredient lists helps avoid irritation.