Author: admin

  • Goodbye Hair Dye: The New Grey Hair Coverage Trend Helping Women Look Younger Naturally

    Goodbye Hair Dye: The New Grey Hair Coverage Trend Helping Women Look Younger Naturally

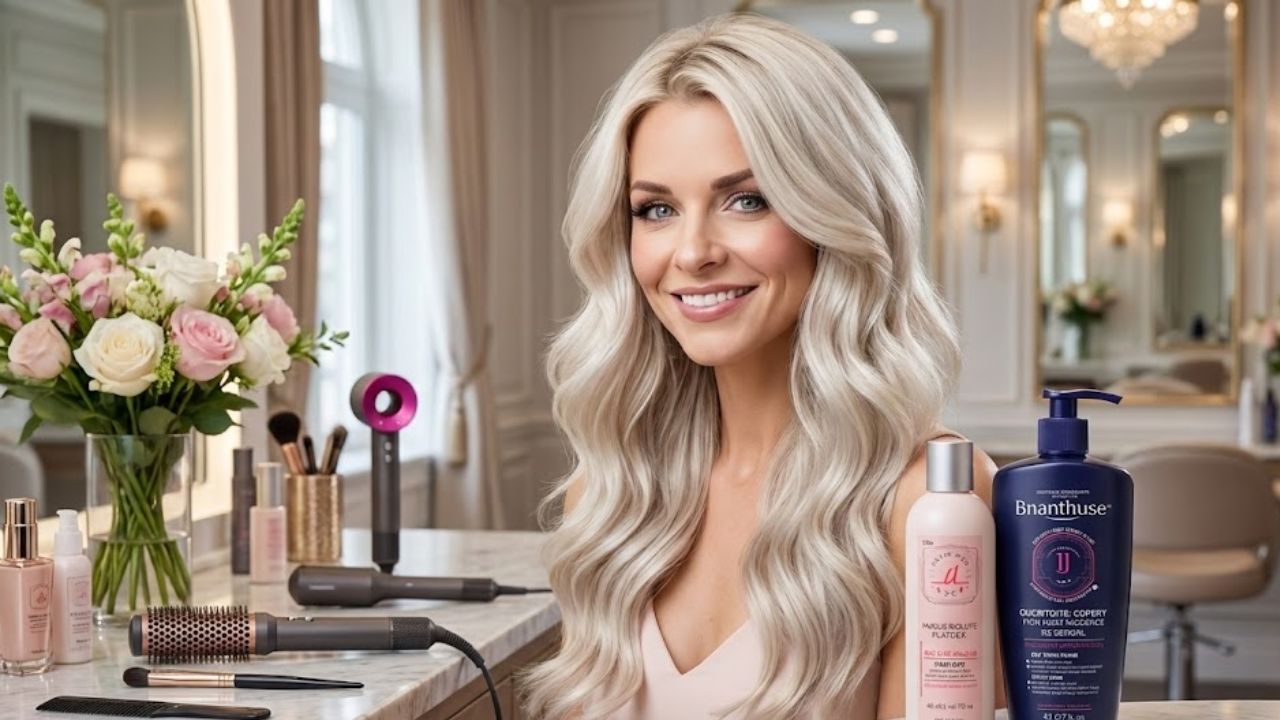
    “I’m exhausted from chasing my roots,” she admits, eyes fixed on the thin silver line tracing her part. Dye bowls sit nearby like a science experiment — chestnut, espresso, iced mocha brown — yet none of them appeal to her. She doesn’t want something that screams hair dye. She wants a finish that feels subtle, natural, and far less obvious.

    The stylist understands. Instead of reaching for permanent color, she opens a different chart — one filled with sheer tones, soft glosses, and carefully placed lighter strands. There’s no drastic transformation and no marathon appointment. Just thoughtful techniques that allow gray hair to blend in, soften contrast, and quietly refresh the face without drawing attention.

    This marks the end of hair dye as we once knew it. The new approach is calmer, smarter, and far more forgiving — and it’s reshaping how aging is seen in public.

    From Heavy Coverage to Smart Camouflage

    Step into a modern salon and you’ll hear the same request again and again: “I don’t want it to look dyed.” Gray hair itself isn’t the problem. What people are avoiding is that flat, solid block of color that looks artificial in daylight. The focus has shifted to soft blending — letting some silver show while guiding how it appears.

    Techniques now lean on transparent tints, root shadows, light-catching glosses, and scattered highlights that subtly trick the eye. Many stylists are replacing harsh permanent dyes with semi-permanent veils that fade gradually. The payoff is fewer stark regrowth lines, less time in the chair, and a look that feels fresh rather than freshly colored.

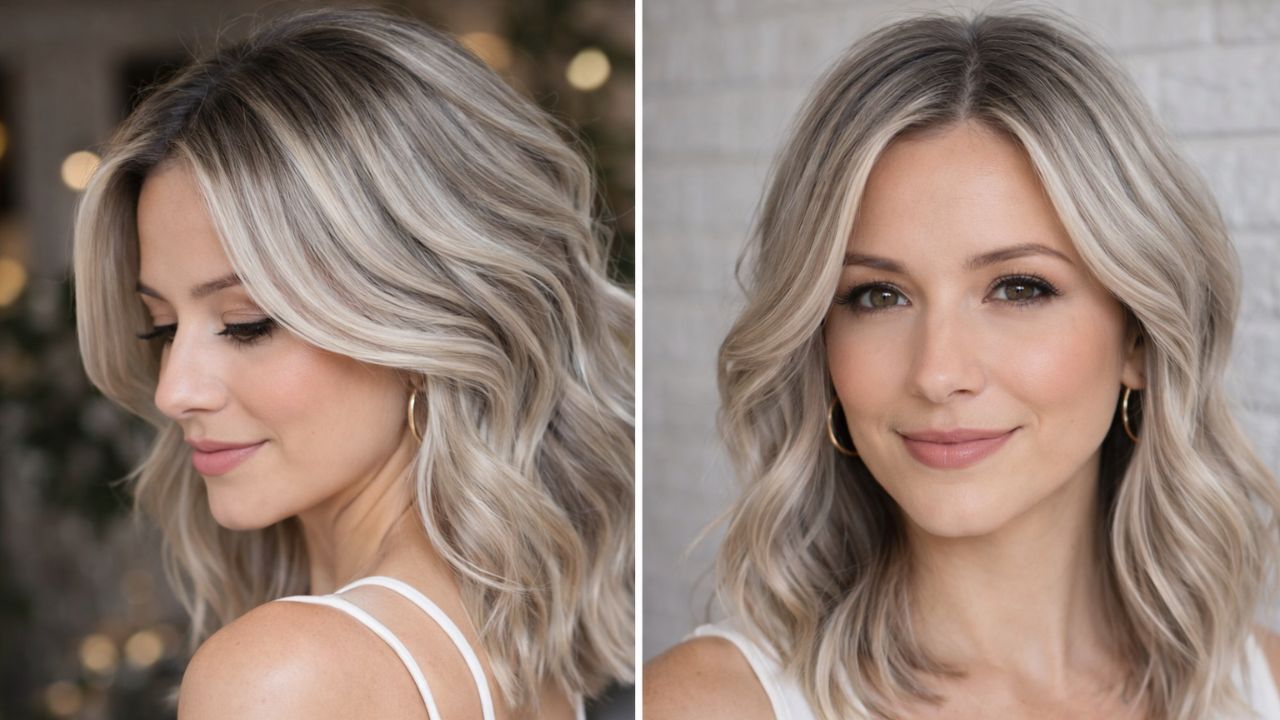
    In a small London salon, 52-year-old Karen arrived with a familiar plea: “Make the gray disappear.” She had been coloring every three weeks, constantly battling fast-appearing roots. Her stylist suggested a different route — a soft mushroom-brown glaze, a few ultra-fine face-framing highlights, and no solid root coverage. Two hours later, the harsh regrowth line was gone. The silver strands looked intentional, almost like a refined balayage.

    Eight weeks on, the grow-out was barely visible. Karen no longer dreaded the mirror or counted days to her next appointment. “I feel younger,” she said, “not because the gray vanished, but because I’ve stopped fighting it.” That sense of mental relief is a big reason this movement is spreading well beyond social media.

    Why Blending Gray Changes the Face

    Solid, dark, opaque dye can create a severe frame around the face, drawing attention to fine lines and under-eye shadows. On the other extreme, bright white roots against dyed lengths spotlight the scalp. Blending techniques soften both effects. By lowering contrast and adding light near the face, skin appears less tired, features look cleaner, and attention shifts away from the hairline.

    Stylists often describe it as contouring for hair — using light and shadow to guide the eye. Instead of erasing gray, they incorporate it into the design. It’s not a trick; it’s simply a more thoughtful use of what’s naturally growing.

    The Modern Playbook for Youthful Gray

    The standout technique today is known as gray blending. Rather than covering every strand, the stylist works in sections. A translucent demi-permanent color softens the brightest silvers, while subtle lowlights add depth. Around the face, ultra-fine highlights or baby lights prevent heavy patches and keep everything airy.

    • An astrophysicist challenges Elon Musk’s Mars vision
    • A giant 7.5-metre anaconda discovered in the Amazon
    • A rapid test reveals Alzheimer’s far earlier than symptoms
    • Donald Trump proposes adding a floor above the White House colonnade
    • A mutant virus spreads by hijacking human cells
    • Natural scent tricks replacing air fresheners
    • A newly identified nighttime Alzheimer’s symptom confirmed by neurologists
    • Intense training shows benefits against autoimmune muscle diseases

    This strategy avoids rigid maintenance schedules. Without a harsh line between dye and gray, appointments can stretch to eight or even twelve weeks. The secret lies in deliberate imperfection — small variations in tone and light that create an expensive, lived-in finish. The result feels polished, not painted.

    Simple Care That Keeps Gray Looking Intentional

    Daily upkeep remains refreshingly minimal. A gentle purple or blue shampoo once a week prevents yellowing. A lightweight shine serum or oil helps coarse gray strands lie smoother and reflect light. For special occasions, tinted root sprays or powders along the part instantly soften contrast, acting like a subtle filter for the hairline.

    Few people want a complicated mirror routine. What lasts are small, sustainable habits — switching to milder shampoos, using heat protection when blow-drying, trimming brittle ends. Over time, these details make gray hair appear healthy and deliberate rather than unruly.

    The Emotional Shift Behind the Trend

    This gentler approach also changes how people see themselves. Instead of hunting individual white strands, attention moves to shine, movement, and texture. The question becomes, “Does my hair look alive?” rather than “Does it look young?” That subtle mindset shift removes much of the daily frustration gray hair once caused.

    Paris-based colorist Lila Moreau explains it simply: “Clients no longer ask to cover gray. They want to look rested and bright, like themselves on a good day. Gray blending and face-framing light do that. The goal isn’t to hide age — it’s to stop roots speaking before you do.”

    Common Mistakes That Undermine the Look

    • Choosing overly dark shades for coverage, which can age the face
    • Relying on frequent permanent box dye, creating a heavy, matte finish
    • Ignoring cut and shape, which can make even good color look tired
    • Overusing purple shampoo until hair appears dull
    • Expecting one session to undo years of coloring

    A New Perspective on Age and Confidence

    When people stop chasing total gray erasure, something interesting happens. They experiment again — softer bangs, a slightly shorter cut, lighter tones near the face that echo natural silver. Friends don’t comment on the gray itself. They say, “You look rested,” or “You look different, in a good way.”

    This shift isn’t about abandoning color altogether. It’s about letting go of panic appointments, hiding between touch-ups, and fearing regrowth under harsh lights. Some still color, just more gently. Others embrace mostly natural gray with a gloss for shine. Many land somewhere in between.

    The deeper story is about choice. When gray is blended and softened rather than treated as a flaw, the focus moves from erasing age to editing its impact. Keeping the years you’ve lived while playing with light, texture, and shape becomes a form of quiet confidence — and that’s what truly shows.

    Key Takeaways for Readers

    • Gray blending over full coverage: Demi-permanent tones, soft lowlights, and fine highlights reduce harsh regrowth and create a more youthful result.
    • Simple, consistent maintenance: Weekly purple shampoo, gentle products, and occasional root sprays manage gray without complexity.
    • Emphasis on texture and light: The right cut, added shine, and less aggressive heat make hair look vibrant and lift the entire face.
  • Goodbye Hair Dye for Grey Hair: What to Add to Your Conditioner for Natural Colour Revival

    Goodbye Hair Dye for Grey Hair: What to Add to Your Conditioner for Natural Colour Revival

    For years covering grey hair has meant choosing between harsh chemical dyes and disappointing natural remedies. Now a simple addition to your regular conditioner using something you probably keep next to the coffee is becoming popular among people who want a gentler way to darken their hair.

    Why More People Are Quitting Chemical Hair Dye for Grey Coverage

    Grey hair shows up when pigment cells in the hair follicles slow down & eventually stop making melanin. Age is one factor but stress and genetics also matter along with smoking and nutritional deficiencies and certain medical conditions. The outcome is well known: a few silver strands appear and then slowly spread across the scalp. Most people choose permanent or semi-permanent colour first. It delivers results quickly. But each colouring session has drawbacks: harsher formulas and longer processing times & a mix of chemicals that can irritate ageing hair or sensitive scalps.

    Hair without pigment is usually drier & more fragile and less flexible so regular dyes can make it rougher & cause it to break more easily. Frequent colouring removes moisture and damages the cuticle & makes white hair look flat instead of shiny. Even products labelled as ammonia-free or gentle use oxidative reactions that alter the structure of hair. That might work fine on thick oily hair at 25 but feels very different on thinner delicate strands at 50. Plant-based options like henna & indigo appeal to people looking for alternatives but they come with problems too. The results differ greatly from person to person and the colours can turn out too warm or too dull and once you apply them they are extremely hard to fix at the salon.

    The Cocoa Conditioner Hack Everyone Is Talking About

    This is where cocoa becomes useful. We’re not talking about sugary instant cocoa but plain unsweetened cocoa powder that you use for baking. This brown powder contains natural pigments and plant compounds that can lightly stain hair without damaging the outer protective layer. Cocoa doesn’t work like permanent hair dye. It acts more like a gentle filter that gives grey hair a brownish tint while also nourishing it. Cocoa has flavonoids and tannin-like molecules that attach to the outer surface of hair. When you use it on light or grey hair the deposited color creates a subtle darkening effect that becomes more noticeable with repeated use.

    On darker hair it adds depth and warmth rather than changing the color dramatically. Cocoa also provides extra benefits that appeal to dermatologists and hairdressers. It contains antioxidant compounds that protect hair from daily environmental damage. It has naturally softening components that make hair easier to manage. It also has a mild astringent effect on the scalp that helps balance oil production. When you combine these properties with the conditioning ingredients already in your regular conditioner you create a treatment that both colors & conditions your hair at the same time.

    How to Blend Cocoa Powder Into Your Conditioner the Right Way

    The method spreading across beauty forums is surprisingly simple & cheap. You don’t need specialized tools or lab-grade ingredients. All you need is a bowl and a spoon. Step-by-step method Use this routine on freshly washed and towel-dried hair. Start with once or twice a week at first. Put a generous amount of your usual conditioner into a clean bowl. Pick a silicone-light or silicone-free formula if you want better pigment adherence. Add 2 to 4 tablespoons of unsweetened cocoa powder based on your hair length and thickness. Stir slowly until you get a thick & smooth paste with an even chocolate-brown color and no lumps. Section your hair with clips and apply the mixture. Focus on visibly grey areas around the temples and parting and crown.

    Comb through with a wide-tooth comb to distribute the blend from roots to ends. Leave it on for around 20 minutes. People with very resistant white hair may stretch it to 30 minutes. Rinse thoroughly with lukewarm water & massage the scalp to remove any cocoa residue. Most users report a soft shift from bright white to a cooler and smoky brown tone after the first application. Deeper results build over time. The aim is not to replace a salon color in a single session. Instead it gently blurs contrast and brings a darker halo to the overall look. The change is more visible where hair is lightest. This helps grey roots appear less harsh between full coloring appointments. Who this method suits and who should be careful

    Who Should Try This Grey Hair Method — and Who Should Avoid It

    Cocoa-enhanced conditioner works best for certain hair types and situations. It is most effective for people who have a few scattered grey hairs instead of completely white hair. The product also suits blondes or light brunettes whose grey hairs stand out noticeably against their natural color. People with sensitive scalps who react badly to chemical hair dyes often find this option gentler. It appeals to anyone who prefers a gradual change rather than a dramatic transformation. For those with very dark hair the cocoa conditioner will not completely hide grey roots. However it can make the transition between new growth and previously colored hair less obvious. The overall result stays subtle and looks more like a tinted gloss than a full color treatment.

    Hair Type Likely Result After Cocoa Use
    Mostly white or grey, fine strands A gentle beige-brown tone appears, hair looks glossier and smoother
    Salt-and-pepper brown hair Grey strands blend better, overall shade looks softer and more even
    Dark brown or black with limited greys Very subtle colour shift with a light warm undertone

    How Cocoa Interacts With the Hair Shaft and Pigment Loss

    Grey hair typically feels rough because its outer protective layer lifts up more easily than pigmented hair. This lifting makes grey hair more likely to become frizzy and develop tangles. Conditioner helps by smoothing down this outer layer and creating a coating that allows individual hairs to glide past each other without catching.

    When cocoa is added to conditioner the tiny particles and natural color compounds settle onto the surface of each hair strand. They remain on the outside rather than penetrating deep into the hair shaft where permanent hair dyes work. This surface-level placement is why the color develops gradually over multiple applications and washes out slowly instead of creating an obvious line of regrowth. You can picture cocoa as a protective tinted layer on a delicate surface. It offers some protection and adds some color without requiring a major commitment. Since cocoa conditioner contains no harsh oxidizing chemicals the internal structure of your hair stays mostly unchanged. For aging hair that tends to be dry this milder method can create a real improvement in how your hair feels and moves.

    Cocoa vs Other Grey Hair Solutions: Oils, Dyes, and Treatments Compared

    Cocoa has become part of a wider range of options for people who want to postpone their next hair coloring session or change how they handle grey hair. Some people use herbal rinses like black tea or coffee that create a light staining effect but may dry out hair when used too often. Others choose tinted conditioners designed for brunettes or professional grey blending treatments at salons. Cocoa stands out because it is easy to find & affordable while also conditioning the hair. It fits into a regular hair care routine without requiring major changes. The downside is that results can be unpredictable since the shade varies & too much product can make hair look dull if not rinsed thoroughly.

    Beyond Colour: Daily Care Tips to Keep Greying Hair Healthy and Strong

    Grey Hair Care Beyond the Conditioner Bowl Grey hair care extends beyond what you put in your conditioner bowl. Dermatologists say lifestyle factors can speed up or slow down the appearance of silver hair. Chronic stress and smoking both put pressure on pigment cells. So do unprotected sun exposure and diets low in antioxidants. People who try cocoa treatments often adopt gentler habits at the same time. They use UV-protective sprays outdoors and cut back on high-heat styling tools. They space out washing days and choose nourishing masks rich in lipids and proteins. This combination helps each strand maintain its integrity for longer regardless of its color. Cocoa can still play a role for those not ready to give up professional color.

    Some colorists suggest using homemade masks in the weeks after a salon appointment to refresh tone & maintain shine without adding more oxidative color to already processed hair. Others see it as a bridge for clients who want to transition slowly to their natural grey without facing a harsh grow-out line. The cocoa trend fits a broader move towards soft interventions. These are small and reversible tweaks that respect the hair’s changing biology instead of fighting it at all costs. More people are testing the method and adapting it to their texture and skin & schedule. The line between kitchen and bathroom keeps getting thinner.

  • An 83-Year-Old Trainer Shares Daily Habits That Keep Fitness Non-Negotiable

    An 83-Year-Old Trainer Shares Daily Habits That Keep Fitness Non-Negotiable

    Harry W King is living proof that age doesn’t define capability. At 83, he continues to train four days a week, combining strength training with rowing machine workouts, while also coaching others in his role as a Planet Fitness trainer. His commitment to movement hasn’t faded with time — it has evolved.

    Movement has always been part of who I am, and it still fuels my energy and independence today,” King shares with Tom’s Guide during a recent conversation. His fitness journey began in high school, where he played basketball, before joining the Marine Corps and earning a second-degree black belt in Karate.

    Over the years, his routine has adapted. Advanced osteoarthritis, rheumatoid arthritis, and the realities of aging have required adjustments, but not excuses. “I’m now 83, but staying active is non-negotiable for me,” he explains.

    Inside Harry’s Weekly Training Routine

    King follows a structured yet flexible training plan. “I work out four days a week, mixing weight training with cardio using machines like the bike, elliptical, and my personal favorite — the rower,” he says.

    He strongly advocates resistance training for long-term health. “A solid weight-training program helps build muscle strength, improve balance, support bone density, and manage weight,” King explains. He also encourages working with a trainer to maintain proper form and avoid injury.

    His own workouts are split across muscle groups. Typically, he trains upper body one day, lower body another, and focuses on core strength on the third day.

    Strength Training Advice for Older Adults

    When selecting weights, King emphasizes patience. “Start light and progress gradually,” he tells his clients. He believes seniors can follow training plans similar to younger individuals, provided they listen closely to their bodies and avoid rushing progress.

    For beginners or those returning after a long break, King recommends starting with simple bodyweight movements:

    • Push-ups
    • Crunches
    • Crossover crunches
    • Chin-ups
    • Squats
    • Crab walks
    • Lunges

    The Walking Workout Harry Swears By

    Walking is one of the most accessible exercises at any age,” King says. It requires no equipment and can be done almost anywhere. To make it more effective, he suggests adding variety.

    On a treadmill, King recommends interval-style walking. This could mean walking briskly for two minutes, followed by a slower recovery pace for one minute. “Intervals add challenge and keep workouts engaging,” he notes.

    For those seeking additional ideas, exploring different walking methods — including interval-based approaches — can help improve cardiovascular fitness and support fat loss.

    Advice for Absolute Beginners

    King encourages older adults to begin or restart their fitness journey without fear. “Start small and don’t let intimidation hold you back,” he says. A complex plan isn’t necessary at the beginning.

    He suggests focusing on simple, consistent habits such as walking, gentle stretching, or practicing standing up from a chair without using your hands. “Consistency matters more than intensity,” King adds.

    Harry’s Current Fitness Goals at 83

    At this stage of life, King’s priorities are clear. “My goals are about staying strong, mobile, and independent,” he explains. Maintaining muscle strength and balance remains essential.

    More than anything, he aims to keep moving through activities he genuinely enjoys. “Staying consistent is what has kept me feeling young all these years,” King says.

  • Quick Healing Method for Dry Cracked Heels Using Simple Kitchen Ingredients

    Quick Healing Method for Dry Cracked Heels Using Simple Kitchen Ingredients

    Cracked Heels The first time you see the cracks they are small. Thin white lines spread across your heel like a dried riverbed. At first you can easily ignore them. Maybe they came from walking barefoot in the house or from those new sandals you wear all the time. But then one morning when you step out of bed the floor feels rough against your skin. There is a sting & a slight pull. The cracks have grown deeper and feel a little sore. Sometimes they even snag on your socks.

    A thought quietly settles in your mind that it is time to do something about this. Dry cracked heels have a way of sneaking up on us. We usually notice them only when they already feel uncomfortable. Every step reminds us that our feet have been asking for care for a while. They carry us through long days & busy routines. The good news is that relief does not require expensive treatments or complicated routines. Some of the most effective remedies are probably already in your kitchen. They wait in familiar jars & bottles you use every day. This is about paying attention to your heels again. It is about turning the end of your day into a small calming ritual. You can use simple ingredients like oil and honey and milk & salt to soften neglected skin. These natural remedies help cracks heal gently over time.

    The Hidden Story Your Heels Are Telling

    Your heels do more work than you think. They hit the ground first with every step and take the impact when you run or stand for hours. But you probably don’t pay much attention to them because you can’t see them easily & they stay covered most of the time. You might feel the rough skin when you shower and tell yourself you’ll fix it later but then forget about it. Your skin shows what happens to it over time. When your heels get dry and cracked it usually means they’ve dealt with too much pressure & rubbing without enough moisture. Walking barefoot on hard surfaces or wearing shoes with thin soles or open backs can cause problems.

    Long hot showers and cold weather also dry out your skin along with indoor heating systems. The skin on your heels is naturally thick because it needs to protect you but when it gets too dry it stops being flexible. Instead of bending when you walk it starts to crack & those cracks can get deeper and start hurting. The good news is that your skin works constantly to fix itself. When you give it what it needs like softening treatments and moisture along with some protection it can heal faster than you expect.

    Your Kitchen as a Simple Healing Space

    Your kitchen holds more than just food ingredients. It contains simple remedies that can help your skin feel better. That olive oil you cook with works well as a moisturizer for dry and rough skin. The honey in your pantry pulls moisture into your skin and soothes cracked spots. Milk and yogurt can soften flaky skin naturally. When you combine sugar or salt with oil you create a scrub that removes dead skin cells. Taking care of yourself with everyday kitchen items feels good because you already know what they are. You don’t need to read complicated labels or buy special products. These are just basic ingredients with textures and smells you recognize. Before you start using them on your skin it makes sense to understand what each one actually does.

    Natural Ingredient Heel Care Benefits Recommended Use
    Olive Oil / Coconut Oil Penetrates deeply to hydrate cracked heels and soften hardened skin Night-time massage, nourishing base for DIY scrubs
    Honey Locks in moisture, calms irritation, and encourages skin repair Healing mask mixed with warm milk or natural oil
    Milk / Yogurt Gently loosens dead skin cells using natural lactic acid Soothing foot soak or creamy softening pack
    Sugar / Salt Exfoliates rough layers and smooths uneven heel texture Foot scrub applied after soaking feet in warm water
    Banana / Avocado Feeds skin with vitamins and healthy fats for deep nourishment Thick hydrating mask for very dry or cracked heels

    A Gentle Evening Ritual for Cracked Heels

    Think of this routine as a quiet evening pause. The day is slowing down and the house feels calmer. You take just fifteen minutes to care for your feet.

    Step 1: Warm Milk and Salt Foot Soak

    Fill a basin with warm water that feels comfortable on your skin. Pour in half a cup of milk along with one or two spoons of salt and add a small amount of olive oil. Place your feet in the water & let them soak for ten to fifteen minutes. The warm temperature helps relax your skin while the milk works to soften any dry areas and the oil starts to bring back moisture.

    Step 2: Gentle Scrub to Smooth Rough Skin

    Mix sugar or fine salt with olive oil or coconut oil until you get a thick paste. Gently massage the mixture onto your heels using circular motions and pay extra attention to the rough spots. Be careful not to scrub too hard because delicate skin requires a gentle approach rather than aggressive rubbing. When you finish rinse your feet with warm water.

    Step 3: Honey and Yogurt Healing Mask

    Mix one tablespoon of honey with one tablespoon of thick yogurt and add a few drops of oil. Spread this mixture generously on the cracked areas and leave it on for 10 to 15 minutes. This treatment provides deep moisture & soothes your skin. Rinse gently with water & pat your skin dry with a towel.

    Overnight Oil Treatment for Deep Healing

    Before you go to sleep at night you should take some warm olive oil or coconut oil and rub it into your heels for several minutes. After that you need to put on a pair of clean cotton socks so the moisture stays locked in while you sleep through the night. When you wake up in the morning your heels will usually feel much softer and smoother and they will hurt a lot less than they did before.

    Daily Habits to Prevent Cracks from Returning

    Your heels will stay healthy once they heal if you follow some basic habits. Put moisturizer on your feet after you shower & do not use water that is too hot. Change your shoes regularly and drink plenty of water throughout the day. When you see dry skin starting to form you should treat it right away. These small steps will stop serious problems from developing in the future.

    When Home Remedies May Not Be Enough

    If cracks become deep or start bleeding or fail to improve despite regular care, it may be time to seek professional help. Some underlying health issues can interfere with the healing process and a doctor or podiatrist can recommend the right treatment approach. While home remedies provide relief, medical guidance ensures proper recovery. Most cases of cracked heels result from dry skin that needs attention. By using warmth and oil along with patience and some common household ingredients, your feet can feel comfortable and well-maintained again. This allows them to continue supporting you through your daily activities.

  • Goodbye to Retirement at 67: The New Social Security Age Redefining Work and Life Plans

    Goodbye to Retirement at 67: The New Social Security Age Redefining Work and Life Plans

    A retired truck driver with weathered, sunburned hands rests on his cane, speaking softly with a younger woman in scrubs just off a night shift. They share the same frustration: the age they believed marked “retirement” has quietly moved without much warning.

    For years, 65 felt like the finish line, then 67 took its place. Now, that number is shifting again — not always through legislation, but through lived experience. The math behind Social Security is changing, and so are the expectations of millions of Americans who once counted on it as a reliable safety net.

    Behind the counter, government slides explain full retirement age, delayed credits, and penalties. Few people watch. Most are focused on their phones, running their own numbers, wondering what they can actually afford next year. One chart, more than any speech, seems to change everything.

    Why retirement at 67 is slowly fading away

    On paper, the official full retirement age (FRA) now sits between 66 and 67, depending on birth year. In reality, that target keeps drifting later. Health expenses stretch longer, careers extend further, and many people checking their first estimates at 62 realize the benefit is far smaller than expected.

    Instead of one clean age, retirement has become a sliding window from 62 to 70, where every year changes the size of the monthly check. More advisors now point to 70 as the real turning point, when benefits reach their maximum. Retirement is no longer a birthday milestone — it’s a set of trade-offs.

    Linda, 63, a public school secretary in Ohio, planned to stop working at 65 like her parents. When her husband lost his job at 61, she met with a Social Security counselor and faced the numbers.

    Claiming at 62 would have meant a 25–30% lifetime reduction. Waiting until her FRA near 67 helped, but still felt tight with a mortgage and rising property taxes. Delaying until 70 raised her projected benefit by roughly 24% above her FRA amount. For her, that difference meant food, heat, and medication — not abstract percentages.

    She chose a middle path: working part-time past 67, filing at 68, and using savings to fill the gap. There was no magical birthday, just a personal decision shaped by a system in motion.

    How the Social Security formula nudges people to wait

    Social Security rewards patience. Claim before your full retirement age and your monthly benefit shrinks. Delay past FRA, up to age 70, and it grows by about 8% per year. Over a lifetime, that difference is pushing many people beyond the old 67 benchmark.

    The core issue is longevity. The system was designed when people lived fewer years in retirement. Today, a 62-year-old might live another 25 or 30 years. Locking in a smaller check for decades carries far more weight than it once did.

    The new “retirement age” is less about law and more about culture. People are delaying not because they want endless work, but because they fear running out of money at 82 instead of 72.

    Thinking about claiming age with intention, not autopilot

    The first step is simple but uncomfortable: look at your real numbers. Log into your mySocialSecurity account and review your benefits at 62, at full retirement age, and at 70. Don’t skim them. Say the amounts out loud. Ask yourself whether they actually feel livable.

    Then place those numbers into your real life. Physical jobs, chronic health issues, family obligations, and debt all matter. Your claiming age should fit your body, your bills, and your stress level, not a tidy chart.

    A common trap is claiming at 62 for relief, then continuing to work anyway. If you claim before FRA and earn above the annual limit, part of your benefit is temporarily withheld. The money is recalculated later, but the short-term cash squeeze can be jarring.

    More Americans are responding by working part-time into their late 60s, delaying benefits when possible, and treating 67 as a transition phase rather than a full stop. The law stays the same, but reality keeps evolving.

    Practical moves for ages 62, 67, and beyond

    One effective approach is building a short-term “bridge.” Instead of filing at 62, some people rely on part-time work, savings, or small retirement account withdrawals to delay claiming until 67, 68, or 70. The goal is letting the Social Security benefit grow while covering expenses elsewhere.

    This doesn’t require wealth. It can mean trimming costs, renting a room, taking seasonal work, or earning a few hundred dollars a month. Those sacrifices now can translate into a permanently higher check later, easing pressure in advanced age.

    Many avoid planning out of fear that Social Security will disappear. While funding challenges exist, current discussions focus on gradual adjustments, not sudden collapse. Panic-driven decisions often cause more harm than patience.

    Spousal and survivor benefits matter too. In many households, it makes sense for the higher earner to delay to 70, even if the lower earner claims earlier. The real question isn’t fairness in your 60s — it’s security in your 80s.

    A retired SSA supervisor put it plainly: Social Security is often the only lifetime, inflation-adjusted income people will ever have. That reality makes the claiming decision heavier than it used to be.

    A simple checklist to stay grounded

    • Know your benefit amounts at 62, full retirement age, and 70.
    • Be honest about how long you can work without harming your health.
    • Discuss survivor benefits if you have a spouse or ex-spouse.

    What the shifting retirement age reveals about America

    The quiet move away from retiring at 67 reflects a broader truth. Many people in their late 60s are still working — teaching part-time, stocking shelves, driving buses, freelancing. Some enjoy the purpose. Others feel boxed in by rising costs.

    The gap between what Social Security can provide and what people expected has become a source of deep financial anxiety. At the same time, it has sparked new forms of adaptation: shared housing, phased retirements, and second careers.

    There is no single right age anymore. There is only your health, your family, and your numbers. The system won’t decide for you. Those honest conversations — at kitchen tables, in break rooms, and in Social Security waiting lines — may be the most valuable safety net of all.

  • Shoulder Pain Fix Plan: Physical Therapist Shares 5 Exercises That Restore Mobility and Build Strength

    Shoulder Pain Fix Plan: Physical Therapist Shares 5 Exercises That Restore Mobility and Build Strength

    Sometimes, building strong shoulders in the gym isn’t enough. If you’re dealing with tightness, discomfort, or recurring pain, it may be time to focus on mobility and control with guidance from a physiotherapist.

    Rebecca Bossick, lead physiotherapist at One Body LDN, shares five simple movements designed to release tight traps, improve rounded posture, and ease everyday shoulder aches. These exercises can be done at your desk or before and after workouts, making them both practical and effective.

    If you can spare just 10 minutes a few times a week, these are the key moves worth adding to your routine.

    Why Shoulder Mobility Matters

    “The shoulder is one of the most mobile joints in the body, but that freedom also makes it one of the least stable,” explains Bossick. Long hours of sitting and repetitive movements without proper balance can gradually train the shoulders into poor patterns.

    Over time, tight traps, rounded shoulders, and slumped posture can lead to persistent niggles that may progress into strains or postural dysfunction.

    While desk-based workers benefit greatly from regular movement breaks, these exercises are suitable for anyone looking to improve shoulder function and reduce discomfort.

    Bossick notes that conditions such as rotator cuff strains, shoulder impingement, and frozen shoulder are often linked to internally rotated shoulders and tight chest muscles. As the smaller stabilizing muscles weaken, factors like poor lifting technique, skipped warm-ups, and repetitive strain can worsen the issue.

    “These injuries often persist because people either stop moving completely or push through pain,” she says. “What the shoulder truly needs is controlled, consistent movement that strengthens and stabilizes the joint.”

    Five Moves That Actually Help

    1. Scapula Retractions

    Stand tall and gently squeeze your shoulder blades together, holding for a few seconds before releasing. This helps activate proper postural muscles and reduces overuse of the upper traps, a common source of tension for desk workers.

    2. Wall Angels

    With your back and arms against a wall, slowly raise and lower your arms in a controlled “snow angel” motion. Though deceptively challenging, this movement improves coordination and mobility between the shoulder blades and upper back, supporting overhead movement and daily comfort.

    3. Resistance Band External Rotations

    Anchor a light resistance band at elbow height. Keep your elbow close to your side and rotate your hand outward. This exercise targets the rotator cuff, a group of small but essential muscles that stabilize the shoulder and help prevent injury.

    4. Face Pulls

    Using a resistance band or cable, pull toward your face with your elbows lifted. This strengthens the rear deltoids and mid-back muscles, helping to open the chest and maintain an upright posture.

    5. Y-T-Ws

    Either lying face down or hinging forward at the hips, move your arms to form the letters Y, T, and W. This endurance-based exercise trains the deep stabilizers of the shoulder, improving control, balance, and upper-back strength.

    Final Thoughts on Consistency

    Starting small and staying consistent is key. Doing these exercises intensively for a short period, then stopping altogether, won’t deliver lasting results.

    “Even ten minutes, three times a week, is enough to notice a change,” says Bossick. “Prioritize slow, controlled repetitions rather than heavy resistance. As confidence builds, you can gradually introduce bands or light dumbbells.”

    Simple habits like scapula retractions or gentle shoulder rolls throughout the day can ease tension and reinforce better posture.

    “Think of it as retraining your body,” Bossick explains. “You’re reminding your muscles how to move well, even when your environment doesn’t change.”

    She adds, “You wouldn’t wait for your teeth to hurt before brushing them. Your joints deserve the same care. A few minutes of focused movement each week can be the difference between ongoing aches and a body that feels strong and capable.”

  • I’m a personal trainer — try my 4-week program designed to hone full-body muscle and build strength

    I’m a personal trainer — try my 4-week program designed to hone full-body muscle and build strength

    As a personal trainer, my role is to guide clients toward their fitness goals, whether that means gaining strength and muscle, improving cardiovascular fitness, enhancing mobility and flexibility, reducing body fat, or achieving a mix of all these outcomes.

    Reaching these goals requires more than random workouts. Training programs must follow proven principles to deliver long-term, sustainable results. This includes maintaining a balanced, protein-rich diet, managing daily activity, staying consistent with exercise, and applying progressive overload — the structured adjustment of training to encourage continuous improvement.

    I don’t usually share my programs because they’re customized for each individual, but this is one of my tested, beginner-friendly resistance plans. It’s designed to develop full-body muscle and strength in the gym and works well for beginners and experienced lifters alike.

    The program targets all the major muscle groups and, when followed consistently, can deliver noticeable results within a few months.

    Four-Week Full-Body Training Plan

    This four-week plan is suitable for beginners, with weights adjusted to match your current ability. It’s structured to support progressive strength and hypertrophy, helping you build confidence alongside physical fitness. To keep it accessible, the program uses only free weights and cables, with no machines required.

    You’ll complete two full-body workouts, alternating between them two to three times per week. Expect a focus on compound lifts, sensible training volume, and clear progression. Rest for 90 seconds after the first two main lifts and 30–60 seconds between accessory movements.

    Workout A: Lower Body, Push and Back

    • Barbell back squat: 3×8 at 60–65% 1RM — use a squat rack
    • Dumbbell or barbell bench press: 3×8–10 at 60–65% 1RM — chest and triceps
    • One-arm dumbbell row: 3×10 per side at 65% 1RM — horizontal pull
    • Dumbbell Romanian deadlift: 3×10 at 60–65% 1RM — posterior chain
    • Cable face pull: 3×12–15 at 55–60% 1RM — upper back and posture
    • Incline dumbbell curl: 3×10–12 at 60–65% 1RM — biceps

    Workout B: Posterior Chain, Back and Biceps

    • Barbell deadlift: 3×6 at 65–70% 1RM — primary strength lift
    • Standing dumbbell or barbell overhead press: 3×8 at 65% 1RM — shoulders
    • Lat cable pulldown: 3×10 at 65% 1RM — vertical pull
    • Dumbbell goblet squat: 3×10 at 60–65% 1RM — quad-focused
    • Dumbbell hammer curl: 3×10–12 at 60–65% 1RM — biceps and brachialis
    • Cable straight-arm pulldown: 3×12–15 at 55–60% 1RM — lat isolation

    How to Progress Over Four Weeks

    Week 1: Stay at the lower end of each rep range and leave a few reps in reserve. Prioritize proper form and movement quality.

    Week 2: Increase training volume by adding one to two reps per set on main lifts while keeping the weight unchanged.

    Week 3: Add 2.5–5% more weight and aim to finish each set with one to two reps in reserve.

    Week 4: Maintain the same weight but add an extra set to the first two main lifts in each session.

    For continued progress, you can later split the workouts into upper and lower body sessions or slow down your lifting tempo to increase time under tension. The key is gradually adding reps or load over time.

    Reassessing Strength and Main Lifts

    I recommend re-testing your one-rep max (1RM) every month or two to ensure your training loads reflect your improving strength. If you’re lifting the same weight months later, progression has stalled. Increases should be small and controlled, typically around 2.5–5%.

    The first two exercises in each workout are your primary lifts. Use barbells for the first movement and barbells or dumbbells for the second. All remaining exercises are accessory movements performed with free weights or cables.

    Choosing the Right Starting Weights

    Your working weights are based on a percentage of your one-rep max. This represents the heaviest weight you can lift for a single repetition. For example, if your bench press 1RM is 100kg, then 60% would be 60kg for sets of 8–10 reps.

    If you don’t know your 1RM or prefer not to test it, choose a load where the final reps feel challenging but controlled, leaving no more than two to three reps in reserve. You should complete every rep with good form. If technique breaks down, reduce the weight. If it feels too easy and you could complete several extra reps, increase the load.

    Each session lasts around 60 minutes. To save time, you can superset the final accessory exercises by performing them back-to-back before resting. This approach reduces total rest time and keeps your workouts efficient.

  • A Pilates instructor confirms: This is the 15-minute core workout you need to build strength, endurance and coordination

    A Pilates instructor confirms: This is the 15-minute core workout you need to build strength, endurance and coordination

    When my schedule is packed and I can’t fit in a full Pilates class or yoga session, I usually turn to YouTube, roll out one of the best yoga mats for home workouts, and get moving without leaving the house.

    I recently came across this Pilates-meets-strength training routine while trying to squeeze a 15-minute core workout into my day. It’s described as an “express core workout,” making it ideal when time is limited but you still want an effective session.

    “This 15-minute core workout combines elements of strength training and Pilates to create a powerful flow that challenges strength, endurance, and coordination,” explains Izzy, the instructor behind the Pilates By Izzy YouTube channel.

    How the Express Core Workout Is Structured

    The routine centers on long, flowing sequences designed to build both endurance and strength. It’s best suited to those working at an intermediate level, as the movements are layered and performed with control.

    Important Safety Notes Before You Start

    Izzy encourages viewers to take breaks and modify movements based on individual needs, and recommends consulting a healthcare professional before starting any new fitness program. She also stresses the importance of never pushing through pain, particularly if you experience discomfort in the neck or back.

    This workout is not advised if you are pregnant, have a heart condition, or are dealing with a current injury or health concern. Above all, Izzy reminds participants to prioritize proper form over intensity and listen closely to their bodies.

    What You’ll Need and Which Muscles It Targets

    Aside from your mat, the only equipment required is a Pilates ball. The workout targets the entire core, not just the abs, engaging the upper and lower abdominal muscles along with the obliques.

    Although this session appears as day two of a 25-day challenge, it stands alone well. The workouts are free to access, and you don’t need to complete the earlier session to gain the benefits of this one.

    Warm-Up and Movement Flow

    The warm-up is short but effective, moving through a yoga-inspired sequence that includes child’s pose, downward dog, and cat-cow. There’s also a gentle backbend similar to upward dog, with options to bend the elbows or rest on the forearms if needed.

    Once the main workout begins, Izzy uses the Pilates ball to guide you through each movement. Her instructions are clear and well-paced, with strong emphasis on syncing breath with movement. She clearly cues when to inhale and exhale, helping you activate the core muscles and use the diaphragm effectively.

    Why This Short Workout Feels So Intense

    Izzy’s slow, controlled pace creates continuous tension, leaving no room to rush through the exercises. Over time, this approach helps build a stronger mind-muscle connection, improving control and awareness.

    While the routine includes only a handful of exercises, you spend longer on each as movements are gradually layered. This Pilates-style structure increases time under tension, meaning your muscles work harder in less time.

    The higher repetition counts challenge muscular endurance and reinforce breath control. You will definitely feel the burn, but with just 15 minutes on the clock, the workout passes quickly. To get the most out of it, make sure you know how to properly engage your core and take time to warm up the hip flexors, as the routine also includes leg-focused movements.

  • My Skin Looks Even Toned Glowing and Clear After Fixing These Daily Skincare Habits

    My Skin Looks Even Toned Glowing and Clear After Fixing These Daily Skincare Habits

    For a long time, after I first discovered body makeup, I assumed it was only meant for red carpets and high-glam events. As someone who is naturally clumsy, bruises, scars, and uneven patches are simply part of daily life for me. Everything changed when I stumbled across a long-expired bottle of Sally Hansen Airbrush Legs in my mom’s bathroom and decided to try it anyway. It wasn’t flawless, but it was eye-opening. That moment showed me the potential. Since then, both I and the body makeup category have evolved, and today’s formulas are far removed from the thick, orange finishes of the past.

    Modern body makeup isn’t about hiding skin completely. To me, it works like a great under-eye concealer or a reliable brow gel—it simply makes everything feel more polished. Whether it’s a stubborn bruise or a mosquito bite that won’t fade, a touch of bronze can help even out tone and add a subtle glow without masking what’s naturally there.

    What I love most about current formulas is how easy they are to use. They wash off effortlessly, wear comfortably, and let me control how much coverage I want. Some days, I skip it entirely. Other days, I’ll add a soft-focus finish to my legs or lightly blur my shoulders before wearing a sleeveless top. It’s quick, simple, and has boosted my confidence in many everyday situations. These are the body makeup types I genuinely use week after week.

    Lightweight Body Perfectors

    My skin rarely needs full coverage. These formulas are designed to smooth texture and even skin tone without covering it up. I apply them to my arms, legs, décolletage, or stomach whenever I want a natural glow and a refined look. They’re perfect for nights out, dinner plans, or important meetings. Think of them as the body version of a skin tint—effortless and flattering.

    High-Coverage Body Concealers

    When something truly needs to be hidden—like bruises, scars, or an old tattoo I regret—this is what I reach for. These products function like traditional concealers, offering opaque coverage that lasts. The formulas are long-wearing, resilient to heat and movement, and designed to stay in place throughout a full day.

    Instant Bronzing Body Makeup

    This category exists for one simple reason: giving my legs a sun-kissed look without actual sun exposure. While I enjoy self-tanner, it often requires time, has a noticeable smell, and doesn’t always fade evenly. These bronzing formulas provide natural-looking warmth that rinses off easily at night. As a bonus, they usually have a pleasant scent, making them even more enjoyable to use.

    Quick-Apply Body Sprays

    These products remind me of the original Sally Hansen—now available in a much better formula. They can be applied in seconds and work best on large areas like the legs. The texture is lightweight, and they’re the fastest way to create a finished, polished appearance with minimal effort.

    The Right Tools Make the Difference

    The line between body makeup that looks natural and makeup that doesn’t often comes down to application. I rely on a dense buffing brush with enough surface area to blend product seamlessly across larger parts of the body. It helps achieve an even finish quickly while keeping everything looking believable.

    For over 30 years, Marie Claire has been a trusted global source for fashion, beauty, and cultural reporting. Every product featured is personally recommended by a Marie Claire writer, editor, or expert consulted directly. When we suggest something, we do so with care, experience, and respect for the trust readers place in us.

  • I’m a personal trainer — forget heavy weights and try this 3-move workout to build strong arms and abs

    I’m a personal trainer — forget heavy weights and try this 3-move workout to build strong arms and abs

    Looking for three effective exercises to build your abs and arms without lifting heavy weights? This simple routine targets the triceps, shoulders, and core through a mix of pushing, stabilizing, and isometric holds that challenge your upper body strength.

    You won’t need any equipment for this workout, although using a supportive yoga mat is highly recommended. Since you’ll be placing your bodyweight through your hands, a mat can help reduce wrist discomfort. For the final move, having access to a box, bench, or sturdy chair will be useful.

    Designed with beginners in mind, this personal trainer-approved bodyweight workout helps develop functional strength when practiced consistently and combined with a broader strength training plan. Here’s how to approach it.

    What Is the Abs and Arms Workout?

    Follow along with demonstration videos to ensure proper exercise form. Aim to work for 45 seconds with just 10 seconds of rest between movements, repeating the circuit for six total rounds. You can adjust the difficulty by changing the number of rounds or modifying the work-to-rest ratio.

    Keeping rest periods brief allows you to increase time under tension and overall intensity. It also gives you a moment to relieve wrist pressure, as each exercise is weight-bearing and engages the forearms. If wrist strain becomes an issue, holding light dumbbells can help reduce discomfort.

    1. Alternating Arm and Leg Plank

    This variation challenges balance, stability, and deep core engagement. The goal is to maintain a strong plank without tipping or arching the lower back. Keep your glutes engaged and move with control as you extend opposite limbs.

    How to do it:

    • Begin in a forearm plank with shoulders stacked over wrists and hips aligned with shoulders, toes tucked under
    • Brace your core by drawing your belly toward your spine and squeezing your glutes and thighs
    • Lift one arm and the opposite leg, holding briefly as you balance
    • Return to plank and switch sides; perform from a high plank for added difficulty

    2. Spiderman Plank

    The Spiderman plank works the core, hips, shoulders, and triceps by combining a controlled push-up with a dynamic knee drive. Focus on keeping your hips level and avoiding excessive arching or piking.

    This move emphasizes pushing strength, so lower your chest slowly and press back up with intention. If the push-up feels too challenging, hold the plank and concentrate on the knee drive alone.

    How to do it:

    • Start in a strong plank position and engage your core
    • Bend your elbows to lower your chest while driving your right knee toward your right elbow
    • Pause briefly, then push back to plank and switch sides
    • Skip the push-up if needed and focus only on the knee movement

    3. Triceps Dips

    Triceps dips place emphasis on the triceps and shoulders while challenging your ability to control your bodyweight. Maintaining an upright torso is key, as it helps preserve alignment and targets the correct muscles.

    Keep your back close to the bench, avoid shrugging your shoulders, and focus on smooth, powerful presses through the arms.

    How to do it:

    • Place your hands on a bench or box behind you, close to your hips
    • Step your feet forward; straight legs increase difficulty, bent knees make it easier
    • Engage your core and keep your back straight and close to the bench
    • Bend your elbows to lower your body, keeping your gaze forward
    • Pause briefly, then press up and fully straighten your arms