Author: admin

  • 7 Yoga Exercises You Can Easily Practice at Home Without Stress

    7 Yoga Exercises You Can Easily Practice at Home Without Stress

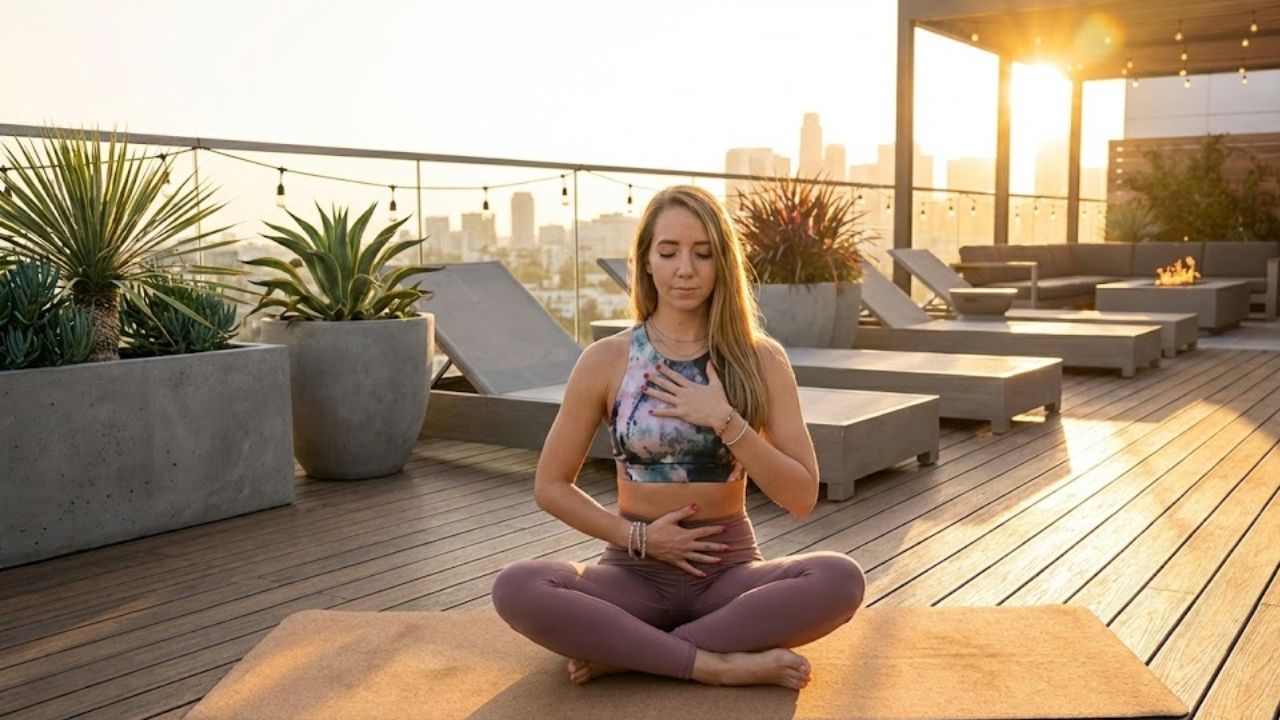
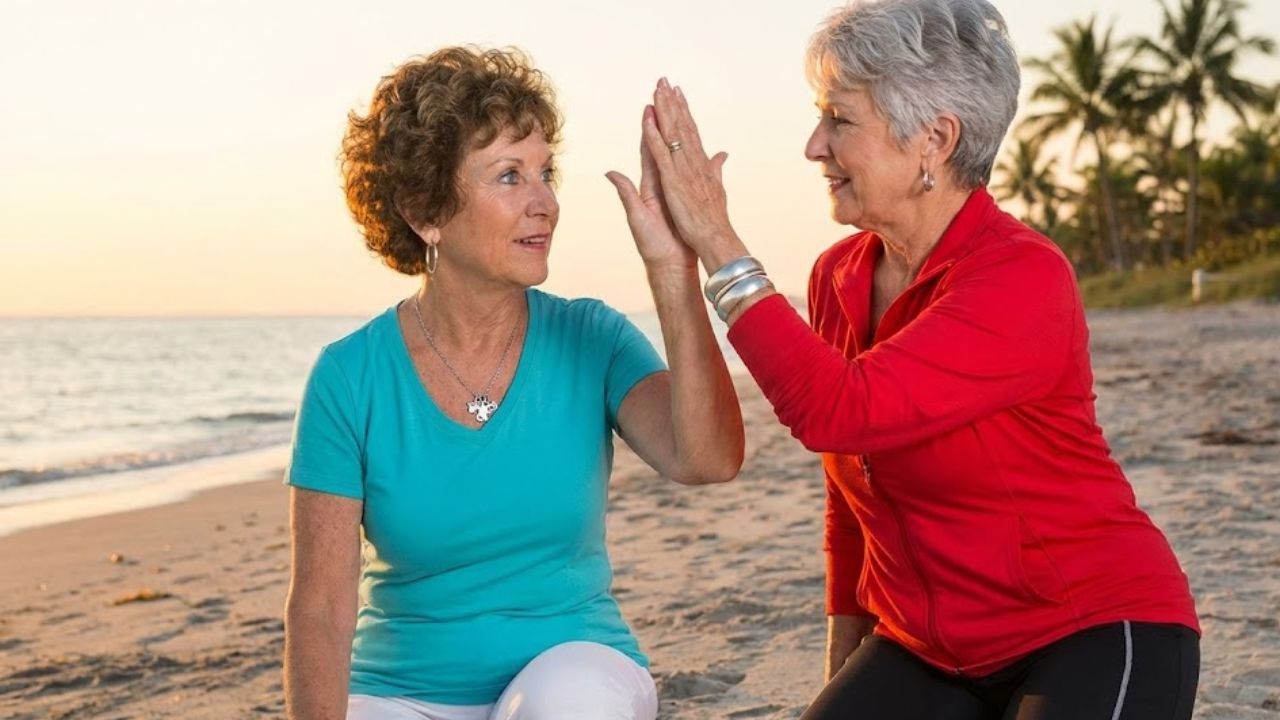
    Seven Simple Yoga Exercises You Can Do at Home Practicing yoga at home has grown in popularity because it adapts well to hectic schedules without demanding expensive gear or spacious rooms. A mat and a peaceful spot are enough to develop physical strength & mental clarity while improving your flexibility. Home yoga lets you progress according to your own rhythm & pay attention to what your body tells you. The following seven exercises are straightforward and beneficial for newcomers and people getting back into a consistent routine. These positions are useful and appropriate for maintaining daily health.

    Mountain Pose Tadasana for Full Body Awareness

    Mountain Pose: A Simple Foundation for Better Posture Mountain Pose might appear basic at first glance but it serves as the foundation for countless yoga positions. To perform it correctly you should stand upright with your feet placed together and your arms hanging naturally at your sides while keeping your spine extended. The key is to concentrate on pressing your feet firmly into the ground while simultaneously reaching the top of your head toward the ceiling.

    Downward Facing Dog for Strength and Flexibility

    Downward Facing Dog is one of the most recognized yoga poses. Start from your hands and knees & lift your hips back to form an inverted V shape. This pose stretches your spine and hamstrings along with your shoulders and calves. It strengthens your arms & legs at the same time. The pose boosts blood circulation throughout your body and helps fight fatigue. You can practice this pose at home to energize yourself in the morning or to loosen up your muscles in the evening.

    Cobra Pose Bhujangasana for a Stronger Back

    Downward Facing Dog is a well-known yoga pose that many people recognize. You begin on your hands and knees and then lift your hips upward and backward until your body creates an inverted V shape. This position stretches multiple areas including your spine & hamstrings as well as your shoulders and calves. It also builds strength in both your arms and legs while you hold the pose. The position improves blood flow through your entire body and reduces feelings of tiredness. You can do this pose at home when you wake up to feel more energized or later in the day when you need to relax tight muscles.

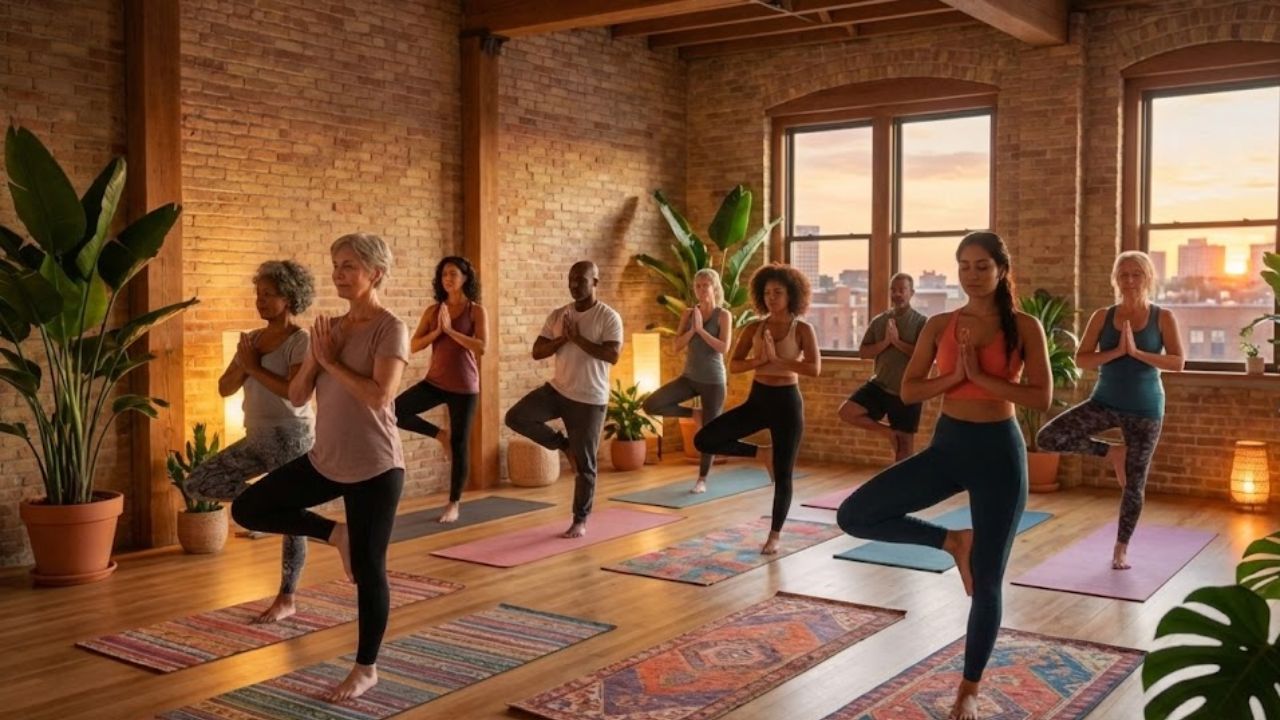
    Tree Pose Vrikshasana for Balance and Focus

    Tree Pose helps you work on balance while making your mind feel calm. You stand on one leg & put the bottom of your other foot against your calf or the inside of your thigh. You can bring your hands together at your chest or lift them above your head. This pose makes your legs stronger and helps you coordinate better while improving your ability to focus. When you practice balance poses at home you develop more patience and mental stability that helps you in everyday situations.

    Child Pose Balasana for Deep Relaxation

    Tree Pose helps you work on balance while calming your mind. You stand on one leg and place the sole of your other foot against your calf or inner thigh. You can press your hands together at your chest or raise them overhead. This pose strengthens your legs and improves your coordination while sharpening your focus. When you practice balance poses at home you build patience and mental stability that benefits you in daily life.

    Bridge Pose Setu Bandhasana for Core and Glute Strength

    Bridge Pose Benefits and Instructions Bridge Pose works well for building strength in your core muscles and lower back area while also targeting your glutes. Start by lying flat on your back and bending both knees so your feet rest on the ground about hip width apart. Push your feet firmly into the floor as you raise your hips toward the ceiling. This position helps maintain a healthy spine & may ease tension or mild pain in your lower back region. The pose creates an opening across your chest area which can enhance your ability to breathe more deeply and efficiently.

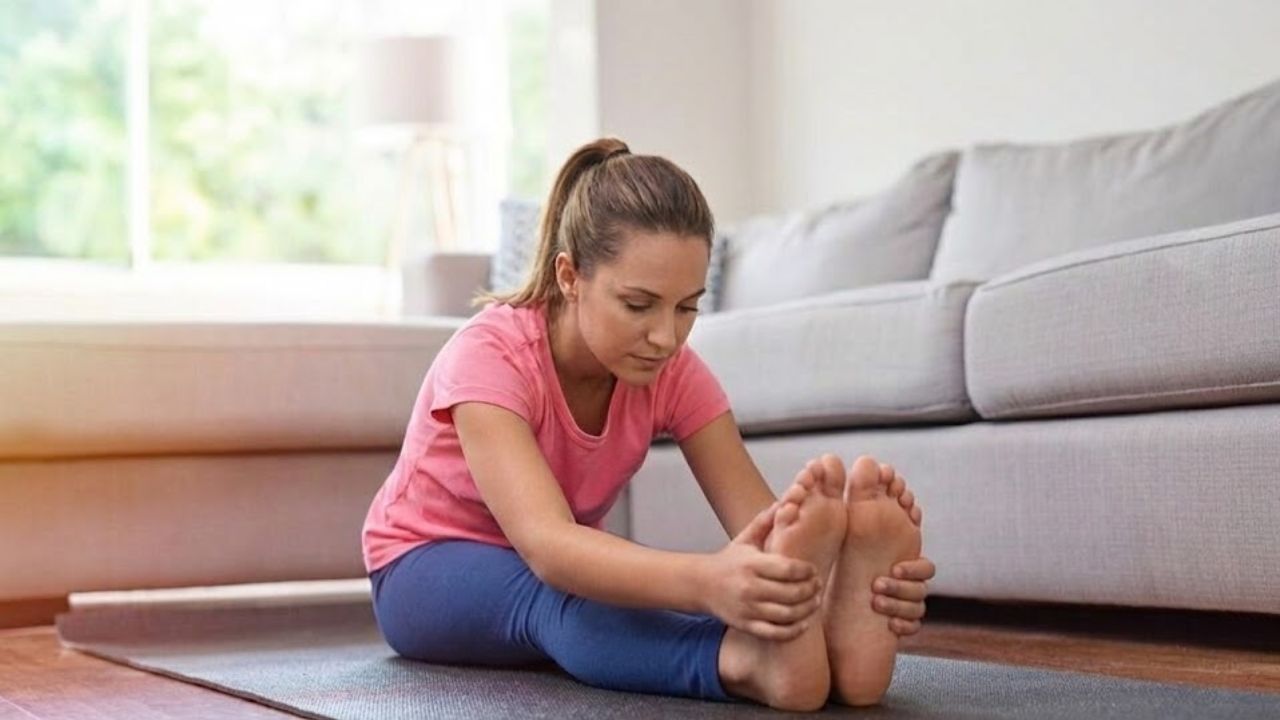
    Seated Forward Bend for Flexibility and Calm

    The seated forward bend stretches your spine and hamstrings while helping your lower back relax. It also calms your mind. Start by sitting down with your legs stretched out in front of you. Take a breath in to make your spine longer. Then breathe out as you slowly bend forward. This position helps your body become more flexible. It can also release tension after you have had a busy day. When you practice this pose at home in a peaceful space it works even better to help you feel calm.

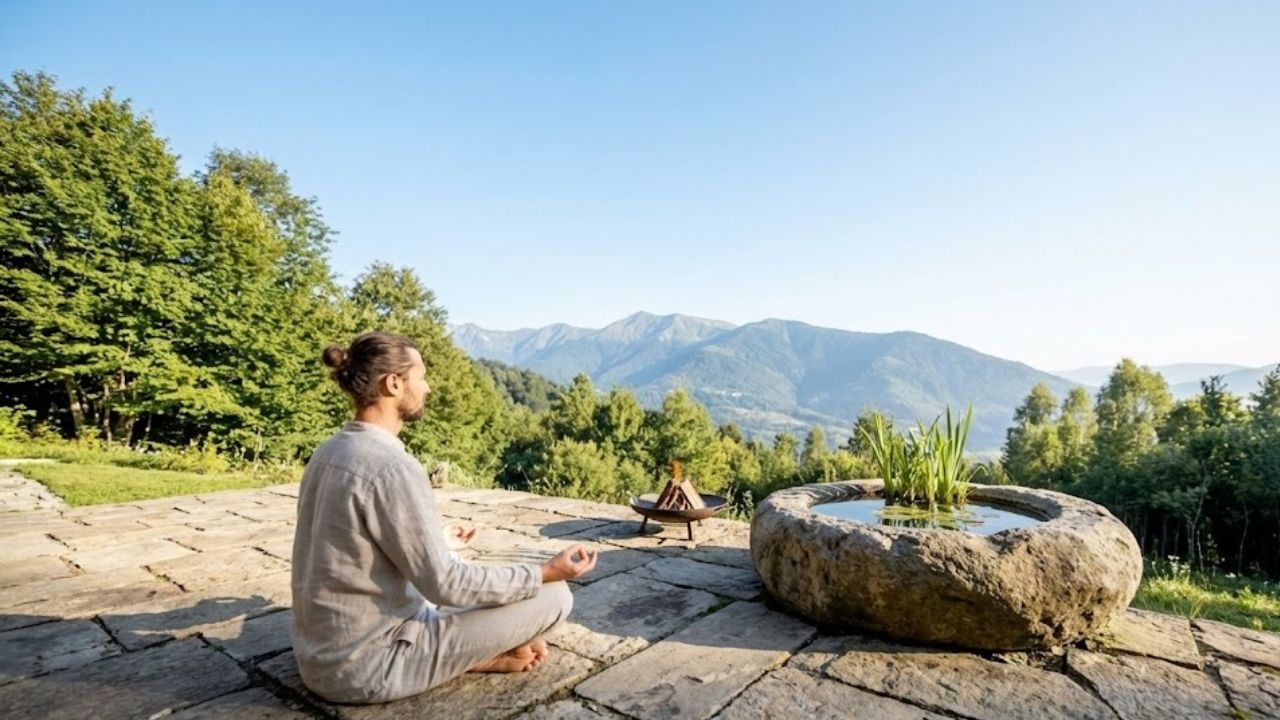
    Why Practicing Yoga at Home Works So Well

    Home yoga gives you the chance to practice regularly without feeling rushed. You can set your own schedule and modify poses to match your comfort level while paying close attention to your breathing technique. Given today’s focus on mental health and managing stress, yoga provides a natural approach that works well with contemporary living. These poses need no special equipment and fit easily into your everyday routine making them practical for maintaining wellness over time.

    Tips to Stay Consistent with Home Yoga

    Begin with brief fifteen to twenty minute sessions and slowly increase the duration over time. Make sure your practice area stays tidy and free from interruptions. Pay attention to your breathing and never force your body beyond comfortable limits. Regular practice is more valuable than pushing yourself too hard. Even a mild routine performed every day produces meaningful long-term results. Practicing yoga at home does not require you to be perfect. The goal is simply to commit to the practice while staying aware of how your body feels and moving with purpose. These seven yoga exercises provide a well-rounded way to develop strength and flexibility while promoting relaxation. They can help you build a healthier & more conscious lifestyle without leaving your house.

  • 9 Simple Yoga Poses Suitable for All Ages and Fitness Levels

    9 Simple Yoga Poses Suitable for All Ages and Fitness Levels

    Yoga is a practice that works for everyone regardless of age. It helps people of all generations become more flexible and strong while improving balance and overall health. The great thing about yoga is that you don’t need special skills or expensive gear. You just need your body and a mat. Here are nine basic yoga poses that anyone can do. These poses will help improve your physical health and mental focus at any stage of life.

    Mountain Pose (Tadasana)

    Why it’s suitable for all ages: Mountain Pose may look simple, but it plays a key role in building correct posture, balance, and body awareness. It forms the base for many standing yoga poses and can be practiced safely by people of all age groups.

    How to practice: Stand upright with your feet together and arms resting alongside your body. Distribute your weight evenly through both feet, lift your chest gently, and lengthen your spine upward. Keep your core engaged and breathe slowly and steadily.

    Benefits: Enhances posture, strengthens leg muscles, and encourages mindfulness.

    Child’s Pose (Balasana)

    Why it’s suitable for all ages: Child’s Pose is a deeply calming posture that gently stretches the body while allowing complete relaxation. It’s ideal for beginners, seniors, or anyone needing a restorative break.

    How to practice: Begin on your hands and knees, then slowly sit your hips back toward your heels. Stretch your arms forward and lower your forehead to the mat, allowing your neck and shoulders to relax.

    Benefits: Gently stretches the back, hips, and thighs while calming the nervous system.

    Cat–Cow Pose (Marjaryasana–Bitilasana)

    Why it’s suitable for all ages: This flowing movement supports spinal health by increasing flexibility and releasing tension. It’s especially helpful for people who sit for long hours.

    How to practice: Come onto all fours with wrists under shoulders and knees under hips. Inhale to arch your spine and lift your gaze (Cow), then exhale as you round your back and tuck your chin (Cat). Move slowly with your breath.

    Benefits: Improves spinal mobility, eases back tension, and supports better posture.

    Downward-Facing Dog (Adho Mukha Svanasana)

    Why it’s suitable for all ages: Downward Dog offers a full-body stretch while gently strengthening muscles. It improves circulation, balance, and overall flexibility.

    How to practice: From all fours, lift your hips upward to form an inverted V-shape. Press your palms firmly into the mat, keep your spine long, and allow your heels to move toward the floor.

    Benefits: Strengthens arms and legs, stretches hamstrings, and improves posture.

    Warrior II (Virabhadrasana II)

    Why it’s suitable for all ages: Warrior II builds strength and stability while opening the hips and chest. It’s excellent for improving confidence and endurance.

    How to practice: Stand with feet wide apart, turning one foot outward. Bend the front knee while extending both arms parallel to the floor. Keep your shoulders relaxed and gaze forward.

    Benefits: Strengthens legs, improves balance, and increases hip flexibility.

    Tree Pose (Vrksasana)

    Why it’s suitable for all ages: Tree Pose challenges balance while promoting mental focus. It’s helpful for improving coordination and stability.

    How to practice: Stand tall and shift your weight onto one leg. Place the sole of the opposite foot on the calf or inner thigh, avoiding the knee. Bring hands together at the chest or raise them overhead.

    Benefits: Enhances balance, strengthens legs, and sharpens concentration.

    Seated Forward Bend (Paschimottanasana)

    Why it’s suitable for all ages: This calming stretch targets the lower body and spine, making it ideal for people who sit for extended periods.

    How to practice: Sit with legs extended straight ahead. Inhale to lengthen your spine, then exhale and gently fold forward, reaching toward your feet while keeping your back long.

    Benefits: Stretches hamstrings and spine while encouraging relaxation.

    Bridge Pose (Setu Bandhasana)

    Why it’s suitable for all ages: Bridge Pose is a mild backbend that strengthens the lower body and counteracts the effects of prolonged sitting.

    How to practice: Lie on your back with knees bent and feet flat on the floor. Press through your feet to lift your hips upward, keeping your shoulders grounded and neck relaxed.

    Benefits: Strengthens the lower back, glutes, and legs while opening the chest.

    Savasana (Corpse Pose)

    Why it’s suitable for all ages: Savasana allows the body and mind to fully relax and absorb the benefits of the practice. It’s an essential part of every yoga session.

    How to practice: Lie flat on your back with arms relaxed at your sides and palms facing upward. Close your eyes and focus on slow, natural breathing.

    Benefits: Promotes deep relaxation, reduces stress, and improves mental clarity.

  • 6 Gentle Yoga Poses for Daily Wellness and Relaxed Movement

    6 Gentle Yoga Poses for Daily Wellness and Relaxed Movement

    Adding yoga to your everyday life helps you stay physically healthy while improving flexibility & lowering stress levels. You do not need to master difficult poses to gain these advantages. Simple and gentle yoga works just as well for supporting your overall health. The six poses described here are straightforward to practice and suitable for anyone regardless of experience level. They fit easily into your daily wellness habits. These poses will help you feel more balanced & relaxed whether you want to release tension or increase energy or quiet your thoughts.

    Mountain Pose (Tadasana)

    Mountain Pose is a foundational yoga posture that may appear simple but plays a powerful role in building stability and awareness. It helps improve posture, enhance balance, and create a strong base for all standing poses. This posture encourages a sense of grounding and helps you become more aware of how your body aligns from head to toe.

    How to Practice:
    Stand upright with your feet hip-width apart and arms resting naturally by your sides. Distribute your weight evenly across both feet. Gently lift your chest, roll your shoulders back, and engage your core muscles. Raise your arms overhead with palms facing inward or slightly outward. Maintain steady, deep breathing and hold the pose for 30 seconds to one minute.

    Benefits:
    Mountain Pose strengthens the legs, supports proper posture, and promotes calm, controlled breathing, helping you feel centered and focused.

    Cat-Cow Pose (Marjaryasana–Bitilasana)

    Cat-Cow is a gentle flowing sequence that alternates between spinal flexion and extension. It is especially effective for loosening the spine, releasing built-up tension, and preparing the body for deeper movements. This pose is ideal for warming up the back and easing stiffness in the neck and lower spine.

    How to Practice:
    Begin on all fours in a tabletop position, aligning your wrists under your shoulders and knees beneath your hips. Inhale as you drop your belly, lift your chest, and tilt your tailbone upward (Cow Pose). Exhale as you round your spine, tuck your chin, and draw your belly in (Cat Pose). Continue moving smoothly between these poses while coordinating with your breath.

    Benefits:
    Cat-Cow improves spinal flexibility, stretches the neck and back, and encourages mindful breathing, making it excellent for stress relief.

    Child’s Pose (Balasana)

    Child’s Pose is a deeply restorative posture that allows the body and mind to fully relax. It gently stretches the hips, thighs, and spine while providing a sense of comfort and security. This pose is often used as a resting position during yoga practice.

    How to Practice:
    Kneel on the floor with your big toes touching and knees spread apart. Sit back onto your heels and slowly fold forward, lowering your forehead to the mat. Extend your arms forward or let them rest alongside your body. Breathe deeply and allow your muscles to soften.

    Benefits:
    Child’s Pose reduces tension in the back and neck, calms the nervous system, and promotes deep relaxation.

    Seated Forward Fold (Paschimottanasana)

    Seated Forward Fold is a soothing stretch that targets the hamstrings, spine, and lower back. It helps release physical tension while encouraging mental calmness, making it a valuable pose for both flexibility and relaxation.

    How to Practice:
    Sit on the floor with your legs extended straight ahead and feet flexed. Inhale to lengthen your spine, then exhale as you hinge forward from the hips. Reach toward your feet, ankles, or shins while keeping your back as straight as possible. Hold the pose for 30 seconds to one minute while breathing steadily.

    Benefits:
    This pose improves flexibility in the hamstrings and spine, relieves lower back tension, and promotes a calm, relaxed state of mind.

    Legs Up the Wall (Viparita Karani)

    Legs Up the Wall is a restorative inversion that allows the body to unwind and reset. It is particularly beneficial for tired legs and is commonly used to promote relaxation and improve circulation.

    How to Practice:
    Sit beside a wall and gently lie down on your back while lifting your legs up against the wall. Adjust your position so your body feels comfortable, with arms resting at your sides. Close your eyes and relax into the pose for 5 to 10 minutes, focusing on slow, deep breathing.

    Benefits:
    This pose helps reduce leg fatigue, supports circulation, eases lower back tension, and calms the nervous system.

    Savasana (Corpse Pose)

    Savasana is the final relaxation pose that concludes a yoga session. Though simple in appearance, it is essential for allowing the body to absorb the benefits of the practice and achieve deep rest.

    How to Practice:
    Lie flat on your back with legs extended and arms relaxed at your sides, palms facing upward. Close your eyes and focus on slow, steady breathing. Consciously relax each part of your body, starting from your toes and moving upward. Remain in this pose for 5 to 10 minutes.

    Benefits:
    Savasana promotes deep relaxation, reduces stress, lowers blood pressure, and helps calm both the body and mind.

    How to Include These Poses in Your Daily Routine

    Incorporating yoga into your daily life doesn’t require a long time commitment. Even a short session of 5 to 15 minutes can help you feel more balanced and relaxed. You can practice these six poses together as a complete routine or use them individually as calming breaks throughout the day. Beginners may start with a few minutes daily and gradually extend their practice as comfort and confidence grow.

  • 5 Simple Yoga Poses That Improve Flexibility Without Strain

    5 Simple Yoga Poses That Improve Flexibility Without Strain

    Yoga helps you become more flexible while improving your posture & releasing body tension. These benefits apply whether you just started or have practiced for years. Specific poses work on tight areas and gradually increase your range of motion. Regular yoga stretching improves how your body moves & supports mental health through focused awareness. Below are five straightforward yoga poses that build flexibility. Anyone can do these poses regardless of experience level. Practice them every day to see lasting improvements.

    Downward-Facing Dog (Adho Mukha Svanasana)

    Why it’s great for flexibility: Downward-Facing Dog is a classic yoga posture that works the entire body while deeply stretching key muscle groups. It mainly targets the hamstrings, calves, shoulders, and spine, helping to release stiffness and improve overall flexibility in the legs and lower back.

    How to do it: Start in a tabletop position with your hands under your shoulders and knees under your hips. Lift your hips upward and back, forming an inverted V-shape. Keep your arms straight, fingers spread wide, and shoulders relaxed. Press your heels gently toward the floor while lengthening your spine.

    Benefits: Lengthens the hamstrings, calves, and spine; supports better posture; builds full-body strength and flexibility.

    Forward Fold (Uttanasana)

    Why it’s great for flexibility: Forward Fold is a calming stretch that deeply targets the hamstrings, lower back, and neck. It helps elongate the spine and improve leg flexibility while encouraging mental relaxation and stress relief.

    How to do it: Stand upright with feet hip-width apart. Inhale to lift and lengthen the spine, then exhale as you hinge forward from the hips. Let your hands reach toward the floor, ankles, or shins. Keep a slight bend in your knees if needed to protect your lower back.

    Benefits: Improves flexibility in the legs and lower back; releases spinal tension; promotes calmness and mental clarity.

    Seated Forward Bend (Paschimottanasana)

    Why it’s great for flexibility: This seated posture offers a deep stretch for the hamstrings, spine, and lower back. It is especially beneficial for people who sit for long periods, helping counter tightness and poor posture.

    How to do it: Sit on the floor with both legs extended straight. Inhale to lengthen your spine, then exhale as you fold forward from the hips. Reach for your feet, shins, or use a yoga strap if needed. Keep your chest open and spine long.

    Benefits: Stretches the back and hamstrings; increases spinal flexibility; encourages relaxation and mindfulness.

    Butterfly Pose (Baddha Konasana)

    Why it’s great for flexibility: Butterfly Pose focuses on opening the hips and stretching the inner thighs and groin. It gently improves lower-body flexibility and supports better hip mobility.

    How to do it: Sit upright with your legs stretched forward, then bring the soles of your feet together. Let your knees drop outward and hold your feet with your hands. Gently press your knees toward the floor and, if comfortable, lean slightly forward.

    Benefits: Enhances hip mobility; stretches inner thighs and groin; supports better lower-body flexibility.

    Cobra Pose (Bhujangasana)

    Why it’s great for flexibility: Cobra Pose is a gentle backbend that opens the chest and stretches the spine and shoulders. It improves spinal flexibility while counteracting slouched posture.

    How to do it: Lie face down with legs extended and the tops of your feet resting on the mat. Place your hands under your shoulders, elbows close to your sides. Inhale and slowly lift your chest using your back muscles, keeping the neck relaxed and avoiding strain on the lower back.

    Benefits: Increases spinal and shoulder flexibility; opens the chest; supports healthier posture and back mobility.

  • 10 Simple Yoga Moves That Support a Healthier Lifestyle

    10 Simple Yoga Moves That Support a Healthier Lifestyle

    Yoga is widely recognized as one of the most effective ways to support a healthy and balanced lifestyle. It not only enhances flexibility, strength, and posture but also plays a vital role in improving mental well-being by reducing stress and encouraging relaxation. Whether you are a beginner or someone looking to enhance an existing fitness routine, these 10 easy yoga poses are ideal for building better overall health. Practicing these movements regularly can help strengthen your body, calm your mind, and support long-term wellness.

    1. Mountain Pose (Tadasana)

    Mountain Pose forms the base of all standing yoga postures and is essential for developing proper alignment and balance. It also helps cultivate awareness and steady breathing.

    How to Practice:

    Stand upright with your feet hip-width apart and arms resting naturally at your sides. Engage your leg muscles, lengthen your spine, and lift gently through the top of your head. Breathe evenly while grounding your feet into the floor. Hold the position for 30 seconds to 1 minute.

    Benefits:
    This pose builds leg strength, improves posture, and sharpens balance and concentration, making it a great starting point for any practice.

    2. Downward-Facing Dog (Adho Mukha Svanasana)

    Downward-Facing Dog is a classic yoga posture that provides a full-body stretch while building strength and flexibility.

    How to Practice:

    Begin on your hands and knees, then lift your hips upward to form an inverted V shape. Keep your hands shoulder-width apart and your feet hip-width apart. Press your heels toward the mat, relax your neck, and allow your head to hang naturally. Hold for 30 seconds to 1 minute.

    Benefits:
    This pose stretches and strengthens major muscle groups, improves circulation, and helps release built-up tension.

    3. Child’s Pose (Balasana)

    Child’s Pose is a calming, restorative posture that gently stretches the back and hips while promoting relaxation and deep breathing.

    How to Practice:

    Kneel on the floor with your big toes touching and knees slightly apart. Lower your torso toward the mat and rest your forehead down. Extend your arms forward or alongside your body. Remain here for 1 to 2 minutes, breathing slowly.

    Benefits:
    This pose soothes the nervous system, relieves muscle tension, and encourages mental calm.

    4. Cat-Cow Pose (Marjaryasana–Bitilasana)

    Cat-Cow is a flowing movement that improves spinal flexibility and eases stiffness in the back and neck.

    How to Practice:

    Start on all fours with your wrists under your shoulders and knees under your hips. Inhale as you arch your spine, lifting your chest and tailbone. Exhale as you round your back, tucking your chin inward. Continue for 5 to 10 slow rounds.

    Benefits:
    This sequence enhances spinal mobility, improves posture, and helps release stress from the upper body.

    5. Warrior II (Virabhadrasana II)

    Warrior II is a strong standing pose that builds lower-body strength while opening the hips and chest.

    How to Practice:

    Stand with your feet wide apart. Turn your right foot outward and your left foot slightly inward. Bend your right knee while keeping the left leg straight. Extend your arms parallel to the floor and gaze over your right hand. Hold for 30 seconds to 1 minute, then switch sides.

    Benefits:
    This pose strengthens the legs and arms, boosts stamina, and improves circulation.

    6. Seated Forward Fold (Paschimottanasana)

    Seated Forward Fold is a gentle stretch that relaxes the body while lengthening the spine and hamstrings.

    How to Practice:

    Sit with your legs extended forward and feet flexed. Inhale to lengthen your spine, then exhale as you fold forward from the hips. Reach toward your feet or shins while keeping your back long. Breathe deeply into the stretch.

    Benefits:
    This posture improves flexibility, calms the mind, and helps relieve tension in the lower back.

    7. Cobra Pose (Bhujangasana)

    Cobra Pose is a mild backbend that opens the chest and strengthens the spine, making it especially helpful for counteracting prolonged sitting.

    How to Practice:

    Lie face down with your hands beneath your shoulders and elbows close to your body. Inhale as you gently lift your chest, pressing lightly into your hands. Keep your hips grounded and shoulders relaxed. Hold for 15 to 30 seconds before lowering down.

    Benefits:
    This pose strengthens the back, stretches the chest and abdomen, and reduces shoulder and spinal tension.

    8. Bridge Pose (Setu Bandhasana)

    Bridge Pose is a supportive backbend that engages the lower body while increasing spinal flexibility.

    How to Practice:

    Lie on your back with knees bent and feet flat on the floor, hip-width apart. Place your arms alongside your body with palms facing down. Inhale as you lift your hips upward, engaging your glutes. Hold for 30 seconds to 1 minute, then gently lower.

    Benefits:
    This pose strengthens the legs and lower back while opening the chest and easing back discomfort.

    9. Downward-Facing Dog to Plank Flow

    This flowing sequence builds strength and coordination while engaging the core and upper body.

    How to Practice:

    Begin in Downward-Facing Dog. Inhale as you move forward into Plank, keeping your body aligned. Exhale as you press back into Downward-Facing Dog. Repeat for 5 to 10 rounds.

    Benefits:
    This flow strengthens the arms, core, and legs while improving flexibility and body control.

    10. Savasana (Corpse Pose)

    Savasana is the final relaxation pose and an essential part of yoga practice, allowing the body to fully absorb the benefits of movement.

    How to Practice:

    Lie flat on your back with arms resting by your sides and palms facing upward. Close your eyes and focus on slow, natural breathing. Let your body relax completely. Remain here for 5 to 10 minutes.

    Benefits:
    This pose reduces stress, lowers tension, and promotes deep mental and physical relaxation.

    Making Yoga Part of Your Daily Life

    Adding these simple yoga poses to your routine can have a powerful impact on both physical and mental health. You don’t need to perform all 10 poses at once—start with a few and build gradually. Practice in the morning for energy or in the evening to unwind. Even a short daily session can improve flexibility, reduce stress, and support a healthier lifestyle.

  • 5-Minute Yoga Routine to Relieve Work Stress and Release Muscle Tension Quickly

    5-Minute Yoga Routine to Relieve Work Stress and Release Muscle Tension Quickly

    After spending hours at your desk looking at a computer screen or going through multiple meetings in a row work stress naturally affects both your body & mind. Tight shoulders and stiff necks along with sore lower backs and mental stress are problems that many people face at work today. You might not always have time for long breaks or visits to a yoga studio during work hours, but a short yoga routine can help relieve that tension effectively. Taking just five minutes lets you refresh your body and mind while bringing calmness & flexibility into your day. This quick yoga routine focuses on the areas where tension builds up most during work and fits easily into your schedule regardless of how busy you are.

    How a 5-Minute Yoga Break Instantly Reduces Work Stress

    Yoga works well for reducing stress and tension from work because it combines deep breathing with mindful movement and better posture. Much of the tension we feel at work comes from sitting too long and dealing with deadlines and heavy workloads. Yoga helps realign your body and loosen tight muscles while improving flexibility. At the same time it promotes relaxation through focused breathing. Taking short yoga breaks during your workday can ease both physical discomfort and mental tiredness. This makes it simpler to stay focused and productive throughout the day. Here is a quick routine that helps you relax and release tension in less than five minutes. You do not need any special equipment for this routine. All you need is a quiet space where you can focus on your breathing.

    1. Seated Cat-Cow Flow for Spinal Mobility and Posture Reset (1 Minute)

    The seated Cat-Cow Stretch offers a simple method to loosen your spine and reduce tension that builds up from desk work. This flowing movement helps your back and neck stay mobile while easing stiffness and creating a sense of calm. How to Do It: Sit in your chair with both feet flat on the ground & place your hands on your knees. Take a deep breath in while arching your back and lifting your chest upward as you pull your shoulder blades closer together. This is the Cow position. Breathe out while rounding your back forward & tucking your chin down toward your chest as you push your hands against your knees. This is the Cat position. Continue moving between these two positions for one minute and match your breathing to each movement. Benefits: This stretch improves how well your spine moves & decreases stiffness in your back. It releases tightness in your neck and shoulders. The focus on breathing helps lower your stress levels.

    2. Standing Forward Fold to Release Lower Back and Leg Tension (1 Minute)

    The Standing Forward Fold stretches your lower back and hamstrings effectively. These areas typically become stiff when you spend long hours sitting down. This pose also soothes your nervous system & boosts blood flow to your brain. How to Do It: Position your feet at hip width and keep a slight bend in your knees. Take a deep breath while lengthening your spine. Breathe out as you fold forward from your hips and reach down toward the floor or your shins. Allow your head to hang naturally and let your upper body relax downward. You should feel the stretch through your hamstrings and lower back. Stay in this position for one minute while breathing deeply and letting your body sink into the stretch. Benefits: This pose stretches your lower back along with your hamstrings and calves. It releases tension that builds up from sitting and poor posture. The exercise calms your mind and helps you relax.

    3. Neck and Shoulder Stretch to Relieve Desk-Induced Tightness (1 Minute)

    Neck and Shoulder Stretch Spending long periods sitting at a desk often causes your neck and shoulders to feel tight and uncomfortable. This basic stretching exercise helps loosen up those problem areas and brings quick relief. **Steps to Follow:** Start by sitting or standing up straight with relaxed shoulders. Slowly tilt your head toward your right shoulder as if trying to touch your ear to it. Place your right hand on the left side of your head & apply light pressure to increase the stretch. Stay in this position for 30 seconds before switching to the other side. Repeat the same movement by tilting your head left and using your left hand for gentle pressure. You can also roll your shoulders in circles both forward and backward to enhance the benefits. **What This Does for You:** This stretch reduces built-up tension in your neck and shoulder muscles. It helps your neck move more freely in all directions. The gentle movements also help calm your nervous system and lower your stress levels.

    4. Seated Spinal Twist to Refresh the Core and Ease Stiffness (1 Minute)

    The Seated Spinal Twist helps release tension in your spine and makes your posture better. When you twist your body you loosen up tight muscles in your lower & middle back. These areas get stiff when you sit for too long. How to Do It: Sit up straight in your chair with both feet flat on the ground & keep your spine tall. Take a breath in while you stretch your spine upward. Then breathe out slowly as you turn your upper body to the right side. Put your left hand on the outside of your right knee & place your right hand behind you on the chair. Stay in this position for 30 seconds and breathe deeply. After that turn to the other side and do the same thing. Benefits: Reduces stiffness in your lower back & spine Makes your posture and spine alignment better Supports healthy digestion & keeps your spine healthy

    5. Deep Breathing Pause for Mental Calm and Instant Relaxation (1 Minute)

    To finish the routine you should spend some time concentrating on your breathing. Deep breathing is one of the fastest methods to trigger the parasympathetic nervous system that helps you feel relaxed & clears your mind. You can use this technique at any point during your day when you need to reduce stress or anxiety. How to Do It: Find a comfortable position sitting on a chair or on the floor. Close your eyes & put one hand on your chest while placing the other hand on your belly. Breathe in deeply through your nose while counting to 4 and feel your belly expand. Hold your breath briefly and then breathe out slowly through your mouth while counting to 6 as your body becomes more relaxed with each breath out. Continue this pattern for 1 minute. Benefits: Lowers stress and anxiety levels Creates a feeling of calmness and mental clarity Enhances your ability to focus & concentrate

  • Mind-Bending Optical Illusion Test That Challenges Viewers to Spot 46 and 65 Among 64s in Under 6 Seconds

    Mind-Bending Optical Illusion Test That Challenges Viewers to Spot 46 and 65 Among 64s in Under 6 Seconds

    Welcome to an exciting optical illusion challenge that will test your focus & observation skills. Your task is to find the numbers 46 & 65 hidden among many 64s in just 6 seconds. This challenge is harder than it appears at first glance. Optical illusions help improve your thinking abilities and concentration while providing entertainment. Try to complete this challenge as quickly as possible. This type of visual puzzle requires you to scan the image carefully and identify numbers that look similar but have small differences. The numbers 46 & 65 can easily blend in with 64 because they share similar digits. Your brain needs to process the information rapidly to spot these variations within the time limit. To succeed in this challenge you should focus on one section of the image at a time rather than trying to view everything at once. Look for patterns that break the repetition of 64s. The numbers you seek will stand out slightly if you train your eyes to notice the subtle changes in digit arrangement. These puzzles are popular because they engage your visual processing system and make you think quickly. Regular practice with optical illusions can sharpen your attention to detail and improve your ability to spot differences in everyday situations. Whether you find the numbers within 6 seconds or need more time the exercise still benefits your mental agility.

    Can Your Eyes Detect 46 and 65 Hidden Among 64s Within Six Seconds?

    Optical illusions capture our attention because they test the way our brains process visual information. The human brain constantly searches for patterns in everything we observe and anything that disrupts these patterns immediately draws our focus. Visual puzzles exploit this automatic tendency by presenting images filled with recognizable shapes and structures that our minds try to organize. This natural process makes it challenging to identify the subtle variations or odd elements concealed within the picture. Through regular practice and focused observation you can train yourself to detect even minor details that appear unusual or inconsistent with the rest of the image.

    Why This Tricky Optical Illusion Confuses Even Sharp Observers

    To complete this challenge you need to develop your ability to identify differences and strengthen your attention to fine details. Here are some helpful approaches: Start by viewing the entire image at once.

    – Take a quick scan of the whole picture. Your brain will automatically detect numbers that differ from the repeated 64s. Look for variations in form or color intensity.

    – Numbers like 46 and 65 can be difficult to distinguish because they share visual similarities with 64.

    – Search for numbers that appear incorrect or slightly unusual. Pay special attention to the borders and corner areas. The different numbers are frequently placed along the outer edges or in less crowded sections of the image. This strategy can speed up your search.

    – Listen to your instincts. Your brain can occasionally recognize patterns that may not actually exist. Stay focused and have confidence in your ability to locate the numbers that are different.

    Are You Fast Enough to Crack This Visual Brain Teaser?

    The main difficulty in this optical illusion stems from the visual similarity between the numbers 46 & 65 when compared to 64. The number 64 shows up repeatedly across the entire puzzle which makes it much more difficult to identify the other numbers. The human brain automatically searches for familiar patterns and shapes so when it encounters 64 appearing multiple times it often overlooks 46 & 65 without registering them. This challenge effectively measures your ability to focus on fine details and recognize subtle variations within nearly identical patterns.

    How Solving This Optical Illusion Strengthens Focus and Mental Agility

    Rewritten Text When you participate in optical illusion challenges you train your brain to process information more effectively. These exercises improve your concentration and strengthen your visual memory while enhancing your ability to spot inconsistencies. Regular practice of these mental workouts can sharpen your problem-solving skills and increase your overall cognitive speed.

  • These Fitness Habits Helped Me Feel Stronger in My 70s and You Can Follow Them Too

    These Fitness Habits Helped Me Feel Stronger in My 70s and You Can Follow Them Too

    Reaching your 70s doesn’t have to mean slowing down or feeling fragile, especially for older adults in the United States who want to stay active. Many people discover that small, consistent fitness habits can make a huge difference over time. This article shares practical routines that helped me feel stronger, steadier, and more confident in my 70s without extreme workouts or expensive equipment. These habits focus on listening to your body, moving with purpose, and building strength gradually, making them realistic and sustainable for anyone who wants to age with energy and independence.

    Simple fitness habits that build strength in your 70s

    One of the most important lessons I learned was that consistency beats intensity. Short daily walks, light stretching, and gentle bodyweight movements added up over time. I focused on daily gentle movement rather than long workouts, which kept my joints happy and my motivation high. Adding balanced body routines helped improve stability, while slow controlled reps reduced the risk of injury. I also paid attention to rest and recovery, allowing my muscles to adapt. These habits made exercise feel like part of daily life, not a chore, and gradually built real, usable strength.

    Healthy fitness routines that improved balance and mobility

    As balance became more important, I introduced simple practices that challenged coordination safely. Standing on one foot near a chair, heel-to-toe walking, and gentle yoga poses worked wonders. Focusing on joint-friendly exercises kept movements comfortable, while improved core stability made everyday tasks easier. I noticed fewer stumbles thanks to better posture control, and my confidence grew with steady balance gains. These routines didn’t require a gym, just a few minutes of mindful practice, proving that mobility can improve at any age.

    Daily fitness habits that support energy and confidence

    Beyond physical strength, these habits boosted my overall energy and mood. Morning movement helped set a positive tone for the day, while light evening stretches supported better sleep. I learned to respect listening to limits instead of pushing through pain. Pairing exercise with hydration awareness and consistent daily timing made routines easier to stick with. Over time, I felt renewed daily energy and greater confidence in my body, which encouraged me to stay socially and mentally active as well.

    Why these fitness habits work well for people in their 70s

    These habits succeed because they are realistic and adaptable, not overwhelming. They emphasize long-term consistency over quick results, which is crucial as the body changes with age. By focusing on safe movement patterns, they reduce injury risk while still challenging muscles and balance. The routines also support mental motivation habits, making it easier to stay committed. Most importantly, they promote independent active aging, helping older adults maintain strength, confidence, and quality of life without extreme measures.

    Fitness Habit Main Benefit
    Daily walking Improves stamina and circulation
    Light strength training Builds muscle and bone support
    Balance exercises Reduces fall risk
    Gentle stretching Maintains flexibility and mobility
    Rest days Supports recovery and consistency

    Frequently Asked Questions (FAQs)

    1. Can someone really start fitness habits in their 70s?

    Yes, gentle and consistent habits can be started safely at almost any age.

    2. How long should daily exercise last for older adults?

    Even 15–30 minutes of light activity can provide meaningful benefits.

    3. Do these habits require special equipment?

    No, most routines use bodyweight movements and simple household support.

    4. Should a doctor be consulted before starting?

    Yes, it’s wise to check with a healthcare provider before beginning new exercises.

  • Sneaker Outfit Ideas That Will Define Fashion Trends in 2026

    Sneaker Outfit Ideas That Will Define Fashion Trends in 2026

    Sneakers are moving into a new phase & the styling trends for 2026 focus on understated confidence. The most stylish people are not giving up comfort but instead are improving it with clean and deliberate combinations that look naturally refined. Consider sneakers not as a casual sports option but as the foundation that makes your whole outfit appear current and simple.

    A major change is the way sneakers are now worn with tailored clothing. Quality trousers and neat cotton shirts along with gently structured blazers have become the standard approach for achieving an effortlessly stylish appearance. Even basic knit outfits & comfortable suits gain a new sophisticated quality when combined with sleek lace-up shoes or simple retro designs. The important thing is maintaining a sophisticated color scheme so the sneakers seem like a natural part of the outfit rather than something added later.

     Dresses & skirts are also being matched with sneakers in a way that feels characteristic of 2026. Textured midi dresses and structured skirts along with flowing slip styles look unexpectedly polished with matching sneakers that provide comfort while maintaining elegance. For those embracing the athletic leisure style quality track pants and zip-up jackets paired with trendy sneakers produce a forward-thinking casual appearance that is already prevalent in street fashion.

  • Improve circulation, boost energy and ease stiffness with this 7-move morning routine

    Improve circulation, boost energy and ease stiffness with this 7-move morning routine

    Starting your day with gentle movement can completely change how your body feels, especially when mornings feel stiff or sluggish. This 7-move morning routine is designed to improve circulation, boost energy levels, and ease everyday stiffness without needing equipment or extra space. In India, where long sitting hours, early starts, and busy schedules are common, a short and consistent routine like this can support better mobility and focus. The goal isn’t intensity, but waking up your joints, muscles, and breath so your body feels ready and alert from the very first hour.

    Improve circulation with a simple morning routine

    This routine begins with slow, controlled movements that encourage blood flow from head to toe. Gentle joint rotations and dynamic stretches help warm muscles and reduce that heavy morning feeling many people experience. By focusing on steady joint motion, you stimulate circulation without stressing the body. Adding mindful breathing supports oxygen-rich movement, helping muscles feel more responsive. Over time, this approach can lead to lighter limb sensation and improved coordination. Practicing consistently also supports natural body warmth, which is especially helpful on cooler mornings or after long periods of inactivity.

    Boost daily energy using a 7-move morning routine

    Unlike high-intensity workouts, this routine boosts energy by gently activating the nervous system. Movements flow smoothly, helping you feel awake without feeling drained. The combination of posture changes and controlled pace encourages smooth energy release rather than sudden spikes. Many people notice clearer mental focus after finishing, making it easier to start work or household tasks. Because the routine avoids strain, it supports balanced morning momentum that lasts longer into the day. Over time, this habit can improve consistent energy levels without relying on caffeine or stimulants.

    Ease stiffness and mobility with a gentle morning routine

    Morning stiffness often comes from joints and muscles staying still overnight. These seven moves target common tight areas like the spine, hips, shoulders, and ankles. Slow transitions encourage joint lubrication flow, which can reduce discomfort. The routine also supports muscle tension release by gently lengthening tight areas instead of forcing them. With regular practice, many people experience improved range comfort and fewer aches throughout the day. The relaxed pace helps maintain safe movement patterns, making this routine suitable for beginners and older adults alike.

    Why this 7-move routine works long term

    The strength of this routine lies in its simplicity and consistency. Because it takes only a few minutes, it’s easier to maintain daily, which leads to lasting benefits. Regular movement first thing in the morning supports healthy circulation habits and keeps joints active. Over weeks, the body adapts by improving flexibility and reducing stiffness buildup. The routine also encourages mind-body awareness, helping you notice tension early. When practiced daily, it becomes a foundation for sustainable morning wellness that supports both physical comfort and mental clarity.

    Routine Element Main Benefit Body Area Focus
    Joint rotations Improves circulation Ankles, wrists, neck
    Spinal mobility Reduces stiffness Back and core
    Hip openers Eases tightness Hips and lower body
    Arm swings Boosts energy Shoulders and chest
    Gentle stretches Enhances flexibility Full body

    Frequently Asked Questions (FAQs)

    1. How long does this 7-move morning routine take?

    It usually takes 7–10 minutes depending on how slowly you move.

    2. Can beginners follow this routine safely?

    Yes, the movements are gentle and suitable for most beginners.

    3. Is this routine helpful for stiffness from long sitting?

    Yes, it targets joints and muscles affected by prolonged sitting.

    4. Should this routine be done every day?

    Daily practice offers the best results for circulation and mobility.