Blog

  • Makeup Primer Earns Constant Compliments for Creating Smooth Radiant Skin

    Makeup Primer Earns Constant Compliments for Creating Smooth Radiant Skin

    Anyone who knows me will tell you that laid-back living is not exactly my trademark. I’m intensely organised, thrive on detailed planning, and genuinely enjoy cataloguing everything from outfits to gift ideas. Yet when it comes to beauty, I’m the complete opposite. I avoid anything that demands endless tools, complex routines, or waking up hours early just to style my hair. For me, beauty only works if it fits into a simple daily routine without unnecessary effort.

    I still care deeply about results. I want to look fresh and polished and feel confident in my skin, but I need the most efficient route to get there. That’s why every product in my bathroom has to work hard and earn its place in an intentionally minimal collection.

    Why Primer Changed Everything for Me

    For years, I didn’t believe a primer was essential, especially for everyday wear. If my skin was well moisturised and protected with daily SPF, adding another layer felt excessive. That mindset shifted completely after I worked with an exceptional make-up artist for my wedding in 2024. Not only did she help me look my absolute best, but she also opened my eyes to the power of the right base products.

    I later booked one-to-one lessons with her to refine what we called my everyday make-up look—versatile enough for most situations, yet easy to elevate for special occasions. While she taught me valuable techniques, her product recommendations were the real takeaway. I left with new favourites, including bronzer, blush, foundation, and one standout product that quickly became essential.

    The Primer I Never Expected to Love

    That product was the Bobbi Brown Vitamin Enriched Face Base. Designed to act as both moisturiser and primer, it claims to nourish skin while helping foundation apply smoothly—and it truly lives up to that promise. Though priced at £54, a small amount goes far, making it a worthwhile investment.

    The rich creamy texture feels deeply hydrating without being heavy, and applying it is genuinely enjoyable. I usually allow it to settle for a few minutes before adding base products, but on good skin days, I can rely on concealer alone thanks to the natural glow it creates.

    Long-Lasting Results That Truly Deliver

    This primer has completely transformed how my make-up performs. I’ve worn it through extreme heat, freezing temperatures, long workdays, workouts, and even under intense stage lighting without any movement. I also receive constant compliments on how bright and healthy my skin looks when I use it.

    I’m incredibly selective with beauty products, yet I would repurchase this without hesitation. I’ve recommended it to family and friends, all of whom agree it’s a make-up game changer. While I may never master a flawless eyeliner flick or prevent lipstick from fading instantly, this primer consistently helps me feel confident and comfortable in my skin.

  • How to Apply Lash Serum Correctly for Longer Healthier Eyelashes Without Irritation

    How to Apply Lash Serum Correctly for Longer Healthier Eyelashes Without Irritation

    Over the past year, one feature people constantly notice is my eyelashes. Once you understand how to use a lash serum properly, you can achieve the same results.

    I’m often asked, “Are those your real lashes?” or “Do you wear false lashes to work?” I never keep secrets. My answer is simple: they’re completely natural, thanks to high-quality mascara and, more importantly, consistent lash serum use.

    My Lash Serum Results Timeline

    I began using a lash serum about a year ago and noticed visible improvement within two weeks. After three months, my lashes looked longer, thicker, and fuller—so much so that people started commenting regularly.

    What Lash Serums Are and How They Work

    Lash serums are topical treatments designed to support and enhance natural eyelash growth. According to Dr. Amy Vowler, a hair restoration doctor at Hair GP, these serums work by nourishing the lash follicle and activating dormant follicles, encouraging stronger hair growth.

    She explains that lash serums promote gradual, semi-permanent results by extending the lash growth phase, leading to thicker and longer lashes over time.

    Most cosmetic-grade lash serums are peptide-based and include amino acids, botanical extracts, and vitamins. These ingredients help reduce breakage and enhance shine, although they do not directly alter the lash growth cycle.

    The eyelash growth phase typically lasts only 30 to 45 days. With consistent application, improvements usually appear within 6 to 12 weeks. However, once use stops, lashes gradually return to their original state.

    Key Lash Serum Ingredients to Look For

    With so many lash serums available, choosing the right one can feel overwhelming. Dr. Vowler recommends looking for formulas that strengthen lashes and support follicle health.

    • Peptides (such as Myristoyl Pentapeptide-17): Support keratin production
    • Panthenol (Vitamin B5): Hydrates and reinforces the lash shaft
    • Hyaluronic Acid: Prevents dryness and breakage
    • Amino Acids (such as arginine): Improve blood flow to the follicle
    • Plant Extracts (pumpkin seed, green tea): Provide antioxidants and gentle stimulation

    My Trusted Lash Serum Choice

    After trying several options, the one that delivered the most noticeable and consistent results for me is the RevitaLash Advanced Eyelash Conditioner. While it’s not the most affordable option, its performance stood out clearly.

    The brand describes it as an ophthalmologist-developed eyelash conditioner designed to enhance lash appearance while protecting against breakage and improving strength, flexibility, and overall health.

    The formula is vegan-friendly, cruelty-free, and powered by the proprietary BioPeptin Complex, a blend of vitamins and nutrients that hydrate, fortify, and naturally enhance lashes, including a subtle curling effect.

    RevitaLash Advanced Eyelash Conditioner Details

    • Key Ingredients: BioPeptin Complex, ginseng, Swertia Japonica extract, saw palmetto, amino acids, vitamin B
    • Application: Once daily on clean, dry lashes; allow 2–3 minutes to dry
    • Results: 98% of testers reported stronger, healthier-looking lashes
    • Why It Stands Out: Clinically tested, physician-developed, gentle yet effective, and suitable for sensitive skin

    Commerce Writer Mayola Fernandes notes that after three to four weeks, her lashes looked so full that colleagues assumed she was wearing extensions, with no irritation experienced.

    How to Apply Lash Serum Correctly

    According to Claire Larsen, global master educator at RevitaLash, consistency matters more than frequency. Applying lash serum once per day or night is sufficient—using more will not accelerate results.

    Apply a thin line to clean, dry lashes, directly above the upper lash line only. Avoid applying to the lower lashes.

    While results vary, many users notice improvements quickly, with continued enhancement over time.

    Who Should Avoid Lash Serums

    Dr. Vowler advises that some individuals should use caution or avoid lash serums entirely.

    • Those with ingredient allergies
    • People with sensitive skin or conditions like eczema, rosacea, or blepharitis
    • Pregnant or breastfeeding women, due to limited safety data
    • Individuals with eye conditions such as glaucoma, uveitis, chronic dry eye, or infections
    • Anyone who has had eye surgery within the last six months
    • Those using prescription lash treatments like Latisse, as combining products may cause reactions
    • Contact lens wearers should apply only after lenses are removed
  • I Tried a High Protein Diet for 2 Weeks Here’s How My Skin Body and Energy Changed

    I Tried a High Protein Diet for 2 Weeks Here’s How My Skin Body and Energy Changed

    I decided to try a high protein diet for two weeks to see how it would affect my skin, body, and energy levels, especially within the context of daily life in India where carb-heavy meals are common. From busy workdays to home-cooked meals, I wanted something practical and realistic. High protein diets are often praised for fitness and weight management, but their impact on skin clarity and day-to-day energy isn’t always discussed. This short experiment gave me some surprisingly noticeable changes—both positive and challenging—that felt worth sharing.

    High Protein Diet Effects on Skin Health

    Within the first week, I noticed subtle but encouraging changes in my skin. It felt less oily by midday, and a few stubborn breakouts started calming down. I believe this was linked to more stable blood sugar levels and fewer refined carbs. Foods like eggs, lentils, and paneer kept me full while supporting skin cell repair. I also felt better hydration retention, possibly due to improved nutrient absorption. However, I had to consciously increase water intake to avoid dryness, which can happen with higher protein intake. Overall, my complexion looked more even, and that healthy glow felt tied to balanced nutrient intake rather than any skincare product.

    How a High Protein Diet Changed My Body

    Physically, the changes were more noticeable than I expected in just two weeks. My body felt firmer, especially around the arms and core, likely due to better muscle recovery support. Even without changing my workout routine, I experienced less soreness after exercise. The biggest shift was reduced bloating, which made my clothes fit more comfortably. Protein-rich meals also helped control random snacking urges, thanks to longer satiety periods. That said, I had to plan meals better to avoid digestive discomfort, as sudden increases can feel heavy. Still, the sense of improved body composition was motivating enough to stay consistent.

    High Protein Diet and Daily Energy Levels

    Energy-wise, this was the most impressive part of the experiment. Instead of post-lunch crashes, I experienced steady energy release throughout the day. Breakfasts with protein kept my focus sharp, and afternoon fatigue almost disappeared. This consistency helped with productivity and even improved my mood. I realized that pairing protein with fiber was key for better digestion balance. On days I skipped this balance, I felt sluggish. The diet also supported mental clarity boost, making long work hours easier to handle. While caffeine intake naturally reduced, my overall stamina felt more natural and sustained.

    Overall Takeaway After Two Weeks

    After two weeks, the high protein diet felt less like a trend and more like a sustainable lifestyle tweak. The combined benefits to skin, body, and energy made daily routines smoother and more enjoyable. It wasn’t about extreme restriction but about smarter choices and listening to my body. Planning meals ahead and staying hydrated were crucial for digestive comfort management. While results can vary, this short experiment highlighted how food quality directly influences how we feel and look. For anyone curious, starting gradually and focusing on whole protein sources can make the transition far easier.

    Aspect Before Diet After 2 Weeks
    Skin Condition Occasional breakouts Clearer, balanced
    Energy Levels Afternoon crashes Consistent energy
    Body Feel Bloating Leaner, lighter
    Hunger Control Frequent snacking Better appetite control

    Frequently Asked Questions (FAQs)

    1. Is a high protein diet safe for everyone?

    Most healthy adults can follow it safely, but medical conditions require professional advice.

    2. Did you completely avoid carbohydrates?

    No, I focused on reducing refined carbs while keeping complex carbs in moderation.

    3. How much protein did you consume daily?

    I aimed for balanced portions spread across meals rather than exact gram counting.

    4. Would you continue this diet long term?

    Yes, with flexibility and variety to keep it sustainable and enjoyable.

  • This Trainer Says Simple Repeatable Workouts Build the Most Strength for Over 60s Try This Plan

    This Trainer Says Simple Repeatable Workouts Build the Most Strength for Over 60s Try This Plan

    Building strength after 60 does not require complicated routines or exhausting gym sessions. According to experienced trainers across the United States, the most effective results often come from simple, repeatable workouts that are easy to remember and safe to perform consistently. As the body ages, recovery, joint health, and balance become just as important as muscle growth. That is why many fitness experts now recommend straightforward strength plans that focus on consistency over intensity, helping older adults stay active, confident, and independent without feeling overwhelmed.

    Why Simple Repeatable Workouts Work Best for Over 60s

    For adults over 60, repeating familiar movements helps the body adapt safely and efficiently. When exercises stay consistent, muscles learn patterns faster, reducing the risk of injury while improving strength. Trainers emphasize that this approach supports joint-friendly movements, encourages muscle memory development, and promotes steady strength gains over time. Instead of chasing variety, repeatable routines allow older adults to focus on proper form and breathing. This method also builds confidence, since knowing what comes next removes anxiety around exercise. Over weeks, these simple patterns improve balance, posture, and coordination, all of which are essential for daily activities like walking, lifting groceries, or getting up from a chair.

    A Trainer-Approved Strength Plan for Seniors Over 60

    This plan focuses on full-body exercises performed two to three times per week, allowing enough rest between sessions. Trainers recommend prioritizing basic compound exercises such as squats, wall push-ups, and seated rows because they engage multiple muscle groups at once. Keeping repetitions moderate supports safe strength building while avoiding strain. Consistency also helps maintain healthy bone density, which naturally declines with age. Most importantly, workouts should feel challenging but manageable. If movements feel too difficult, they can be modified using chairs, resistance bands, or lighter weights, making the plan accessible for different fitness levels.

    How Consistent Training Improves Daily Life After 60

    Regular strength training does more than build muscle; it directly improves quality of life. Trainers note that repeatable workouts enhance everyday functional strength, making routine tasks easier and safer. Over time, participants experience better balance control, which lowers the risk of falls, and enjoy improved energy levels throughout the day. Mental benefits are just as important, as exercise supports mood and cognitive health. Because the routine is simple, older adults are more likely to stick with it long term, turning fitness into a habit rather than a chore.

    Why Simplicity Is the Key to Long-Term Strength

    The biggest advantage of repeatable workouts is sustainability. Complex programs often lead to burnout, but simple routines encourage long-term exercise adherence. Trainers believe that consistency leads to lasting mobility improvements and supports independent aging goals. By focusing on the same core movements, the body gradually becomes stronger and more resilient. Over months and years, these small, steady gains add up, helping older adults remain active, reduce injury risk, and enjoy a higher level of independence without unnecessary strain.

    Workout Element Recommended Frequency Primary Benefit
    Bodyweight Squats 2–3 times weekly Leg strength
    Wall Push-Ups 2 times weekly Upper body strength
    Seated Rows 2–3 times weekly Posture support
    Standing Balance Holds Daily Fall prevention

    Frequently Asked Questions (FAQs)

    1. How often should over 60s do strength workouts?

    Most trainers recommend strength training two to three times per week.

    2. Are repeatable workouts safe for beginners?

    Yes, simple routines are ideal for beginners because they reduce injury risk.

    3. Do these workouts require gym equipment?

    No, most exercises can be done at home using bodyweight or light resistance.

    4. How long before strength improvements are noticed?

    Many people notice better strength and balance within four to six weeks.

  • Goodbye Kitchen Cabinets: Homeowners Are Switching to a Cheaper Mold-Resistant Storage Trend for 2026

    Goodbye Kitchen Cabinets: Homeowners Are Switching to a Cheaper Mold-Resistant Storage Trend for 2026

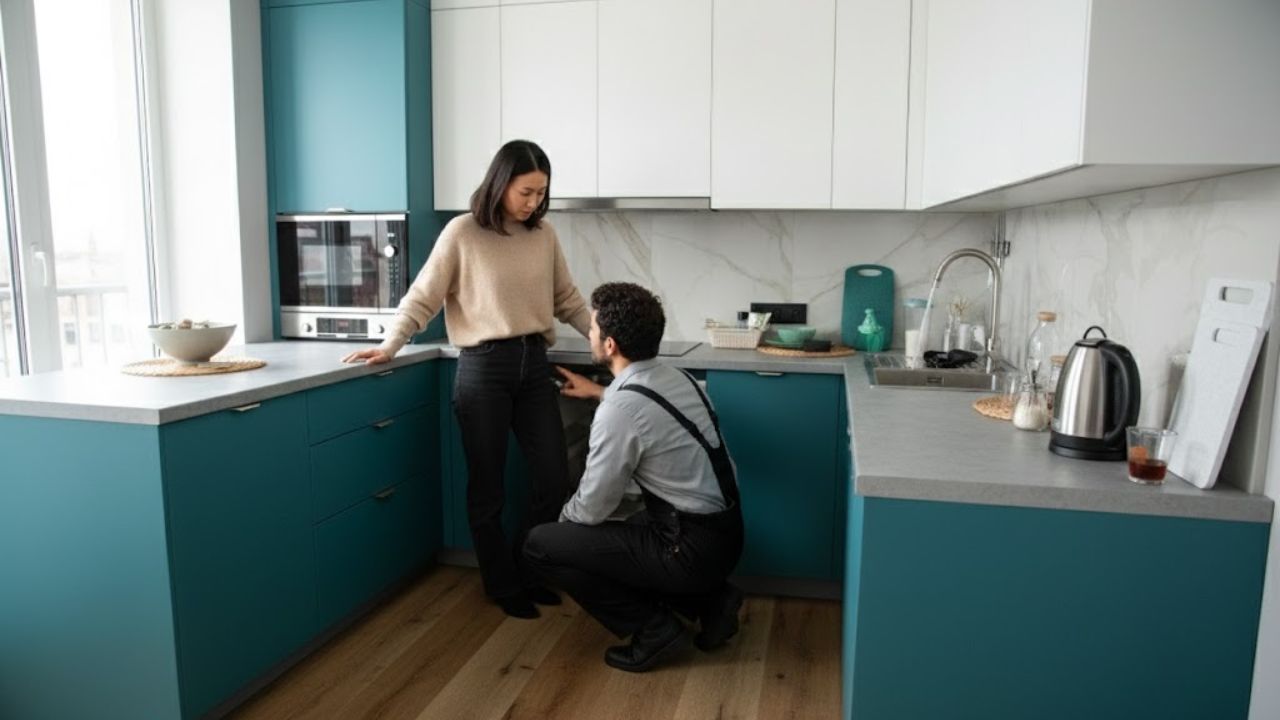
    Glossy white cabinets, identical handles, everything aligned like a catalogue spread. Then, a few months later, reality creeps in. Doors swell near the dishwasher, a dark stain appears under the sink, and there’s that unmistakable smell that hints something unwanted is growing. After spending a fortune, corners begin to yellow, edges chip, and panels quietly warp.

    Friends start sharing dreamy renovation clips from TikTok and Instagram. No upper cabinets. Open walls. Slim shelves. Industrial rails. It looks bold, almost unfinished, yet somehow more mature—and noticeably cheaper. That’s when the thought sneaks in: maybe wall cabinets are just a habit no one ever questioned.

    One evening, while adjusting yet another crooked door, you pause and wonder: what if the future of kitchens doesn’t include cabinets at all?

    Why Traditional Cabinets Are Losing Ground

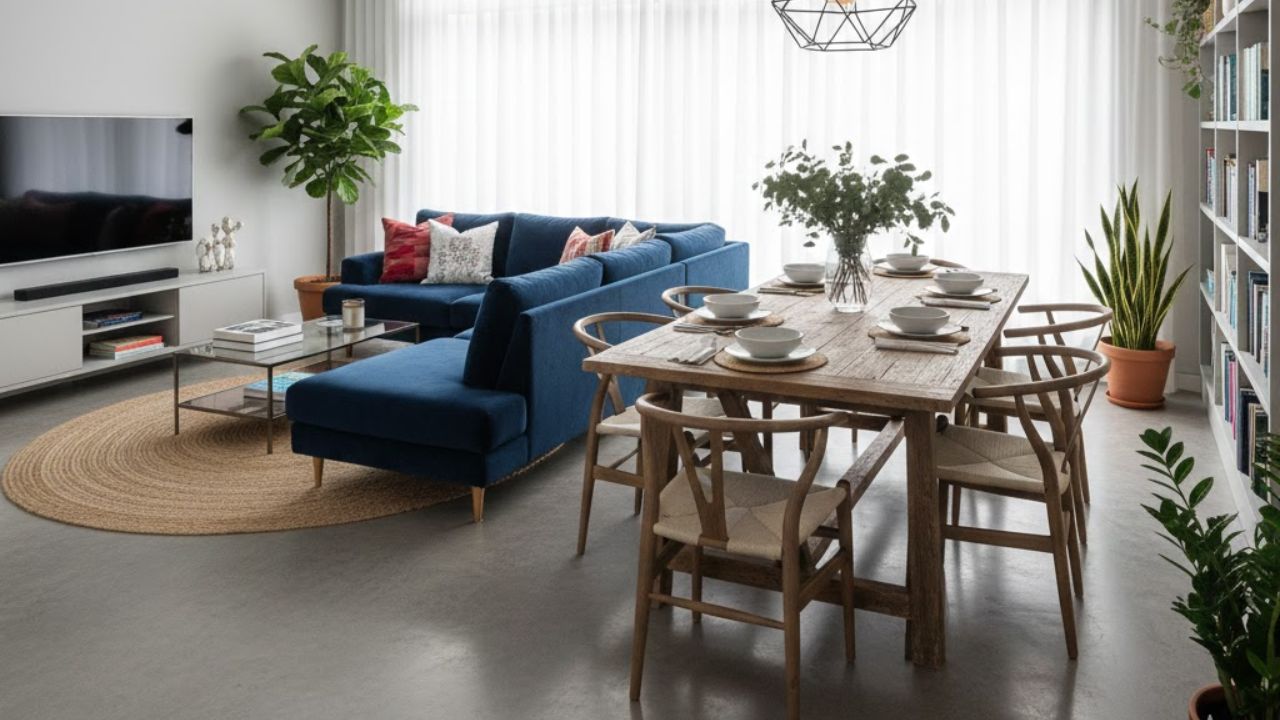
    Open-shelf and cabinet-free kitchens were once reserved for architects and design purists. Now they’re everywhere—small rentals, family homes, even low-budget renovations. The reason is simple: people are exhausted by bulky wooden boxes that trap steam, hide mess, and slowly rot out of sight.

    The classic setup hasn’t changed much: MDF or chipboard frames, attractive fronts, hinges, and hope. But kitchens are hot, humid, and full of tiny leaks. Every boil, splash, and forgotten crumb takes its toll. Over time, the damage shows up where you least look. The visible parts stay presentable, while the hidden ones decay.

    This has sparked a very practical question: if kitchens are such a harsh environment, why are we still lining walls with wood-based boxes?

    The Numbers—and Experiences—Back It Up

    Renovation data reflects this shift. In several European markets, design studios report that over a third of new kitchen projects now feature minimal or no upper cabinets. It’s not just about style. Homeowners who have already replaced sagging cupboards once—or twice—aren’t eager to repeat the process.

    Lena, 34, renovated her compact flat kitchen in 2022. Her previous cupboards had swollen near the sink and developed mould behind the base after only five years. This time, she chose steel rails, open shelving, and a single freestanding pantry on legs. Two winters, a dishwasher leak, and a toddler later, nothing smells damp, nothing peels, and cleaning is faster than ever. “I’m never boxing a wall in again,” she says.

    Stories like hers are what turn a design idea into a mainstream movement.

    The Practical Logic Behind Cabinet-Free Kitchens

    Most warping comes from trapped moisture and wood-based panels absorbing it. Most mould thrives in dark, still air. Remove the boxes, and you remove the perfect hiding spots. Steel doesn’t swell. Tiles don’t bubble. Open shelves dry quickly.

    There’s also a daily advantage: you spot dust, spills, and drips immediately. Nothing festers unnoticed. It’s not a miracle solution—it’s simply exposure.

    Even when people keep lower units, they often pair them with open upper sections: tiled walls, metal brackets, glass shelves, or aluminium profiles. The result is less material, fewer weak points, and more breathing space for both walls and budget.

    The Cheaper Shift: Rails, Shelves, and Freestanding Storage

    The move away from wall cabinets doesn’t mean living out of boxes. It’s about replacing fixed carcasses with flexible, movable pieces. The formula is straightforward: durable lower drawers where needed, combined with wall rails, open shelves, and one or two freestanding pantry units.

    A simple steel rail above the worktop holds mugs, utensils, and pans. A narrow shelf stores everyday glasses and bowls. A tall metal or solid-wood shelving unit near the fridge becomes the pantry. None of it warps under steam, and none of it creates a damp, hidden cavity. If the layout changes, you move it instead of demolishing it.

    Cost-wise, the difference is clear. A full run of bespoke wall cabinets can swallow thousands. Rails, brackets, and flat-pack shelves often come in at a few hundred total.

    “Where Will Everything Go?” The Storage Reality

    This is the most common concern, and the answer lies in method, not hardware. Start by emptying every cabinet and sorting items into three groups: daily use, occasional use, and unnecessary clutter.

    Daily items earn visible spots—plates, glasses, your best pan, the knife block. Weekly or seasonal tools move to lower cupboards or the freestanding pantry. The rest becomes a reality check.

    On most kitchen walls, two or three sturdy shelves can hold all everyday crockery. A single rail can carry ladles, spatulas, and a few pans. Dry goods stored in sealed jars stay visible without absorbing moisture. The goal isn’t more storage, but more honest storage.

    Common Mistakes—and How to Avoid Them

    The first mistake is turning open storage into visual chaos. Mismatched mugs, chipped plastic, and random packaging quickly overwhelm the eye. Start with a small, consistent visible set: one family plate set, one glass style, a few favourite mugs per person. Rotate the rest into drawers.

    The second mistake is poor placement. Shelves that are too high or rails that require stretching quickly become annoying. Place your most-used shelf just above eye level for the shortest adult in the home. Rails should allow you to grab a pan with one hand while cooking with the other.

    What Designers Are Saying

    Designers observing this shift are increasingly direct.

    “Closed cabinets made sense in cold, drafty homes where you needed protection from dust,” says London-based kitchen designer Marta R. “In modern flats, they mostly protect clutter and mould. Open systems force clarity. They’re lighter, cheaper, and anything dirty is instantly visible—and easy to wipe.”

    How It Changes the Feel of the Room

    Cabinet-free kitchens don’t just function differently—they feel different. Even narrow galley kitchens begin to feel connected to the living space. Light reaches the walls instead of disappearing into wooden boxes. Favourite bowls are seen, not forgotten. Tools you own actually get used.

    Practical Tips for Making It Work

    • Choose moisture-resistant materials like metal, glass, ceramic, or treated solid wood.
    • Keep absorbent items away from sinks and dishwashers.
    • Leave small gaps between shelves and walls for air circulation.
    • Wipe exposed surfaces weekly to prevent grease buildup.
    • Store flour, rice, and grains in tight-lid containers to avoid pests and hidden damp.

    Living With Your Kitchen, Not Fighting It

    Removing wall cabinets is more than a design choice—it’s a quiet lifestyle shift. You accept that kitchens are humid, active spaces, not showrooms. You stop hiding clutter and start designing for reality.

    We’ve all shoved random items into cupboards before guests arrive, promising to sort them later. That’s exactly how warping, mould, and mystery smells take hold. Open storage removes the hiding places. At first, it feels uncomfortable. Over time, it becomes freeing.

    There’s also relief in spending less and worrying less. When storage is steel, tile, glass, or freestanding furniture on legs, leaks feel less catastrophic. There’s no dark cavity for damp to settle in. That mental lightness is why this “cheap” trend often feels surprisingly luxurious once you live with it.

    Key Takeaways

    • Fewer fixed units: Replacing wall cabinets with rails, shelves, and freestanding furniture cuts costs and installation work.
    • Moisture-resistant materials: Metal, tile, glass, and treated solid wood reduce swelling and hidden mould.
    • Visible, honest storage: Keeping only what you use daily in sight makes cleaning easier and kitchens calmer.
  • This Dumbbell Routine Helped Me Get Stronger at 63 Without a Trainer and It’s Surprisingly Simple to Follow

    This Dumbbell Routine Helped Me Get Stronger at 63 Without a Trainer and It’s Surprisingly Simple to Follow

    I’ve stayed consistent with exercise for more than 40 years, through three pregnancies and multiple injuries, and at 63, my goal is to keep moving without slowing down anytime soon. Group fitness has always been my comfort zone—I even taught aerobics during the 1980s and 1990s—because I enjoy the energy, structure, and sense of community. Last year, I added a personal trainer to my routine to get more customized strength work following a shoulder replacement. Still, despite all that experience, one challenge remained: finding the confidence and motivation to train alone in the weight room.

    That’s why trying the Women’s Health+ Build & Burn series felt perfectly timed. My daughter Addison, an associate editor at Women’s Health, insisted I’d “absolutely crush” the dumbbell track—and she wasn’t wrong. Over the past year, I’ve been focused on getting stronger, lifting heavier, and learning to do it independently, without relying on my trainer. With the holidays and work demands piling up, I also needed something efficient and flexible that could fit into my schedule.

    Choosing the Right Track for My Lifestyle

    The Build & Burn series immediately stood out for its flexibility. It offers three tracks—dumbbell, barbell, and kettlebell—with four workouts per week. I chose the dumbbell option because it aligned best with my goals and the equipment I had access to at home and in my condo gym. While I regularly use barbells and kettlebells with my trainer, dumbbells made it easy to stay consistent without commuting to a full gym.

    Armed with dumbbells and determination, I was excited to begin. Below are my honest takeaways and lessons after completing the Build & Burn dumbbell program.

    First Impressions of the Dumbbell Program

    The plan follows a four-week structure with four workouts each week. As the weeks progress, exercises gradually become more challenging through increased reps or longer work periods. Each session includes a brief warmup, followed by the main lifts organized into supersets—three or four exercises performed back-to-back with no rest—then finished with an intense burnout finisher. You complete one superset for three rounds before moving on.

    Day 4 quickly became my favorite because it leaned heavily into cardio and HIIT-style movements. These are exercises I might normally skip, so having them programmed in pushed me outside my comfort zone in a really satisfying way.

    Weekly Workout Split

    • Day 1: Upper body
    • Day 2: Lower body
    • Day 3: Total body
    • Day 4: Conditioning and core

    Getting started felt effortless. All I needed were dumbbells and a mat, both of which were readily available. Each workout stayed under 45 minutes, making it easy to fit in whenever I had time—often at the end of the day.

    Quick Workouts, Big Impact

    After just the first week, I was impressed by how time-efficient the workouts were. I kept my usual routine of a five-minute warmup on the elliptical before starting, but once I began lifting, everything flowed quickly since there were no long rest periods. In about 35 minutes, I felt fully worked and accomplished.

    Compared to traditional gym sessions that can stretch to an hour or more, this structure kept me motivated during a hectic and stressful season. Even on days when I felt tempted to skip a workout, the program reminded me that I’d always feel better afterward.

    Easy to Modify for Injuries and Experience

    Because of my shoulder replacement, some movements aren’t ideal for me anymore—but the plan was easy to adjust. For example, I modified pushups by doing them on a bench to reduce shoulder strain. During chest presses, I adjusted my arm angle to stay pain-free while still targeting the correct muscles.

    I also swapped out exercises when needed. Sprawls didn’t feel right, so I substituted planks. I replaced snatches with biceps curls, and swapped weighted jumping jacks for squat jumps. These changes allowed me to stay consistent without aggravating old injuries.

    Despite past knee injuries, including torn ACLs and a knee replacement, I was pleasantly surprised that I didn’t need to modify any lower-body exercises. Lunges, skaters, and other dynamic movements were all doable—challenging, but manageable.

    Confidence Gains After Four Weeks

    Completing the program gave me a noticeable boost in confidence. I proved to myself that I could follow a structured strength training plan on my own, without a class or personal trainer. The workouts were clearly laid out, easy to follow, and still challenging—especially with my background in fitness and proper form.

    I also appreciated that the schedule left room for other activities. Over the four weeks, I still attended a few cycling classes and trained with my personal trainer, even incorporating some Build & Burn exercises into those sessions.

    Most importantly, I experienced clear strength improvements. Starting with lighter weights helped me ease in safely, but I progressed quickly. By the second and third weeks, weights that once felt heavy became manageable, which was incredibly motivating.

    What I’ll Take Forward

    Going forward, I plan to reuse many of the movements and training concepts from this program. Exercises like skaters, toe taps, and reverse lunges with a twist added variety, cardio, and core engagement. I also loved the superset-plus-finisher format, which was both challenging and enjoyable.

    This program is an excellent option for anyone who doesn’t have access to a personal trainer. Beginners can start with lighter weights to focus on proper form and gradually build confidence and strength over time.

    My Top 3 Tips for Build & Burn Success

    1. Plan Ahead to Stay Motivated

    The structured layout helped me stay committed during a busy holiday season. Knowing that each workout targeted a specific area—upper body, lower body, total body, or conditioning—removed the mental burden of planning. Scheduling workouts directly into my calendar made me far more likely to follow through.

    2. Start Small and Progress Gradually

    If you’re new to strength training or returning after an injury, doing something is always better than doing nothing. I began with lighter weights to protect my shoulder, then increased them quickly as my confidence grew. Choosing the right weight made the workouts feel both safe and effective.

    3. Customize the Program to Fit Your Body

    Modifying exercises was essential for me, and adding extra challenges kept things interesting. Some days I increased reps, added balance elements, or included extra core work. Tailoring the workouts ensured they stayed engaging and effective while meeting my needs.

    A Program That Builds Strength and Confidence

    The Women’s Health+ Build & Burn series helped me maintain strength and muscle during one of the busiest periods of my life. More importantly, it gave me the confidence to train independently and push myself in new ways. At 63, I rediscovered just how capable my body still is—and I left every workout feeling stronger than when I walked in.

  • Goodbye to the Dining Table the International Home Trend Replacing Traditional Eating Spaces Permanently

    Goodbye to the Dining Table the International Home Trend Replacing Traditional Eating Spaces Permanently

    A large oak rectangle stood in the middle of the apartment, surrounded by four chairs that hadn’t shifted all week. Real life unfolded elsewhere: tacos eaten on the sofa, laptops spread across the kitchen island, a child doing homework on the bed with crumbs scattered over the duvet. The so-called family table had quietly become a resting place for unopened mail and online shopping returns.

    Meanwhile, across Europe and the United States, architects are sketching something entirely different. Interior feeds are filled with open spaces where a traditional dining table is missing. In its place appear hybrid kitchen islands, oversized modular sofas, and low seating arrangements that resemble cafés or co-working spaces more than classic homes.

    Goodbye to the dining table? It’s no longer just a catchy phrase. A genuine shift is slowly entering our living rooms.

    A new living core as the table fades away

    In many newly built apartments abroad, the dining table has simply disappeared. Step into a modern flat in Copenhagen, Rotterdam, or Seoul, and the first thing you notice is often a large island block, a generous low sofa, or a continuous wall bench. These spots host eating, working, chatting, and scrolling all at once. The old table-and-four-chairs setup now feels performative, like scenery no one actually uses.

    The focus has shifted from a dining corner to a living core. One central, multi-purpose element anchors the space: an island, bar, platform, or oversized coffee table. Meals become just one activity among many. Seating is side by side, laptops remain open, plates slide aside, and conversations overlap naturally. It’s less about fixed positions and more about adapting as you go.

    In Tokyo, interior designer Yuto Kato notes that clients under 35 rarely request a classic table. “They want a sofa that functions as a table or a platform that doubles as a bed,” he explains. Fixed, formal eating areas don’t align with modern schedules. People eat at different times, often alone, often with screens nearby. Anything inflexible quickly turns into unused space.

    Data supports this shift. A 2023 survey of urban homeowners in the UK and Germany found that nearly 60% eat most weekday dinners away from a dedicated dining table. Among 18–34-year-olds, that number rises above 70%. Tables are still purchased, often for tradition or resale value, but daily life quietly happens elsewhere.

    Architects also see kitchens shrinking while social living areas expand. In Nordic countries, developers reduce formal dining zones and stretch the living space around a central adaptable feature. A Berlin architect refers to it as the “social island” — a solid surface where cooking, charging phones, spilling coffee, signing paperwork, and celebrating birthdays all coexist. When the dining table remains, it often serves more as a symbol than a tool.

    This evolution isn’t about laziness or trends driven by social media. It reflects how work, leisure, and meals now blend into a single timeline. With hybrid work and food delivery, shared meals no longer happen at one fixed hour or place. Furniture is gradually adjusting to real habits, along with a deeper desire to stop dividing life into rigid categories.

    How homes abroad replace the dining table

    The most common alternative is the social island placed between the kitchen and living area. Unlike narrow breakfast bars, these islands offer wide surfaces and comfortable seating. Imagine a thick wooden block with storage below, power outlets on the side, and a mix of stools, benches, or even a sofa edge nearby. It becomes the home’s daily gathering point.

    • Why people feel uneasy taking the last piece of food even when invited
    • The rare total solar eclipse bringing six minutes of darkness and where to see it
    • The exact phrasing that helps feedback land without triggering defensiveness
    • Why post-it notes clean keyboard crumbs better than compressed air
    • The psychological boost behind small wins and how to create more of them
    • Why bleach should never be used on urine stains due to toxic reactions
    • How letting yourself rest improves mental clarity and focus
    • How curiosity-based questions strengthen children’s critical thinking

    Another popular option is the oversized low coffee table paired with a deep sofa. In Seoul and Stockholm, these tables can be nearly bed-sized, surrounded by floor cushions pulled in when guests arrive. Plates, board games, notebooks, and remotes share the same surface. Meals become informal, with shared platters and relaxed postures that change the atmosphere entirely.

    For those considering this shift, the first step is surprisingly simple: choose one hero element. Are you someone who cooks and hosts, or someone who snacks and works from the sofa? Families who value long weekend lunches may choose a narrow island with seating on both sides. Couples in small spaces might prefer a sofa-platform paired with a lift-up coffee table that hides storage. Everything else stays light and movable.

    Soyons honnêtes: no one lives in a perfectly styled interior every day. Abroad, islands still collect unopened letters, and low tables gather sticky glasses and charging cables. The difference is acceptance. Furniture is designed to handle life as it happens, not to enforce ideal behaviour. If eating on the sofa is inevitable, the solution is to make a sofa that actually works for it.

    Many households recognize the familiar moment when a beautifully set table is abandoned in favour of the TV. Modern interiors now design around that reality. Sofa arms grow wider, cup holders appear, and coffee tables rise to laptop height. The result feels casual but closely aligned with how people live most days, not just on special occasions.

    As London-based interior architect Mia Harper puts it, “A home that demands upright dinners every night is like a suit worn only on Sundays. People want jeans and sneakers. They want furniture that adapts to them.”

    Common dining table alternatives abroad

    • Hybrid island-sofa – A central block bridging kitchen and living space, with stools on one side and a sofa edge on the other.
    • Oversized coffee table – Nearly mattress-sized, rounded, and fitted with storage for floor cushions.
    • Floor-level dining zone – A raised platform with mats and a low table inspired by Japanese and Korean interiors.
    • Wall bench with fold-out surface – A slim bench that hides a pull-down table for occasional group meals.
    • Rolling micro-tables – Small wheeled tables that move between sofa, balcony, and bed.

    What this shift changes in our homes and rituals

    When the dining table disappears, rituals must move elsewhere. Abroad, people create small habits to replace formality: placing phones in a bowl during shared meals, switching to warmer lighting once laptops close, or using a specific tray reserved only for communal snacks.

    This transition can feel uncomfortable for those raised around the table as a sacred gathering point. Some worry about losing meaningful family dinners. Yet many young parents notice children talk more freely while drawing at an island or sitting on the floor than when confined to identical chairs. Movement becomes easier, and conversation follows naturally.

    The real risk is fragmentation, with everyone drifting through the space alone. That’s why intentional design matters. Homes create magnetic zones using lighting, rugs, or music tied specifically to shared moments. Moving away from the dining table is less about abandoning togetherness and more about rebuilding it in ways that fit modern life.

    Looking at your own dining table, you may start to question its role. Is it a living space, or a quiet display of good intentions? This trend doesn’t demand immediate removal. It simply invites you to imagine shifting your home’s centre toward where life already happens.

    Perhaps your true table has been there all along, hidden among cushions or beside the coffee machine. The farewell may not be to shared meals, but to the rigid furniture once thought essential for them.

    Key takeaways

    • The heart of the home is shifting from the dining table to islands, sofas, and floor spaces, helping guide space and budget decisions.
    • Furniture is becoming hybrid, offering practical ideas like social islands and modular platforms.
    • Rituals matter more than furniture, with light, gestures, and atmosphere preserving shared moments.
  • 10 K Beauty Serums That Keep Skin So Hydrated It Looks Smooth Glossy and Glass Like

    10 K Beauty Serums That Keep Skin So Hydrated It Looks Smooth Glossy and Glass Like

    When it comes to skincare innovation, South Korea consistently sets the global standard. K-Beauty has produced some of the world’s most celebrated sun protection formulas, introduced treatments like the widely discussed salmon sperm facial, and continues to outperform many Western products when it comes to addressing redness, uneven tone, and texture. During a trip to Seoul last year, a visit to Olive Young—often compared to Sephora—felt essential. That stop resulted in over $400 worth of skincare and, eventually, an extra suitcase.

    After spending the past 12 months testing nearly every product I bought, the timing feels perfect as Olive Young arrives in New York City. With firsthand experience across categories, it’s now easier to pinpoint which formulas truly deliver and are worth repurchasing. Below is a curated breakdown of the standout products that earned a permanent spot in my routine.

    Glass Skin Essentials for Smooth, Luminous Texture

    The concept of glass skin originates from Korean beauty culture and refers to skin that looks exceptionally smooth, clear, and radiant. These products focus on refining skin texture, evening tone, minimizing the look of pores, and restoring a plump appearance with lasting hydration.

    Sulwhasoo First Care Activating Serum

    This luxurious serum immediately shows why it’s considered a K-Beauty staple. Formulated with ginseng extract, it supports skin barrier repair while helping improve brightness through a vitamin C derivative. A blend of traditional Korean herbal extracts enhances hydration, leaving the skin balanced and revitalized after each application.

    Peach & Lily Glass Skin Refining Serum

    Designed to live up to its name, this lightweight serum enhances daily radiance with consistent use. A single pump helps smooth uneven texture and delivers a soft pearlescent glow. It performs especially well on makeup-free days, giving the complexion a polished, refreshed finish.

    Targeted Solutions to Calm Redness

    For those dealing with persistent flushing or rosacea-prone skin, reducing redness can be challenging. Alongside lifestyle adjustments and prescription care, these formulas help visibly neutralize skin redness both instantly and over time.

    Erborian CC Red Correct

    This multitasking formula combines the benefits of a calming serum, SPF protection, and color-correcting pigments. It adapts to the skin upon application, disguising redness while soothing irritation. Its long-term place in my routine speaks to its consistent performance.

    Cicapair Sensitive Skin Serum

    When skin feels overheated or inflamed, this serum offers immediate relief. Powered by centella asiatica and allantoin, it helps calm irritation on contact while supporting barrier repair. Chilling it beforehand enhances its cooling effect.

    Gentle Yet Effective Care for Acne-Prone Skin

    K-Beauty approaches acne by prioritizing barrier restoration and hydration rather than harsh treatments. The goal is to calm flare-ups while maintaining skin balance, making these formulas suitable for sensitive complexions.

    Innisfree Gentle Retinol & Salicylic Acid Serum

    This formula blends salicylic acid with a low-strength retinol to address breakouts without causing dryness. A green tea complex supports hydration, reduces visible redness, and helps strengthen the skin barrier for a more resilient complexion.

    SKIN1004 Madagascar Centella Tea-Trica Relief Ampoule

    Ideal for sensitive, acne-prone skin, this ampoule uses plant-based calming extracts to minimize redness, refine pores, and support overall balance. Its non-comedogenic formula makes it suitable for regular use.

    Advanced Serums for Aging Skin Concerns

    South Korea is known for its advanced anti-aging treatments, both in-office and at home. For those unable to travel, these serums help address fine lines, uneven tone, and loss of firmness.

    Medicube PDRN Pink Peptide Serum

    This topical serum uses PDRN technology derived from salmon DNA, paired with hydrating peptides. The formula supports skin regeneration, improves elasticity, and helps even out pigmentation for a smoother appearance.

    Haruharu Wonder Black Rice Hyaluronic Serum

    With a lightweight, lotion-like texture, this serum targets visible wrinkles through black rice extract and hyaluronic acid. Applied as a spot treatment, it helps create a visibly plumped effect within weeks.

    Lightweight Eye Serums That Deliver Results

    K-Beauty eye serums are designed to be thinner than traditional creams while still delivering high-performance actives. They focus on smoothing fine lines, improving dark circles, reducing puffiness, and restoring hydration.

    CosRx Snail Peptide Eye Cream

    Building on the popularity of snail-based skincare, this eye formula uses snail mucin and peptides to brighten and firm the under-eye area. It effectively reduces puffiness without irritating sensitive skin.

    Beauty of Joseon Revive Eye Serum Ginseng + Retinal

    This eye serum blends ginseng extract with retinal to target dark circles and fine lines. Its lightweight consistency layers smoothly under concealer, making it suitable for both morning and evening routines.

  • 6 Daily Exercises That Build Real Strength More Effectively Than Gym Machines After 50

    6 Daily Exercises That Build Real Strength More Effectively Than Gym Machines After 50

    Exercise machines often advertise safety and ease of use, but after 50 they can quietly erode true strength. Fixed movement paths remove balance challenges, limit stabilizer muscle engagement, and allow dominant muscles to take over while weaker areas decline. Over time, these imbalances reduce functional ability and shift excess stress onto the joints instead of distributing work through the muscles.

    Everyday strength depends on coordination, postural control, and managed tension. Free, body-led movements require muscles to stabilize, communicate, and generate force together. This cooperation builds practical strength that supports daily tasks like carrying groceries, climbing stairs, and protecting joints, all without unnecessary wear and tear.

    The six movements below fit naturally into daily routines and outperform machines by restoring natural movement patterns. Practiced daily with focus, moderate effort, and clean form, they help strength build steadily and reliably after 50.

    Sit-to-Stand Squat for Daily Leg Power

    This exercise develops lower-body strength using the same motion performed multiple times each day. Unlike leg press machines that lock the body into one track, sit-to-stand squats require balance control, hip drive, and core engagement at the same time. Each repetition trains the legs and trunk to work together, supporting knee health while reinforcing strong hip extension.

    Daily practice improves neuromuscular efficiency, allowing strength to be expressed smoothly and without strain. Over time, this movement rebuilds leg power, boosts confidence, and reinforces joint-friendly mechanics that machines fail to address.

    How to Do It

    • Sit on a chair with feet shoulder-width apart
    • Brace the core and lean slightly forward
    • Push through the heels to stand tall
    • Lower back down with controlled movement

    Standing Push-Away Press for Upper-Body Stability

    Upper-body pushing strength is essential beyond the gym. This standing press variation forces the shoulders, chest, arms, and core to stabilize while producing force. Unlike seated machines that provide external support, this movement demands upright posture, full-body balance, and tension management from head to toe.

    Performed daily, it improves shoulder durability and restores pressing strength without compressing the joints. Light resistance paired with slow, controlled motion builds more usable strength than heavy machine work that removes stabilization demands.

    How to Do It

    • Stand tall holding a resistance band or light dumbbells
    • Press hands forward at chest height
    • Keep ribs down and core braced
    • Return slowly with control

    Hip Hinge Reach to Protect the Spine

    Strong hips play a major role in protecting the spine and powering movement after 50. This hinge exercise targets the glutes and hamstrings while teaching proper hip loading mechanics instead of stressing the lower back. Many machines isolate muscles without teaching this essential coordination.

    Daily hinge practice restores posterior-chain strength, enhances posture, and reinforces safe bending patterns. This combination directly reduces back strain and supports stronger, more confident movement throughout the day.

    How to Do It

    • Stand tall with feet set hip-width apart
    • Push hips back while reaching arms forward
    • Maintain a long, neutral spine
    • Return to standing by driving hips forward

    Split-Stance Hold for Single-Leg Strength

    Single-leg strength is a key marker of resilience after 50. This split-stance position challenges balance awareness, hip stability, and leg strength simultaneously. Machines rarely reveal side-to-side differences, but this stance exposes and corrects them efficiently.

    Holding this position daily strengthens stabilizing muscles around the hips, knees, and ankles. Improved balance lowers fall risk while reinforcing strength that transfers directly to walking, stair climbing, and everyday movement.

    How to Do It

    • Step one foot forward into a split stance
    • Lower slightly until both legs are engaged
    • Hold the position with an upright torso
    • Switch sides after each hold

    Standing Row Pull-Back for Posture Support

    Upper-back strength is essential for maintaining posture and protecting the shoulders. This standing row movement trains the arms while requiring the core and hips to stabilize the body. Many machines support the torso, allowing postural collapse without consequence.

    Daily pulling strengthens muscles responsible for upright alignment and shoulder positioning. Consistent tension in these areas reduces neck strain, improves arm strength, and balances the pushing movements common in daily life.

    How to Do It

    • Stand tall holding a resistance band or dumbbells
    • Pull elbows back toward the ribs
    • Squeeze the shoulder blades together
    • Return slowly with control

    Loaded Carry Walk for Real-World Strength

    Few movements build practical strength like carrying weight while walking. This exercise trains grip strength, core bracing, hip control, and postural endurance at the same time. Machines isolate individual parts, while loaded carries integrate the entire system.

    Practiced daily, carries reinforce proper bracing and teach the body to move under load without breakdown. Even short distances performed with focus develop durable strength that carries over into nearly every aspect of life after 50.

  • Expert Yoga Stretch in 13 Minutes: Routine That Restores Alignment Improves Mobility and Feels Amazing Fast

    Expert Yoga Stretch in 13 Minutes: Routine That Restores Alignment Improves Mobility and Feels Amazing Fast

    If you spend most of your day sitting at a desk, scrolling on your phone, or juggling constant stress, finding a quick way to ease tension can feel essential. When your body starts to feel tight or fatigued, a short, focused stretch can make a noticeable difference in how you feel.

    Yoga expert Adriene Mishler, founder of Yoga with Adriene, offers a simple solution designed to do exactly that. Her 13-minute upper back and neck-focused yoga stretch fits easily into your routine, whether you practice it in the morning, during a lunch break, or right after work. The session is designed to help release built-up tension and bring more ease into the body through gentle, mindful movement.

    According to Mishler, modern digital habits cause stress to collect in the upper back and neck, often leading to poor posture, stiffness, and discomfort. This short practice uses slow stretches and intentional mobility work to support alignment, improve movement, and create a feeling of openness through the shoulders, spine, and neck. With just a mat and optional props, it offers a quick moment of relief.

    How the Upper Back and Neck Yoga Session Begins

    Like many of Mishler’s routines, the practice starts seated in a comfortable cross-legged position. After a few calming breaths, you’ll gently move your upper body in circular motions, allowing the spine to round and extend naturally. These slow movements encourage spinal awareness, help warm the muscles, and prepare the body for deeper stretches.

    You’ll then transition into a gentle neck stretch by dropping one ear toward the shoulder and switching sides. This simple movement helps release neck tension and ease stiffness that often builds up from long hours of sitting or screen use.

    Cat-Cow and Mobility-Focused Movements

    Once the body feels warmer, Mishler guides you into a tabletop position for classic cat-cow stretches. This foundational movement encourages you to alternate between arching and rounding the spine, syncing each motion with your breath. The cow pose gently opens the chest, while the cat pose helps stretch the upper back and support spinal strength.

    These flowing movements are especially effective for improving upper body flexibility and maintaining a healthy spine. Practiced slowly, they also help build body awareness and ease tension stored in the back and shoulders.

    Spinal Twists for Deep Tension Release

    The session also includes a series of slow, controlled spinal twists. Highlights include a relaxed thread-the-needle stretch and a seated raised-arm twist. These poses are designed to improve spinal mobility, gently stretch the shoulders, and create a satisfying release through the upper back.

    By moving with intention and breath, these twists help the body feel lighter and more open, making them especially helpful after long periods of inactivity or mental stress.

    Why Short Yoga Sessions Can Reduce Stress

    Beyond improving flexibility, yoga is widely known for its ability to lower cortisol levels and reduce stress. Research published in the International Journal of Preventive Medicine highlights yoga’s effective role in stress reduction, along with benefits such as improved mood and reduced anxiety. As Mishler’s practice shows, even 10 to 13 minutes of simple, mindful movement can make a meaningful difference in how both the body and mind feel.