Blog

  • Hairstyles After 60: Forget Dated Cuts This Hairstyle Is Considered the Most Youthful by Stylists

    Hairstyles After 60: Forget Dated Cuts This Hairstyle Is Considered the Most Youthful by Stylists

    The woman facing the salon mirror kept pulling at the tips of her hair. It sat at shoulder length, perfectly blow-dried and held firmly in place. “I’ve worn this cut since my son was in high school,” she said softly, meeting her own gaze as if for the first time. Her son is now 43. Around her, hairdryers buzzed and quiet chatter floated by, yet she felt alone with one nagging thought: when did my hair start looking older than I feel?

    The stylist leaned in, studied her face, then smiled. “You’re 64, not 104. Give me twenty minutes and we’ll take ten years off.”

    What followed is something professional hairstylists are repeating more and more. One very specific haircut is quietly taking over.

    The haircut that subtly takes years off after 60

    Ask several stylists which haircut makes women over 60 look instantly refreshed, and the answer is strikingly consistent. A modern, softly layered bob, slightly undone, falling somewhere between the jawline and the collarbone. Not the stiff, rounded styles of the past. Not the ultra-short cuts that can sharpen features too much.

    This bob has movement. It sways as you walk, softens strong lines, and lets a few strands frame the cheeks. The face appears lifted rather than pulled tight. It doesn’t look “set.” It looks lived-in, relaxed, and real.

    Take Françoise, 67, a retired nurse, who walked into a Paris salon wearing the same rigid, back-combed style she’d kept since the 1990s. Her stylist suggested a layered bob grazing the neck, with gentle bangs brushing the eyebrows. “I almost protested,” she laughs. “I thought going shorter would make me look older.”

    They cut it anyway. The blow-dry took ten minutes. When she put her glasses back on and looked up, the change was subtle but undeniable. Her jawline appeared more defined, the lines around her mouth softened, and her eyes looked brighter. Two weeks later, friends kept asking if she’d done something to her face. She hadn’t. It was just the haircut.

    Why this layered bob works so well beyond sixty

    The reason this style is so effective is simple. As the face naturally loses volume over time, long and heavy hair tends to pull features downward. Extremely short hair, on the other hand, can expose every contour and shadow. The mid-length layered bob sits right in between. It frames the face, adds support, and brings structure without overwhelming it.

    Light layers introduce texture where hair often becomes finer. Soft movement around the cheekbones creates a gentle, contouring effect. The eye reads the face differently when hair lifts instead of weighing it down. That’s why many professionals quietly refer to this cut as their “non-surgical facelift.”

    How to ask for a youthful bob without disappointment

    The transformation doesn’t happen by simply asking for “a bob.” The youthful version relies on three essentials: the right length, soft layers, and gentle framing around the face. Most stylists agree the most flattering length sits between the bottom of the ear and just above the collarbone. Too short can feel severe. Too long, and the lifting effect disappears.

    When you sit in the chair, avoid vague descriptions. Bring one or two photos of women close to your age whose hair you admire. Then be clear: “I want a layered bob with movement, not a round, helmet-style blow-dry.” Those words matter more than you might expect.

    A common mistake after 60 is chasing volume at all costs. Heavy teasing, stiff hairspray, thick mousse at the roots—techniques that once worked can now look dated. They freeze the hair and draw attention to lines around the forehead.

    Another trap is holding onto a style that suited a younger version of your face. We’ve all looked at old photos and thought, “That haircut was so me.” But features change, and so does daily life. Few people do a perfect salon blow-dry every morning. You need a cut that still works when you simply rough-dry it with your hands.

    Stylists agree on one rule: this bob should never look too perfect. A few uneven pieces, a slightly tousled finish, maybe a soft wave from a large-barrel iron. That intentional imperfection is what keeps it modern.

    What professional stylists emphasize most

    “Women over 60 don’t need ‘age-appropriate’ hair,” says London hairstylist Carla Mendez, who works primarily with mature clients. “They need hair that reflects their energy. A soft, textured bob lets them move, laugh, run for the bus, and still feel like themselves. The goal isn’t to hide age, but to stop the haircut from adding years they don’t feel.

    • Ask for softness: Face-framing layers, light texture, and no harsh lines around the jaw.
    • Prioritize movement: A cut that holds its shape when air-dried or finger-styled.
    • Keep some length: Between chin and collarbone allows tucking, pinning, or gentle waves.
    • Consider a gentle fringe: Wispy bangs can soften the forehead and highlight the eyes.
    • Limit styling time: If it needs forty minutes every morning, it’s working against you.

    More than a haircut: a quiet shift after sixty

    What surprises many women isn’t just how this cut looks, but how it feels. When the old, stiff style falls to the floor, something else often goes with it: other people’s expectations of how a woman “should” look at a certain age. The new bob moves when you laugh, works with sneakers or lipstick, behaves on holiday and in the grocery line.

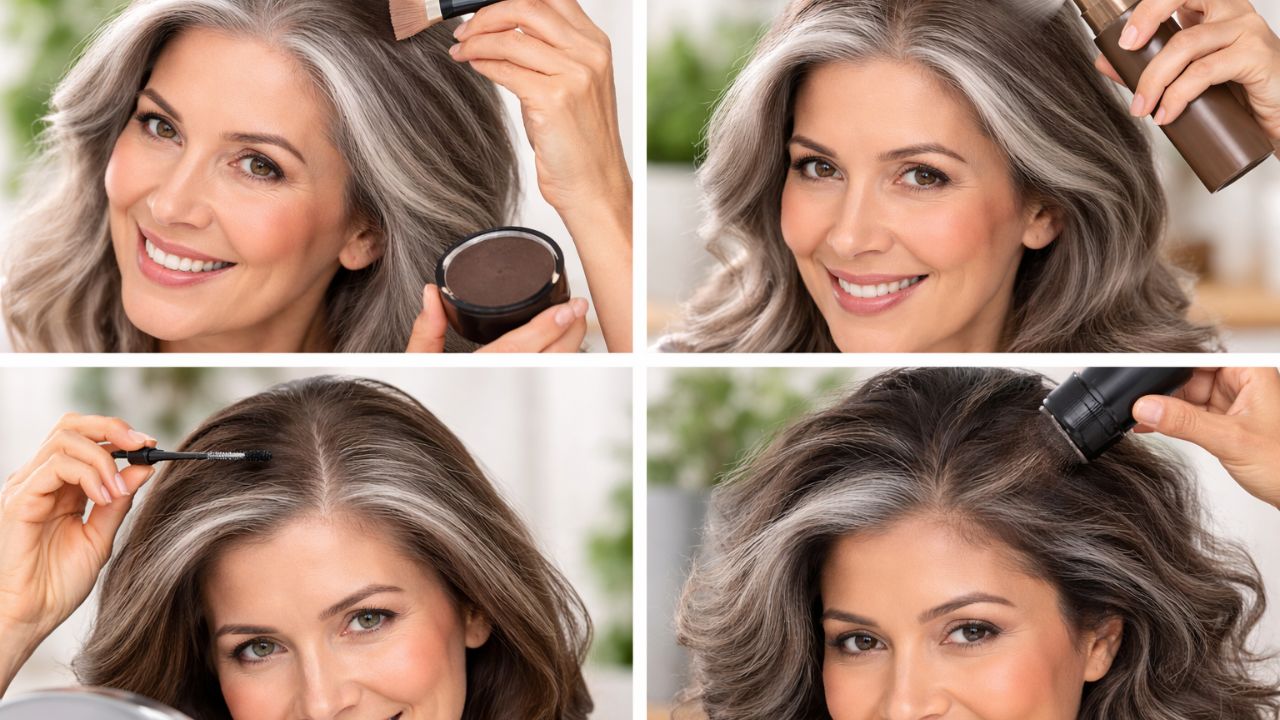
    Some women embrace their grey and add a luminous gloss. Others choose a soft balayage to break up solid color. The shared thread is the same: less effort, more presence. A haircut that doesn’t demand attention yet quietly says, “I’m still here, and I’m not done trying.” It sparks conversations, invites photos with grandchildren, and travels lighter than a bag full of makeup.

    • Modern layered bob: Mid-length, textured, and softly moving around the face, helping lift features and counter the downward pull of heavy hair.
    • Soft, flexible styling: Air-dried finishes and light products that look current without salon-level effort.
    • Personal adaptation: Adjusting length, fringe, and color to suit your face shape and daily life, creating a cut that feels authentically yours.
  • Restore Shine to Dirty Tiles and Grout Quickly Using Easy Natural Methods

    Restore Shine to Dirty Tiles and Grout Quickly Using Easy Natural Methods

    The tiles beneath your feet hold more history than you might realize. They have absorbed years of wet footprints and muddy paw prints along with spills from rushed morning meals and dust that settles after long days. One day you look down and notice the floor that used to be bright now appears worn out. The grout lines that were once clean & light have become dark borders that make the entire room seem lifeless. You drag a finger across a grout line and it leaves a gray mark. It is not a major problem but it makes your home feel less inviting. The thought of using strong chemical cleaners with rubber gloves and harsh fumes seems as tiring as dealing with the dirt itself. However it does not need to be that way. Using a few natural ingredients & some effort you can bring back that brightness without much trouble.

    The Moment You Notice the Dullness

    It often starts with a single ray of light. The afternoon sun slants across your kitchen and suddenly every streak and speck becomes visible. You see dull spots where there used to be a glossy reflective surface. The grout lines between tiles look darker as if they’re swallowing the light instead of reflecting it. You crouch for a closer look. Near the stove you notice a faint ring from an old sauce spill. By the door there’s a gritty trail from shoes that came in on a rainy day. You hadn’t noticed the gradual shift or the way dirt & grime layered themselves over time. You just saw the slow fade of shine and the subtle way a bright room can go a little flat. There’s an instinctive urge to scrub and fix it right now. But you hesitate. The strong chemical smell from store-bought tile cleaners lingers in your memory. You picture harsh sprays fogging the air with your eyes stinging and your throat scratching. That strange artificial scent somehow smells both clean and completely unnatural. You’d rather open the windows and pull on comfortable clothes. You want to reach for something gentler that you can mix in a simple bowl on your kitchen counter.

    The Quiet Power of Simple Natural Ingredients

    Natural cleaning can be just as effective as chemical products. The key is combining the right ingredients with warm water and a soft brush while giving them enough time to work. These gentle cleaning agents are convenient because most of them are already in your home. You can find them in your pantry or under your kitchen sink ready to use whenever you need them. The effectiveness comes from understanding how these natural substances interact with dirt and grime. They may work more slowly than harsh chemicals but they get the job done without releasing toxic fumes or leaving harmful residues behind. This makes them safer for your family and pets while still maintaining a clean home environment.

    Baking Soda: The Soft Grit That Listens to Your Hands

    Baking soda has a texture that feels soft and powdery when you touch it. If you rub it between your fingers it seems almost silky but still has a slight grittiness to it. When you use it on tile and grout it works as a mild scrubbing agent. It has enough roughness to remove dirt and grime but it won’t damage the surface underneath. Instead of stripping away material it gently lifts away the mess.

    Vinegar: The Sharp, Efficient Restorer

    Vinegar has a sharp smell that hits you as soon as you open the bottle. When you use it for cleaning it works in a straightforward way. Mix it with warm water & it removes soap scum and water spots along with the daily buildup that makes tiles look dull. It works particularly well on ceramic & porcelain tiles that have developed a cloudy layer. When you combine vinegar with baking soda on grout lines you get a fizzing reaction. The bubbles form & break down while pulling dirt out of small spaces. It seems almost magical but it’s really just basic chemistry using common household items to clean your floors effectively.

    Lemon, Soap, and Salt: The Supporting Cast

    Sometimes you need a cleaning routine that fills your space with fresh & lively scents. Lemon juice brings the smell of sunshine and fresh air into your home. When you rub a cut lemon across dirty tile edges it leaves a clean citrus scent behind while its natural acids work to break down stains and mineral buildup. Adding castile soap or a gentle dish soap helps the mixture spread smoothly across surfaces and breaks down greasy spots to make mopping simpler. For those extra tough stains you can add a small amount of fine salt to boost your scrubbing power. The tiny grains work like little helpers that gently wear away the marks left behind from daily use.

    A Simple Natural Routine That Brings Back the Shine

    Picture this: the windows are open, soft light comes through a basin of warm water sits on the counter and a small group of ingredients waits beside it. Restoring tile doesn’t need to be difficult. It can feel like caring for a surface that has served you quietly for years.

    Step 1: Clear, Sweep, and Breathe

    Begin by clearing the floor. Pull back chairs and lift rugs. Move small baskets and bins aside. As the space opens you get a clearer view of every tile and every line of grout. Then sweep with slow strokes. Listen to the gentle sound of bristles moving dust and crumbs into small piles. When you’ve swept and maybe run a dry mop over the surface the room already feels lighter and more orderly.

    Step 2: Mix a Quick Everyday Tile-Shine Solution

    Ingredient Amount Purpose
    Warm water 2 liters (about 8 cups) Base for dissolving dirt and spreading cleaner
    White vinegar* 1/2 cup Cuts residue, restores shine
    Liquid castile or mild dish soap 1–2 teaspoons Lifts grease and everyday grime
    Optional: a few drops of essential oil 3–5 drops Adds a gentle, pleasant scent

    Step 3: Focused Grout Revival with Baking Soda and Vinegar

    Speed does not have to mean aggression. Quick & natural methods can deliver visible results in a single afternoon without leaving your home smelling like a laboratory. The secret lies in understanding what your tiles and grout actually need and what they cannot stand. Most people assume that harsh chemicals are the only way to achieve fast cleaning results.

    Matching Method to Material

    Not all tiles are the same & giving them the right kind of care matters for keeping them in good condition. Ceramic and porcelain tiles are the easiest to maintain. You can safely use vinegar-and-water solutions or baking soda paste or mild soap on these surfaces. Natural stone tiles like marble or slate or travertine or limestone need more careful handling. Acidic cleaners such as vinegar and lemon can damage the surface and create dull spots that are difficult to fix. For stone tiles stick to warm water with a small amount of gentle pH-neutral soap and use microfiber cloths or mops. Glazed tiles have a protective glassy coating while unglazed tiles are more porous. Avoid harsh scrubbing on unglazed tiles and make sure to rinse all surfaces thoroughly after cleaning. When you are unsure about a cleaning method test it on a small hidden area first. This simple step helps you avoid damaging your tiles.

    Keeping the Shine Alive with Gentle Habits

    Once the tiles are gleaming and the grout looks clean again the room feels different. Light bounces around more easily and colors in the room appear more accurate. This is not just about cleanliness but about how a bright floor makes a space feel more alive. The transformation goes beyond surface level improvements. A freshly cleaned floor changes the entire atmosphere of the room. Everything seems more inviting & the space feels larger than before. The renewed appearance creates a sense of order that affects how you experience the entire area.

    Small Daily and Weekly Rituals

    Keeping your floors looking good does not require scrubbing every weekend. Think of it as taking care of a small garden with regular and simple work. Stop dirt at the door by placing a doormat on both sides of entry doors. Walking on these mats removes tiny rocks & dirt that could scratch or damage your tiles. Use a dry mop or broom regularly to pick up dust before it gets stuck in the grout lines. A soft broom or microfiber mop works well for quick cleaning. Clean up spills right away when they happen. If you drop sauce or spill coffee just wipe it up within a few minutes. The less time liquid sits on the floor the lower the chance it will leave a stain. Do a light mopping once a week using warm water with a small amount of mild soap. This is usually all you need. Only use vinegar when you notice buildup forming rather than using it every time. Let fresh air in while you clean. Opening windows helps the floor dry faster and makes the room feel more comfortable.

    A Soft Finish: Buffing by Hand

    There is something quietly satisfying about the final step. After you finish mopping and cleaning the grout and the floor has mostly dried in the air you should take a clean and dry microfiber cloth or flat mop & move it lightly across the tiles. This simple buffing step removes the last drops of moisture and any faint streaks that remain. Under your hand the floor transforms from just clean to softly gleaming. You notice how the light from a lamp now travels across several tiles before breaking. You see the faint reflection of a chair leg and the outline of a plant pot mirrored gently in the floor. These are small things but they alter how a room feels in a way that is a bit like opening curtains in your mind.

    When Cleaning Becomes a Conversation with Your Home

    Restoring the shine to dirty tiles & dim grout lines goes beyond just making things look better. It connects you to the surfaces that support you daily. You kneel and scrub and rinse while remembering dinners and spills and moving days and muddy seasons. Dirt tells a story but so does the act of clearing it away. Natural methods fit into that story without disruption. There are no harsh chemical fogs and no aching throat from fumes. Just warm water and grainy baking soda and bright citrus & the soft slide of vinegar across dull ceramic. Your skin stays comfortable and the air remains breathable. Pets wander through the room without any danger. The transformation happens surprisingly fast. An afternoon or even an hour for a small space can make an obvious difference. The room becomes lighter and your mood lifts with it. You see clean grout like fresh lines in a sketch and tiles shining like they did when the room was new. You accomplished this with simple tools that care for your home without damaging it. The next time sunlight crosses your floor it will meet a surface ready to reflect it back into the room. You will feel that small quiet satisfaction of knowing you did more than scrub a floor. You gave part of your home its light back.

  • At 56 Jennifer Aniston Credits This 30 Minute Fitness Class for Maintaining Strength and Muscle Tone

    At 56 Jennifer Aniston Credits This 30 Minute Fitness Class for Maintaining Strength and Muscle Tone

    For Hollywood legend Jennifer Aniston, working out once meant spending 45 minutes on high-intensity cardio like running or boxing. After years of demanding, high-impact routines, her body began craving movement that was gentler—but still powerful. That change led her to Pvolve, a low-impact workout centered on functional strength training.

    Guided by her trainer, Dani Coleman, the 56-year-old has been focusing more on strength and longevity rather than intensity alone.

    Why Strength Matters More With Age

    Muscle supports our skeleton,” Jennifer explains. “As we get older and lose muscle mass, our bones can become brittle and may lead to osteoporosis. One of the main causes of injury among older adults is falling and breaking a bone because there isn’t enough muscle support—we want to avoid that.”

    Wellness Beyond the Workout

    Exercise is just one piece of Jennifer’s overall wellness routine. She recently spoke with Women’s Health about the many habits that help her stay balanced, energized, and happy—including time spent with her two beloved dogs.

    Jennifer Aniston’s Healthy Habit Q&A

    After letting my dogs, Clyde and Chesterfield, outside to run around, I prepare 16 ounces of water mixed with colostrum, hair-growth peptides, and the juice of a whole lemon. That’s the first thing I consume, about 30 to 45 minutes before coffee or breakfast.

    Who inspired you early on?

    My grandmother. I loved sitting with her in the kitchen while she made spanakopita, cookies, and Greek pastries. She always made me laugh and took such loving care of me.

    Nothing makes me happier than curling up on the couch with my two dogs, getting cozy, and watching a great show.

    Your go-to habit for physical longevity?

    Maintaining healthy muscle mass is essential. I do Pvolve workouts with my trainer, Dani, three to five times a week, and I’ll add a Pilates class occasionally to keep things varied.

    How do you care for your mental health?

    I try to meditate daily. Some days are too busy for a full 20 minutes, but I’ll still find 10 minutes—or even a short pause—to breathe and quiet my mind.

    When did you last feel truly on top of the world?

    I always feel that way when I finish a project. Wrapping something that required real effort and meant a lot is incredibly fulfilling. The most recent project I completed was season four of The Morning Show.

  • Plank Hold Timing Explained: The Ideal Plank Durations That Build Core Strength Based on Age

    Plank Hold Timing Explained: The Ideal Plank Durations That Build Core Strength Based on Age

    The floor presses cool against your forearms. Your toes grip the mat, legs engaged, and breathing settles into a steady rhythm. Between the tension in your core and the focus in your mind, a question arises: “How long should I hold this plank?” Ten seconds? Thirty? Two minutes that feel endless? Planks aren’t one-size-fits-all. They are a dynamic interplay between your body and gravity, evolving as you age. What feels strong at 18 can become challenging at 48 or demand extra care at 68. Across all ages, your core remains the foundation—supporting your spine, protecting your back, and allowing fluid movement. Determining the ideal plank duration starts with understanding your body as it is today.

    Plank Hold Timing: How It Works

    The Silent Strength Within

    Unlike noisy workouts with pounding feet or clashing weights, planks arrive quietly. Your body forms one long line: shoulders stacked over elbows or wrists, heels reaching back, head floating naturally. From the outside, it looks effortless. Inside, however, a subtle storm activates. Deep stabilizers engage: the transverse abdominis tightens like a supportive belt, the multifidus protects the spine, the diaphragm links breath to effort, and the pelvic floor provides steady support from below. These muscles thrive on calm, precise effort repeated consistently.

    For this reason, quality matters more than duration. A tense, collapsing one-minute plank offers less benefit and higher risk than a clean twenty-second hold performed with strong alignment and control. Time is important, but it should end when your form begins to falter, not after pushing through discomfort.

    The Truth About Long Planks

    Fitness culture often glorifies extremes: two-minute holds, five-minute challenges, viral clips of shaking bodies clinging on by willpower. The reality is quieter: beyond a certain point, holding a plank longer builds tolerance for discomfort more than meaningful strength. Research and expert coaching agree—short, precise holds repeated regularly are more effective for core strength and spinal health than occasional marathon efforts.

    This doesn’t mean long planks are harmful, only that the benefits diminish while the risk of fatigue-related misalignment rises. Over time, the question shifts from “How long can I endure?” to “How well can I support my body now?”

    Age, Gravity, and the Plank Equation

    As we age, the body’s response changes. Recovery slows, tissues stiffen, and balance demands more focus. A plank once effortless may now require intention—and that reflects biology, not weakness. Rather than a single rule, it’s helpful to follow flexible ranges based on your form and capability.

    Suggested Plank Hold Times by Age

    • Teens (13–19): 20–40 seconds, 2–4 sets, 2–4 days/week
    • 20s–30s: 30–60 seconds, 2–4 sets, 3–5 days/week
    • 40s: 20–45 seconds, 2–4 sets, 3–4 days/week
    • 50s: 15–40 seconds, 2–3 sets, 2–4 days/week
    • 60s–70s+: 10–30 seconds, 2–3 sets, 2–4 days/week

    These ranges are guideposts, not rules. What matters most is the quality of each second you hold.

    Your 20s and 30s: Strength Without Limits

    In this age range, recovery is fast, tissues resilient, and strength comes naturally. Thirty to sixty seconds is often ideal. The main risk is subtle breakdowns: hips dipping, shoulders creeping, or lower back warnings. Dividing effort into several shorter, controlled holds is more beneficial than one long, punishing attempt.

    Your 40s: Strength With Awareness

    By your 40s, your body communicates more clearly: old injuries, stiffness, or tightness appear faster. Most productive holds now range from 20 to 45 seconds, repeated a few times. Some days may allow longer holds, while other days stopping sooner is wiser. The focus shifts to sustainability and supporting posture over time.

    Your 50s, 60s, and Beyond: Resilient, Not Reckless

    Later decades require rethinking strength. Muscle mass may decline, balance may shift, and recovery may lengthen—but planks remain valuable. Short holds of 10–30 seconds with excellent alignment can be very effective. Modified versions like knee or incline planks are intelligent adaptations. Each well-supported second preserves posture, stability, and confidence in movement.

    Recognizing When to Stop

    Your body signals when a plank becomes risky: lower back sag, shoulder tension, breath-holding, or facial strain. Stopping at the first sign of form loss isn’t quitting—it’s smart training. This approach teaches your nervous system efficiency and prevents collapse over time.

    Making Planks a Daily Practice

    Planks don’t need to be dramatic. They can be sprinkled throughout the day: a short hold before coffee, another after work, one before bed. Over time, these small, consistent efforts build meaningful strength. The goal isn’t a record—it’s standing taller, moving confidently, and supporting your body in daily life. Hold as long as form feels honest. Rest. Repeat. That’s where lasting core strength lives.

  • Goodbye Hair Dye The Grey Coverage Trend Helping People Look Younger Without Colouring

    Goodbye Hair Dye The Grey Coverage Trend Helping People Look Younger Without Colouring

    “I’m tired of chasing my roots,” she says, eyes fixed on the fine silver line cutting through her part. The counter around her looks like a color lab, stacked with bowls labeled chestnut, espresso, iced mocha brown. She doesn’t want any of them. What she’s asking for is something quieter. Not hair dye as people recognize it. Something subtle, forgiving, and far less desperate.

    The stylist understands. Instead of the usual swatches, she reaches for a different guide — one filled with sheer tones, soft glosses, and strategic light placement. There’s no dramatic color shift planned, no long afternoon trapped in the chair. Just techniques that let gray blend in, blur harsh lines, and quietly take years off without broadcasting the effort.

    This is the end of hair dye as we used to know it. What’s replacing it is calmer, smarter, and designed for real life. And it’s reshaping how people choose to age in public.

    From Full Coverage to Subtle Camouflage

    Step into any modern salon and you’ll hear the same phrase repeated: “I don’t want it to look dyed.” The resistance isn’t to gray hair itself. It’s to the solid, opaque color that looks flat under daylight and artificial under scrutiny. The new focus is on soft blending — allowing silver to show, but deciding where and how.

    Instead of harsh permanent formulas, colorists are leaning on semi-permanent washes, translucent tints, root shadows, and light-catching glosses. The payoff is fewer stark regrowth lines, shorter appointments, and hair that looks refreshed rather than freshly treated. It’s less about concealment and more about making natural gray work in your favor.

    In a small London salon, 52-year-old Karen arrived with a familiar plea: “Make the gray disappear.” She’d been coloring every three weeks, constantly chasing a regrowth line that felt relentless. Her stylist proposed another route — a soft mushroom-brown glaze across the hair, ultra-fine highlights around the face, and no solid root coverage.

    Two hours later, the sharp divide between gray and color was gone. In its place sat a smoky, dimensional tone where the silvers looked deliberate, almost like refined balayage. Eight weeks on, the grow-out was barely noticeable. “I feel younger,” she said, not because the gray vanished, but because I stopped fighting it. That mental relief is a big reason this approach is catching on well beyond social media.

    Why Blending Gray Changes the Whole Face

    There’s a practical reason this shift works. Solid dark color can frame the face too harshly, exaggerating fine lines and shadows. At the other extreme, bright white roots against dyed lengths draw attention straight to the scalp. Blending techniques soften both problems.

    By lowering contrast and introducing light around the face, the skin appears brighter, features look cleaner, and the eye focuses on expression instead of regrowth. Stylists often describe it as contouring for hair — using light and depth to redirect attention.

    The gray isn’t erased. It’s integrated. Not magic, just smarter use of what’s already growing.

    The Modern Playbook for Younger-Looking Gray Hair

    The standout technique right now is known as gray blending. It’s less about covering and more about negotiation. Rather than coating every strand, the stylist works in sections. A sheer demi-permanent tone softens the brightest whites, while subtle lowlights add depth. Around the face, ultra-fine “baby lights” break up heavy patches.

    This method frees people from rigid schedules. With no hard line between color and gray, appointments can stretch to eight or even twelve weeks. The slightly imperfect finish is intentional — those tiny shifts in tone create a polished, lived-in look that reads as expensive rather than obvious.

    Daily maintenance stays simple. A gentle purple or blue shampoo once a week keeps silver from yellowing. A lightweight oil or shine serum helps wiry grays lie smoother and reflect light instead of frizzing. For special occasions, tinted root sprays or powders can soften the part in seconds, blending everything together like a discreet filter.

    What’s lasting about this trend is its realism. No one wants a long routine before breakfast. Small, sustainable habits matter more — milder shampoos, heat protection when blow-drying, and regular trims so silver strands don’t stick out. Over time, these choices make gray hair look intentional rather than unruly.

    A Quieter Shift in Confidence

    This softer approach also changes how people talk to themselves. Instead of inspecting every white strand up close, attention shifts to texture, shine, and movement. The question becomes, “Does my hair look alive?” rather than “Does it look young enough?” That change alone removes much of the daily frustration gray hair can bring.

    “My clients don’t ask to cover gray anymore,” says Paris-based colorist Lila Moreau. “They ask to look rested and brighter, like themselves on a good day. Gray blending, gloss, and face-framing light are how we get there now. The aim isn’t to hide age, but to stop roots from speaking first.”

    Common Mistakes That Undermine the Effect

    • Choosing overly dark shades for coverage, which harden the face
    • Relying on frequent permanent box dye, creating a flat, heavy finish
    • Ignoring cut and shape, even with good color
    • Overusing purple shampoo until hair looks dull
    • Expecting one appointment to erase years of coloring

    Rethinking Age, Hair, and Control

    When people stop chasing the idea of zero gray, something shifts. They experiment again — softer fringe, lighter pieces around the face, or a cut that lifts the neckline. Friends rarely comment on the gray itself. Instead they say, “You look rested,” or, “You look different, in a good way.”

    This isn’t a rejection of color. It’s a farewell to panic touch-ups, hiding under hats, and the dread of visible regrowth. Some still use dye, just with more flexibility. Others lean into natural gray with a light gloss. Many land somewhere between. None of it has to be absolute.

    The deeper change is about choice. When gray becomes a design element instead of a flaw, the focus moves from erasing age to shaping how it appears. Keeping your years while refining light, texture, shape, and shine isn’t about hiding. It’s about deciding how you want to be seen — and that quiet control is what truly shows.

  • The 8 Best Self-Help Books for 2026 Covering Mindset Money Career and Personal Growth

    The 8 Best Self-Help Books for 2026 Covering Mindset Money Career and Personal Growth

    As a fitness professional and doctor of physical therapy, movement has always been part of my life. Throughout my twenties, I chased the idea of looking “toned” — a term that, in reality, is more marketing language than physiology. I followed the workouts that promised results: high reps, light weights, endless cardio, and I felt proud walking out of classes completely exhausted. I also restricted my food, believing that eating less was the key to changing my body.

    Like many women, I stayed lean by undereating and overtraining, but I never felt truly strong. I dealt with chronic pain, constant fatigue, and a cycle of pushing harder while fueling less.

    Everything shifted when I began prioritising muscle building and body recomposition. What most people call “getting toned” is actually recomp — losing fat while gaining muscle at the same time.

    The challenge is that achieving body recomposition looks nothing like what many of us were taught, especially women. It’s the opposite of quick fixes and extreme approaches. Consistency, not intensity, is what makes it work.

    Once I learned how to train for hypertrophy, eat to support recovery, and truly rest, the results came faster than I expected. Within a year, I gained eight pounds of muscle and lost about five pounds of fat — with fewer workouts, more food, no joint pain, and far less effort.

    My Personal Experience With Body Recomposition

    I’ve successfully gone through body recomposition twice and plan to do it again soon after having my second baby.

    The first time, over the course of a year, I gained eight pounds of muscle while losing five pounds of fat. The second time, postpartum, I gained 4.2 pounds of muscle and reduced fat within just a few months.

    Muscle tends to return more quickly after the first build. This is because muscle fibres retain additional myonuclei — essentially the control centres of muscle cells — even when muscle mass decreases. When training resumes, these nuclei allow muscle growth to happen faster.

    That’s why building muscle now is one of the best investments you can make for your future body.

    How Long Does Body Recomposition Take?

    Body recomposition is a gradual process, and that’s exactly what makes it effective. It encourages sustainable habits across training, nutrition, and recovery.

    Trying to rush toward an ideal body composition often backfires. Overtraining can lead to injury and time away from workouts, while undereating can stall muscle growth or even cause muscle loss. Although strength training is central to recomp, proper fueling is just as critical. Large calorie deficits increase the risk of losing muscle along with fat.

    What Body Recomposition Looks Like Month by Month

    Month 1

    You may notice early fat loss if you’re in a calorie deficit. Muscle growth usually takes longer, though beginners may see small changes sooner.

    Month 2

    You’ll start feeling stronger and more coordinated as your nervous system adapts. Subtle muscle definition may appear toward the end of the month, as muscle growth often takes 8–12 weeks.

    Month 3

    Visible muscle definition becomes more noticeable, alongside continued fat loss.

    Month 4 and Beyond

    Progress continues, though plateaus are normal. Early gains happen faster due to rapid neuromuscular adaptation, but improvements can slow as your body adjusts. This phase requires refined habits, training close to failure, and a focus on consistency.

    You can’t force this process. With a 200–400 calorie deficit, expect around 0.5–1 pound of fat loss per week and visible muscle growth within 8–12 weeks, with meaningful progress by the three-month mark.

    The Four Foundations of Body Recomposition

    Successful body recomposition depends on focusing on the right priorities. These four pillars matter most.

    Nutrition: Supports Fat Loss and Muscle Growth

    While I’m not formally trained in nutrition, here’s what I’ve learned from registered dietitians and real-world experience:

    • Maintain a small calorie deficit of about 200–400 calories below maintenance
    • Consume 0.7–1 gram of protein per pound of body weight daily

    Tracking food intake, especially early on, can be extremely revealing. I discovered I was eating more calories than I realised and far less protein than needed. While tracking isn’t for everyone, it can build valuable nutritional awareness.

    Strength Training: Drives Muscle Growth

    There’s no such thing as a true “toning” workout. Fat loss primarily comes from nutrition, and you can’t spot-reduce fat. Exercise builds muscle only when it provides enough mechanical tension.

    Research consistently shows:

    • Intensity: Train to failure or within 1–3 reps of failure, usually under 30 reps
    • Frequency: Train each muscle group about twice per week
    • Volume: Aim for at least 4 sets per muscle group weekly

    The muscle “burn” from high-rep workouts isn’t what causes growth. Mechanical tension does. That’s why many traditional toning workouts fail to deliver lasting results.

    Cardio and Daily Activity: Supports Energy Expenditure

    Cardio and movement still matter, but not necessarily for burning fat directly. Calories burned during exercise may not be fully additive during recomp, especially in a calorie deficit.

    Excessive cardio can interfere with recovery and strength performance. Staying active is important — around 150 minutes of light-to-moderate cardio per week works well — but trying to “burn off” food often backfires.

    Cardio is valuable for heart health, but lasting body composition changes are driven primarily by strength training and nutrition.

    Recovery: Enables Growth and Consistency

    Muscle isn’t built during workouts — it’s built during recovery. Rest allows muscles to repair, adapt, and grow stronger.

    I recommend taking about two rest days from lifting each week. Rest prevents overuse injuries, reduces burnout, and supports long-term consistency. Reframing rest as a productive part of the process makes it easier to embrace.

    The Biggest Mistake That Slows Progress

    The most common issue I see is not training close enough to failure. If muscles aren’t sufficiently challenged, they won’t grow.

    This often happens because people:

    • Stop at a preset rep count even when the weight isn’t challenging
    • Quit due to the discomfort of the burn rather than true muscle fatigue
    • Stop from general fatigue or boredom instead of mechanical failure

    Signs you’re close to true mechanical failure include:

    • Noticeably slower rep speed near the end
    • A spike in heart rate during the final reps
    • The “Rest Test”: after resting 5 seconds, if you can do 3 or more reps, you weren’t close enough

    Training to failure means you can’t complete another rep without help. Training close to failure — about 1–3 reps away — is all that’s needed.

    Why Body Recomposition Matters

    I recommend body recomposition for nearly everyone. While it may sound purely aesthetic, it goes far deeper. Building muscle improves metabolic health, bone density, longevity, and even mental well-being.

    Importantly, body recomposition can occur without weight loss. When fat decreases and muscle increases, body composition improves even if the scale doesn’t change.

    Traditional weight loss often leads to muscle loss along with fat, especially in aggressive calorie deficits.

    Recomposition requires time, precision, and consistency. You’ll need to experiment with calories, balance training and recovery, and commit for the long term. But over the course of a year, you won’t just change your body — you’ll develop skills and awareness that benefit you for life.

  • Household Oils Encourage Thicker Eyebrows and Longer Lashes Over Time

    Household Oils Encourage Thicker Eyebrows and Longer Lashes Over Time

    You rarely notice eyebrow thinning all at once. It happens slowly, under the bathroom light, as you lean closer with a cotton pad in hand. A few hairs near the tail seem shorter. The once-defined arch looks uneven. Age, years of overplucking, stress, or dry indoor air may all play a role. Whatever the reason, the change can make your face feel unfamiliar, as though something essential around your eyes has faded. Soon, every fallen lash in the sink catches your attention during nightly makeup removal.

    The Quiet Strength of Simple, Everyday Oils

    Before turning to costly serums or complicated ingredient lists, it helps to notice what is already within reach. In many UK homes, everyday oils sit quietly on shelves—olive oil near the cooker, coconut oil on the counter, or a small bottle of castor oil tucked away. These oils lack luxury branding, yet they offer steady nourishment through patience and consistency. For brows and lashes, which are delicate hairs, this gentle care can support healthier growth conditions over time.

    Why Brows and Lashes Feel So Personal

    Eyebrows and eyelashes often hold emotional meaning. Many women recall phases of heavy makeup, overplucking trends, or hormonal shifts that affected hair growth. When brows thin or lashes weaken, the face can appear tired or unfamiliar, subtly influencing self-image. Choosing a natural approach often feels kinder and more aligned with a slower, mindful lifestyle. Oils do not promise instant results, but with regular use, they encourage the body’s natural processes to function more effectively.

    Household Oils That Help Support Hair Health

    Several common oils are known for their supportive properties. Castor oil is widely used because its thick texture helps it cling to fine hairs, reducing breakage. Coconut oil is helpful for dryness caused by frequent mascara use, while olive oil gently conditions brows. Lighter oils such as almond or argan oil suit sensitive skin and absorb easily. These oils do not force growth; instead, they protect and strengthen, creating better conditions for brows and lashes to thrive.

    • Castor Oil: Dense with a slightly tacky feel, rich in ricinoleic acid, helps lock in moisture, strengthen hair fibres, and reduce breakage.
    • Coconut Oil: Light to medium texture that melts on contact, penetrates the hair shaft, reduces protein loss, and leaves hairs softer.
    • Olive Oil: Medium weight and mildly heavy, rich in antioxidants, supports the skin barrier around roots and improves flexibility.
    • Sweet Almond Oil: Smooth and silky, absorbs well, gentle enough for sensitive eye areas while nourishing fine hairs.
    • Argan Oil: Lightweight and non-greasy, high in vitamin E and essential fatty acids, improves strength and resilience.

    Building a Calm Evening Care Routine

    Consistency is key, and the most effective routines are those that fit naturally into your evening. Begin with clean, makeup-free eyes and freshly washed hands. Select one oil or a simple blend, apply a small amount to the brows using a clean spoolie, and lightly coat the upper lashes with care. Gently blot away excess oil to avoid irritation. Repeating this routine nightly for several weeks turns it into a soothing ritual rather than a task.

    Respecting Skin and Eye Sensitivity

    The skin around the eyes is delicate, making awareness essential. Always perform a patch test with new oils and start with very small amounts. If irritation appears, switch to a lighter oil. Take care to prevent oil from entering the eyes, and rinse gently if it does. Anyone with existing eye conditions or ongoing treatments should seek guidance from a pharmacist or GP. Progress is gradual, so focus on reduced shedding and subtle fullness instead of rapid changes.

    Daily Habits That Support Healthier Growth

    Oils are most effective when paired with supportive habits. Reducing the use of waterproof mascara, being gentle during makeup removal, and following a balanced diet rich in protein, healthy fats, and minerals all contribute to healthier hair. Managing stress and paying attention to hormonal balance can also influence growth. Oils provide external care, while nutrition, rest, and lifestyle form the foundation beneath it.

    Creating Your Own Simple Oil Blend

    Once comfortable, blending oils at home becomes easy. A mix of castor oil for thickness, almond oil for softness, and argan oil for light nourishment works well. Store the blend in a clean container, label it with the date, and use it within a few months. This personalised approach keeps your routine clear and reassuring, using ingredients you recognise and trust.

    Observing Progress Without Pressure

    Tracking changes gently helps prevent over-fixation. Taking a makeup-free photo every few weeks in consistent lighting can reveal subtle improvements. Over time, fuller lines, fewer gaps, and stronger lashes often appear gradually. Missing a few nights does not undo progress—simply return to the routine when possible. The goal is not perfection, but steady, thoughtful care for what you already have.

  • At-Home Eyebrow Tinting Made Easy With a Simple Step-by-Step Method for Soft Defined Brows

    At-Home Eyebrow Tinting Made Easy With a Simple Step-by-Step Method for Soft Defined Brows

    At-home eyebrow tinting has quickly become a popular beauty routine for those who want polished brows without frequent salon visits, especially in India where DIY grooming is on the rise. With the right approach, you can enhance your natural brows safely and affordably from the comfort of home. This method focuses on achieving soft, defined results rather than harsh or overly dark brows. By following a simple step-by-step process and using beginner-friendly products, even first-timers can gain confidence and control while creating a neat, well-groomed eyebrow look.

    At-home eyebrow tinting basics for beginners

    Understanding the basics is the first step to successful at-home eyebrow tinting. Choosing a shade close to your natural brow color helps avoid dramatic mistakes and supports a natural brow tone. Always perform a patch test to reduce the risk of irritation and ensure skin safety first. Clean brows free of oil or makeup allow the tint to adhere evenly, resulting in smoother color payoff. Using minimal product and following timing instructions closely prevents over-darkening, which is key for soft everyday brows. These foundational steps help beginners feel more comfortable before moving on to application.

    Step-by-step eyebrow tinting method at home

    A clear method makes the process less intimidating. Start by outlining your brows with petroleum jelly to protect surrounding skin and create clean brow edges. Mix the tint as directed and apply using a small angled brush for controlled application. Work from the tail toward the front, allowing lighter coverage near the inner brow for balanced brow depth. Set a timer and monitor color development closely to avoid staining. Once time is up, gently wipe off with a damp cotton pad to reveal even tinted brows that still look natural.

    Maintaining soft defined brows after tinting

    Proper aftercare ensures your tint lasts longer and fades evenly. Avoid washing your face for at least 12 hours to allow the pigment to settle, supporting longer lasting tint. Use gentle, sulfate-free cleansers around the brow area to maintain color retention care. Applying a light brow oil or serum helps nourish hair and promotes healthy brow growth. Touch-ups should be spaced out to prevent dryness or damage, keeping your look consistent with low maintenance grooming routines that suit busy lifestyles.

    Summary and practical takeaways

    At-home eyebrow tinting is a practical option for anyone seeking defined brows without salon dependency. When done correctly, it offers cost effective beauty benefits while allowing full control over shade and intensity. The key lies in preparation, patience, and following instructions carefully to avoid common errors. By focusing on subtle enhancement rather than dramatic change, you can achieve polished daily brows that complement your face. With regular care and mindful touch-ups, this simple routine can become a reliable part of your personal grooming routine.

    Aspect Recommended Practice Benefit
    Shade selection Match natural brow color Soft, realistic finish
    Patch testing 24 hours before use Reduced irritation risk
    Application time 5–10 minutes Controlled color depth
    Aftercare Avoid water for 12 hours Longer-lasting results
    Maintenance Retint every 3–4 weeks Consistent brow look

    Frequently Asked Questions (FAQs)

    1. Is at-home eyebrow tinting safe?

    Yes, when you follow instructions carefully and perform a patch test beforehand.

    2. How long does eyebrow tint usually last?

    Most tints last between two to four weeks depending on skin type and care.

    3. Can beginners try eyebrow tinting at home?

    Absolutely, beginner kits and simple methods make it suitable for first-timers.

    4. What should I do if my brows turn too dark?

    Gently cleanse the area and allow a few days for the color to naturally fade.

  • Make Your Own Natural Eyebrow Gel Using Aloe Vera Gel and Cocoa Powder

    Make Your Own Natural Eyebrow Gel Using Aloe Vera Gel and Cocoa Powder

    The radiator started up with its usual metallic ticking sound that normally meant warmth was coming. Outside the wind moved through empty branches and shook the window frames like a quiet signal that colder weather was ahead. Inside the air was warm enough but it felt thin and dry. Your throat felt scratchy and your skin felt tight on your hands while your nose seemed ready to sneeze at any moment. Then you remembered something you heard before from maybe an older family member or somewhere online about putting a glass of water near the radiator to make the room feel warmer. You look toward the kitchen and think about how strange it seems that an ordinary glass of water could actually help heat a room. It sounds like some kind of old myth or superstition. But as the evening goes on and the air gets even drier you fill a glass completely and carry it back to set it down next to the radiator. As the water slowly heats up something small begins to change. It happens in a quiet way that you can barely notice at first but winter always shows its secrets like this.

    The Science Hiding in a Simple Glass of Water

    At first glance, the idea that a simple glass of water can help a room feel warmer—without increasing your energy bill—sounds almost too comforting to be real. Water, after all, doesn’t generate heat. It isn’t a miniature heater quietly working on your windowsill. The real explanation is far more subtle. It’s not about producing extra warmth, but about helping your body experience the warmth that’s already there more effectively.

    When a radiator runs, it does two things at once: it heats the air and dries it out. That dryness often goes unnoticed at first. You might feel it as a slightly scratchy throat, tight skin, static in your clothes, or those tiny shocks when you touch metal. What’s less obvious is how dry air quietly changes the way your body perceives temperature.

    Why Dry Air Makes Warm Rooms Feel Colder

    Your body is constantly exchanging heat with the air around it. In very dry conditions, moisture evaporates more quickly from your skin and from every breath you exhale. This process pulls heat away from your body, creating a subtle cooling effect—even when the thermometer says the room is warm. The radiator is doing its job perfectly, but your body doesn’t quite agree with the reading on the wall.

    This is where the glass of water comes in. Placed near a heat source, it slowly absorbs warmth and releases moisture into the air through gentle evaporation. The change in humidity may be small, but it can be enough to reduce moisture loss from your skin and lungs. The temperature hasn’t actually changed, but the room feels softer, warmer, and more comfortable to your body.

    Aloe Vera: The Gentle Tamer

    Aloe vera has been soothing skin for centuries, long before it appeared in neatly labeled bottles. Pure aloe gel feels cool, light, and slightly slippery—never stiff or sticky. On eyebrows, it behaves like a quiet, understanding styling agent, offering hold without harshness.

    In a homemade brow gel, aloe acts as the foundation. Its natural texture gives light-to-medium control, guiding brow hairs into place while keeping them flexible. When you choose a high-quality gel with minimal additives, it also delivers gentle hydration each time you apply it, making the routine feel more like care than correction.

    Cocoa Powder: Earthy Color from the Kitchen

    Cocoa powder brings warmth, depth, and natural pigment. Its rich brown tone works surprisingly well as a brow tint, especially for light to medium-dark shades. Mixed into aloe, cocoa creates a soft, stain-like color rather than a bold, painted effect.

    The beauty lies in control. A small pinch gives a whisper of definition; a bit more deepens the look. The result blends seamlessly with natural brows, avoiding harsh lines. There’s something deeply satisfying about using the same ingredient that flavors hot chocolate to gently frame your face—beauty and nourishment sharing the same origin.

    Gathering Your Little Alchemy Kit

    Making your own brow gel feels less like a cosmetic project and more like a small ritual. Clean jars, a simple spoon, a spoolie brush—each item plays its part. The process is calm, tactile, and unrushed.

    At its core, the recipe needs only aloe vera gel and cocoa powder. Optional additions like a drop of jojoba oil for slip or a pinch of coffee or charcoal for deeper tones can be added later. The charm of this formula is its simplicity: two humble ingredients, thoughtfully combined.

    Item Role & Use
    2 teaspoons pure aloe vera gel (clear, unscented) Acts as the main base, providing natural hold, smooth application, and moisture
    ¼–½ teaspoon unsweetened cocoa powder Adds a soft, natural tint to enhance brow color
    Small clean glass jar or lidded container Used to safely store the prepared mixture
    Clean spoolie or angled eyebrow brush Helps apply and shape the product evenly on brows
    Mini spoon or mixing stick Used to combine and blend all ingredients smoothly

    Mixing the Gel: Slow, Simple, and Satisfying

    Spoon about two teaspoons of aloe vera gel into a clean jar. Sprinkle in roughly a quarter teaspoon of cocoa powder and stir slowly, pressing out any clumps. The clear gel gradually transforms into a smooth, earthy brown.

    Test the color on the back of your hand and let it dry briefly. Adjust as needed—more cocoa for depth, more aloe for softness. The texture should be creamy, light enough to spread easily, yet thick enough to cling to a brush. Once mixed, close the jar and let it rest for an hour so everything settles evenly.

    Applying the Gel with Care and Intention

    This homemade gel invites a slower approach. Start with clean, dry brows. Lightly dip a spoolie into the jar and wipe off excess. Brush through the brows in short, feathered strokes, following the natural direction of hair growth.

    Begin at the inner brow and work outward, shaping rather than drawing. For more definition, allow the first layer to dry, then add another—focusing on sparse areas. An angled brush can help mimic individual hairs if needed. The finish remains soft and flexible, never stiff or heavy.

    Nature, Skin, and the Choice to Simplify

    Choosing to make a simple product at home carries quiet meaning. It reduces waste, limits unnecessary ingredients, and reconnects you to the act of creation. Each refill of a small jar replaces another disposable tube. Each application reminds you that beauty doesn’t have to be complicated or distant.

    Natural solutions aren’t universal, and listening to your skin matters. Patch testing is essential, and adjustments are part of the process. Still, there’s power in slowing down, stirring something by hand, and shaping your brows with intention rather than urgency.

    In that small moment—brush in hand, cocoa-scented gel in the jar—you’re reminded that beauty can be gentle, practical, and deeply personal. Sometimes, it begins with the simplest things.

  • Salon-Style Eyebrows at Home: 7 Simple Steps for Perfect Coloring and Definition

    Salon-Style Eyebrows at Home: 7 Simple Steps for Perfect Coloring and Definition

    Waking up with full and well-shaped brows without needing a pencil feels like the perfect beauty shortcut. When you tint your eyebrows correctly at home the color can last between 3 & 6 weeks. The important part is being careful & controlled so your brows look natural and enhance your face instead of looking too dark or messy. This guide will show you how to tint your eyebrows safely and neatly at home without making a mess in your bathroom.

    Why At-Home Brow Tinting Is Worth Considering

    Tinting your brows at home goes beyond convenience or avoiding salon trips. One tint kit typically provides enough product for multiple uses while a professional appointment covers only a single session. When you do it yourself you decide how dark the color should be and how soft the front appears & what the final shape looks like. The color in the hair usually lasts between 3 and 6 weeks and the subtle stain on your skin fades after 5 to 7 days. This creates a gradual fade instead of an abrupt change.

    The flexibility is another benefit. You can modify the shade or adjust the timing whenever your hair color changes or your makeup preferences shift with the seasons. Having control over this small detail often makes your entire face appear more refined and put-together even when you skip makeup.

    How Long Brow Tint Actually Lasts

    The staying power of your brow tint depends on skin type, daily habits, and product use. Hair holds pigment far longer than skin, which is why brows gradually soften instead of vanishing all at once.

    Factor What You’ll Usually See
    Dry or normal skin with gentle cleansing Defined color for 3–6 weeks; skin stain fades in about a week
    Oily skin, frequent swimming, or strong sun exposure Noticeable fading after 2–3 weeks
    Heavy oils, balms, or exfoliants near brows Color fades faster, especially from the skin

    Treat freshly tinted brows kindly—less heat, less rubbing, and fewer harsh cleansers—and the color will reward you by lasting longer.

    What You’ll Need Before You Start

    You do not need professional equipment but having the right basics helps you get even color and safer results: Brow-specific tint or gel without ammonia Developer or oxidant that the brand recommends Glass or plastic mixing cup and spatula Angled or precision brow brush Cotton pads & cotton swabs Thick cream or petroleum jelly to protect your skin Gloves & a clean spoolie Micellar water or gentle toner A timer or phone stopwatch Safety is important. Never use regular hair dye on your brows. Some dyes can cause serious eye injuries and ingredients like PPD (p-phenylenediamine) are known to trigger allergic reactions especially on delicate facial skin.

    Why Patch Testing Is Non-Negotiable

    Before using any tint you should apply a small amount of the mixed product behind your ear or on the inside of your elbow. Leave that area uncovered for 48 to 72 hours. If you notice redness or itching or swelling or blistering then the dye is not safe for you to use. This simple step helps you avoid uncomfortable and visible reactions near your eyes.

    Seven Steps to Natural, Salon-Style Brows at Home

    Shape Your Brows a Day in Advance

    Tweeze the stray hairs that clearly sit above your eyebrows & below them and in the space between both brows. Do not make the main eyebrow shape thinner when you tweeze. Use a pencil to lightly draw the outline of the eyebrow shape you want to achieve. Then clean the entire area using micellar water and carefully wipe away any extra oil from the skin so the tint will go on smoothly & evenly across your brows.

    Shield the Surrounding Skin

    Apply a thin layer of thick cream or petroleum jelly along the penciled outline you created. Make sure to keep it off the actual brow hairs. This protective barrier stops unwanted staining from occurring and helps you achieve cleaner and sharper edges.

    Mix the Tint Smoothly

    Mix about 0.5 to 0.75 inch of tint with developer following the instructions on the package. Most products use equal parts of each ingredient. Stir the mixture until it becomes smooth and creamy with no lumps remaining. Pick a color that is one or two shades darker than your natural eyebrow color. Avoid selecting a shade that looks too dark compared to your hair color.

    Apply Where Brows Are Fullest

    Start at the inside part of your eyebrow closest to your nose. Make small strokes that go in the same direction as your eyebrow hairs grow and make sure each hair is completely covered. Continue moving toward the outer end of your eyebrow but use a little less product as you go. If you have light colored hairs or gray hairs make sure they are completely covered so your eyebrows look even and not patchy.

    Process Carefully and Watch the Clock

    Set your timer based on what the brand recommends. This is usually somewhere between 7 and 15 minutes. When you reach the 3 to 5 minute point you should take a clean spoolie brush and gently comb through the inner part of your eyebrow. This helps soften the front area and prevents your brows from looking too blocky or harsh.

    Remove Gently and Condition

    Set your timer according to the brand’s recommended time which typically falls between 7 and 15 minutes. After 3 to 5 minutes have passed you need to take a clean spoolie brush and carefully comb through the inner section of your eyebrow. This step helps create a softer appearance at the front and stops your brows from looking overly blocky or severe.

    Check in Natural Light and Begin Aftercare

    Let the color set for roughly one hour before you examine the symmetry in natural daylight. Small differences between the two brows are completely normal & you can easily balance them out using makeup. Make sure to keep your brows dry during the first twenty-four hours after the procedure. You should also stay away from any oil-based products & avoid exfoliating the surrounding area for several days following your appointment.

    Common Brow Tinting Mistakes to Avoid

    Common Tinting Mistakes to Avoid Ignoring the patch test can cause unwanted irritation on your skin. Choosing a shade that is too dark or warm often creates a harsh appearance that looks fake. When removing tint you should use gentle wiping motions because scrubbing causes skin irritation and damages hair follicles. Failing to follow proper aftercare means your tint will fade quickly due to exposure to heat and sunlight or using strong cleansing products.

    A Small Change That Makes a Big Difference

    A good brow tint makes a real difference in how you look. Your skin appears more refreshed and your eyes become more noticeable. Even when you wear no makeup your face looks put together. When you prepare properly and use safe products and take care of your brows afterward you can tint them at home and enjoy weeks of easy definition. After you discover the right method for your brows you will realize it becomes an essential beauty routine that you cannot imagine living without.