Blog

  • Knife Sharpening at Home: A Professional Method to Restore Razor-Sharp Edges Safely

    Knife Sharpening at Home: A Professional Method to Restore Razor-Sharp Edges Safely

    The first time I opened a bottle of storebought cleaner after a long hike in the woods the smell hit me like a wall. Artificial lemon. Chemical sharpness. My eyes prickled & my throat caught and suddenly the quiet moss-covered trail I’d left an hour before felt like it belonged to another planet. Out there water moved through soil and stone filtered by roots and time. In here under harsh lights and plastic bottles everything felt manufactured. I remember thinking why does my home have to smell like a laboratory to be considered clean?

    The Moment You Realize Your Home Is Part of an Ecosystem

    Once you notice it you cannot un-notice it. The way bright blue liquid circles the sink drain and vanishes as if into nothing when you know it goes somewhere: into pipes and treatment plants and rivers and oceans that already work too hard. The way spray from glass cleaner hangs in sunbeams and drifts through the room like a tiny chemical fog you quietly breathe in. The way your recycling bin overflows with hard plastic bottles that used to hold something that made your head spin a little when you used too much. We talk a lot about the environment as if it exists somewhere far away like a forest or coastline or the Arctic. But the truth is you live inside an ecosystem right now. Your home is not a sealed bubble. Air flows in and out while dust travels on the wind and on your socks & water moves in from the tap and back out again carrying traces of what you pour into it. The cleaners under your sink do not just affect the surface they scrub. They shape the tiny world you inhabit every day. There is something quietly radical about opening your cupboard & finding not a row of neon-colored mystery solutions but a few humble familiar things: a jar of baking soda & a bottle of vinegar & a chunk of plain soap & a lemon & maybe a small vial of essential oil if you like a bit of perfume with your practicality. These are ingredients your great-grandparents would recognize. Ingredients that in the right combination can make your home smell like a place where people cook and read and rest and open windows. Not like a showroom.

    The Secret Lives of Everyday Ingredients

    Your kitchen already contains everything you need for effective cleaning. The secret is recognizing that everyday items can work as powerful cleaning agents. Pick up these common ingredients and examine them closely. Baking soda feels fine & soft when you touch it. White vinegar has a sharp smell that might make your nose wrinkle but it carries a clean scent that seems to cut through dirt. A lemon has bright waxy skin that feels slightly sticky after you slice it. Olive oil pours slowly and has a smooth heavy texture. These simple household items can replace many commercial cleaning products.

    Simple Recipes That Turn Your Kitchen into a Low-Waste Lab

    Let’s make that quiet apothecary come alive with some practical use. These recipes work well because they bend to fit what you already have at home. You do not need fancy equipment or precise measurements that stress you out. All it takes is basic common sense & a bit of willingness to try something new. The formulas here are meant to be forgiving when you make small changes. If you are missing one ingredient you can often swap it for something similar. The goal is to make remedies that actually fit into your real life instead of sitting as pretty ideas in your head.

    All-Purpose Surface Spray

    – This is the everyday cleaner you’ll end up using the most—on kitchen counters, door handles, light switches, and those random sticky patches that seem to appear out of nowhere. It’s simple, effective, and relies on ingredients most homes already have.

    – Mix equal parts white vinegar and water in a clean spray bottle. If you enjoy a subtle scent, add a few drops of an essential oil such as lemon, lavender, or tea tree, then shake gently to combine. There’s no complicated process and no long waiting time.

    – Spray directly onto hard surfaces and wipe with a cloth. Avoid using this on natural stone like marble or granite, as the acidity of vinegar can damage and etch these materials. The initial vinegar smell may feel strong, but it fades quickly as it dries. Over time, that faint tang starts to signal “clean” rather than harsh chemicals, making the process feel calmer and more familiar.

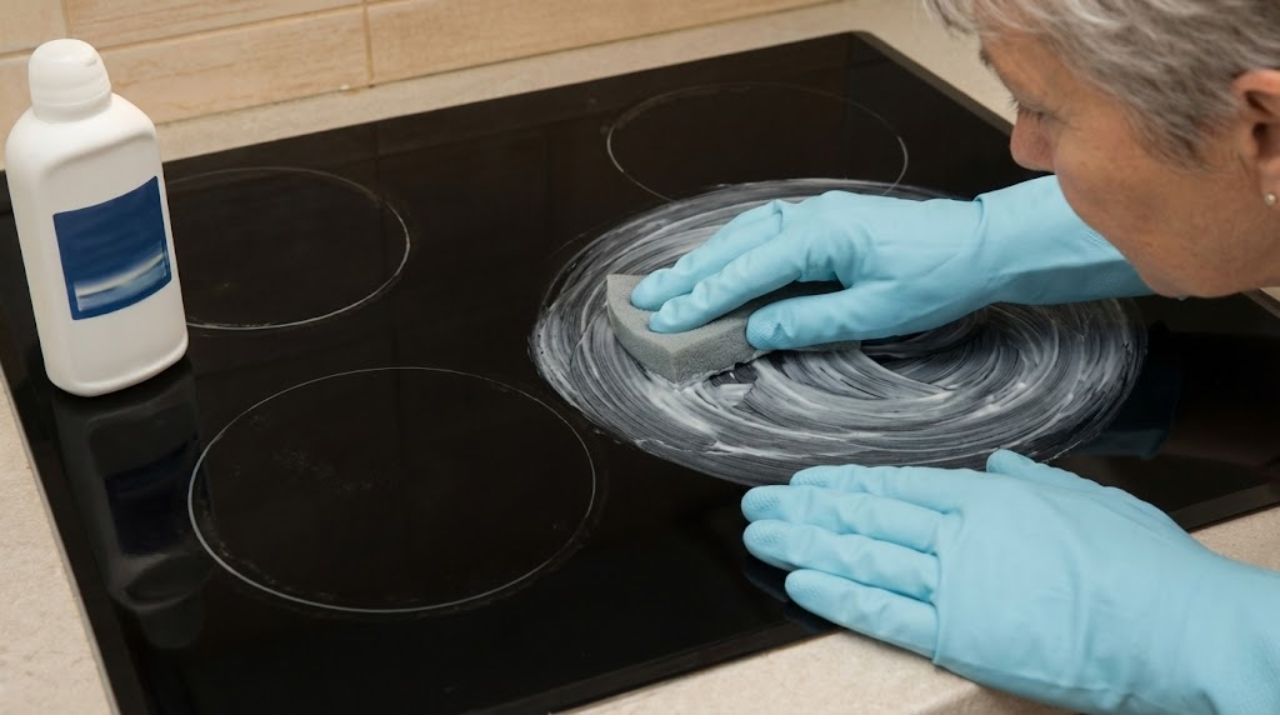
    Gentle Scrub for Sinks, Tubs, and Stovetops

    – This scrub is ideal for surfaces that look dull or worn—a ring around the bathtub, a sink that’s lost its shine, or stubborn residue around stovetop burners. It cleans without scratching and restores surfaces gently.

    – Combine half a cup of baking soda with just enough water to create a thick, spreadable paste. For extra grease-cutting power, you can add a tablespoon of castile or plain liquid soap. Mix until smooth. You can prepare it fresh each time or store it in a small covered container for a few days.

    – Apply the paste using a damp cloth or sponge, scrub gently, then rinse thoroughly. On stainless steel or enamel, it leaves behind a soft, honest shinenot overly glossy, but clearly clean and refreshed.

    Glass and Mirror Cleaner

    – This solution is designed for clarity—no streaks, no cloudy residue, and no overpowering chemical smell. Just clean glass that almost disappears when the light hits it correctly.

    – Mix equal parts white vinegar and water in a spray bottle. For improved streak-free results, especially on mirrors, add one teaspoon of rubbing alcohol per cup of solution. Shake gently before use.

    – Spray lightly onto glass or mirrors and wipe with a lint-free cloth or an old cotton T-shirt. Step back once finished; the surface looks clear and neutral, reflecting light and space rather than artificial fragrance.
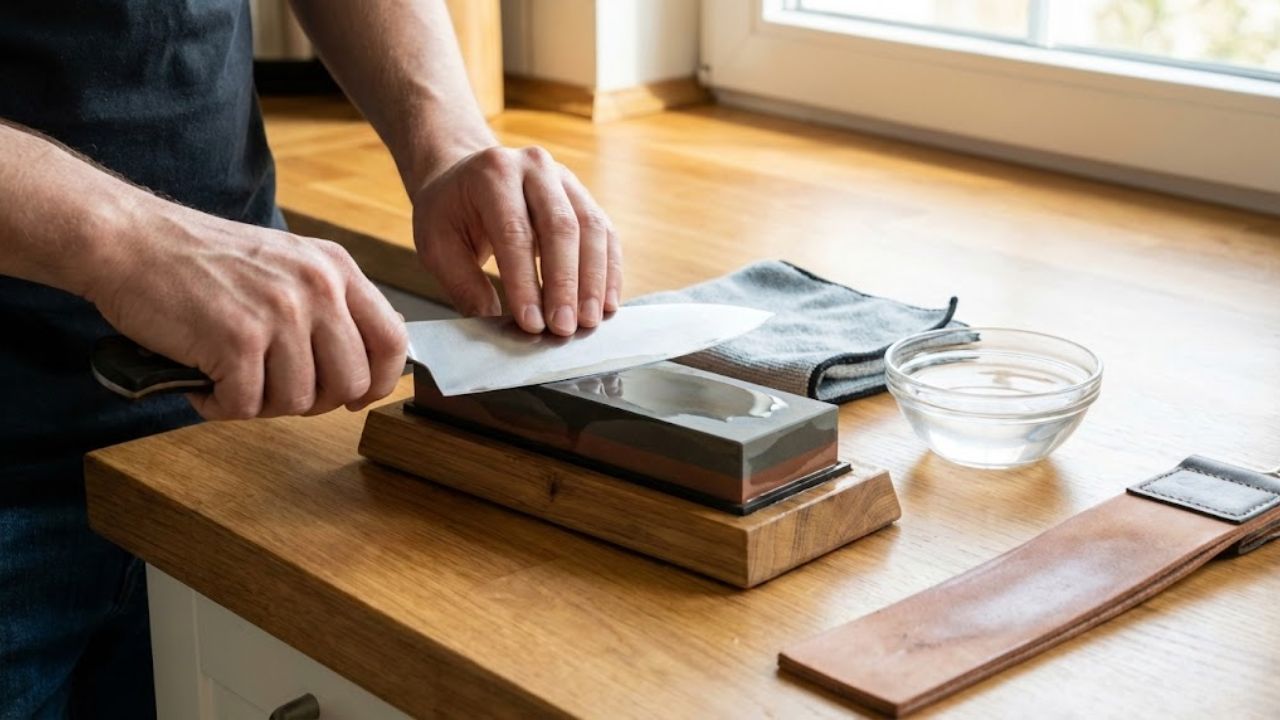
    Wood Surface Polish

    – This polish is meant for wooden furniture that shows signs of everyday life—coffee rings, armrests with a soft sheen, or shelves that deserve more than a quick dusting. It nourishes rather than disguises.

    – Combine two parts olive oil (or another light plant-based oil) with one part lemon juice or white vinegar in a small jar or bottle. Shake well before each use, as the mixture naturally separates over time.

    – Dampen a soft cloth with a small amount of the polish and rub it into the wood following the grain. Buff gently with a dry section of the cloth. The result isn’t brand-new furniture, but wood that looks cared for and respected.

    Deodorizing Carpet or Mattress Shake

    – For soft surfaces that aren’t washed often—like carpets, rugs, or mattresses—this mixture helps lift trapped odors quietly and effectively, without masking them with heavy perfumes.

    – Mix one cup of baking soda with 10 to 15 drops of essential oil, if desired. Stir thoroughly until there are no clumps and the scent is evenly distributed throughout the powder.

    – Sprinkle lightly over the surface, allow it to sit for 15 to 30 minutes, then vacuum thoroughly. Instead of an artificial fragrance, what remains is simply the absence of unpleasant smells.

    Eco-Cleaning Starter Kit: Quick Reference

    Below is a simple overview of common eco-cleaning ingredients and their uses, useful for quick reference and easy planning.Baking soda is ideal for scrubbing and deodorizing sinks, tubs, ovens, and refrigerators. White vinegar works well for degreasing and removing limescale but should be avoided on marble, granite, and natural stone. Castile or plain soap serves as a base for general cleaning, including dishes and floors. Lemon or citrus helps with deodorizing and light bleaching, though it should be used carefully on fabrics. Salt adds extra scrubbing power for pans, cutting boards, and drains. Essential oils can add light scent and mild antimicrobial properties when used sparingly and stored safely.

    Cleaning That Feels More Like Care Than a Chore

    – Switching from harsh commercial cleaners to simple, pantry-based ingredients subtly changes the experience of cleaning. It becomes less aggressive and more intentional, similar to cooking or tending plants. There’s mixing, testing, and adjusting based on what’s needed in the moment.

    – As you wipe down surfaces, you begin noticing small details—fingerprints on doorframes, smudges at child height, signs of daily life. Cleaning becomes less about erasing evidence of living and more about preparing the space for what comes next.

    – Scrubbing a sink with baking soda offers resistance and response, effort and result. The outcome isn’t advertisement-level shine, but something more honest: a surface that feels clean to the touch, without worry about invisible residues.

    Safety, Sanity, and Knowing the Limits

    – Eco-friendly cleaning still requires awareness and responsibility. Not every natural ingredient can be mixed freely, and not every situation is suited for homemade solutions.

    – Never mix vinegar with bleach, as this produces toxic chlorine gas. Use vinegar cautiously on sensitive surfaces like natural stone or delicate finishes. Always label homemade solutions clearly, especially in homes with children or pets. Spot-test new mixtures before full use, and ensure proper ventilation during cleaning.

    – There are times when commercial products are appropriate, such as serious mold or post-illness disinfection. Thoughtful cleaning isn’t about perfection, but about choosing gentler defaults whenever possible.

    From Under the Sink to Down the River

    – Everything used in cleaning continues its journey beyond your home. Water carries residues through pipes, treatment systems, and eventually back into the environment. Some substances persist; others break down easily.

    – Simple ingredients like soap, vinegar, and baking soda are familiar to natural systems. Microorganisms can process them without long-term harm, reducing environmental impact. The benefits are immediate as well—cleaner indoor air, gentler effects on skin, and less plastic waste.

    – Over time, the space under your sink changes too. Fewer bottles, more refillable containers, and a sense of calm replace clutter. Cleaning becomes a quiet partnership with your home and the wider world, focused on care rather than control.

  • An old-school moisturizer, far from luxury brands, is crowned the number one choice by dermatology experts

    An old-school moisturizer, far from luxury brands, is crowned the number one choice by dermatology experts

    On a sleepy Sunday morning at the drugstore, beneath slightly buzzing neon lights, a woman in a black blazer stands motionless in the skincare aisle. To her left sit the glossy jars: frosted glass, gold-toned lids, names that sound like luxury perfumes. To her right, a plain white tub with a blue lid. Its price? Less than what you’d spend on a couple of coffees.

    She lifts the expensive cream, skims the promises, arches an eyebrow. Then she picks up the simple tub, flips it over, and smiles. “My dermatologist swears by this,” she tells the cashier, almost apologetically, as if choosing the plain option needs an excuse.

    And it has very little to do with marble bathrooms or rose-gold tools.

    The Modest Moisturizer Dermatologists Truly Trust

    Ask dermatologists what they personally use at home, and a pattern quickly emerges. Their answers usually point to the same type of product: a low-cost, fragrance-free, no-frills moisturizer packaged in a tube or tub.

    No shimmering peptides. No diamond dust. Just a thick, almost old-fashioned cream that wouldn’t look out of place in a grandmother’s bathroom.

    That’s the product quietly earning the top spot in clinics worldwide.

    A New York dermatologist once explained that when patients ask for “the best cream, like celebrities use,” she simply smiles and reaches for the same sample every time: a basic pharmacy-brand moisturizer. No influencer campaign. No luxury counter. Just a straightforward label and a formula rich in ceramides and glycerin.

    She remembers a patient with severely dry, irritated skin who had cycled through three premium “cloud creams,” each pricier than the last. None helped. After one month with the basic cream, her skin barrier settled, redness eased, and she stopped relying on heavy makeup to hide irritation.

    The patient’s stunned response? “You mean this was all I needed?”

    From a dermatological perspective, the reasoning is blunt and simple. Skin ignores marketing and responds to ingredients. Experts favor short, functional formulas: humectants like glycerin and hyaluronic acid, occlusives such as petrolatum, and barrier-repairing ingredients like ceramides or niacinamide.

    Fragrance and essential oils are often skipped, not because they’re inherently bad, but because they’re among the most common triggers for irritation and allergies. That’s why the “number one” cream is usually the one that hydrates quietly, protects the barrier, and avoids drama.

    Unexciting in the jar. Transformative on stressed skin.

    Using a Basic Cream the Right Way

    How you apply a simple moisturizer can make a surprising difference. Dermatologists tend to recommend the same uncomplicated routine: cleanse gently, leave the skin slightly damp, then apply a generous layer of cream. Not five steps — just one, done properly.

    Many suggest warming the product between your fingers first, then pressing it into the cheeks, forehead, and chin instead of rubbing aggressively. The idea is to coat the skin evenly, like putting on a soft cotton T-shirt rather than squeezing into something restrictive.

    On especially dry days, a thin second layer can help on areas like the cheeks or around the nose.

    Plenty of people unknowingly undermine good moisturizers. They over-cleanse with harsh foaming washes, layer multiple active serums, and then blame the cream when their skin stings. Often, the issue isn’t the product — it’s the routine around it.

    Dermatologists almost sound relieved when someone agrees to simplify: a mild cleanser, one dependable moisturizer, sunscreen in the morning. Stick with it for four weeks, and skin often responds with calm, steady improvement.

    This doesn’t mean giving up enjoyable skincare entirely. It means building on a solid base first. As one French dermatologist put it:

    “Trendy actives are like high heels — great occasionally, but you don’t live your life in them. Everyday skin health relies on a sturdy pair of sneakers: a basic moisturizer.”

    What Experts Look For in “Old-School” Creams

    • Short, easy-to-read ingredient lists
    • No fragrance or very minimal fragrance
    • Ceramides, glycerin, and/or petrolatum
    • Tested on sensitive skin, not only “normal” skin
    • Affordable enough for generous, twice-daily use

    The last point matters more than most people admit. When a cream is expensive, users tend to apply too little — and then conclude it doesn’t work.

    What This Shift Reveals About Beauty Today

    When dermatologists consistently recommend modest products, it raises an uncomfortable question: what are we really paying for with a $120 jar of cream — the formula, or the fantasy around it?

    Many of us know that feeling: opening a luxurious jar and hoping it will finally change how our skin looks, how we feel, how we see ourselves. The basic moisturizer offers no such promises. It simply says, “I’ll help your skin function better.”

    That may be why experts defend it so strongly.

    There’s something grounding about choosing the plain tub at night after a day of scrolling past flawless faces online. It’s a decision rooted in function, not fantasy. Supporting the skin you have, rather than chasing the one you wish you woke up with.

    In a quiet way, that choice feels rebellious. You start to notice that glow comes less from gold packaging and more from skin that isn’t constantly battling dryness and inflammation.

    This mindset doesn’t banish pretty jars forever. It simply reshuffles priorities. First, a dependable moisturizer that respects your skin barrier and your budget. Then, if you want, the extras — a serum here, a mask there.

    The dermatologist-approved “number one” isn’t a single brand or secret formula. It’s a category: simple, barrier-supporting moisturizers that work across ages, skin types, and trends.

    The next time you’re standing under fluorescent lights in that aisle, the real question might not be “Which cream looks the most luxurious?” but “Which one will my skin quietly thank me for in three months?”

    Key Takeaways

    • Simple formulas win: Fragrance-free creams with humectants and barrier-repairing ingredients focus on function over hype.
    • Application matters: Gentle cleansing, damp skin, and consistent use maximize results.
    • Higher price doesn’t mean better results: Affordable pharmacy moisturizers often outperform luxury products for sensitive or dry skin.
  • Breakthroughs in diabetes care signal a turning point that could soon render todays treatments obsolete

    Breakthroughs in diabetes care signal a turning point that could soon render todays treatments obsolete

    On a rainy Tuesday in Boston, inside a clinic that still carries the faint scent of disinfectant and coffee, a nurse gently removes a small white sensor from a patient’s arm. The woman sitting in the chair has lived with type 1 diabetes since she was eleven. She checks her phone, bracing herself for the usual red spikes. Instead, the graph shows a calm, steady line.

    Her insulin pump and sensor have been communicating all night, smoothing out fluctuations while she slept. No alarms. No corrections. Just balance.

    Outside, people hurry through puddles, unaware that inside this modest exam room, the daily rules of diabetes are quietly being rewritten. The nurse smiles and says, almost offhandedly, “This is only the start.”

    The Silent Transformation Behind a Simple Glucose Line

    If you haven’t kept up with diabetes care recently, you might still picture finger pricks, carb calculations, and the constant worry of nighttime highs. Those fundamentals remain, but the tools have evolved rapidly. In fact, some clinicians admit the pace of change has made parts of their training feel outdated.

    Step into a modern diabetes clinic today and you’ll see apps, sensors, and algorithm reports instead of handwritten logbooks. Pumps connect to phones, phones sync to the cloud, and the data comes back as personalized patterns showing how your body reacts to pizza dinners or stressful Mondays.

    Behind those charts, a deeper change is underway. The relentless mental work of diabetes management is slowly being handed over to machines.

    Not long ago, terms like “closed-loop systems” or “artificial pancreas” sounded futuristic. Today, they’re prescribed to teenagers who scroll through social media while their pumps adjust insulin doses every few minutes without intervention.

    One 17-year-old described waking up without a headache for the first time in years. His overnight glucose stayed in range. He hadn’t done anything special. He simply slept.

    Recent clinical trials echo these stories. People using hybrid closed-loop systems spend significantly more time in healthy glucose ranges. Severe lows decrease. Dangerous highs flatten. Parents of children with type 1 diabetes often say the biggest change isn’t in the data. It’s in their sleep.

    Why This Shift Feels Different From Past Tech Upgrades

    What made this possible is a quiet combination of more accurate sensors, smarter algorithms, and gentler hardware. Continuous glucose monitors now check sugar levels every few minutes through the skin, replacing the need for constant finger pricks. Pumps deliver tiny, precise doses based on prediction, not just reaction.

    More than new gadgets, this change is about returning mental space to the person living with diabetes. When machines handle the minute-by-minute calculations, your brain no longer has to act as a full-time pancreas. It can simply be a brain again.

    This isn’t magic. Not yet. But compared to the era of syringes and guesswork, today’s systems already feel like they belong to a different century.

    Beyond Management: The Push Toward Fewer Treatments

    Here’s where the story truly shifts. For decades, diabetes care focused on living better with a lifelong condition. Now, researchers are openly exploring something more radical: reducing or eliminating daily treatment altogether.

    Across labs in Cambridge, California, and beyond, scientists are developing beta cell replacement therapies. The goal is to provide new insulin-producing cells that can survive safely inside the body. Some are created from stem cells and trained to behave like natural pancreatic cells. Others are protected inside tiny capsules that shield them from immune attacks.

    Early results have already made headlines. In one trial linked to Vertex Pharmaceuticals, a man with long-standing type 1 diabetes reduced his insulin use by over 90% after receiving stem-cell–derived islet cells. His pancreas function, measured by C-peptide levels, began to resemble that of someone without diabetes.

    Another approach uses an implantable pouch filled with insulin-producing cells, designed to act like a mini pancreas under the skin. Roughly the size of a credit card, it quietly performs the job the pancreas once handled.

    These trials remain early, with careful language about partial remission and unknown durability. Still, for people who have counted carbs since childhood, a 90% reduction in insulin is less a statistic and more a glimpse of a different life.

    What makes these therapies so disruptive is their logic. Instead of constantly correcting blood sugar from the outside, they aim to restore the body’s internal system. That represents a fundamental shift away from endless management.

    Rewriting the Biology, Not Just Replacing Cells

    At the same time, gene-editing tools like CRISPR are being explored in conditions tied to immune and metabolic dysfunction. The long-term hope is not only to replace damaged cells, but to retrain the immune system that destroys them.

    Other research teams are testing vaccines designed to delay or even prevent type 1 diabetes in high-risk children by calming immune responses before the pancreas is attacked.

    If even some of these efforts succeed, the insulin pens, pumps, and supplies that define diabetes today could eventually feel outdated, much like dial-up internet in an age of fiber connections.

    Living in the Transition Without Burning Out

    So what does this mean for someone managing diabetes right now, caught between finger pricks and future cures? Many specialists suggest treating current technology as supportive teammates, not strict taskmasters.

    If you use continuous glucose monitoring or smart insulin tools, focus on patterns rather than perfection. A midweek spike might reflect commute stress, not personal failure. Make one small adjustment, watch for a few days, and adjust again.

    Think of today’s tools as training wheels. The better you understand your body now, the more prepared you’ll be when more advanced options arrive.

    Breakthrough headlines can also stir complicated emotions. Some people feel pressure to use every feature flawlessly. Sensors fall off. Pumps alarm at inconvenient times. Sometimes, you just eat the cake.

    The mistake is believing imperfect use equals failure. Progress in diabetes care is meant to serve people, not judge them. Simplifying settings or taking mental breaks isn’t regression. It’s human.

    As one endocrinologist put it, today’s newly diagnosed patients may not need the same treatments ten years from now. The conversation is shifting from tighter control to the real possibility of less treatment altogether.

    Practical Ways to Stay Grounded While Things Change

    • Stay informed without overload: Check trusted updates monthly instead of chasing every headline.
    • Ask one focused question at appointments: “If I were your family, what option would you want me to know about?”
    • Think in time horizons: What helps now, in a few years, and over the next decade?
    • Protect emotional energy: Step back if news creates frustration instead of hope.
    • Share responsibility: Make sure at least one other person understands your setup and emergency plan.

    A Moment That Redefines What “Chronic” Means

    Health headlines often promise revolutions and deliver incremental change. Diabetes has seen plenty of those disappointments. This moment feels different.

    Daily care is steadily becoming automated, easing the constant interruptions and sleepless nights. At the same time, entirely new strategies — from stem-cell implants to immune-targeted therapies — are pushing toward a future where lifelong treatment may no longer be the default.

    That future still faces real barriers: cost, access, and inequality across regions. Breakthroughs only matter if they become widely available, not exclusive luxuries.

    Even so, the ground is shifting. Children diagnosed today may one day tell their families about a time when devices were worn constantly, much like earlier generations spoke of glass syringes and boiling needles.

    For decades, diabetes has been defined by constant adjustment. Now, the question is slowly changing from “How can I manage this better?” to “How long will I need to manage this at all?”

    No one can promise timelines. Science rarely moves on demand. But for the first time, the idea that today’s standard treatments could become obsolete feels less like fantasy and more like an ongoing project.

    Perhaps the real shift is this: people with diabetes are beginning to imagine a future where the condition no longer dominates every thought. What they do with that reclaimed time and energy may be the most meaningful outcome of all.

    Key Takeaways

    • Automation of daily care: Closed-loop systems reduce constant decisions, leading to better sleep and steadier days.
    • Cell-based therapies emerging: Early trials suggest insulin dependence could drop dramatically for some.
    • Preparing for change: Using current tools wisely builds confidence and direction instead of passive waiting.
  • Bad news for homeowners: starting February 15, a new rule bans lawn mowing between noon and 4 p.m., with fines at stake

    Bad news for homeowners: starting February 15, a new rule bans lawn mowing between noon and 4 p.m., with fines at stake

    The sound arrived just after lunch. A sharp, metallic hum slicing through the drowsy calm of a winter afternoon. Curtains shifted, a dog started barking, and someone muttered under their breath behind closed glass. Then, barely two minutes later, it stopped. You could almost sense the realization settling in next door. February 15. The new rule.

    From that day forward, between 12 p.m. and 4 p.m., the lawn mower stays parked. Across many towns, a fresh regulation has quietly woven itself into daily life, landing squarely in that inconvenient window when people finally have time to deal with their gardens. Fines are possible, complaints are rising, and long-standing backyard habits are being reshaped.

    The grass, of course, will continue to grow.

    From Sunday Calm to Daily Quiet: Understanding the Midday Ban

    For years, the rule was simple: protect Sunday mornings. No drills, no chainsaws, no roaring mowers while people enjoyed slow starts and coffee at home. Now that quiet period has stretched into the heart of the day, and it applies well beyond weekends. From February 15, many municipalities prohibit lawn mowing and other noisy garden work between noon and 4 p.m., with penalties that can be costly if ignored.

    On paper, the idea feels sensible. Hotter summers, remote work, children napping, and older residents resting all play a role. In practice, the restriction collides with the limited free time many homeowners actually have.

    Think about a typical weekday. Leaving home early, returning late, cooking dinner, helping with homework, tackling chores. By the time the mower could come out, daylight is fading or local rules already ban noise after early evening. Weekends aren’t much better, filled with errands, sports, and family commitments. For many, that midday stretch in spring and summer was the only realistic chance to tame the lawn.

    Now imagine receiving a warning for mowing at 1 p.m. on your only free Saturday. Some towns have already noted a rise in neighbor complaints related to garden noise over the past three years, especially since working from home became common. Each complaint may look small on paper, but it often reflects real frustration.

    There is reasoning behind the silence. Heatwaves are more frequent, and cutting grass in early afternoon strains both lawns and people. Local authorities also point to how constant background noise slowly erodes community comfort. Leaf blowers, hedge trimmers, pressure washers—together they’ve transformed the sound of residential streets. The rule aims to guarantee a daily pocket of calm.

    The downside is who bears the burden. Not everyone can hire a gardener who works mid-morning. Not everyone can afford a robot mower quietly gliding across the yard. This is where a rule designed with good intentions can start to feel heavy-handed.

    What Changes Now: Adjusting Habits Without Losing Your Mind

    The first adjustment is straightforward: shift your mowing schedule. Most regulations still allow noisy garden work early in the morning or later in the afternoon. That may mean starting a bit earlier on Saturdays from spring through autumn, or using long summer evenings between 5 p.m. and 7 p.m.. The lawn won’t mind being cut at 9 a.m. instead of 1 p.m.

    Planning may sound dull, but here it genuinely helps. A simple lawn calendar on the fridge—every 10 to 14 days, outside the banned window—can save both stress and fines. Treat mowing like an appointment: inconvenient to schedule, but worse if neglected.

    Then there’s the issue everyone feels: noise. Many homeowners are gradually replacing old petrol mowers with battery-powered models. They aren’t silent, but they are noticeably quieter and far less likely to trigger complaints. The same trend applies to hedge trimmers and blowers. The upfront cost can sting, but the long-term peace is often worth it in dense neighborhoods.

    Most people recognize that moment of pulling the starter cord and sensing every nearby window watching. No one wants to be the cul-de-sac villain. And realistically, few people read every line of local bylaws and follow them perfectly overnight. A bit of flexibility and goodwill on all sides usually keeps daily life manageable.

    Some residents are taking the rule as a chance to rethink their gardens entirely. Smaller lawns, ground cover, and wildflower patches that need minimal mowing are becoming more common. In parts of France and Germany, towns even promote no-mow zones to support pollinators. It doesn’t mean abandoning order, just reducing the area that requires noisy maintenance.

    As one small-town mayor recently admitted, “At first, people were angry. After a year, several said they felt relieved. The neighborhood is quieter, and they spend less time mowing under intense heat.”

    • Switch part of your lawn to slow-growing grass or flower meadow mixes
    • Group noisy tasks like mowing and hedge trimming into one morning session
    • Share a battery mower with neighbors instead of multiple petrol machines
    • Use the noon–4 p.m. slot for quiet garden tasks such as hand weeding or planning
    • Check local details, as some towns allow exceptions for professionals or small electric tools

    Beyond the Rule: What Midday Silence Reveals About Community Life

    This restriction is more than a technical limit on decibels. It highlights the ongoing balance between private space and shared comfort. Your garden is personal, your free time is scarce, and your lawn often reflects pride and effort. At the same time, sound travels easily through thin walls and shared courtyards, especially in closely packed housing.

    Some residents will adapt smoothly, setting alarms earlier and choosing quieter equipment. Others will feel singled out, seeing yet another rule that overlooks long commutes, tight budgets, and packed schedules. Between these reactions lies room for conversation—on the sidewalk, at town meetings, or in neighborhood chats where someone finally asks, “Can we talk about the noise?”

    The grass will keep growing, with or without regulations. What may truly shift is how neighbors negotiate everyday life together, balancing lawns, time, and patience side by side.

    Key Takeaways at a Glance

    • New midday restriction: No noisy garden work from 12 p.m. to 4 p.m. starting February 15, helping avoid fines and disputes
    • Adjusted routines: Early morning or late afternoon mowing keeps you compliant and reduces stress
    • Quieter garden choices: Battery tools and smaller lawns mean less noise, fewer complaints, and easier upkeep
  • Fix Scratches on Glass Cooktops Quickly at Home Without Replacement

    Fix Scratches on Glass Cooktops Quickly at Home Without Replacement

    The first time you notice it your heart sinks. That shiny black glass cooktop you used to love now has a pale jagged scratch running across it. Perhaps it appeared when you moved a heavy pot too quickly or when a tiny grain of salt got stuck under a pan. The scratch is small but every time you enter the kitchen you spot it immediately. When you touch the surface you can feel the rough edge. You begin to worry that the damage is permanent and wonder if you need to replace the entire cooktop or simply accept the flaw.

    Why Scratches Appear on Glass Cooktops (Even With Careful Use)

    Glass cooktops look smooth, modern, and almost unbreakable—like a dark, glossy surface that can handle daily cooking without trouble. In reality, the glass is more sensitive than it appears. Tiny abrasions can form even when you’re careful. Sliding a heavy pot, a grain of salt trapped under cookware, or a cast-iron pan with a rough base can all quietly mark the surface. Often, the scratch isn’t noticed right away. It shows up later while cleaning, bringing that familiar mix of irritation and regret. The important thing to know is that many of these scratches are not permanent and can often be reduced with gentle care.

    Understanding the Scratch: How Serious Is It?

    Before trying to fix anything, it helps to understand what kind of scratch you’re dealing with. Look at the cooktop under bright light and from different angles. If the scratch appears only at certain angles and your fingernail doesn’t catch on it, it’s likely a light surface mark. These are usually the easiest to improve. If your nail catches slightly, the scratch may still be manageable. Deep grooves that clearly catch your nail are more serious and can’t be fully removed at home. Thinking of scratches in levels—light haze, visible lines, and deep grooves—helps you choose the right approach and set realistic expectations.

    Preparing the Right Tools: Gentle, Not Aggressive

    Start by cleaning the cooktop thoroughly so no grease or debris interferes with the repair. Use a soft cloth and a cooktop-safe cleaner, then dry the surface completely. For polishing, choose mild options only. Baking soda paste, non-gel toothpaste, ceramic cooktop cream, or a glass polishing compound are all suitable for light to medium scratches. These products work by gently smoothing the surface rather than grinding it down. Always use a soft microfiber cloth and avoid harsh sponges, steel wool, or anything gritty that could add new scratches.

    At-Home Methods That Can Reduce Scratches

    Begin by testing your chosen method on a small, hidden area. If the finish remains clear, move on to the scratch. For light scratches, apply baking soda paste or toothpaste and rub gently in small circles. Wipe clean, check progress, and repeat if needed. For more visible scratches, ceramic cooktop cream or glass polishing compound often works better. Apply with light pressure and patience, letting the product do the work. Deep scratches won’t disappear, but careful polishing can soften their appearance and make them far less noticeable.

    Finishing the Surface After Polishing

    Once the scratch looks improved, clean the area again to remove residue. Many people like to finish with a cooktop cleaner that leaves a light protective shine. Buff gently with a dry microfiber cloth until the surface reflects evenly. The scratch may still exist faintly, but it usually fades into the background rather than standing out.

    Method Used Most Effective For Main Advantages Possible Drawbacks
    Baking Soda Paste Minor surface marks and dull patches Low cost, easily available at home, gentle on glass Not effective for deep or clearly visible scratches
    Non-Gel Toothpaste Light but noticeable scratches Simple application, mild abrasive helps polish glass Needs repeated attempts for visible results
    Cooktop Polishing Cream Light to moderate scratch damage Specifically made for glass cooktops, restores shine safely More expensive than basic household options
    Glass Polishing Compound Multiple or stubborn scratch marks Stronger polishing power, better visible improvement Requires careful use to prevent surface damage

    How to Prevent Future Scratches on Your Cooktop

    Prevention is mostly about changing small habits. Lift cookware instead of sliding it. Wipe the bottoms of pots and pans before placing them on the glass. Clean spills—especially sugar or salt—before cooking again. Avoid storing heavy or rough cookware directly on the cooktop. If you use protective mats or covers, make sure they are designed specifically for glass cooktops and safe for heat.

    When Repair Isn’t Enough and Replacement Is Safer

    If a scratch looks more like a crack, spreads over time, or feels deeply gouged, it’s best to stop and seek professional advice. Structural damage can affect how the glass handles heat and may become a safety issue. However, most everyday scratches are cosmetic and don’t require replacement. With gentle methods and patience, you can restore much of the cooktop’s smooth appearance and continue using it with confidence.

    Final Thoughts on Caring for a Glass Cooktop

    A glass cooktop is both practical and reflective, showing signs of daily cooking life over time. Scratches don’t always mean failure or neglect—they’re often just part of regular use. Learning how to soften or reduce them helps keep your kitchen looking calm and cared for. More importantly, it builds confidence in maintaining your appliance without panic, allowing you to focus on cooking rather than worrying about every small mark.

  • Eyebrow Placement Hack Makeup Artists Use to Instantly Create a Brighter Look

    Eyebrow Placement Hack Makeup Artists Use to Instantly Create a Brighter Look

    The woman sitting in the café looked exhausted at first glance. Her laptop was open, a triple espresso in hand, with faint shadows visible beneath her concealer. Yet when she lifted her face, she appeared surprisingly refreshed. Not spa-rested, but genuinely awake. The reason was subtle and sat just above her eyes. Her eyebrows were slightly lifted and softly highlighted, making her eyes appear bright and alert even under unforgiving café lighting and unreliable Wi-Fi.

    Makeup artists backstage at fashion weeks and creators on social media repeat the same advice. If you only have one minute in the morning, focus on your eyebrows. A tiny adjustment creates a quiet illusion. It is the kind of change that makes coworkers ask if you switched skincare routines, when all you really did was draw your brow pencil a few millimeters higher. One small eyebrow shift can noticeably change how your entire face is read.

    Why an Awake Appearance Starts With Brows

    Look closely at backstage photos from any fashion show and one detail stands out. Models may have unfinished base makeup, but their eyebrows are already shaped. The tails are gently lifted, arches defined, and the brow bone looks clean and open. This small touch makes the upper face appear instantly more alert.

    Makeup artists know that eyebrows are noticed before most other facial features. Their angle, height, and framing influence whether someone looks tired, relaxed, stern, or refreshed. Brows that sit too low can make the face look sleepy. When they are softly raised and opened, the eyes appear rested even after poor sleep.

    This is easy to spot during a morning commute. Someone in gym clothes may skip foundation, but if their brows are brushed upward and the inner corners brightened, they look ready for the day. Someone else with puffy eyes from a late night can appear meeting-ready simply by tidying the brows and lifting the arch slightly.

    Social media has embraced this trick as well. Before-and-after clips often show only a brow adjustment and a touch of highlight. The result looks more awake and sometimes younger. A 2023 trend known as the eyebrow lift hack gained millions of views because people wanted to look less tired without heavy makeup.

    The reason this works is tied to facial structure. Eyebrows act like curtains for the eyes. When they sit low or feel heavy, they visually press down on the eyelid, emphasizing under-eye shadows and puffiness. Lifting the tail slightly and cleaning beneath the arch opens vertical space, making the whites of the eyes look brighter. Nothing physically moves, yet the illusion changes how your face is perceived.

    Light also plays a role. Brightening the brow bone, inner corner, and peak of the arch helps reflect light where faces naturally appear alert. This balance of shadow and highlight is how makeup artists refresh tired faces in minutes backstage.

    The Simple Brow Adjustment Makeup Artists Swear By

    The technique itself is simple and relies on three small steps to create an invisible lift. First is fill and lift. Lightly fill the top edge of the brow instead of focusing only on the bottom. Concentrate on the outer third, using hair-like strokes to raise the tail by one or two millimeters. This alone changes how your face looks.

    Next is clean and brighten. Using a small brush or fingertip, tap a skin-tone concealer or brightening pen just under the highest point of the arch. Blend it downward onto the lid to remove heaviness rather than create a sharp line.

    Finally, highlight with intention. Add a tiny amount of satin-finish highlighter under the arch and at the inner corner of the eye. Tap gently instead of dragging. Once practiced, the entire process takes about 45 seconds per eye.

    The result does not look trendy or overdone. It simply makes you appear more awake than you feel. Problems happen when the brow is overfilled from underneath, creating thickness and weight above the eyelid. This can pull the gaze downward, especially when the tail extends too far.

    Using concealer that is too light can also backfire. Harsh halo brows may work under studio lights but can look chalky in daylight. The lift should feel soft and natural. Choose a shade close to your skin tone with slight brightness and blend until it melts into the lid.

    This method works because it is easy enough to become routine. Two strokes to lift the tail, one swipe to clean the arch, and a small dot of light. No extra products and no extra time.

    A Minimal Brow Shift That Gently Lifts Your Whole Face

    Once this technique becomes part of your routine, you may notice small changes. Seeing yourself on a phone screen later in the day, you might look less tired than expected. On warm days, brows and mascara alone may feel enough for a video call.

    There is also comfort in these small rituals. Those brief moments in front of the mirror are often the only time you look at your face with intention rather than criticism. Adjusting a brow or softening a shadow is not about vanity. It is a quiet way of preparing yourself for the day.

    When you are exhausted but still need to show up, that subtle brow lift becomes a small sign of readiness. When things are going well, it simply helps your appearance match how you feel. Whether on a screen, in a meeting, or waiting for coffee, your eyes look alert even as your mind catches up.

  • 6 Lip Tints That Deliver a Soft Natural Finish Perfect for Everyday Makeup Wear

    6 Lip Tints That Deliver a Soft Natural Finish Perfect for Everyday Makeup Wear

    Finding the right lip tint can make everyday makeup feel effortless, especially when you want a soft, natural finish that works for work, errands, or casual outings. In India, where climate, skin tones, and busy routines all play a role, lip tints have become a go-to option for lightweight color with comfort. They offer a balance between subtle pigment and hydration, making them ideal for daily wear. From barely-there hues to buildable shades, the right lip tint can enhance your natural look without feeling heavy or overdone.

    Everyday Lip Tints for a Soft Natural Look

    For daily makeup, lip tints that provide a gentle wash of color are often the most practical choice. These formulas are designed to blend seamlessly with your natural lip tone, creating a barely-there color effect that feels polished but not dramatic. Many options now focus on lightweight liquid texture, which sits comfortably on the lips without stickiness. What makes them stand out is their buildable pigment control, allowing you to go from subtle to slightly defined with ease. Paired with a hydrating comfort feel, these tints are perfect for long days when reapplication needs to be quick and fuss-free.

    Natural Finish Lip Tints Ideal for Daily Wear

    When choosing a lip tint for everyday use, the finish matters just as much as the shade. Products that dry down to a soft matte sheen or a gentle stain tend to look more natural throughout the day. Many popular choices focus on skin-tone friendly shades that complement a wide range of complexions common in India. Another benefit is their smudge-resistant wear, which helps maintain a neat appearance even during meals or commutes. Combined with a non-drying formula, these lip tints strike the right balance between longevity and comfort.

    Best Lip Tints That Look Effortless Every Day

    The best lip tints for everyday makeup are those that adapt easily to different looks and moods. Whether you prefer a hint of pink, peach, or nude, these products offer a natural flush effect that enhances rather than hides your features. Many are designed for easy swipe application, making them ideal for touch-ups on the go. Their long-lasting stain finish ensures color stays put without frequent reapplication. Added benefits like comfortable all-day wear make these lip tints reliable staples in any daily makeup routine.

    Why Soft-Finish Lip Tints Work So Well

    Soft-finish lip tints have earned their popularity because they align perfectly with modern, minimal makeup trends. Instead of masking the lips, they enhance natural beauty through subtle color payoff and a fresh everyday appearance. Their lightweight nature supports low-maintenance makeup routines, which is ideal for busy lifestyles. Many users also appreciate how these products offer versatile styling options, pairing well with both simple and slightly elevated looks. Overall, they deliver a balance of ease, comfort, and polish that suits daily wear beautifully.

    Lip Tint Type Finish Ideal For Wear Time
    Water-based Tint Natural stain Minimal makeup 4–6 hours
    Cream Tint Soft matte Dry lips 5–7 hours
    Gel Tint Sheer glossy Fresh look 3–5 hours
    Velvet Tint Blurred matte Office wear 6–8 hours

    Frequently Asked Questions (FAQs)

    1. Are lip tints suitable for daily use?

    Yes, lip tints are lightweight and comfortable, making them ideal for everyday wear.

    2. Do lip tints work for Indian skin tones?

    Most modern lip tints are designed with versatile shades that suit a wide range of Indian complexions.

    3. How long do lip tints usually last?

    Depending on the formula, lip tints can last anywhere from 3 to 8 hours.

    4. Can lip tints dry out lips?

    Hydrating or cream-based lip tints are less likely to cause dryness when used regularly.

  • Short Haircuts for Fine Hair: 4 Volume-Boosting Styles That Make Short Hair Look Thicker Instantly

    Short Haircuts for Fine Hair: 4 Volume-Boosting Styles That Make Short Hair Look Thicker Instantly

    Her short haircut looks polished, tidy, almost flawless—and yet she sighs. “Why does it always feel so flat?” she murmurs, tugging at the sides as if volume might suddenly appear. Nearby, a friend with the same length but a messier cropped bob shakes her head once, and her hair comes alive with texture, shape, and movement. Same length, completely different result. The secret isn’t the products on the sink. It’s the structure of the haircut itself and how it’s designed to create volume where nature held back.

    Short fine hair has a quiet truth: with the right cut, it can look fuller than it actually is. With the wrong one, every strand collapses straight down. The upside? A few smart haircut choices can completely change the story in a single salon visit.

    1. The Softly Textured French Bob: Effortless Fullness Without Stiffness

    The French-inspired textured bob has a certain ease to it—relaxed, full, never overdone. For fine short hair, it works like invisible support under each strand. The length usually sits at the jawline or just below the cheekbones, while the ends are intentionally uneven rather than blunt and heavy.

    The beauty lies in contrast: a clean outer shape paired with airy texture inside. Instead of one flat surface, the eye catches layers of movement. Subtle internal layering, gentle point-cut ends, and a softly imperfect part create the illusion of noticeably thicker hair.

    Imagine a crowded morning commute. Many fine bobs look pressed down, as if they lost a battle with the pillow. Then there’s someone with a choppy French bob—bangs brushing the brows, ends flipping slightly with each step. The hair isn’t denser. It’s simply cut to move, not to sit still.

    Stylists who work with actors and models rely on this approach. They add barely visible internal layers and often rough-dry instead of locking everything into place. Some salons even report that requests for a textured French bob have surged, especially among those who felt their longer hair just hung lifelessly.

    This cut succeeds because it breaks up the uniform weight that pulls fine hair down. Hidden layers allow the roots and mid-lengths to lift away from the scalp, while light layering removes heaviness without thinning the ends. Add a soft fringe or side-swept bangs, and fine hair suddenly behaves less like a flat sheet and more like a living, moving fabric.

    2. The Long-Top Pixie: Targeted Volume Where It Matters Most

    A pixie cut can feel risky for fine hair. Too short, and the scalp shows. Too long, and everything collapses. The winning formula is tapered sides and back combined with longer, feathered layers on top. This keeps density where the eye naturally focuses—the crown and front.

    Stylists often keep the nape close and clean, gradually increasing length as they move upward. The top is cut in soft, uneven layers instead of one solid block. This allows flexibility: push it back, sweep it sideways, or wear it lightly tousled.

    Picture a small London salon on a rainy weekday. A client arrives with a shoulder-length cut hanging flat around her face. Twenty minutes later, what remains is a long-layered pixie—snug around the ears, fuller on top, able to lift or fall forward naturally. She stares at her reflection, surprised. Her hair looks thicker, simply because it’s now stacked and supported instead of weighed down.

    Fine hair thrives on structure, not length. Shorter sides remove visual bulk from areas that flatten easily, drawing attention upward. When top layers are razor-cut or point-cut, strands interlock slightly instead of lying straight. These tiny air pockets between hairs create that rounded, voluminous look many people chase with styling products alone.

    Here, the haircut does the heavy lifting. Products simply help it last.

    3. The Modern Shaggy Crop: Easy Volume With a Lived-In Feel

    The layered shaggy crop lives between a bob and a pixie. It features short, blended layers, extra length at the crown, and soft pieces around the face. For fine hair, it’s an everyday shortcut to volume: wake up, shake it out, quick scrunch, and go.

    The shape is rounder and more relaxed than a classic bob, but never chaotic. Layers are designed to blend smoothly, so hair always looks intentional—even when air-dried with minimal effort.

    Many styles look perfect on day one and impossible to recreate later. The shaggy crop flips that script. Initially, it may feel almost too light. After a couple of days, natural oils and product residue settle in, creating effortless, slouchy volume that looks better with time.

    One wearer summed it up simply: “It’s the first cut that forgives me when I’m tired.” Instead of long morning routines, she now scrunches a little cream into damp hair, lets it partially air-dry, and finishes with a diffuser. The result? Soft bends, flicked ends, and a fuller crown—without stiffness.

    Technically, this cut relies on vertical layering to avoid bulk at the ends. The weight line is broken, creating a gentle halo of fullness around the head. Hair moves in different directions, so it can’t all collapse at once. With the right structure, even low-effort styling looks deliberate and styled.

    4. The Stacked Bob With a Neat Nape: Built-In Lift From the Back

    The stacked bob is a quiet powerhouse for volume. From the front, it may appear simple and classic. From the side and back, the secret shows: a short, snug nape that gradually builds into fuller layers at the crown, creating a rounded, lifted shape.

    For very fine hair, some opt for a subtle undercut at the nape. Nothing dramatic—just a hidden, lightly buzzed section that removes the flattest weight. This allows the upper layers to fall inward, which paradoxically makes them look thicker.

    The technique is precise. The stylist shortens the underlayer, then cuts the hair above in graduated steps that stack naturally. When blow-dried from the nape upward, the shape lifts easily without relying on heavy products.

    This is how many people achieve that coveted rounded back view seen in salon photos. Even after minimal styling, the built-in graduation helps the haircut hold its form. As one fine-hair specialist explains, “With a good stacked bob, your hair has a memory. Even after a rough night’s sleep, it remembers where the volume belongs.”

    Daily Habits That Help Short Fine Hair Keep Its Volume

    • Apply a light volumising mousse at the roots only.
    • Dry hair in the opposite direction of where it will fall, then flip it back.
    • Ask for thinning only where hair clumps, never at the very ends.
    • Change your part occasionally to refresh root lift.
    • Trim every 6–8 weeks to maintain the shape.

    Choosing the Right Short Volumising Cut for Fine Hair

    Finding the ideal cut isn’t about formulas—it’s about conversation. Face shape, daily habits, and styling tolerance matter just as much as hair texture. A skilled stylist watches how your hair naturally falls before making the first cut.

    If you constantly tuck hair behind your ears, a pixie with longer top layers may feel easier than a bob. If you enjoy softness at the neck, a textured bob or shaggy crop can keep that feel while still adding lift at the crown.

    Honesty makes the difference. Share how much time you realistically spend styling. Mention whether you dislike sticky products or rely on dry shampoo. These details often decide whether a haircut stays full—or becomes another style that only worked for a few days.

    Short hair on fine strands doesn’t mean sacrificing fullness. With cuts designed for lift—textured bobs, smart pixies, shaggy crops, and stacked shapes—every strand works harder. The right structure turns fine hair from a limitation into a quiet advantage.

    Key Styles at a Glance

    • Textured French bob: Soft internal layers and broken ends create airy movement for an effortless, fuller look.
    • Pixie with long top layers: Short sides and a longer crown concentrate volume where it’s most flattering.
    • Stacked or shaggy shapes: Graduated napes and blended layers provide built-in lift that lasts on low-effort days.
  • Stop Washing Your Hair This Often, Dermatologists Warn – You’re Training Your Scalp to Misbehave

    Stop Washing Your Hair This Often, Dermatologists Warn – You’re Training Your Scalp to Misbehave

    One eye on the clock, one hand glued to your phone, the other scrubbing your scalp with determination. Shampoo, rinse, repeat. Every day. Sometimes twice when workouts are involved. Your hair feels clean for a few hours, then the roots turn oily, the ends feel parched, and you blame yourself for not rinsing properly. So you reach for the bottle again, following a habit you stopped questioning long ago.

    Dermatologists are now quietly pointing out a hard truth: many of us wash our hair too often and in ways that disrupt the scalp. This isn’t a small mistake. It’s a cycle that fuels excess oil, frizz, flakes, and constant product-hopping without real results.

    Your hair isn’t the problem. Your routine might be.

    How Daily Shampooing Became the Norm

    For most people, hair-washing isn’t a conscious choice. It’s automatic. Every day, or every other day at best. Much like brushing teeth, except the scalp doesn’t benefit from constant stripping. Dermatologists increasingly see irritated scalps, dryness, and sudden oiliness that doesn’t align with age or genetics. The pattern is familiar: frequent washing, forceful scrubbing, and anxiety when roots shine by midday.

    We’ve been taught to fear natural oils, yet those oils exist to protect hair and skin. That fear often makes scalp issues worse, not better.

    Talk to people around you and the habit shows up everywhere. The daily exerciser washes every day. Teenagers sometimes wash twice. New parents wash less and notice their hair oddly improves. A UK survey by a major haircare brand found that over 60% of people shampoo at least four times a week, despite dermatologists rarely recommending that frequency for healthy scalps.

    What’s striking isn’t just how often people wash, but how they feel about it. Many apologise for washing only twice a week, as if it signals poor hygiene. Social media reinforces this guilt, framing visible oil as failure. In reality, hair is meant to change from day to day.

    What Happens When You Overwash

    When shampoo strips the scalp too often, it reacts defensively. Natural sebum is removed, and oil glands respond by producing more. This rebound effect traps you in a loop of over-washing and overproduction. Meanwhile, the lengths and ends, especially if coloured or heat-styled, grow dry, brittle, and dull.

    Dermatologists keep repeating a simple reminder: your scalp is skin. You wouldn’t scrub your face with harsh cleanser twice a day and call it care. Treating the scalp the same way leads to imbalance rather than cleanliness.

    How Often Is “Right” for Most People?

    For an average scalp without medical issues, dermatologists usually suggest washing two to three times a week. Hair that is thick, curly, coily, or tightly textured often benefits from washing even less, sometimes once a week or every ten days, with a stronger focus on hydration.

    The adjustment works best when done gradually. Extend wash days one at a time, allowing the scalp to recalibrate. Apply shampoo only to the roots, not the full length, and let the suds cleanse the ends naturally as you rinse.

    Think scalp care, not constant cleansing. Use fingertips instead of nails, massage gently, let shampoo sit briefly, then rinse thoroughly.

    Managing the In-Between Days

    The hardest part is often the transition. Flat roots, a greasy fringe, hair that doesn’t match the mental image of “clean”. This is when most people panic and shampoo again. Dermatologists explain that a short adjustment phase is normal. Light, alcohol-free dry shampoo, loose styles, or low ponytails can help bridge the gap.

    A less-than-perfect hair day isn’t a personal failure. It’s your scalp learning a new balance.

    Let’s be honest: no one follows flawless routines every day like social media tutorials suggest. We skip wash days, sleep with hair tied too tightly, forget pillowcases. And still, our hair survives. Long-term health comes from gentler habits: lukewarm water, fewer shampoo repetitions, and avoiding aggressive scrubbing.

    “Most people don’t have bad hair,” says Dr. Maria Chen, a board-certified dermatologist specialising in hair disorders. “They have a scalp that’s been over-washed and over-scrubbed. When patients reduce washing to two or three times weekly, I often see less itching, fewer flakes, and calmer oil production within a month.”

    When Hair Care Becomes Self-Judgement

    On rushed mornings, many of us judge ourselves by a bit of shine at the roots. That judgement can feel heavy during stressful weeks. We link messy hair with a messy life, when it’s often just sebum doing its job.

    The goal isn’t flawless hair every day. It’s a routine that supports your scalp without draining your energy.

    • Oily roots and dry ends: Wash 2–3 times weekly, shampoo the scalp only, and condition the ends lightly.
    • Flaky or itchy scalp: Consult a dermatologist about medicated shampoos rather than scrubbing harder.
    • Curly, coily, or textured hair: Less frequent washing with richer conditioning often works best.
    • Frequent exercise: Rinse with water or use co-wash between full shampoos if sweat is the main issue.

    Redefining What “Clean” Really Means

    When people stop obsessing over wash counts and start listening to their scalp, a sense of relief often follows. Some notice longer-lasting colour or better styling hold. Others realise their flakes were mostly irritation from harsh formulas. The entire routine slows down.

    You may still enjoy freshly washed hair, but you no longer chase it daily. Wash days become part of a rhythm, not the whole story.

    For years, marketing has pushed the idea that oil, waves, and frizz must be erased. Dermatologists are encouraging a different view: healthy hair is allowed to look alive. Not frozen in day-one perfection, but flexible and real.

    On some days, you’ll still grab the shampoo for confidence before a meeting or date. That’s normal. On others, you’ll accept hair that isn’t perfectly clean and realise it’s still you, still presentable, still worthy. Letting your scalp breathe and your hair exist beyond “just washed” may be the quiet beauty shift no product can sell.

    • Ideal washing frequency: Around 2–3 times per week, less for highly textured hair, to calm the scalp.
    • Transitioning away from daily shampoo: Gradually extend wash intervals and use light solutions between washes.
    • Scalp-respecting habits: Gentle massage, lukewarm water, and shampoo focused on roots reduce irritation and damage.
  • Say Goodbye to Wood Pellets: Energy Experts Back a Cheaper Greener Heating Alternative

    Say Goodbye to Wood Pellets: Energy Experts Back a Cheaper Greener Heating Alternative

    No low hum, no faint scent of burnt wood — only the steady ticking of the clock and the soft hiss of the kettle. Outside, a thin layer of frost coated the garden chairs, the kind of cold that usually pushes the thermostat one step higher.

    For years, wood pellets felt like the smart answer: cheaper than gas, cleaner than oil, and almost a symbol of eco-conscious living. Then prices surged, deliveries became unreliable, and stacks of pellet bags filled the garage like unpaid labour. He glanced at the pellet stove, checked his latest energy bill, and something quietly snapped.

    That winter, he chose a different way to heat his home. And everything changed.

    From pellet storage to silent systems: what’s shifting inside our homes

    Step into any DIY store today and the change is obvious. Pellet stoves are pushed aside, replaced by sleek white units with quiet fans. Air-to-air heat pumps, infrared panels, hybrid setups — the heating aisle now resembles a tech showroom. Yet the core question remains unchanged: how to stay warm without draining savings or harming the planet.

    Evenings still echo with familiar worries. “Pellet prices jumped again.” “My neighbour switched to a heat pump and pays far less.” “What if winter blackouts hit?” Beneath the technical jargon lies a simple fear: being cold at home.

    Energy specialists are increasingly clear. Burning fuel — even compressed sawdust — is losing ground to advanced electric heating linked to cleaner power grids. That’s where the deeper transformation begins.

    Why households across Europe are rethinking pellets

    In Germany, once a stronghold of pellet heating, new figures from regional energy agencies reveal a clear shift. Homes that replaced pellet stoves with modern air-to-air heat pumps cut annual heating costs by 30 to 50%, depending on insulation and electricity tariffs. Same winters, same living space, but vastly different outcomes.

    France mirrors this trend. In 2021, pellets were affordable and praised as the future. By 2023, prices had doubled in some areas, with frequent shortages. A homeowner near Lyon found his five-ton yearly pellet use now rivaled his former gas bill. After installing a 5 kW air-to-air heat pump, his heating expenses dropped by roughly 40%, despite rising electricity prices — and the heavy lifting stopped.

    In Scandinavia, where winters are far harsher, the move is even clearer. Entire neighbourhoods are replacing chimneys and pellet hoppers with heat pumps or renewable district heating. The focus has shifted from what to burn to how efficiently heat is used.

    The efficiency gap that’s changing the equation

    Energy analysts keep repeating a simple truth: the cleanest energy is the energy you don’t consume. Pellets once looked ideal because they used wood residues and were labelled carbon neutral on paper. Reality is more complex. Forestry, drying, packaging, transport, and stove efficiency all add emissions and cost.

    A heat pump works on a different principle. Instead of creating heat, it moves existing heat from air or ground. For every unit of electricity used, it typically delivers three to four units of heat. As electricity grids become cleaner, each degree of warmth quietly reduces its carbon footprint.

    Financially, the difference is striking. Pellet stoves usually convert 75–85% of fuel energy into usable heat. A properly sized heat pump multiplies electricity several times over. Combined with volatile pellet prices, the balance increasingly tips toward electric systems.

    The home heating setup experts now recommend

    Energy advisors often point to a straightforward formula: efficient electric heating powered by low-carbon electricity. In practice, this means air-to-air heat pumps for apartments or smaller homes, and air-to-water systems for houses with radiators or underfloor heating. Sometimes, infrared panels complement the setup in frequently used rooms.

    The method is about optimisation, not magic. First, reduce heat loss through insulation and airtightness. Then use systems that maximize every kilowatt-hour. Finally, manage usage intelligently with off-peak tariffs or self-consumed solar energy. Experts describe it as turning your house into a thermos before heating it efficiently.

    Comfort also improves. These systems require little maintenance: no ash, no chimney cleaning, no fuel storage. Temperature is set via remote or app. Zoned heating allows warmth where it’s needed most, aligning comfort with real living patterns.

    Daily comfort, lower bills, cleaner air

    Picture a damp November evening. The living room holds steady at 20°C while the heat pump runs quietly. A slim infrared panel warms the home office during work hours, then shuts off automatically. Cheaper nighttime electricity gently boosts stored warmth. Heating becomes coordinated, not constant.

    A Belgian family that replaced a pellet boiler with a hybrid electric system saw annual heating and hot water costs fall from about €1,900 to roughly €1,250, partly offset by rooftop solar. The children noticed just one thing: no more smoky smell.

    The environmental gain is tangible. Even efficient pellet stoves release fine particulate pollution. Electric systems eliminate this local pollution, improving air quality, especially in dense areas.

    Planning the switch without regret

    Upfront costs remain a hurdle. Heat pumps require investment, and subsidies vary by region. This makes careful planning and honest quotes essential. Over a decade or more, especially where pellet prices fluctuate sharply, the economics often favour electric heat.

    Experts advise starting with an energy audit to identify heat loss. Reducing demand by even 20–30% can significantly lower system size and cost. Correct sizing matters: oversized systems waste energy, undersized ones struggle in cold spells.

    Zoning is equally important. Heating every room identically rarely reflects real life. Smarter controls and automation help maintain comfort without constant manual adjustments.

    Where this quiet transition is heading

    Saying goodbye to pellets once sounded radical. Today, it feels like a natural step in a longer evolution. Heating is shifting from visible flames and stored fuel to quiet, algorithm-driven comfort powered by renewable energy.

    The ritual of feeding a fire fades, replaced by cleaner air, simpler routines, and more predictable bills. For many households, true comfort now means stability rather than spectacle.

    As technology improves and power grids decarbonise, the gap continues to widen. Heating is no longer just a machine in the basement — it’s a flexible system shaped room by room, hour by hour. And that may be the most meaningful change of all.

    Key point Details Why it matters to readers
    Annual cost comparison: pellets vs heat pump A typical 120 m² reasonably insulated house using ~4–5 tons of pellets a year often spends €1,500–€2,000 at current prices. A well-sized air-to-air or air-to-water heat pump in the same home can bring heating costs closer to €800–€1,400, depending on electricity tariffs and usage. Gives a realistic idea of what you might actually save over a full winter, not just on paper, and helps judge whether the investment in a new system makes financial sense.
    Maintenance and daily chores Pellet systems require regular ash removal, annual chimney sweeping, mechanical checks and storage management. Modern heat pumps mostly need a yearly visual inspection, filter cleaning and occasional servicing, with no fuel deliveries or heavy bags to handle. Highlights how much time and effort you can get back in everyday life, which often matters as much as the euros on the bill when deciding to switch.
    Environmental footprint over 10–15 years Pellets rely on wood sourcing, drying, bagging and transport, plus local particulate emissions. Heat pumps use electricity that is increasingly low-carbon in many countries and emit no particles on-site. Over a decade, total CO₂ emissions can be cut by 30–60% compared with pellets, depending on the grid mix and building efficiency. Shows how the choice of heating technology affects not only your home, but also local air quality and long-term climate impact for your children and neighbours.