Blog

  • I practiced triangle pose daily for 2 weeks and felt full-body openness and mobility

    I practiced triangle pose daily for 2 weeks and felt full-body openness and mobility

    Practicing yoga consistently can create noticeable changes in how the body feels and moves, and my two-week daily experience with triangle pose proved that clearly. In India, where yoga has deep roots, many people turn to simple postures to restore mobility without complicated routines. Triangle pose may look basic, but when practiced mindfully every day, it can unlock stiffness across the body. Over just 14 days, I noticed smoother movement, better posture, and a surprising sense of openness that extended far beyond the hips or hamstrings.

    How daily triangle pose practice improves mobility

    Committing to triangle pose every day gently challenges multiple muscle groups at once, which is why mobility improves so quickly. The pose encourages hip joint freedom while lengthening the inner thighs and hamstrings without strain. As the torso opens sideways, the spine experiences lateral stretch relief that counters long hours of sitting. Over time, the shoulders adapt too, creating upper body ease that makes everyday movements feel lighter. What surprised me most was how this single posture promoted balanced muscle engagement, helping both sides of the body feel equally supported and flexible.

    Triangle pose effects on full-body openness

    Beyond flexibility, triangle pose creates a feeling of space throughout the body that’s hard to ignore. Each session invited deep chest expansion, making breathing feel calmer and more natural. The steady grounding of the feet built stable lower alignment, which translated into better posture during the day. As the weeks progressed, I noticed spinal length awareness that reduced tension in my lower back. This consistent practice also encouraged mind-body connection, making me more aware of subtle tight spots and how to release them gently.

    Why two weeks of triangle pose felt transformative

    Two weeks may sound short, but daily repetition made the triangle pose surprisingly powerful. The routine fostered joint range confidence, allowing me to move without hesitation or stiffness. Small adjustments each day supported postural strength gains that carried into walking and standing. I also felt energy flow balance, especially in the hips and side waist, areas that often feel neglected. Most importantly, the simplicity of the pose encouraged consistent practice habit, proving that transformation doesn’t always require long or complex sessions.

    Summary and personal reflection

    Practicing triangle pose daily for two weeks showed me how a single yoga posture can influence the entire body. The experience highlighted gentle daily progress rather than dramatic effort, which felt sustainable and motivating. I gained functional movement comfort that supported daily tasks, from bending to reaching. The pose also reinforced mindful movement focus, helping me slow down and listen to my body. Overall, this short commitment delivered lasting mobility benefits, making triangle pose a practice I plan to keep.

    Aspect Observed Benefit Timeframe
    Hip mobility Improved ease of movement 7–10 days
    Spinal flexibility Reduced side stiffness 1–2 weeks
    Posture Better alignment awareness 10–14 days
    Overall openness Full-body lightness 2 weeks

    Frequently Asked Questions (FAQs)

    1. Is triangle pose suitable for beginners?

    Yes, it can be easily modified and practiced safely by beginners.

    2. How long should I hold triangle pose daily?

    Holding it for 30–60 seconds per side is sufficient.

    3. Can triangle pose help with back stiffness?

    Yes, it gently stretches the spine and side body.

    4. Do I need yoga props for triangle pose?

    No, but blocks can help improve comfort and alignment.

  • A personal trainer recommends the CrossFit Isabel workout to build serious strength and power

    A personal trainer recommends the CrossFit Isabel workout to build serious strength and power

    A personal trainer’s recommendation can often cut through fitness noise, and the CrossFit Isabel workout is a prime example. Known for its simplicity and intensity, this workout has gained popularity among athletes in the United States who want fast, measurable strength gains. Built around explosive barbell movements, Isabel challenges both physical power and mental focus. It may look straightforward on paper, but the speed, load, and technique required make it a serious test. When performed correctly, it can sharpen athletic performance while delivering noticeable improvements in strength and power.

    Why the CrossFit Isabel workout builds raw power fast

    The CrossFit Isabel workout focuses on one movement done with intent, which is why trainers love it for developing power. By repeating a single lift under time pressure, the body learns to generate force efficiently. This approach encourages explosive strength gains, reinforces full-body coordination, and demands precise lifting mechanics. Many athletes notice how quickly it exposes weak points, whether in mobility or timing. Because the workout is short, intensity stays high, helping lifters push harder without pacing themselves too cautiously. Over time, this structure supports improved neural drive and better bar control, both essential for serious strength development.

    How the Isabel CrossFit routine challenges strength and speed

    Unlike longer conditioning workouts, Isabel rewards speed with control. Each repetition requires commitment, making it a lesson in balancing aggression and accuracy. Athletes must maintain consistent power output while avoiding sloppy form that can lead to missed lifts. Trainers often highlight how it improves mental workout focus, as there’s little room for distraction. The clock adds pressure, but smart athletes learn to stay calm and efficient. Over repeated sessions, this builds confidence under load and sharpens fast-twitch activation, both of which translate well to other strength-based training goals.

    Personal trainer tips for mastering the CrossFit Isabel workout

    Personal trainers often stress preparation before attempting Isabel. A thorough warm-up supports joint mobility readiness and protects against strain. Choosing the right weight is equally important, as ego lifting can undermine progress. Coaches recommend focusing on clean movement patterns and maintaining controlled breathing rhythm throughout the workout. Breaking reps strategically helps preserve form without sacrificing intensity. With practice, athletes develop efficient lifting cycles and gain a deeper appreciation for technique-driven power, making Isabel a reliable benchmark workout.

    Summary and training takeaways

    The CrossFit Isabel workout stands out because it proves that simplicity can still be demanding. Its structure highlights how strength and power are built through focus, repetition, and intent rather than endless variety. When approached thoughtfully, it encourages smart intensity choices, reinforces technical lifting discipline, and promotes measurable performance progress. For athletes and everyday gym-goers alike, Isabel can serve as both a challenge and a learning tool. Used occasionally within a balanced program, it offers a clear snapshot of power development while motivating continued improvement.

    Workout Element Purpose
    Barbell Snatch Develops explosive full-body power
    High Repetition Count Builds strength endurance and speed
    Time-Based Goal Encourages intensity and focus
    Simple Structure Highlights technique and efficiency

    Frequently Asked Questions (FAQs)

    1. What is the CrossFit Isabel workout?

    It is a benchmark workout featuring repeated barbell snatches performed as fast as safely possible.

    2. Is Isabel suitable for beginners?

    Beginners can scale the weight and focus on technique before increasing intensity.

    3. How often should Isabel be performed?

    Most trainers recommend using it occasionally as a benchmark rather than weekly.

    4. What equipment is needed for Isabel?

    You only need a barbell, weight plates, and adequate lifting space.

  • At 92 I Renewed My Passport for 10 More Years Thanks to This Exercise Routine Started in My 60s

    At 92 I Renewed My Passport for 10 More Years Thanks to This Exercise Routine Started in My 60s

    Renewing a passport at 92 sounds extraordinary, but in India it’s entirely possible when health and mobility remain strong. This inspiring story highlights how a consistent exercise routine started in one’s 60s can shape longevity, independence, and confidence well into later decades. Rather than focusing on extreme fitness, the emphasis is on sustainable daily movement, balance, and mental clarity. The journey shows how small habits compound over time, helping older adults stay active enough to travel, manage paperwork, and embrace life milestones that many assume are out of reach after a certain age.

    Exercise Routine That Supported Active Aging Into the 90s

    The foundation of this long-term fitness routine was simplicity and consistency. Gentle walking, light stretching, and bodyweight movements were practiced almost daily, prioritizing joint-friendly motion and steady heart health. Over the years, these habits improved posture, circulation, and overall stamina without stressing the body. Importantly, rest days were respected, reinforcing injury-free progress. By focusing on movements that supported daily tasks like climbing stairs or standing for long periods, the routine built functional strength focus that translated directly into independence during later life.

    How Starting Exercise in Your 60s Builds Lasting Strength

    Beginning an exercise routine in your 60s can still deliver remarkable benefits. In this case, slow strength-building helped maintain muscle mass and bone density, supporting better balance control and reducing fall risk. Breathing exercises and moderate cardio enhanced lung capacity, encouraging calm energy levels throughout the day. Over time, these practices nurtured long-term mobility gains that made aging feel less restrictive. The key was patience—progress was measured in months, not weeks—allowing the body to adapt naturally and sustainably.

    Staying Passport-Ready With Fitness and Mental Clarity

    Renewing a passport at 92 required standing in queues, following instructions, and maintaining alertness—tasks supported by regular exercise. Physical activity promoted sharp mental focus and confidence during official processes. Stretching and light yoga improved flexibility, making travel preparation easier and reinforcing independent living skills. Perhaps most importantly, exercise cultivated a positive mindset, reinforcing self-belief habits that age does not limit capability. This holistic approach kept both body and mind ready for new journeys.

    Why Consistent Movement Matters More Than Intensity

    This experience underscores that longevity is less about intense workouts and more about consistency. Moderate exercise practiced for decades supports resilience, circulation, and confidence, forming healthy aging routines. By aligning movement with enjoyment, the habit becomes sustainable, encouraging lifelong activity patterns. The result is not just physical strength but emotional readiness to embrace milestones others might avoid. Starting later in life still delivers meaningful change, proving it’s never too late to invest in daily movement.

    Exercise Type Frequency Primary Benefit
    Walking Daily Cardiovascular endurance
    Stretching 5 times/week Flexibility and posture
    Bodyweight exercises 3 times/week Muscle strength
    Breathing exercises Daily Mental clarity

    Frequently Asked Questions (FAQs)

    1. Can starting exercise in your 60s really make a difference?

    Yes, consistent moderate exercise can significantly improve strength, balance, and mobility over time.

    2. What type of exercise is safest for seniors?

    Low-impact activities like walking, stretching, and light strength training are generally safest.

    3. How often should older adults exercise?

    Most benefit from daily light movement combined with a few strength sessions each week.

    4. Does exercise help with mental sharpness in old age?

    Regular physical activity supports blood flow and routines that aid mental alertness.

  • Men Apply Lemon and Honey on Face for Oil Control — Viral Skincare Hack Explained

    Men Apply Lemon and Honey on Face for Oil Control — Viral Skincare Hack Explained

    In India, men are increasingly experimenting with simple, kitchen-based skincare routines, and one viral trend grabbing attention is applying lemon and honey on the face for oil control. Social media reels and grooming blogs suggest this natural combo can help manage excess shine, unclog pores, and refresh tired-looking skin without expensive products. While the idea sounds straightforward, understanding how lemon and honey actually interact with oily male skin is important. This article breaks down the routine, its real benefits, potential risks, and how Indian men can safely try this hack at home.

    Why Men Use Lemon and Honey for Oil Control

    Men with oily skin often struggle with midday shine, acne, and enlarged pores, especially in humid Indian climates. Lemon is known for its natural astringent properties, which many believe help tighten pores and reduce grease. Honey, on the other hand, works as a gentle humectant that balances moisture. Together, they are promoted as a quick fix for excess facial oil, greasy skin feel, and clogged pore issues. Supporters of this hack say the mix leaves skin feeling fresh rather than dry. However, results vary based on skin sensitivity, frequency of use, and proper dilution.

    How to Apply Lemon and Honey Safely on Face

    The safest way to try this routine is moderation and correct preparation. Most dermatology-aware users recommend mixing a few drops of fresh lemon juice with a teaspoon of raw honey, never using lemon alone. Apply the mixture for just a few minutes, then rinse thoroughly. This method is believed to support temporary oil balance, surface skin clarity, and quick refresh effect without harsh scrubbing. Overuse can irritate skin, especially under strong sunlight, so evening application is usually preferred. A patch test is essential before full-face use.

    Does This Viral Skincare Hack Really Work?

    Results from lemon and honey face application are mixed and depend largely on skin type. Some men report reduced shine and smoother texture, while others experience redness or sensitivity. Lemon’s acidity may help with short-term oil control, but it does not address deeper causes like hormones or genetics. Honey may support natural skin comfort and light hydration support, preventing excessive dryness. Dermatologists generally agree this hack can be an occasional remedy, not a replacement for a consistent skincare routine designed for men.

    Summary or Analysis

    The lemon and honey oil-control hack has gained popularity because it feels accessible and natural. For Indian men dealing with oily skin, it may offer instant freshness boost and visible shine reduction when used carefully. However, lemon’s acidic nature means misuse can do more harm than good. This routine works best as an occasional experiment rather than a daily habit. Men serious about skincare should combine such hacks with gentle cleansers, sunscreen, and professional advice for long-term skin health.

    Aspect Lemon and Honey Effect
    Oil Control Short-term reduction in surface oil
    Skin Type Suitability Best for mildly oily skin
    Recommended Use 1–2 times per week
    Potential Risk Irritation if overused
    Overall Benefit Temporary freshness and glow

    Frequently Asked Questions (FAQs)

    1. Can men use lemon and honey daily on their face?

    No, daily use is not advised due to the risk of skin irritation.

    2. Is this hack suitable for sensitive skin?

    Men with sensitive skin should avoid lemon or do a patch test first.

    3. How long should the mixture stay on the face?

    It should be left on for no more than 3–5 minutes.

    4. Does this replace a regular face wash?

    No, it should only be used occasionally, not as a cleanser substitute.

  • Women Drinking Fenugreek Seed Water Daily for Hair Fall Control — Full Routine Inside

    Women Drinking Fenugreek Seed Water Daily for Hair Fall Control — Full Routine Inside

    Across India, women looking for gentle, affordable solutions to hair fall are turning to fenugreek seed water as a daily wellness habit. Passed down through traditional home remedies, this drink is now being rediscovered by younger women facing stress-related shedding, hormonal changes, and nutritional gaps. Fenugreek seeds are easy to source, simple to prepare, and fit naturally into everyday routines. When consumed correctly and consistently, fenugreek seed water is believed to support hair strength from within rather than offering surface-level fixes.

    Fenugreek Seed Water for Hair Fall Control in Women

    Fenugreek seed water works internally, which is why many women notice gradual but meaningful improvements rather than overnight changes. The seeds contain plant compounds that may help reduce daily hair fall by supporting scalp health and strengthening roots over time. Regular intake is often linked to better hormonal balance, especially for women dealing with irregular cycles or stress-induced shedding. Fenugreek is also known for supporting iron absorption, a key factor in preventing weakness-related hair loss. Together, these benefits contribute to overall scalp nourishment, creating a healthier environment for hair growth.

    Daily Fenugreek Water Routine Women Follow at Home

    The routine is simple and fits easily into a busy lifestyle. Most women begin with overnight soaking—one teaspoon of fenugreek seeds in a glass of water left covered overnight. In the morning, the water is strained and consumed as part of a calm morning routine. Drinking it on an empty stomach is commonly recommended to improve absorption and digestion. The key factor is consistent intake; skipping days often delays visible results. Many women follow this routine for four to six weeks before evaluating changes in hair texture and fall.

    Who Benefits Most From Fenugreek Water for Hair

    Fenugreek seed water tends to work best for women whose hair fall is linked to internal imbalances rather than external damage. Those with sensitive digestion often appreciate its role in improving digestive comfort, which indirectly supports nutrient uptake. Women managing thyroid-related issues sometimes include it for gentle thyroid support, though it is not a medical treatment. It is also popular among new mothers dealing with postpartum shedding. When combined with a balanced diet, fenugreek contributes to better nutrient synergy that supports overall hair health.

    Summary and Practical Insight

    Fenugreek seed water is not a miracle cure, but it offers a steady, affordable approach to managing hair fall naturally. Women who stay patient often report long-term results rather than quick cosmetic changes. The habit works best when paired with natural consistency, adequate sleep, and reduced stress. As with any traditional remedy, outcomes depend on overall lifestyle and mindful nutrition. For many women in India, this simple daily drink becomes less about hair alone and more about building sustainable wellness from within.

    Aspect Recommended Practice
    Seeds Quantity 1 teaspoon fenugreek seeds
    Soaking Time 8–10 hours overnight
    Best Time to Drink Morning on empty stomach
    Visible Results 4–6 weeks with regular use
    Who Should Avoid Women with allergies or medical restrictions

    Frequently Asked Questions (FAQs)

    1. How long should women drink fenugreek seed water?

    Most women try it consistently for at least four weeks to notice changes.

    2. Can fenugreek water stop hair fall completely?

    It may reduce hair fall caused by internal imbalances but cannot address all causes.

    3. Is fenugreek seed water safe to drink daily?

    Yes, in moderate amounts, but women with health conditions should consult a professional.

    4. Can fenugreek water be taken at night instead?

    Morning consumption is preferred, but it can be taken later if digestion feels comfortable.

  • Apply Ghee on Lips Every Night and Wake Up with Naturally Soft Pink Lips

    Apply Ghee on Lips Every Night and Wake Up with Naturally Soft Pink Lips

    Applying ghee on lips every night is an age-old home remedy that many people in India still swear by for natural lip care. Ghee, also known as clarified butter, has been used in Indian households for centuries because of its nourishing and healing properties. When used consistently before bedtime, it works overnight to repair dryness, restore softness, and enhance the natural pink tone of lips. This simple habit fits easily into a nightly routine and appeals to those who prefer natural solutions over chemical-based lip products.

    Apply Ghee on Lips Every Night for Deep Moisture

    Using ghee on lips before sleeping helps lock in moisture when the body naturally goes into repair mode. Ghee forms a gentle protective layer that prevents water loss and supports deep overnight hydration. Its natural fats soothe irritation and reduce the feeling of tightness caused by dry weather or dehydration. Many people notice noticeably softer lips within a few days of regular use. Since ghee is free from artificial additives, it suits sensitive skin and supports natural skin healing. Over time, consistent application can improve lip texture and make them feel smooth and healthy every morning.

    Using Ghee on Lips to Restore Natural Pink Color

    Dark or dull lips are often caused by dryness, sun exposure, or frequent use of matte lip products. Applying ghee nightly helps reverse this damage by improving circulation and nourishment. The vitamins present in ghee support healthy lip cells and gradually enhance the natural tone. With regular use, lips may appear brighter due to improved blood flow and better hydration. Unlike tinted balms, this method supports natural lip color without masking it. Patience is key, as visible changes usually appear after consistent nightly care over a few weeks.

    Why Applying Ghee on Lips Is Safe and Effective

    One reason ghee works so well is its compatibility with the skin. It absorbs easily and rarely causes irritation, making it ideal for daily use. Regular application strengthens the lip barrier and supports long-lasting softness. Ghee also contains antioxidants that help fight environmental stress, contributing to gentle lip repair. Since it is edible and chemical-free, many people trust it as a safer alternative to commercial products. When applied nightly, it supports consistent lip nourishment without the risk of dependency often linked to synthetic balms.

    Summary and Practical Takeaway

    Making ghee part of a nightly lip-care routine is a simple yet effective habit for those seeking natural results. It works gradually, so consistency matters more than quantity. A small amount applied before bed can support overnight lip recovery and help maintain softness throughout the day. Over weeks, users often experience visible texture improvement and a healthier appearance. For anyone looking to reduce reliance on chemical products, this traditional remedy offers simple natural care with minimal effort and cost.

    Aspect Effect of Ghee on Lips
    Moisturizing Prevents dryness and cracking overnight
    Color Improvement Supports natural pink tone with regular use
    Safety Edible, chemical-free, and skin-friendly
    Best Time to Apply Before bedtime for overnight repair
    Suitable For Dry, sensitive, or dull lips

    Frequently Asked Questions (FAQs)

    1. Can I apply ghee on lips every night?

    Yes, daily nighttime application is safe and effective for most people.

    2. How long does it take to see pink lips?

    Visible improvement usually appears after two to three weeks of consistent use.

    3. Is ghee suitable for sensitive lips?

    Yes, pure ghee is generally gentle and suitable for sensitive skin.

    4. Should I wash my lips in the morning?

    A normal morning face wash is enough to remove any excess ghee.

  • Vitamin C Serum Recipes That Boost Collagen and Even Out Skin Tone Naturally

    Vitamin C Serum Recipes That Boost Collagen and Even Out Skin Tone Naturally

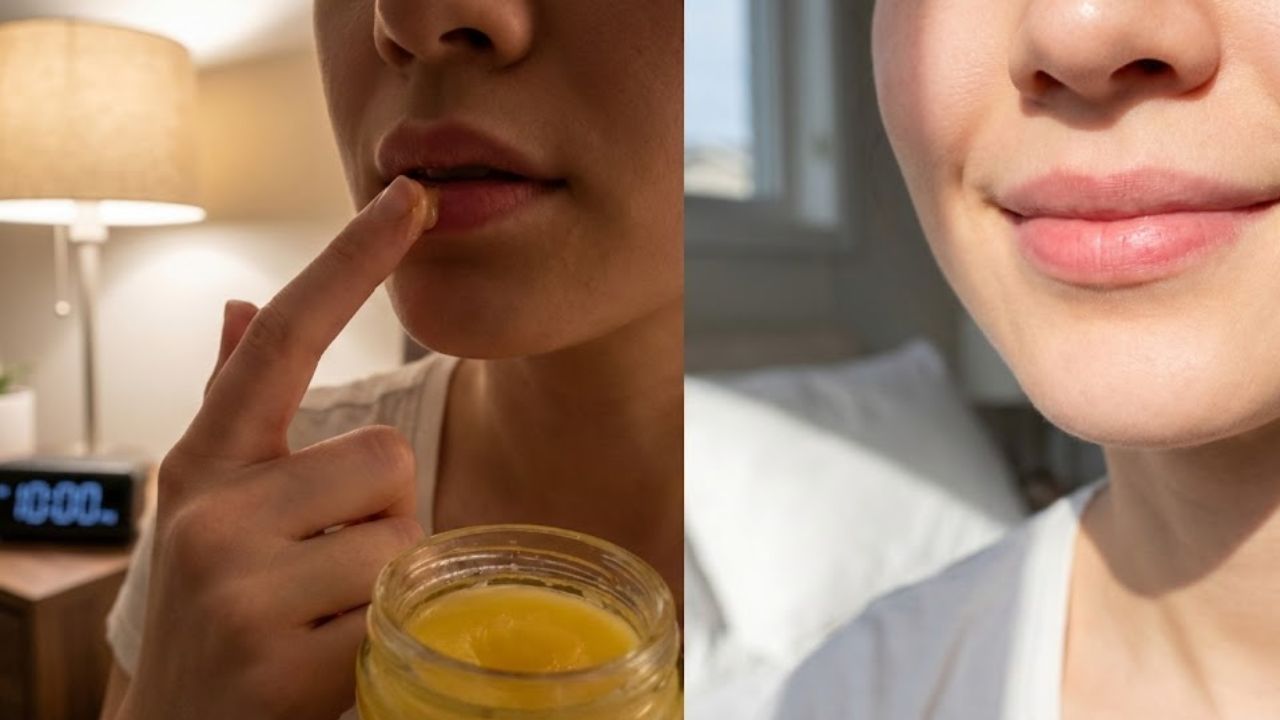
    The first time I made my own vitamin C serum at home, my kitchen had a light citrus smell in the air. I used a small glass bowl and a spoon along with some amber bottles. Instead of buying another expensive product filled with ingredients I couldn’t pronounce, I decided to create something fresh myself. When I mixed the powder with water and watched it dissolve into a clear liquid I felt genuinely excited. This was skincare in its simplest form. It was just about skin & science and a fruit that everyone knows.

    The Quiet Alchemy of Vitamin C on Your Skin

    There’s a moment when you look in the bathroom mirror under soft morning light & notice something different. The faint shadow of an old breakout has lightened. The fine crinkle near your mouth looks less sharp. Your skin tone that was once patchy and uneven has begun to blur into something softer and more uniform. This is the kind of slow magic vitamin C is famous for. Not an overnight miracle but a steady process of brightening and firming and evening things out with the patience of the natural world. Vitamin C in its pure form as L-ascorbic acid slips into the upper layers of your skin and gets to work like a quiet architect.

    It supports collagen production which is the protein that keeps skin springy & resilient. It also helps to blunt the overzealous melanin signals that can leave behind dark spots after pimples or sun exposure or hormonal shifts. If collagen is the scaffolding that holds your face taut and lifted then vitamin C is one of the workers keeping that scaffolding from rusting and collapsing. But what makes vitamin C truly fascinating is its fragility. It is notoriously unstable and breaks down when exposed to air or light or heat.

    The same bright reactive energy that makes it so effective at neutralizing free radicals also makes it short-lived. That’s why so many serums come in dark glass with elaborate formulas designed to keep the molecule alive just long enough to help your skin. And it’s also why a fresh thoughtfully made DIY serum can feel like catching a fruit at the exact moment it’s perfectly ripe.

    Before You Mix: A Little Skin Science and Safety

    Standing at your counter with a small bowl and a jar of vitamin C powder can feel empowering but there are a few things worth understanding before you turn your kitchen into a mini apothecary. Your skin is delicate and layered like a forest ecosystem. It has a natural barrier & a microbiome and an ideal pH that is usually slightly acidic. Disturb that balance too aggressively and you will feel it through stinging or redness or dryness or irritation that lingers. Pure vitamin C is most effective at a low pH between about 2.5 and 3.5 but that is also where it can be quite strong for sensitive or compromised skin.

    Think of it like sun on snow because it is bright and beautiful but capable of causing burn if you stay out too long. This is why dilution and patch testing and listening to your skin are essential steps you should not skip. As you start experimenting with DIY recipes these are the questions to keep in your back pocket like a compass in the woods. What is my skin like right now in terms of sensitivity or dryness or oiliness or reactivity or resilience? How strong is this formula since a 5 to 10 percent vitamin C solution is gentler while 15 to 20 percent is more intense? Am I willing to start slow and adjust rather than forcing fast results? Am I protecting my skin from the sun with a good SPF during the day? Here is the quiet truth buried beneath the glossy vitamin C marketing language.

    Collagen building and tone evening are long games. Your skin is an organ with memory. Dark spots were written over weeks or months. Boosting collagen is like slowly weaving a stronger net under the surface one strand at a time.

    Simple, Fresh Vitamin C Serum for Everyday Glow

    There is something deeply satisfying about creating a serum with only a few ingredients that you can actually pronounce. You get no fillers and no mysterious fragrance. Instead you work with a small selection of elements that complement each other well. Think of it like preparing a simple recipe for tea or soup. This basic vitamin C serum serves as the ideal starting point for most people. It is gentle on the skin and clean in formulation. The serum works effectively and is meant for short-term use. This approach ensures you always have a fresh product to apply.

    Base Recipe: Everyday 10% Vitamin C Serum

    What you’ll need: 1 teaspoon L-ascorbic acid powder (cosmetic or supplement grade with no additives) 4 teaspoons distilled or boiled-and-cooled water 1 teaspoon vegetable glycerin or aloe vera juice (optional for extra hydration) 1 small dark-glass dropper bottle A tiny funnel or a steady hand How to make it: In a clean glass or ceramic bowl sprinkle the vitamin C powder. Add the water slowly and stir until the crystals dissolve completely and the liquid turns clear. Stir in the glycerin or aloe if you’re using it. This gives the serum a slightly silkier glide & adds moisture. Pour into your dark-glass bottle and cap tightly.

    Store in the fridge. How it feels and works: Apply a few drops on clean skin at night. It will feel watery at first and then slightly tacky as it dries. The 10% strength offers collagen support & gentle brightening without irritating the skin barrier. Over a few weeks it becomes a simple routine. You take the cold glass bottle from the fridge and apply the serum with your fingertips over your cheeks and forehead. Because homemade vitamin C serums don’t have the stabilizers of commercial versions they’re meant to be used fresh. This usually means within 1 to 2 weeks. When the liquid starts to darken to pale yellow or amber it’s oxidizing and losing its potency. Pour it out & start anew.

    Serum Recipes Tailored for Collagen and Tone

    You can start making adjustments once you feel confident with the basic recipe. Think of it like learning which herbs work best for different health needs.

    Collagen-Boosting Night Serum (Richer 15% Blend)

    This formula uses vitamin C to help your skin produce collagen and pairs it with vitamin E and ferulic acid if you can get them. These three ingredients work as a team to improve stability and provide antioxidant protection. You will need 1.5 teaspoons of L-ascorbic acid powder along with 5 teaspoons of distilled water and 0.5 teaspoon of vegetable glycerin. Add 3 to 4 drops of vitamin E oil & optionally include a pinch of ferulic acid powder. To make this serum you should mix the vitamin C into the water & stir until it dissolves fully.

    If you are using ferulic acid add it now and stir until it dissolves as well. Next pour in the glycerin and vitamin E oil and whisk gently until everything combines smoothly. Transfer the mixture into a dark glass bottle & store it in the refrigerator. You should use it within one to two weeks for best results. This serum has a slightly thicker texture that makes it suitable for nighttime use. The vitamin E oil creates a smooth application while the glycerin provides a soft feel on your skin. When you use this combination regularly it helps your skin feel firmer & more resilient. Your complexion develops better structure & feels more substantial and supported as time goes on.

    Even-Tone Citrus Dew for Oily or Combination Skin

    If your skin tends to be oily & you have dark marks that take a long time to fade a lightweight watery formula works better than thick cream. This recipe avoids heavy moisturizing ingredients and oils while focusing on clarity and fast absorption. What you need: 1 teaspoon L-ascorbic acid 6 teaspoons distilled water or green tea that has been cooled without sugar 0.5 teaspoon aloe vera juice if desired How to prepare it: Mix the vitamin C powder into the water or cooled green tea until it dissolves.

    Add the aloe vera juice if you want some extra soothing moisture. Put it in a bottle & keep it in the refrigerator. Make a new batch every week to ten days. Green tea contains catechins which are antioxidants that help with brightening and calming the skin. This formula works well for skin that breaks out frequently but still shows marks from previous blemishes.

    How Vitamin C Serums Fit Into Your Daily Ritual

    Skin care routines engage your senses beyond their practical purpose. You hear water running and feel a towel on your face while watching serum absorb into your skin. Understanding where vitamin C fits into your routine & how frequently to use it helps your skin benefit without irritation. A simple routine works well: Evening cleanse: Remove sunscreen & the dirt from your day. Vitamin C serum: Apply a few drops to clean dry skin & let it absorb completely. Moisturizer: Apply a hydrating cream or gel that matches your skin type over the serum. Most people do well using vitamin C serum 3 to 4 nights per week when starting with a 10 to 15 percent concentration.

    People with sensitive or dry skin should try every other night first. Your skin should feel soft and look subtly brighter rather than tight or irritated. You can use vitamin C in the morning if your skin handles it well but you must apply sunscreen afterward. Vitamin C protects against environmental damage but cannot replace broad-spectrum SPF protection. These products work together as vitamin C neutralizes free radicals while sunscreen blocks most of the damage before it starts.

    Listening to Your Skin: Adjusting Strength and Frequency

    There is a special connection that develops when you pay attention to your skin the same way you notice changes in weather. Sometimes your skin feels calm and other times it becomes sensitive or develops dry patches in unexpected places. Your vitamin C formulas should change based on these shifts. When your skin stings or turns red or starts flaking near your nose and mouth your mixture might be too concentrated or applied too often. You can make adjustments similar to how a gardener changes watering schedules and shade coverage. To reduce potency add more distilled water to your formula while using the same amount of vitamin C.

    To calm irritation apply a thicker moisturizer or pure aloe gel on top of your serum. To give your skin a break skip application for several nights and use products with barrier-healing ingredients like ceramides or squalane or mild oils. As time passes you might discover that your skin tolerates and benefits from stronger concentrations such as increasing from 10% to 15%. You might also find that weaker solutions used gradually produce better results. The biological processes that build collagen and regulate pigmentation do not improve with aggressive treatment but instead need regular application. If you prefer specific measurements a basic guide can help you determine the right approach.

    Skin Category Recommended Vitamin C Concentration Ideal Usage Frequency
    Sensitive / Easily Irritated 3% – 8% (low-strength formulas) 1–3 evenings per week
    Normal / Combination 8% – 15% 3–5 evenings per week
    Oily / Tolerant 10% – 20% Daily use if skin adapts well
    Mature / Dry 5% – 15% (with hydrating agents) 2–5 evenings per week

    Stability, Storage, and Knowing When to Let Go

    Homemade vitamin C serums work like fresh juice. They are bright and effective when new but you cannot store them for months & expect the same results. Oxidation constantly affects them and turns your clear liquid yellow then orange and finally brown. Some basic rules help maintain potency: Use dark glass bottles because amber or cobalt glass protects the serum from light. Store in the fridge since cool temperatures reduce oxidation and feel good on skin. Watch the color as clear or nearly clear is best. Pale straw color usually works fine but once it becomes deeper yellow or orange you should discard it.

    Keep it small by making only enough for one to two weeks at a time because smaller batches stay fresher. If you have seen a sliced apple turn dark on a countertop you understand what happens inside that bottle. The same antioxidant reaction that makes vitamin C valuable is also what causes it to slowly break down. You want that transformation to occur on your face where it neutralizes free radicals and supports collagen instead of happening in the bottle on your shelf.

    When a Little Glass Bottle Becomes a Quiet Ritual

    Over time making your own vitamin C serum can shift from being a project to becoming a calming routine. Measuring the powder and stirring until it dissolves and feeling the cool serum on your skin becomes a moment to pay attention. You start noticing not just fine lines and dark spots but how your whole face changes based on your sleep and stress & time outside and how you care for yourself. Vitamin C supports collagen production and helps even out skin tone and softens the appearance of acne marks and sun damage and brightens dull skin from everyday life.

    But there is something meaningful about taking a proven ingredient and bringing it into your own routine at your own pace. In a world where serums promise to erase and fix and perfect everything a small amber bottle you mixed yourself sends a different message. It says you are working with your skin instead of against it. You will give it what it needs in amounts it can handle over time. You will watch and adjust and be patient. Maybe in the process you will learn to see your face not as a problem to solve but as something living that you get to care for.

  • Natural Hair Coloring Guide: Dye Hair Safely Using Henna-Based Home Recipes

    Natural Hair Coloring Guide: Dye Hair Safely Using Henna-Based Home Recipes

    The first time I used henna to dye my hair the house filled with a smell like wet spices. Steam covered the windows while the kettle made its soft noise. On the kitchen counter I had mixed a bowl of green powder that looked like plant food instead of something meant for hair. My friends questioned my choice and asked why I would put mud on my head. I had grown tired of chemical dyes that stung my scalp and made it itch. The artificial red color always faded quickly and washed away in the shower. I wanted something that worked more slowly and felt gentler on my hair. I preferred a natural color that reminded me of leaves in sunlight and old traditions rather than something made in a laboratory with warning labels in small print.

    Why Henna Feels Different from Regular Hair Dye

    Henna doesn’t rush. It doesn’t blast your hair open with chemicals & shove pigment inside before slamming the cuticle shut again. Instead it works more like an old friend sitting beside you & weaving color into your hair strand by strand. The plant magic settles in with patience and time. The plant behind the color is Lawsonia inermis. This shrub thrives in hot & dry climates with desert air and clay soil & the kind of sunlight that makes stones glow. Its leaves are dried and powdered to stain skin & fabric and most famously hair. The active dye molecule called lawsone has a unique talent. It binds to the keratin in your hair and wraps each strand in a translucent veil of color rather than replacing what’s inside. That’s why hennaed hair doesn’t look flat or artificial. Light slips through the translucent stain and bounces back off your natural pigment below.

    This creates layered & shifting tones instead of a single unchanging color. Under a cloudy sky it may look like a deep auburn. In bright sunlight copper flashes awake. There’s movement in hennaed hair as if the plant carried a memory of wind and sunlight along with it. And then there’s the feel. Many people first discover henna after a long romance & eventual breakup with conventional hair dye. They’re tired of brittle ends and the smell of ammonia that clings to towels and the constant cycle of coloring and repairing & re-coloring. Henna steps into that chaos with quiet strength. It binds to hair like armor and often makes it feel thicker and stronger. It adds weight and shine instead of stripping & roughening. Of course natural doesn’t automatically mean harmless or right for everyone. But when used wisely pure henna can be a radically different experience from the ordinary salon routine. It’s less about erasing what you have & more about enhancing it.

    The Heart of Henna: Choosing the Right Powder

    Before you mix your first bowl you need to choose the right kind of henna. When you shop in stores or browse online you will find many green packages labeled as herbal color or black henna or henna mix or instant henna. Some of these products contain ingredients that your scalp should not be exposed to. Pure henna powder should contain only one thing: dried & ground Lawsonia inermis leaves. It should not have metallic salts or added dyes or unknown chemicals. The powder looks mossy green to olive in the package and when you mix it with liquid & let it sit the paste turns into a rich earthy brown that smells like hay and green tea and freshly cut grass. Any product labeled as black henna should make you cautious. Real henna cannot dye hair black because at its darkest it only produces deep auburn or brownish red tones. Black henna usually contains synthetic dyes like PPD which is para-phenylenediamine and this chemical can cause severe allergic reactions and create long term sensitivities. It might stain quickly and look impressive but it can damage your skin & hair. Some henna products include additional ingredients like amla or indigo or cassia or hibiscus or bhringraj. These additions can be beneficial when used properly but they should be clearly labeled so you know exactly what touches your scalp. When you see a long list of chemicals with complicated names you should avoid that product. Henna has been used for thousands of years and its ingredient list should be simple. Here is an easy way to test henna: if the brand shows the botanical name and lists only plant ingredients and leaves a faint orange stain on your fingertip or on white paper after a few minutes then you probably have genuine henna.

    Designing Your Natural Color: Henna-Based Recipes

    Henna is rarely used alone by people who mix hair color at home. It serves as a foundation that other plants & kitchen ingredients can build upon. Your hair has its own base color whether that is blonde or mouse-brown or gray or dark chocolate. The henna mixture works like a see-through layer that goes on top of that natural color.

    Classic Copper Glow

    Best for: light brown, dark blonde, or gray hair.

    Ingredients: 100 g pure henna powder Warm water or strong black tea Juice of half a lemon or 1 tbsp apple cider vinegar (optional)

    Deep Auburn with Amla Shadow

    Best for: warm brown hair or those wanting muted reds.

    Ingredients: 80 g henna 20 g amla powder arm water or cooled black tea

    Amla softens orange tones and helps maintain curls and waves. The final shade resembles **deep wine or redwood bark**, rich and understated.

    Brown and Soft Red with Indigo Blends

    Best for: medium to dark hair or natural gray coverage.

    Henna and indigo work together to create **natural browns**.

    Two-step method

    –  Apply full henna, rinse and dry.

    – Apply fresh indigo paste for brown depth.

    One-step blends:

    – Warm medium brown: 50% henna / 50% indigo

    – Dark brown: 30% henna / 70% indigo

    Always mix indigo fresh with **lukewarm water and a pinch of salt**. Apply immediately—indigo acts fast.

    Golden Honey with Cassia

    – Best for: blondes, light gray hair, or conditioning treatments.

    – Ingredients: 100 g cassia powder Optional 10–20 g henna for strawberry warmth Warm chamomile teaCassia offers shine and strength with minimal color, producing a soft golden glow on light hair.

    Enhancement Add-Ins from Your Kitchen

    Black tea or coffee: deepens tones slightly

    – Hibiscus: boosts rosy undertones

    Aloe vera gel: soothes scalp and improves slip

    – Plain yogurt: adds moisture, softens intensity

    – Essential oils: light fragrance and scalp comfort (use sparingly)

    A Simple Henna Hair Journey: Step-by-Step Ritual

    Step Action Tips
    1 Strand Test Test on shed hair; wait 24–48 hours for final color.
    2 Mix Paste Aim for smooth, herbal-scented paste.
    3 Rest Paste 4–8 hours; surface darkens naturally.
    4 Prep Hair Clean hair, no conditioner.
    5 Apply Generously Section hair; apply like frosting.
    6 Wrap and Wait Cover and keep warm for 1–4 hours.
    7 Rinse Gently No shampoo for 24–48 hours.

    Listening to Your Hair: Safety and Sensitivity

    Natural doesn’t mean careless. Always do a patch test before full application. While pure henna reactions are rare, blends may contain herbs unfamiliar to your body.Henna is permanent and cumulative. Chemical lightening afterward can be unpredictable, especially if low-quality henna was used. Treat henna as a long-term commitment, not a temporary experiment.For dry or damaged hair, shorten processing time or add  aloe or a drop of oil. Hydration—inside and out—matters.Gray hair may stain brighter at first, creating copper highlights. Embrace the effect or plan indigo blends to soften contrast.

  • Women Using Coffee and Coconut Oil Body Scrub Are Getting Spa-Like Skin at Home

    Women Using Coffee and Coconut Oil Body Scrub Are Getting Spa-Like Skin at Home

    Across India, women are rediscovering a simple body-care ritual that delivers spa-like results without expensive appointments. Using a coffee and coconut oil body scrub at home has quickly become a favourite for those seeking smoother, brighter skin naturally. This easy DIY blend uses ingredients already found in many kitchens, making it affordable and accessible. Beyond exfoliation, the scrub helps revive dull skin, improve texture, and create a relaxing self-care moment. It’s a trend rooted in simplicity, consistency, and a desire for effective skincare that fits into everyday routines.

    Coffee and Coconut Oil Body Scrub for Smooth Skin

    The coffee and coconut oil body scrub works because both ingredients complement each other beautifully. Coffee granules act as a natural exfoliant, gently removing dead cells and revealing fresher skin underneath. Coconut oil balances this by deeply nourishing and preventing dryness, leaving skin soft instead of stripped. Regular use supports gentle exfoliation, enhances natural skin glow, and encourages even texture feel. Many women enjoy how the scrub also provides instant softness, making skin look polished after just one use. The process itself feels indulgent, turning an ordinary shower into a calming, spa-inspired ritual.

    Why Women Prefer Coffee Coconut Oil Scrub at Home

    One reason this scrub is so popular is the control it offers. Women can adjust the quantity, texture, and frequency based on their skin needs. Unlike commercial products, there are no harsh additives, which supports clean ingredient care and chemical-free routine. The natural caffeine in coffee may help improve the look of skin tone, while coconut oil locks in moisture for long-lasting hydration. Over time, users report visible skin smoothness and a more refreshed appearance. This flexibility and transparency make the scrub appealing for those who value mindful, at-home beauty practices.

    How Coffee and Coconut Oil Scrub Mimics Spa Results

    Spa treatments focus on exfoliation, nourishment, and relaxation, and this scrub delivers all three. Massaging the scrub in circular motions helps stimulate circulation, giving skin a healthy, revived look. The aroma of coffee combined with coconut oil creates a relaxing sensory experience, similar to professional body treatments. With consistent use, women notice improved skin texture, reduced dryness signs, and polished skin finish. It’s not about instant miracles but gradual improvement, making the scrub feel like a practical alternative to frequent spa visits.

    Summary or Analysis

    The coffee and coconut oil body scrub trend highlights how effective skincare doesn’t always require luxury products. For women in India, this simple mix fits perfectly into busy lifestyles while still delivering noticeable results. When used consistently and gently, it supports healthy skin habits, encourages regular self-care, and promotes budget-friendly beauty. While it may not replace professional treatments entirely, it offers a reliable, comforting option for maintaining smooth, glowing skin at home, proving that small routines can make a meaningful difference.

    Aspect Coffee & Coconut Oil Scrub Typical Spa Scrub
    Cost Low, kitchen-based High per session
    Ingredients Natural, minimal Commercial blends
    Convenience Anytime at home Appointment needed
    Skin Feel Soft and nourished Polished and smooth

    Frequently Asked Questions (FAQs)

    1. How often should this body scrub be used?

    Two to three times a week is enough for most skin types.

    2. Is the scrub suitable for sensitive skin?

    Yes, if used gently and tested on a small area first.

    3. Can this scrub help with dry skin?

    Coconut oil helps lock in moisture and reduce dryness.

    4. Should soap be used after the scrub?

    A mild cleanser can be used lightly if needed.

  • Girls Are Using Tomato and Sugar Scrub for Pink Lips — Lip Care Hack Revealed

    Girls Are Using Tomato and Sugar Scrub for Pink Lips — Lip Care Hack Revealed

    Across India, young women are rediscovering a simple kitchen-based lip care remedy that promises naturally pink, soft lips without expensive products. The tomato and sugar scrub trend is gaining attention because it uses everyday ingredients known for gentle exfoliation and natural brightness. Many girls prefer this method as it fits easily into a weekly routine and feels safe when done correctly. From college students to working professionals, this DIY approach is becoming popular for its affordability, simplicity, and the way it supports healthier-looking lips over time.

    Why Tomato and Sugar Scrub for Pink Lips Is Trending

    The popularity of this scrub comes from how tomato and sugar work together on dull lips. Tomato contains natural acids that help remove darkness, while sugar gently buffs away dead skin. When used carefully, the scrub supports natural lip exfoliation, improves surface blood flow, and helps reduce daily pigmentation buildup. Many girls notice that lips look fresher because the scrub encourages healthy skin renewal without harsh chemicals. In India’s climate, where sun exposure and dehydration are common, this simple routine feels practical. The key is moderation—overuse can irritate lips, but once or twice a week often gives visible results.

    How to Use Tomato and Sugar Lip Scrub Safely

    Using the scrub correctly makes all the difference. Start by mixing a pinch of sugar with a few drops of fresh tomato juice. Apply gently using clean fingertips and massage in small circles. This method supports gentle dead skin removal while maintaining lip moisture balance. Avoid scrubbing too hard, as lips are sensitive and need careful pressure control. After rinsing, applying a balm helps lock in softness and supports post-scrub hydration. Many girls prefer doing this routine at night so lips can recover naturally by morning.

    Benefits Girls Notice from Tomato Sugar Lip Care

    With consistent but limited use, girls often report noticeable improvements. Lips tend to feel smoother, and the natural tone appears brighter over time. This happens because the scrub helps with improved lip texture and encourages natural pink tone by removing surface dryness. Another advantage is chemical-free lip care, which appeals to those avoiding strong cosmetic products. Over weeks, users also notice better balm absorption, making everyday lip care more effective. Results vary, but patience and gentle use are essential for lasting benefits.

    Summary or Analysis

    The tomato and sugar scrub is not a miracle fix, but it fits well into a natural lip care routine. For girls in India looking for affordable solutions, it offers a balance between tradition and practicality. When paired with hydration and sun protection, the scrub supports long-term lip softness and encourages consistent care habits. It works best as a supporting routine rather than a daily treatment. Understanding your skin type and stopping if irritation occurs ensures safe home remedies remain effective. Overall, it’s a simple habit that can complement modern lip care.

    Aspect Tomato & Sugar Scrub Regular Lip Balm
    Main Purpose Exfoliation & brightening Moisturising
    Usage Frequency 1–2 times weekly Daily
    Ingredients Natural kitchen items Commercial formula
    Cost Very low Low to moderate

    Frequently Asked Questions (FAQs)

    1. Can this scrub make lips permanently pink?

    It helps improve natural tone over time but results vary by individual.

    2. How often should girls use this scrub?

    Once or twice a week is enough to avoid irritation.

    3. Is tomato safe for sensitive lips?

    Yes, if used gently and discontinued at the first sign of discomfort.

    4. Should lip balm be used after scrubbing?

    Yes, applying balm helps seal moisture and soothe the lips.