Category: News

  • 6 Best Lip Tints for Achieving a Soft Natural Makeup Look Loved by Beauty Editors

    6 Best Lip Tints for Achieving a Soft Natural Makeup Look Loved by Beauty Editors

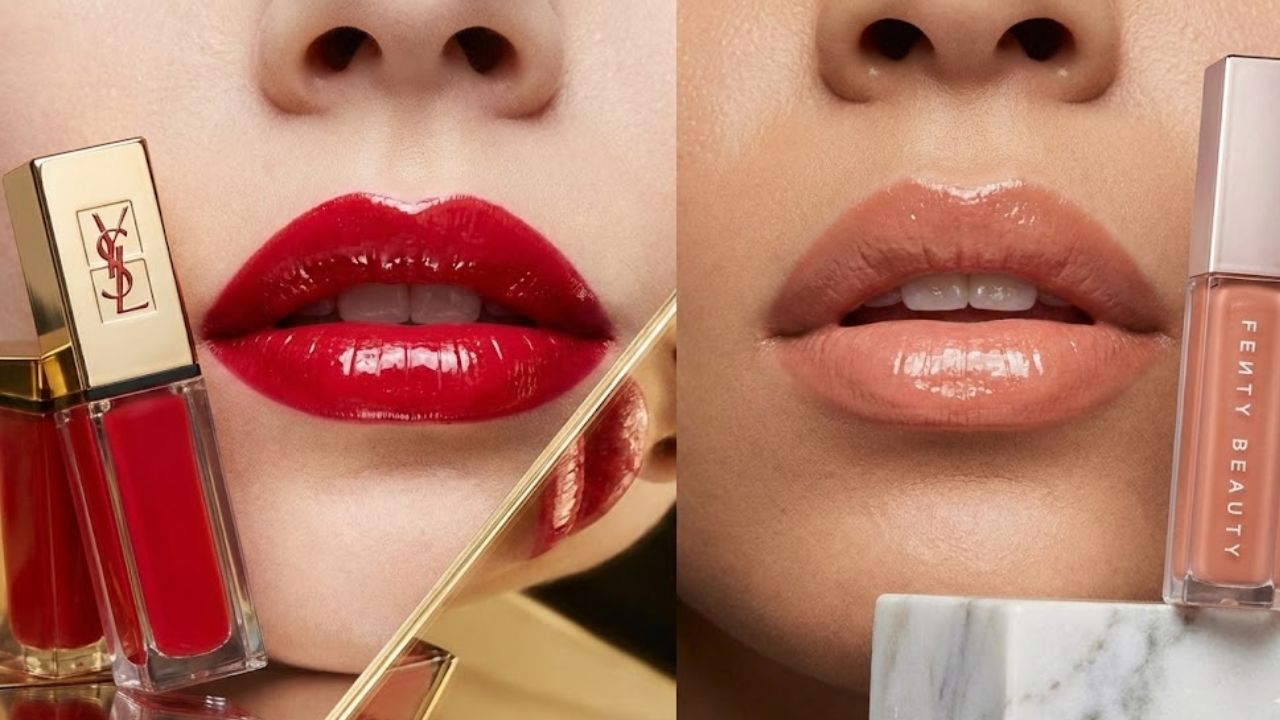
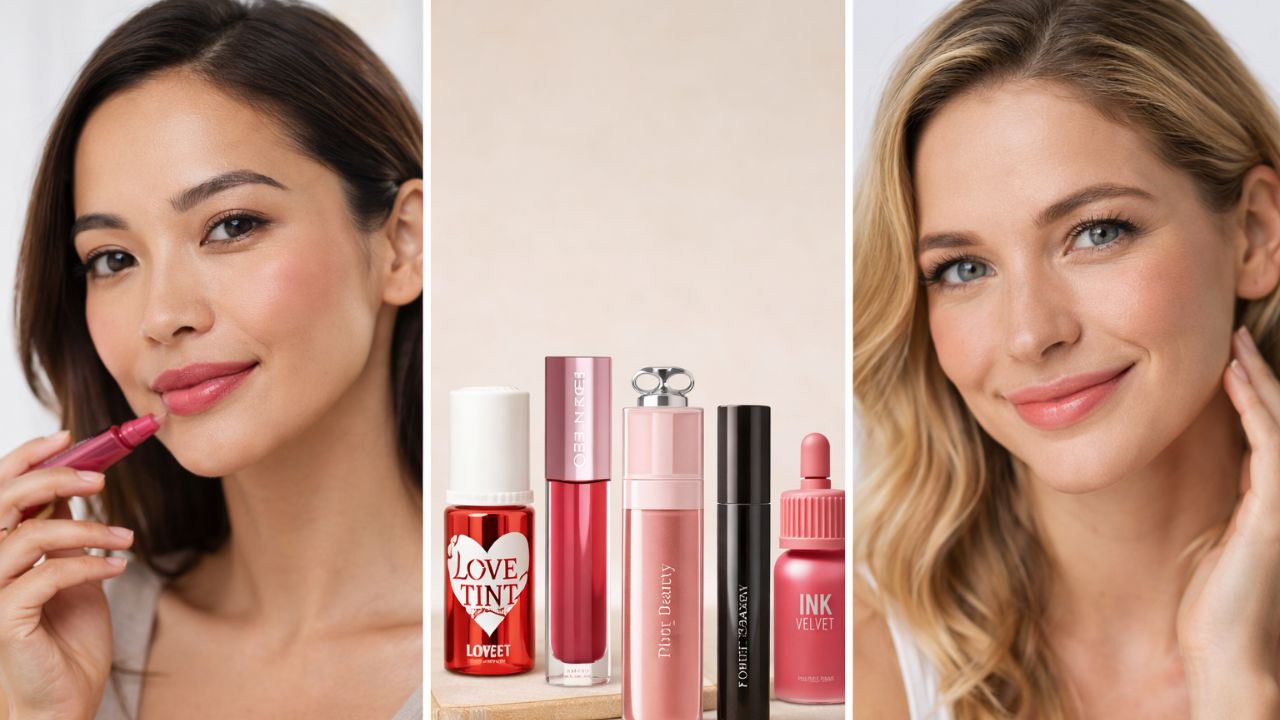
    Achieving a soft, natural makeup look has become a major beauty goal for many makeup lovers across India, and lip tints are playing a starring role. Unlike heavy lipsticks, lip tints offer sheer colour, a lightweight feel, and a “your lips but better” finish that beauty editors genuinely swear by. From barely-there pinks to muted berry hues, the right formula can instantly brighten your face without looking overdone. Whether you prefer dewy, matte, or balmy textures, these editor-loved lip tints help create an effortless, fresh-faced look perfect for everyday wear.

    Best lip tints for soft natural makeup looks

    Beauty editors often reach for lip tints because they deliver colour without effort, making them ideal for relaxed, everyday makeup. The best formulas melt into the lips, offering sheer buildable colour that enhances rather than hides your natural tone. Many modern tints also focus on comfort, featuring lightweight water texture that feels almost invisible after application. What truly sets editor favourites apart is their ability to leave a skin-like lip finish, meaning no harsh edges or obvious lines. These qualities make them perfect for minimal makeup days when you want to look polished but not overly made up.

    Natural-looking lip tints beauty editors love

    What makes a lip tint editor-approved is how seamlessly it fits into real life. Shades inspired by natural lip colours are especially popular, creating effortless everyday makeup that works for office hours, quick errands, or casual outings. Many editors also look for formulas that provide comfortable long wear without drying out the lips as the day goes on. A major plus is a hydrating stain effect, which keeps lips soft while leaving behind a subtle flush even after the glossiness fades. These thoughtful details help lip tints stand out in crowded beauty routines.

    Soft makeup lip tints for a fresh finish

    For a truly soft makeup look, application matters just as much as the product itself. Editors recommend patting lip tints with fingertips to achieve a blurred lip look that mimics naturally flushed lips. Many also love formulas that double as cheek colour, creating a multi-use makeup product that saves time and space. The best options offer a natural tint payoff, allowing you to control intensity with ease. This flexibility makes lip tints ideal for beginners and makeup minimalists alike.

    Why lip tints remain a beauty-editor favourite

    Lip tints continue to dominate beauty editor recommendations because they align perfectly with modern makeup trends. Their ability to enhance rather than mask lips supports no-makeup makeup trend, which remains popular across India. Editors also appreciate formulas that suit different skin tones, offering universally flattering shades that work with minimal base makeup. Above all, lip tints deliver low effort beauty, making them a reliable choice for busy mornings and quick touch-ups. This balance of ease, comfort, and natural finish keeps them firmly in editor-approved lists.

    Lip Tint Type Finish Best For Wear Time
    Water-based tint Natural stain Daily minimal makeup 4–6 hours
    Gel lip tint Soft glossy Fresh dewy looks 5–7 hours
    Balm tint Hydrating sheen Dry lips 3–5 hours
    Matte lip tint Velvet matte Oilier lips 6–8 hours

    Frequently Asked Questions (FAQs)

    1. Are lip tints suitable for everyday wear?

    Yes, lip tints are lightweight and subtle, making them ideal for daily use.

    2. Can lip tints dry out the lips?

    Hydrating formulas are comfortable, but very matte tints may feel drying without balm.

    3. Do lip tints work for all skin tones?

    Most modern lip tints come in universally flattering shades suitable for diverse skin tones.

    4. How do I make lip tint last longer?

    Applying on exfoliated lips and blotting lightly helps extend wear time.

  • Everyone Is Switching to Tinted Lip Oils in 2026 These 11 Are Editor Favorites

    Everyone Is Switching to Tinted Lip Oils in 2026 These 11 Are Editor Favorites

    Last week, I stepped into Sephora for the first time in months to hunt for a new lip product—and instantly felt overwhelmed. Even as a seasoned beauty editor, the endless rows of glosses, balms, oils, and stains can feel like too much. Between crowded aisles, limited testers, and shelves packed with nearly identical tubes, choosing the right lip product isn’t easy. That’s where we come in. At Cosmo, we test countless formulas to cut through the noise and spotlight what’s truly worth your time, including the best tinted lip oils that simplify your routine.

    While many trending lip looks rely on layers of liner, balm, and gloss, a tinted lip oil delivers everything in one swipe. These hybrids blend skincare-level hydration, the shine of a gloss, and a touch of pigment for effortless, polished lips. After testing nearly every option on the market, Team Cosmo narrowed down the top formulas that provide immediate color and glow—plus hydration you’ll actually feel hours later.

    Why We Love It

    Saie’s Glossybounce leaves lips looking plush, pillowy, and glassy without any stickiness. The shade “Bounce,” a warm mauve, is endlessly wearable and flattering. The moisturizing formula keeps lips soft and silky for hours, making it easy to toss in your bag and reapply as needed.

    One Cosmo editor says: “The way this makes my lips so soft and juicy is unreal. It’s the perfect mix of lip oil, sheer tint, and high-shine gloss.” —Lauren Balsamo, Beauty Director

    Why We Love It

    Gisou’s Honey Lip Oil earned its cult status for a reason. Known for its deeply hydrating formula, the tinted versions add a soft wash of color while keeping lips nourished for hours. It’s ideal for low-makeup days when you want a healthy, polished look without effort.

    One Cosmo editor says: “I loved the original clear version, but the tinted shades took it to another level. The medium and deep browns pair perfectly with liner, and they feel amazing on the lips.” —Beth Gillette, Beauty Editor

    Why We Love It

    This innovative formula applies like a stick but melts into the lips like an oil. The texture is lightweight and smooth, leaving behind a glossy finish with just enough tint to enhance your natural lip color—perfect for everyday wear.

    One Cosmo editor says: “This is the ultimate hybrid. It gives juicy shine, buildable pigment, and real hydration thanks to mango oil and hyaluronic acid.” —Jasmine Hyman, Assistant Beauty Editor

    Why We Love It

    Dior’s iconic lip oil went viral for a reason. The updated formula offers richer pigment and longer-lasting hydration while maintaining the plush, high-shine finish fans love. It remains a standout favorite among Cosmo readers year after year.

    Why We Love It

    This under-$10 option proves you don’t need to splurge for quality. With a luxurious feel, glossy finish, and nourishing formula, it rivals high-end competitors at a fraction of the price. Team Cosmo is collectively obsessed.

    Why We Love It

    While the brand’s balms get plenty of hype, Dream Lip Oil is the real standout. The formula hydrates, protects, and softens while delivering a sheer, modern tint that works beautifully for everyday wear.

    Why We Love It

    Merit’s lip oil is a longtime staple thanks to its sleek packaging and ultra-light texture. Infused with squalane, it hydrates without feeling heavy, and the sheer tint is buildable for a subtle or slightly bolder look.

    Why We Love It

    Kulfi’s formula redefines what a lip stain can be. Packed with nourishing oils, it delivers lasting pigment with real hydration, eliminating the need for a separate gloss.

    Why We Love It

    This lip oil doubles as a subtle plumper, using hyaluronic acid and peptides to smooth and volumize lips instantly. Unlike traditional plumpers, it moisturizes instead of drying out the lips.

    Why We Love It

    Tarte’s Maracuja formula stands out for its longer wear time and intense hydration. With a blend of plant oils, it feels almost like a lip mask while delivering rich shine and tint.

    One Cosmo editor says: “It’s thicker than most lip oils, but that’s why it lasts so much longer. I reach for it when I don’t want constant touch-ups.” —BG

    Why We Love It

    The iconic Orgasm shade translates beautifully into a lip oil. The shimmery peach-pink tint enhances natural lip color with a soft glow that’s polished yet wearable.

    Lip Oil vs. Lip Gloss: What’s the Real Difference?

    A lip oil is typically skincare-first, formulated with nourishing oils and emollients that hydrate and condition the lips. The finish is glossy but lightweight, and lips often stay soft even after the shine fades.

    A lip gloss, on the other hand, is makeup-first. Its primary focus is shine and pigment, with hydration playing a secondary role. While modern glosses can feel comfortable, the moisturizing effect usually disappears once the gloss wears off.

  • Homemade Eyebrow Gel Made With Aloe and Cocoa Gives Soft Natural Hold All Day

    Homemade Eyebrow Gel Made With Aloe and Cocoa Gives Soft Natural Hold All Day

    The radiator clicked to life with its familiar metallic rhythm, a sound that usually promised comfort. Outside, wind slipped through bare branches and rattled the windows, quietly announcing colder days ahead. Indoors, the temperature felt fine, yet the air seemed strangely thin. Your throat felt rough, your hands tight and dry, and your nose hovered on the edge of a sneeze.

    Somewhere in the back of your mind, a half-remembered tip surfaced—maybe from an older relative or something read online—about placing a glass of water near the radiator. It sounded outdated, almost like superstition. Still, as the evening wore on and the dryness deepened, you filled a glass and set it beside the heat. Slowly, almost unnoticed, the atmosphere began to shift. Winter tends to reveal its truths quietly.

    The Subtle Science Behind a Glass of Water

    The idea that a simple glass of water could make a room feel warmer—without touching the thermostat—seems unlikely. Water doesn’t create heat, after all. There’s no hidden warmth being released into the space. What changes instead is how your body experiences the existing heat.

    Why Dry Air Makes Warm Rooms Feel Colder

    When a radiator runs, it heats the room while also stripping moisture from the air. At first, this dryness is easy to miss. It shows up as itchy skin, a scratchy throat, static in clothing, or small shocks when touching metal. What’s less obvious is how dry air quietly alters temperature perception.

    Your body is constantly exchanging heat with its surroundings. In dry conditions, moisture evaporates faster from your skin and with every breath you take. This evaporation draws heat away, creating a subtle cooling effect—even when the room is technically warm. The heater works, but your body feels out of sync with the reading on the wall.

    How Moisture Helps Warmth Feel Real

    This is where the glass of water plays its role. Placed near a heat source, it warms and slowly releases moisture into the air through evaporation. Even a small increase in humidity can reduce moisture loss from your skin and lungs. The temperature doesn’t change, but the room begins to feel softer, warmer, and more comfortable.

    Aloe Vera as a Gentle Brow Styling Base

    Aloe vera has long been valued for its soothing properties, long before it became a bottled staple. In its pure form, the gel is light, cooling, and flexible, never stiff or sticky. Applied to brows, it offers subtle hold while keeping hairs soft.

    As a homemade brow gel base, aloe provides light-to-medium control and hydration. A high-quality gel with minimal additives supports brow health with each use, turning daily grooming into a care-focused ritual rather than a quick fix.

    Cocoa Powder for Natural Brow Tint

    Cocoa powder adds warmth and depth through its natural brown pigment. It works especially well for light to medium-dark brows, blending smoothly when mixed with aloe. Instead of harsh color, it creates a soft, natural-looking tint.

    This method allows full control. A small amount gives gentle definition, while a little more deepens the shade. The result blends seamlessly, avoiding sharp lines. There’s a quiet satisfaction in using an ingredient from the kitchen to softly frame your face.

    Putting Together a Simple Brow Gel Kit

    Making your own brow gel becomes a calm, intentional process. Clean jars, a spoon, and a spoolie each have their place. The experience feels tactile and unhurried.

    The core formula relies on just two ingredients, with optional additions added later if desired. Its charm lies in its simplicity.

    • Pure aloe vera gel: Serves as the base, offering natural hold, moisture, and smooth application
    • Unsweetened cocoa powder: Adds a soft tint to enhance natural brow color
    • Small glass jar or container: Stores the finished mixture safely
    • Clean spoolie or angled brush: Helps apply and shape brows evenly
    • Mini spoon or mixing stick: Used to blend ingredients smoothly

    Mixing the Gel Slowly and Smoothly

    Add two teaspoons of aloe vera gel to a clean jar. Sprinkle in about a quarter teaspoon of cocoa powder and stir gently, pressing out any clumps. The clear gel gradually shifts into a smooth, earthy brown.

    Test the shade on the back of your hand and allow it to dry briefly. Adjust as needed—more cocoa for depth, more aloe for softness. The final texture should be creamy and brush-friendly. Once mixed, seal the jar and let it rest for an hour so everything settles evenly.

    Applying with Care and Precision

    Using a homemade brow gel encourages a slower pace. Begin with clean, dry brows. Dip a spoolie lightly into the gel, removing excess before application. Brush through brows using short, feathered strokes that follow natural growth.

    Work from the inner brow outward, shaping rather than drawing. For added definition, let the first layer dry before applying another, focusing on sparse areas. An angled brush can help create hair-like strokes if needed. The finish stays soft and flexible, never stiff.

    Why Simple, Natural Choices Matter

    Creating something at home carries quiet significance. It reduces waste, limits unnecessary ingredients, and reconnects you with the process of making. Each refill replaces disposable packaging, and each application reinforces the idea that beauty doesn’t need complexity.

    Natural solutions aren’t one-size-fits-all, so listening to your skin is essential. Patch testing and small adjustments are part of the journey. In that unhurried moment—brush in hand, cocoa-scented gel nearby—you’re reminded that care can be gentle, practical, and personal. Sometimes, meaningful change begins with the simplest things.

  • Orange Peels in Boiling Water Create a Winter Scent Homes Can’t Replicate

    Orange Peels in Boiling Water Create a Winter Scent Homes Can’t Replicate

    Your cheeks burn from the cold, your fingers feel stiff, and your keys slip from your hand in the hallway. Then it hits you. The entire house smells like a sunlit Spanish orchard, even though it’s late January and darkness has already settled outside.

    You follow the aroma into the kitchen. On the stove, a small pot releases gentle steam, lifting slow curls of warm citrus air. There’s no candle, no diffuser, no pricey seasonal spray. Just a few orange peels saved from the compost, dropped into boiling water.

    A simple scent that quietly changes the whole mood

    The shift happens almost instantly. The room feels softer and calmer, as if the air itself has relaxed. Your shoulders drop. Your thoughts slow. It’s one of those small moments that feels strangely comforting, like discovering a quiet secret.

    Indoor winter air turns stale quickly. Heating dries everything out, windows stay shut, and smells linger longer than they should. Cooking aromas, damp coats, laundry drying indoors, and that unmistakable wet-weather dog smell all hang in the background.

    When orange peels begin to simmer, the contrast is striking. The heavy air picks up something bright, fresh, and gently sweet. It doesn’t overpower the room. It moves slowly, spreading from space to space, subtly lifting the atmosphere as it goes.

    Why boiling orange peels feels like a winter reset

    The effect goes beyond simply smelling pleasant. It feels like pressing a reset button on your home. A small, almost effortless action that changes how the space feels for hours.

    There’s a quiet beauty in how it starts. Someone peels an orange, pauses, and instead of tossing the skin away, reaches for a saucepan. Water is added, peels drop in, and the stove is switched on.

    Within minutes of boiling, the scent begins to travel. In a medium-sized flat, it can reach hallways and bedrooms in ten to fifteen minutes. In larger homes, it settles first in the living room, carried along by warm air.

    People who try it often say the same thing: they didn’t expect it to work so well. One home blogger shared that her children called it “orange house day” and asked for it again instead of lighting a candle. The action is small, but the emotional return is surprisingly large.

    The natural reason this works better than sprays

    Orange peels contain natural aromatic compounds such as limonene and linalool. When heated, these molecules evaporate and travel with the steam, lightly scenting the air.

    Unlike synthetic sprays that simply mask odours, steam helps lift and disperse lingering smells. Kitchens carrying traces of fried food or fish clear more quickly, and the added humidity can make winter air feel less dry and scratchy.

    There’s also satisfaction in knowing you’re using something that would have been thrown away. You’re turning waste into atmosphere, and that small detail changes how the moment feels on a grey day.

    How to simmer orange peels so the scent lasts

    The method is straightforward. Place saved orange peels in a small pot of water, bring it to a boil, then reduce to a gentle simmer. Let it run for 30 to 60 minutes, topping up the water as needed.

    Fresh peels work best. One or two oranges are enough for a small flat, while three or four suit larger or more open spaces. Keep the lid off so the fragrant steam can move freely through your home.

    For a deeper, more wintery note, you can add a cinnamon stick, a few cloves, or a slice of fresh ginger. The scent becomes warmer and cozier, without losing its natural lightness.

    A few common mistakes can dull the effect. Using a pot that’s too large weakens the scent. Letting the water boil dry can create an unpleasant burnt smell. Setting a simple timer helps avoid disappointment.

    This isn’t meant to mimic a hotel diffuser. The aroma is soft, organic, and slightly uneven from room to room. That natural quality is part of its appeal.

    Making this habit easy to repeat

    • Store peels in a glass jar in the fridge for up to three days
    • Start simmering while cooking or making tea
    • Use a small saucepan for gentle, steady steam
    • Mix citrus with apple cores or lemon peels for variety
    • Open doors so the scent can travel naturally

    The quiet psychology of citrus scent in winter

    Citrus aromas are often linked to lower stress and improved alertness, even at low levels. The brain reads them as fresh and clean almost instantly.

    In winter, life can feel compressed by darkness and routine. When your home suddenly smells bright and sunny, it sends a subtle message that the world isn’t only cold and grey. That message matters more than we often realise.

    On a deeper level, this small ritual says, “I’m taking care of my space”. Not perfectly, not performatively, but gently and honestly. On a difficult day, that can change how the evening unfolds.

    Others notice too. Guests comment. Children remember. A passing remark like “your place always smells good in winter” tends to linger.

    Boiling orange peels while soup simmers grounds you in the moment. You’re not chasing aesthetics or productivity. You’re simply making the air around you kinder.

    Why this tiny ritual stays with you

    We’ve all opened the door to a home that feels slightly stuffy and discouraging. A small pot of citrus steam turns that moment into something warmer and more welcoming. Once you feel that shift, it’s hard to forget.

    The beauty of this habit is how easily it adapts. One orange and ten minutes in a small studio. A larger pot running all afternoon in a busy family house. You can share it quietly, without explanation, and let the scent create the memory.

    Key takeaways at a glance

    • Simple winter ritual – Boiling leftover orange peels for 30–60 minutes refreshes the home quickly
    • Natural, lasting aroma – Citrus oils and steam travel through rooms without harsh chemicals
    • Emotional comfort – Creates a cozy, cared-for feeling during dark winter months
  • Homemade Eyebrow Gel Using Aloe and Cocoa Creates Soft Natural Hold

    Homemade Eyebrow Gel Using Aloe and Cocoa Creates Soft Natural Hold

    The radiator clicked to life with its familiar metallic rhythm, a sound that usually promised comfort. Outside, wind slid through bare branches, tapping the windows as if warning that colder days were settling in. Indoors, the room was warm, yet the air felt thin and dry. Your throat felt scratchy, your hands felt tight, and your nose hovered on the edge of a sneeze.

    That was when a memory surfaced—something once mentioned by an older relative or read somewhere online—about placing a glass of water near a radiator to make a room feel warmer. It sounded unlikely, almost like an old superstition. Still, as the evening stretched on and the dryness became more noticeable, you filled a glass and set it beside the heat source. Slowly, quietly, something began to shift, the way winter often reveals its effects without announcement.

    The Subtle Science Behind a Glass of Water

    The idea that a simple glass of water could improve comfort without raising heating costs seems almost too gentle to be true. Water doesn’t create heat, and it certainly isn’t acting as a hidden heater. The change happens elsewhere. It’s not about generating warmth, but about helping your body feel the warmth already present.

    When a radiator runs, it warms the room while also pulling moisture from the air. At first, this dryness is easy to overlook. It shows up as dry skin, a scratchy throat, static in clothing, or small shocks from metal surfaces. What’s less obvious is how this lack of moisture quietly alters the way your body experiences temperature.

    Why Dry Air Makes Warm Rooms Feel Cooler

    Your body constantly exchanges heat with its surroundings. In very dry air, moisture evaporates more quickly from your skin and from every breath you release. This evaporation draws heat away from your body, creating a subtle cooling effect—even when the room itself is warm. The radiator may be working exactly as intended, but your body doesn’t fully agree.

    Placing a glass of water near the heat allows it to warm gradually and release moisture through gentle evaporation. Even a small increase in humidity can reduce moisture loss from your skin and lungs. The temperature remains the same, yet the air feels softer, warmer, and more comfortable.

    Aloe Vera as a Gentle Brow Base

    Aloe vera has soothed skin for centuries, long before it became a packaged cosmetic. In its pure form, the gel feels cool, light, and non-sticky. On eyebrows, it works quietly, offering control without stiffness.

    In a homemade brow gel, aloe serves as the base. Its natural texture provides light-to-medium hold, keeping brow hairs in place while allowing them to move naturally. When using a high-quality gel with minimal additives, it also adds a touch of hydration, turning styling into care.

    Cocoa Powder for Natural Definition

    Cocoa powder adds depth and warmth through its natural pigment. Its soft brown tone blends well with light to medium-dark brows, creating definition without harsh edges. When mixed with aloe, it produces a subtle, stain-like effect rather than a bold, painted finish.

    The amount controls the result. A small pinch offers gentle enhancement, while a little more deepens the shade. The color merges smoothly with natural brows, avoiding sharp lines. Using a familiar kitchen ingredient to frame the face brings a quiet sense of balance between beauty and simplicity.

    Preparing Your Simple Brow Gel Setup

    Making brow gel at home feels more like a calm routine than a cosmetic task. A clean jar, a small spoon, and a spoolie brush are all that’s needed. The process is unhurried and hands-on, inviting focus rather than rush.

    At its simplest, the formula uses only aloe vera gel and cocoa powder. Optional additions, such as a drop of jojoba oil for smoothness or a pinch of coffee or charcoal for deeper color, can be included later. The appeal lies in its simplicity—just two ingredients combined with care.

    • Pure aloe vera gel (2 teaspoons): Acts as the base, offering natural hold, smooth application, and moisture.
    • Unsweetened cocoa powder (¼–½ teaspoon): Provides soft, natural color to enhance brows.
    • Small clean glass jar: Used for mixing and storing the finished gel safely.
    • Spoolie or angled brow brush: Helps apply and shape the gel evenly.
    • Mini spoon or mixing stick: Used to blend ingredients smoothly.

    Mixing the Gel Slowly and Evenly

    Spoon the aloe vera gel into a clean jar. Sprinkle in the cocoa powder and stir gently, pressing out any clumps as you go. The clear gel gradually turns into a smooth, earthy brown.

    Test the shade on the back of your hand and allow it to dry briefly. Adjust by adding more cocoa for depth or more aloe for softness. The finished texture should be creamy and light, thick enough to cling to a brush without feeling heavy. Once mixed, close the jar and let it rest for about an hour so the blend settles evenly.

    Applying the Gel with a Light Touch

    Begin with clean, dry brows. Dip a spoolie lightly into the gel and remove any excess. Brush through the brows using short, gentle strokes that follow the natural direction of hair growth.

    Start at the inner brow and move outward, shaping rather than drawing. For added definition, allow the first layer to dry before applying another, focusing on sparse areas. An angled brush can help mimic individual hairs if needed. The finish stays soft and flexible, never stiff.

    Choosing Simplicity in Daily Care

    Creating a product at home carries quiet intention. It reduces waste, limits unnecessary ingredients, and brings awareness back to the act of making. Each refill of a small jar replaces a disposable tube, and each application reinforces that beauty doesn’t need to be complicated.

    Natural solutions are personal, and paying attention to your skin is essential. Patch testing and small adjustments are part of the process. Still, there is value in slowing down, mixing something by hand, and shaping your brows with care rather than haste.

    In that brief moment—brush in hand, cocoa-scented gel nearby—it becomes clear that beauty can be gentle, practical, and deeply personal. Sometimes, it begins with the simplest things.

  • 12 Yoga Poses to Release Body Stiffness and Improve Flexibility

    12 Yoga Poses to Release Body Stiffness and Improve Flexibility

    12 Yoga Poses to Reduce Body Stiffness Body stiffness affects many people for various reasons including prolonged sitting & lack of movement. Stress and aging also contribute to tight muscles and joints. Intense physical activity can leave the body feeling rigid and uncomfortable. Common problem areas include the neck and shoulders along with the lower back and hips and legs. Yoga offers an effective approach to address these issues through gentle movements that don’t strain the body. The practice emphasizes controlled breathing combined with deliberate stretching. This method allows tight muscles to relax naturally without forcing them beyond their limits. Regular practice helps restore natural movement patterns & increases overall flexibility.

    Mountain Pose (Tadasana)

    Mountain Pose appears basic but serves a vital function in developing better posture and physical awareness. This standing position works to straighten the spine & activate core muscles while establishing a base for improved balance and mobility across the entire body.

    Gentle Neck Rolls

    This smooth movement helps maintain flexibility in your spine. When you round your back and then arch it you create a gentle stretch that runs through your spine and reaches into your hips and shoulders and neck. The exercise also warms up your entire body at the same time.

    Cat–Cow Pose

    This smooth movement works well for keeping your spine flexible. The motion of rounding your back and then arching it creates a gentle stretch through your spine and extends into your hips and shoulders and neck. At the same time it warms up your whole body.

    Downward-Facing Dog

    Downward-Facing Dog stretches your spine and shoulders along with your hamstrings and calves. At the same time it makes your arms & core stronger. This pose works well for reducing stiffness that comes from sitting for long periods during the day.

    Standing Forward Bend

    This pose stretches the entire back of your body from your spine down through your hamstrings and calves. It helps relax your nervous system and reduces mental stress.

    Low Lunge

    Low Lunge works on tight hips and thighs that get stiff when you sit for long periods. This pose helps your hips move more freely & improves your posture.

    Butterfly Pose

    Butterfly Pose Butterfly Pose works to open your hips and inner thighs in a gentle way. When you practice this pose regularly it helps reduce stiffness in your lower body. Over time you will notice your hip flexibility getting better. This pose is simple but effective for anyone who sits a lot during the day or feels tight in the hip area. The stretching action targets the muscles that often get neglected in daily movement patterns.

    Seated Spinal Twist

    Seated twists encourage your spine to move and help reduce tightness in your back and waist area. These twisting motions also aid your digestive system & make your body more flexible overall.

    Cobra Pose

    Seated twists help your spine stay mobile and ease tension throughout your back & waist. The rotating movement supports healthy digestion and improves your overall flexibility.

    Child’s Pose

    This gentle resting position provides a deep stretch for your back hips and shoulders. The pose promotes relaxation and helps your body and mind let go of built-up tension.

    Supine Figure Four Pose

    You perform this pose while lying on your back. It works on tight hips and glutes while your spine stays supported. This makes it a safe and effective way to reduce stiffness in your lower body.

    Legs Up the Wall

    Legs Up the Wall helps improve blood flow throughout your body while reducing tiredness in your legs. This pose also eases tension in your lower back. It creates a calming effect that aids in relaxation and helps your body recover from daily stress.

    How Yoga Helps Reduce Stiffness

    Yoga helps your body by stretching muscles in a gentle way and making your joints move more easily. It also gets your blood flowing better throughout your body. When you combine slow movements with steady breathing you help tight muscles relax & your nervous system becomes calmer. If you practice regularly over time you will notice that your flexibility gets better and your posture improves. You will also find that moving becomes easier in general. The best part is that yoga does all of this without putting any stress on your body.

  • Grow Thicker Eyebrows and Eyelashes Naturally Using Safe Household Oils

    Grow Thicker Eyebrows and Eyelashes Naturally Using Safe Household Oils

    You don’t notice your eyebrows getting thinner in some dramatic moment. It happens quietly under the bathroom light when you lean in close with a cotton pad. A few hairs at the end look shorter than before. The arch that used to be bold now seems patchy. It might be from getting older or from plucking too much in the early 2000s or maybe just from stress and dry heated air. Whatever caused it makes your face look different somehow like something important is missing from around your eyes. Then you start paying attention to every single lash that falls in the sink when you take off your mascara at night.

    The Quiet Power of Everyday Oils

    Before investing in expensive serums or decoding long ingredient lists, it helps to pause and look at what you already have at home. In many UK households, simple oils quietly sit on shelves—olive oil near the stove, coconut oil on the counter, or a small bottle of castor oil tucked away. These oils don’t come with flashy promises or luxury packaging, but they offer something more reliable: nourishment, patience, and consistency. For brows and lashes, which are simply fine hairs, this kind of gentle care can make a meaningful difference over time.

    Why Brows and Lashes Matter on a Personal Level

    Eyebrows and eyelashes often carry emotional weight. Many women remember years of overplucking, heavy makeup trends, or periods of hormonal change that altered hair growth. When brows thin or lashes weaken, it can subtly affect how you see yourself, making the face look tired or unfamiliar. Choosing a natural approach feels kinder and more aligned with a slower, more mindful lifestyle. Oils don’t promise instant transformation, but with regular use, they support what your body naturally wants to do.

    Common Household Oils That Support Hair Health

    Castor oil is the most talked-about option because of its thick texture and ability to cling to tiny hairs, helping reduce breakage. Coconut oil works well for dryness caused by frequent mascara use, while olive oil can gently condition brows. Lighter oils like almond or argan suit sensitive skin and absorb more easily. These oils don’t force growth; instead, they strengthen and protect, creating healthier conditions for brows and lashes to thrive.

    Oil Name Texture & Absorption Benefits for Brows & Lashes
    Castor Oil Dense, slightly tacky feel High in ricinoleic acid, helps lock in moisture, strengthen hair fibres, and minimise lash and brow breakage.
    Coconut Oil (Regular or Fractionated) Light to medium, melts quickly on contact Penetrates the hair shaft to reduce protein loss, leaving brows and lashes softer and shinier.
    Olive Oil Medium weight, mildly heavy Rich in antioxidants, supports the skin barrier around hair roots and improves hair flexibility.
    Sweet Almond Oil Smooth, silky, absorbs well Very gentle and calming, making it suitable for sensitive eye areas while nourishing fine hairs.
    Argan Oil Lightweight, non-greasy Loaded with vitamin E and essential fatty acids, helps improve smoothness, strength, and overall resilience.

    Creating a Calm Night-Time Routine

    Consistency matters, and the easiest routines are the ones that fit naturally into your evening. Start with clean, makeup-free eyes and washed hands. Choose one oil or a simple blend, apply a small amount to brows using a clean spoolie, and lightly coat upper lashes with care. Blot away excess oil to prevent irritation. Repeating this nightly for several weeks turns the process into a calming ritual rather than a chore.

    Paying Attention to Skin and Eye Sensitivity

    The eye area is delicate, so listening to your skin is essential. Always patch test new oils and start with minimal amounts. If irritation occurs, switch to a lighter oil. Avoid letting oil enter the eyes, and rinse gently if it does. Anyone with existing eye conditions or ongoing treatments should seek advice from a pharmacist or GP. Progress is gradual, so focus on reduced shedding and subtle fullness rather than quick results.

    Everyday Habits That Encourage Healthier Growth

    Oils work best alongside supportive habits. Limiting waterproof mascara, being gentle during makeup removal, and eating a balanced diet rich in protein, healthy fats, and minerals all help. Managing stress and paying attention to hormonal health can also influence hair growth. Think of oils as external care, while nutrition, rest, and lifestyle form the foundation beneath it.

    Making a Simple Custom Oil Blend

    Once comfortable, you can mix your own small blend at home. A combination of castor oil for thickness, almond oil for softness, and argan oil for light nourishment works well. Store it in a clean bottle, label it with the date, and use within a few months. This personalised blend keeps your routine simple and transparent, with ingredients you trust.

    Noticing Change Without Pressure

    Tracking progress gently helps avoid obsession. Taking a makeup-free photo every few weeks in the same lighting can show subtle improvements over time. Fuller lines, fewer gaps, and stronger lashes often appear gradually. Missing a few nights doesn’t undo progress—just return to the routine when you can. The aim isn’t perfection, but consistent, quiet care for what you already have.

  • Henna Based Hair Dye Recipes Deliver Vibrant Color Without Chemical Damage

    Henna Based Hair Dye Recipes Deliver Vibrant Color Without Chemical Damage

    The first time I applied henna to dye my hair, the kitchen filled with a scent that felt oddly familiar, like an old pharmacy. The air carried notes of wet earth and dried leaves, warm and grounding, as if soil had been steeped in hot water. On the counter sat a ceramic bowl holding a deep green paste, thick and glossy, resembling melted chocolate blended with crushed plants. I paused with the spoon hovering, wondering if this muddy mixture could truly compare to the shiny boxed dyes from the drugstore. Then I dipped the brush, parted my hair, and spread the paste through each strand. The henna felt cool, dense, and soothing on my scalp, staining my hands as it coated my hair. By the time it rinsed out, it had quietly reshaped how I understood beauty.

    Why Henna Still Feels Magical in a Chemical-Filled World

    Walking through a modern hair dye aisle can feel overwhelming, with sharp chemical odors, bold promises, and warning labels hidden in fine print. Many people accept ammonia, peroxide, and synthetic formulas as the cost of achieving the right shade. Henna offers an entirely different approach. Made from the Lawsonia inermis plant, henna has been used for thousands of years to color hair, skin, and fabric naturally. When blended with warm liquid, its lawsone pigment releases slowly and bonds gently with keratin. Instead of stripping hair, henna coats each strand in a translucent layer of color, leaving hair stronger, shinier, and visibly healthier. Its earthy scent, more like leaves and tea than perfume, turns hair coloring into a calming ritual rather than a rushed task.

    Selecting Pure and Honestly Labeled Henna

    The quality of henna matters more than anything else. True henna should be pure, body-art-quality powder, free from metallic salts and synthetic dyes. Many bad experiences come from compound hennas that hide chemicals behind misleading labels. High-quality henna feels soft, finely sifted, smells grassy and fresh, and never sparkles or smells artificial. Freshness is essential, as henna loses strength over time. Reading labels carefully and sourcing responsibly becomes part of the process. You are not just buying color; you are choosing a plant grown in sun and soil, harvested and ground with care. When treated as a living material, henna delivers richer and more reliable results.

    Putting Together a Simple Henna Toolkit

    Henna does not require expensive equipment. A glass, ceramic, or stainless-steel bowl, a spoon, gloves, an applicator brush, plastic wrap, and an old towel are enough. Reactive metals should be avoided, and hands and clothing should always be protected. More important than tools is patience. Henna works slowly, releasing dye over hours rather than minutes. Compared to instant chemical dyes, henna feels more like preparing a slow meal instead of fast food, intentional, unhurried, and far more satisfying in the end.

    A Classic Henna Recipe for Warm Copper Shades

    The most basic recipe produces soft copper tones. Pure henna powder is mixed with strong warm tea until it reaches a yogurt-like consistency. Optional lemon juice or apple cider vinegar may help with dye release if the scalp tolerates mild acidity. The mixture should rest for four to eight hours until the color deepens. Apply evenly to clean hair, wrap securely, and leave on for two to four hours. After rinsing, the shade may appear bright orange at first, but it gradually oxidizes over several days into a more natural copper or auburn, depending on the starting hair color.

    Creating Auburn and Brown Shades with Plant Blends

    Henna can be adjusted by combining it with other plant-based powders. Mixing henna with amla softens brightness, producing cooler auburn tones while supporting hair texture. For brown or chocolate shades, a two-step process works best. First, henna is applied to create a red base, followed by indigo to deepen the color. This approach offers better control and more predictable results, especially on light to medium hair, creating shades that range from chestnut to near black.

    Common Natural Add-Ins and Their Effects

    • Amla powder helps cool strong red tones and adds body, ideal for balanced auburn shades.
    • Indigo powder deepens henna into brown or near-black tones, often used for gray coverage.
    • Cassia (neutral henna) boosts shine with a light golden glow and minimal color change.
    • Black tea or coffee adds subtle depth and richness, especially for medium to dark hair.
    • Chamomile tea gently brightens lighter hair with soft golden warmth.
    • Aloe vera gel improves moisture retention and smooths paste texture for dry or fragile hair.
    • Essential oils like lavender or rosemary enhance fragrance and may support scalp comfort.

    Henna Gloss for Gentle Color and Extra Shine

    For a softer effect, a henna gloss is a good option. A small amount of prepared henna paste is mixed with a silicone-free conditioner and applied like a hair mask. It is left on for forty-five to ninety minutes before rinsing. This method adds subtle warmth, light highlights, and noticeable shine without a dramatic color change. It also offers a gentle way to try henna before committing fully.

    Finding the Right Shade Through Layering

    Henna builds color gradually. Each application adds depth, richness, and gloss. Light hair shifts toward golden copper, medium hair becomes chestnut or auburn, and dark hair shows red tones in sunlight. Gray strands turn into warm highlights rather than disappearing completely. Because henna fades slowly, starting with lighter applications allows better control. The shade can always be deepened over time while preserving hair health.

    Safety, Patch Testing, and Hair History

    Even natural dyes require care. A patch test should always be done to check for sensitivity. Apply a small amount to the skin, rinse, and observe for twenty-four to forty-eight hours. Extra caution is needed if hair has been previously treated with chemical dyes, especially those containing metallic salts. While pure henna is generally safe, poor-quality products can cause unexpected reactions. Protecting the hairline with oil, ensuring ventilation, and allowing enough processing time all help support safe results.

    Aftercare and Long-Term Color Results

    Rinsing henna takes patience, but warm water and time help remove the paste fully. Many people avoid shampooing for the first day to allow the color to settle. Over the next few days, the shade deepens and stabilizes. With gentle cleansing and minimal sulfates, henna color lasts well. Regular root touch-ups or occasional gloss treatments keep the color consistent while maintaining strength and shine.

    The Quiet Strength of Plant-Based Hair Color

    Henna works with natural hair rather than against it. Grays become highlights, and natural variation becomes part of the look. Choosing henna represents a quiet shift away from harsh chemicals and rushed routines. It encourages patience, earthiness, and connection. The final result is not a perfectly uniform salon shade, but a living color shaped by time, light, and nature, one that feels personal, grounded, and enduring.

  • Japanese Hair-Washing Method for Healthy, Shiny Hair Without Expensive Treatments

    Japanese Hair-Washing Method for Healthy, Shiny Hair Without Expensive Treatments

    Some evenings washing your hair feels like just another chore instead of a relaxing moment. But when you take your time and turn it into a small ritual something shifts. Your hair can start to look smoother and shinier and even a bit fuller without paying for expensive salon visits. This Japanese-inspired Head Spa routine is basically a spa treatment for your scalp and when you do it regularly the results become really noticeable.

    What a Japanese-Inspired Head Spa Really Means

    Understanding Head Spa The basic concept behind a Head Spa is straightforward: treat your scalp with the same care you show your hair. Rather than quickly washing and rinsing this approach combines soft massage with thoughtful cleaning and proper drying. The goal reaches further than just having clean hair. It focuses on soothing the scalp and reducing stress while helping hair keep its natural smoothness and brightness. A complete home routine typically involves several straightforward steps. You start with a scalp massage before washing. Then you can apply oil before shampooing if you choose to.

    The shampooing itself targets the scalp more than the hair lengths. After that comes gentle drying with a towel followed by blow-drying on a low heat setting. You might also include a rice-water rinse from time to time. Each individual step seems basic but when you put them all together they can transform how your hair feels over time. What really attracts most people goes beyond just seeing better results. It’s the calm and centered sensation that happens when you turn a quick shower into a brief mindful practice.

    How Often You Should Wash Your Hair (Why One Rule Doesn’t Fit Everyone)

    Rethinking how often you wash your hair matters before you learn the actual washing process. Washing your hair too frequently strips away natural oils and leaves it feeling dry and damaged. Not washing enough causes buildup that makes hair look flat and feel oily. The right washing schedule depends on your individual scalp type and lifestyle factors. Most people find their sweet spot somewhere between washing once and three times per week.

    General Washing Rhythm by Hair Type

    People with normal or wavy hair typically do best washing once or twice each week unless they exercise heavily or use lots of styling products. Those who have oily scalps might need to wash up to three times weekly and should concentrate the shampoo mainly on the scalp area. People with dry or curly hair usually only need to wash about once a week or sometimes even less often. Dermatologists point out that straight hair allows natural oils from the scalp to travel down the hair strands more easily.

    Curly & coily hair types keep moisture closer to the scalp so they require less frequent washing. Most people find that cutting back from daily washing to about twice weekly makes their hair feel stronger and look better. Their hair also tends to produce less oil over time than they initially expected.

    Step 1: Scalp Massage Before Shampoo

    The Japanese Head Spa routine starts with a scalp massage on dry hair before you add water or shampoo. You can use your fingertips or a soft silicone brush. Start at the back of your neck and work your way up to the top of your head using small circular movements. Studies on daily scalp massage for about four minutes over several months have found a small increase in hair thickness. This happens because of better blood flow & gentle stretching of the scalp.

    This massage loosens buildup and boosts circulation while helping you relax deeply. Many people find this the best part of the routine because it makes the scalp feel lighter & more comfortable for hours afterward.

    Step 2: Light Pre-Wash Oil for Protection

    Before you shampoo your hair you should apply a thin layer of oil to your scalp and the length of your hair. You do not need to use a lot of oil because this is not supposed to be a thick mask. The main purpose is to keep your hair from becoming too dry when you wash it. Research that has looked at different hair oils shows that coconut oil is especially good at preventing protein loss when you use it before and after washing your hair. If you have fine hair you might prefer lighter oils such as argan oil or jojoba oil or grapeseed oil because they work well without weighing your hair down. Take a few drops of oil and warm it up by rubbing it between your hands. Massage the oil gently into your scalp & then smooth whatever oil is left over through the middle and ends of your hair. Leave the oil in your hair for a few minutes before you rinse it out with lukewarm water. When you shampoo focus mostly on washing your roots because the foam that runs down through the rest of your hair will usually be enough to clean it.

    Step 3: Gentle Drying Makes a Big Difference

    Hair is most fragile when wet. Instead of rubbing it vigorously with a towel, gently press out excess water using a microfiber towel or a soft cotton T-shirt. Think of squeezing rather than scrubbing.

    Studies comparing drying methods suggest that microfiber towels are gentler on hair fibers than rough cotton towels or immediate blow-drying. Over time, this small change can noticeably reduce frizz and breakage.

    Step 4: Smart, Low-Heat Blow-Drying

    Blow-drying does not cause harm when you do it the right way. Problems happen when you use too much heat or keep the dryer in one spot for too long or hold it too near your hair. Let your hair dry naturally for a while before you start using the dryer. Pick the lowest heat that still works well. Move the dryer around constantly and keep it about six inches from your head. Point the air from your roots down toward the ends because this helps make the outer layer of your hair smoother. Most people notice that using less heat over time makes their hair ends feel softer and prevents dryness that builds up.

    Bonus Step: Occasional Rice-Water Rinse

    You can try a rice-water rinse once every few weeks as a finishing touch. This is simply the cloudy water that remains after you soak or rinse rice. Pour it through your hair lengths after you have already used shampoo and conditioner. It helps make hair feel smoother & look shinier. You do not need to do this every time you wash your hair. When you use it from time to time it gives your hair a gentle shine boost. It also makes your hair care routine feel more special and intentional.

    What This Head Spa Ritual Can Change Over Time

    When you combine scalp massage with light pre-wash oil and gentle drying methods alongside low-heat blow-drying & occasional rice-water rinses you end up with healthier hair instead of just shinier strands. This routine protects your scalp while reducing friction & heat damage so your hair can develop its natural shine. Over time most people see less breakage and smoother ends while their hair becomes easier to style without needing extra products. This approach inspired by Japanese Head Spa treatments shows that hair responds well to patient and careful handling by becoming softer and shinier while giving you a natural sense of confidence.

  • If you grew up in the 1960s or 1970s, you were likely taught life lessons that have quietly disappeared from modern education

    If you grew up in the 1960s or 1970s, you were likely taught life lessons that have quietly disappeared from modern education

    The gym carried a faint mix of floor polish and sweat, and every desk bore a small groove carved by last year’s pencil. The teacher entered with a whistle, not a laptop. There was no PowerPoint, no online quiz. Instead, class began with a look that communicated respect, consequences, and expectations without a single word.

    If you grew up during the 1960s or 1970s, you likely remember learning things in school that never appeared on the chalkboard. How to offer a firm handshake. How to endure boredom without falling apart. How to repair something instead of throwing it away.

    No one called these lessons “life skills.”

    They were simply part of life.

    Somewhere between rotary phones and smartphones, many of those lessons quietly disappeared from classrooms.

    The Forgotten Lessons of Everyday Toughness

    Talk to someone who finished school in 1972, and their memories sound different. They don’t talk about apps or testing metrics. They talk about being sent to run laps for talking back. About teachers who didn’t ask whether you felt inspired, but expected effort regardless.

    Beneath those routines was a shared message. You fall, you stand up again. You don’t understand, you stay after class. You dislike the rule, you follow it anyway. These weren’t motivational quotes on a wall. They were reinforced through repetition and routine.

    One woman I spoke with, now in her late sixties, recalled failing a math test in eighth grade. There was no extra credit and no discussion about fairness. The teacher handed back the paper and said, “You’re smarter than this. Be here at 7:30 tomorrow.”

    And she was. Every morning for two weeks. No snacks. No encouragement. Just chalk dust and long division until the numbers finally made sense. She still tells this story to her grandchildren whenever they say, “I’m just not a math person.”

    Her lesson isn’t about kindness. It’s about belief. The teacher believed that struggle was part of learning, not a reason to quit.

    • Why wearing jeans in extreme winter cold is discouraged and what clothing truly keeps you warm
    • Are childfree adults selfish or simply honest about their choice
    • Pensions set to rise from February 8, but only for retirees who submit a missing certificate
    • Day turning into night: the longest solar eclipse of the century now has a confirmed date
    • How pumping water into empty oil fields has helped delay land subsidence in major cities
    • Lidl preparing to launch a Martin Lewis–approved gadget to help households through winter
    • Astronomers officially confirm the date of the longest solar eclipse of the century
    • Emergency declared in Greenland after orcas are spotted unusually close to melting ice shelves

    Today, we talk constantly about resilience, often wrapped in worksheets and trendy language. In the 60s and 70s, resilience was more physical and direct. Long walks to school. Detentions that involved real work. Sports where trophies were earned, not handed out.

    That system wasn’t flawless, and sometimes it went too far. Still, it taught a powerful idea: discomfort isn’t an emergency. Waiting, retrying, feeling bored or embarrassed won’t destroy you. When every inconvenience becomes a crisis, the old lesson of “just get on with it” starts to feel almost radical.

    Respect, Responsibility, and Small Daily Rituals

    One difference people often highlight is how respect was taught as a habit, not a debate. You stood when an adult entered. You didn’t use a teacher’s first name. You wrote “Dear Mr. Smith” at the top of a note, even if it was only about a missing textbook.

    These customs may sound outdated today, but they trained children to pause and acknowledge others. The message was clear: you are not the center of every moment, and your behavior shapes the room you’re in.

    Many adults now quietly admit that something feels off. Children are bright, funny, and digitally skilled, yet many struggle with eye contact, basic courtesy, or sticking with tasks that don’t offer instant rewards. There’s more anxiety, more “I can’t”, and less “I’ll figure it out.”

    This isn’t their fault. When we remove every obstacle from childhood, we also remove the small moments where responsibility used to form. Paying for a lost library book. Calling to apologize instead of sending a text. Admitting your role in a conflict without adults stepping in to manage it.

    Let’s be honest: nobody gets this right all the time.

    Those raised in the 60s and 70s often describe responsibility as non-negotiable. Chores came before play. Helping younger siblings was expected. If you broke something you borrowed, you worked to replace it.

    One retired teacher summed it up:

    “We didn’t ask kids how they felt about responsibility. We gave them responsibility and let the feelings come later.”

    Some of these older habits are surprisingly easy to reintroduce at home:

    • Encouraging children to greet visitors clearly, using their name
    • Having them call instead of text when canceling plans
    • Assigning one household task that truly belongs to them
    • Allowing natural consequences instead of always stepping in

    These aren’t dramatic changes. They’re small, repeated signals that communicate: you are capable, you matter, and your actions carry weight.

    What We Gain by Relearning What Was Lost

    If you listen closely to people who grew up in the 60s and 70s, you’ll hear a quiet sense of longing. Not just for the music or cars, but for the clarity. Expectations were clear. Boundaries were visible. Life was often unfair, and somehow, you learned to cope.

    Few want to return to the harsher parts of that era. They aren’t asking for less empathy or more fear. They’re wondering if, in our rush to modernize, we discarded a few quietly powerful lessons along the way.

    Key Takeaways

    • Everyday resilience: Struggle and boredom were treated as normal parts of learning, helping challenges feel like training rather than personal failure.
    • Practiced respect: Simple rituals such as greetings, titles, and handwritten notes built social confidence.
    • Real responsibility: Chores, consequences, and owning mistakes encouraged independence and self-reliance.