Category: News

  • Grow Thicker Eyebrows and Eyelashes Naturally at Home Using Safe Oils With Proven Benefits

    Grow Thicker Eyebrows and Eyelashes Naturally at Home Using Safe Oils With Proven Benefits

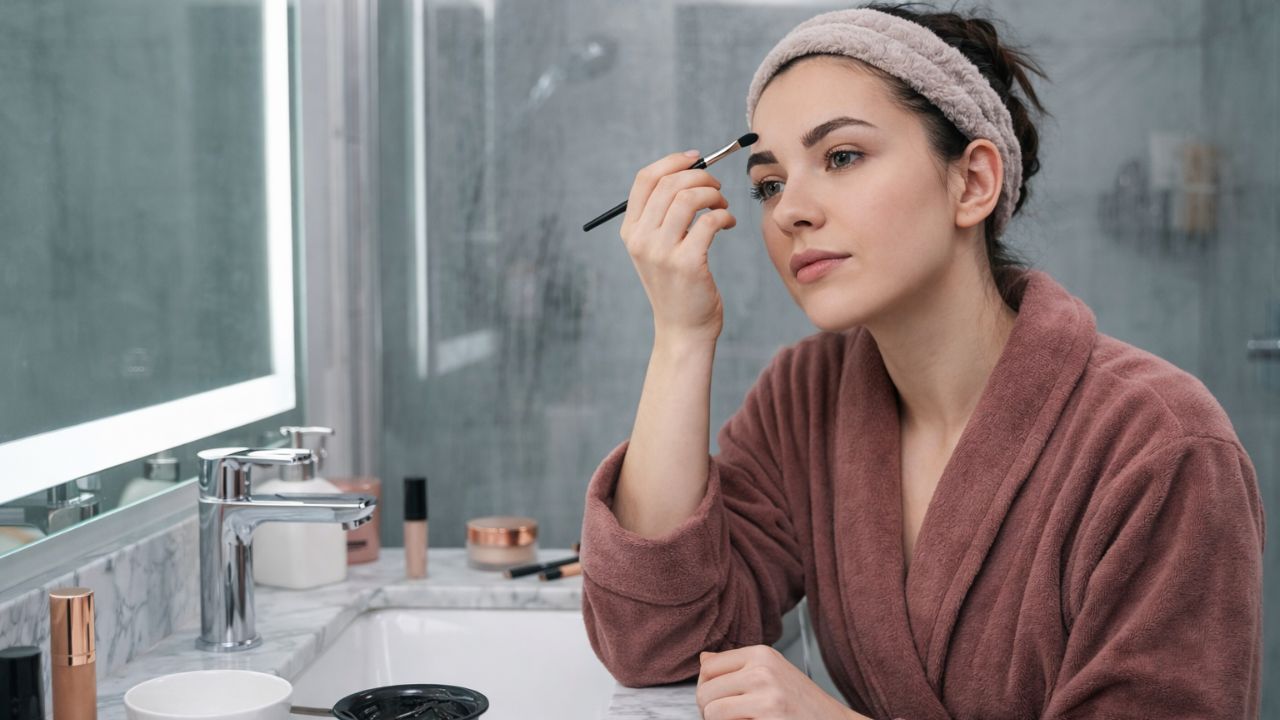
    You rarely see your eyebrows thinning in a dramatic instant. It happens quietly under the bathroom light as you lean in with a cotton pad. A few hairs at the ends look shorter, and the once-bold arch appears patchy. This can result from aging, overplucking in earlier years, stress, or dry heated air. Whatever the cause, it subtly changes your face, making it feel like something essential around your eyes is missing. Soon, you find yourself noticing every eyelash that falls when removing mascara at night.

    The Gentle Strength of Everyday Oils

    Before spending on pricey serums or deciphering complex ingredient lists, it helps to take stock of what’s already in your home. In many UK households, simple oils quietly sit on shelves—olive oil near the stove, coconut oil on the counter, or a small bottle of castor oil tucked away. These oils may lack flashy packaging, but they provide something more dependable: nourishment, patience, and consistency. For fine hairs like brows and lashes, this gentle care can create meaningful improvements over time.

    Why Brows and Lashes Hold Emotional Value

    Eyebrows and eyelashes carry more than aesthetic weight. Many women recall years of overplucking, bold makeup trends, or hormonal shifts that altered hair growth. When brows thin or lashes weaken, it can subtly affect self-perception, making the face appear tired or unfamiliar. Choosing a natural approach feels gentler and aligns with a more mindful, slower lifestyle. Oils don’t promise instant results, but regular use supports what your body naturally aims to do.

    Household Oils That Nourish Hair

    • Castor oil: Known for its thick texture and ability to cling to tiny hairs, helping reduce breakage.
    • Coconut oil: Ideal for combating dryness caused by frequent mascara use.
    • Olive oil: Gently conditions brows without weighing them down.
    • Almond or argan oil: Lighter options for sensitive skin that absorb easily.

    These oils don’t force growth. Instead, they strengthen and protect, creating healthier conditions for brows and lashes to thrive.

    Oil Name Texture & Absorption Benefits for Brows & Lashes
    Castor Oil Dense, slightly tacky feel High in ricinoleic acid, helps lock in moisture, strengthen hair fibres, and minimise lash and brow breakage.
    Coconut Oil (Regular or Fractionated) Light to medium, melts quickly on contact Penetrates the hair shaft to reduce protein loss, leaving brows and lashes softer and shinier.
    Olive Oil Medium weight, mildly heavy Rich in antioxidants, supports the skin barrier around hair roots and improves hair flexibility.
    Sweet Almond Oil Smooth, silky, absorbs well Very gentle and calming, making it suitable for sensitive eye areas while nourishing fine hairs.
    Argan Oil Lightweight, non-greasy Loaded with vitamin E and essential fatty acids, helps improve smoothness, strength, and overall resilience.

    Establishing a Soothing Night-Time Routine

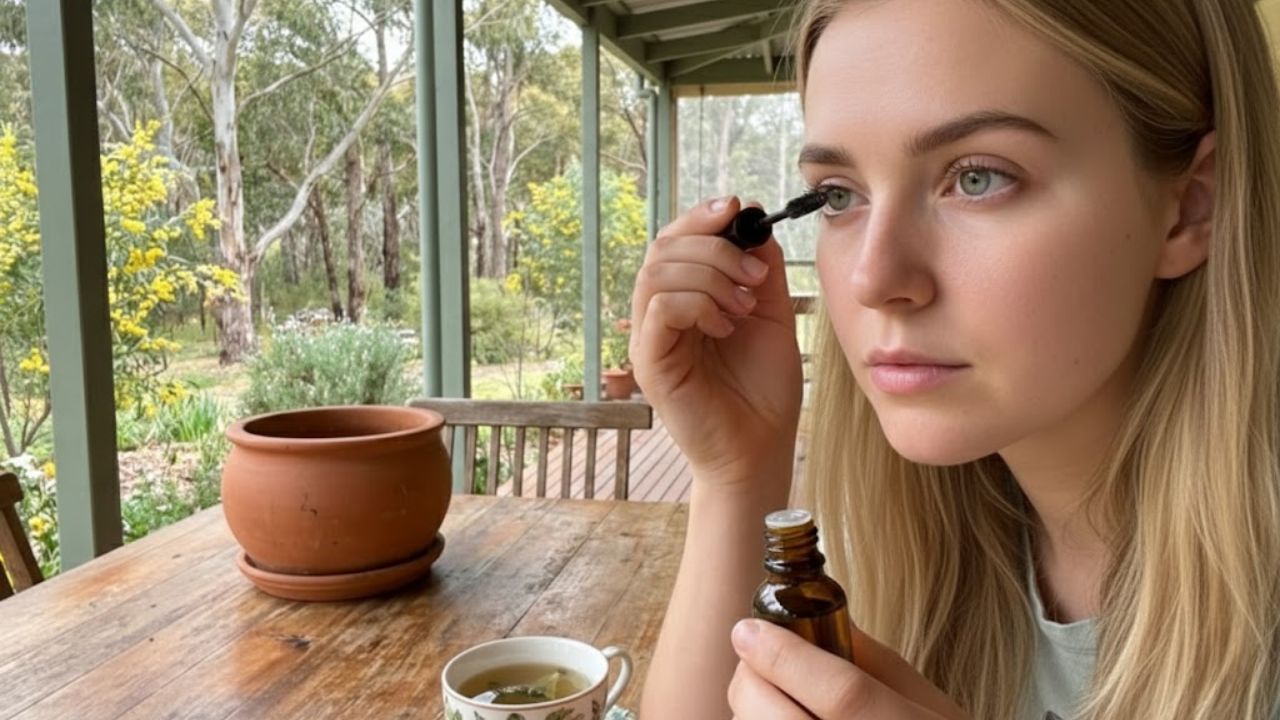
    Consistency is key, and the simplest routines are those that fit naturally into your evening. Begin with clean, makeup-free eyes and washed hands. Choose a single oil or a simple blend, apply a small amount to brows using a clean spoolie, and lightly coat upper lashes with care. Blot away any excess oil to avoid irritation. Doing this nightly for several weeks transforms the process into a calming ritual rather than a chore.

    Paying Attention to Sensitive Skin Around the Eyes

    The skin around the eyes is delicate, so listen to your skin. Always patch test new oils and start with minimal amounts. If irritation occurs, switch to a lighter oil. Avoid getting oil in the eyes, and rinse gently if it happens. Those with existing eye conditions or ongoing treatments should consult a pharmacist or GP. Progress is slow, so focus on reduced shedding and subtle fullness, not instant results.

    Everyday Habits That Support Stronger Growth

    Oils work best when paired with supportive daily habits. Limiting waterproof mascara, being gentle during makeup removal, and maintaining a diet rich in protein, healthy fats, and minerals all contribute. Managing stress and monitoring hormonal health also influence hair growth. Think of oils as external support, while nutrition, rest, and lifestyle form the foundation for healthy brows and lashes.

    Creating a Simple Custom Oil Blend

    Once you’re comfortable, try making your own small blend at home. Combine castor oil for thickness, almond oil for softness, and argan oil for light nourishment. Store it in a clean bottle, label it with the date, and use within a few months. A personalised blend keeps your routine simple, transparent, and trustworthy.

    Tracking Change Without Pressure

    Gently tracking progress helps avoid obsession. Take a makeup-free photo every few weeks in consistent lighting to notice subtle improvements. Gradually, you may see fuller lines, fewer gaps, and stronger lashes. Missing a night or two doesn’t undo progress—simply return to the routine. The goal isn’t perfection but consistent, quiet care for the hair you already have.

  • At Home Eyebrow Tinting Made Simple With a Step by Step Method for Soft Defined Brows

    At Home Eyebrow Tinting Made Simple With a Step by Step Method for Soft Defined Brows

    At-home eyebrow tinting has become a go-to beauty routine for those seeking well-groomed brows without frequent salon visits, especially in India where DIY grooming is gaining popularity. With the right technique, you can enhance your natural brows safely and affordably at home. This approach focuses on achieving soft, defined results instead of harsh or overly dark brows. By following a straightforward step-by-step method and using beginner-friendly products, even first-timers can gain confidence while creating neat, polished eyebrows.

    Eyebrow Tinting Basics for Beginners

    Getting familiar with the fundamentals is essential for successful at-home tinting. Start by selecting a shade close to your natural brow color to maintain a natural appearance and avoid drastic mistakes. Always conduct a patch test to minimize irritation and ensure skin safety. Clean, oil-free brows allow the tint to adhere evenly, giving a smoother, more consistent color. Using minimal product and strictly following timing instructions prevents over-darkening, which is crucial for soft, everyday brows. Mastering these steps helps beginners feel more confident before starting the actual application.

    Step-by-Step At-Home Eyebrow Tinting

    Having a clear process makes tinting less intimidating. Begin by applying petroleum jelly around your brows to protect the surrounding skin and create clean edges. Mix the tint according to the instructions and apply with a small angled brush for precise control. Start from the tail and work toward the front, using lighter coverage near the inner brow for balanced depth. Set a timer and monitor color development carefully to avoid staining. Once the time is up, gently wipe off the tint with a damp cotton pad to reveal evenly tinted, natural-looking brows.

    Maintaining Soft, Defined Brows After Tinting

    Proper aftercare helps your tint last longer and fade evenly. Avoid washing your face for at least 12 hours to allow the pigment to settle, supporting long-lasting color. Use gentle, sulfate-free cleansers around the brow area to maintain the tint. Applying a light brow oil or serum nourishes the hair and promotes healthy growth. Space out touch-ups to prevent dryness or damage, ensuring your brows stay polished with low-maintenance grooming suitable for busy routines.

    Key Takeaways for At-Home Eyebrow Tinting

    At-home eyebrow tinting is an effective solution for achieving defined brows without relying on salon visits. Done correctly, it offers cost-effective beauty benefits while giving full control over shade and intensity. Preparation, patience, and careful adherence to instructions are crucial to avoid common mistakes. By aiming for subtle enhancement rather than dramatic change, you can enjoy polished, daily brows that complement your face. With consistent care and mindful touch-ups, this simple routine can become a reliable part of your grooming regimen.

    Aspect Recommended Practice Benefit
    Shade selection Match natural brow color Soft, realistic finish
    Patch testing 24 hours before use Reduced irritation risk
    Application time 5–10 minutes Controlled color depth
    Aftercare Avoid water for 12 hours Longer-lasting results
    Maintenance Retint every 3–4 weeks Consistent brow look
  • The Ordinary New Serum Called Filler in a Bottle Delivered Noticeably Younger Skin in My 40s

    The Ordinary New Serum Called Filler in a Bottle Delivered Noticeably Younger Skin in My 40s

    In India, discussions around skincare in your 40s often center on skin firmness, fine lines, and effective products that truly deliver results. This is why The Ordinary’s new serum, popularly called a “filler in a bottle,” has generated so much attention among women seeking subtle yet noticeable improvements. Instead of promising instant miracles, the serum emphasizes hydration-driven plumping and smoother texture, leaving skin refreshed and youthful without invasive treatments. For Indian users juggling work, family, and personal care, such simple and effective skincare feels practical and empowering.

    The Ordinary Serum: A Non-Invasive Filler Alternative

    What makes this Ordinary serum unique is its ability to replicate the effects of professional fillers through hydration rather than needles. Its formula targets deep moisture retention, naturally plumping the skin. With regular use, it visibly enhances areas prone to lines, like the cheeks and smile zones. Women in their 40s often notice smoother skin texture and a soft, youthful bounce that also helps makeup apply more evenly. Lightweight yet effective, it provides a hydration boost suitable for India’s diverse climates. Over time, many users report a fuller appearance without irritation.

    Why This Serum is Perfect for Skin in Your 40s

    As skin ages, it tends to lose moisture faster, which can make fine lines and dullness more prominent. This serum directly addresses that concern by strengthening the skin’s hydration reserves. Consistent application helps bind moisture deeply, keeping the skin resilient throughout the day. Many appreciate its non-greasy finish, especially in humid weather. The serum also softens fine lines by maintaining skin suppleness rather than tightness. Over weeks, it often creates a refreshed, youthful appearance, making the face look well-rested even during busy schedules.

    How to Apply the Serum for Maximum Results

    Correct application is key to achieving the best results with this serum. It works most effectively on slightly damp skin for better absorption. Just a few drops provide intense hydration without heaviness. Follow with a moisturizer to lock in moisture and enhance plumping. Many users apply it both morning and night for consistent effects. Over time, this routine supports daily skin resilience and maintains a naturally smooth, youthful look without appearing overdone.

    Summary: Real-World Benefits for Women in Their 40s

    For Indian women in their 40s, this Ordinary serum offers a practical and realistic approach to youthful skin. While it doesn’t replace cosmetic procedures, it delivers visible improvements achievable at home. Regular use often results in healthier bounce, a smoother surface, and a subtle glow. Its appeal lies in simplicity and affordability compared to in-clinic treatments. Combined with good skincare habits, it supports naturally fuller skin and enhances confidence without dramatic changes. For many, it is a smart addition to a mature skincare routine.

    Product Overview

    • Main Benefit: Hydration-based plumping effect
    • Ideal Age Group: 40s and above
    • Texture: Lightweight, fast-absorbing
    • Usage Frequency: Once or twice daily
    • Skin Types: Normal, dry, combination
  • Knife Sharpening at Home: The Professional Technique That Restores Razor Sharp Edges Safely

    Knife Sharpening at Home: The Professional Technique That Restores Razor Sharp Edges Safely

    The first time I opened a store-bought cleaner after a long hike, the smell hit me like a wall. Artificial lemon, sharp chemicals—my eyes watered, my throat tightened, and the quiet, mossy trail I’d left an hour earlier felt like a distant memory. Out there, water flowed through soil, filtered by roots and time. Inside, under harsh lights and plastic bottles, everything felt manufactured. I wondered why a home has to smell like a laboratory to feel clean.

    The Moment You Notice Your Home’s Hidden Impact

    Once you see it, you cannot unsee it. The bright blue liquid swirling down the sink drain doesn’t disappear—it travels through pipes, treatment plants, and rivers that already work hard. Spray from glass cleaner drifts through sunbeams like a quiet chemical fog you breathe in. Recycling bins overflow with plastic bottles that once held dizzying potions. We often think of the environment as far away, in forests or oceans, but your home is part of an active ecosystem. Air moves, dust travels on socks, water flows in and out carrying traces of what you pour into it. The cleaners under your sink shape the world you inhabit daily.

    There is something quietly radical about opening your cupboard to find simple, familiar ingredients: baking soda, vinegar, plain soap, a lemon, and maybe a drop of essential oil. These are things your great-grandparents would recognize—ingredients that clean without masking life. They can make your home smell like a place of cooking, reading, and resting, not a showroom.

    The Hidden Power of Everyday Ingredients

    Your kitchen already holds the tools you need for effective cleaning. The secret is recognizing that common items can be powerful cleaning agents. Baking soda feels soft and fine, white vinegar has a sharp scent that cuts through dirt, a lemon has bright, slightly sticky skin, and olive oil is smooth and heavy. These items can replace many commercial products without fuss.

    Simple Recipes to Turn Your Kitchen into a Low-Waste Cleaning Lab

    Bring your eco-cleaning apothecary to life with practical recipes. These methods adapt to what you already have at home. No fancy equipment, no strict measurements—just basic sense and willingness to try something new. Formulas are forgiving, and missing ingredients can often be swapped. The goal is real-life solutions you’ll actually use.

    All-Purpose Surface Spray

    • Mix equal parts white vinegar and water in a clean spray bottle. Add a few drops of essential oil if desired. Shake gently.
    • Spray on hard surfaces like counters, door handles, and light switches. Wipe with a cloth. Avoid marble or granite—vinegar can damage natural stone.
    • The vinegar smell fades quickly, eventually signaling “clean” rather than harsh chemicals, making the process calmer and more familiar.

    Gentle Scrub for Sinks, Tubs, and Stovetops

    • Combine half a cup of baking soda with enough water to form a thick paste. Optionally, add a tablespoon of castile or plain liquid soap. Mix smooth.
    • Apply with a damp cloth or sponge, scrub gently, rinse thoroughly. On stainless steel or enamel, it leaves an honest, soft shine—not glossy, but clearly clean.

    Glass and Mirror Cleaner

    • Mix equal parts white vinegar and water. For mirrors, add 1 teaspoon of rubbing alcohol per cup. Shake gently.
    • Spray lightly on glass or mirrors, wipe with a lint-free cloth or old cotton T-shirt. Surfaces reflect light clearly without artificial fragrance.

    Wood Surface Polish

    • Mix two parts olive oil with one part lemon juice or white vinegar. Shake before use.
    • Dampen a soft cloth, rub along the wood grain, and buff gently. The result is nourished, respected wood, not brand-new gloss.

    Deodorizing Carpets and Mattresses

    • Mix one cup baking soda with 10–15 drops of essential oil. Stir until evenly distributed.
    • Sprinkle lightly, sit 15–30 minutes, then vacuum. The result is neutral, fresh surfaces without overpowering perfume.

    Eco-Cleaning Starter Kit: Quick Reference

    • Baking soda: Scrubs and deodorizes sinks, tubs, ovens, fridges.
    • White vinegar: Degreases and removes limescale. Avoid natural stone.
    • Castile or plain soap: Base for general cleaning, dishes, and floors.
    • Lemon/citrus: Deodorizes and lightly bleaches. Use carefully on fabrics.
    • Salt: Extra scrubbing power for pans, cutting boards, drains.
    • Essential oils: Light scent and mild antimicrobial effect when used safely.

    Cleaning That Feels Like Care

    Switching from harsh cleaners to pantry ingredients changes cleaning from aggressive to intentional, like cooking or gardening. Mixing, testing, and adjusting transforms the task into noticing small signs of life—fingerprints, smudges, daily wear. Cleaning becomes preparation, not erasure.

    Scrubbing with baking soda gives tactile feedback, effort, and result. Surfaces feel genuinely clean, without worrying about hidden chemical residues.

    Safety, Awareness, and Limits

    Even natural cleaning requires care. Never mix vinegar with bleach—this creates toxic chlorine gas. Use vinegar cautiously on sensitive surfaces, label homemade solutions, spot-test, and ensure ventilation. Commercial products may still be needed for serious mold or post-illness disinfecting. Thoughtful cleaning prioritizes gentler defaults whenever possible.

    From Your Sink to the Environment

    Cleaning residues continue beyond your home. Water carries them through pipes and treatment plants into rivers and oceans. Simple ingredients like soap, vinegar, and baking soda break down naturally, minimizing environmental impact. Benefits include cleaner air, gentler effects on skin, and less plastic waste.

    Under the sink, fewer bottles and more refillable containers create calm and order. Cleaning becomes a quiet partnership with your home and the wider world, focused on care rather than control.

  • Remove Scratches From Glass Cooktops at Home Using Simple Methods Without Full Replacement

    Remove Scratches From Glass Cooktops at Home Using Simple Methods Without Full Replacement

    The moment you see it, your heart sinks. That once-pristine black glass cooktop now shows a pale, jagged scratch across its surface. It could have appeared from moving a heavy pot too quickly or a tiny grain of salt trapped under cookware. The scratch might be small, but it catches your eye every time you enter the kitchen. Running your fingers over it reveals a rough edge, prompting worry about whether the damage is permanent or if replacement is necessary.

    Why Glass Cooktops Can Scratch Despite Careful Handling

    Glass cooktops appear sleek, durable, and almost indestructible, yet they are more delicate than they seem. Minor abrasions can occur even with careful use. Sliding a heavy pot, a grain of salt under a pan, or using cast-iron cookware with a rough base can all leave marks. Often, scratches aren’t noticed immediately and only appear later during cleaning, bringing frustration. Fortunately, many scratches are not permanent and can be minimized with the right care.

    Assessing the Scratch: How Serious Is It?

    Before attempting any repair, identify the type of scratch. Examine the cooktop under bright light from multiple angles. If the scratch is only visible at certain angles and your fingernail doesn’t catch on it, it is likely a light surface mark—usually easy to improve. If your nail catches slightly, the scratch may still be manageable. Deep grooves that clearly catch your nail are more serious and cannot be fully removed at home. Classifying scratches as light haze, visible lines, or deep grooves helps determine the best approach and sets realistic expectations.

    Preparing the Tools: Gentle Solutions Work Best

    Start by thoroughly cleaning the cooktop to remove grease or debris. Use a soft cloth with a cooktop-safe cleaner and dry the surface completely. For polishing, choose mild solutions only. Options like baking soda paste, non-gel toothpaste, ceramic cooktop cream, or glass polishing compounds are suitable for light to medium scratches. These products work by gently smoothing the surface rather than grinding it down. Always use a soft microfiber cloth and avoid abrasive sponges, steel wool, or gritty materials that could create new scratches.

    At-Home Techniques to Reduce Scratches

    Test your chosen method on a small, hidden area first. If the finish remains intact, move on to the scratch. For light scratches, gently rub baking soda paste or toothpaste in small circular motions. Wipe clean, check progress, and repeat if needed. For more noticeable scratches, ceramic cooktop cream or a glass polishing compound often yields better results. Apply with light pressure, allowing the product to work gradually. Deep scratches won’t disappear, but careful polishing can soften their appearance and make them far less noticeable.

    Finishing the Cooktop After Polishing

    Once the scratch appears improved, clean the area again to remove any residue. Many users like to finish with a cooktop cleaner that adds a protective shine. Buff gently with a dry microfiber cloth until the surface reflects evenly. While the scratch may still be faintly visible, it usually blends into the background rather than standing out.

    Method Used Most Effective For Main Advantages Possible Drawbacks
    Baking Soda Paste Minor surface marks and dull patches Low cost, easily available at home, gentle on glass Not effective for deep or clearly visible scratches
    Non-Gel Toothpaste Light but noticeable scratches Simple application, mild abrasive helps polish glass Needs repeated attempts for visible results
    Cooktop Polishing Cream Light to moderate scratch damage Specifically made for glass cooktops, restores shine safely More expensive than basic household options
    Glass Polishing Compound Multiple or stubborn scratch marks Stronger polishing power, better visible improvement Requires careful use to prevent surface damage

    Tips to Prevent Future Scratches

    Prevention is mostly about small daily habits. Lift cookware instead of sliding it, and wipe pot and pan bottoms before placing them on the cooktop. Clean spills, especially sugar or salt, before cooking again. Avoid storing heavy or rough cookware on the cooktop. If using protective mats or covers, ensure they are specifically designed for glass cooktops and safe for heat.

    When to Consider Professional Help or Replacement

    If a scratch looks like a crack, spreads, or feels deeply gouged, stop and seek professional advice. Structural damage can affect heat handling and become a safety concern. Most everyday scratches, however, are cosmetic and do not require replacing the cooktop. With careful, gentle methods, you can restore much of the smooth appearance and continue using it confidently.

    Final Thoughts on Maintaining Your Glass Cooktop

    A glass cooktop is both practical and visually striking, reflecting the daily activity of your kitchen. Scratches do not always indicate neglect—they are often part of normal use. Learning how to reduce their appearance helps maintain a clean, cared-for surface. More importantly, it builds confidence in keeping your appliance in good condition, allowing you to focus on cooking without worrying over every small mark.

  • Lip Liner Placement Trick That Instantly Makes Lips Look Fuller Without Heavy Overlining

    Lip Liner Placement Trick That Instantly Makes Lips Look Fuller Without Heavy Overlining

    The girl in the café bathroom is unaware of the quiet audience behind her, watching as she carefully works on her lips. With just two quick strokes of a pencil and a touch of gloss, she finishes without any dramatic overlining or layered contouring. When she looks into the mirror, her lips appear soft, healthy, and naturally full—as if she’s just returned from a restful holiday.

    There’s nothing exaggerated. No sharp outlines, no bold Instagram-style edges. Her lips simply have more dimension than the rest. Later, when you try to replicate the look with the same pencil, gloss, and expression, your lips still appear flat. The difference lies in a tiny placement detail—subtle, yet powerful enough to transform the entire effect.

    It’s About Where Attention Falls, Not Bigger Lips

    Why Classic Lip-Liner Techniques Can Miss the Mark

    The traditional advice is familiar: trace just outside your natural lip line, soften, fill in, and move on. While this approach often worked in the past, heavy overlining can look unnatural in daylight. Instead of enhancing, it can make lips feel slightly disconnected from the rest of the face, especially in close-up views.

    The Modern Shift in Lip Artistry

    Contemporary lip artists are taking a more refined approach. The goal isn’t to create dramatically larger lips, but to guide the viewer’s eye. Fullness becomes a natural byproduct, not the main focus. This subtle strategy translates beautifully in selfies, video calls, and everyday interactions. The effect is understated but striking.

    Micro-Adjustments Matter More Than Bold Lines

    The magic happens in tiny, precise placements rather than thick outlines. Understanding exactly where to place the pencil changes how lip lining works. It’s about highlighting your natural structure, keeping lips soft, believable, and never obviously drawn on.

    Where Professionals Actually Apply Lip Liner

    A quick scroll on TikTok or Instagram shows a clear pattern. Artists focus on three key areas:

    • The peaks of the Cupid’s bow
    • The center of the lower lip
    • The subtle “pillows” just off-center

    The corners are barely defined, creating a suggested outline rather than a rigid frame.

    Why This Technique Feels Naturally Effortless

    One London-based makeup artist revealed she uses the same pencil on every client, adjusting only placement based on how light naturally hits the lips. People often ask which filler clinic she recommends. Her answer? A £7 pencil and her simple technique. The result is a balanced, refreshed appearance—fullness is a bonus, harmony is the key.

    The Science Behind the Visual Effect

    The technique works because the eye is drawn to contrast and curves. The dip of the Cupid’s bow, the curve of the lower lip, and light-catching gloss points naturally attract attention. By enhancing these areas and softening the corners, the brain perceives fuller lips without obvious outlines.

    Exact Liner Placement for Natural Fullness

    Start with dry, relaxed lips. Use a sharpened nude liner matching your lip tone:

    • Draw a small bridge across the Cupid’s bow, connecting peaks slightly above the natural dip. Think soft plateau, not sharp M.
    • On the lower lip, place the pencil about one millimeter outside the natural line at the fullest point. Sketch a short arc no wider than your iris.
    • Leave the outer thirds mostly untouched, then connect central points to corners with feather-light strokes that fade.
    • Smudge gently, then tap gloss or balm at the center.

    The result: soft corners and a pillowy center. Avoid overlining the sides or height—subtlety keeps the effect believable. Work in stages, lining the center first, then connecting corners as needed. Practicing slowly helps it become second nature.

    Why the Soft-Blur Technique Works on Real Faces

    This method enhances natural features instead of creating armor-like lines. It leaves a refreshed look rather than a heavily made-up appearance. Imperfections or minor shaking don’t ruin the effect, as the focus is on overall impression.

    The technique adapts beautifully from bright daylight to soft evening lighting, keeping lips defined in the center and gentle at the edges. It moves naturally with facial expressions, designed for real, living faces rather than static images.

  • 10-Second Challenge: Spot 3 Differences Between Two House Images

    10-Second Challenge: Spot 3 Differences Between Two House Images

    Optical illusions and spot-the-difference puzzles are popular brain teasers that people enjoy regardless of their age. These puzzles challenge your ability to observe carefully while testing your mental focus and attention to detail. This article presents a 10-second challenge that will test your visual skills. Your task is to find 3 differences between two pictures of a beautiful house within just 10 seconds. Time is limited and you need to work quickly.

    Understanding the Puzzle: Can You Spot the Differences?

    At first glance, both images appear almost identical, each featuring a delightful yellow house with a red roof and a lovely garden setting. Yet hidden within these seemingly matching scenes are subtle variations waiting to be uncovered. Your challenge is simple but demanding: find 3 differences between the two images in just 10 seconds.

    Although it may sound easy, the close resemblance of the pictures combined with the ticking clock can make this task surprisingly tricky. Spot-the-difference puzzles are designed to test your observation skills, sharpen your focus, and enhance how quickly your brain processes visual details. Are you ready to take on the challenge?

    Why Spot-the-Difference Puzzles Are Good for Your Brain

    Engaging with spot-the-difference challenges offers more than just entertainment. These puzzles actively support mental development in several key ways:

    – Sharper Attention to Detail: Searching for tiny visual changes trains your eyes and mind to notice details you might normally overlook.

    – Faster Visual Recognition: Working against the clock helps improve how quickly your brain interprets visual information.

    – Stronger Focus and Concentration: These puzzles require sustained attention, helping you learn to block out distractions.

    – Better Problem-Solving Skills: Identifying differences encourages pattern recognition and logical thinking.

    A Smart Way to Tackle the Puzzle

    With only 10 seconds on the clock, staying calm and organized is essential. Following a simple strategy can make all the difference:

    – Scan the Scene Quickly: Begin with a fast overview of both images to understand their layout.

    – Divide the Image into Sections: Focus separately on areas like the sky, the house exterior, and the garden.

    – Watch for Minor Changes: Differences are often very small, such as missing objects or altered positions.

    – Move Fast but Stay Systematic: Avoid fixating on one area for too long; keep your eyes moving.

    – Practice Regularly: Repeated practice builds speed and accuracy over time.

    The Three Hidden Differences Explained

    Now that you know how to approach the challenge, let’s break down the three differences between the left and right images. While both show the same charming house, these subtle changes set them apart:

    1. A Cloud Missing from the Sky

    In the left image, a small cloud appears near the roofline. This cloud is completely absent in the right image, making it the first difference.

    2. Fewer Lamps Between the Doors

    The left image displays two wall lamps positioned between the doors. In the right image, one of these lamps has been removed.

    3. An Extra Bush in the Garden

    Look closely at the bottom-right section of the garden. The right image includes an additional small bush that does not appear in the left image.

    Why These Puzzles Feel So Tricky

    Spot-the-difference puzzles challenge the brain because it naturally focuses on similarities rather than discrepancies. When images closely resemble each other, small changes are easier to miss. Adding time pressure increases the difficulty, forcing quicker decision-making and sharper focus.

    These puzzles take advantage of visual perception habits, encouraging you to retrain your brain to notice subtle details more efficiently.

    Final Thoughts: Keep Training Your Observation Skills

    Finding three differences in just 10 seconds is a fun yet demanding mental exercise that strengthens focus, visual awareness, and critical thinking. Whether you spotted all the differences or missed a few, each attempt helps sharpen your skills.

    With regular practice, these puzzles become easier and more enjoyable. Over time, you’ll notice improvements not only in puzzle-solving but also in everyday attention to detail.

  • Newcomer Yoga Essentials Gentle Poses for Comfortable Movement and Understanding Flexibility’s Everyday Benefits

    Newcomer Yoga Essentials Gentle Poses for Comfortable Movement and Understanding Flexibility’s Everyday Benefits

    Simple Yoga Poses to Boost Your Flexibility Yoga provides excellent benefits for both flexibility & strength while improving your overall wellbeing. If you are new to yoga or looking to enhance your flexibility then starting with fundamental poses will establish a strong foundation. These positions gently stretch your muscles and decrease stress while enabling your body to move more freely through its complete range of motion. This guide presents straightforward yoga poses that are ideal for beginners seeking to develop better flexibility.

    Understanding Flexibility: How Gentle Yoga Supports Daily Comfort and Mobility

    Flexibility is essential for effective yoga practice. Better flexibility helps you execute poses correctly and reduces the chance of getting hurt. As your flexibility improves you can advance more consistently in your yoga routine. When your muscles are flexible your body relaxes easier and releases built-up stress. Practicing yoga regularly keeps your joints healthy & improves blood flow throughout your body. Yoga also helps create a peaceful mindset & reduces mental stress.

    Beginner-Friendly Yoga Poses That Gradually Enhance Flexibility

    Downward-Facing Dog (Adho Mukha Svanasana)

    This classic yoga pose offers a deep stretch for the hamstrings, calves, and back. Begin on your hands and knees. Press your palms firmly into the mat and lift your hips upward toward the ceiling. Straighten your legs as much as is comfortable without strain. Keep your hands shoulder-width apart and your feet set hip-width apart. Stay in this pose for a few steady breaths, noticing the stretch flowing through your entire body.

    Child’s Pose (Balasana)

    Child’s Pose is a calming resting posture that gently stretches the hips, thighs, and back. Start by kneeling on the mat and slowly lowering your hips back toward your heels. Bring your forehead down to rest on the floor. You may stretch your arms forward or relax them alongside your body for added ease. Remain in this pose as long as needed to release tension and promote relaxation.

    Forward Fold (Uttanasana)

    Stand upright with your feet positioned hip-width apart, then slowly bend forward from the hips. Reach your hands toward your toes or the floor while allowing your head to hang naturally. Keep your neck relaxed and shoulders loose. This pose stretches the hamstrings, calves, and back while encouraging mental calm. If the stretch feels intense, gently bend your knees.

    Cat–Cow Stretch (Marjaryasana–Bitilasana)

    This gentle flowing sequence helps stretch and strengthen the spine through controlled movement. Begin on your hands and knees, aligning your wrists under your shoulders and knees under your hips. Inhale as you drop your belly, lift your chest, and raise your tailbone into Cow Pose. Exhale as you round your spine upward, tucking your chin toward your chest for Cat Pose. Continue moving slowly between these two poses to improve spinal flexibility.

    Seated Forward Fold (Paschimottanasana)

    This seated pose enhances flexibility in the hamstrings and lower back. Sit on the floor with your legs extended straight in front of you and toes pointing upward. Slowly hinge forward from the hips, reaching toward your feet or ankles. Keep your spine long and avoid collapsing the chest. Breathe steadily as you hold the pose and deepen the stretch.

    Butterfly Pose (Baddha Konasana)

    Sit comfortably on the floor and bring the soles of your feet together. Let your knees gently drop out to the sides. Hold your feet with your hands while keeping your spine upright. Softly press your knees downward toward the floor to stretch the inner thighs and groin. This pose helps open the hips and improves overall leg flexibility.

    Practicing Safely: Simple Guidance for a Comfortable and Confident Yoga Journey

    Start slowly if you are new to yoga or stretching exercises. Listen to your body and ease into each pose carefully. Keep your breathing steady & deep while you practice. Breathe in when you lengthen your body & breathe out when you sink deeper into stretches. Use props like yoga blocks or straps if you struggle to reach your feet or the ground in certain poses. These tools help you keep the right form. Practice yoga consistently because regular sessions improve your flexibility over time. Try to do yoga several times per week to see the best results.

  • Find the Number 3436 Hidden Among 3426 in Just 6 Seconds

    Find the Number 3436 Hidden Among 3426 in Just 6 Seconds

    Optical illusions have long fascinated people by testing perception and concentration. Although they appear to be simple visual games, they reveal much deeper insights into how the human brain processes information and how easily it can be misled. One such illusion challenges viewers to spot the number 3436 hidden among repeated 3426 numbers within just 6 seconds.

    First Glance: Why the Puzzle Seems Easy

    At first look, the puzzle feels straightforward. Every number appears identical, neatly arranged in a grid. However, there is a subtle twist: one number is different. Hidden within the grid of 3426 lies the number 3436. The challenge is to find it quickly, but the illusion cleverly plays tricks on your visual perception.

    The Challenge: Spot the Hidden 3436

    The goal is simple identify the number 3436 among dozens of 3426 numbers in under 6 seconds. The uniform font, size, and spacing create a consistent pattern that convinces the brain that everything is the same. This false sense of uniformity makes the odd number difficult to detect.

    Why This Optical Illusion Is So Tricky

    This illusion works because the brain relies heavily on pattern recognition. When it sees repetition, it assumes consistency instead of checking each detail carefully.

    Key factors that increase difficulty include:

    – Single-Digit Difference: Only one digit changes, making the variation easy to miss.

    – Uniform Design: Identical font, size, and spacing reduce visual contrast.

    – Visual Rhythm: Even spacing creates a flow that discourages detailed scanning.

    How the Brain Processes This Illusion

    The brain is designed to save energy by automating recognition. When it encounters repetitive visuals, it assumes sameness. This illusion forces the brain to slow down and engage in active verification, rather than passive observation.

    This puzzle tests:

    – Selective Attention – focusing on fine details

    – Detail Recognition – identifying subtle changes

    – Visual Endurance – maintaining focus under time pressure

    Tips to Spot the Hidden Number Faster

    If the number was hard to find, that’s normal. These tips can help:

    – Scan Vertically instead of row by row

    – Focus on Middle Digits where the change occurs

    – Divide the Grid into smaller sections

    – Stay Calm and avoid rushing

    The Solution: Where Is 3436?

    The hidden number 3436 is located near the bottom-left area of the grid, slightly off-center. Once your focus locks onto the middle digits, the difference becomes clear and easy to recognize.

    Common Mistakes People Make

    – Rushing through the grid too quickly

    – Assuming Perfection in repeated patterns

    – Ignoring Key Digits and focusing only on the overall shape

    What This Illusion Reveals About Your Brain

    Solving this puzzle quickly reflects strong attention to detail and focus under pressure. Taking longer doesn’t mean poor eyesight—it shows how naturally the brain depends on pattern shortcuts instead of verification.

    Final Thoughts

    This optical illusion is more than a game—it’s a powerful exercise for the mind. Whether you spotted the number instantly or needed extra time, the challenge helps sharpen visual accuracy and cognitive focus. Keep practicing similar puzzles to continuously strengthen your observation skills.

  • Build lower back strength with just 2 beginner-friendly exercises

    Build lower back strength with just 2 beginner-friendly exercises

    Lower back exercises might not look as exciting as ab workouts but they matter just as much. A weak lower back is one of the main reasons adults deal with ongoing back pain. If you are just starting out or getting back into fitness after a long break you might not know where to begin. Coach Milad and Ryan from the Instagram account tailoredfitPT share three easy exercises to strengthen your lower back. If you are pregnant or recently had a baby or recovering from an injury you should talk to a qualified professional first for advice that fits your situation.

    These exercises help prevent lower back pain by targeting deep abdominal muscles along with your glutes and back muscles. These muscle groups work together to protect your spine. You will need a dumbbell or weight plate for these exercises. If you do not have gym equipment you can use a heavy book or a milk carton filled with water.

    Single leg extensions work by having you lie on your back with knees bent at 90 degrees in tabletop position. Hold a dumbbell with both hands above your head while lifting your head and shoulders off the mat. Tighten your core and extend one leg straight out away from your body. Hold this position briefly before returning to tabletop position and switching to the other leg.

    Pallof press can be done using a cable machine at the gym or a resistance band at home. Begin in a lunge position and press your front knee slightly outward to activate the glute medius. Hold the cable or resistance band with both hands and press it straight out away from your body for 10 to 20 repetitions. If this feels too challenging you can do leg raises in a side plank position instead to work your obliques.

    Lower back strength is essential for keeping your torso stable during everyday activities. The muscles in your lower back work together with your deep abdominal muscles to create a strong and stable core.

    The erector spinae muscles and deep multifidus muscles are particularly important in this process. When your lower back muscles are weak you become more vulnerable to injuries and falls.

    Simple movements like bending or twisting or lifting can easily cause harm if these muscles lack strength. People who sit for extended periods need to focus on lower back exercises to avoid pain. The exercises described in this program help reverse the negative effects of prolonged sitting and support a healthy spine.

    These workouts develop functional fitness that benefits your daily life. Your lower back serves as the connection point for transferring force between your upper body and lower body. A strong lower back helps you stand with better posture & keep your balance and maintain proper spine alignment when lifting objects of any weight. For older adults maintaining lower back strength becomes especially important for preserving independence & mobility as they age.