Author: admin

  • Goodbye to Grey Hair: Shampoo Add-In Trick Revives and Darkens Hair Naturally

    Goodbye to Grey Hair: Shampoo Add-In Trick Revives and Darkens Hair Naturally

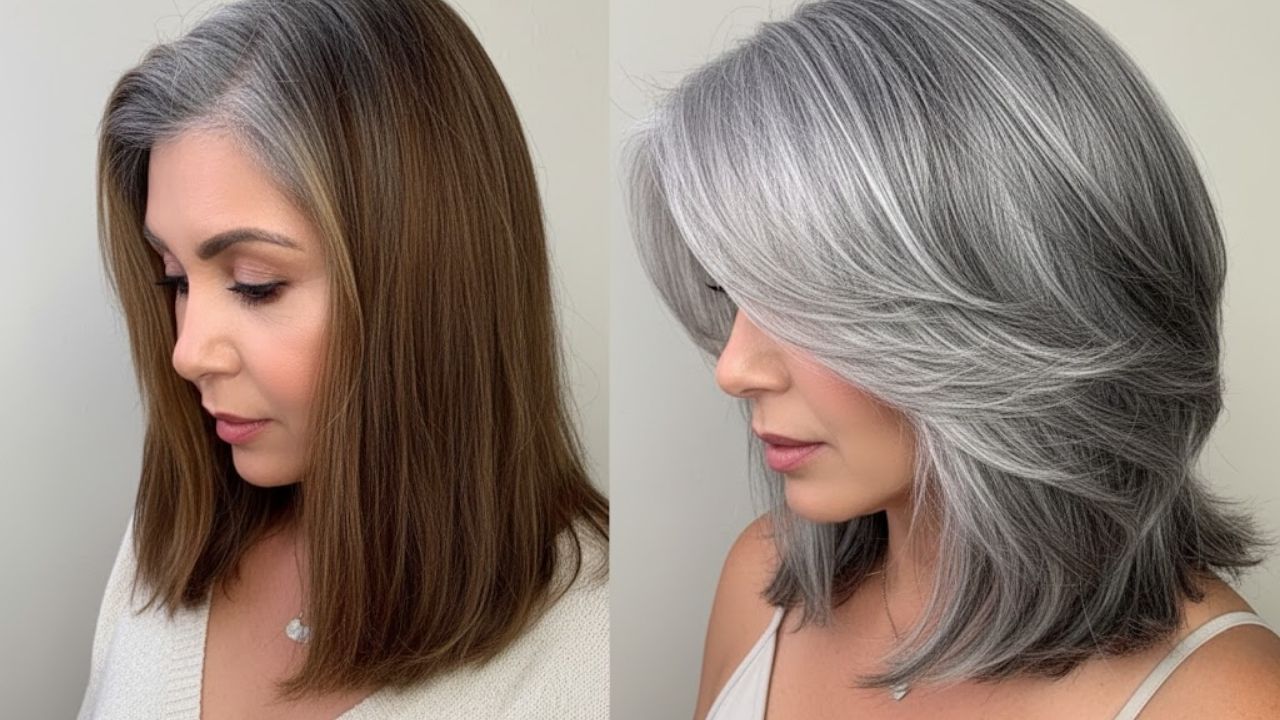
    She studies her roots under the bathroom mirror lights, leans in, then steps back as if denying what she just noticed. Fine **silver strands** glint under the neon glow. With a quiet sigh, she reaches for a box labeled dark chestnut, scans the instructions, and slides it back onto the shelf. Too time-consuming. Too chemical. Far too much effort for an ordinary Tuesday night.

    Nearby, another shopper scrolls through her phone and murmurs, “There has to be something simpler than this.” A short video appears: “Add this to your shampoo and greys look darker in weeks.” She pauses. Familiar ingredients. No gloves. No harsh regrowth line along the scalp. Just a shower routine that doesn’t loudly declare a battle with age.

    The hair dye remains untouched. Suddenly, her shampoo feels like a quiet solution.

    But could such a small habit really make a difference?

    Why gentle grey darkening is suddenly everywhere

    Grey hair once felt like a final judgment. Now, it feels more like a conversation. Many people no longer want to erase it completely. They want it **softer**, **less stark**, and less attention-grabbing at the roots. On public transport, you see it often: natural hair with a muted veil of grey instead of a sharp metallic streak announcing overdue dye.

    The shift goes beyond appearance. There is growing fatigue with heavy coloring routines, strong chemicals, and long salon visits. In their place comes curiosity for smaller, quieter habits. A spoon added to shampoo. A familiar kitchen ingredient mixed into a bottle. A subtle adjustment instead of a dramatic overhaul.

    A quieter approach to looking rested, not recolored

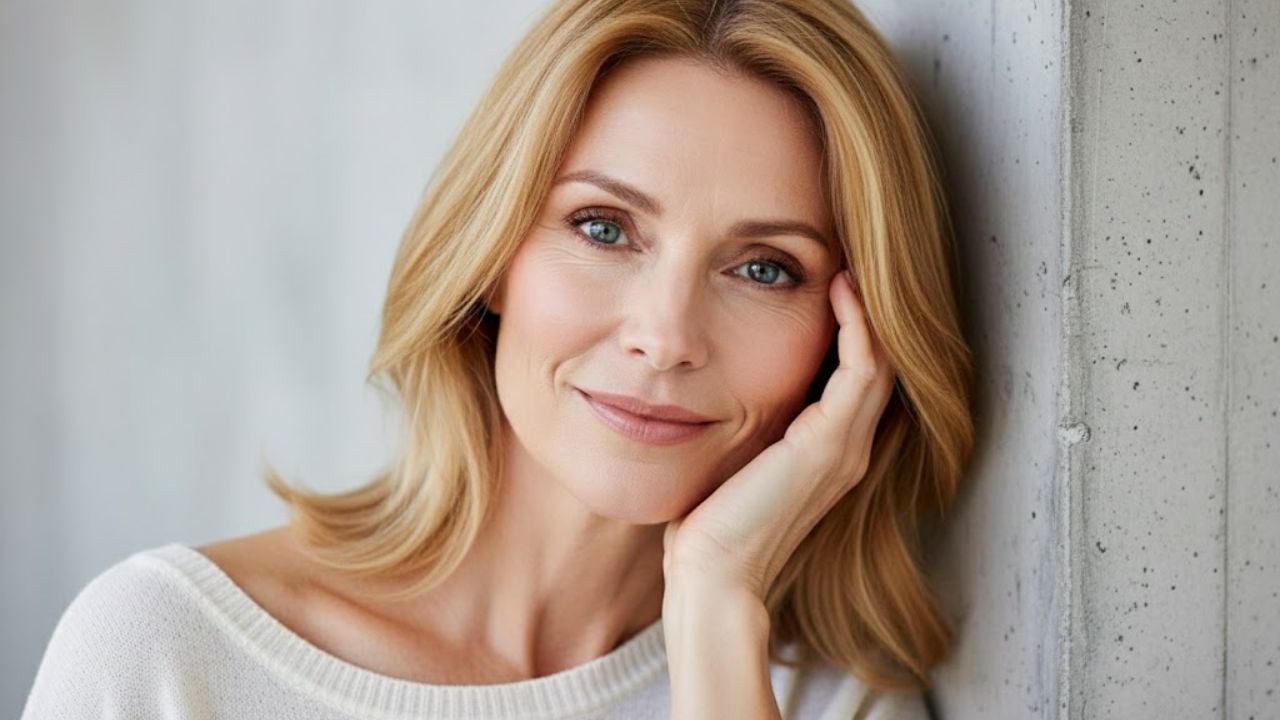
    On a rainy Monday in London, 49-year-old Emily recalls noticing white at her temples during a video call. Her reaction was not fear of aging, but the thought that she looked tired. After trying permanent dye once, she disliked the flat color, lingering odor, and the feeling that the hair no longer felt like her own.

    Later, she read about mixing coffee or black tea into shampoo to gradually deepen hair color. No overnight change. No artificial shine. Just a slow, gentle darkening with each wash. Within weeks, friends commented that she looked more refreshed. No one mentioned her hair. That quiet result was exactly what she wanted.

    She is far from alone. Beauty retailers report rising interest in searches for natural grey hair darkening and no-dye grey coverage. These searches reflect a desire for control rather than concealment. People want flexibility: keeping some silver, softening others, and experimenting without committing to aggressive treatments.

    How natural pigments interact with grey hair

    Grey hair appears as melanin production slows or stops. Hair follicles contain melanocytes, which create pigment. As these cells decline, strands lose color and appear white or grey. Traditional dyes use strong chemicals to penetrate the hair shaft and replace missing pigment quickly.

    The newer methods work differently. Natural tannins and plant pigments cling to the outer surface of the hair, much like tea staining fabric. They fade gradually but are typically gentler on the scalp. The goal is not to overpower biology, but to work with it, patiently and repeatedly, during everyday routines.

    So when someone suggests adding something to shampoo, they are really offering a slower, softer agreement with time.

    The simple shampoo trick people keep trying

    The idea is surprisingly straightforward. By adding a natural colorant to regular shampoo, it becomes a mild darkening wash. The most common choices are strong black tea or coffee extract. Think of it as creating a light tint inside the bottle already used each day.

    A concentrated brew is prepared, cooled fully, and mixed into shampoo. With every wash, pigments lightly stain the hair’s outer layer. There are no gloves, no timers, and no sharp chemical scent. Just an extra minute under warm water, massaging what looks like ordinary lather.

    Some go further by adding powdered herbs such as sage, rosemary, or amla. At that point, the process becomes a small ritual. The outcome is never full coverage. Instead, grey strands soften, blending more like highlights than harsh lines.

    What expectations often get wrong

    Disappointment usually comes from unrealistic hopes. Natural pigments do not turn white hair jet black overnight. They build translucent layers over time, similar to watercolor washes. Very light or coarse hair may show subtle results at first.

    Hair texture matters. Thicker hair may require stronger brews or occasional leave-in treatments. Finer hair can darken faster but may also show buildup sooner. Consistency matters, but perfection is unrealistic. The routine is meant to fit real life, not an ideal schedule.

    Overdoing it is the most common mistake. Too much coffee can dry hair, while overly strong tea can leave residue. Moderation is key. It is easier to deepen color gradually than to reverse excess buildup.

    A simple routine many people follow

    • Brew 250 ml of very strong black tea or coffee and allow it to cool completely.
    • Pour half into an almost empty bottle of gentle shampoo and shake well.
    • Use 2–3 times per week, leaving lather on for 3–5 minutes.
    • Observe results for two weeks before increasing strength.
    • Dilute or stop if hair feels dry, and condition lightly if needed.

    What looks simple on paper often feels more meaningful in practice. In the shower, it becomes a moment to quietly renegotiate how hair ages alongside you rather than against you.

    Living with softer greys instead of fighting them

    Those who adopt this habit often describe a subtle psychological shift. When silver appears less stark, people feel freer to change partings, grow hair longer, or ease up on heavy makeup. The mirror becomes less of a challenge and more of a reflection.

    There is also relief. No last-minute salon rushes. No panic before important events. The shampoo trick doesn’t eliminate grey hair, it simply lowers its volume. The change is gentle, but noticeable.

    Some days, the light still reveals every white strand. That remains part of the agreement. What changes is the sense of agency. Small, consistent care replaces waiting for drastic fixes. Over time, many describe reaching a quiet truce with their hair.

    Conversations follow naturally. When asked if they changed color, the answer is often simple: “Not really, I just add tea to my shampoo.” It sounds modest, but it reflects a deeper idea. Aging is not only about loss. It is about adjustment, attention, and small choices that still feel personal.

    There is no promise of turning back time. This approach lives elsewhere. It gently adjusts contrast rather than erasing lines. And for many, that understated shift feels like the most satisfying kind of change.

    • Gentle darkening: Natural pigments slowly soften grey contrast.
    • Simple routine: Adds one realistic step to daily washing.
    • Customisable results: Strength and frequency adapt to personal hair needs.
  • Five Elegant Blouse Trends Pairing Perfectly With Jeans This Spring

    Five Elegant Blouse Trends Pairing Perfectly With Jeans This Spring

    There’s a moment and a mood for dresses, and I’ll always have a soft spot for a midi skirt, but in all honesty, jeans are what I live in day to day. They’re comfortable, endlessly adaptable, and work seamlessly throughout the year. That said, I used to struggle when it came to making them feel appropriate for slightly dressier occasions. Everything changed last year when I bought my first blouse, and since then, this refined top style has become a permanent part of my wardrobe.

    I already own a classic black satin blouse, but with my 2026 goal of adding more visual interest to my otherwise minimal outfits, I decided it was time to explore more current blouse styles. Naturally, my first source of inspiration was the spring/summer 2026 runway collections.

    Staying true to my minimalist approach, I focused on blouse designs that feel modern yet remain easy to integrate into a capsule wardrobe. After browsing through the latest lookbooks from my favourite designers, I narrowed it down to five polished yet enduring blouse trends worth investing in before spring arrives.

    Scroll on to explore the five key blouse trends set to shape spring 2026 and beyond.

    You Might Also Enjoy

    • Johanna Piispa styled in an Almada Label scarf
    • I’m Over My Standard Basics—The 5 Elevated Styles I’m Wearing in 2026
    • 7 Trends That Instantly Make Classic Jeans Feel 2026
    • 33 New Arrivals From Ref, Mango, and Shopbop for Timeless Dressers

    The Blouse Trends Shaping Spring 2026

    1. Pirate-Inspired Romance

    Style Notes: After seeing this aesthetic appear across collections from designers like Zimmerman, Blumarine, and Chloé, I’m fully leaning into the pirate-style blouse trend this year. These buccaneer-inspired silhouettes feel refreshingly modern while maintaining a soft, romantic edge. They’re perfect for elevating classic blue jeans with minimal effort and offer an easy way to inject interest into a neutral-based capsule wardrobe without stepping outside my comfort zone.

  • 9 Habits People Who Felt Deeply Loved as Children Do Naturally Without Realising

    9 Habits People Who Felt Deeply Loved as Children Do Naturally Without Realising

    There is a subtle but powerful difference between people who were deeply loved as children and those who learned early on that love had to be earned.

    This is not about having perfect parents or an ideal home. It is about the lived experience of emotional safety.

    When you were upset, were you comforted? Did your needs feel important? Did love remain present even when you made mistakes?

    When love is consistent, it shapes the nervous system for trust. It teaches that the world is generally safe and that people are mostly dependable.

    When love is unpredictable, conditional, or tied to performance, people can still become capable and accomplished adults. But they often carry an invisible emotional weight.

    They stay alert for danger, overanalyze relationships, and question themselves even when things are going well.

    This pattern appears frequently in counseling work. What many people call confidence or secure attachment is not something suddenly discovered in adulthood. It is often something received early in life.

    The hopeful truth is that even if this was missing in childhood, it can still be learned. It requires awareness, practice, and a great deal of patience.

    Below are nine behaviors that people who were genuinely loved tend to show naturally, and that others often spend years developing.

    They Feel Entitled to Take Up Space

    People who experienced steady love do not enter rooms worried about being a burden. They do not apologize for having opinions or minimize themselves to avoid conflict.

    They speak openly, ask questions, and occupy space without guilt.

    Those who grew up feeling unwanted or emotionally overlooked often learn the opposite lesson: stay small, stay quiet, do not need too much.

    This belief often carries into adulthood, showing up as hesitation at work, discomfort asking for support, or fear of being noticed.

    A gentle practice is to pause in those moments and remind yourself, “I am allowed to be here.” Simple words, but often deeply restorative.

    They Trust Love Will Survive Mistakes

    Children who felt secure learned early that mistakes do not lead to abandonment.

    As adults, they do not panic when they get something wrong. They do not assume one misstep will end a relationship, and they can face conflict without unraveling.

    When love was withdrawn after disappointment, a painful belief often forms: “If I mess up, I lose people.”

    This belief fuels perfectionism, people-pleasing, and anxiety over minor misunderstandings.

    One revealing question is this: when you make a mistake, do you expect repair or punishment? The answer often reflects your emotional foundation.

    They Do Not Carry Responsibility for Others’ Emotions

    People raised in emotionally stable environments generally do not feel obligated to manage everyone else’s feelings.

    They may care when someone is upset, but they do not automatically assume fault or scramble to fix the situation.

    Those who lacked emotional safety often became highly sensitive to mood shifts. If a parent was unpredictable, critical, or withdrawn, monitoring emotions may have felt necessary for survival.

    This can lead to adult habits such as:

    • Scanning the room upon arrival
    • Feeling guilty when others are uncomfortable
    • Owning problems they did not create
    • Walking on eggshells to maintain peace

    It is possible to care without carrying. Kindness does not require emotional self-erasure.

    They Accept Compliments Without Deflection

    Some people can simply say “thank you” and allow a compliment to land. No jokes, no dismissal, no self-criticism.

    This usually reflects an early lesson that receiving is allowed.

    Without consistent love, praise can feel unsafe or undeserved. It may trigger distrust, exposure, or pressure to keep proving oneself.

    Receiving can be practiced. The next time you are complimented, say “Thank you, I appreciate that,” and stop there.

    Allowing the moment to settle helps retrain the nervous system to accept care.

    They Set Boundaries Without Crushing Guilt

    People who were genuinely loved tend to see boundaries as normal rather than selfish or dramatic.

    They can say:

    • “That doesn’t work for me.”
    • “I’m not comfortable with that.”
    • “Please don’t speak to me that way.”

    And they do not spiral afterward.

    Those who felt unloved often learned that having needs made them difficult. They tolerate too much, over-explain, and give until resentment builds.

    If boundaries trigger anxiety, remember this: boundaries are not rejections. They are instructions for how to treat you.

    They Do Not Mistake Intensity for Love

    When emotional safety was missing, love can become associated with anxiety and unpredictability.

    This can show up as chasing approval, confusing emotional highs and lows with passion, or feeling most connected during uncertainty.

    As a result, calm love may feel dull, stability may feel suspicious, and drama may feel familiar.

    Often, what is described as wanting “sparks” is actually wanting to feel nervous.

    Nervousness is not always chemistry. Sometimes it is the nervous system bracing for inconsistency.

    Asking whether a connection is driven by love or anxiety can be life-changing.

    They Ask for Help Without Shame

    Securely loved children learn that others are safe to lean on.

    As adults, they view support as normal. They ask for help early and do not equate needing others with weakness.

    Those who grew up without reliable support often learn self-reliance as survival. They handle everything alone, even when exhausted.

    This can lead to resentment from constant giving and very little receiving.

    If asking feels difficult, start small. Request a favor, advice, or simply someone to listen.

    Support is not earned. It is something you are allowed to receive.

    They Do Not Constantly Prove Their Worth

    This pattern appears in relationships, careers, friendships, and parenting.

    People who felt loved do not usually build their identity around earning care. They want to grow, but they are not driven by a belief that they are never enough.

    Those who felt unloved often chase worth through achievement. They overwork, overgive, and become indispensable because being needed feels safer than being loved.

    You can be impressive and still feel empty if worth was always conditional.

    A revealing question is: if you stopped proving yourself, who would you be?

    They Expect Good Things Without Bracing for Disaster

    People who were securely loved often carry a steady belief that life may work out, and that they can cope even if it does not.

    This is not unrealistic optimism. It is nervous system safety.

    Those who lacked it often expect disappointment. They stay guarded, avoid hope, and prepare for loss because optimism once felt risky.

    This can look like:

    • Overthinking positive moments
    • Anxiety when life feels calm
    • Avoiding dreams to prevent pain
    • Self-sabotage when success appears

    Healing involves slowly learning to expect goodness again, not because life is perfect, but because you are capable.

    Final Thoughts

    If you did not feel genuinely loved as a child, it was never because you were unlovable.

    It was because the adults around you did not know how to provide consistent emotional safety.

    Children do not fail at being loved. They adapt.

    If you are reading this, you are already showing that adaptation through growth, effort, and self-reflection.

    While those who were deeply loved may carry these traits naturally, those who learned them later often develop something equally powerful.

    Emotional intelligence. Resilience. Self-awareness. Compassion.

    Move gently. Practice slowly. Notice every small shift.

    You are not behind. You are rebuilding, and that work matters.

  • This Strength Training Strategy Helps Cyclists Build Power and Endurance Without Adding Extra Miles

    This Strength Training Strategy Helps Cyclists Build Power and Endurance Without Adding Extra Miles

    The most successful cyclists understand that resistance training is an essential part of a well-rounded program. Those who perform at the highest level also know that using a structured, phased approach is the most effective way to unlock its full benefits. Strength work supports stronger riding, helps lower injury risk, and allows cyclists to maintain performance as they age. However, randomly lifting weights without a plan rarely delivers optimal results. A strategic progression ensures safer training and better long-term gains.

    A multi-phase strength training plan offers a clear roadmap. Each stage targets specific goals and prepares the body for the demands of the next phase. Below, experts outline why this method works, what each phase focuses on, and how cyclists can align it with their personal training objectives.

    Why a Structured, Phased Strength Plan Matters

    Following a phased resistance strategy allows athletes to address postural issues and faulty movement patterns before advancing to heavier or more intense work. This gradual progression builds strength safely while reducing the likelihood of setbacks. By laying a solid physical foundation first, cyclists can handle later phases with greater confidence and efficiency.

    This method also introduces planned variation into training. Each phase builds upon the last, supporting continuous improvement both on and off the bike. A structured approach helps reduce training plateaus, prevents overuse injuries, and lowers the risk of mental burnout by keeping workouts purposeful and progressive.

    Phase One: Stability and Movement Control

    The first phase centers on corrective exercise, aiming to address issues like rounded shoulders, limited mobility, or tight hip flexors. The primary goal is restoring balanced mobility and stability throughout the body. Light resistance—or even bodyweight movements—is used to strengthen weak areas and reinforce efficient posture.

    This phase often includes balance training and core control work. The focus is on maintaining stability while the arms and legs move independently. Exercises are designed to ensure joints can move through a full range of motion and tolerate forces from multiple directions before heavier loads are introduced.

    How to Apply Phase One

    Working with a qualified professional can help identify subtle movement limitations that are easy to overlook. Training should begin with static posture drills before progressing to controlled movement. For example, maintaining proper alignment during simple holds can later evolve into dynamic exercises that challenge posture under motion.

    Phase Two: Building Muscular Endurance

    The endurance phase uses lighter resistance to train muscles to sustain effort over extended periods. This stage commonly employs superset training, where one exercise fatigues fast-twitch fibers before another challenges slow-twitch fibers to maintain stability under fatigue.

    This approach helps reinforce proper form when tired, a scenario cyclists frequently face during long rides. It is also an efficient training method, making it well-suited for off-season periods when riders aim to improve strength while preserving a level of cardiovascular fitness and anaerobic capacity.

    How to Apply Phase Two

    Supersets typically pair two biomechanically similar movements performed back-to-back without rest. One focuses on traditional strength, while the other emphasizes endurance in an unstable position. Repetition ranges usually fall between eight and twelve reps per exercise within each superset.

    Phase Three: Maximizing Strength Output

    This phase prioritizes increasing the force-producing capacity of the muscles. Simply put, it is about getting stronger. Greater strength in the quads, glutes, and hamstrings allows cyclists to generate more power with each pedal stroke, directly supporting on-bike performance.

    How to Apply Phase Three

    Training centers on compound, multi-joint lifts performed with heavy loads, often around 85 percent of one-rep max. Sets are short, typically ranging from one to five repetitions. Because of the intensity, longer rest periods—often two to five minutes—are essential for recovery between sets.

    Phase Four: Developing Explosive Power

    Power training focuses on improving explosive force production. This ability is critical for cyclists who want to accelerate quickly, increase cadence, and enhance short-burst speed. Movements are performed with maximum intent and speed.

    How to Apply Phase Four

    This phase includes plyometric exercises such as jumps and explosive push-ups, as well as weighted movements like kettlebell swings and Olympic-style lifts. Power work can also be performed on the bike by increasing resistance and pedaling as fast as possible. Sessions are short and intense, with low repetition counts and generous recovery between sets.

    Adjusting Phased Training to Match Your Goals

    For those new to strength training, progressing through each phase in order is recommended. While timelines vary, many athletes spend four to six weeks in endurance and strength phases, and two to four weeks in power-focused work. The initial stability phase lasts until posture and movement quality are restored.

    More experienced cyclists may rotate between phases using undulating periodization to maintain variety. Seasonal adjustments are also common, with early phases emphasized during the off-season and power-focused work introduced closer to peak riding periods. Regardless of the approach, proper application and individual customization are key. Aligning the model with personal ability and goals ensures the phased system delivers lasting results.

  • Hip Stiffness From Sitting Eases Quickly With Targeted Yoga Poses

    Hip Stiffness From Sitting Eases Quickly With Targeted Yoga Poses

    Spending extended time at a desk, in a car, or relaxing on the couch can quietly push the hips into a tight, restricted state. Over time, the hip flexors shorten, blood circulation slows, and the joints gradually lose their natural range of motion. This often shows up as hip tightness, lower-back discomfort, poor posture, or a heavy feeling when standing up. The good news is that reversing sitting-related stiffness doesn’t require intense workouts. Gentle, mindful yoga poses can help restore hip mobility and make everyday movement feel natural again.

    Why Sitting Leads to Hip Tightness

    When you sit for long periods, the hips remain in a flexed position. The muscles at the front of the hips adapt by shortening, while the glutes and stabilizing muscles become underused. This imbalance reduces joint lubrication and signals the body to protect the area, resulting in stiffness. Yoga works by lengthening tight muscles, reactivating underused ones, and calming the nervous system so the hips can release safely.

    How Yoga Helps Reverse Sitting-Related Stiffness

    Yoga is most effective when practiced slowly and intentionally. By combining gentle movement with steady breathing, it boosts circulation to the hips, supports joint nourishment, and eases tension caused by stress. Unlike forceful stretching, this approach allows the hips to soften naturally, making it ideal for stiffness linked to prolonged sitting.

    Standing Forward Fold to Release the Hips

    A relaxed forward fold allows the hips and lower back to soften while gently decompressing the spine. Keeping the knees bent is essential, as it reduces strain and helps the hips release without resistance. This pose is especially helpful after standing up from long periods of sitting.

    Low Lunge to Open Tight Hip Flexors

    The low lunge directly counters the position the hips stay in while sitting. By gently opening the front of the hips and thighs, this pose helps restore balance and makes walking and standing feel easier. Slow, deep breaths enhance the release.

    Half Split Stretch for the Back of the Hips

    Shifting back from a lunge into a half split stretches the hamstrings and the back of the hips, areas that often tighten alongside the hip flexors. This balanced stretch supports smoother and more natural hip movement.

    Butterfly Pose for Inner Hip Relaxation

    Sitting with the soles of the feet together encourages the inner hips and groin to relax—areas that can feel restricted after sitting all day. Supporting the knees with cushions allows the hips to open gently without forcing depth.

    Seated Figure Four for Outer Hip Relief

    Crossing one ankle over the opposite thigh targets the outer hips and glutes, which often tighten from prolonged sitting. This mild stretch can help reduce pressure in the lower back.

    Cat–Cow Flow to Restore Joint Hydration

    Moving the spine through gentle flexion and extension improves circulation around the pelvis and hips. This rhythmic flow helps rehydrate the joints and reconnect breath with movement after long periods of stillness.

    Wide-Knee Child’s Pose for Deep Release

    Child’s pose with wide knees allows the hips to open softly while the body fully relaxes. It is particularly effective at the end of the day when physical stiffness is combined with mental fatigue.

    Supine Knee-to-Chest for Decompression

    Lying on the back and gently hugging the knees decompresses the hips and lower spine. This simple, restorative pose helps relieve built-up pressure after hours of sitting.

    Supine Spinal Twist to Restore Natural Rotation

    Gentle twists help bring back natural rotational movement in the hips and spine, which often becomes limited with sedentary habits. Twisting also helps calm the nervous system.

    How Long and How Often to Practice

    Aim for 10–20 minutes most days, especially after long sitting periods. Even short, consistent sessions can make a noticeable difference. Think of these poses as daily movement snacks for your hips.

    Using Props for Comfort and Support

    Pillows, blankets, blocks, or chairs can support the body so muscles relax instead of tighten. Comfort encourages deeper release and helps prevent overdoing the poses.

    Common Mistakes to Avoid

    Avoid forcing depth, rushing transitions, or holding your breath. A mild, comfortable sensation is enough—sharp pain is a signal to ease off. Gentle consistency always works better than intensity.

    Signs the Practice Is Working

    With regular practice, standing up feels easier, walking becomes smoother, posture improves, and the lower back feels less strained. Many people also notice better comfort while sleeping.

    Final Thoughts

    Hip stiffness caused by sitting is common, but it is also reversible. These gentle yoga poses help counter long hours of sitting by restoring mobility, improving circulation, and calming built-up tension. Start slowly, move with awareness, and breathe deeply. With consistent practice, your hips can regain freedom, making everyday movement feel lighter and more comfortable.

  • Yoga Poses That Instantly Relieve Hip Tightness and Restore Movement

    Yoga Poses That Instantly Relieve Hip Tightness and Restore Movement

    Hip stiffness often appears without warning—after long hours of sitting, driving, or even a stressful day with very little movement. When the hips tighten, walking can feel heavy, the lower back may start to ache, and sitting comfortably becomes a challenge. The good news is that relief doesn’t require a long workout. A few gentle yoga poses, practiced mindfully, can ease tension quickly by relaxing tight muscles and calming the nervous system.

    Why Hip Stiffness Feels So Sudden

    The hips are involved in almost every movement the body makes. When they remain in one position for too long—especially while sitting—the surrounding muscles tighten rapidly. Stress also plays a role, as a tense nervous system often causes the hips to grip. Yoga helps by slowing the body down, improving circulation, and signaling that it’s safe to release stored tension.

    Why Gentle Yoga Brings Fast Results

    Instant relief comes from relaxation, not force. Gentle poses paired with slow breathing reduce muscle guarding and improve joint lubrication. As the body relaxes, the hips soften—often within just a few minutes.

    Standing Forward Fold for Quick Release

    A relaxed forward fold is one of the fastest ways to ease hip stiffness. Bending the knees and letting the upper body hang heavy gently stretches the hips and lower back while calming the mind, often creating noticeable relief right away.

    Low Lunge to Ease Tight Hip Flexors

    Low lunge directly targets the front of the hips, which commonly tighten from prolonged sitting. Moving into the pose slowly and breathing deeply helps undo that compressed feeling and makes standing and walking feel easier.

    Butterfly Pose for Inner Hip Tension

    Sitting with the soles of the feet together encourages the inner hips to relax. Supporting the knees with cushions allows the hips to open without resistance, making this pose effective even for very stiff areas.

    Seated Figure Four for Outer Hip Relief

    This pose focuses on the outer hips and glutes, which often contribute to stiffness and lower-back discomfort. Gentle pressure in this area frequently brings immediate comfort.

    Cat–Cow for Hip and Spine Mobility

    Flowing through cat–cow increases circulation around the pelvis and hips. This gentle movement helps rehydrate the joints and reduces stiffness caused by staying still for too long.

    Wide-Knee Child’s Pose for Deep Relaxation

    A wide-knee version of child’s pose allows the hips to open softly while the body fully relaxes. This is especially helpful when hip stiffness is connected to stress or fatigue.

    Supine Knee-to-Chest for Gentle Decompression

    Lying on the back and hugging the knees toward the chest releases pressure from the hips and lower spine. This simple, soothing pose often brings instant comfort after a long day.

    Supine Spinal Twist to Restore Natural Movement

    Gentle spinal twists help restore natural rotation in the hips and spine. They also calm the nervous system, allowing stiffness to melt away more quickly.

    How Long to Hold Each Pose

    Holding each pose for 30 to 60 seconds can already make a difference. For deeper relief, stay for one to two minutes while breathing slowly and focusing on comfort rather than depth.

    A Breathing Tip That Speeds Up Release

    Inhale through the nose for four counts and exhale for six. Longer exhales activate the relaxation response and help tight hip muscles let go faster.

    Common Mistakes That Slow Relief

    Forcing stretches, rushing transitions, or holding the breath can cause the hips to tighten even more. Gentle movement and patience are far more effective for quick results.

    How Often to Practice These Poses

    These poses can be used whenever stiffness appears—after sitting, before bed, or during work breaks. Short, frequent sessions are highly effective.

    Final Thoughts

    Hip stiffness doesn’t always require long routines or intense stretching. These yoga poses can bring instant relief by calming the body and gently restoring movement. When practiced mindfully, even for a few minutes, they help the hips feel lighter, freer, and more comfortable—making everyday movement easier again.

  • How to Squat Safely After 40 The Proper Form Trainers Say Prevents Injury and Builds Strength

    How to Squat Safely After 40 The Proper Form Trainers Say Prevents Injury and Builds Strength

    Resistance training is one of the most powerful ways to shape how we age. It helps strengthen bones, supports heart health, and slows age-related muscle loss, which can otherwise reduce mobility, independence, and overall quality of life. Among all strength exercises, squats offer an especially high return. This simple movement targets multiple areas at once and supports long-term function, making it a valuable addition to any routine focused on healthy ageing.

    Squats are considered a foundational exercise for good reason. They engage several muscle groups simultaneously and mirror everyday actions like sitting and standing, bending, and lifting. Because of this carryover, squats help make daily tasks feel easier and more controlled as the body gets older.

    “As we age, our tolerance to everyday loads such as stairs, lifting, or getting off the floor reduces unless we train it,” says Third Space master trainer Will Pate. He notes that from around 40, muscle mass can begin to decline, averaging 1–2% per year after age 50 in sedentary adults.

    Without intervention, Pate warns that many people may lose 30–50% of muscle mass by age 80 compared with their twenties. The encouraging news is that squats, combined with other strength exercises, can deliver benefits at any stage of life. Resistance training has been shown to improve muscle size and strength even in older adults, helping offset much of the decline associated with ageing and keeping the body capable well beyond the gym.

    If you’re beginning strength training in your 40s or adjusting your routine for this stage of life, you’re on the right track. While the basic mechanics of a squat stay the same at any age, additional factors such as past injuries and hormonal changes can influence recovery. Understanding these considerations helps ensure squats remain safe and effective.

    Key benefits of adding squats to your routine

    “Squats aren’t essential, but they’re extremely efficient,” says Pate. When tolerated well, they provide a significant payoff for a relatively simple movement. According to him, squats deliver several important advantages that support long-term strength and function.

    They reinforce a core human movement

    Getting up from a chair or lowering yourself down is something done every day, yet it becomes more demanding with age. Squats strengthen this pattern, helping daily movements feel smoother and less tiring.

    They promote healthier joints

    When performed with control, squats encourage coordinated motion at the hips, knees, and ankles. This allows joints to share load evenly instead of placing stress on one area.

    They build lower-body strength efficiently

    As a compound exercise, squats work several muscles at once, making them a time-efficient option for beginners or anyone with limited training time.

    They help preserve bone density

    Bones adapt to load. Squats apply healthy stress to the hips, thighs, and spine, which are key regions for maintaining bone strength during midlife.

    They support confidence and independence

    Being able to lower down and stand back up with control is empowering, particularly for those starting exercise later. Building this ability in your 40s helps maintain independence in later years.

    Muscles worked during a squat

    Squats engage several major muscle groups at the same time.

    • Glutes
    • Quadriceps
    • Hamstrings

    They also rely on supporting muscles for stability and control.

    • Core
    • Back
    • Calves

    How to perform a bodyweight squat correctly

    Start by standing with your feet roughly hip-width apart, allowing the toes to point slightly outward if comfortable. With the ribcage stacked over the pelvis, send your hips back and bend the knees as though sitting into a chair behind you. Keep the chest relaxed and upright as you lower to a pain-free depth. To stand, push the floor away through the whole foot and return to an upright position.

    Signs your squat technique is working for you

    Squat mechanics vary based on individual structure and mobility. Rather than aiming for a perfect visual shape, focus on how the movement feels. A well-suited squat should feel smooth and controlled, allow natural breathing, avoid sharp pain during or after, feel repeatable the next day without joint soreness, and be felt mainly through the thighs and hips rather than the lower back.

    Common squat errors to avoid

    Moving too fast is a frequent mistake. Lowering with control allows the ankles, knees, and hips to bend together naturally. Other issues often come from mismatching the exercise to the individual, such as going deeper than mobility allows, forcing knee alignment, holding the breath, or pushing through discomfort. As Pate explains, discomfort is feedback and shouldn’t be ignored.

    When it’s appropriate to add weight

    A key sign you’re ready to progress is being able to perform multiple bodyweight repetitions with good control. If you can complete 10–20 reps comfortably and feel capable of repeating the set, the resistance may be too light to drive improvement. Other indicators include feeling stable, recovering well between sessions, and maintaining movement quality throughout each set.

    When adding load, begin conservatively. Even 2–5kg can be enough. The goal is to finish feeling worked, not exhausted, while still moving as well as you did without added weight.

    The most suitable squat variations for women over 40

    These variations are designed to be joint-friendly, adaptable, and confidence-building, whether training at home or in the gym.

    Chair squat or box squat

    Stand in front of a chair, lower yourself down slowly, then stand back up using your legs. Use your arms only if needed for assistance.

    Goblet squat

    Hold a light dumbbell or kettlebell close to the chest. Squat comfortably while keeping the weight near the body, then push through the feet to return to standing.

    Supported squat

    Hold onto a stable surface such as a rail or doorframe. Squat to a comfortable depth, relying on the support only as much as necessary.

    Leg press

    The leg press targets the same primary muscles as a squat while offering external stability and reduced balance demands. Sit with the hips fully supported, place the feet hip- to shoulder-width apart on the platform, and move through the exercise with controlled motion, avoiding locked knees at the top.

  • The Sheer Stockings Nail Trend Is Back Creating a Polished Look Inspired by Classic Hosiery

    The Sheer Stockings Nail Trend Is Back Creating a Polished Look Inspired by Classic Hosiery

    There’s an undeniable charm to a classic winter night-out outfit that never feels forced. The familiar combination—a long-sleeve black top, leather shorts, sheer black stockings, and knee-high boots—has remained a cold-weather staple for years. Among all those layers, sheer stockings stand out as the true style hero. Their versatility and subtle elegance have now inspired one of winter’s most talked-about manicure trends: sheer stockings nails.

    Much like jelly nails reimagined for colder months, this trend leans into soft neutrals such as nudes, grays, and blacks, sometimes enhanced with delicate patterns that echo statement tights. To better understand why this look is everywhere right now, nail experts share insight into the trend and its most stylish interpretations.

    Meet the Nail Experts

    Julie Kandalec is a celebrity manicurist and the founder of Julie K Nail Artelier, as well as a KISS Nails Brand Ambassador.

    Bailey Stanworth is a nail expert and the founder of Quickies Press On Nails.

    What Defines the Sheer Stockings Nail Trend

    Think of your favorite sheer tights. They provide light coverage, a smoother finish, and subtle warmth while still allowing skin to show through. In many ways, they function like a light-coverage foundation or gloss—and that same concept has translated seamlessly into nail design.

    “This trend captures the sensual, translucent quality of stockings—especially black—and recreates that depth and texture through nail art,” explains Bailey Stanworth. “You can experiment with designs like polka dots or lace patterns, or keep it clean with a single sheer shade.”

    While sheer polish itself isn’t new, the hosiery-inspired color palette makes this trend feel distinctive. “These nails can reflect any shade commonly found in stockings, but black, burgundy, and nude tones stand out the most,” says Julie Kandalec. Stanworth adds that unlike other viral nail trends, this look feels genuinely fresh and inventive rather than simply a renamed solid color.

    How to Achieve the Look

    There are two main approaches to getting sheer stockings nails. “You can achieve it using a jelly and opaque polish combination, or opt for press-on nails,” Kandalec explains. She suggests starting with a sheer or opaque nude polish, paired with a sheer black jelly shade for depth.

    Because translucency is central to this trend, nail prep is essential. “Sheer colors highlight every ridge or imperfection, so it’s important to begin with a perfectly smooth nail surface,” Kandalec advises.

    Below are standout examples that showcase how versatile and stylish the sheer stockings nail trend can be.

    Sheer Stockings Nail Inspiration

    Sheer Glitz

    This neutral glitter manicure mirrors the look of evening stockings. A slim black line centered on each nail adds a refined, understated elegance.

    Barely-There Sheer

    Ultra-light and endlessly chic, this manicure features subtle French detailing over a sheer base. The result is a look that feels timeless, modern, and impeccably polished.

    Sheer Umber

    Brown proves just as powerful as black in sheer form. This warm umber shade delivers a sleek finish that stands out without any added embellishment.

    Polka Dot Princess

    A soft pink sheer base paired with playful polka dots creates a look that feels nostalgic yet current. This universal tights-inspired shade is elevated with delicate nail art.

    Ballet Slippers Nails

    Inspired by ballet stockings, this design combines a sheer chrome finish with heart-shaped French tips for a look that feels graceful and stage-ready.

    Sleek Silhouette

    A sheer black base becomes striking with precise linework and heart accents. The barely-there translucence adds depth while keeping the design clean and bold.

    Seeing Red

    This sheer burgundy manicure balances color and subtlety perfectly. The translucent red base keeps it neutral, while dotted details add personality and flair.

    Stocking Status

    Combining lace motifs, polka dots, and bold black accents, this manicure blends multiple fashion-forward stocking styles into one statement-worthy set.

    Lacy White

    A milky, translucent base paired with delicate floral lace detailing offers a bright yet soft take on the sheer stockings trend, finishing the look with elegance.

  • A Celebrity Manicurist Shares the Simple Tricks That Make Any Manicure Look Luxurious

    A Celebrity Manicurist Shares the Simple Tricks That Make Any Manicure Look Luxurious

    If you’re anything like me, your saved folders are probably overflowing with nail trend inspiration and creative manicure ideas. Yet I’ve always been curious about how those flawless hands manage to look so pristine, with perfectly groomed cuticles, precisely shaped nails, and not a trace of dryness anywhere.

    Whenever I do my nails at home, they never quite reach that salon-level finish. Nail technicians spend years refining their skills, so while a DIY manicure will never fully match a professional one, there are ways to elevate the result. The secret lies in proper nail preparation, from filing correctly to finishing with nourishing cuticle oils.

    As a beauty editor who has had the privilege of visiting celebrity manicurists, I’ve noticed one universal rule they all follow: nail prep is essential. For some professionals, prep alone can take hours before any polish, gel, or BIAB is applied. Regardless of the manicure type, preparation is what truly determines the final look.

    Why Nail Preparation Matters

    Nail prep is the foundation of every great manicure,” explains celebrity manicurist Georgia Rae. “You can use the best products available, but without proper preparation, they simply won’t last. Good prep improves adhesion, creates a smoother finish, and helps prevent lifting, chipping, or peeling.”

    Below, Rae shares her expert advice on preparing nails for a manicure that looks polished and lasts longer.

    How to Prepare Your Nails

    1. Focus on Cuticle Care

    “I always begin by gently pushing back and slightly lifting the cuticle—the skin at the base of the nail—from the nail bed,” says Rae. “I then carefully buff or nip away only the non-living tissue.”

    Professionals are trained to remove cuticles safely, but at home it’s best to gently push them back using a cuticle pusher or orange stick rather than cutting. “Cuticles should be pushed back gently, never aggressively cut. Removing too much can cause irritation,” Rae advises.

    For home prep, Rae recommends using a cuticle remover and massaging it into the nails and surrounding skin. When rinsing, she suggests using a nail brush to exfoliate, then drying thoroughly with a towel.

    Using an orange wood stick, gently push back the cuticle. Rae also likes to lift stubborn dead skin from the nail plate with a loop-ended tool, trimming away only visible dead skin that turns white once dry.

    2. Shape the Nails Carefully

    “Next, I move on to shaping,” says Rae. “Always use a 240-grit file on natural nails. Blunt the edges slightly to prevent snags, and check from every angle to ensure the shape is even.”

    Whether you prefer almond, oval, square, or squoval nails, take your time to ensure each nail is the same length and shape on both hands. When creating almond or oval shapes, avoid filing the side walls too much, as this can weaken the nail structure and increase the risk of breakage.

    3. Prepare the Nail Plate

    “I then cleanse the nail to remove dust and oils, making sure everything is completely dry before application,” Rae explains. Her essential tools include an orange wood stick, a loop tool, a fine 240-grit file, lint-free wipes, and a nail cleanser.

    One common mistake to avoid is over-buffing, which can thin and weaken the nail. Rae also stresses the importance of keeping nails free from oils or residue before applying base coat or polish. Even touching your nails can transfer natural oils that affect longevity.

    4. Apply the Right Base Coat

    “Always use a base coat suited to your nail type,” says Rae. Nail strengtheners can double as base coats for weak or flexible nails. She also recommends avoiding soaking nails in water before painting, as water absorption can cause polish to lift once dry.

    Once the base coat has fully dried, you can apply your chosen nail colour and finish with a top coat for added shine and durability.

    5. Maintain Ongoing Hand and Nail Care

    The care you give your hands and nails between manicures plays a major role in how easy prep will be next time, especially for cuticles. “Consistent nail care between manicures is key to long-lasting results,” says Rae.

    If there’s significant dead skin buildup, avoid trying to remove it all at once. Instead, establish a regular hand and nail routine and allow improvement to happen gradually.

    Keep hand cream nearby—on your nightstand, in your bag, or at your desk—to maintain hydration. Applying cuticle oil daily helps keep nails and surrounding skin soft and healthy. Be cautious with harsh cleaning products, and wear gloves during housework to protect both hands and nails.

  • 2026 Short Hair Trends: Three Cropped Styles That Visually Slim the Face and Refresh Your Look

    2026 Short Hair Trends: Three Cropped Styles That Visually Slim the Face and Refresh Your Look

    The short hair trend for 2026 returns to a clean, refined “line-focused” aesthetic. From a polished one-piece bob to breezy mid-length bobs and softly layered cuts that frame the jaw, this season highlights balance, proportion, and facial contouring. Thoughtful lengths and precise layering help the hair feel lighter while enhancing definition, dimension, and facial elegance.

    2026 Short Hair Pick 1: The Structured Bob

    If you are ready to embrace short hair this season, a sharp, disciplined bob is the most confident choice. The key lies in adjusting the length to complement your face shape:

    • Round faces: Opt for a length that sits 1–2 centimetres below the jawline to create a lengthening effect.
    • Long face shapes: A cut just under the jawline or a short-to-medium length that brushes the shoulders works best.
    • Prominent cheekbones or angular jawlines: Choose a length that gently grazes the jaw, with subtle layers to soften and wrap around facial contours.

    2026 Short Hair Pick 2: Jaw-Length Layered Cut

    For those seeking a lighter feel, a jaw-grazing layered haircut stands out this season. This cut draws attention to the jawline and is especially flattering for rounder face shapes. Soft layers paired with natural movement or loose curls add volume, flow, and an effortlessly chic finish, creating a look that feels modern yet relaxed.

    2026 Short Hair Pick 3: The Airy Bob

    The airy bob blends soft waves and fluffy texture to achieve a light, breathable appearance. It maintains the femininity of medium-length hair while keeping the clean silhouette of a bob. Ideal for those who want to keep some length while enhancing face shape, this style relies on gentle layers along the sides and ends for a naturally polished, easygoing look.