Author: admin

  • Easy At-Home Eyebrow Tinting Method Creates Soft Defined Brows Using a Simple Step-by-Step Process

    Easy At-Home Eyebrow Tinting Method Creates Soft Defined Brows Using a Simple Step-by-Step Process

    At-home eyebrow tinting has become a common beauty practice for people who want neat brows without regular salon appointments. This trend is growing in India as more people try DIY grooming methods. When done correctly you can improve your natural brows safely and cheaply at home. This technique aims for soft and defined results instead of harsh or too dark brows. By using a straightforward process and products designed for beginners even people trying it for the first time can feel confident & in control while creating a tidy and well-groomed eyebrow appearance.

    Getting started with at-home eyebrow tinting

    Learning the fundamentals is essential for safe and successful at-home eyebrow tinting. Selecting a shade that closely matches your natural brow color helps prevent harsh results and keeps your brows looking soft and natural. A patch test is always necessary to minimize the risk of irritation and prioritize skin safety. Brows should be thoroughly cleansed and free from oil or makeup so the tint adheres evenly, ensuring smooth, consistent color. Using a small amount of product and strictly following timing instructions reduces the chance of over-darkening, which is especially important for everyday brows.

    A simple step-by-step eyebrow tinting process

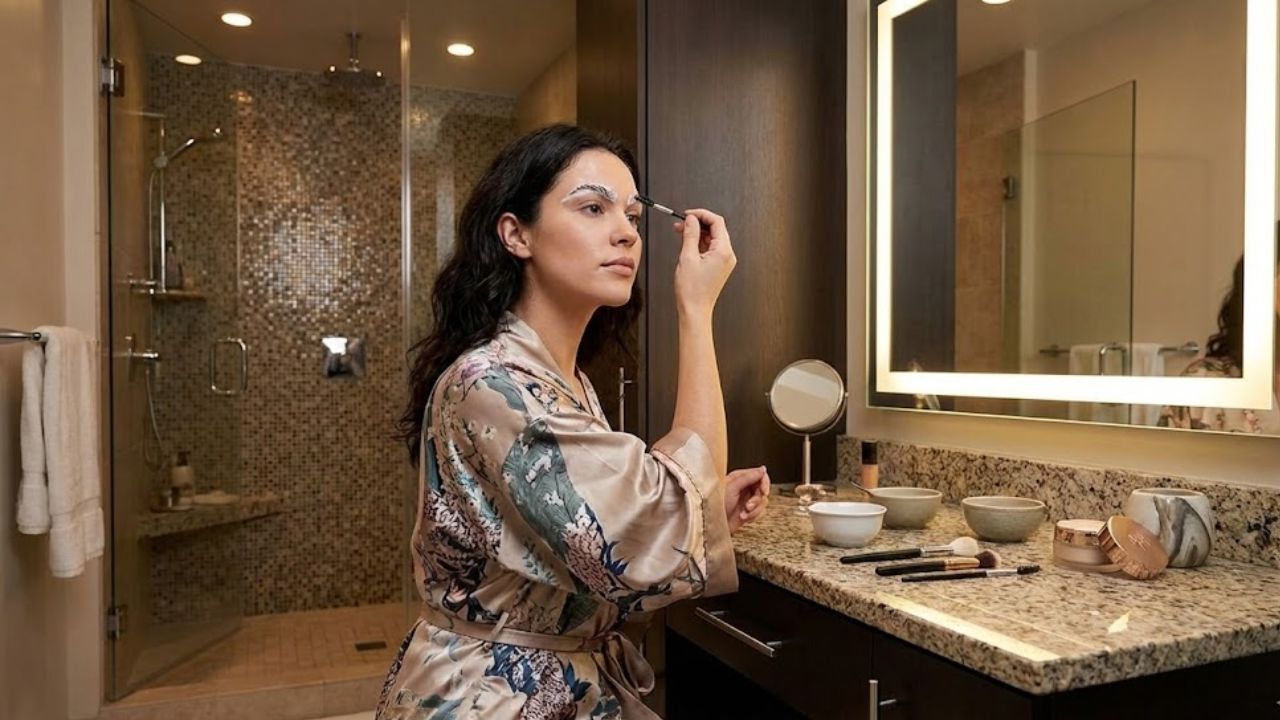
    Following a structured method can make brow tinting feel much more approachable. Begin by applying petroleum jelly around the brows to shield the surrounding skin and create clean, defined edges. Prepare the tint according to the instructions, then apply it with a small angled brush for precise control. Start at the tail of the brow and move toward the front, keeping the inner brow lighter for balanced definition. Set a timer and watch the color develop carefully to avoid staining. Once the time is complete, gently remove the tint with a damp cotton pad to reveal even, natural-looking brows.

    How to care for brows after tinting

    Good aftercare helps your brow tint last longer and fade evenly. Avoid washing your face for at least 12 hours so the pigment can fully set, supporting longer-lasting results. Use mild, sulfate-free cleansers near the brow area to protect color retention. Applying a lightweight brow oil or serum helps nourish brow hair and encourages healthy growth. Space out touch-ups to prevent dryness or damage, allowing you to maintain soft, defined brows with minimal upkeep.

    Key takeaways for successful at-home brow tinting

    At-home eyebrow tinting offers a convenient way to achieve defined brows without relying on salon visits. When done correctly, it provides cost-effective beauty benefits and full control over shade and intensity. Success depends on careful preparation, patience, and following instructions precisely. Focusing on subtle enhancement rather than dramatic change helps create polished brows that suit your features. With proper care and mindful touch-ups, this routine can become a reliable part of your grooming routine.

    Aspect Recommended Approach Key Benefit
    Shade Selection Choose a shade close to your natural brow color Creates a softer, more natural-looking finish
    Patch Testing Perform a patch test at least 24 hours before application Helps minimise the risk of skin irritation
    Application Time Leave the tint on for 5–10 minutes Allows better control over colour intensity
    Aftercare Avoid contact with water for 12 hours post-application Ensures longer-lasting tint results
    Maintenance Retint brows every 3–4 weeks Keeps brows looking fresh and well-defined
  • 7 Bedtime Yoga Poses That Relax the Body and Promote Deep Sleep

    7 Bedtime Yoga Poses That Relax the Body and Promote Deep Sleep

    Getting quality sleep has become a growing concern for many people in India, especially with busy schedules, late-night screen time, and rising stress levels. Gentle bedtime yoga offers a simple, natural way to calm the nervous system and prepare the body for rest. By focusing on slow movements, mindful breathing, and supported poses, bedtime yoga helps release physical tension and quiet mental chatter. Practiced consistently, these poses can create a soothing pre-sleep ritual that supports deeper, more restorative sleep without relying on medication.

    Bedtime yoga poses that gently release daily tension

    After a long day, the body often holds stress in the hips, lower back, and shoulders. Bedtime yoga poses are designed to unwind these areas without demanding effort or flexibility. Movements are slow and intentional, encouraging muscle tension release while signaling the brain that it is safe to relax. Poses like child’s pose, seated forward folds, and gentle twists support joint comfort and reduce restlessness. This calming approach helps improve body awareness, allowing you to notice tight areas and soften them gradually. Over time, this practice can become a trusted way to transition from activity to rest with evening calm.

    Relaxing bedtime yoga sequences for calming the mind

    Sleep problems are often linked to an overactive mind rather than physical discomfort alone. Relaxing bedtime yoga emphasizes breath-led movement to settle racing thoughts. Slow stretches paired with deep breathing activate the parasympathetic nervous system, promoting mental quiet. Poses such as legs-up-the-wall or gentle supine stretches encourage breath awareness and help reduce anxiety before bed. As the nervous system settles, many people notice stress reduction and a smoother transition into sleep. Practicing these sequences regularly can support emotional balance, making it easier to let go of the day.

    Gentle bedtime yoga practices that support deep sleep

    Gentle bedtime yoga focuses less on flexibility and more on creating a sense of safety and ease. Supported poses held for longer periods allow the body to fully relax, encouraging deep relaxation. Using cushions or blankets can enhance sleep readiness by minimizing strain and promoting comfort. These practices help regulate nervous system balance, which is essential for falling and staying asleep. Over time, consistent practice may improve sleep quality, helping you wake up feeling more refreshed and energized the next morning.

    Why bedtime yoga works as a nightly sleep ritual

    Bedtime yoga works best when approached as a calming ritual rather than a workout. Repeating the same gentle poses each night trains the body and mind to associate movement with rest. This consistency supports healthy sleep habits and reduces resistance to winding down. By slowing the breath and softening the muscles, yoga helps shift focus inward, encouraging mindful relaxation. Over time, this practice can strengthen nighttime routine cues and promote natural sleep onset, making it easier to fall asleep without effort.

    Yoga Pose Main Benefit Recommended Hold
    Child’s Pose Relaxes back and hips 1–2 minutes
    Seated Forward Fold Calms nervous system 1 minute
    Legs-Up-The-Wall Reduces fatigue 2–3 minutes
    Supine Twist Releases spinal tension 1 minute each side
    Corpse Pose Promotes full relaxation 3–5 minutes
  • 8-Second Challenge: Spot 3 Differences in the Grandma and Dog Image

    8-Second Challenge: Spot 3 Differences in the Grandma and Dog Image

    Spot the Difference” puzzles have remained a favorite activity for anyone who enjoys testing their attention to detail. These challenges are both entertaining and mentally stimulating, making them a great way to sharpen your mind. In this puzzle, your goal is to find three differences between two nearly identical images of a grandma and her dog. The twist? You have just 8 seconds to identify all the changes. This fast-paced task pushes your visual awareness, focus, and quick-thinking abilities under pressure.

    Why “Spot the Difference” Puzzles Are So Popular

    For decades, “Spot the Difference” puzzles have appeared in books, magazines, and online platforms. People of all ages enjoy them as a light mental workout or a relaxing way to pass the time. Although they often look easy at first, these puzzles can be deceptively challenging. The objective is to carefully compare two similar images and detect small variations, which may include altered colors, missing items, or subtle background changes.

    Beyond entertainment, these puzzles offer meaningful mental benefits. Regularly solving them can strengthen focus, concentration, visual memory, and pattern recognition. They also train the brain to process visual information more quickly and accurately, skills that are useful in everyday situations like multitasking and problem-solving.

    What Makes This Puzzle Especially Difficult?

    Finding differences within a limited time frame requires fast and accurate visual processing. In this challenge, the images of the grandma and her dog look almost identical at first glance, but small differences are hidden within fine details. These changes are carefully placed to test your ability to separate tiny variations from the overall image.

    When time is limited, the brain often focuses on larger, more noticeable elements, causing smaller details to be overlooked. Some differences are so subtle that they only become visible when each part of the image is examined closely.

    The 8-second countdown adds another layer of difficulty. Working against the clock increases pressure, forcing your brain to stay alert while processing information quickly. This tests not just your visual memory, but also your speed and mental flexibility.

    Smart Ways to Spot the Differences Faster

    Success in any “Spot the Difference” puzzle depends on careful observation. These tips can help improve your chances of finding all three differences in time:

    Pay Attention to Small Details: Major elements like the grandma and the dog usually stay the same. Look closely at minor details such as clothing, accessories, or background items where changes are more likely.

    Scan the Image Systematically: Avoid jumping around the picture. Start from one corner and move section by section. This organized approach helps prevent missed details.

    Watch for Color and Shape Variations: Many differences involve slight changes in color, size, or shape. Carefully examine areas like clothing, objects, and the dog’s posture.

    Stay Calm Under Time Pressure: The short time limit can feel stressful, but rushing often leads to mistakes. Stay focused and look for one difference at a time.

    Practice Regularly: The more puzzles you solve, the faster your brain becomes at spotting differences. With practice, your visual processing and observation skills naturally improve.

    Mental Benefits of Playing Spot-the-Difference Games

    These puzzles are more than just fun challenges. They help improve attention span by requiring sustained focus on visual details. Over time, this can support better concentration in daily tasks.

    They also strengthen pattern recognition skills. By repeatedly comparing similar images, your brain becomes better at identifying small inconsistencies, a useful ability in many real-world situations.

    Another key benefit is enhanced visual memory. As you analyze and compare images, your brain quickly stores and recalls visual details. This skill is essential for everyday activities such as reading, driving, and recognizing faces.

    Three Key Differences in the Grandma and Dog Puzzle

    This puzzle includes three carefully hidden changes between the two images. Here’s a clear breakdown of what to look for:

    Grandma’s Collar: In the second image, the grandma’s collar differs in both shape and color. This subtle alteration stands out once you focus on her clothing.

    Dog Treat Bowl: A banana appears next to the treats in the bowl in the second image. This item is missing in the first image.

    Dog’s Chest Patch: The shape of the patch on the dog’s chest changes slightly in the second image, making it a small but important detail.

    Each difference is designed to test your memory and attention. None are instantly obvious, which makes careful inspection essential for success.

    Final Thoughts: Can You Beat the Clock?

    “Spot the Difference” puzzles like this one offer a fun and effective way to challenge your visual skills and keep your mind active. Whether you aim to finish before the timer runs out or simply enjoy the process, these puzzles help sharpen focus and improve attention to detail. The next time you try one, stay calm, observe closely, and see how quickly you can uncover every difference.

  • Plank Hold Timing Explained: The Ideal Plank Durations That Build Core Strength Based on Age

    Plank Hold Timing Explained: The Ideal Plank Durations That Build Core Strength Based on Age

    The floor presses cool against your forearms. Your toes grip the mat, legs engaged, and breathing settles into a steady rhythm. Between the tension in your core and the focus in your mind, a question arises: “How long should I hold this plank?” Ten seconds? Thirty? Two minutes that feel endless? Planks aren’t one-size-fits-all. They are a dynamic interplay between your body and gravity, evolving as you age. What feels strong at 18 can become challenging at 48 or demand extra care at 68. Across all ages, your core remains the foundation—supporting your spine, protecting your back, and allowing fluid movement. Determining the ideal plank duration starts with understanding your body as it is today.

    Plank Hold Timing: How It Works

    The Silent Strength Within

    Unlike noisy workouts with pounding feet or clashing weights, planks arrive quietly. Your body forms one long line: shoulders stacked over elbows or wrists, heels reaching back, head floating naturally. From the outside, it looks effortless. Inside, however, a subtle storm activates. Deep stabilizers engage: the transverse abdominis tightens like a supportive belt, the multifidus protects the spine, the diaphragm links breath to effort, and the pelvic floor provides steady support from below. These muscles thrive on calm, precise effort repeated consistently.

    For this reason, quality matters more than duration. A tense, collapsing one-minute plank offers less benefit and higher risk than a clean twenty-second hold performed with strong alignment and control. Time is important, but it should end when your form begins to falter, not after pushing through discomfort.

    The Truth About Long Planks

    Fitness culture often glorifies extremes: two-minute holds, five-minute challenges, viral clips of shaking bodies clinging on by willpower. The reality is quieter: beyond a certain point, holding a plank longer builds tolerance for discomfort more than meaningful strength. Research and expert coaching agree—short, precise holds repeated regularly are more effective for core strength and spinal health than occasional marathon efforts.

    This doesn’t mean long planks are harmful, only that the benefits diminish while the risk of fatigue-related misalignment rises. Over time, the question shifts from “How long can I endure?” to “How well can I support my body now?”

    Age, Gravity, and the Plank Equation

    As we age, the body’s response changes. Recovery slows, tissues stiffen, and balance demands more focus. A plank once effortless may now require intention—and that reflects biology, not weakness. Rather than a single rule, it’s helpful to follow flexible ranges based on your form and capability.

    Suggested Plank Hold Times by Age

    • Teens (13–19): 20–40 seconds, 2–4 sets, 2–4 days/week
    • 20s–30s: 30–60 seconds, 2–4 sets, 3–5 days/week
    • 40s: 20–45 seconds, 2–4 sets, 3–4 days/week
    • 50s: 15–40 seconds, 2–3 sets, 2–4 days/week
    • 60s–70s+: 10–30 seconds, 2–3 sets, 2–4 days/week

    These ranges are guideposts, not rules. What matters most is the quality of each second you hold.

    Your 20s and 30s: Strength Without Limits

    In this age range, recovery is fast, tissues resilient, and strength comes naturally. Thirty to sixty seconds is often ideal. The main risk is subtle breakdowns: hips dipping, shoulders creeping, or lower back warnings. Dividing effort into several shorter, controlled holds is more beneficial than one long, punishing attempt.

    Your 40s: Strength With Awareness

    By your 40s, your body communicates more clearly: old injuries, stiffness, or tightness appear faster. Most productive holds now range from 20 to 45 seconds, repeated a few times. Some days may allow longer holds, while other days stopping sooner is wiser. The focus shifts to sustainability and supporting posture over time.

    Your 50s, 60s, and Beyond: Resilient, Not Reckless

    Later decades require rethinking strength. Muscle mass may decline, balance may shift, and recovery may lengthen—but planks remain valuable. Short holds of 10–30 seconds with excellent alignment can be very effective. Modified versions like knee or incline planks are intelligent adaptations. Each well-supported second preserves posture, stability, and confidence in movement.

    Recognizing When to Stop

    Your body signals when a plank becomes risky: lower back sag, shoulder tension, breath-holding, or facial strain. Stopping at the first sign of form loss isn’t quitting—it’s smart training. This approach teaches your nervous system efficiency and prevents collapse over time.

    Making Planks a Daily Practice

    Planks don’t need to be dramatic. They can be sprinkled throughout the day: a short hold before coffee, another after work, one before bed. Over time, these small, consistent efforts build meaningful strength. The goal isn’t a record—it’s standing taller, moving confidently, and supporting your body in daily life. Hold as long as form feels honest. Rest. Repeat. That’s where lasting core strength lives.

  • WishCare Tinted Ceramide Lip Balm Promises Hydrated Smooth Lips With a Natural Finish

    WishCare Tinted Ceramide Lip Balm Promises Hydrated Smooth Lips With a Natural Finish

    This is more than an everyday lip balm—it’s a complete lip care essential that blends protection, hydration, and beauty in one effortless swipe. The WishCare Tinted Ceramide Lip Balm tackles the common struggle of dry, exposed lips while adding a soft, universally flattering natural pink tint suitable for any moment of the day. What truly sets it apart is its broad-spectrum SPF 50 PA+++ protection, created specifically for the delicate lip area, which is far more sensitive than facial skin. Powered by ceramides, the formula works to repair and strengthen the lip barrier for hydration that lasts. Added niacinamide and kojic acid help brighten the lips and reduce pigmentation, promoting a smoother, more even tone. The texture is lightweight and non-greasy, delivering comfortable all-day wear without stickiness. It’s also cruelty-free, paraben-free, and completely vegan, making it a clean beauty must-have.

    Is the sun protection sufficient for everyday outdoor use?

    Yes—absolutely. This lip balm offers SPF 50 PA+++ broad-spectrum protection tailored for the sensitive lip area, providing advanced defense against harmful UV rays. It maintains the ideal balance between sun protection, hydration, and comfort, making it suitable for daily wear. Whether you’re stepping out for errands, spending time at the beach, or staying outdoors for extended periods, it keeps your lips protected while preserving moisture and a natural-looking tint.

    WishCare Tinted Ceramide Lip Balm Duo for Long-Lasting Care

    One balm is great—but having two ensures uninterrupted care. The pack of two offers a practical solution for consistent lip protection, allowing you to keep one at home and one on the go. You receive the same trusted formula that delivers deep hydration, SPF 50 sun defense, and subtle color enhancement, now with added convenience. Ceramides, niacinamide, and kojic acid continue to support barrier repair and brightening, while the lightweight, non-greasy texture remains comfortable for daily use. This duo provides excellent value while helping maintain soft, smooth, and healthy-looking lips every day.

    Why opt for the pack of two instead of just one?

    The 2-pack option offers enhanced convenience and better value, making it easier to maintain consistent lip care wherever you are. With multiple balms for different locations—home, office, or travel—you’ll always have SPF 50 protection and ceramide-powered hydration within reach. Having a backup ensures continuous care, helping preserve lip health and natural color without interruptions.

    Your All-in-One Lip Care Essential

    The WishCare Tinted Ceramide Lip Balms show that you don’t have to settle for less. By combining advanced ceramide technology, high-level sun protection, and a naturally enhancing tint, they deliver comprehensive care in one simple product. There’s no need to choose between hydration and color or protection and comfort—this solution brings it all together. Explore the WishCare range and experience lip care that offers lasting protection, comfort, and a healthy-looking finish you can rely on every day.

  • Transform Your Body Composition With This Efficient 35-Minute Lower-Body and Core Strength Workout

    Transform Your Body Composition With This Efficient 35-Minute Lower-Body and Core Strength Workout

    Building muscle while burning fat can reshape your body from the inside out. Having more muscle supports a faster metabolism, while also improving overall strength and making daily movement feel easier. It can also help protect bones and joints, reduce the risk of injury, and support blood sugar control alongside better heart health. Beyond the physical changes, this approach can lift your mood and energy. Our new four-week Build and Burn training plan for Women’s Health COLLECTIVE members is designed to help you work toward these goals.

    This Session: 35-Minute Lower-Body and Core Strength Workout

    If you’ve already completed the full-body workout from the plan, this session shifts the focus to your lower body and core. You can follow PT Laura Hoggins in the real-time video, or save the workout below to complete whenever it suits you. Once you’re done, you can scroll to find details on how to trial the plan for free.

    Workout Details

    • Workout length: 35 minutes
    • Equipment needed: 2 x medium/heavy dumbbells or kettlebells
    • Choosing your weight: Pick weights that feel tough in the final two reps without sacrificing technique. Laura explains that progress comes from challenging your muscles, but the goal isn’t to hit failure. The weight should still allow clean form through every rep. If the target is 10 and you’re struggling around rep eight but can still complete reps nine and 10 with solid form, that’s a good match. Avoid selecting something so heavy that you can’t finish the full rep count.
    • How to do it: Complete three rounds of each triset or superset. You have one minute to get through all exercises in that set, then rest for whatever time is left until the minute ends. Rest 60–90 seconds between rounds.

    Warm-Up Moves to Prep Your Body

    • Hip 90/90s
    • Good mornings
    • Plank shoulder taps

    The Workout: Trisets and Supersets

    For each block, use one minute to complete all exercises listed. If you finish early, rest for the remaining time. Repeat each block three times, then rest for 60–90 seconds between rounds.

    Block A (1 Minute Total)

    • A1: Bulgarian split squats x 10 each side
    • A2: Shoulder press x 10
    • A3: Bent-over row x 10 each side

    Block B (1 Minute Total)

    • B1: Sumo squats x 10
    • B2: Glute bridges x 10
    • B3: Dead bugs x 5 each side

    Block C (1 Minute Total)

    • C1: Curtsy lunges x 10 each side
    • C2: Plank hold x 30–40 seconds

    Cool-Down to Finish Strong

    • Child’s pose and reach x 30 seconds
    • Supine rotation x 30 seconds each side
    • Arm stretch x 30 seconds each side

    Laura’s Tips and Easy Modifications

    Move with steady control and clear intention, prioritising quality reps rather than rushing for speed.

  • An Expert Helped Fix My Thinning Hair Here’s What Worked Plus the 13 Best Products for 2026

    An Expert Helped Fix My Thinning Hair Here’s What Worked Plus the 13 Best Products for 2026

    Hair thinning can feel frustrating and deeply personal, especially when it starts affecting confidence and daily styling routines. In the United States, more people are now seeking professional guidance rather than relying on trial-and-error solutions. After consulting a hair expert, I learned that progress comes from combining the right habits with targeted products. This guide breaks down what actually worked, explains why expert advice matters, and highlights standout hair care solutions worth considering for 2026, all while keeping expectations realistic and results-focused.

    Expert Advice for Thinning Hair Solutions

    The first thing the specialist addressed was understanding the cause behind thinning rather than masking it. They emphasized scalp health basics, consistent routines, and avoiding harsh styling habits that quietly worsen hair loss. Instead of chasing quick fixes, the focus shifted to long-term hair support through gentle cleansing, nourishment, and protection. The expert also stressed the importance of balanced product layering, ensuring treatments don’t cancel each other out. Most importantly, they explained how patience plays a role, as visible growth changes often take months, not weeks, to appear.

    What Actually Worked for Thinning Hair

    What made the biggest difference was adopting a routine built around consistency rather than complexity. Lightweight formulas helped avoid buildup, while ingredients targeting follicle stimulation focus supported healthier growth cycles. Switching to products that prioritize strand strengthening care reduced breakage, making hair appear fuller over time. The expert also recommended limiting heat tools and incorporating daily scalp massage to encourage circulation. Together, these small changes created noticeable density improvement without overwhelming the routine.

    Best Hair Products for Thinning Hair 2026

    Looking ahead to 2026, the best-performing products share a common theme: science-backed simplicity. Formulas designed for fine hair compatibility delivered results without weighing strands down. Ingredients aimed at root-level nourishment supported both scalp and hair health, while modern serums offered targeted thinning support for problem areas. Shampoos and treatments emphasizing clean ingredient blends stood out for maintaining long-term results rather than temporary volume boosts.

    Expert Insights and Final Takeaways

    The biggest lesson from expert guidance is that thinning hair doesn’t respond to shortcuts. Progress comes from understanding your scalp, committing to routines, and choosing products with purpose. Combining professional insight with realistic expectations leads to sustainable hair results that feel manageable over time. Rather than chasing trends, focusing on proven care habits and supportive formulas creates a routine that adapts as hair needs change, making confidence part of the process again.

    Product Type Main Benefit Best For
    Volumizing Shampoo Lightweight cleansing Fine, thinning hair
    Scalp Serum Targeted nourishment Sparse areas
    Strengthening Conditioner Reduced breakage Weak strands
    Growth Treatment Supports regrowth Ongoing thinning
    Heat Protectant Damage prevention Styled hair

    Frequently Asked Questions (FAQs)

    1. How long does it take to see results?

    Most people notice changes after consistent use for three to six months.

    2. Can thinning hair be reversed?

    It can often be improved or slowed with the right routine and products.

    3. Are expensive products always better?

    No, effectiveness depends more on ingredients and consistency than price.

    4. Should I see a specialist for thinning hair?

    Yes, expert guidance helps identify causes and avoid ineffective treatments.

  • It Cosmetics Launches a New Skin Tint Designed to Deliver Natural Coverage and Skin Benefits

    It Cosmetics Launches a New Skin Tint Designed to Deliver Natural Coverage and Skin Benefits

    It Cosmetics has expanded its complexion lineup with a new skin tint designed to deliver natural-looking coverage while supporting skin health, a trend that continues to gain popularity in the United States. As more consumers look for makeup that feels lightweight and works like skincare, this launch arrives at the perfect moment. The brand is known for blending dermatologist-developed formulas with everyday makeup needs, and this latest release aims to simplify routines. With a focus on comfort, glow, and skin-friendly ingredients, the tint targets people who want effortless coverage without sacrificing long-term benefits.

    It Cosmetics Skin Tint Focused on Natural Coverage

    The new It Cosmetics skin tint is built for those who prefer a fresh, barely-there finish that still evens out the complexion. Instead of masking skin, it enhances it with sheer buildable coverage that adapts easily to daily wear. The formula is designed to feel weightless, offering breathable skin feel that works well for long hours. Many users will appreciate the natural radiant finish, which avoids a flat or cakey look. By blending smoothly and minimizing uneven tone, the tint supports a no-makeup makeup style that fits modern beauty routines.

    Skin Tint Formula with Added Skin Benefits

    Beyond coverage, this It Cosmetics skin tint emphasizes skincare-inspired performance. The formula includes ingredients chosen to support hydration throughout wear, making it suitable for dry and combination skin types. It also aims to improve the look of skin over time with daily complexion support rather than temporary results. Many fans of the brand will notice the focus on comfort-first ingredients that help reduce tightness or heaviness. With consistent use, the tint promotes a smoother skin appearance, aligning with the growing demand for makeup that actively benefits skin health.

    Why It Cosmetics Skin Tint Fits Modern Makeup Trends

    The rise of skin tints reflects a shift toward simpler, more flexible beauty products, and It Cosmetics has positioned this launch to meet that demand. Consumers increasingly value quick daily application without complicated steps or tools. This tint supports multi-use convenience, working well alone or layered with other products. Its adaptable formula suits everyday lifestyle wear, whether for work or casual outings. By combining makeup and skincare in one step, the product responds to minimal routine preferences that are shaping the current beauty landscape.

    Summary and Overall Analysis

    Overall, the new It Cosmetics skin tint represents a thoughtful response to changing consumer expectations in the beauty market. By prioritizing skin-first makeup design, the brand continues to bridge the gap between cosmetics and skincare. The balance of coverage and care supports long-term skin confidence rather than quick fixes. For people seeking a polished yet effortless look, this launch highlights modern complexion innovation. As skin tints become a staple in everyday routines, this product stands out for its focus on comfort, versatility, and skin-friendly performance.

    Feature Details
    Product Type Skin Tint
    Coverage Level Sheer to Light
    Key Benefit Natural Finish with Skin Benefits
    Best For Daily Wear and Minimal Makeup
    Target Users All Skin Types

    Frequently Asked Questions (FAQs)

    1. What is the main purpose of the It Cosmetics skin tint?

    It is designed to provide natural-looking coverage while supporting overall skin health.

    2. Is this skin tint suitable for everyday use?

    Yes, its lightweight formula makes it ideal for daily wear.

    3. Does the skin tint offer skincare benefits?

    Yes, it includes ingredients aimed at hydration and improving skin appearance.

    4. Who should consider using this product?

    It is best for people who want minimal coverage with added skin benefits.

  • Trainers Call This Underrated Full-Body Move Essential for Reversing Sitting Damage

    Trainers Call This Underrated Full-Body Move Essential for Reversing Sitting Damage

    If you’re just starting with strength training, choosing the right exercises can feel overwhelming. With so many options available, it’s hard to know what truly deserves your time. According to trainer Monty Simmons, one movement stands out above the rest for beginners, especially for desk-bound lifestyles or anyone who spends long hours sitting: the Romanian deadlift (RDL). He explains that this exercise restores a fundamental movement pattern that many people gradually lose due to prolonged sitting.

    When we remain seated for most of the day, Simmons notes that the pelvis often shifts into a tucked position. Over time, this leads to a reduced ability to perform a proper hip hinge movement, which is essential for safe and efficient daily motion.

    How the RDL Restores Healthy Movement

    The hip hinge plays a vital role in coordinating the pelvis and thigh bone, allowing them to move together smoothly. This coordination supports everyday functional movement, from standing up to lifting objects safely. Including the RDL in your routine helps reinforce this pattern while also counteracting the negative effects of prolonged sitting.

    Simmons explains that the RDL helps retrain hip mechanics, allowing the hips to move fluidly again. This is particularly important when bending to pick something up, especially heavier objects. Using the RDL teaches your body to recruit multiple muscle groups at once rather than overloading just one area.

    He highlights that effective lifting should engage the glutes, hamstrings, and lower back together. When these muscles work in harmony, it becomes easier to manage heavier loads while reducing strain and lowering injury risk.

    Why the Romanian Deadlift Is Beginner-Friendly

    For those new to strength training, Simmons believes the RDL is often more suitable than a traditional deadlift. One key reason is accessibility. Performing a standard deadlift requires a high level of hip mobility, and not everyone can comfortably achieve the correct starting position.

    The RDL, by contrast, features a shorter range of motion, making it easier for beginners to control and perform correctly. This reduced range allows new lifters to focus on form and muscle engagement without being limited by flexibility.

    Mastering Proper RDL Form Before Adding Weight

    Correct technique is crucial when performing an RDL, both for injury prevention and effective muscle activation. Before introducing weights, Simmons recommends starting with a simple drill to learn the movement pattern.

    Sets: 3   Reps: 10

    • Stand with your feet hip-width apart.
    • Place a flat object, such as a barbell plate, across your thighs at the hip crease.
    • Lean forward slightly so your abdomen rests on the plate, keeping it in place.
    • Lower your hips as if sitting back, without losing contact with the plate.
    • Go as low as possible while maintaining a neutral spine.
    • Return to standing, keeping the plate in contact throughout the movement.

    How to Perform a Bodyweight Romanian Deadlift

    Once you feel comfortable with the drill, you can move on to a bodyweight RDL. Simmons advises mentally imagining the plate is still there, using that sensation to guide your movement.

    The goal is to notice three key sensations: a gentle hamstring stretch, a sense of glute tension, and clear glute activation. If you feel all three, your form is likely on point.

    Sets: 3   Reps: 10

    • Stand with feet hip-width apart and knees slightly bent.
    • Hinge at the hips while keeping your back flat.
    • Lower your torso until you feel a light stretch in your hamstrings.
    • Drive your hips forward and squeeze your glutes to stand tall again.

    Progressing to Dumbbell Romanian Deadlifts

    After building confidence with the bodyweight version, you can begin adding resistance. The movement remains the same, but you’ll hold a weight in each hand positioned close to the front of your legs.

    Simmons explains that introducing weight challenges your posture, as the load naturally encourages a rounded back. Your task is to maintain a flat back position while preserving the same muscle sensations you felt during earlier stages.

    He suggests starting with 13lb (6kg) dumbbells and increasing the load gradually over time. Keeping the weights close to your legs throughout the movement helps maintain proper alignment and control.

    Even as you advance to weighted RDLs, Simmons recommends continuing to use the plate drill and bodyweight version during warm-ups. This reinforces correct technique, activates the right muscles, and supports long-term movement quality.

  • Unexpected Nail Colour Has Experts Choosing It Over Red and Brown

    Unexpected Nail Colour Has Experts Choosing It Over Red and Brown

    January nail trends often lean towards milky white finishes and sheer pink tones, reflecting a clean, minimalist mood for the new year. With fresh starts on everyone’s mind, it’s no surprise that understated manicures take centre stage. Still, there’s something undeniably polished about choosing a deep, dark nail colour to kick off the year with confidence.

    While classic favourites like navy shades and forest green hues usually dominate winter manicures, experts have recently been spotlighting an equally refined option that feels timeless yet fresh. This sophisticated colour choice is quickly gaining attention and feels like the perfect update for a January salon visit. That shade, of course, is maroon nails.

    Blending the richness of brown with the warmth of red, this deep maroon tone delivers an effortlessly elegant look. It steps away from the festive red nails seen around Christmas while still maintaining a distinctly winter-ready feel for January and February. With growing interest reflected in recent Google trends, maroon also works as a stylish alternative to burgundy for anyone craving something familiar yet refreshed. It’s safe to say this shade will be everywhere in the weeks ahead.