Author: admin

  • Goodbye Hair Dye for Grey Hair: The Simple Conditioner Add In That Revives Natural Colour Gradually

    Goodbye Hair Dye for Grey Hair: The Simple Conditioner Add In That Revives Natural Colour Gradually

    For years, covering grey hair meant choosing between strong chemical dyes and inconsistent natural remedies. Now, a simple addition to your regular conditioner—using something you probably keep next to your coffee—is gaining popularity among those seeking a softer, natural way to darken hair.

    Why People Are Moving Away From Chemical Hair Dyes

    Grey hair appears when pigment-producing cells in hair follicles slow down or stop creating melanin. While aging is the most common factor, stress, genetics, smoking, nutritional deficiencies, and certain medical conditions can also play a role. The result is familiar: silver strands appear and gradually spread across the scalp.

    Most people initially opt for permanent or semi-permanent dyes for quick results. However, each session comes with downsides: harsh chemical formulas, long processing times, and ingredients that can irritate aging hair or sensitive scalps.

    Hair without pigment tends to be drier, more fragile, and less flexible. Regular coloring can make it rougher and more prone to breakage. Frequent dyeing strips moisture, damages the cuticle, and can leave white hair looking flat rather than shiny. Even so-called ammonia-free or gentle dyes rely on oxidative reactions that alter hair structure—fine for thick hair at 25, but harsh on delicate strands at 50. Plant-based options like henna and indigo offer alternatives but can produce unpredictable results, often leaving colors too warm or dull and difficult to correct professionally.

    The Cocoa Conditioner Hack Everyone’s Talking About

    This is where unsweetened cocoa powder comes in—not the sugary kind, but plain baking cocoa. Rich in natural pigments and plant compounds, it lightly stains hair without harming the protective outer layer. Cocoa acts like a gentle filter, adding a subtle brownish tint to grey hair while also nourishing it.

    Cocoa contains flavonoids and tannin-like molecules that attach to the hair surface. On light or grey hair, this creates a soft darkening effect that builds with repeated use. On darker hair, it adds depth and warmth rather than dramatically changing the color. Additional benefits include antioxidants to protect hair from environmental stress, natural softening agents for manageability, and mild astringent properties that help balance scalp oil.

    How to Properly Mix Cocoa Into Your Conditioner

    The method spreading across beauty forums is simple and cost-effective. You only need a bowl and a spoon. Use this routine on freshly washed, towel-dried hair, starting once or twice a week:

    • Place a generous amount of your regular conditioner in a clean bowl. For best results, choose a silicone-light or silicone-free formula.
    • Add 2–4 tablespoons of unsweetened cocoa powder, adjusting for hair length and thickness.
    • Stir until you have a smooth, chocolate-brown paste with no lumps.
    • Section hair with clips and apply, focusing on grey areas at the temples, parting, and crown.
    • Comb through with a wide-tooth comb to distribute evenly from roots to ends.
    • Leave on for 20 minutes; for resistant white hair, extend to 30 minutes.
    • Rinse thoroughly with lukewarm water, massaging the scalp to remove residue.

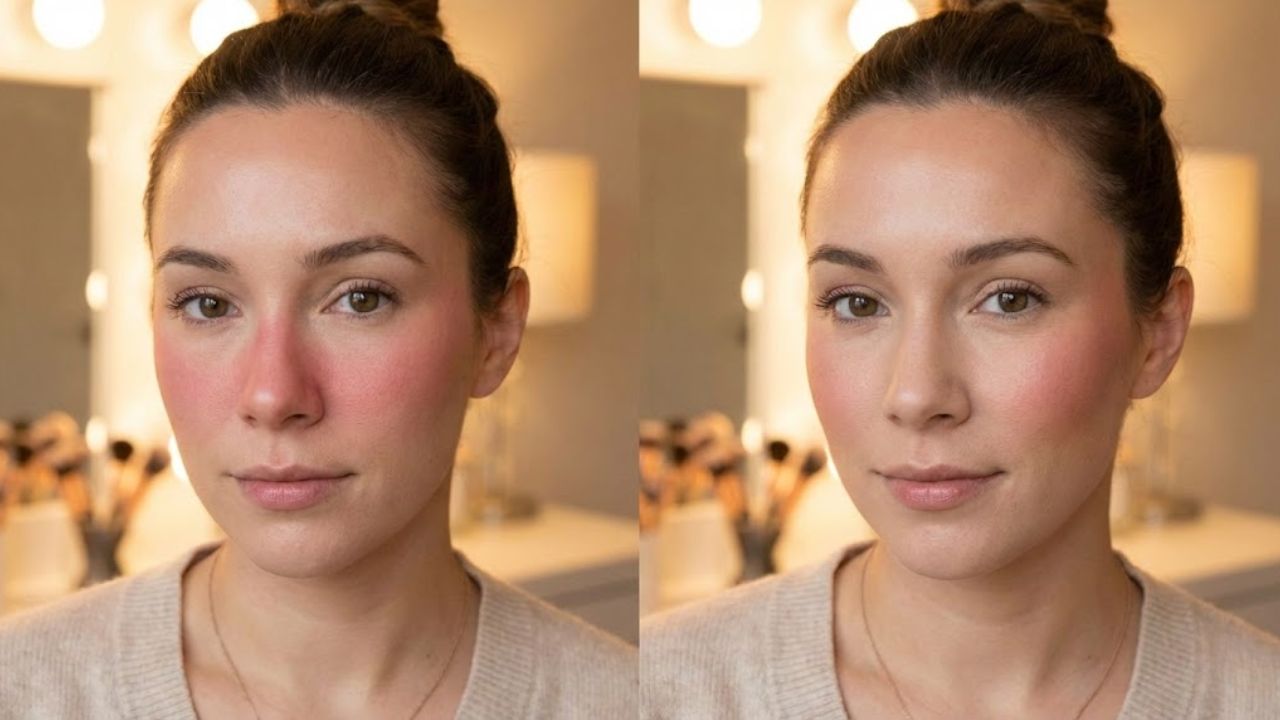
    Most users notice a soft shift from bright white to a cooler, smoky brown after the first application. The effect deepens over time, blurring contrast and creating a subtle halo rather than a full color change. This helps grey roots appear less stark between salon visits.

    Who Benefits From Cocoa-Enhanced Conditioner—and Who Should Be Cautious

    This method works best for those with scattered grey hairs rather than fully white hair. It suits blondes or light brunettes whose grey strands stand out and anyone with a sensitive scalp seeking a gentler option. Those preferring gradual change over dramatic transformation will appreciate it. For very dark hair, cocoa will not fully conceal grey roots but can soften transitions between new growth and previously colored hair, creating a tinted gloss effect.

    Expected Results by Hair Type

    • Mostly white or grey, fine hair: Soft beige-brown tone, hair appears glossier and smoother.
    • Salt-and-pepper brown hair: Grey strands blend, creating a softer, even shade.
    • Dark brown or black hair with limited greys: Subtle warm undertone shift.

    How Cocoa Works on the Hair Shaft

    Grey hair is rougher because its outer layer lifts more easily, causing frizz and tangles. Conditioner smooths this layer, allowing hairs to glide past each other. Cocoa particles settle on the hair surface, gradually building color over multiple applications without penetrating deeply like permanent dyes. This provides gentle protection and color without altering the hair’s internal structure, improving texture and manageability for aging hair.

    Cocoa Compared With Other Grey Hair Solutions

    Cocoa fits among options like herbal rinses, tinted conditioners, or professional grey blending treatments. It is affordable, easy to find, and conditions hair while adding subtle color. Drawbacks include variable results depending on hair shade and the need for thorough rinsing to avoid dullness.

    Daily Care Tips to Keep Grey Hair Healthy

    Effective grey hair care extends beyond cocoa treatments. Stress, smoking, sun exposure, and low-antioxidant diets accelerate silver hair. Cocoa users often adopt gentler routines: UV-protective sprays, less heat styling, extended washing intervals, and nourishing masks rich in proteins and lipids. Some colorists recommend homemade masks after salon visits to refresh tone without further chemical exposure. Cocoa offers a gradual, reversible approach that complements these healthy habits, bridging the gap between professional coloring and natural grey transition.

  • Facial Balance Tip: Why Applying Blush Too Close to the Nose Alters Proportions

    Facial Balance Tip: Why Applying Blush Too Close to the Nose Alters Proportions

    The girl in the café looked perfect from a distance. Her eyebrows were shaped well and her eyeliner was neat & her lips were shiny. When she moved closer to the window something seemed wrong. Her cheeks had a thick stripe of color right beside her nose like she had just run up several flights of stairs. The makeup quality was fine but it was applied in the wrong place. You have probably noticed this before while looking at social media or passing people on the street. Sometimes a face has blush that sits too close to the center and it makes the features look smaller & compressed. It looks fine when you check it in your bathroom mirror but once you see it on camera or in natural light it throws off the entire balance of the face. That small difference of about two centimeters separates a fresh healthy look from a crowded appearance. This is not just about style preferences. It comes down to basic geometry.

    How Blush Placed Too Close to the Nose Can Disrupt Facial Harmony

    When blush sits too close to the nose it can make your face look narrower and more strained. The middle of your face becomes the focal point while everything else like your eyes and cheekbones gets pushed to the background. Rather than lifting your features the color drags them inward. The outer parts of your face seem to disappear. Blush near the nostrils can also highlight any redness around your nose and make your skin look tired instead of fresh. From far away this placement can look puffy or crowded instead of soft and romantic. What should add dimension ends up flattening everything. Look at selfies taken under harsh office lights and you notice it right away. The person looks like themselves but something feels off. Their nose seems more prominent. The center of their face looks busy. Their outer cheeks appear strangely pale. In photos blush placed near the nose tends to blend with any natural redness around the nostrils. Your phone camera makes it worse because it sharpens contrast and shadows so the blush near your nose becomes a solid block of color instead of a gentle glow. Some makeup artists who work in television mention a danger zone around the nose where too much color makes the face look smaller and more exhausted especially under studio lights. That explains why red carpet blush is always placed higher & further out. The reason is straightforward. Your face is not a flat surface but a mix of vertical and horizontal lines. Blush affects how those lines appear. When color is placed very close to the nose your vertical line from forehead to chin looks shorter and more compressed.

    Strategic Blush Placement That Enhances Features Instead of Compressing Them

    Start with a basic reference point by drawing an imaginary vertical line down from the center of your eye. This marks your inner boundary. Your blush should not cross this line toward your nose. Put your brush on the part of your cheek that naturally curves out when you make a slight smile. You don’t need a big grin but just a small lift of your mouth. Apply your color there and then blend it outward toward the top of your ear in a soft comma shape. Apply thin layers because it is easier to add more color than to remove a mistake that has spread too close to your nose. If you are unsure then leave a small gap of bare skin between the side of your nose and where your blush begins. Many people apply blush too far inward because they follow advice to focus on the apples of the cheeks and they take it too literally. When rushing in the morning the brush lands too close to the nostril and this becomes a habit. On round faces this can make cheeks appear fuller instead of lifted. On angular faces it can make the center of the face look harsh and draw attention away from the cheekbones. On textured skin the color near the nose tends to settle into pores and fine lines. Everyone has experienced catching their reflection later in the day and wondering why they look flushed or tired. Usually the problem is not how much blush you used but where you placed it. A small adjustment outward can improve how you look in photos all day. There is a simple mental checklist to help you keep blush away from your nose while still looking natural:

    – Leave at least one finger width of bare skin between your nose and blush.

    – Angle your brush slightly upward instead of straight across your face.

    – Remove excess product from the brush before touching your skin.

    – Blend more on the outer edge than the inner edge.

    – Step back from the mirror and look at your face from arm’s length away.

    Let’s be honest because nobody spends ten minutes blending blush every single day. That is why simple visual guidelines like the center-of-eye line & the one-finger gap are more useful than complicated contour instructions. They work whether you are using an inexpensive cream stick or a luxury compact & whether you are half asleep before work.

    Creating Personal Facial Balance Beyond Social Media Makeup Trends

    There is no single correct way to place blush because it depends on the effect you want to create. Moving blush slightly toward the nose can give a cute & youthful appearance on certain faces like a natural cold-weather flush. However if you go too far with this placement it stops looking intentional and starts looking unbalanced. Every face is different and everyone has their own preference for how much color they want to show. Some people enjoy a bold central blush that looks playful and inspired by Korean beauty trends. Others like just a hint of color placed high on the cheekbone that works almost like a subtle filter. The key is understanding how each placement affects your overall look and then making deliberate choices instead of just following habits. The next time you put on blush you should try a simple test. Apply blush on one side the way you normally do with the color placed closer to your nose. On the other side place it slightly higher & further out toward your temple. Step back and take a photo in natural daylight so you can compare the two sides properly. Look at which side makes your eyes stand out more. Notice which side allows your nose to blend naturally into your face instead of becoming the main focal point. Think about which side feels more authentic to your personal style rather than copying the last makeup tutorial you watched late at night. Showing these comparison photos to a friend can give you surprising insights. This exercise is not about criticizing your features. It helps you understand how color placement guides where people look first. The more you experiment with different placements the more you realize your face is not something that needs fixing but rather a canvas you can arrange in different ways. Placing blush near your nose is just one small detail in your overall makeup look but it makes a significant impact. Once you understand this principle you can adjust the intensity whenever you want. The goal is not to hide anything but simply to control what feature you want others to notice first.

    Key Focus Area Updated Guidance Why It Matters
    Space Near the Nose Keep a narrow section of bare skin between the nose and blush placement Avoids a congested center and maintains natural facial balance
    Blush Positioning Rule Stop application before reaching the vertical line below the eye’s center Creates a lifted effect rather than a weighed-down or puffy look
    Blending Direction Diffuse color outward and gently upward toward the temples Visually opens the face, defines cheekbones, and looks flattering on camera
  • After 70: Gerontologists Say One Specific Movement Habit Boosts Healthspan More Than Walking or Gyms

    After 70: Gerontologists Say One Specific Movement Habit Boosts Healthspan More Than Walking or Gyms

    A grandfather bends down to pick up a toy without grimacing. An 80-year-old neighbor climbs the stairs with a grocery bag as if she were 40. That day, in a rehabilitation room in Boston, a gerontologist was quietly observing patients over 70. Some were walking on a treadmill, others were pedaling slowly. And at the back of the room, a 76-year-old woman kept standing up from a chair—again and again—without stopping.

    The doctor smiled, almost amused. He didn’t take notes on the treadmill or the bike, but on that precise movement: standing up, sitting down, repeating. Nothing spectacular. No music, no technology, no visible strain. Just a movement the body has known forever, but practices less and less with age.

    Later, in the hallway, he made a remark that became famous among his students: “Walking is good. But this is what keeps people independent.” He was referring to that simple, repetitive movement that gerontologists now consider a quiet pillar of healthspan after 70.

    The Movement Pattern Gerontologists Emphasize

    Ask ten people over 70 how they stay fit, and most will mention walking, sometimes gentle exercise classes. Yet gerontologists who study falls, fractures, and loss of independence point to another key indicator: the ability to stand up and sit down, again and again.

    This sequence—sitting, standing, bending, reaching, lowering, rising—separates a fragile body from a resilient one. It isn’t glamorous, but it perfectly matches what daily life demands: picking up keys, gardening, playing on the floor with a grandchild, getting up at night to use the bathroom.

    Researchers refer to these as “transitional movements”: moving from lying to sitting, sitting to standing, standing to walking, and back again. The data are clear: the easier and more frequent these transitions are after 70, the lower the risk of severe disability, hospitalization, and loss of independence. Walking supports the heart. Transitions support daily life.

    What Simple Clinical Tests Reveal

    In Brazil, a striking study used a surprisingly simple test: sitting down on the floor and standing back up without using hands or knees. Participants who struggled had a higher risk of mortality in the following years. It wasn’t an athletic challenge—it was a window into real-world mobility.

    In Europe and the United States, similar chair-based tests are used: how many times can a 75-year-old stand up and sit down in 30 seconds without using their arms? These numbers predict far more than leg strength—falls, independence at home, recovery after surgery. The sit-to-stand test often reveals more than a step counter on an app.

    Margaret, 79, in Manchester, walked every day around the same block. She thought she was doing everything right. After a fall in her kitchen, she realized she couldn’t get up on her own. Her geriatrician didn’t prescribe a treadmill, but a floor and a mat. For months, she simply practiced getting down and standing back up safely. Today she still walks, but what reassures her most is knowing she can get back up if she slips.

    Why These Movements Are So Powerful After 70

    Standing up and lowering down engage the entire system: muscles, joints, balance, brain, and circulation. Standing challenges the legs and heart. Lowering with control demands stability, coordination, and core engagement. No sophisticated machine can fully replicate this complexity.

    Walking is linear and predictable. Transitions are three-dimensional and rooted in real life: bending, rotating, reaching sideways. When these patterns disappear, the body doesn’t just grow weaker—everyday tasks turn into obstacles, and healthspan quietly shrinks.

    There’s also a psychological component. Those who maintain these transitions retain motor confidence. They dare to kneel, sit on the floor, travel, accept invitations. Avoiding these movements “to be safe” does the opposite—it reinforces fear and gradually shrinks the world around them.

    How to Train the Movement That Protects Healthspan

    Gerontologists agree on a simple recommendation: deliberately practice rising and lowering movements for a few minutes, several times a week. The basic exercise is the sit-to-stand from a stable chair: feet firmly planted, arms crossed or lightly resting on the thighs, stand up with control, then sit down slowly.

    Once comfortable, the pattern can expand: moving from bed to sitting, then standing; kneeling on a cushion; sitting on the floor; then rising step by step. Done mindfully, this becomes a full functional ladder, focused on familiarity rather than performance.

    For some, the starting point is very modest: holding a table, lifting the hips slightly, then sitting back down. For others, it evolves into full floor rises, using hands if needed. The principle remains the same: moving through levels, not just forward in a straight line.

    Let’s be honest—few people do this daily. The trick is to weave it into everyday life: five stand-ups before each meal, a few extra repetitions during bathroom visits, or during TV commercial breaks.

    If going down to the floor feels scary, that’s not failure—it’s information. Start higher. Use a bed or sturdy chair as support. As ability improves, fear recedes, and movements once considered risky become ordinary again.

    Waiting to be “fitter” is the most common mistake. The transition itself creates fitness. The goal isn’t achievement, but kind repetition. After 70, muscles still respond—just more slowly.

    Rethinking How We View Aging

    When gerontologists say these movements support healthspan better than walking alone, they’re inviting a shift in perspective. Healthy aging isn’t just about distance covered, but about the ability to move between levels.

    Many families discover too late that a parent who “walked every day” can no longer stand up alone after hospitalization. Sharing this reality earlier turns ordinary gestures—standing, sitting, bending—into daily investments.

    There’s also a social dimension. These exercises can become shared moments: a game with a grandchild, a weekly routine with neighbors. That makes training more human and less medical.

    Finally, there’s an emotional resonance. Standing up physically mirrors the ability to rise after hardship. For some, reclaiming this movement opens doors again: traveling, moving homes, starting a hobby, sometimes even a new relationship.

    After 70, the future isn’t written only in medical records. It hides in how a person sits, stands, or reacts when something falls to the floor. These micro-moments contain powerful clues about tomorrow’s independence.

    Key Takeaways

    Transitional movements: Regularly practicing sit-to-stand and floor-to-stand movements predicts independence better than step counts.

    At-home practice: Chair rises, bed-to-chair transitions, and gradual floor work, two to three times per week, with no equipment.

    Healthspan mindset: Shift from “how much I walk” to “how easily I change levels” for more meaningful goals after 70.

  • Neither Nivea Nor Neutrogena: Experts Rank a Different Moisturizer as Best for Hydration and Skin Health

    Neither Nivea Nor Neutrogena: Experts Rank a Different Moisturizer as Best for Hydration and Skin Health

    The woman didn’t browse. She walked past the towering blue Nivea tins and the familiar Neutrogena bottles as if they belonged to a story she already knew by heart. She stopped at a modest shelf, picked up a plain tube, and leaned toward the pharmacist. “This is the one you mentioned, right?”

    Two nearby customers noticed. One subtly lifted a phone and snapped a photo. The moment was brief, barely ten seconds, yet it carried weight. Something had shifted, quietly.

    For months, skincare professionals have whispered about this “quiet winner.” Now, everyday shoppers are starting to follow.

    The twist? It isn’t a heritage brand. It’s a science-led moisturizer built around hydration and barrier health, not nostalgia or flashy packaging.

    The understated moisturizer dermatologists keep recommending

    Ask dermatologists what most people misunderstand about moisturizers, and you’ll hear the same tired breath. Choices are still made based on fragrance, texture, or habit. We reach for Nivea or Neutrogena out of familiarity, not understanding.

    What’s changing is strikingly simple. Experts are increasingly naming a ceramide-rich, barrier-supporting cream as their top daily choice. One product appears again and again in clinics and online discussions: CeraVe Moisturizing Cream, the white-and-blue tub that looks more medical than glamorous.

    On paper, it’s plain. On skin, it performs.

    Why clinics are quietly changing their advice

    From New York to Berlin, dermatology practices are adjusting their default recommendations. In a 2023 survey of board-certified dermatologists in the US, CeraVe Moisturizing Cream appeared far more often than classic high-street names when doctors listed what they personally suggest for dry, stressed, or post-treatment skin.

    This isn’t marketing hype. It’s what shows up when professionals talk candidly about what actually works.

    Online, the message is even louder. TikTok and Reddit are filled with people managing eczema, acne, rosacea, or winter-dull skin, sharing before-and-after photos and praising the same unassuming formula. One viral clip summed it up simply: “I stopped chasing glow and started fixing my barrier.”

    Why barrier-focused creams are now ranked number one

    To understand this shift, it helps to drop the idea of moisturizer as a final cosmetic step. A modern hydrating cream acts more like a repair system. CeraVe combines three essential ceramides (1, 3, 6-II), hyaluronic acid for water retention, and an MVE delivery system that releases hydration gradually over hours.

    While Nivea and Neutrogena offer effective hydrators, many flagship products still focus more on comfort and occlusion than on rebuilding the skin barrier at a cellular level.

    Barrier-first formulas restore the “mortar” between skin cells, helping moisture stay in and irritants stay out. That’s why dermatologists keep repeating one message: fix the barrier, and everything else becomes easier.

    How professionals suggest using the new frontrunner

    With barrier creams, timing matters. The ideal moment is on slightly damp skin, right after cleansing. Gently pat dry, leaving a trace of moisture, then warm a pea-sized amount between your fingers before pressing it onto the skin.

    This isn’t about aggressive rubbing. It’s about laying down a soft, even seal that locks in water and allows ceramides to integrate properly. At night, many dermatologists recommend a slightly thicker layer, almost like a gentle moisture wrap. In the morning, a lighter application works well under sunscreen.

    One winter evening in London, a 29-year-old nurse finally simplified her routine. She followed just three steps: gentle cleanse, CeraVe Moisturizing Cream, and high-SPF sunscreen in the morning.

    Two weeks later, makeup stopped clinging to flakes, and redness around her nose eased. Her life hadn’t changed. Her shifts were still long, the coffee still strong. But her skin had stepped out of crisis mode. On hard days, that matters.

    Where most routines quietly go wrong

    Many people invest in a dermatologist-approved cream, then layer it over harsh toners, scrubs, and multiple active serums. The barrier never gets a chance to recover, leaving the moisturizer in constant repair mode. Soyons honnêtes, almost no one maintains a perfect routine every single day.

    Dermatologists often suggest a pause that sounds almost too easy: on irritated or dehydrated skin, stop aggressive actives for 10–14 days and let the moisturizer take center stage. Once tightness and redness settle, products can be reintroduced slowly.

    As one French dermatologist puts it, “You can’t decorate a house while the walls are crumbling.”

    A mindset shift from pretty jars to skin health

    The move away from classic brands toward barrier-focused creams reflects a deeper change. People are shifting from “what looks nice” to “what keeps my skin calm long-term.”

    That change favors ingredients over branding, formulas that don’t sting, and textures that work quietly on sensitive or acne-prone skin. It values consistency over novelty.

    There’s also an emotional layer. On bad skin days, the mirror feels accusatory. On better days, it fades into the background. A stable, deeply hydrating cream doesn’t solve everything, but it removes one major stress: the constant guessing game.

    On a broader level, this return to simple, dermatologist-approved moisturizers is a gentle rebellion against overcomplication. People want fewer steps, fewer surprises, and more reliability.

    Key takeaways from the shift to barrier-first care

    • Focus on ceramides: Modern top-rated moisturizers prioritize barrier repair to strengthen skin over time.
    • Simpler routines win: Cleanser, ceramide cream, and SPF often outperform crowded shelves.
    • Barrier-first thinking: Calming the skin barrier reduces dryness, redness, and sensitivity.
  • Goodbye Hair Dyes Grey Coverage Trend Is Rising – It Softens Silver While Keeping Hair Looking Natural

    Goodbye Hair Dyes Grey Coverage Trend Is Rising – It Softens Silver While Keeping Hair Looking Natural

    The group chat is buzzing, the sink timer is already ticking toward 35 minutes. She pauses. The sharp smell of ammonia, the stained towel, the familiar doubt: “Didn’t I just do this a few weeks ago?” Silver is back at her temples, roots louder than her lipstick. She exhales, half-laughing. Keeping grey hidden feels like a full-time job, just to silence what her hair insists on saying.

    But outside the bathroom, something is changing. In salons, on TikTok, even over office coffee breaks, people are quietly sharing alternatives. A new approach to grey hair is spreading—one that doesn’t look artificial, doesn’t punish the scalp, and doesn’t steal entire Sundays. It doesn’t shout “fresh dye.” It murmurs good rest, healthy skin, balanced life.

    Grey hair hasn’t vanished.

    A subtle shift away from full-coverage dye

    Step into a busy salon on a Saturday morning and listen closely. Fewer clients ask for “total coverage”; more request “soft blending”, “natural brightness”, or “low-maintenance grey”. The movement isn’t about erasing grey. It’s about dissolving it into the overall look. The line between dyed and natural is intentionally blurred.

    Colorists describe it as a truce: not an all-out battle against grey, but not full surrender either. Fine highlights, delicate toners, a light gloss for shine—nothing heavy or lacquered. Under salon lights, grey strands turn into reflections rather than flaws. The effect feels less like a makeover and more like you on an exceptionally good day.

    On social media, the trend is unmistakable. Searches for “grey blending” and “root smudge” have surged over the past two years. A London salon owner shared that nearly half of her clients over 40 no longer want classic root dye. They ask for softer roots, movement, and reduced contrast. One 52-year-old arrived upset after a harsh dark dye that made her features look severe on Zoom. Three months later, lowlights and a pearl glaze gave her a hairline that finally matched her skin tone and eye colour.

    She didn’t look artificially young. She looked rested. Like someone who sleeps well, drinks water, and knows when to say no. That’s the promise of these techniques: a quieter, calmer youthfulness. Not rewinding to 25, but dimming the harsh spotlight of obvious regrowth and flat, opaque colour.

    Why softer colour works better on mature hair

    This trend isn’t just about aesthetics. Solid, uniform dye can be unforgiving on mature hair. It wipes out natural variation, creating a helmet-like effect that draws the eye. The darker the colour, the faster each new grey root announces itself. That stark contrast pulls attention straight to the scalp and forehead, where time already leaves traces.

    Blending, glazing, and toning work in the opposite direction. They scatter attention. Soft transitions replace hard lines, and the eye reads harmony instead of age. Subtle dimension and shine can lift the face visually—no needles, no filters. There’s also a mental shift: instead of fighting each new grey strand, you decide how it joins the overall picture. The battle becomes styling.

    Covering grey without actually covering it

    The modern approach begins with a simple principle: match your hair to your life, not to a colour chart. Colorists talk about “grey blending” and “soft coverage”. Typically, they start with gentle lightening around the face, then weave ultra-fine highlights and lowlights through the greys. Rather than hiding every white strand, nearby shades help it visually melt away.

    A clear or lightly tinted gloss follows. Unlike traditional dye, this gloss revives dull fibres, adds slip and reflection, and subtly adjusts tone—warmer, cooler, smokier—without harsh blocks of colour. Transparency is key. Grey remains visible, but it reflects light instead of absorbing it. On short hair, a toner every six to eight weeks may be enough. On longer hair, a face-framing glaze can do most of the work.

    A common mistake is attempting to leap from full coverage to no dye overnight. The shock is often unsettling. Transitioning works best in stages: extend time between root touch-ups, soften the root melt, then gradually lift the overall shade closer to natural greys. It’s less a dramatic reveal and more an editing process.

    Another trap is clinging to the exact shade worn at 25. Skin tones evolve, undertones shift, and once-flattering colours can turn harsh. A too-dark, cool brown on warmer, drier skin exaggerates every line. Gentle caramel threads, warm beige, or smoky taupe can restore softness to the face. Being honest, few people maintain this alone—but two or three strategic salon visits can set up a full year of easy hair.

    The emotional side of grey blending

    Colorists specialising in this movement say the emotional impact matters as much as technique.

    “I’m not just colouring hair,” says New York colourist Maya R., who shares grey-blending transformations with her 300k followers. “I’m helping people renegotiate their relationship with age. The aim isn’t to look 20—it’s to make 52 look luminous and unapologetic.”

    Clients report the same benefits: less panic before events, fewer emergency box dyes, more carefree hair-up and hair-down moments. The freedom comes from coherence, not perfection. A few practical habits support the process:

    • Ask for soft coverage or grey blending, not total erasure.
    • Bring reference photos taken in daylight.
    • Plan a six-month transition, not a one-visit fix.
    • Use sulphate-free shampoos to protect tone.
    • Finish with light creams or oils that enhance texture.

    Rethinking ageing, starting at the roots

    On a crowded commuter train, the old pattern still appears: opaque brown hair, a sharp white parting, an anxious hand checking roots. Nearby, a newer scene unfolds. Softly marbled strands, silver and beige mingling, a gentle glow around the face. It doesn’t say “salon yesterday”; it says “I’m taking care of myself, my way”. The second glance lands on the eyes, not the hairline.

    That’s the real promise here. Not eternal youth, but control over first impressions. Grey blending, glazes, toner washes—technical terms for a very human desire: to be seen fully, not reduced to a white stripe or a flat block of colour. When hair looks intentional yet lived-in, the face feels expressive, not tired. Lines remain, but they stop being the only story.

    Socially, the idea spreads fast. Friends trade tips about the one appointment that changed everything. Daughters compliment their mothers’ silvery highlights. Colleagues quietly ask for the name of that colourist who makes grey look expensive, not neglected. At its core, this trend rewrites an old rule that said you either dye obsessively or give up. There’s now a realistic middle ground where roots grow, life happens, and confidence stays intact.

    We’ve all faced that harsh bathroom light moment. This new approach doesn’t promise to erase it forever. It offers something gentler: softer mornings, kinder mirrors, and a hair story no longer stuck between denial and resignation. That may be why so many people share their transitions online, root lines included. They’re not just showing colour formulas—they’re sharing a new mindset: “I still care. I just care differently now.”

    Key elements of the grey-blending approach

    • Grey blending: Fine highlights, lowlights, and toners mixed with close shades to soften regrowth and extend time between salon visits.
    • Glosses and glazes: Transparent or lightly tinted treatments that boost shine and refine tone without flat, harsh colour.
    • Gradual transition: A step-by-step move from full coverage to softer, lived-in colour that protects hair and supports confidence.
  • Not Once a Week, Not Alternate Days: Dermatologists Reveal How Often You Should Wash Hair for Scalp Health

    Not Once a Week, Not Alternate Days: Dermatologists Reveal How Often You Should Wash Hair for Scalp Health

    One reel claims you must wash your hair every day or your scalp will clog. The next warns that washing too often will destroy your natural oils. She sighs, sets the bottle down, then picks it up again. Same argument, different morning.

    We confidently debate skincare routines, workout cycles, and intermittent fasting. Yet ask a simple question – “How often do you wash your hair?” – and guilt creeps into the answer. Too often. Not enough. Not the “right” way. Between curly-hair TikTok, glossy shampoo ads, and your mum’s old advice, the scalp barely gets a say.

    So when a dermatologist finally gives a clear response, it isn’t “once a week” or “every other day”.

    So, How Often Should You Really Wash Your Hair?

    The first thing dermatologists say is to stop chasing a magic number. Hair washing isn’t about rigid schedules. It’s about a living, reactive scalp and how it behaves day to day. Oily, itchy, tight, flaky, flat at the roots – these are signals, not failures.

    When London-based dermatologist Dr. Amrita Singh answers this question, she doesn’t start with calendars. She starts with symptoms. If the scalp feels greasy, smells off, or itching increases, that’s the cue. The idea that everyone should wash on the same fixed days is driven by marketing, not medicine.

    You can often spot over-washers easily. Their hair looks fluffy at the ends but stuck to the scalp. They feel “dirty” if they skip a day, then wonder why oil returns so fast. According to Dr. Singh, many have unknowingly pushed their scalp into constant overproduction mode.

    At the other extreme are once-a-week minimalists. Like Léa, 29, who stretched washes to eight days after seeing claims online. By day five, her scalp felt tight, roots collapsed, and fine flakes appeared. The reset she expected turned into discomfort.

    Why One-Size-Fits-All Hair Rules Don’t Work

    Dermatologists are watching hair-washing advice swing wildly online. Surveys show many people feel confused about wash frequency, often copying routines that don’t match their hair type. Oily and dry scalps end up treated the same, leading to irritation and frustration.

    Medically speaking, the scalp is simply skin with hair attached. It produces oil, sheds cells, hosts microbes, and reacts to hormones, stress, pollution, and climate. Wash too often with harsh products, and you strip its barrier, triggering more oil and inflammation. Wait too long, and sweat, dirt, and product build-up fuel itching and flaking.

    This is why neither “once a week” nor “every other day” holds up universally. A dermatologist considers hair type, lifestyle, and environment. Someone running marathons in a humid city won’t share the same needs as an office worker in a cold climate. The only universal rule is that your routine should match your scalp, not someone else’s.

    The Realistic Dermatologist-Approved Routine

    When pushed for a guideline, most dermatologists land in the same range: two to four washes per week for many people. Not a fixed plan, but a flexible window. If oil appears within 36 hours, you’ll lean higher. If your scalp feels calm after three days, the lower end may work.

    Dr. Singh keeps it simple in practice. Fine, oily hair often benefits from washing every one to two days with a gentle shampoo. Thick, curly, or coily hair usually does better with once or twice weekly washing using richer formulas focused on the scalp. Sensitive or flaky scalps may need a medicated shampoo once or twice a week, paired with a mild option on other days.

    In real life, very few people follow textbook routines daily.

    What Happens When You Wash Too Much

    Carlos, 34, worked in a busy restaurant kitchen and washed his hair twice daily to remove grease and smoke. Soon, his scalp burned and peeled, which he assumed was severe dandruff. In reality, he had over-stripped his skin barrier.

    After reducing to one gentle wash per day, then five times a week, and switching to a mild, fragrance-free shampoo, his redness and flaking faded within weeks. The fix was simple: less washing, better balance.

    What Happens When You Wash Too Little

    Maya, 26, with 3C curls, washed only once a week. By Friday, her scalp itched, flakes appeared, and discomfort set in. Instead of daily washing, Dr. Singh suggested a gentle mid-week scalp cleanse with a diluted, sulphate-free shampoo applied only at the roots.

    Two months later, her curls were unchanged, but her scalp felt calmer and more comfortable.

    Why Balance Matters More Than Rules

    Dermatologists notice clear patterns. Over-washers complain of tightness, itching, and rapid oil return. Under-washers mention odour, heaviness, and lingering discomfort. Both groups chase the same goal: light roots and a comfortable scalp.

    The logic is straightforward. Wash often enough to remove sweat, pollution, and product build-up before irritation sets in. Not so often that you damage the scalp’s protective lipid layer. Your “right frequency” depends on your life, not an idealised routine.

    How to Wash Your Hair the Way Dermatologists Recommend

    The method matters almost as much as frequency. Dermatologists repeat one rule: shampoo is for the scalp, conditioner is for the lengths. Start by thoroughly wetting hair with lukewarm water. Very hot water may feel good, but it strips oils faster.

    Use a small amount of shampoo appropriate to your hair length, emulsify it in your hands, and massage gently with fingertips, not nails. Work across the entire scalp, then rinse well. Repeat only if hair is heavily soiled or coated in products.

    Conditioner belongs from mid-lengths to ends, where hair is older and drier. Leave it briefly, then rinse until hair feels smooth but not slippery. Those with fine hair can apply conditioner only to the final third of their lengths. Sensitive scalps should avoid heavy formulas near the roots.

    Letting Go of Shame Around Hair Washing

    There’s surprising shame tied to hair habits. People apologise for washing “too much” or “too little”, as if shampoo carried moral weight. It doesn’t. There are only cause-and-effect reactions, and those can change.

    Common mistakes include scrubbing with nails, piling hair into knots while washing, leaving styling products on the scalp for days, or chasing that squeaky-clean feel. Almost everyone has done these at some point.

    Dr. Singh often reassures anxious patients with a simple reminder: you don’t owe anyone perfectly washed hair; you owe your scalp comfort.

    • Observe your scalp for a week, noting oil, itch, smell, or flakes.
    • Adjust frequency based on those signals, not a rigid schedule.
    • Use gentle formulas and focus cleansing on the scalp.
    • Change gradually over two to three weeks.
    • Seek medical advice if pain, heavy flaking, or persistent itching continues.

    A Routine Built on Listening, Not Rules

    Once you stop asking “How often should people wash their hair?” and start asking “How often does my scalp feel good?”, everything shifts. Some weeks involve more sweat, travel, or styling. Others are quiet and low-maintenance. Your routine can move with you.

    There’s freedom in knowing there’s no single correct number. You can wash more in summer, less in winter. You can wash before an important meeting simply because it makes you feel better. That flexibility doesn’t make you careless or obsessive. It makes you human.

    Dermatologists aren’t pushing another rigid wellness rule. The message is softer: the sweet spot rarely lives at the extremes. It sits in the middle, where real life happens. And if this inspires you to test what actually works for your scalp, that might be the most useful answer of all.

    Key Takeaways for Everyday Hair Care

    • Flexible frequency: Most dermatologists suggest two to four washes weekly, adjusted to scalp type.
    • Scalp-first approach: Shampoo targets the scalp, while conditioner belongs on lengths and ends.
    • Listen to signals: Oiliness, itching, odour, and flakes guide the right routine.
  • Goodbye Hair Dyes: The Emerging Grey Hair Coverage Trend Promising a Younger Look

    Goodbye Hair Dyes: The Emerging Grey Hair Coverage Trend Promising a Younger Look

    She pauses, eyes fixed on the faint silver at her temples reflected back from the mirror. On her phone, a paused TikTok shows a woman proudly wearing a soft salt-and-pepper blend—no harsh dye line, no obvious regrowth. The stylist catches her glance and smiles, gently saying that those greys don’t have to be hidden anymore. Outside, the change is visible too. There’s less flat, helmet-like color and more dimensional, lived-in shades. People look their age, yet somehow fresher. Hair isn’t being dyed the old way anymore; it’s being blended, glazed, and softened. Quietly, the way we show aging in public is shifting, starting with letting go of the idea that every grey must vanish.

    From Hiding to Harmonizing: A Subtle Shift

    Step into a busy salon today and the language has changed. Instead of constant talk about covering greys, clients ask for blending, dimension, and softness. The goal isn’t to erase silver strands, but to use them as natural highlights. Colorists now speak less about strict coverage and more about soft transitions and low-maintenance techniques. The results are understated: brighter around the face, gentler at the roots, and no sharp line as hair grows. On the street, it reads as effortless care rather than overcorrection.

    This shift reflects both style and fatigue. Endless root touch-ups every few weeks have worn people down, as has the emotional strain of watching new growth appear. Many are done with feeling that being polished means fighting their own biology. Online, before-and-after photos tell the same story: harsh, solid dye transformed into smoky blends with silver woven through. The captions repeat one idea—the greys were respected. And when the line between “young color” and “old roots” disappears, so does much of the shame once attached to going grey.

    Modern Tools That Work With Grey

    Today’s approach starts by moving away from aggressive, all-over permanent dye. Instead, stylists rely on glosses and glazes that coat the hair with sheer color rather than saturating it. A gloss can soften stark white into pearl or champagne tones, while cool-toned glazes refine darker greys by removing dull yellow hues. Many formulas also boost shine and smoothness, and shiny hair always looks healthier, regardless of color.

    Placement matters just as much. Instead of coloring everything, colorists weave in lowlights to create movement, letting the eye see texture rather than blocks of silver. Around the face, slightly lighter tones lift features naturally. Purposefully leaving some grey visible is what keeps the look current. For those with strong contrast between grey roots and dark lengths, the transition is gradual—months of highlights, soft root smudging, and subtle shadowing that ease the shift. The natural grey takes over slowly, without any abrupt moment.

    At home, the same philosophy applies. Rather than frequent full dyes, people maintain color with tinted masks, purple shampoos, and occasional root touch-ups only when needed. The routine stays realistic and manageable, helping hair look intentional between salon visits.

    Transitioning Without Stress or Damage

    The most effective strategy is patience. A thoughtful transition can take anywhere from six to eighteen months, depending on hair growth and starting color. Asking for a soft grow-out plan—using babylights, lighter lowlights, and blended roots—helps diffuse contrast and makes greys feel deliberate. Sometimes, going slightly lighter overall makes silver strands look like part of the design rather than unfinished roots.

    Maintenance matters. Using shampoos for color-treated hair, rotating in silver or purple formulas weekly, and prioritizing hydration all help greys stay smooth and bright. Dry, frizzy texture makes silver stand out in the wrong way, while moisture keeps it polished. Many colorists also recommend pairing blended color with a sharper cut to maintain energy and structure.

    There are practical benefits too. Less frequent chemical processing protects scalp and hair health, reducing breakage as hair naturally becomes finer. Emotionally, stepping off the constant root-touch-up cycle can feel freeing. Missing a salon appointment no longer feels like failure—it’s simply part of life.

    The Emotional Ease of Going Softer

    Almost everyone knows that moment—bright light revealing new silver strands at the front. The instinct is to hide them quickly. Grey blending asks a gentler question: what if they don’t need to be the enemy? The shift doesn’t mean abandoning care; it means curating rather than panicking. When greys are left visible on purpose, the language changes from “I failed to cover them” to “we placed them.”

    This approach isn’t about denying vanity or glorifying aging. It’s about balance. You can still want flattering hair while accepting that it evolves. Looking fresher comes not from erasing time, but from relaxing your grip on it. The people who shine most with this trend aren’t chasing perfection—they simply look like their hair makes sense for who they are now.

    Practical Takeaways for Grey Blending

    • Start with blending, not full coverage: Babylights, lowlights, and softer roots reduce harsh regrowth and extend time between appointments.
    • Use glosses and glazes for shine: Sheer treatments refine tone, boost reflection, and keep greys luminous.
    • Match your cut and styling: Defined shapes and lightweight products prevent greys from looking wiry or tired.
  • Not Once a Week and Not Every Other Day: A Dermatologist Clarifies the Best Hair-Wash Schedule for You

    Not Once a Week and Not Every Other Day: A Dermatologist Clarifies the Best Hair-Wash Schedule for You

    We’ve all stood in the shower, questioning, “Did I wash my hair yesterday, or was it three days ago?” The mirror fogs up, water runs, and you’re torn between looking greasy or over-cleaning your scalp. On social media, some people swear by weekly washes while others boast daily routines. Both seem flawless. Meanwhile, you’re just trying to make it through the week without hiding your roots. The truth is, the ideal frequency isn’t one-size-fits-all—it’s about finding the rhythm that keeps your scalp healthy and hair looking its best.

    Dermatologist Insights for Healthy Hair in Real Life

    Dermatologist Dr. Lara Kim often sees patients frustrated by their hair care routines. From oily crowns and itchy scalps to flat lengths and persistent flakes, many have already experimented with multiple shampoos. Daily washers end up with straw-like tangles, while once-a-week enthusiasts accumulate sebum under layers of dry shampoo. The common theme? scalp imbalance. Dr. Kim emphasizes that the scalp reacts to genetics, hormones, weather, and product use. Over-washing triggers excess oil, while under-washing traps sweat and pollutants. For most healthy scalps, the sweet spot falls between every other day and twice a week, tailored to hair type and lifestyle.

    Finding Your Ideal Hair Wash Routine

    Dr. Kim recommends a practical approach: start a 10-day scalp diary. Track washing days, when hair starts to look greasy, itching episodes, and environmental factors like humidity. This helps identify the point where your scalp signals it needs attention. The goal is simple: wash just before discomfort appears. Fine or oily hair might need washing every other day, while thick, curly hair may go 3–4 days. The emphasis is not rigid rules but a comfortable scalp and hair that doesn’t feel waxy or tight.

    Key Point Details Why It Matters
    Ideal Wash Frequency 2–3 times per week for most people, adjusted based on oiliness and scalp comfort. Provides a starting point to avoid over-washing or under-washing, rather than following social media trends.
    Workout & Sweat Impact Rinse with water after heavy sweating; use shampoo only on scheduled wash days. Keeps scalp clean without stripping essential oils.
    Hair Type Considerations Fine, straight hair may need every-other-day washing; thick curls can go 3–4 days with conditioner on lengths only. Prevents a one-size-fits-all routine and reduces frustration with comparison.
    Seasonal Adjustments Hot, humid months may require one extra wash; dry winters may need fewer washes. Aligns hair care with environmental conditions for a healthy scalp.
    Washing Technique Apply shampoo to roots only, massage gently with fingertips, rinse thoroughly; conditioner on mid-lengths and ends only. Ensures hair stays clean without irritation or grease buildup.

    Practical Tips for Everyday Hair Care

    • Use lukewarm water and take at least 30 seconds to fully soak scalp and hair.
    • Apply a small amount of shampoo, thinning with water, and focus on the scalp.
    • Rinse thoroughly; residue is often the cause of greasy roots.
    • Adjust washing schedule based on your scalp’s cues, not trends.
    • During heavy activity or gym days, a simple water rinse helps maintain balance without over-stripping oils.

    Listening to Your Scalp Beats Following Trends

    Hair-washing anxiety often comes from comparing routines or fearing bad hair days. Hormones, stress, and seasonal changes all play a role. Dr. Kim advises: “Your scalp doesn’t care about trends, it cares about balance: clean enough to breathe, oily enough to protect.” By observing your own scalp signals and adjusting washes accordingly, you create a routine that works for you—without guilt or constant adjustment. Understanding your hair’s natural rhythm is empowering and prevents frustration with strict schedules or influencer advice.

    Summary: Finding Your Hair Care Balance

    Start with 2–3 washes per week, focus shampoo on the roots, condition only the lengths, and modify based on oiliness, itch, and environmental factors. Track your scalp’s responses, and let comfort, not social media trends, dictate your washing schedule. This approach ensures a healthy scalp, hair that behaves, and confidence that doesn’t hinge on a perfectly curated routine.

  • Goodbye Pressure Cooker as Families Shift Toward Smarter Safer All In One Appliances

    Goodbye Pressure Cooker as Families Shift Toward Smarter Safer All In One Appliances

    Families who once planned their evenings around a sharp, metallic whistle are now swapping it for something that hums softly, blinks gently, and handles the thinking on its own. A new generation of smart cookers is appearing on kitchen counters, offering slow-cooked depth at weekday speed without the anxiety of rattling lids or scorched meals. The classic pressure cooker hasn’t vanished, but it is being quietly edged out by appliances that feel more discreet, more controlled, and slightly unnerving in how capable they are.

    On social media, the enthusiasm is unmistakable. Parents film themselves tipping ingredients into sleek multi-cookers, pressing a single button, and walking away to help with homework. No guesswork, no fear of mishaps, no frantic knob-turning. Recipes run on software, pressure is managed in silence, and dinner finishes without drama. The pressure-cooking era isn’t ending so much as being replaced by something calmer and more calculated.

    From kitchen tension to calm confidence

    Picture a typical Tuesday evening: children orbiting the kitchen, emails still arriving, and dinner barely started. The old pressure cooker meant rushing — chopping fast, locking the lid, and hovering nervously in case the whistle spiralled out of control. Now, many households do something almost radical in its simplicity. They open a smart cooker, add prepared ingredients, tap “Beef Stew – 35 minutes”, and walk away.

    The emotional change is striking. Where there was once tension, there is now trust in a machine that doesn’t shout, but quietly calculates. Heat, pressure, and timing are handled with steady assurance, and that calm seeps into the room. In many homes, the loudest part of cooking is the conversation, not the panic at the stove. This isn’t just a gadget upgrade; it’s a shift in how cooking feels.

    Sales figures back up this change. Retail analysts across the US and Europe report declining demand for traditional stovetop pressure cookers, while multi-cookers and smart pots continue to rise. Shoppers aren’t asking which pressure cooker to buy anymore. They want to know which model connects to their phone or includes presets for biryani, yogurt, or beans.

    Online videos echo the same story. A father in London cooks lentils between video calls, pleased that his dal never sticks. A grandmother in Mumbai relies on a connected cooker that sends a message when the khichdi is ready, joking that the pot knows the recipe better than her son. The long-held fear of misjudged pressure or burnt food is slowly being coded out of daily life.

    Why smart cookers feel safer and more practical

    Beneath the polished exteriors and app controls lies a very practical appeal. Modern smart cookers distribute heat evenly, release pressure in controlled stages, and cut power automatically when cooking is complete. There’s no standing by the sink with cold water, no guessing whether steam is escaping too fast. Sensors check temperature and pressure hundreds of times a minute, quietly doing what most home cooks never could. Soyons honnêtes : personne ne fait vraiment ça tous les jours avec une cocotte sur le gaz.

    How automation is changing everyday family meals

    The real transformation isn’t just speed. It’s the way these devices remove an entire mental layer from cooking. You no longer need to remember how long chickpeas take under pressure or whether a recipe needs two whistles or three. You choose a preset, and the cooker adjusts heat and time based on what’s actually happening inside.

    As a result, meals once reserved for weekends suddenly fit into weeknights. Pulled pork in under an hour. Risotto without constant stirring. Dried beans cooked from scratch the same evening. Many parents admit that without this level of automation, frozen food or takeaway would appear far more often. The smart cooker doesn’t turn anyone into a master chef. It simply narrows the gap between wanting to cook and having the energy to do it.

    That familiar moment still happens — arriving home exhausted and staring at ingredients that feel like a problem rather than a plan. What’s new is how some cookers respond. Paired with recipe apps, they suggest one-pot meals based on what’s available, complete with an attached cooking program. With one tap, the machine decides when to build pressure, when to simmer, and when to keep food warm without drying it out.

    For families balancing school runs, commutes, and late meetings, this change is substantial. Dinner stops being a full evening project and becomes closer to loading the dishwasher. The emotional payoff matters: less guilt, less resentment, and more shared confidence in the kitchen. Smart cookers often become the most democratic appliance in the house, usable by teenagers, grandparents, and distracted parents alike.

    Safety, trust, and leaving the room

    There is also a safety story that many people feel even if they don’t articulate it. Memories of early pressure cookers — worn gaskets, forced lids, stories of burns — linger in family lore. Modern smart cookers tackle that anxiety directly with layers of locks, vents, and software safeguards that don’t depend on perfect user attention.

    Most models won’t operate unless the lid is correctly sealed. Steam is vented away from hands and faces, and if internal temperatures rise too quickly, power shuts off automatically. Some units even send alerts if something seems wrong. What sounds like marketing language becomes a practical reality: people feel safe leaving the kitchen. The appliance no longer needs constant supervision.

    Using a smart cooker confidently, not perfectly

    For anyone transitioning from a traditional pressure cooker, the smartest first step is simple. Start with familiar dishes — chili, soup, a basic curry. Use the presets, then adjust timing slightly the next time. That gradual tuning between your taste and the machine is where confidence grows.

    A small habit helps: when a dish works well, note the settings. A quick photo and a line like “Chickpea curry – 18 minutes, natural release” can save future guesswork. Within weeks, many people build a personal playbook that turns chaotic evenings into something reliably manageable.

    Basic organization also makes a difference. Keeping a trivet, a long spoon, and frequently used spices nearby trims time off every session. Cold water speeds pressure build, warm stock deepens flavour. Layering ingredients properly — aromatics first, liquids next, proteins on top — helps prevent sticking.

    Common mistakes are rarely dramatic: overfilling the pot, skipping the minimum liquid, or assuming every recipe needs no attention at all. The resulting frustration often sounds like self-blame, but it’s misplaced. These machines are smart, not psychic. They still need clear inputs to work well.

    Comparison is another quiet trap. Perfect online images can make real meals feel inadequate. They aren’t. What matters is whether dinner is eaten, enjoyed, and shared. The mood at the table is a better measure than any photograph.

    As one nurse and mother of two put it, the real advantage isn’t the app, but being able to trust dinner to finish while she showers after a shift. That sentiment captures what many users feel: these cookers don’t just save time, they change how that time feels.

    What this quiet goodbye really represents

    Moving from a shrieking metal pot to a silent, glowing cooker isn’t just a change in equipment. It’s a rewrite of the emotional script around meals. The soundtrack shifts from panic and guesswork to gentle beeps and clear messages. It may be less dramatic, but it’s far more humane.

    Food doesn’t automatically become healthier because a machine controls pressure. What does change is the distance between “I should cook” and “I will cook”. That space is where real life happens, shaped by fatigue and stress. For many households, smart cookers simply make good food easier to fit into that reality.

    There’s also a generational ripple. Children growing up with programmable cookers won’t inherit the same fear of steam or the idea that only one person knows the timing. Recipes become shareable, adjustable, and approachable. Old pressure-cooker stories start to sound like tales from another era.

    Perhaps that’s the real farewell — not to pressure cooking itself, but to the belief that cooking must demand constant vigilance and nerve. Families are choosing tools that leave space for conversation, homework, or rest while dinner finishes quietly in the background. The hiss is fading, and the future of family meals hums more softly than expected.

    Why readers are paying attention

    • Built-in safety systems remove long-standing fears by using locking lids, shielded vents, and automatic pressure control that prevents common accidents.
    • Time-saving presets handle rice, beans, stews, yogurt, and more, delivering consistent results without constant monitoring.
    • Energy and cost efficiency come from sealed cooking and reduced oven use, helping families save on power and takeaway over time.
  • Not Once a Week, Not Alternate Days: Dermatologists Reveal How Often You Should Wash Hair for Scalp Health

    Not Once a Week, Not Alternate Days: Dermatologists Reveal How Often You Should Wash Hair for Scalp Health

    A teenager tugging oily bangs into a knot, a professional smoothing frizz, and a fitness enthusiast sniffing their scalp all share the same dilemma: uncertainty about hair-washing frequency. The dermatologist sees this question daily—should you wash every day, every other day, or once a week? The truth is more nuanced than any viral trend. Hair-washing frequency isn’t a one-size-fits-all rule; it’s about listening to your scalp and understanding its unique needs rather than following a calendar.

    Personalized Hair Care for Every Scalp

    The dermatologist emphasizes that hair-washing routines should reflect the scalp’s behavior rather than fixed schedules. Some scalps crave daily cleansing, while others react negatively to frequent shampooing. Think of shampooing like brushing teeth: you wouldn’t dictate a universal schedule for oral hygiene, so why enforce one for scalp oil and sweat? There isn’t a single “X times per week” magic number. Instead, observe your scalp’s cues, considering factors like genetics, hormones, lifestyle, and environment to determine the ideal routine.

    Signs Your Hair Routine Needs Adjustment

    Patients often display extremes: the office worker washing weekly who develops flaking and build-up by midweek, and the gym enthusiast shampooing twice daily, only to face dry, brittle strands. Both cases show the scalp sending strong signals about imbalance. Too little washing leads to sebum and sweat accumulation, feeding bacteria and yeast. Too much washing, especially with harsh shampoos, strips the protective barrier, triggering irritation and rebound oil production.

    Tracking Your Optimal Wash Rhythm

    Instead of relying on social media trends, start with a proper wash and track your scalp over the next several days. Check roots at 24, 48, and 72 hours to see if they feel greasy, itchy, or odorous. The moment your scalp signals discomfort is your maximum interval. Adjust your routine accordingly—daily, every two days, or once every few days—depending on your scalp’s needs and real-life constraints like schedules, styling habits, and hair type. Consistency, not perfection, is key.

    Hair Type / Lifestyle Recommended Wash Frequency Notes
    Oily, fine, straight hair; urban, active Daily or every other day Use mild shampoo, avoid heavy conditioner on roots
    Normal scalp, medium hair; desk-based life Every 2–3 days Optional quick water rinse after heavy sweat
    Curly, coily, or fragile hair Once or twice a week Include scalp-only washes or co-wash in between
    Scalp issues (flaking, redness, psoriasis) Follow dermatologist-prescribed medicated schedule Slot in gentle washes on non-medicated days
    Very oily, active lifestyle Daily with gentle shampoo Choose “daily use” or mild formulas to avoid irritation

    Step-by-Step Dermatologist Guidelines

    • Focus on the scalp: Massage gently for 60 seconds with fingertips, letting foam slide down lengths.
    • Rinse thoroughly: Remove all shampoo residue without scrubbing hair ends aggressively.
    • Alternate washing: For curly or textured hair, mix real shampoo days with co-wash or scalp-only cleanses.
    • Use mild formulas: Especially for frequent washing, choose gentle shampoos with fewer sulfates and light fragrances.
    • In-between care: Quick scalp rinses or micellar water on hairline help manage sweat and odor without full washes.

    Rethinking “Clean Hair”

    Clean hair isn’t about a perfect, blown-out look. It’s scalp comfort, odor-free roots, and no sticky build-up. Observing your scalp throughout daily life—after workouts, long commutes, or stressful weeks—helps determine whether washing is needed. Listening to these subtle cues rather than algorithm-driven routines allows you to build a sustainable, effective hair-care rhythm. In essence, healthy hair begins with responding to your scalp, not social trends.