Author: admin

  • Seven Minute Hip Mobility Routine Reduces Tightness and Improves Daily Movement

    Seven Minute Hip Mobility Routine Reduces Tightness and Improves Daily Movement

    My hips have always been tight but they feel worse during this season. I work long hours at my desk and the stiffness builds up quickly. I take shorter steps when I walk and feel twinges when I run. Standing up after sitting too long brings that familiar ache. I know mobility work helps but it has to fit my schedule. When I’m busy I stick with routines under 10 minutes because they’re easier to do consistently. That’s why I tried a seven-minute hip mobility routine from Lindsey Bomgren who is a NASM-certified personal trainer. She posts as @nourishmovelove & promised the routine would loosen tight hips fast without equipment or taking much time. I did it regularly for three weeks & noticed three important things that changed how my hips feel every day.

    Lindsey’s 7-Minute Hip Mobility Routine

    Lindsey’s hip mobility routine features seven exercises, each lasting one minute. She highlights in the video that you can pause at any time to spend extra moments on exercises that feel especially beneficial. The routine includes:

    90/90 internal rotation knee drops

    90/90 pigeon pose

    90/90 rear knee and heel lifts

    tabletop hip circles

    frog rocks

    V-sit leg lifts

    Cossack squats

    This sequence is effective because it moves your hips through multiple positions and patterns in a short time. It targets both internal and external hip rotation, movements often overlooked but essential for comfortable walking, running, and sitting. The 90/90 exercises penetrate deep into the hip capsule, while frog rocks and tabletop hip circles enhance range of motion in various directions. This routine balances mobility and strength work, as the V-sit leg lifts and Cossack squats engage muscles to maintain extended positions, ensuring long-lasting mobility improvements.

    Three Changes Noticed After Trying the Routine

    Hips Felt Looser Without Forcing Stretches

    What surprised me was how quickly my hips became looser without the uncomfortable strain of deep stretching. The routine progresses slowly between positions, using 90/90 variations and hip circles to improve flexibility in a gentle, effective way. After just one week, everyday movements like rising from a chair or taking longer steps felt smoother. By week three, the usual stiffness after sitting all day had noticeably decreased, which felt like a real win.

    Improved Hip Mobility in Multiple Dimensions

    This routine goes beyond basic flexibility. Exercises like V-sit leg lifts and Cossack squats challenge your hips through various ranges while keeping muscles active in deeper positions. Over three weeks, I noticed progress in movements involving internal and external rotation that had previously felt restricted. My hips now feel balanced and supported all day, rather than temporarily loose after a single session.

    Short Duration Encourages Consistency

    Although seven minutes seems brief, that compact duration makes the routine easy to stick with. On busy days, it felt manageable to fit in during work breaks or even before bed, when I might otherwise skip exercise. Maintaining this routine almost daily created more noticeable results than occasional longer workouts ever did.

    Final Verdict

    After three weeks, this routine has become a regular part of my mobility practice. Its short length makes it easy to maintain, yet it delivers real results. For anyone who sits for most of the day, this is an accessible and effective method to loosen tight hips and improve overall mobility.

  • Almond Oil Supports Fuller Lashes and Thicker Brows When Used Correctly

    Almond Oil Supports Fuller Lashes and Thicker Brows When Used Correctly

    The first time I noticed my lashes were thinning was during a regular morning. I stood by the window holding my coffee while dawn brightened the city. When I looked at my reflection I saw that something about my eyes had changed. They appeared less defined & somehow less expressive than they used to be. My eyebrows had changed too. They were once thick with natural fullness but now showed small gaps where hair had been. The change was subtle instead of dramatic. It was the type of thing you miss at first but eventually realize something is off.

    The Gentle Practice of Reviving Your Lashes and Brows

    You might have noticed your mascara doesn’t coat as many lashes or that your brow pencil struggles to fill gaps. Lashes and brows frame the face like a delicate border around a painting. They may not define who we are, but they shape how our features come together. When they begin to thin, it isn’t about vanity—it’s a small, personal loss. There’s something intimate in touching your own face with intention, tracing your finger along the brow line or lash base. In a world dominated by quick fixes, a small bottle of almond oil feels almost traditional, like an heirloom tucked beside your grandmother’s jewelry and handkerchiefs. Within that pale golden liquid lies a gentle strength that nourishes and protects, rooted in a long-standing ritual of care. Almond oil doesn’t promise instant results. It won’t magically lengthen lashes overnight or fill brows in a week. What it does offer is slow, subtle support: moisturizing, protecting, and enhancing the natural fullness and softness of your lashes and brows over time. Think of it as a nightly ritual—a chance to pause, reconnect, and nurture your reflection.

    How Almond Oil Supports Lash and Brow Health

    Before you start, it’s helpful to understand what almond oil can actually do. Each lash and brow is composed mainly of keratin and grows from follicles that need nourishment and a healthy environment. Almond oil can’t create new follicles, but it supports the health of existing hairs and follicles. Sweet almond oil—the type commonly used in beauty—contains fatty acids like oleic and linoleic acid along with vitamin E. These nutrients help retain moisture, preventing delicate hairs from becoming brittle and breaking.

    Vitamin E acts as an antioxidant, protecting the sensitive skin around your eyes from environmental stressors like pollution and sun exposure. Almond oil creates a protective layer around follicles and hairs, helping lashes and brows stay strong. Over time, reduced breakage can make them appear fuller and more uniform. How you apply the oil also matters: gently massaging it along the lash line and brows can increase blood circulation, delivering more nutrients and oxygen to follicles. While this doesn’t guarantee major regrowth, it provides a gentle boost and establishes a calming, beneficial routine.

    Choosing the Best Almond Oil for Your Eyes

    When selecting almond oil, quality matters, especially around your eyes. Look for sweet almond oil that is cold-pressed, unrefined, or virgin to retain its natural benefits and minimize additives. High-quality almond oil should have a light, nutty scent and a smooth, non-sticky texture. If you are allergic to nuts, avoid almond oil and consult a dermatologist for alternatives like castor oil or squalane.

    Step-by-Step Guide: Creating a Nightly Lash & Brow Ritual

    Step 1: Prepare Your Canvas

    Start with a clean face, free of makeup. Residue from mascara, brow pomade, or liners can block the oil from reaching your lashes and brows. Use a gentle, oil-free remover or a mild cleanser. Rinse and pat dry with a soft towel without rubbing or tugging.

    Step 2: Apply Oil to Lashes Safely

    Use a minimal amount of oil. A clean mascara wand, spoolie, or thin eyeliner brush works best. Dip lightly into the oil—just enough to coat the tool. Close one eye and gently brush along the lash line from outer to inner corner, focusing on the base rather than the waterline. Avoid excess oil to prevent dripping. Small contact with the eye is usually harmless, but rinse with lukewarm water if discomfort occurs.

    Step 3: Nurture Your Brows

    Eyebrows are less sensitive than lashes but still need gentle care. Use a clean spoolie or your ring finger with just one or two drops of oil for both brows. Apply following the natural direction of hair growth, using small circular motions to massage the oil into the skin underneath. Hydrated skin creates a better environment for healthier, softer brow hairs over time.

    Step 4: Timing and Patience

    Consistency is key. Apply almond oil 4–6 nights a week for at least 6–8 weeks. Some notice subtle improvements in softness and reduced shedding within 3–4 weeks, while others may need up to three months for visible changes. Avoid irritation by pausing use if needed and handle lashes and brows gently, limiting harsh treatments and excessive tweezing.

    Expected Results: Texture, Timeline, and Subtle Changes

    Almond oil works gradually. Changes are often felt before they are seen: lashes may become stronger and break less, making mascara application smoother, while brows can feel softer with sparse areas appearing slightly fuller. Results unfold over time, emphasizing healthy, nourished hair rather than dramatic overnight transformation.

    Time Period Visible Changes You May Experience
    Weeks 1–2 Lashes and brows may feel softer to the touch with a mild natural shine. The skin around the brow area can appear more hydrated and comfortable.
    Weeks 3–4 Reduced lash fallout becomes noticeable, while brows start to look neater and more balanced. Sparse areas may appear slightly less obvious.
    Weeks 6–8 The eye area may show a fuller overall look, with brows gaining improved consistency and density, especially in previously fragile sections.
    After 3 Months Optimal results can be seen: lashes look healthier and shinier, and brows develop a naturally fuller, softer shape when supported by gentle care habits.

    Combining Almond Oil with Other Gentle Ingredients

    Almond oil pairs well with other gentle oils like castor oil or vitamin E. Start with small amounts to ensure your skin tolerates the mixture. A common blend is 1 part castor oil to 2 parts sweet almond oil. The almond oil thins the mixture for easier application, while castor oil adds nourishing benefits. Store blends in a clean container in a cool, dark place and use within a few months.

    Integrating Almond Oil into Your Routine

    Apply almond oil after your evening skincare. Avoid the under-eye area if prone to milia. Skip application when using strong treatments like retinoids. If using a lash serum, apply it first and allow it to dry before adding a thin layer of almond oil directly to the hairs.

    Safety, Sensitivity, and Listening to Your Skin

    Almond oil is generally gentle, but always observe your skin’s response. Keep the oil away from areas prone to bumps or irritation. Adjust usage according to your skincare routine and comfort to maintain a safe and effective practice.

    Rethinking Beauty: Care Over Correction

    Using almond oil is a quiet, intentional act in a world of quick fixes. Every night, dipping a clean wand into golden oil and brushing it along lashes and brows is a choice to nurture rather than correct. Over time, you may notice fuller lashes or softer brows, but the greater reward is the mindful, caring ritual you create. Beauty becomes about cherishing and protecting what you already have, making each night a small, meaningful act of self-care.

  • One Ordinary Pantry Item Is Making Old Hardwood Floors Look Newly Installed

    One Ordinary Pantry Item Is Making Old Hardwood Floors Look Newly Installed

    The late afternoon sun cut across the living room, exposing every streak, dull patch, and footprint pressed into what should have been beautiful hardwood floors. It was the kind of light that tells the truth. A friend walked in, glanced down, paused, and then offered the polite response: “Oh, I love your floors.”

    They were oak, at least in name. Once expensive. But between kids, a dog, and winter boots, that warm, honey-toned glow seen in magazines had long faded. The usual fixes had already been tried: overpriced “miracle” cleaners, sticky polishes that left residue, and homemade TikTok sprays that smelled like salad and did absolutely nothing.

    A quiet tip from someone who’s tried everything

    Then an older neighbor shared a suggestion with the calm confidence of experience. “Use this,” she said, “and just watch.” The floors didn’t merely look cleaner afterward. They looked alive again.

    The pantry staple hardwood fans quietly trust

    The unlikely hero is plain white vinegar. Not the branded cleaning kind shouting about being eco-friendly, but the simple bottle tucked behind the olive oil. When mixed properly, it helps hardwood floors catch the light again in a way that makes you stop mid-step.

    Vinegar carries that faintly sharp, familiar scent that reminds many of a grandmother’s kitchen. On floors, once diluted, it doesn’t leave the sticky film common with commercial products. Instead, it cuts through thin layers of soap residue, wax, and everyday grime that dull the natural beauty of wood.

    Used correctly, it doesn’t coat your floors. It releases them. The grain looks clearer, the color richer, and the surface no longer feels like it’s covered in plastic.

    A real-life result that surprised even skeptics

    Jenna, a homeowner in her thirties with a demanding job, two kids, and a Labrador who treats the hallway like a racetrack, had tried three different name-brand polishes. Each promised a “mirror shine.” What she ended up with was slippery boards and cloudy buildup.

    One weekend, tired of wasting money on bottles under the sink, she tried a vinegar mix she’d seen mentioned online: one cup of white vinegar in a bucket of warm water. She mopped once, let it dry, and then snapped a photo because she didn’t quite believe what she was seeing.

    The difference was striking. Before, the floor looked greyed-out and slightly greasy. After, the reflections were clean, and the wood lines stood out again. No artificial shine. Just bright, honest floors that looked cared for. She sent the photo to her sister with one message: “Apparently the answer was 89 cents a bottle.”

    Why this simple method actually works

    This quiet trick keeps circulating among neighbors, cleaners, and renovation forums for a reason. Vinegar is acidic, but mild when properly diluted. That gentle acidity breaks down old cleaner residue, tap-water minerals, and everyday dirt that makes hardwood appear flat.

    Most commercial shine products work by laying something on top of the floor: acrylics, oils, or silicones. They look impressive briefly, then start streaking, trapping dust, and dulling. Vinegar does the opposite. It removes what doesn’t belong so the original finish can shine again.

    Used in moderation, it’s safe for sealed hardwood finishes. It won’t repair scratches, but by clearing buildup around them, those marks often appear less noticeable. The light spreads more evenly, making the floor look clearer, much like cleaning foggy glasses.

    How to use vinegar for naturally brighter hardwood floors

    The basic mix is straightforward: 1 cup of white vinegar to about 1 gallon (4 liters) of warm water. Stir gently and resist the urge to add more vinegar. That’s where people run into trouble.

    Start by sweeping or vacuuming thoroughly. Grit destroys shine. Lightly dampen a microfiber mop in the solution. It should be moist, not dripping. Mop in small sections, following the wood grain where possible.

    Let the floor air-dry naturally. No fans, towels, or rushing. Within minutes, the dull haze often fades, and the natural glow returns. Sometimes the difference is most obvious when you leave the room and walk back in.

    Common mistakes to avoid

    This method works best when it’s not overused. Vinegar feels so easy and inexpensive that it’s tempting to use it constantly. It’s better treated as a reset, not a daily habit. Once every few weeks or monthly for busy homes is usually enough.

    Avoid using vinegar on unsealed or waxed wood. In those cases, the acidity can cause damage. If you’re unsure about your floor’s finish, test a small hidden area and observe how it dries.

    Some manufacturers officially discourage vinegar use, largely to protect themselves. Checking their guidelines can offer peace of mind. Still, many professional cleaners quietly rely on this exact mix, often pulled from a plain, unlabeled bucket.

    “I’ve been cleaning houses for 20 years,” says Marie, a professional cleaner managing eight homes weekly. “Clients ask about expensive TV products. I smile, then use vinegar. It doesn’t fake shine. It reveals it.

    Small habits that make the shine last longer

    • Use microfiber mops instead of cotton rags to prevent lint and streaks.
    • Change the solution when it turns cloudy to avoid spreading grime.
    • Add one or two drops of essential oil if the vinegar scent bothers you.
    • Keep shoes by the door; grit dulls floors quickly.
    • Spot-clean spills instead of re-mopping entire rooms.

    Why this simple fix feels so rewarding

    There’s something satisfying about realizing you don’t need shelves of branded bottles to have good-looking floors. Just one pantry staple, warm water, and a few minutes. It cuts through the noise of endless ads promising perfection.

    When sunlight hits clean wood instead of streaky boards, the whole room feels different. Mornings feel calmer. The space looks sharper, more intentional.

    On a deeper level, this small routine offers a rare, tangible improvement. Amid endless images of perfect homes online, your own slightly scratched, lived-in floor looks better in a real way. Not flawless. Just better.

    The tip spreads quietly. A neighbor mentions it. A cleaner shares it in passing. A comment hides deep in a forum thread. It’s rarely flashy, but it sticks because it works.

    Soyons honnêtes : nobody does this every day. The shine doesn’t demand strict schedules. It’s forgiving. And that’s likely why people keep using it, not out of pressure, but because the reward shows up almost immediately.

    Key takeaways at a glance

    • Use diluted white vinegar: 1 cup vinegar to 1 gallon warm water for an easy, low-cost solution.
    • Best for sealed hardwood: Ideal for polyurethane-finished floors; always patch-test first.
    • Think reset, not routine: Use every few weeks to restore shine without harming the finish.
  • Lip Liner Placement Trick Creates Fuller Looking Lips Without Heavy Overlining

    Lip Liner Placement Trick Creates Fuller Looking Lips Without Heavy Overlining

    The girl in the café bathroom has no idea anyone is paying attention, yet the quiet line behind her watches closely as she works on her lips. With two quick strokes of a pencil, she presses her lips together, then adds a touch of gloss. There’s no exaggerated overlining, no layered contouring ritual. When she looks up at the mirror, her lips appear as though she’s just returned from a restful holiday—soft, healthy, and naturally full.

    Nothing looks obvious. There’s no sharp outline or bold Instagram-style border. Her lips simply seem more dimensional than everyone else’s. Later, standing in front of your own mirror, you try to copy the look. You use the same pencil, the same gloss, even the same expression. Yet your lips still look flat. The difference comes down to a tiny placement detail—easy to miss, but powerful enough to change everything.

    It’s Not About Bigger Lips — It’s About Where Attention Goes

    Why Traditional Lip-Liner Rules Don’t Always Hold Up

    The classic advice is familiar: trace just outside your natural lip line, soften it, fill it in, and move on. It’s a technique many people learned early, and for years it worked well enough. But on real faces, in natural daylight, heavy overlining can feel disconnected. Instead of enhancing your features, it can make lips appear slightly out of sync with the rest of your face, especially up close.

    The Quiet Shift Modern Lip Artists Are Making

    Today’s leading lip artists are moving in a more refined direction. Rather than chasing the illusion of a dramatically larger mouth, they focus on guiding the viewer’s eye. The fullness you notice isn’t the main goal—it’s a result. This is why the technique looks so good in selfies, video calls, and real-life conversations. The change is subtle, but the effect is striking.

    Why Millimetres Matter More Than Bold Outlines

    The transformation happens through micro-adjustments, not thicker lines. Once you see where the pencil is actually placed, your understanding of lip lining shifts. It’s not about changing your lip shape—it’s about emphasizing the structure that already exists. This precision keeps lips looking believable, softly enhanced, and never obviously drawn on.

    Where Makeup Artists Truly Apply Lip Liner

    A quick scroll through TikTok or Instagram reveals the pattern. Artists barely define the corners of the mouth. Instead, they place pigment in three focused areas: the Cupid’s bow peaks, the center of the lower lip, and the subtle “pillows” just off-center. Toward the edges, the liner is diffused and barely there, creating an outline that feels more like a suggestion than a statement.

    Why the Finish Looks Effortlessly Real

    A London-based makeup artist once shared that she uses the same lip pencil on every client, adjusting only the placement based on how light naturally hits their lips. People often ask which filler clinic she recommends. She simply laughs and points to a £7 liner and a grainy video of her technique. The most common response? “I don’t know what you did, but I look rested.” The effect isn’t just fullness—it’s balance, where the mouth finally feels in harmony with the face.

    The Visual Science Behind the Effect

    This technique works because of how the eye processes faces. We don’t look evenly; our attention jumps to areas of contrast and shape change. The dip of the Cupid’s bow, the curve at the center of the lower lip, and the light-catching points where gloss sits naturally all draw focus. Enhancing these zones while softening the corners leads the brain to read the lips as fuller—without any obvious outline.

    The Exact Liner Placement That Adds Fullness Without Overlining

    Begin with dry lips and a relaxed mouth—no posing. Use a sharpened nude liner that matches your lip tone. Draw a small bridge straight across the Cupid’s bow, connecting the peaks just slightly above your natural dip. Think of a softened plateau rather than a sharp M.

    Next, move to the center of your lower lip. Place the pencil about one millimeter outside your natural line only at the fullest point. Sketch a short arc no wider than your iris when looking straight ahead. Leave the outer thirds of the lower lip mostly untouched.

    Now connect these central points to the natural corners using feather-light upward strokes that fade as they reach the edges. The line should almost disappear. Smudge gently with a fingertip, then tap a small amount of gloss or balm just at the center.

    The result is soft corners and a pillowy middle that no one can quite explain. The temptation is always to add more—to the sides, to the height—but that’s where things tip into obvious overlining. On a phone screen it may pass, but under harsh lighting it doesn’t.

    Restraint is what keeps this believable. When liner hugs the outer corners too closely, even a slight mismatch between skin and pencil becomes noticeable. Work in stages. Line the center first, step back, then connect to the corners only where needed. Practicing this on a slow day makes it second nature when you’re half-awake before work.

    Why This Soft-Blur Technique Works on Real, Unfiltered Faces

    Part of this placement’s appeal goes beyond appearance. On a tough morning, drawing a sharp outline can feel like putting on armor. This softer approach feels like enhancing what’s already there. People notice you look refreshed rather than heavily made up.

    It also offers flexibility. If your hand shakes or the line isn’t perfect, the effect still holds because the focus is on the overall impression, not tiny flaws. That margin for error matters more than most realize, especially on days when your skin—or confidence—isn’t cooperating.

    In the evening, the technique adapts beautifully to changing light, from bright bar settings to soft restaurant glow. The lips stay defined at the center and gentle at the edges, moving naturally with your expressions instead of appearing stiff. It’s makeup designed for a living, moving face, not a frozen image.

  • 6 Best Eye Shadow Primers for Long Lasting and Vibrant Makeup

    6 Best Eye Shadow Primers for Long Lasting and Vibrant Makeup

    compensation from retailers or from purchases of products through these links. The best eye shadow primers can determine whether your makeup stays perfect or disappears before lunch. A single application helps your eye shadow show more vibrant color & blend more smoothly without creasing or fading. Consider it as preparing your eyelids for makeup application. Modern formulas do more than keep color in place. They smooth out texture & balance skin tone while providing benefits like moisture or shine control. If you have fine lines near your eyes or want your shimmer to look brighter and last through the day the right primer makes a difference. Continue reading for recommendations from Allure editors and makeup artists that show great eye makeup begins with what you apply before the shadow.

    Editor’s Picks: Eye Shadow Primers That Truly Perform

    Why it’s worth it: The Urban Decay Eye Primer Potion has been a favorite among editors and makeup artists for years. The reason is simple according to Miami-based makeup artist Natalie Dresher who previously spoke to Allure. It makes eye shadow last longer without gathering in fine lines or feeling too heavy on the skin. The formula is lightweight with an almost serum-like texture that spreads smoothly without any buildup or uneven patches. The texture is slightly tacky but not overly sticky which helps keep eye shadow in place throughout the day. The Original shade is a sheer translucent beige while Eden offers a matte beige finish and Sin provides a pale champagne shimmer. There is also an anti-aging version designed for mature skin that includes plumping peptides & brown algae. This primer works well for just about anyone looking to improve their eye makeup wear.

    Best Overall Performance: Urban Decay Primer That Locks Color All Day

    Why it’s worth it: Milk’s Hydro Grip Eye Primer is completely invisible and works like double-sided tape for eye shadow without settling into fine lines. Pittsburgh makeup artist Patty Bell explains that it has a thinner formula that makes it easy to blend on the delicate eyelid area. It will lock your eye makeup into place for eight hours and contains hyaluronic acid to add moisture & create a blurred effect on the lid. The primer is also made with blue agave for great grip and includes niacinamide and aloe for extra hydration. Bell even recommends using it under the eyes to help prevent concealer from creasing. This product truly serves multiple purposes.

    Ideal for Mature Lids: Milk Hydro Grip for Smooth, Crease-Free Wear

    Why it’s worth it: This Nyx Professional Makeup Ultimate Shadow & Liner Primer is one of Bell’s top picks & delivers quality that exceeds its affordable price. The formula feels light on your skin and spreads easily within seconds so anyone can apply it without trouble. You can choose from four natural-looking shades that work so well you could wear them alone as cream eyeshadow. These shades help hide visible veins & uneven skin tone while creating a smooth surface on your eyelids. The primer contains vitamin E which keeps your eyelids moisturized throughout the day and prevents that unpleasant dry and flaky appearance.

    Top Budget-Friendly Choice: NYX Primer That Delivers Pro Results

    Why it’s worth it: Nars’ Pro-Prime Smudge Proof Eyeshadow Base is a behind-the-scenes product that improves every eye look. The sheer formula vanishes on contact and creates a light layer that you barely notice. New York City makeup artist Nick Barose told Allure that he loves how it grips without feeling heavy or interfering with any shadow he applies on top. He added that it has been his favorite for decades because it just lets the color shine. The formula contains rice extract and sea whip extract that help hydrate and protect the delicate eye area. It wears more like skin care than traditional makeup and does not cause dryness. This primer quietly does all the work if you want longer wear and cleaner blending with shadow that truly pops.

    Perfect for Dry Eyelids: NARS Base That Prevents Flaking and Fading

    Why it’s worth it: If you own a Too Faced palette then you probably need the brand’s Shadow Insurance Eye Primer to make those eyeshadows perform better. The formula contains oil-absorbing silica that reduces shine and keeps your eyelids smooth throughout the day. The silky texture has no color & works with any skin tone while creating a base that helps eyeshadow stick properly. This means you get brighter colors that blend more easily & stay on longer. The waterproof formula resists fading and smudging even when it’s humid or raining outside. The brand claims it lasts 24 hours but we found it worked well for 12-hour days which is still impressive.

    Go-To for Oily Lids: Too Faced Primer with 24-Hour Oil Control

    Why it’s worth it: The Laura Mercier Eye Basics Primer comes in two shades and works great for evening out skin tone on your eyelids. The light blue version helps hide purple and pink tones that show up as redness or visible veins. The peach version brightens dull skin and makes it look more awake. After you put it on your eyelids look smooth and even. It also helps your eyeshadow stay in place all day whether you use powder or cream formulas. This primer also takes care of your skin while you wear it. It has aloe to calm & add moisture. Lanolin acid keeps that moisture locked in. Safflower seed oil feeds your skin with nutrients but feels lightweight and comfortable.

  • Natural Henna Hair Dye Recipes for Safe, Vibrant and Long-Lasting Results

    Natural Henna Hair Dye Recipes for Safe, Vibrant and Long-Lasting Results

    The first time I used henna to dye my hair the kitchen smelled like an old pharmacy. The air was filled with the smell of wet dirt and dried leaves that felt warm & strangely nice like someone had soaked soil in hot water. A ceramic bowl sat on the counter filled with deep green paste that looked thick and shiny like melted chocolate mixed with plant matter. I stopped for a second with the spoon hanging over the bowl & thought about whether this muddy mix could really work as well as the shiny boxes of hair dye at the drugstore. Then I put the brush in the paste and separated my hair and spread it through my strands. The henna felt cool and thick like a face mask on my scalp and this natural hair color started to stain my hands and my hair and later changed how I thought about beauty.

    Why Henna Still Feels Like Magic in a Chemical World

    Walking through a modern hair dye aisle often feels overwhelming—sharp chemical smells, bold promises, and warning labels tucked into tiny print. To achieve a perfect shade, many people accept ammonia, peroxide, and synthetic formulas as a normal trade-off. Henna offers a completely different experience. Derived from the Lawsonia inermis plant, henna has been used for thousands of years to stain hair, skin, and fabric naturally. When mixed with warm liquid, its lawsone pigment releases slowly, binding gently to keratin. Instead of stripping hair, henna wraps each strand in a translucent layer of color, leaving hair stronger, glossier, and visibly healthier. The scent is earthy and real—more like leaves and tea than perfume—turning hair coloring into a grounding ritual rather than a rushed cosmetic chore.

    Choosing Pure and Honestly Labeled Henna

    The quality of henna matters more than anything else. True henna should be pure, body-art-quality powder without metallic salts or synthetic dyes. Many negative experiences come from so-called compound hennas that contain hidden chemicals. Good henna feels soft and finely sifted, smells grassy and fresh, and never sparkles or smells artificial. Freshness is crucial, as henna loses staining power over time. Reading labels carefully and sourcing responsibly becomes part of the process. You’re not just buying color—you’re choosing a plant grown under sun and soil, harvested and ground with care. When henna is respected as a living material, the results on your hair are noticeably richer and more reliable.

    Building a Simple Henna Toolkit

    Henna doesn’t require expensive tools. A glass, ceramic, or stainless-steel bowl, a spoon, gloves, an applicator brush, plastic wrap, and an old towel are enough. Avoid reactive metals, and always protect your hands and clothes. More important than tools is patience. Henna works slowly, releasing dye over hours instead of minutes. Compared to instant chemical dyes, henna feels more like cooking a slow meal than using fast food—intentional, unhurried, and far more rewarding in the end.

    Classic Henna Recipe for Copper Tones

    The simplest recipe creates warm copper shades. Mix pure henna powder with strong warm tea until it reaches a yogurt-like consistency. Optional lemon juice or apple cider vinegar can help dye release if your scalp tolerates mild acidity. Let the mixture rest for 4–8 hours until the color deepens. Apply evenly to clean hair, wrap, and leave for 2–4 hours. After rinsing, the color may appear bright orange at first, but it will oxidize over several days into a more natural copper or auburn, depending on your base hair color.

    Creating Auburn and Brown Shades Naturally

    Henna can be softened or deepened by combining it with other plant powders. Mixing henna with amla reduces brightness and adds cooler auburn tones while supporting hair texture. For brown or chocolate shades, a two-step process works best: first apply henna for a red base, then follow with indigo to deepen the shade. This method offers better control and more predictable results, especially on light to medium hair, producing colors ranging from chestnut to near black.

    Ingredient Used Primary Benefit Ideal For
    Amla Powder Softens strong red tones into cooler auburn and boosts hair body Anyone aiming to reduce orange hues and achieve a balanced brown-red shade
    Indigo Powder Transforms henna color into deep brown or near-black tones Gray coverage seekers or those wanting dark brunette results
    Cassia (Neutral Henna) Enhances shine with a light golden glow and little color deposit Blonde or light hair types looking for warmth and gloss
    Black Tea / Coffee Adds subtle depth and richness to overall hair tone Medium to dark hair needing a deeper, fuller color finish
    Chamomile Tea Naturally brightens with soft golden warmth Light hair shades wanting a gentle sun-lit effect
    Aloe Vera Gel Improves moisture retention and smooth paste consistency Dry, curly, or fragile hair needing added hydration
    Essential Oils (Lavender, Rosemary) Enhances fragrance and may calm or stimulate the scalp Those sensitive to henna scent or focused on scalp comfort

    Henna Gloss for Subtle Color and Shine

    If you prefer a gentle effect, a henna gloss is ideal. Mix a small amount of henna paste with a silicone-free conditioner and apply it like a hair mask. Leave it on for 45–90 minutes before rinsing. This method adds soft highlights, warmth, and noticeable shine without a dramatic color shift. It’s a perfect way to experiment with henna before committing fully.

    Finding Your Ideal Shade Through Layering

    Henna builds color gradually. Each application adds depth, gloss, and richness. Lighter hair turns golden-copper, medium hair becomes chestnut or auburn, and dark hair reveals subtle red tones in sunlight. Gray strands transform into warm highlights rather than disappearing completely. Because henna fades slowly, starting gently is wise. You can always deepen the shade with future applications while maintaining hair health.

    Safety, Patch Tests, and Hair History

    Even natural dyes require care. Always perform a patch test to check for sensitivity. Apply a small amount to skin, rinse, and observe for 24–48 hours. Be cautious if your hair has a history of chemical dyes, especially those with metallic salts. Pure henna is generally safe, but poor-quality products can cause unexpected reactions. Protect your hairline with oil, ventilate the room, and allow adequate processing time without rushing.

    Aftercare and Long-Term Results

    Rinsing henna is a slow process, but warm water and patience help remove the paste completely. Many people avoid shampoo for the first 24 hours to let the color settle. Over several days, the shade deepens and stabilizes. With gentle cleansing and minimal sulfates, henna color lasts well. Regular root touch-ups or occasional gloss treatments keep the color consistent while maintaining hair strength and shine.

    The Quiet Power of Plant-Based Hair Color

    Henna doesn’t fight your natural hair—it works with it. Grays become highlights, natural variations become part of the beauty. Choosing henna is a quiet rebellion against harsh chemicals and rushed beauty standards. It invites patience, earthiness, and connection. The result isn’t a salon-perfect uniform shade but a living color shaped by time, light, and nature—one that feels deeply personal and grounded.

  • Cakey Concealer Fix: Why It Happens and How to Correct It in Under 10 Seconds

    Cakey Concealer Fix: Why It Happens and How to Correct It in Under 10 Seconds

    It doesn’t matter that you only got four hours of sleep or that your schedule is packed with meetings or that you genuinely made an effort this morning. You lean in closer and squint at the mirror and then you notice it: your under-eye area looks dry and patchy with a strange texture. The concealer you carefully blended just ten minutes ago has settled into thick lines and is clinging to every small crease you never knew existed. Your phone buzzes & you’re running late but you can’t stop staring at your reflection wondering how everything became so cakey. You try tapping it gently with your fingertip but it just pills up. You attempt to swipe it smooth but it streaks across your skin instead. Every time you touch it the situation gets worse. The product that promised a flawless second-skin finish now makes you look tired & overdone.

    Why your concealer turns cakey in the first place

    Most people blame the product but the real problem is usually the skin underneath. Concealer works like a magnifying glass because it makes everything on your face more obvious. Dry patches and fine lines and leftover eye cream and even old mascara residue will all work together to ruin your makeup quickly. The thin skin around your eyes has almost no oil glands. It is fragile and moves constantly when you talk or laugh or scroll or squint. A thick layer of pigment sitting on top of that moving and thirsty surface is bound to crease & look cakey. The concealer is not always bad but it is being asked to do an impossible job without any help. On a busy Monday morning in a crowded train you can actually see this happen. One woman is checking her reflection in her phone and gently tapping under her eye. You notice the concealer on one side has cracked into tiny islands.

    On the other side it looks smoother and more diffused & almost like real skin. Later she tells you she rushed through skincare and skipped eye cream because she did not have time & then layered on a heavy full-coverage concealer straight from the applicator. By ten in the morning it was already sitting in lines. At lunch she remembered a trick from a makeup artist on TikTok about warming the concealer with fingertips and then pressing instead of dragging. Ten seconds and one side was fixed. The other still looked like dried paint. Studies from beauty brands quietly admit what everyday mirrors already show. A high percentage of people use way too much concealer way too fast on skin that is not ready for it. The mismatch between texture & quantity and skin condition is where the caking begins. Cakey concealer is rarely just about shade or brand. It is about texture and balance. When concealer is too dry it clings to rough skin.

    When it is too creamy it slides into lines & pools. Use too much & it sits on top of the skin instead of blending in. Use it on unprepped slightly flaky skin and every microscopic patch becomes a spotlight. Your body heat and your facial expressions & the humidity in the air all affect how the product behaves. Think of concealer as a soft wax that melts and moves and sets in layers. If those layers are uneven or overloaded or fighting with an oily eye cream underneath the product will almost always crack or gather. Cakey concealer is basically makeup that never really fused with your skin in the first place.

    The 10-second fix that smooths cakey concealer

    The fastest fix is surprisingly simple. Use clean warm fingers and press. No extra product or complicated tools needed. Just heat & pressure. Your fingertip is slightly warmer than your skin and that warmth softens the concealer sitting on top and in fine lines. Here’s how it works in real time. Look down into a mirror so your under-eye area stretches a little. Place the pad of your ring finger on the cakey patch and count to three. Then gently press and roll without swiping. You’re nudging product back into the skin and redistributing it rather than scraping it off. Repeat this under each eye where you see product gathering near the inner corner or outer crease. In about 10 seconds total the surface looks more like skin and less like makeup. Sometimes you don’t need anything else. On a shoot with a beauty editor who had been awake since 4 a.m. her concealer started to crack halfway through the day. There was no time to redo her entire base. No powder or beauty blender or ring light magic. Just a tiny compact mirror and a tissue and her hands. She dabbed a tissue under her eye first to pick up excess oil. Then she tapped her ring finger on the back of her hand to warm it a bit and pressed under one eye. You could literally see the product soften & blur. The lines didn’t vanish but the heaviness did. The photographer lowered his camera for a second and said whatever you just did do it again on the other side. That same gesture works at your desk or in a bathroom stall or in the back of a cab. No one needs to know you’re reworking your concealer. It looks like you’re just touching your face and thinking about something else entirely. And in a way you are because you’re thinking about how to make peace with your skin instead of fighting it with layers. There are a few traps people fall into when trying to fix cakey concealer. The first is adding more product directly on top of creased makeup. That usually creates a double layer with fresh cream on top and dry cracks underneath. It might look better for five minutes then the whole thing collapses again. The second trap is panic-powdering. Too much powder will sit on top of creased concealer and exaggerate every texture line. A light dusting only works if the concealer is already smooth. So your real priority is to reset the product first and then lightly lock it in.

    Rethinking “perfect” concealer so it works with real life

    When you notice how a small adjustment can fix cakey concealer, you begin to rethink the pursuit of a perfect base that never budges. Perhaps the aim is not to build a mask that stays rigid all day. Perhaps it is to wear makeup that can be refreshed and adjusted as your day unfolds. This perspective removes some of the pressure. Rather than searching for one perfect product that never settles into lines, you choose formulas that adapt well to warmth and touch and the occasional check in the mirror. You accept that skin has natural texture and fine lines and that the area under your eyes will crease when you smile at a funny text. You do not need to hide these things to look good. Everyone has experienced that moment of seeing their reflection in the afternoon & thinking they looked better in the morning. That feeling is genuine. But it becomes easier when you realize a small adjustment takes only a few seconds. Not a complete reapplication. Not an elaborate routine. Just a quick touch with your finger or a tissue or a bit of powder. The quick fix is actually a way of thinking presented as a technique. It suggests that your makeup can adapt with you rather than work against you. It means you do not have to pick between full makeup and no makeup to feel comfortable. You can keep a simple solution ready and use it whenever needed whether on a date or in a meeting or in a bathroom with harsh lighting. Once you start viewing concealer as something you can adjust throughout the day rather than something that must stay perfect, your appearance feels less critical. A crease stops being a problem. It simply shows that your face has been expressive. And that can be smoothed out gently in less than ten seconds.

    Point clé Détail Intérêt pour le lecteur
    Préparer la peau, pas la cacher Appliquer une fine couche d’hydratant bien absorbé avant le concealer Réduit les patchs et permet un rendu plus lisse
    Le geste des 10 secondes Utiliser la pression du doigt chaud pour faire fondre et redistribuer le produit Corrige le côté cakey sans tout démaquiller
    Corriger, pas empiler Retirer l’excès, lisser, puis appliquer de la poudre ciblée Évite l’effet masque et garde un air naturel toute la journée
  • Many people don’t realize it, but sweet potatoes and regular potatoes aren’t closely related at all “here’s why”

    Many people don’t realize it, but sweet potatoes and regular potatoes aren’t closely related at all “here’s why”

    Not long ago, in a busy supermarket, I watched a man pause in the vegetable aisle, one hand gripping a bag of russet potatoes, the other hovering over sweet potatoes. He glanced at his partner and joked, “So… which potato are we cooking tonight?” She laughed and shrugged. “Aren’t they basically the same?” In the end, both went into the cart, the question unanswered and dinner decided.

    I’ve heard that same easy confusion at family tables, during nutrition debates, and even in professional kitchens. We roast them, mash them, fry them, and casually group them together. In our minds, a potato is just a potato.

    Not Close Relatives: How Far Apart They Really Are

    Grocery store displays don’t help. Sweet potatoes often sit right next to baking potatoes, sometimes under the same sign. Visually, it sends a clear message: two versions of the same vegetable. Most of us trust that cue more than anything we once learned in school. A brown tuber and an orange tuber both get filed away as filling, carb-heavy comfort food.

    But under the skin, they come from entirely different worlds.

    Regular potatoes belong to the Solanaceae family, better known as the nightshades, alongside tomatoes, eggplants, and peppers. Sweet potatoes, on the other hand, are part of the Convolvulaceae family, related to morning glory flowers. On the evolutionary tree, those branches split so far back that their connection is almost academic.

    Their shared ancestor is ancient, predating agriculture by a wide margin. In everyday terms, calling them the same is like comparing a dog and a fox and insisting they’re identical.

    What links them in our minds isn’t genetics, but function. Both grow underground, both store energy for the plant, both cook well, and both are inexpensive and filling. Our brains love shortcuts, so we grouped them together.

    From the plant’s perspective, however, they’re solving the same problem in different ways. A regular potato is a stem tuber, while a sweet potato is a swollen storage root. One is a modified stem, the other a root that turned itself into a pantry. They simply arrived at a similar solution by very different paths.

    Same Oven, Different Results: What You Notice When You Cook Them

    The contrast becomes obvious the moment you handle them. Slice a raw russet and a raw sweet potato side by side. The russet cuts with a dry, chalky resistance that dusts your knife. The sweet potato feels denser and slightly sticky, almost squeaking against the board. Anyone who has tried to cube a large sweet potato remembers that texture.

    Roast both on the same tray at around 200°C (400°F) with identical oil and salt. Halfway through, the difference shows itself. Sweet potatoes begin to caramelize, their edges turning glossy and dark, while regular potatoes puff up, going crisp outside and fluffy inside.

    Nutritionally, they also head in different directions. A plain baked potato delivers vitamin C, vitamin B6, potassium, and plenty of starch that quickly becomes glucose. A baked sweet potato is rich in beta-carotene, which the body converts into vitamin A, along with more fiber and a form of starch that many people find gentler on blood sugar.

    This contrast explains why sweet potatoes often appear in “healthy” recipes, while russets dominate classic comfort dishes. In practice, both can share a plate without conflict. Most of the rivalry exists in theory, not at the dinner table.

    There’s also an important safety difference. Regular potatoes can produce mild toxins in their green parts, including leaves, stems, and potatoes that have turned green in the light. That trait comes from their nightshade lineage. Sweet potatoes don’t share this characteristic, reflecting their entirely different chemistry.

    So when you swap one for the other in a recipe, you’re not making a small adjustment. You’re inviting a completely different plant lineage into the dish and asking it to act like its distant counterpart. When the result disappoints, the reason suddenly makes sense.

    How to Pick and Use Each One the Right Way

    Next time you stop in front of the potato display, give yourself a brief pause. Ask one simple question: nightshade or morning glory?

    For roasting, wedges, fries, and classic mash, choose starchy regular potatoes like russet, Idaho, or Maris Piper. They expand, crisp, and absorb fat beautifully. That’s exactly what they’re meant to do.

    For deeper color, gentle sweetness, and a creamy, almost custard-like texture, reach for sweet potatoes. Think of them not as an upgraded potato, but as a bridge between a potato and a carrot.

    The most common mistake is treating sweet potatoes exactly like white potatoes. They’re denser and naturally higher in sugar, which means they burn faster at high heat and turn mushy if boiled too long. Salt alone can dull their flavor; they come alive with acid, spice, and warmth such as lime, chili, ginger, yogurt, or feta.

    Regular potatoes, by contrast, don’t respond the same way to sweet or spicy treatments. They shine with fat, salt, and herbs. When both types are roasted together as if they were interchangeable, the result is familiar: one half undercooked, the other nearly candied.

    A chef once summed it up simply: once you understand that one is a stem and the other a root, you stop expecting them to behave the same way in the pan.

    • Use regular potatoes for fries, crispy roast potatoes, gratins, gnocchi, and traditional mash.
    • Use sweet potatoes for spiced trays, soups, curries, and hearty salads.
    • Avoid roasting them together if texture matters; give each its own pan and timing.
    • Store both in a cool, dark place, but keep regular potatoes out of the fridge to preserve flavor and texture.
    • Swap with intention, not out of habit.

    What Changes When You Stop Treating Them as the Same

    Once you accept that sweet potatoes and regular potatoes aren’t close relatives at all, your meals start to shift. Instead of grabbing whichever bag is open, you begin planning around their strengths. A slow weekend roast might feature crisp, classic potatoes alongside a separate tray of spiced, blistered sweet potatoes, each playing its role.

    That small shift in thinking spreads outward. You start noticing details at the market, the feel of the skins, the plant photos on labels, and how often we group vegetables together for convenience. What we casually call “veg” actually represents wildly different organisms with their own histories.

    Seeing sweet potatoes as a flowering morning glory root and regular potatoes as a nightshade stem tuber makes it harder to return to the vague idea that they’re “basically the same.” You don’t need botanical training to appreciate the difference. A little curiosity is enough to change how you cook, shop, and eat.

    Key Takeaways at a Glance

    • Different families: Regular potatoes are nightshades, while sweet potatoes are related to morning glories.
    • Different structures: One is a stem tuber, the other a storage root, affecting texture and cooking behavior.
    • Different roles: Sweet potatoes offer beta-carotene and natural sweetness; regular potatoes deliver fluffiness and crispness.
  • An exceptionally large African python has been officially confirmed by herpetologists during a certified field expedition, stunning the scientific community

    An exceptionally large African python has been officially confirmed by herpetologists during a certified field expedition, stunning the scientific community

    As the early mist thinned over a flooded plain in northern Mozambique, the reeds bent and rose in a slow, weighted rhythm, as if something unseen beneath the water was shifting in its sleep. A herpetologist lifted a hand. Everyone stopped. The buzz of insects suddenly felt unnaturally loud.

    Then the python’s head surfaced—wide, glossy, and impossibly solid. Someone behind the camera murmured, “No way.” The team had come prepared to encounter large snakes. They had not prepared for this.

    An African Giant That Pushes the Limits

    The animal confirmed during this licensed field expedition defies casual description. By every serious metric, it is enormous.

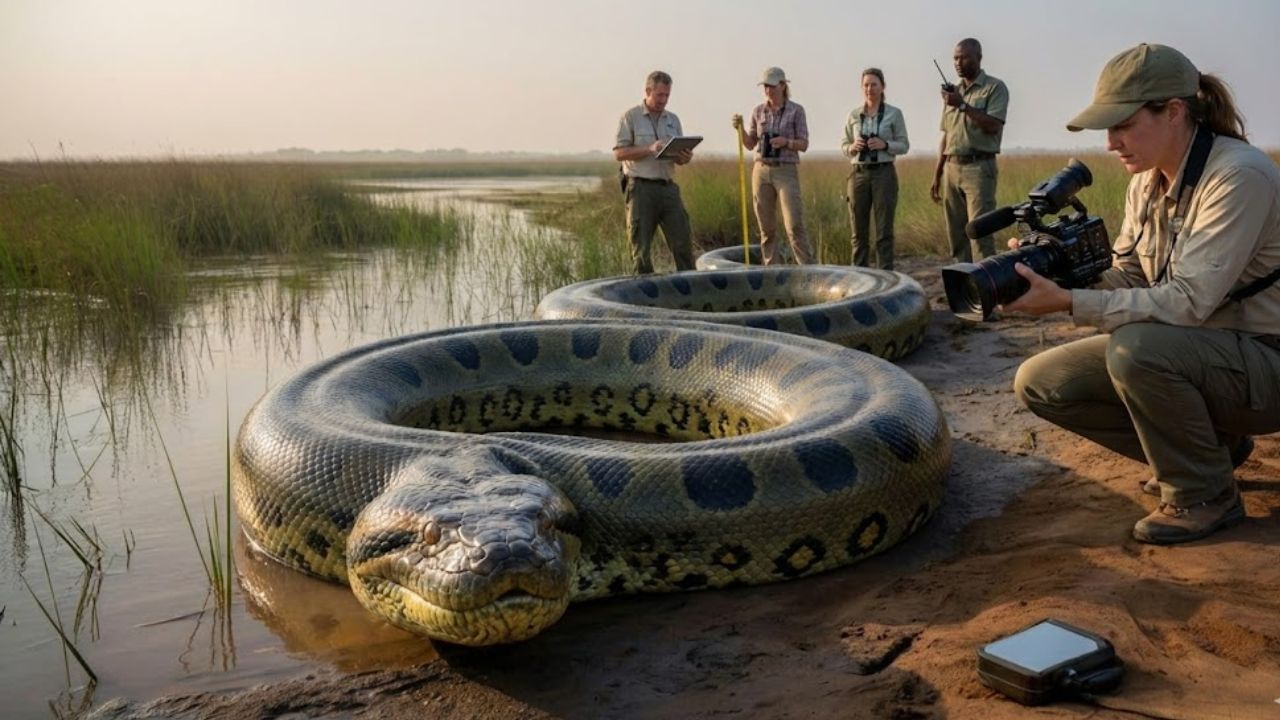
    An African rock python lay coiled along a seasonal pool, its length stretching so far that the team had to reset their measuring tape twice. Sunlight caught the dark brown and olive blotches along its back, a pattern refined by evolution to dissolve into mud, leaves, and shadow.

    What silenced even seasoned researchers was not just its length, but its extraordinary girth. The body was as thick as a man’s thigh, narrowing gradually into a tail that seemed endless. One veteran later admitted that even experienced snake specialists paused in disbelief when the scale of the animal became clear.

    On record, African rock pythons (Python sebae) already rank among the world’s largest snakes, with verified lengths exceeding six meters. This individual, however, measured and documented under strict protocols, presses against the upper boundary of what was previously confirmed.

    To avoid the familiar problem of exaggerated size claims, the team relied on multiple observers, redundant measuring tools, and standardized field documentation. Photographs with scale references, GPS data, and body metrics were later reviewed by independent herpetologists in three different countries.

    This process transformed what could have become a fleeting viral story into a credible scientific record, now discussed in professional circles with equal parts excitement and caution.

    Why One Exceptionally Large Python Matters

    Outliers reshape understanding. A single confirmed giant compels biologists to refine growth models, reconsider prey limits, and reassess which habitats can still support apex predators of this scale.

    This python likely survived for decades, avoiding hunters, habitat loss, and the randomness that ends many large animals early. Its survival suggests that some African ecosystems remain intact enough to nurture giants slowly, over time.

    In an era where many species are diminishing in size, the existence of an oversized predator feels like a quiet contradiction—a reminder that not all wildness has been compressed.

    How Scientists Officially Confirm a Giant Snake

    The team that encountered the python was not on a casual outing. They were conducting a structured herpetological survey under formal research permits, following clear procedures for documenting unusual finds.

    That meant no rushed photos, no forceful handling, and no estimates shouted in excitement.

    The first priority was safety—for both people and snake. Large pythons can deliver severe bites when stressed, and stress itself can harm the animal. The researchers approached slowly, monitored posture and breathing, and waited until the python settled before bringing out equipment.

    Once its position stabilized, measuring tape was laid alongside the body in sections. Each segment was photographed with a reference marker. Straightening a snake of this size by force would have been dangerous and unethical, so the team relied on gentle guidance and the animal’s own gradual movements to align measurements accurately.

    It was a slow process. Training overcame adrenaline. The outcome was precise data, clear images, and measurements that colleagues could trust.

    From Field Notes to Scientific Validation

    After leaving the wetland, the work continued through databases and email threads. Expedition metadata—location, timing, climate conditions, body circumference, head width—was logged and shared.

    Independent experts examined the images, checking for forced perspective or distortion. Skepticism was expected. Extraordinary wildlife claims rarely earn immediate belief.

    Only after repeated verification did researchers begin using terms like “exceptionally large” without hesitation.

    The protocols applied here are increasingly viewed as a model for handling extraordinary animal records. Whether researcher, guide, or serious eco-tourist, the principle is simple: slow down, document carefully, and remove ego from the process.

    The gap between a campfire tale and a citable record often comes down to a few extra minutes of careful measurement, a photo with proper scale, and honest notes about what was actually observed.

    Living Beside a Predator of This Size

    For communities near the discovery site, a six-meter predator is not an abstract concept. It can take goats, dogs, and in rare cases pose risks to people near rivers or fields at dusk.

    Here, coexistence is practical rather than philosophical. It shapes how livestock is stored, where paths run, and what children are taught to notice in tall grass.

    The research team spent time listening to local residents. Stories of “the big one” varied—some exaggerated, others grounded in lived experience.

    Conservation advice often reads cleanly on paper. In reality, electricity is unreliable, roads are distant, and wildlife officers may be hours away. The researchers acknowledged this openly, emphasizing risk reduction rather than denial.

    The message was clear: the animal is real, powerful, and dangerous, but removal is not the only response. That balance matters when fear can quickly turn into calls for eradication.

    One herpetologist summarized the tension bluntly:

    “We’re asking people to live next to an animal that can swallow a goat, while telling them it’s a global treasure. That only works if their fear is respected first.”

    Practical Steps Shared With Local Communities

    • Clear tall grass along narrow paths between homes and water sources.
    • Use raised pens or simple fencing for small livestock at night.
    • Teach children to step back slowly and alert adults if they spot large tracks or shed skins.
    • Report repeated sightings near homes to local authorities or conservation groups.
    • Avoid provoking or handling large snakes for photos or videos.

    These measures do not eliminate risk, but they create space for coexistence with an animal that does not conform to modern comfort.

    What This Python Suggests About the Future

    This single snake will not change the world. It will return to its wetland, hunting antelope and waterbirds, vanishing for weeks beneath roots and mud.

    Yet its confirmation is already influencing research proposals, species accounts, and debates over what “maximum size” truly means.

    For such an animal to exist, there must still be habitat, prey, and time. That implies that somewhere, despite development and extraction, a pocket of Africa remains functional enough to raise a reptilian giant to maturity.

    Reactions to stories like this tend to split. Some feel unease and avoidance. Others feel wonder and attraction. Both responses are deeply human.

    The deeper question is how much unpredictability we are willing to accept in nature. A world stripped of danger is also a world without giants. Comfort and wildness rarely peak in the same place.

    Standing at dawn, watching reeds part for a living mass larger than anything seen outside a screen, what would come first—fear, awe, or something tangled between them?

    The python now exists as verified data—measured, logged, archived. Yet it also lingers in imagination: the weight of muscle, the slow turn of the head, the ancient stillness in its eyes.

    Key Takeaways From the Discovery

    • Certified giant python: An exceptionally large African rock python confirmed through rigorous field science.
    • Measurement process: Segmented tape measurements, scale-referenced photography, and independent expert review.
    • Human–wildlife coexistence: Real-world practices and local knowledge for living alongside large predators.
  • When your dog offers you its paw, it’s rarely about playing or greeting you, and animal experts explain what it really means

    When your dog offers you its paw, it’s rarely about playing or greeting you, and animal experts explain what it really means

    Your dog walks over, sits neatly in front of you, and lifts one paw into the air. They hold it there with a mix of patience and quiet insistence. You smile, maybe take the paw, say a quick “Hey buddy,” and return to your screen. It’s a familiar moment, easy to overlook.

    But if you slow down and really pay attention, something else emerges. The eyes look slightly wider. The ears tilt just so. The body isn’t relaxed or playful—it’s focused. This isn’t about showing off. It’s about communicating.

    When a lifted paw isn’t a performance

    Most people associate a raised paw with a high five, a greeting, or a polite demand for treats. Yet many dog trainers and behaviorists explain that this gesture can mean something very different. In many situations, a lifted paw signals uncertainty, mild stress, or emotional tension. Because it looks endearing, we often reward it—missing the message beneath the surface.

    The rest of the body tells the truth. Are the muscles tight? Is the tail held low or neutral? Are the ears angled back, the eyes flicking around the room? In those moments, the raised paw may be your dog’s way of pausing the situation and quietly asking for reassurance.

    Imagine your dog standing on a cold metal scale at the vet. Their mouth is closed, head lowered slightly. Instead of pulling away, they lift one paw and gently press it against your leg. You see affection. The vet sees a clear sign of discomfort.

    Or picture a storm outside. Thunder rolls, and your dog—who was asleep moments ago—is now sitting upright, one paw resting on your foot. No jumping. No panic. Just calm, deliberate contact. That’s not play. That’s a request for safety.

    We like to believe dogs only ask for food or fun.

    They also ask for security.

    The emotional language dogs use instead of words

    Canine behaviorists often describe the raised paw as a displacement signal or appeasement gesture. It commonly appears when a dog feels torn—curious yet uneasy, interested yet unsure. The gesture slows everything down. It gives them time.

    From a dog’s perspective, the world is loud, fast, and unpredictable. Humans talk constantly, move quickly, and overlook the quieter cues. A paw held mid-air works like punctuation in their emotional sentence, adding emphasis where words don’t exist.

    When we dismiss it as a cute trick, we risk crossing boundaries without realizing it. Once you begin noticing the full picture, the signal becomes harder to ignore.

    How to read the full message behind the paw

    The fastest way to understand a raised paw is to zoom out. Watch the whole dog, not just the charming foot. Start with the face. Are the eyes soft or wide? Is there lip licking, yawning, or sudden stillness? Then check the body. Is the tail loose or stiff? Is your dog leaning toward you or subtly away?

    The next time that paw lands on your knee, pause for three seconds. Breathe. Observe. Quietly label what you see: tense shoulders, ears back, still mouth. This small pause can shift your response from automatic praise to genuine understanding.

    A common mistake many owners admit to is turning every raised paw into a training cue. Your dog places a paw on you, and immediately the commands begin. “Paw! Other paw! High five!” It’s fun, treats appear, and everyone laughs. But if that paw came from worry, you just talked over a whisper with noise.

    Anxious dogs often stay polite. They don’t bark or growl. Instead, they communicate softly. A paw. A lean. A still posture in a busy room. Many owners later realize their dog had been speaking clearly for months—they simply didn’t know the language.

    No one gets this right all the time.

    But noticing it sometimes already changes everything.

    What behavior experts say about pawing

    “Pawing isn’t one single behavior,” explains UK-based canine behaviorist Laura Kent. “For some dogs, it’s learned attention-seeking. For others, it signals discomfort. The key is consistency—notice when it happens, what came just before, and how the body looks overall. The paw is only one letter in a much larger emotional alphabet.”

    Simple ways to respond more thoughtfully

    • Start with context: Ask where you are, what just happened, and who is nearby. Pawing during a storm is very different from pawing at treat time.
    • Scan body language: Look at eyes, ears, tail, mouth, and posture. A loose, wiggly dog is not sending the same message as a stiff, silent one.
    • Stay calm and quiet: If the paw suggests stress, lower your voice, slow your movements, and offer gentle contact instead of excitement.
    • Watch for patterns: Does the paw appear during visitors, loud noises, or tense moments at home? Repetition reveals the real trigger.
    • Support without crowding: Sometimes the best response is simply staying close, resting a hand lightly on their chest, and letting the tension fade.

    What your dog hopes you’ll notice

    Once you start viewing the raised paw as an emotional signal, your own habits often shift. You might lower the TV volume when it appears during loud scenes. You might ask guests to approach more slowly. These changes are small, almost invisible, yet meaningful.

    This doesn’t mean every paw signals distress. It means you treat it as information. Your dog is offering real-time feedback about the shared space you live in. They’re the only one who knows exactly how the room feels at floor level. Listening to that feedback often softens issues once labeled as stubbornness or bad behavior.

    Sometimes, of course, the paw really is about connection. You’re scrolling on your phone, and that paw lands gently on your arm. The body is loose. The eyes are soft. Breathing is slow. That’s not anxiety—that’s a quiet request for attention.

    You don’t need to analyze every moment. Sometimes you can simply accept the invitation. Put the phone down. Offer a calm chest scratch. Speak to your dog like a companion, not background noise. It may sound sentimental. It works.

    Over time, many owners notice a subtle shift. When stressed signals are respected, playful signals grow stronger. Dogs who feel understood tend to relax more deeply, play more freely, and seek closeness with confidence. The raised paw stops being confusing and becomes a shared tool.

    You might start noticing patterns. “She paws more on days I work late.” “He paws less after early walks.” This quiet awareness turns daily routines into an ongoing conversation.

    Your dog won’t start speaking your language. But the space between you narrows. One day, they lift a paw, you understand instantly, and you adjust—no fuss, no drama. Just two species sharing a room, with one small, insistent paw closing the gap.

    Key takeaways for dog owners

    • Observe the full body: Combine the raised paw with eyes, ears, tail, and posture to understand the real emotion and avoid missing subtle stress signals.
    • Use context wisely: Notice what just happened when the paw appears to identify triggers and adjust your dog’s environment.
    • Respond calmly and consistently: Choose quiet presence and gentle reassurance over automatic training to build trust and reduce anxiety.