Author: admin

  • 5 Essential Exercises to Build a Stronger Back

    5 Essential Exercises to Build a Stronger Back

    Effective Back Exercises for a Complete Workout You have many different exercises available when you want to work on your back muscles.

    Build a Stronger Back: Smart Training That Delivers Power and Stability

    Deadlifts are a fundamental exercise that works the muscles along the back of your body. This movement targets your erector spinae muscles lats, rhomboids & traps. It also engages your glutes & hamstrings. You can perform deadlifts with a barbell but a kettlebell makes it easier to learn the proper hip hinge movement. Position your feet at hip width with the kettlebell placed on the floor between them. Tighten your abdominal muscles & lower yourself by bending at both your hips and knees at the same time. Grip the kettlebell handle with both hands. Keep your abdominal muscles engaged & maintain a straight back as you drive through the middle of your foot. Lift the weight by straightening your hips & knees together. At the top position fully extend your hips without leaning backward. Stand upright with your shoulders aligned directly over your pelvis. Lower the kettlebell back down with control & repeat the movement for additional repetitions.

    Kettlebell Deadlifts for Total Back and Core Strength

    The lat pulldown is a vertical pulling exercise that builds the latissimus dorsi muscles. These muscles play a key role in maintaining good posture and keeping your shoulders stable. When your lats are strong they help keep your shoulders from rounding forward & reduce injury risk by supporting your upper arm bone during movement. Position yourself at the lat pulldown machine and set the knee pad so it holds your legs firmly in place. Grab the bar with your hands placed just beyond shoulder width. Tilt your upper body back a little and lift your chest upward. Tighten your core muscles and pull the bar down toward your chest while bringing your shoulder blades together. Slowly let the bar rise back to the starting position while maintaining control & feeling your lat muscles work as they lengthen.

    Lat Pull-Downs to Develop Width and Upper-Back Power

    This pulling movement works your mid-back muscles & helps create better posture and a more balanced back. Keep your shoulders back during the exercise to maintain tension in the correct muscles. Set up the rowing machine with any handle attachment and hold it with your arms straight and your back in a neutral position. Tighten your core muscles and pull the handle toward your body while bringing your shoulder blades together. Return slowly to where you started while staying in control. Perform multiple sets with a weight that challenges you appropriately.

    Horizontal Cable Rows for Mid-Back Thickness and Control

    The dumbbell row is another effective horizontal pulling exercise that targets single arm strength & stability while addressing any strength imbalances between your left and right sides. Training each arm separately ensures more even muscle development across your body. Position yourself next to a bench and place your left hand and left knee on top of it for support. Extend your right leg out to the side for balance while holding a dumbbell in your right hand with your arm hanging straight down. Tighten your abdominal muscles and pull the dumbbell up toward your torso while keeping your elbow tucked in close to your side. Contract the muscles between your shoulder blades when the weight reaches the top and then slowly lower it back down to where you started. Finish all repetitions on one side before moving to the opposite arm.

    Single-Arm Dumbbell Rows to Fix Muscle Imbalances

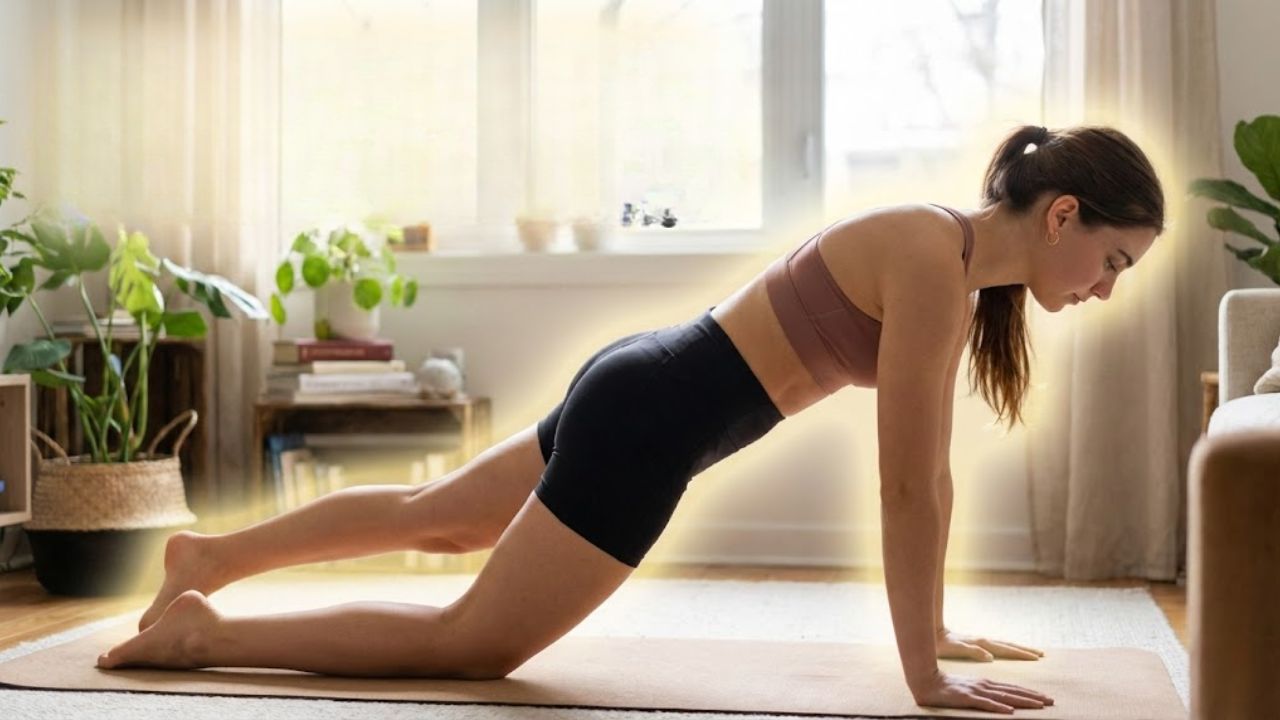
    The pull-up is more advanced than other vertical pulling exercises but it remains a fundamental movement that works your entire back. This exercise can be quite difficult to master initially & demands significant upper body strength. You may need to use assistance while building the strength required for a complete pull-up. At the gym you can use an assisted pull-up machine. Alternatively you can loop a strong resistance band around the pull-up bar and place your knees through it to create a sling shot effect that helps boost you upward as you pull. When using assistance place your knees on the pad or through the resistance band first.

    Grip the pull-up bar with your hands positioned slightly wider than shoulder-width & your palms facing away from you. Hang from the bar with fully extended arms and engage your core. Pull your chin over the bar in one smooth motion by retracting your shoulder blades and using your arms. Point your collarbone toward the ceiling and look up slightly as you pull. Lower your body back down to the starting position slowly and with control. Complete additional reps until you reach fatigue but ensure your form remains consistent throughout.

    Pull-Ups for Functional Strength and Full Back Engagement

    A stronger back helps keep your spine properly aligned & pulls your shoulders into better position. This reduces slouching and helps you stand taller with more confidence. When you train your back muscles you build support for your entire body during different types of movement. This makes you perform better during physical activities and exercise. Daily tasks become easier when your back is strong. You can pick things up from the ground more safely & carry shopping bags or do housework with less strain. Building strength in your back muscles protects your spine from getting injured. This is especially important for the lower back area which is prone to problems and damage. Nitayarak H Charntaraviroj P. Effects of scapular stabilization exercises on posture and muscle imbalances in women with upper crossed syndrome: A randomized controlled trial.

    Why Back Workouts Matter for Posture, Strength, and Injury Prevention

    A stronger back keeps your spine aligned properly & pulls your shoulders into a better position. This helps reduce slouching and allows you to stand taller with more confidence. Training your back muscles builds support for your entire body during different types of movement. This improvement helps you perform better during physical activities and exercise routines. Daily tasks become much easier when your back is strong. You can pick things up from the ground more safely and carry shopping bags or complete housework with less strain on your body. Building strength in your back muscles protects your spine from injury. This protection is especially important for the lower back area which often experiences problems and damage. Nitayarak H Charntaraviroj P. Effects of scapular stabilization exercises on posture and muscle imbalances in women with upper crossed syndrome: A randomized controlled trial. J Back Musculoskelet Rehabil. 2021;34(6):1031-1040. doi:10.3233/BMR-200088

  • 10 Yoga Fitness Secrets: Simple At-Home Practices to Stay Active and Strong

    10 Yoga Fitness Secrets: Simple At-Home Practices to Stay Active and Strong

    10 Yoga Secrets to Stay Fit at Home Staying fit at home does not require expensive gym equipment or complicated workout routines. Yoga provides a straightforward and effective method to keep your body active and your mind peaceful without leaving your house. Some people believe yoga only involves stretching but it actually builds strength & improves balance while teaching proper breathing and creating daily discipline. Here are ten practical yoga secrets that will help you stay fit at home when you practice them consistently and patiently.

    Build Consistency Before Chasing Perfection

    One of the most effective yoga principles is showing up every day, even for a short session. You do not need flawless routines or advanced postures to see progress. Practicing yoga for just 20 to 30 minutes daily helps develop muscle memory, supports better posture, and gradually boosts metabolism. Letting go of perfection while staying consistent allows the body to adapt naturally and respond more positively over time.

    Let Your Breath Lead the Practice

    Breathing forms the foundation of yoga, yet it is often overlooked. Moving through poses without controlled breathing limits the benefits. Slow and deep breaths improve oxygen circulation and support efficient fat use. When movement and breath work together, the body stays calm and injuries are less likely. Even basic breathing awareness can greatly enhance a home yoga routine.

    Engage the Entire Body

    Yoga delivers the best results when the whole body participates. Activating the core during standing and balance poses improves strength and stability. This full-body engagement helps tone muscles evenly and prevents unnecessary strain. With time, movements feel lighter, smoother, and more controlled as body awareness increases.

    Morning Yoga Delivers Quicker Benefits

    Practicing yoga in the morning helps activate digestion and gently improves flexibility. Although the body may feel stiff initially, consistent morning sessions increase blood flow and energy throughout the day. This routine also supports healthy weight balance and reduces stress-driven eating habits.

    Hold Poses to Build Real Strength

    Quick transitions between poses often reduce strength gains. Holding each posture for a few extra breaths builds muscle endurance and strengthens joints. This approach tones the arms, thighs, and core without the need for heavy equipment. Longer holds also improve focus and mental discipline.

    Balance Poses Enhance Overall Fitness

    Balance-focused postures activate deep stabilizing muscles that many workouts miss. Standing on one leg or maintaining balance improves coordination and strengthens the ankles, hips, and spine. These poses also sharpen concentration and improve posture in everyday activities.

    Use Yoga as a Recovery Tool

    Yoga is not limited to active workout days. Gentle stretching on rest days helps muscles recover and prevents stiffness. Recovery-focused yoga improves flexibility and reduces soreness, making it easier to stay consistent. Balancing effort with rest supports long-term fitness.

    Keep Your Yoga Practice Simple

    Complex sequences are not required to stay fit. Simple poses performed with focus often deliver better results than rushed advanced routines. A straightforward practice helps you stay connected to your body and reduces the risk of burnout. Simplicity remains one of yoga’s most underestimated strengths.

    Support Yoga With Mindful Eating

    Yoga results improve when paired with mindful eating habits. Eating with awareness supports portion control and better digestion. Improved digestion boosts energy levels and helps maintain natural weight balance. The discipline learned on the mat slowly influences healthier eating behavior.

    Always End With Stillness

    The final relaxation phase is an essential part of yoga. Ending with stillness allows the body to absorb the full benefits of the practice. This calm moment soothes the nervous system and improves sleep quality. A relaxed mind supports long-term fitness by reducing stress and fatigue.

    Fitness at Home Through Daily Yoga Habits

    Staying fit at home with yoga depends more on daily habits than intense effort. These simple yoga principles work quietly but effectively when practiced consistently. Over time, the body becomes stronger, more flexible, and balanced without pressure or expensive setups. Yoga teaches that true fitness grows through awareness and regular practice.

  • 9 Best Hand Creams for Dry and Cracked Hands This Winter

    9 Best Hand Creams for Dry and Cracked Hands This Winter

    Winter brings an unwelcome problem for many people: hands that become dry and develop cracks. During warmer weather you might skip using hand cream without any issues, but winter demands a different approach. Several factors make this season particularly harsh on your hands. Both indoor heating and outdoor conditions create air that contains less moisture than usual. Wind becomes more frequent and combines with low temperatures to remove the natural oils that keep your skin protected. Without proper care your hands will suffer the consequences. Noticing that your hands have started to dry out is no reason to worry. Many effective products exist that can restore your skin quickly. Whether you prefer a large container to keep at home or a smaller tube to carry with you the right hand cream can eliminate dry and cracked skin completely. These moisturizers work by creating a protective barrier & replenishing what the harsh weather takes away. Regular application throughout the day will keep your hands soft & healthy despite the challenging conditions outside.

    CeraVe makes a thick moisturizing cream that works well on rough and flaky areas. The formula contains hyaluronic acid & ceramides along with their special MVE technology. These ingredients help hydrate your skin deeply & strengthen its natural barrier. People with eczema can use it safely because it does not block pores.

     Dry and cracked hands need attention throughout the day so you need a cream that travels easily. L’Occitane’s shea butter cream has many loyal users who appreciate its rich texture. Despite being thick it does not feel greasy on your skin. The cream soaks in fast so your hands feel normal right after you apply it instead of slippery and coated.

    Want a spa-like experience while you moisturize? Aveda’s Hand Relief cream has a citrusy aroma that creates a pampered feel while the lotion itself is rich & nourishing. It contains andiroba oil for moisture that lasts.

     When things are really bad lean into O’Keeffe’s. This cream is a concentrated solution that is specially designed for cracked dry hands. This set provides the everyday cream along with a specialized night treatment to restore skin fast.

    Moroccanoil has built its reputation on hair care products, but the company also makes an excellent hand cream. The formula combines cocoa butter, shea butter and Argan oil to provide deep moisture for your skin. It also has a pleasant light fragrance that many users enjoy.

     OUAI offers a hand cream with a dense balm texture that contains coconut oil murumuru butter & shea butter to deliver serious hydration. The product features a gentle scent of violet and gardenia that adds to the overall experience.

    Burt’s Bees makes a hand lotion with grapeseed oil and honey that provides deep hydration. The formula has a thick texture that sinks into skin quickly. This product contains no parabens or petrolatum or phthalates.

    Clarins offers a hand cream that works on your entire hand & nails too. The texture feels light on skin while still delivering strong moisturizing benefits from shea butter. You can apply this cream multiple times during the day as needed.

    Prices were accurate at the time of publication. Curious about how we test and choose products at AOL? Here’s  from our editors.

  • Strength Without Strain: 6 Yoga Moves That Build Stability and Body Control

    Strength Without Strain: 6 Yoga Moves That Build Stability and Body Control

    Yoga gets recognized mostly for improving flexibility & balance but it works really well for building strength too. The secret lies in doing movements that work your muscles in a controlled and focused manner while keeping strain low and benefits high. These six yoga moves will help you get stronger without putting unnecessary stress on your body regardless of whether you just started or have been practicing for years. The first move is the plank pose. This position strengthens your core muscles along with your arms & shoulders. You hold your body in a straight line from head to heels while supporting yourself on your forearms and toes.

    Grounded Strength Builder: Downward-Facing Dog Enhances Full-Body Stability

    Downward-Facing Dog stands as one of yoga’s most recognized poses & works wonderfully for developing strength throughout your entire body. This position engages your core muscles along with your shoulders & arms and legs while simultaneously stretching your back and hamstrings. Begin the pose by getting on your hands and knees with your palms pressed firmly against the floor and your knees positioned directly beneath your hips. Curl your toes under and lift your hips upward toward the ceiling to create an inverted V shape with your body. Maintain straight arms and try to keep your feet flat against the ground while making sure your spine stays in a neutral position. Stay in this pose for anywhere between 30 seconds and 1 minute while concentrating on breathing deeply to prevent putting unnecessary strain on your body.

    Core Control Foundation: Plank Pose Trains Strength Without Excess Pressure

    The Plank Pose is a basic yoga position that builds core strength & stability. It works the muscles in your arms shoulders & back while also targeting your abs and glutes. To do the Plank Pose, begin in a push-up position with your hands shoulder-width apart and your feet hip-width apart. Keep your body straight from head to heels without letting your lower back sag. Tighten your core muscles & hold this position for 30 seconds. As you get stronger you can gradually hold it for longer periods.

    Steady Power Position: Warrior II Improves Balance and Lower-Body Endurance

    Warrior II strengthens your legs hips, and core while building endurance and balance. Start by standing with your feet three to four feet apart and extend your arms parallel to the floor. Turn your right foot out at a 90-degree angle and bend your right knee so it stays directly above your ankle. Keep your left leg straight with your left foot facing forward. Hold your torso upright & tighten your core muscles as you maintain this position. This pose builds lower body strength and opens up your hips & chest.

    Deep Core Stabiliser: Boat Pose Builds Control Through Controlled Engagement

    Boat Pose effectively strengthens your core muscles and hip flexors. Begin by sitting on the floor with bent knees and your feet resting flat on the ground. Tilt your upper body back a little while keeping your spine straight and raise your feet until your shins become parallel with the floor. Reach your arms straight out in front of you for balance. When you feel ready you can straighten your legs completely to create a V shape with your body. Keep your spine elongated & prevent your back from curving to reduce unnecessary strain. Stay in this position for 30 seconds while tightening your abdominal muscles to stay stable.

    Spine Support Activator: Bridge Pose Strengthens the Back With Gentle Precision

    Bridge Pose works well for building strength in your glutes & lower back & legs. It also gently stretches your chest and spine. Begin by lying flat on your back with bent knees and your feet placed flat on the floor about hip-width apart. Rest your arms alongside your body with palms down. Push through your feet and raise your hips up toward the ceiling until your body forms a straight line from knees to shoulders. Tighten your glutes when you reach the top and hold this position for several breaths before lowering your hips back to the floor slowly. This exercise helps develop lower body strength and supports better posture.

    Dynamic Balance Booster: Extended Side Angle Develops Strength, Reach, and Control

    Extended Side Angle Pose is a yoga movement that builds strength in your legs and hips and core muscles. It also stretches your sides and shoulders. Start by standing with your feet placed far apart. Point your right foot forward and turn your left foot slightly inward. Bend your right knee until it sits directly over your ankle. Stretch both arms out to your sides. Rest your right forearm on your right thigh & reach your left arm up over your head. Your body should form a straight line from your left heel all the way to your fingertips. Tighten your core muscles and stay in this position while breathing deeply. You should feel the stretch along your side. Hold this pose for 30 seconds before switching to the other side.

  • 15-Minute Yoga Routine: Simple Movements That Sustain Energy Throughout the Day

    15-Minute Yoga Routine: Simple Movements That Sustain Energy Throughout the Day

    Yoga offers an excellent method to increase your energy and sharpen your focus while improving your general health. A brief yoga session works perfectly when you need a fast and practical way to feel awake and ready for the day. You can activate your body and boost circulation in only 15 minutes while setting yourself up for a successful day. This straightforward routine gets your body moving & stretches important muscle groups while building your sense of energy. The sequence works well for beginners & experienced yoga practitioners alike and will help you feel alert and prepared for whatever comes next.

    Gentle Grounding to Start the Flow: Restorative Child’s Pose

    Start your yoga session with Child’s Pose to relax your mind and stretch your lower back along with your hips and thighs. Get down on your knees and spread them wide while keeping your big toes together. Lower your upper body down to the ground slowly and reach your arms forward or place them next to your body. Put your forehead on the floor and breathe deeply several times. This calming pose helps you focus and let go of any tightness in your body while getting you ready both mentally and physically for what comes next in your practice.

    Full-Body Wake-Up Stretch: Energising Downward-Facing Dog

    After finishing Child’s Pose you can move into Downward-Facing Dog which is known as one of the most energizing yoga positions. Begin by getting into a tabletop position where your hands are placed directly beneath your shoulders and your knees are positioned under your hips. Curl your toes under and raise your hips upward toward the ceiling to create an inverted V-shape with your body. Make sure both your hands and feet stay firmly pressed against the ground while you push your heels down toward the floor & extend your spine as much as possible. Hold this position for anywhere between 30 seconds & 1 minute while paying attention to your breathing pattern. This pose stretches your entire body with special focus on the hamstrings and calves and spine which helps improve blood circulation throughout your body and gives you an energy boost.

    Spinal Mobility Reset: Smooth Cat–Cow Movement Sequence

    Next you should try the Cat-Cow Stretch to warm up your spine and ease tension in your neck and shoulders. Start in a tabletop position with your wrists placed under your shoulders and knees under your hips. When you breathe in, arch your back and lift your chest while looking upward to enter Cow Pose. When you breathe out round your back and tuck your chin while pressing down into the floor to enter Cat Pose. Keep moving between these two positions for 30 seconds. This flowing movement helps improve how flexible your spine is while releasing stiffness and boosting energy flow throughout your body.

    Hip-Opening Energy Builder: Deep and Steady Low Lunge

    The Low Lunge effectively stretches your hips and leg muscles while expanding your chest area. Start on your hands & knees and bring your right foot forward between your hands. Make sure your right knee sits directly above your right ankle. Place your left knee on the floor and let your hips drop down gently. Raise both arms above your head & reach upward with your fingers. Stay in this position for 30 seconds to one minute before switching to the other side. This stretch releases hip tension and activates your lower body muscles. It works particularly well when you have been sitting for extended periods.

    Strength With Balance: Power-Boosting Warrior II Hold

    Warrior II strengthens your legs and hips while building stamina. Start by standing with your feet positioned far apart. Turn your right foot outward at a 90-degree angle. Bend your right knee until it forms a right angle while keeping your left leg completely straight. Stretch both arms out to your sides & keep your shoulders loose. Look toward your right hand and stay in this position for 30 seconds. Switch sides and repeat the same steps. This pose works several muscle groups at once and helps improve your balance and focus. It also builds strength and increases your energy levels throughout the day.

    Mindful Stability Practice: Focused Tree Pose Balance

    Tree Pose is a balancing position that tests your stability and helps improve focus and mental clarity. Begin by standing upright with your feet placed together. Move your weight to your left leg and position your right foot against the inner part of your left thigh or calf while making sure to avoid placing it on the knee. Place your hands together at chest level or raise them above your head. Maintain this position for 30 seconds while concentrating on your breathing and working to stay balanced. Switch to the opposite side and repeat the exercise. This pose strengthens your leg & core muscles and also improves your concentration & sense of being grounded.

    Calming the Nervous System: Slow Seated Forward Fold

    After completing the energizing poses you should wind down with a calming stretch. Sit on the floor and extend your legs straight in front of you. Take a breath in and lengthen your spine. Then breathe out as you bend forward from your hips and reach toward your feet or shins. Keep your back straight while you fold forward & make sure you don’t round your spine. Stay in this position for 30 seconds to 1 minute. The Seated Forward Fold stretches your hamstrings & lower back and spine. This pose helps you relax and reduces tension in your body.

    End-of-Routine Recharge: Gentle Shoulder Bridge Lift

    Complete your 15-minute routine with Shoulder Bridge Pose to build strength in your glutes and lower back while stretching your chest and shoulders. Start by lying on your back with bent knees and your feet placed hip-width apart. Push your feet down into the floor and raise your hips up toward the ceiling to form a straight line from your knees through to your shoulders. Rest your arms alongside your body with your palms pressed flat against the floor for stability. Maintain this position for 30 seconds to 1 minute before slowly lowering your hips back down. This pose works your glutes and strengthens your core while boosting your energy through better blood circulation.

  • 6 Benefits of This Exercise for Hips Back and Posture

    6 Benefits of This Exercise for Hips Back and Posture

    The glute bridge looks almost too simple when you first see it. You lie on your back & lift your hips and hold that position. But when you perform it correctly this basic move can reshape how your hips feel and how your jeans fit & even how your lower back behaves. Stay with me because a few small technique tweaks and three smart progressions can turn this quiet floor exercise into one of the most powerful tools in your home routine. This movement targets your glutes better than many complicated exercises.

    Why the Glute Bridge Deserves a Place in Your Routine

    The glute bridge is a supine hip-extension exercise that can be performed using only your bodyweight. It mainly targets the gluteus maximus, while also engaging the hamstrings and deep core stabilizers. Because of this balanced muscle involvement, it’s widely used in general fitness routines as well as rehab-style programs that emphasize hip strength and core control.

    For people who sit for long hours, the hips and glutes often become underactive. The glute bridge helps re-activate these muscles without placing excess strain on the knees. A 2017 laboratory study involving 26 adults showed that a unilateral glute bridge generated about 34% MVIC glute activation, while hamstring activity stayed lower at around 28% MVIC compared to resisted hip-extension drills. In simple terms, the bridge promotes healthier glute-to-hamstring balance.

    Muscles Working During the Glute Bridge

    Although the movement is felt most strongly in the back of the hips, several muscle groups contribute to each repetition. The gluteus maximus drives hip extension, the hamstrings assist with control, and the core muscles stabilize the pelvis and spine throughout the lift.

    A small 2022 study comparing the barbell hip thrust with the barbell glute bridge found that the glute bridge produced higher peak and average activation in both the upper and lower portions of the gluteus maximus, along with greater average gluteus medius involvement. Under that setup, the bridge proved to be just as effective—if not more—for isolated glute activation.

    Muscle Group Function During Glute Bridge
    Gluteus Maximus Primary mover responsible for hip extension and creating strength and shape in the posterior hips
    Gluteus Medius Supports pelvic control and helps maintain proper knee alignment throughout the movement
    Hamstrings Provide secondary assistance in extending the hips without overtaking glute activation
    Core & Trunk Stabilizers Stabilize the spine and help maintain a neutral, controlled posture during the exercise

    Step-by-Step Glute Bridge Technique

    Start by lying on your back with your knees bent and feet flat on the floor, positioned about hip-width apart. Rest your arms by your sides. Adjust your feet so that when you lift your hips, your knees approach a 90-degree angle. Feet that are too close shift work to the quads, while feet too far away place more demand on the hamstrings.

    Press through your heels and lift your hips as you exhale. Focus on squeezing your glutes and pause at the top for one to two seconds without arching your lower back. Keep your ribs down and your core lightly braced. Lower your hips slowly, stopping just short of full contact with the floor to maintain tension. Aim for 10–15 controlled repetitions.

    Six Benefits You’ll Notice Over Time

    First, the glute bridge helps build stronger, more defined glutes by placing direct emphasis on the gluteus maximus. Second, it improves pelvic and lower-back stability, which can ease discomfort caused by prolonged sitting. Third, it supports better posture by reinforcing core engagement and spinal alignment.

    Fourth, regular practice can enhance hip mobility and reduce stiffness. Fifth, the movement encourages better blood flow through the hips and legs, supporting circulation. Sixth, the glute bridge places less stress on the knees than deep squatting movements, making it a joint-friendly option for sensitive days.

    What Research and Experience Suggest

    A 2022 review of eight clinical trials indicated that hip-focused strengthening or stretching may improve low-back pain and disability in the short term more effectively than spine-only exercises, though the evidence was rated as uncertain. This highlights the glute bridge as a useful tool rather than a complete solution.

    From a practical standpoint, slowing down each repetition and keeping the ribs tucked—rather than lifting the hips as high as possible—often leads to better glute engagement and less lower-back strain.

    Three Ways to Make the Glute Bridge More Effective

    Once bodyweight bridges feel comfortable, progression options help maintain challenge. Adding weight by placing a dumbbell or plate across the hips increases resistance and supports strength gains. Compared to hip thrusts, the bridge offers a slightly shorter range of motion but keeps tension centered on the glutes.

    Single-leg glute bridges shift all bodyweight onto one side, increasing demand on the working glute and exposing left-right imbalances. Bridge pulses, performed by adding small controlled movements at the top position, increase time under tension and intensify muscle activation without heavier loads.

    Bringing It All Together

    The glute bridge stands out as an effective home-workout exercise that is quiet, joint-friendly, and supported by muscle-activation research. Whether you progress to heavy barbell hip thrusts or continue with bodyweight variations, consistently training this movement can lead to stronger hips, more resilient glutes, and smoother everyday movement like walking, climbing stairs, or playing with children.

  • Degrease Kitchen Hood Filters Using Boiling Baking Soda with Zero Scrubbing

    Degrease Kitchen Hood Filters Using Boiling Baking Soda with Zero Scrubbing

    Grease-clogged hood filters are quietly raising indoor pollution and energy bills while increasing fire risk in millions of kitchens right now. As more home cooks trade takeaways for sizzling sheet-pan dinners & deep-fried favorites experts say the old wipe it when you see it approach to kitchen hoods no longer works.

    Why Greasy Hood Filters Are Suddenly Getting Serious Attention in Modern Kitchens

    Cooking creates more indoor air pollution than most people think. Research from housing and health organizations shows that frying and grilling and high-heat roasting can quickly increase fine particles & fumes in the air. When your hood filter gets clogged with grease that pollution stays in your lungs instead of being trapped in the metal mesh. Higher energy costs mean that every struggling fan motor and inefficient appliance costs more money.

    Filters blocked with grease make the extractor work harder & create a layer of flammable buildup above the stove. Cleaning the hood filter regularly is one of the easiest and cheapest ways to reduce indoor pollution and lower energy use & decrease fire risk in homes. Professional oven and hood cleaning services can cost hundreds of dollars. Many commercial cleaning sprays contain harsh chemicals that irritate skin and trigger asthma and add more chemicals to the air. This explains why people are returning to an old cleaning method: a boiling baking soda solution that removes grease from the filter with almost no scrubbing required.

    How Boiling Baking Soda Breaks Down Stubborn Grease Without Any Scrubbing

    The Science Behind the Viral Range Hood Filter Cleaning Trick At first glance the trick sounds like social media magic: dunk a filthy filter into a steaming pot and watch it come out shining. Behind the viral clips sits some fairly straightforward chemistry.

    The Simple Chemistry Quietly Doing the Hard Cleaning Work for You

    The Science Behind the Viral Range Hood Filter Cleaning Trick At first glance the trick sounds like social media magic: dunk a filthy filter into a steaming pot and watch it come out shining. Behind the viral clips sits some fairly straightforward chemistry. Range hood filters accumulate grease over time through regular cooking. The grease consists mainly of triglycerides and other organic compounds that solidify as they cool. These substances are hydrophobic and resist ordinary water cleaning. The viral method combines boiling water with baking soda to create an alkaline solution.

    A Real-World, Foolproof Method Anyone Can Follow at Home

    Cleaning professionals who use this approach generally follow the same basic steps with minor adjustments based on stove dimensions and local water quality. Here is how the process works: Take out the hood filter and remove any loose food particles or thick grease deposits by shaking or wiping. Fill a big pot or deep baking pan with water but leave enough room at the top so it does not overflow when you add the filter. Heat the water on the stovetop until it reaches a steady simmer or light boil.

    Add baking soda gradually one spoonful at a time to prevent excessive foaming. Place the filter into the hot water at an angle so that most of its surface stays covered by the liquid. Allow it to simmer for a few minutes while you observe the water turning cloudy as grease breaks away from the filter. Use tongs or heat-resistant gloves to remove the filter and rinse it under hot running water from the tap. If stubborn greasy areas remain you can soak it again or turn the filter over and then let it dry fully in the air before putting it back in place. The amount of baking soda needed varies depending on how dirty the filter is and the pot size but cleaning experts usually recommend using three to five tablespoons for a large filter with heavy grease buildup. Lighter dirt requires less baking soda.

    Why No-Scrub Cleaning Is Winning Over Time-Starved Households

    The method appeals to people for reasons that go beyond its popularity on social media. It connects with larger changes in how homeowners want to take care of their living spaces.

    Hidden Health and Air-Quality Risks Lurking Above Your Cooking Area

    Indoor air quality experts say kitchen ventilation is a major health concern. When range hoods are not properly maintained they cannot effectively remove fumes from gas stoves or smoke from cooking. This leads to problems like asthma flare-ups and eye irritation along with potential long-term breathing issues. Filters are located above the cooking area where grease and dirt accumulate without being seen. Once the mesh becomes clogged with buildup it stops trapping particles properly.

    People might notice food odors lingering in the air but they usually miss the harmful pollutants that remain invisible. This problem matters most for people who rent apartments or live in flats near busy streets. Opening windows is not always practical in these situations. A working range hood becomes essential during winter months when homes remain sealed against the cold. Making sure the ventilation system functions correctly creates noticeable improvements in air quality.

    Rising Living Costs and Growing Pushback Against Harsh Cleaning Chemicals

    Rising living costs are making people reconsider what they keep under the sink. Every specialized cleaning product adds another expense to the shopping bill. Baking soda is different because most homes already have it for cooking or deodorizing. Using one product for multiple tasks makes sense for families who want to save money without compromising on cleanliness.

    Attitudes toward household chemicals are also changing. Parents with small children and people who own pets or have breathing problems often worry about spray cleaners & strong artificial scents. More people are looking for simpler cleaning methods that use fewer harsh ingredients without being completely natural. Boiling a greasy range hood filter in water mixed with baking soda matches this approach. The method is not entirely chemical-free but it skips the aggressive cleaners while still producing good results.

    How Frequently Kitchen Hood Filters Actually Need Deep Degreasing

    Kitchen engineers and fire safety advisers rarely agree on everything but they share one common view. Hood filters need more attention than most people give them. How often you should clean them depends on your cooking habits and the type of food you prepare.

    Cooking habits Recommended hood filter cleaning cycle Reason this schedule is important
    Frequent deep-frying and oil-heavy daily meals Every 3 to 4 weeks Rapid grease accumulation restricts airflow and significantly increases fire hazards.
    Regular home cooking with a mix of roasting and sautéing Every 6 to 8 weeks Maintains strong suction performance while preventing lingering cooking odours.
    Occasional cooking, mainly boiling or microwave use Every 3 to 4 months Grease builds up slowly but can still settle around gas burners over time.
    Rental properties, shared kitchens, or short-term stays At every tenant change or break period Variable usage levels and higher cleanliness standards demand a full reset.

    Landlords who manage student housing and vacation rentals now include hood cleaning as part of their standard upkeep routine. Many even take photos to document the work for their safety files. A fast and inexpensive approach using boiling water works better in these situations than buying commercial cleaning sprays over & over again.

    When the Boiling Method Works Best — And When to Avoid It

    Landlords who handle student housing and vacation rentals now add hood cleaning to their regular maintenance tasks. Some landlords take pictures of the cleaned hoods to keep in their safety records. Using boiling water provides a quick and cheap solution that works better than repeatedly purchasing commercial cleaning products.

    Filter Materials, Heat Limits, and Basic Safety Checks to Know First

    Before putting anything in a pot you should check the hood manual first. Most standard aluminum mesh filters handle short boiling sessions without problems. However painted or coated surfaces along with carbon filters and built-in light covers usually cannot withstand this treatment. Some other important safety considerations include the following points. Boiling water can cause burns so you need to use strong tongs or heat-resistant gloves and make sure children & pets stay away from the stove. If you fill the pot too high or add too much baking soda quickly the mixture can foam up and spill over dangerously.

    Older or delicate filters might bend out of shape if you leave them in rapidly boiling water for too long so a gentle simmer works better. Very thick grease buildup may require a second soaking session or some light scrubbing with a soft brush particularly around the edges. Professional kitchens or filters covered with years of hardened burnt grease need specialized cleaning products and sometimes complete replacement according to experts. This home cleaning method works well for regular household grease accumulation but not for badly neglected restaurant equipment.

    How This One Habit Improves Overall Kitchen Hygiene Long-Term

    A clean hood filter makes the extractor quieter & more effective while reducing unpleasant smells. The benefits extend beyond the immediate area. Better fume capture means less grease buildup on cupboards and ceilings and fewer odors absorbed into fabrics & curtains. Energy efficiency experts point out that any fan pushing air through a blocked filter uses more power than necessary. The savings for one household might seem small but the combined effect across millions of kitchens becomes significant.

    While governments focus on major energy policies these small habits fall into the category of easy actions with clear benefits and virtually no drawbacks. There is also a mental component worth considering. People who establish one simple regular task often expand it into a broader routine. A monthly hood filter cleaning session can prompt someone to check smoke alarm batteries or clear out the toaster crumbs or review expiration dates on spices. The process of boiling the filter and watching the grease dissolve can serve as a refresh point for the entire cooking area.

    Smart Kitchen Practices That Multiply the Benefits Beyond Baking Soda

    For households wanting to make the most of these benefits, experts usually recommend a few extra steps. Putting lids on pans and heating oil slowly rather than at full power helps reduce the grease that reaches the filter. Turning on the hood a few minutes before you start cooking also makes a difference. Basic habits matter too. Picking oils that can handle higher temperatures when frying cuts down on airborne grease. Letting pans cool a bit before washing stops extra burnt layers from forming.

    People with breathing problems often find that using a clean hood along with opening a window slightly or running a small fan during heavy cooking helps them feel better. The same hot baking soda water that cleans hood filters works well for other greasy metal items like removable stove rings & oven racks that fit in the pot. Some barbecue grates can be cleaned this way too. Each item uses the same hot bath before the water gets poured away so you get more use from a few spoonfuls of powder & a bit of energy.

    The growing interest in this simple method reflects a wider trend. People want cleaning approaches that feel straightforward and give them direct control over results. Compared to pricey sprays & complicated devices a worn pot of water and a box of baking soda provides something quietly dependable. It offers a way to clean one of the dirtiest parts of the kitchen using heat and patience with almost no scrubbing required.

  • 15 Yoga Poses That Improve Balance Stability and Core Control

    15 Yoga Poses That Improve Balance Stability and Core Control

    Balance and stability form essential parts of fitness and overall health. When you walk or run or do yoga good balance helps with coordination and posture while reducing the risk of falls & injuries. Yoga works well for building balance & stability because it emphasizes mindful movement and controlled positions. This article presents 15 yoga poses that strengthen the muscles needed for balance and help you develop greater stability in both body and mind. Balance means keeping a stable position whether you are moving or standing still. Stability involves maintaining control of your body in different positions. Both qualities matter for daily activities and physical performance. Yoga builds stability by working muscles throughout the lower and upper body while strengthening the core and supporting joint health. Regular practice of these poses can improve your ability to stay centered and grounded and balanced in various situations.

    Tree Pose (Vrksasana)

    Boost Leg Strength and Mental Focus
    Tree Pose is a foundational balance posture that builds leg strength while sharpening concentration. Stand upright with feet together and shift your weight onto one leg. Place the sole of the opposite foot on the inner calf or thigh of the standing leg. Bring your palms together at the chest or stretch your arms overhead. Hold the pose for 30 seconds to 1 minute, then switch sides. This posture improves balance by activating the legs and core while calming and focusing the mind.

    Warrior III (Virabhadrasana III)

    Develop Core Power and Stability
    Warrior III is a strong balancing pose that engages the legs, core, and back. Begin standing and transfer your weight onto one leg. Lift the opposite leg straight back while hinging forward, keeping your body aligned from head to heel. Extend your arms forward or out to the sides. Hold for 20–30 seconds, then switch sides. This pose enhances strength, coordination, and overall body control.

    Half Moon Pose (Ardha Chandrasana)

    Improve Flexibility and Balance Control
    Half Moon Pose combines balance with flexibility and coordination. From standing, shift your weight onto one leg and reach the opposite hand toward the floor. Lift the other leg and stack your hips, opening the chest. Extend the top arm upward. Hold for 20–30 seconds per side. This posture strengthens the legs, hips, and core while improving balance and body awareness.

    Chair Pose (Utkatasana)

    Build Lower-Body Strength and Endurance
    Chair Pose strengthens the thighs, glutes, and core while testing balance. Stand with feet together, bend your knees, and lower your hips as if sitting back into a chair. Raise your arms overhead or keep palms facing inward. Hold for 30 seconds to 1 minute. This pose builds endurance and stability in the lower body.

    Eagle Pose (Garudasana)

    Enhance Focus and Lower-Body Strength
    Eagle Pose is a compact balancing posture that improves concentration and coordination. Shift your weight onto one leg, wrap the other leg around it, and cross your arms in front of your chest. Sink slightly into the standing leg. Hold for 20–30 seconds before switching sides. This pose strengthens the legs and improves mental focus.

    Warrior II (Virabhadrasana II)

    Strengthen Legs and Improve Grounding
    Warrior II builds strength and stability in the legs and hips. Take a wide stance, bend the front knee, and extend your arms parallel to the floor. Gaze over the front hand and hold for 30 seconds to 1 minute. This pose develops a strong foundation and improves balance and endurance.

    Bridge Pose (Setu Bandhasana)

    Support Core and Spinal Strength
    Bridge Pose strengthens the back, glutes, and core muscles. Lie on your back with knees bent and feet planted firmly on the floor. Press through the feet to lift the hips upward while keeping shoulders grounded. Hold for 30 seconds, then slowly lower down. This pose improves posture and core stability.

    Downward Facing Dog (Adho Mukha Svanasana)

    Improve Full-Body Stability and Flexibility
    Downward Facing Dog strengthens the arms, shoulders, and core while stretching the legs and spine. Begin on hands and knees, then lift the hips to form an inverted “V.” Press evenly through hands and feet and hold for about 30 seconds. This pose builds overall balance and body alignment.

    Boat Pose (Navasana)

    Strengthen the Core and Postural Muscles
    Boat Pose is a powerful core exercise that enhances balance and posture. Sit with knees bent, lean back slightly, and lift your feet off the floor. Extend your arms forward and balance on your sit bones. Hold for 20–30 seconds. This pose strengthens abdominal muscles and improves stability.

    Crow Pose (Bakasana)

    Develop Upper-Body Balance and Control
    Crow Pose is an arm balance that requires strength, focus, and coordination. Start in a squat, place your hands on the mat, and lean forward to shift weight into the arms. Lift your feet off the ground and balance. Hold for 10–15 seconds before releasing. This pose builds arm, shoulder, and core strength.

    Standing Forward Fold (Uttanasana)

    Stretch the Spine and Support Balance
    Standing Forward Fold improves flexibility in the hamstrings and spine while supporting stability. Stand with feet hip-width apart and hinge at the hips, folding forward. Relax the head and neck. Hold for 30 seconds to 1 minute. This pose promotes spinal length and grounding.

    Pigeon Pose (Eka Pada Rajakapotasana)

    Open Hips and Improve Stability
    Pigeon Pose deeply stretches the hips and supports balance in standing postures. From tabletop, bring one knee forward and extend the opposite leg back. Lower your torso toward the floor. Hold for 30 seconds to 1 minute on each side. This pose enhances hip mobility and stability.

    Extended Side Angle (Utthita Parsvakonasana)

    Strengthen the Core and Increase Flexibility
    Extended Side Angle builds strength in the legs and core while improving balance. From Warrior II, lower the forearm to the thigh or floor and extend the opposite arm overhead. Hold for 30 seconds to 1 minute, then switch sides. This pose improves coordination and endurance.

    Reclining Bound Angle Pose (Supta Baddha Konasana)

    Relax the Body and Support Core Stability
    This restorative pose gently opens the hips and groin while promoting relaxation. Lie on your back, bring the soles of your feet together, and let the knees fall outward. Rest your arms comfortably and hold for 1–2 minutes. This pose encourages stability and relaxation in the lower body.

    Locust Pose (Salabhasana)

    Strengthen the Back and Core Muscles
    Locust Pose builds strength in the back, glutes, and core. Lie face down with arms alongside the body. Lift the chest, arms, and legs while engaging the core. Hold for 20–30 seconds, then release. This pose improves posture and overall stability.

    Final Thoughts

    Balance and stability play a vital role in daily movement and long-term physical health. Practicing these 15 yoga poses regularly can help develop strength, focus, and coordination. Over time, you may notice better posture, improved balance, and greater body awareness. Yoga offers a practical and mindful way to feel more grounded, both physically and mentally.

  • 6 Reasons People Aged 60 to 70 Embrace Solitude and Personal Freedom

    6 Reasons People Aged 60 to 70 Embrace Solitude and Personal Freedom

    Around our late sixties or early seventies something often changes. The invitations and group chats and long phone calls that once seemed important start to feel like a burden. We stop chasing every conversation and begin wanting quiet mornings and slow coffee and time to think. But we also keep hearing that being alone is dangerous. The real question becomes clear: how do we embrace our need for solitude without falling into painful loneliness?

    The Quiet Shift After 70

    For much of our lives, we are taught to stay busy, reachable, and constantly engaged. Yet for many people, something subtle changes after around the age of 70. A quiet sense of freedom begins to surface. The need to impress, explain yourself, or always respond starts to fade. Calm becomes more valuable than noise, and authenticity matters more than forced politeness. This isn’t about cutting people off; it’s about choosing carefully who and what truly deserves the time and energy you have now.

    You Don’t Have to Prove Yourself Anymore

    Years of working hard, supporting families, and being the dependable one leave a deep imprint. For decades, many of us try to be convenient for others—agreeable, helpful, and always available. Over time, that effort can become exhausting. Later in life, a powerful realization emerges: your worth has already been established by the life you have lived. You don’t owe constant access to everyone. Letting calls go unanswered when you’re tired, stepping away from one-sided relationships, and choosing people who leave you feeling lighter are all acts of self-respect, not selfishness.

    Peace Starts to Matter More Than Conversation

    As the years pass, the desire to be at the center of everything often fades. In its place comes a deep appreciation for quiet moments—a slow morning, sunlight across the table, or an unhurried walk. Conversations that revolve around complaints or gossip can feel draining, while silence can feel nourishing. By stepping away from unnecessary noise, you make space for inner peace. Life begins to feel steadier, calmer, and more intentional.

    Solitude and Isolation Are Not the Same

    It’s important to distinguish between chosen quiet and harmful isolation. Studies show that many adults experience loneliness or lack emotional support, and among people over 65, a significant share are considered socially isolated. That kind of isolation is linked to higher risks of health problems and early decline. Chosen solitude, however, is different. It usually includes a few meaningful relationships, reliable support, and a sense of connection—to nature, to faith, or to personal purpose. Isolation feels empty, while solitude feels complete.

    Less Contact Often Means Fewer Disappointments

    With age comes clarity. You begin to see who truly cares and who stays only out of habit or convenience. When you stop chasing lukewarm connections, disappointment loses its power. You no longer wait for calls that never come or wonder why someone faded away. Releasing unrealistic expectations frees you from resentment and guilt. Your relationship with yourself becomes more dependable than any unpredictable interaction.

    Time Becomes Your Most Precious Currency

    As we grow older, the awareness that time is limited becomes sharper. Each hour feels valuable. Instead of spending it on automatic obligations or empty conversations, many people begin to use their time more deliberately. Each day brings quiet questions: Who do I genuinely want to see? What conversations feel meaningful? Do I want company now, or would I rather enjoy my own thoughts? Time becomes something to protect, not give away carelessly.

    Real Connection Grows From the Inside Out

    When you learn to listen to yourself, something shifts. You notice your emotions sooner and learn to comfort yourself more gently. The fear of being alone softens because your sense of worth no longer depends on constant interaction. From this grounded place, the relationships that remain are often deeper and more respectful. These are people who honor your pace and don’t expect you to sacrifice your well-being just to keep them close.

    Letting Go Creates Space for a New Season

    Holding onto outdated or formal relationships can feel heavier than releasing them. When you quietly let go of connections that no longer fit, you create room for rest, silence, and interests that reflect who you are now. Life after 70 doesn’t have to shrink; it can deepen. A smaller circle can feel more genuine and fulfilling than any crowded room ever did.

    Living Gently on Your Own Terms

    Stepping back from constant socializing in later life isn’t a sign of fading away. Often, it’s a sign of living more honestly. Fewer conversations can mean more truth. More quiet can mean a richer inner life. You have every right to protect your time, enjoy chosen solitude, and invest in the meaningful relationships that remain. In the end, the most important connection may be the one you continue to build with yourself.

  • 12 New Year Nail Designs for 2026 Inspired by Instagram and TikTok

    12 New Year Nail Designs for 2026 Inspired by Instagram and TikTok

    The new year feels like a fresh start & if you want 2026 to be your year then your nails should reflect that mindset. With all the holiday activities & celebrations happening it makes sense to update your look. Nails have become more than just an accessory because they represent how you want to present yourself and can influence your confidence for the months ahead. Whether you prefer simple polished styles or dramatic eye-catching designs your New Year manicure should express your personality and help you feel ready to take on whatever comes next. The right nail design can actually boost your mood and give you that extra push to tackle your goals. When you look down at your hands and see a manicure that makes you happy it creates a small moment of satisfaction throughout your day.

    As 2025 comes to an end we’ve watched countless nail trends emerge and choosing the right style to begin 2026 can feel overwhelming. But there’s no need to worry because we have plenty of options for you. Whether you want something understated or eye-catching or a design that lasts through the holidays or one that captures the spirit of New Year’s Eve you’ll find what you need here. Expect to see delicate bows and gemstone details along with glitter and metallic finishes that will make you shine like a disco ball as you celebrate the arrival of 2026. I’ve gathered 12 nail designs that are currently popular on social media to help you create your New Year’s look so you can start the year with a manicure that matches the excitement of what 2026 will bring.

    Elegant Gold Bow Accents for a Luxe New Year Look

    Delicate Gold Bows for an Elegant New Year Manicure A simple manicure can be transformed with the addition of delicate gold bows. This festive design offers a subtle and elegant appearance that works perfectly for New Year celebrations without being overly flashy or attention-grabbing.

    Crystal Gemstone Nails That Sparkle on Social Media

    Gemstone Nails for New Year 2026 Gemstones add immediate shine to any nail design. These nails are playful and eye-catching while bringing the perfect amount of glamour for celebrating the arrival of 2026.

    High-Shine Disco Nails Perfect for New Year Parties

    Sparkling Nails for New Year’s Eve These nails have a shiny and shimmery finish that works well for parties. This nail trend helps you sparkle when you watch the ball drop on New Year’s Eve. The glittery design catches light nicely and adds glamour to your celebration look.

    Mysterious Black Cat-Eye Nails with Magnetic Glow

    Cat Eye Nails for a Dramatic New Year Look Cat eye nails offer a moody and sleek appearance that works perfectly when you want to embrace a darker and more dramatic style for New Year celebrations.

    Deep Dark-Green Nails Inspired by Winter Aesthetics

    If you want something more simple to help you through the holidays this year then these dark green nails are perfect for you.

    Minimal Sheer Nails with Soft Polka-Dot Details

    A transparent foundation featuring polka dots produces an easily stylish appearance. This combination brings together playful elements and neat design that works well for the new year.

    Bold Pink and Red Stripe Nails Trending Online

    Looking for something a little more playful? These pink and red striped nails are totally eye-catching and perfect for standing out.

    All-Over Glitter Nails for a Statement New Year Style

    Sparkle and Shine This look never goes out of style and works perfectly for New Year’s Eve celebrations. You can keep it subtle with just a touch of shimmer or go all out with full sparkle coverage.

    Glam Red Nails with Studded Embellishment Details

    The studded detailing adds an edgy twist to a simple nail design that works perfectly for anyone wanting a cool girl aesthetic.

    Modern Reverse French Tips with a 2026 Twist

    Modern French Tip Manicure This style gives the traditional french tip a fresh update. You can customize it with different colors to match your outfit for the new year.

    Gold Star Nail Designs for a Celestial New Year Vibe

    This look is perfect for New Year’s Eve celebrations. The gold stars add a cute & whimsical touch while bringing just the right amount of festive spirit to your style.

    Dreamy Pink Aura Nails Taking Over Instagram

    Pink Aura Nails: A Fresh Look for 2026 Pink aura nails create a gentle glowing appearance that looks modern & stylish. This nail design brings a sense of freshness that perfectly captures current beauty trends.